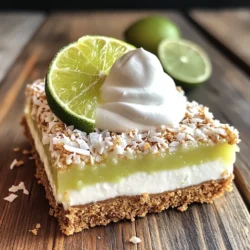
No-Bake Key Lime Pie Bars
Indulge in these delicious Zesty No-Bake Key Lime Pie Bars that are perfect for any occasion. With a crispy coconut graham cracker crust and a creamy, tangy filling, these bars are incredibly easy to make and require no baking! Discover how to create this refreshing treat with simple ingredients in just a few steps. Click through for the full recipe and amaze your friends and family with this delightful dessert!