Want to impress your guests with a dessert that screams indulgence? Dive into my Triple Chocolate Mousse Cake! This layered delight is not only rich and creamy but also easy to make. I'll guide you through the key ingredients, step-by-step instructions, and helpful tips to ensure your cake turns out perfect every time. Get ready for a chocolate experience like no other!
Why I Love This Recipe
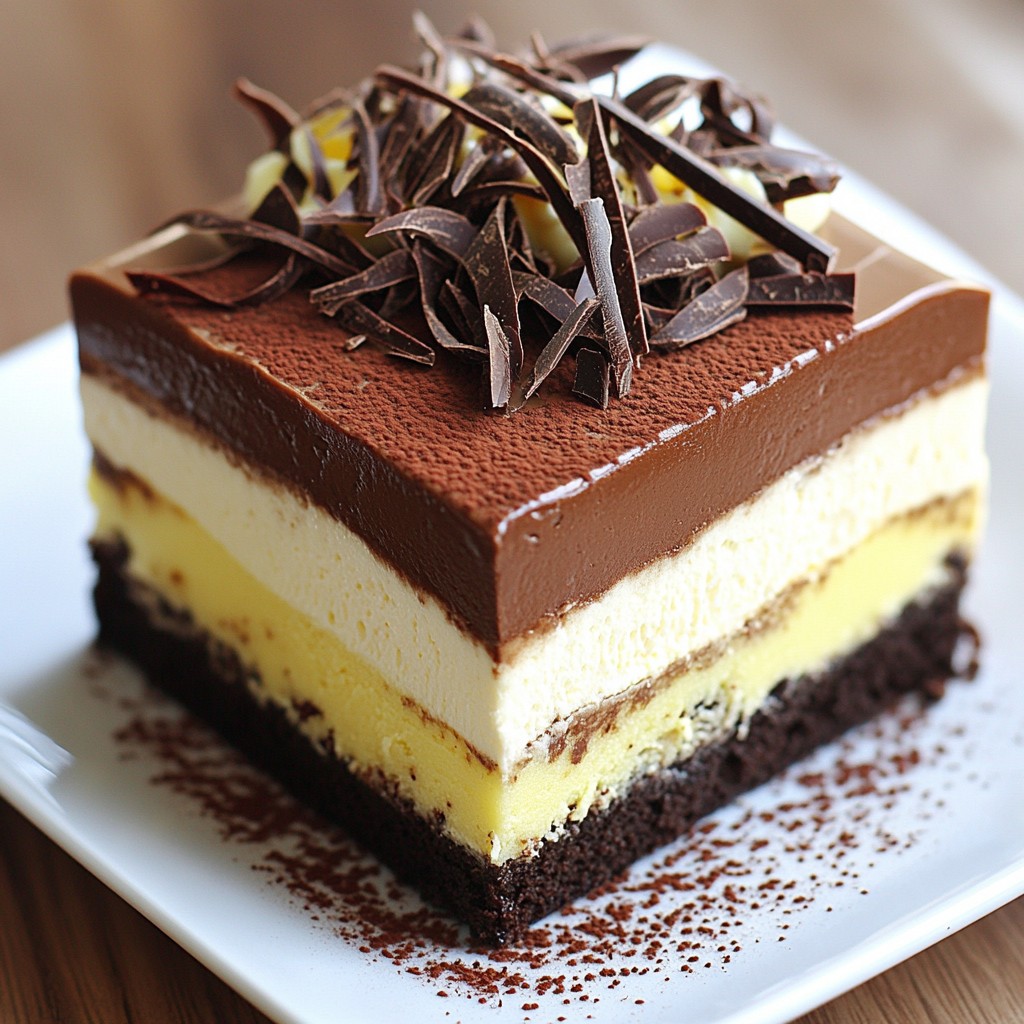
- Decadent Layers: This cake features three rich layers of chocolate mousse, each with its own unique flavor profile, making every bite a delicious experience.
- Impressive Presentation: The beautiful layers of dark, milk, and white chocolate mousse create a stunning visual effect that will wow your guests.
- Perfect for Any Occasion: This cake is a showstopper for celebrations like birthdays, anniversaries, or dinner parties, ensuring everyone leaves satisfied.
- Make Ahead Convenience: The cake can be prepared in advance and stored in the fridge, making it a stress-free dessert option for any gathering.
Ingredients
Key Ingredients for Triple Chocolate Mousse Cake
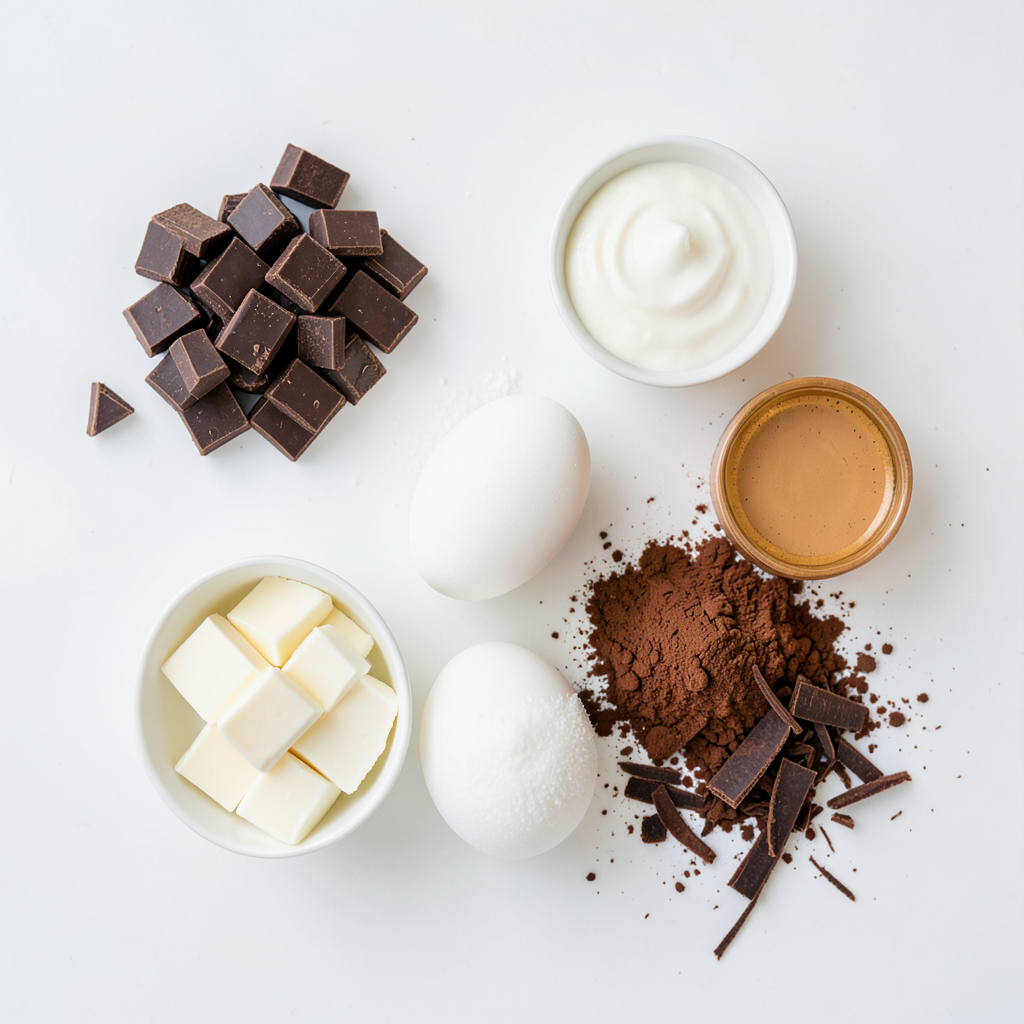
To make this cake, you need a few key ingredients. Each type of chocolate adds its own flavor. Here’s the list:
- 1 cup dark chocolate (70% cocoa), chopped
- 1 cup milk chocolate, chopped
- 1 cup white chocolate, chopped
- 4 large eggs, separated
- ½ cup granulated sugar
- 1 ½ cups heavy whipping cream
- 1 teaspoon vanilla extract
- Pinch of salt
- Cocoa powder and chocolate shavings for garnish
Each ingredient plays a vital role in creating the rich layers of mousse. The dark chocolate gives depth, while milk chocolate adds sweetness. White chocolate brings creaminess, making it a perfect trio.
Recommended Chocolate Types
I recommend using high-quality chocolate for the best taste. Look for chocolate with at least 70% cocoa for dark chocolate. This ensures a rich, complex flavor. For milk chocolate, choose one that is smooth and creamy. The white chocolate should be sweet yet balanced. Brands like Valrhona or Ghirardelli work great.
Substitutions for Dietary Restrictions
If you have dietary needs, there are some easy swaps. For a dairy-free version, use dark chocolate that is dairy-free. You can replace heavy cream with coconut cream. For sugar-free options, try using a sugar substitute that measures cup for cup. Eggs can be replaced with flax eggs for a vegan version. Just mix 1 tablespoon of ground flaxseed with 2.5 tablespoons of water per egg and let it sit.
Step-by-Step Instructions
Melting the Chocolates
Start by melting the dark chocolate. Place it in a heatproof bowl over simmering water. Stir the chocolate until it melts smoothly. After that, take it off the heat and let it cool a bit. Repeat this process for both the milk chocolate and white chocolate. Each type should melt separately in its own bowl. This keeps the flavors pure and rich.
Making Dark Chocolate Mousse
Now, let’s make the dark chocolate mousse. In a clean bowl, whip half a cup of heavy cream. Whip it until you see soft peaks. In another bowl, beat two egg yolks. Mix the egg yolks into the melted dark chocolate. Stir well to combine. Next, gently fold in the whipped cream. This creates a light, airy mousse. Set this aside for later.
Preparing the Milk and White Chocolate Mousses
For the milk chocolate mousse, melt the milk chocolate as you did before. Let it cool slightly, then add one egg yolk to it. Mix it well. Now, fold in another half cup of the whipped cream. This gives the mousse a creamy texture. Now, do the same for the white chocolate mousse. Melt the white chocolate, cool it, and mix in the remaining two egg yolks and a quarter cup of sugar. Then, fold in the last half cup of whipped cream.
Assembling the Cake Layers
Grab a springform pan. Pour the dark chocolate mousse into the bottom. Smooth it out evenly. Place the pan in the freezer for about 30 minutes to set. After that, add the milk chocolate mousse on top and freeze it again for another 30 minutes. Finally, pour the white chocolate mousse on top. Make sure to smooth the surface well. Cover the pan and refrigerate it for at least four hours, or overnight if you can wait!
Chilling and Serving Preparation
Once the cake is set, it’s time to serve! Carefully remove the cake from the springform pan. Dust the top with cocoa powder for a beautiful finish. Add chocolate shavings around the edges for extra flair. Now, slice and enjoy this rich, creamy treat!
Tips & Tricks
Achieving the Perfect Mousse Texture
To get the best mousse, focus on whipping. Whip the cream until soft peaks form. This step adds air and makes it light. When folding, be gentle. Use a spatula to mix. You want to keep the air inside. This makes a fluffy mousse. Chill each layer before adding the next. It helps each layer set well.
Common Mistakes to Avoid
One common mistake is over-mixing the mousse. This can make it dense. Always fold gently until just combined. Another mistake is not cooling chocolate enough. If it’s too hot, it can cook the eggs. Let chocolate cool slightly before mixing. Lastly, don’t skip chilling time. It’s crucial for the mousse to firm up.
Chocolate Quality and its Impact on Flavor
The quality of your chocolate matters a lot. I recommend using high-quality chocolate. Look for brands with 70% cocoa for dark, good milk chocolate, and creamy white chocolate. Better chocolate gives a richer taste. Cheap chocolate can taste waxy. Always check the label for good ingredients. It makes a big difference in your cake's flavor.
Pro Tips
- Use High-Quality Chocolate: The flavor of your mousse cake greatly depends on the quality of the chocolate used. Opt for premium brands for a rich taste.
- Room Temperature Ingredients: Ensure that all your ingredients, particularly eggs and cream, are at room temperature for better incorporation and a smoother texture.
- Chill Between Layers: Allowing each layer to set in the freezer before adding the next is crucial. This helps maintain distinct layers and prevents mixing.
- Garnish Creatively: Use chocolate shavings, fresh berries, or edible flowers as garnishes for an appealing presentation that will impress your guests.
Variations
Adding Flavors (Like Coffee or Mint)
You can boost your mousse with extra flavors. For a coffee kick, add 1 tablespoon of instant coffee to the dark chocolate. Mix it well before you fold in the cream. If you prefer mint, use mint extract instead of vanilla. Just a few drops can make it refreshing. Experiment and find your favorite twist!
Alternative Garnishes
Garnishes can make your cake pop. Instead of just cocoa powder and chocolate shavings, consider crushed cookies or nuts. You might also add fresh berries for a fruity touch. Edible flowers can also give a lovely look. Choose toppings that match your flavor choices for a cohesive dessert.
Making a Single Chocolate Version
Want a simpler cake? You can make a single chocolate mousse version. Just choose one type of chocolate—dark, milk, or white. Melt it, whip the cream, and fold them together. Pour it into your springform pan and chill. This version is just as rich and tasty, with less work!
Storage Info
Best Practices for Storing Leftovers
To keep your Triple Chocolate Mousse Cake fresh, wrap it well. Use plastic wrap or aluminum foil. Store it in an airtight container if possible. This helps prevent the cake from drying out. Keep it in the fridge, where it stays cool and safe.
How Long Can You Keep It in the Fridge?
You can store this cake in the fridge for up to five days. After that, the mousse may lose its creamy texture. Always check for any signs of spoilage before enjoying. If it smells off or looks strange, it’s best to throw it away.
Freezing Options for Mousse Cake
If you want to keep the cake longer, freeze it. Slice the cake before freezing for easy serving. Wrap each slice in plastic wrap, then place them in a freezer bag. This method keeps the cake fresh for up to three months. When you want to eat it, just thaw in the fridge overnight. Enjoy the rich flavors just like fresh!
FAQs
Can I use different types of chocolate?
Yes, you can change the types of chocolate. Use any dark, milk, or white chocolate you like. Each type will bring its unique taste. For example, you might try semi-sweet chocolate instead of dark. This will alter the flavor, but it can be delicious! Just keep the same amounts to get the right texture.
How do I properly melt chocolate without seizing?
To melt chocolate without seizing, use a double boiler. This means placing a bowl over simmering water. Stir the chocolate gently as it heats. Avoid getting water in the chocolate. Water can make chocolate clump. If it clumps, you can’t fix it. Keep the heat low, and be patient. This method gives you smooth, melted chocolate.
Can I make this cake ahead of time?
Yes, you can make this cake ahead of time. It tastes even better after chilling overnight. Just follow the recipe and let it set in the fridge. This allows the flavors to meld. You can prepare it two days in advance. Just cover it well so it stays fresh.
What can I substitute for heavy cream?
If you need a substitute for heavy cream, there are options. You can use coconut cream for a dairy-free choice. Another option is to mix milk with butter. Use 1/4 cup of butter plus 3/4 cup of milk. This creates a similar fat content. You can also use half-and-half, but it may be less rich.
Triple chocolate mousse cake is a delightful treat that combines rich flavors and fun textures. We covered key ingredients, from chocolate types to substitutions for special diets. I shared step-by-step instructions to guide you in making this delicious cake. Tips and tricks helped you achieve the best texture and flavor. Variations added excitement, and proper storage info keeps your cake fresh. In the end, with these tips, you can create a cake everyone will love. Enjoy baking this sweet dish!