Skip to content
DisclaimerTerms Of UseGDPR PolicyCookie Policy

Recipes Pursuit

  • Home
  • Drinks
  • Appetizers
  • Dinner
  • Dessert
  • About
  • Contact
  • Privacy Policy
DisclaimerTerms Of UseGDPR PolicyCookie Policy

NO-ING-IMG

For a great vegan mac and cheese, you need these key ingredients: - 2 cups elbow macaroni - 1 cup raw cashews (soaked for at least 2 hours) - 1/4 cup nutritional yeast - 1/2 cup almond milk (or other plant-based milk) - 2 tablespoons lemon juice - 1 tablespoon Dijon mustard - 1/2 teaspoon garlic powder - 1/2 teaspoon onion powder - Salt and pepper to taste These ingredients work together to create a creamy and rich sauce. The cashews give a smooth texture, while the nutritional yeast adds a cheesy flavor. If you want to enhance your vegan mac and cheese, consider these optional ingredients: - 1/4 teaspoon smoked paprika - Fresh parsley, chopped (for garnish) Smoked paprika gives a nice depth and warmth. Fresh parsley adds a pop of color and freshness to the dish. You can easily swap out some ingredients if you have allergies. Here are some options: - Use gluten-free pasta instead of regular elbow macaroni. - Replace cashews with sunflower seeds for a nut-free version. - Use oat milk or soy milk if almond milk is not suitable. These substitutions keep your dish tasty while catering to dietary needs. Remember, cooking is all about customizing to your taste! For the full recipe, check out the details above. Start by boiling water in a large pot. Add a pinch of salt to the water. Once the water boils, add 2 cups of elbow macaroni. Cook the pasta for about 8 to 10 minutes. Stir occasionally to prevent sticking. When done, drain the pasta in a colander. Rinse with cold water to stop the cooking process. Set the macaroni aside while you make the cheese sauce. For the cheese sauce, you need a blender. First, soak 1 cup of raw cashews for at least 2 hours. Drain the cashews and add them to the blender. Next, add 1/4 cup of nutritional yeast and 1/2 cup of almond milk. Squeeze in 2 tablespoons of lemon juice and add 1 tablespoon of Dijon mustard. Toss in 1/2 teaspoon of garlic powder and 1/2 teaspoon of onion powder. If you want a smoky taste, include 1/4 teaspoon of smoked paprika. Blend this mix on high until it’s smooth and creamy. If the sauce is too thick, add more almond milk until you reach the right texture. Now it’s time to mix the pasta and sauce. Pour the cashew cheese sauce into a large pot set over low heat. Stir it continuously until warm, which takes about 2-3 minutes. Next, gently fold the cooked elbow macaroni into the sauce. Make sure all the pasta is coated well. Cook for another 2 minutes to let the flavors blend together. Taste the dish and adjust the seasoning with salt and pepper if needed. Serve hot, and don’t forget to garnish with fresh parsley for a pop of color and taste. For the full recipe, check the details provided earlier. To create the creamiest sauce, start with soaked cashews. Soaking helps them blend smoothly. Use a high-speed blender for best results. Combine soaked cashews with almond milk and nutritional yeast. Blend until you achieve a velvety texture. If your sauce is too thick, add more almond milk slowly. This keeps it creamy without losing flavor. To adjust flavors, taste your sauce as you go. Add a pinch of salt for depth. Lemon juice gives it a bright kick. If you prefer a tangy twist, try more Dijon mustard. Smoked paprika adds a nice warmth if you want it. Feel free to mix and match spices to find your perfect taste. When cooking the pasta, follow package directions for best results. Drain the pasta well to avoid excess water. When adding the sauce, cook on low heat. Stir gently to coat the pasta without breaking it. Keep it on the heat for a few minutes. This helps meld the flavors together perfectly. For the best outcome, serve it hot right away. For the full recipe, check out the details above. {{image_2}} You can easily make vegan mac and cheese gluten-free. Just use gluten-free elbow macaroni. Many brands offer great options. Follow the same cooking steps from the recipe. Your cheese sauce will still be creamy and tasty. If you need a nut-free cheese alternative, try sunflower seeds. Sunflower seeds give a nice, creamy texture. Soak them like you do with cashews. Blend them with the same ingredients from the recipe. You can also use store-bought nut-free vegan cheese for a quicker option. Adding veggies makes your vegan mac and cheese even better! Spinach, broccoli, or peas work well. Cook them with the pasta for just a few minutes. Then mix them into your cheese sauce. This adds color and boosts nutrition. You can feel good about your meal! For the full recipe, check out the details above. To keep leftover vegan mac and cheese fresh, place it in an airtight container. Make sure to cool it to room temperature first. Then, seal the lid tightly. This helps prevent air from getting in and drying out your dish. You can store it in the fridge for up to five days. If you want to keep it longer, freeze it for up to three months. Reheating vegan mac and cheese is easy. You can use a microwave or a stovetop. For the microwave, place a portion on a plate, cover it with a damp paper towel, and heat for one to two minutes. Stir it halfway through to warm evenly. On the stovetop, add the mac and cheese to a pot. Add a splash of almond milk to help it stay creamy. Heat over low heat, stirring often until warm. The shelf life of your ingredients can affect your dish. Raw cashews last about six months in a cool, dry place. Nutritional yeast can last up to two years if stored in a cool, dark area. Almond milk usually stays good for seven to ten days after opening. Always check the expiration dates on your ingredients to ensure freshness. For more detailed steps, refer to the Full Recipe. The best vegan cheese alternatives include cashew cheese, almond cheese, and coconut cheese. Cashew cheese works well in mac and cheese. It has a creamy texture and a mild flavor. Nutritional yeast also adds a cheesy taste. You can find many brands of vegan cheese in stores. Look for ones that melt well for the best results. Yes, you can make this dish oil-free. Use raw cashews as your base. They create a creamy texture without oil. Add almond milk for extra smoothness. Nutritional yeast adds flavor without added fat. Just be sure to blend until smooth. This keeps your mac and cheese rich and creamy without oil. To make vegan mac and cheese spicier, add some hot sauce. You can also sprinkle in cayenne pepper or chili powder. Start with a small amount and taste as you mix. Adjust the heat to your liking. You can even add diced jalapeños for a fresh kick. These changes give your dish an exciting twist! In this post, we explored the best ingredients for vegan mac and cheese. You learned how to create a creamy cashew sauce and cook perfect pasta. We discussed tips for customizing the flavors and making it gluten-free or nut-free. I shared how to store leftovers and answered common questions. Vegan mac and cheese can be easy and fun. With these ideas, you can enjoy a dish that is tasty and good for you. Try out your favorite ingredients and share your results!

Vegan Mac and Cheese Comforting and Creamy Dish

Are you craving a dish that’s both comforting and creamy? My Vegan Mac and Cheese will satisfy your taste buds

To make teriyaki shrimp bowls, you need some tasty ingredients. Here’s what you’ll need: - 1 lb large shrimp, peeled and deveined - 1 cup jasmine rice - 1 ½ cups water - 1 cup broccoli florets - 1 red bell pepper, sliced - 1 carrot, julienned - 4 green onions, chopped - 1 tablespoon sesame oil - ¼ cup low-sodium soy sauce - 2 tablespoons brown sugar - 1 tablespoon rice vinegar - 1 teaspoon grated ginger - 1 teaspoon garlic powder - Optional: sesame seeds for garnish These ingredients give the dish its sweet and savory flavor. The shrimp is tender, and the veggies add a nice crunch. To cook your teriyaki shrimp bowls, you will need a few tools: - A medium pot for the rice - A large skillet for cooking shrimp and veggies - A small bowl for mixing the sauce - A whisk for blending the sauce - A spatula for stirring These tools make cooking simple and fun. Each serving of teriyaki shrimp bowls is not just tasty but also healthy. Here’s the breakdown: - Calories: ~400 - Protein: ~30g - Carbohydrates: ~50g - Fat: ~10g - Fiber: ~3g This meal is rich in protein and provides energy from the rice and veggies. It’s a balanced meal for lunch or dinner. For the full recipe, check out the section above! To start, rinse the jasmine rice under cold water. You want to do this until the water runs clear. This step helps remove extra starch. In a pot, add the rinsed rice and 1 ½ cups of water. Bring it to a boil on high heat. Once it boils, reduce the heat to low. Cover the pot and let it simmer for 18-20 minutes. When done, fluff the rice with a fork. This fluffy rice will be the base of your teriyaki shrimp bowls. Now, let’s make the teriyaki sauce. In a small bowl, combine ¼ cup of low-sodium soy sauce, 2 tablespoons of brown sugar, 1 tablespoon of rice vinegar, 1 teaspoon of grated ginger, and 1 teaspoon of garlic powder. Whisk these ingredients together until they blend well. This sauce adds a sweet and savory flavor to the shrimp. Set it aside for later. Next, heat 1 tablespoon of sesame oil in a large skillet over medium heat. Once hot, add 1 cup of broccoli florets, 1 sliced red bell pepper, and 1 julienned carrot. Sauté these veggies for about 5-7 minutes. You want them to soften but still stay crunchy. After that, take the veggies out of the pan and set them aside. In the same skillet, add the shrimp. Cook them for 2-3 minutes on each side. They should turn pink and opaque. Now, pour the teriyaki sauce over the shrimp. Stir well and let it simmer for another 2-3 minutes. Now comes the fun part: assembling your bowls! Divide the fluffy jasmine rice among four bowls. On top of the rice, add the sautéed veggies and a generous portion of teriyaki shrimp. Don’t forget to garnish with chopped green onions and sprinkle sesame seeds on top if you like. Your teriyaki shrimp bowls are now ready to enjoy! For the full recipe, check out the details above. To cook perfect jasmine rice, rinse it first. Rinsing removes extra starch. This helps the rice stay fluffy. Use a pot with a lid. Combine 1 cup of rice with 1.5 cups of water. Bring the water to a boil. Once boiling, lower the heat and cover the pot. Simmer for 18-20 minutes. After cooking, let the rice sit for a few minutes. Then, fluff it with a fork. This makes each grain stand out. If you want to switch up the teriyaki sauce, there are easy swaps. You can use coconut aminos instead of soy sauce. This gives a slightly sweeter taste. If you need a gluten-free option, tamari works well too. You can also add honey or maple syrup for sweetness. For a spicy kick, mix in some sriracha. These changes keep the flavor fresh and exciting. Adding extra flavor makes your teriyaki shrimp bowls shine. Try adding lime juice for a zesty twist. Fresh herbs like cilantro or basil also brighten the dish. For crunch, sprinkle sesame seeds on top. You can also add sliced radishes or avocado for color. These simple touches make your meal look and taste gourmet. For the full recipe, check out the linked details. {{image_2}} You can easily swap shrimp for chicken or tofu. Chicken adds a hearty touch, while tofu is great for vegans. If using chicken, cut it into bite-sized pieces. Cook it in the same way as the shrimp. Tofu needs a bit more care. Press it to remove water, then cut it. Sauté it until it’s golden. Both proteins work well with the teriyaki sauce. You can change the veggies based on your taste or diet. Zucchini, snap peas, or bell peppers add color and crunch. Spinach or kale gives a healthy twist. Just remember to adjust cooking time. Softer veggies need less time on the heat. Serve your teriyaki shrimp bowls with sides like edamame or seaweed salad. These add extra flavor and nutrition. You can also drizzle extra teriyaki sauce on top for a bolder taste. For a fresh touch, top with lime wedges or fresh herbs. This adds brightness and makes the dish pop. You can find the Full Recipe for more ideas to elevate your meal. Store your leftover teriyaki shrimp bowls in an airtight container. This helps keep them fresh. Make sure to let them cool first. Place them in the fridge for up to three days. If you want to keep them longer, consider freezing them. When you’re ready to eat, take the bowls out of the fridge. Place them in the microwave on a microwave-safe plate. Heat in short bursts of one minute. Stir between heating to avoid hot spots. This keeps the shrimp from becoming tough. You want them warm, not overcooked. If you choose to freeze your teriyaki shrimp bowls, do it before adding fresh veggies. Cook and cool the shrimp and rice, then pack them tightly in freezer-safe bags. Remove as much air as possible. You can freeze them for up to two months. When ready to eat, thaw overnight in the fridge. Reheat as mentioned before. This keeps the flavors fresh and tasty. For the best taste, add fresh veggies after reheating. Check out the Full Recipe for ideas! The best way to devein shrimp is simple. First, use a sharp knife or kitchen scissors. Make a shallow cut along the back of the shrimp. You will see a dark line; this is the vein. Gently pull it out with your fingers or the knife. Rinse the shrimp under cold water to clean them. This method works well for big shrimp. Yes, you can make Teriyaki Shrimp Bowls ahead of time. Cook and store each part separately. Keep the rice, shrimp, and veggies in different containers. This way, the food stays fresh. When you are ready to eat, just heat them up. It saves time on busy days! Not all Teriyaki Shrimp Bowls are gluten-free. The main ingredient to check is soy sauce. Regular soy sauce contains gluten. You can use gluten-free soy sauce instead. This will make your dish gluten-free. Always check labels if you need to avoid gluten. You can find a full recipe for Teriyaki Shrimp Bowls in this article. It includes all the ingredients and step-by-step instructions. This will help you create a delicious meal with ease. Enjoy making your own tasty bowls at home! In this post, we explored how to create delicious Teriyaki Shrimp Bowls. We discussed key ingredients, step-by-step instructions, and helpful tips. You learned about variations and how to store your meals. Remember, cooking should be fun and easy. Feel free to switch proteins or add your favorite veggies. Enjoy this tasty dish with friends or family. Happy cooking!

Teriyaki Shrimp Bowls Simple and Flavorful Meal

Looking for a meal that’s both simple and bursting with flavor? You’ve come to the right place! Teriyaki shrimp bowls

To make a delicious smoked salmon avocado toast, gather these ingredients: - Ripe avocados - Whole grain or rye bread - Smoked salmon - Cream cheese - Lemon juice - Salt and pepper - Capers (optional) - Fresh herbs (dill or chives) - Red pepper flakes (optional) Using fresh, ripe avocados is key. They should be soft but not mushy. Whole grain or rye bread adds a nutty flavor and good texture. Smoked salmon brings a savory touch that pairs well with the creamy avocado. Cream cheese adds richness and helps the toppings stick. A splash of lemon juice keeps the avocado bright and tasty. Salt and pepper enhance all the flavors. Capers add a nice briny bite, while fresh herbs provide a pop of freshness. Finally, red pepper flakes can give your toast a little heat. For the full recipe, check out Smoked Salmon Avocado Toast 🥑. - Toasting the bread Start by toasting your slices of bread. Choose whole grain or rye for extra flavor. Toast until they are golden brown and crisp. This step adds a great crunch. - Preparing the avocado mixture Next, cut the ripe avocados in half. Remove the pit and scoop the green flesh into a bowl. Add one tablespoon of lemon juice to stop browning. Mash the avocado with a fork until smooth. Season it with salt and pepper to taste. - Spreading cream cheese on the toasted bread Once the bread is toasted, take a tablespoon of cream cheese. Spread it thinly over each slice. This adds a creamy layer beneath the avocado. - Layering smoked salmon on top Now, take your smoked salmon and place it on each piece. Layer the salmon artfully for a beautiful look. You can also add capers if you like. This step adds a salty touch that pairs well with the creamy avocado. Follow these steps for a delicious smoked salmon avocado toast. For a full recipe, check out the details above. To make the best smoked salmon avocado toast, focus on texture. First, achieve the right avocado consistency. Look for ripe avocados that yield slightly when you press them. This means they are soft enough to mash but not too mushy. You want a creamy texture, so mash gently with a fork. Next, choose the best bread for toasting. Whole grain or rye bread works well. These types have a great nutty flavor and hold up well under toppings. Toast until golden brown for a crunchy bite that contrasts nicely with the creamy avocado. Balancing flavors with seasonings is key. After mashing the avocado, add salt and pepper to taste. A squeeze of lemon juice brightens the flavor and keeps the avocado fresh. If you enjoy a little kick, sprinkle on some red pepper flakes for extra spice. Pair your smoked salmon avocado toast with your favorite beverage. A warm cup of coffee offers a nice balance. If you prefer tea, a light herbal blend works great too. For brunch, consider serving this toast with fresh fruit or a simple salad. These sides add color and freshness to your meal. You can also offer a light yogurt parfait for a sweet touch. This combination makes for a delightful brunch spread that everyone will enjoy! For the full recipe, check the detailed instructions above and get ready to impress at your next meal! {{image_2}} You can switch up your smoked salmon avocado toast with tasty toppings. Here are some fun ideas: - Using different types of smoked fish: Try using smoked trout or mackerel. They add unique flavors and can spice up your dish. - Adding vegetables: Cherry tomatoes and radishes give a fresh crunch. Slice them thinly and layer them on top for color and taste. - Exploring global flavor profiles: Add jalapeños for heat or crumbled feta cheese for a Mediterranean twist. These options can brighten up your toast. If you need to adjust the recipe for dietary needs, here are some options: - Vegan alternatives: Use smoked tempeh or tofu instead of salmon. For cream cheese, choose a vegan spread made from nuts or soy. - Gluten-free options: Replace whole grain or rye bread with gluten-free bread. Many brands offer tasty alternatives that won’t skimp on flavor. Experiment with these variations and see what you like best. The smoked salmon avocado toast is versatile, and these changes can make it your own. For the full recipe, check out the section above. To keep your avocados fresh, store them at room temperature. Once ripe, use them within a few days. If you have leftover avocado, sprinkle lemon juice on it. This helps slow down browning. Wrap it tightly in plastic wrap or place it in an airtight container. For smoked salmon, store it in the coldest part of your fridge. Keep it in its original packaging or transfer it to an airtight container. Use it within a week for the best taste. If you can’t use it right away, freeze the salmon. Just make sure to wrap it well to prevent freezer burn. For the prepared toast, enjoy it fresh. If you have leftover toast, store it in an airtight container. Keep the bread separate from the toppings to avoid sogginess. Reheating smoked salmon avocado toast can be tricky. You want to keep the taste and texture just right. Start by preheating your oven to 350°F (175°C). Place the toast on a baking sheet. Heat for about 5-7 minutes until warm. If you’re in a hurry, you can use a microwave. Just be careful not to overheat it. Place the toast on a microwave-safe plate. Heat in short bursts of 10-15 seconds. This way, the avocado stays creamy, and the salmon stays tender. How to select ripe avocados? Look for avocados that feel slightly soft when you press them. The skin should be dark green or black. If it feels hard, it is not ripe yet. Can I prepare smoked salmon avocado toast in advance? You can prepare the avocado mixture ahead of time. However, I suggest waiting to assemble the toast until you are ready to eat. This keeps the bread crisp. What are the health benefits of this dish? This toast is rich in healthy fats from the avocado and protein from the salmon. Avocados provide fiber, vitamins, and minerals. Salmon offers omega-3 fatty acids, which are good for heart health. Where can I buy quality smoked salmon? You can find quality smoked salmon at local fish markets or grocery stores. Look for salmon that is firm and smells fresh. You may also find it online from reputable seafood vendors. What to do if avocado browns too quickly? To slow browning, add lemon juice to the mashed avocado. Store it in an airtight container and press plastic wrap directly on the surface to minimize air contact. How to prevent sogginess in toast? Make sure to toast the bread until it is golden brown. Spread the cream cheese right after toasting, and layer the avocado mixture quickly. This helps keep the bread crispy. Avocado toast with smoked salmon is easy and delicious. You learned about key ingredients, from ripe avocados to optional capers. The step-by-step guide helps you create a tasty dish. We shared tips on perfecting texture and flavor. There are fun variations and dietary options to try. Lastly, we discussed how to store ingredients and reheat leftover toast. Enjoy making this dish your own, and savor every bite.

Smoked Salmon Avocado Toast Healthy Breakfast Recipe

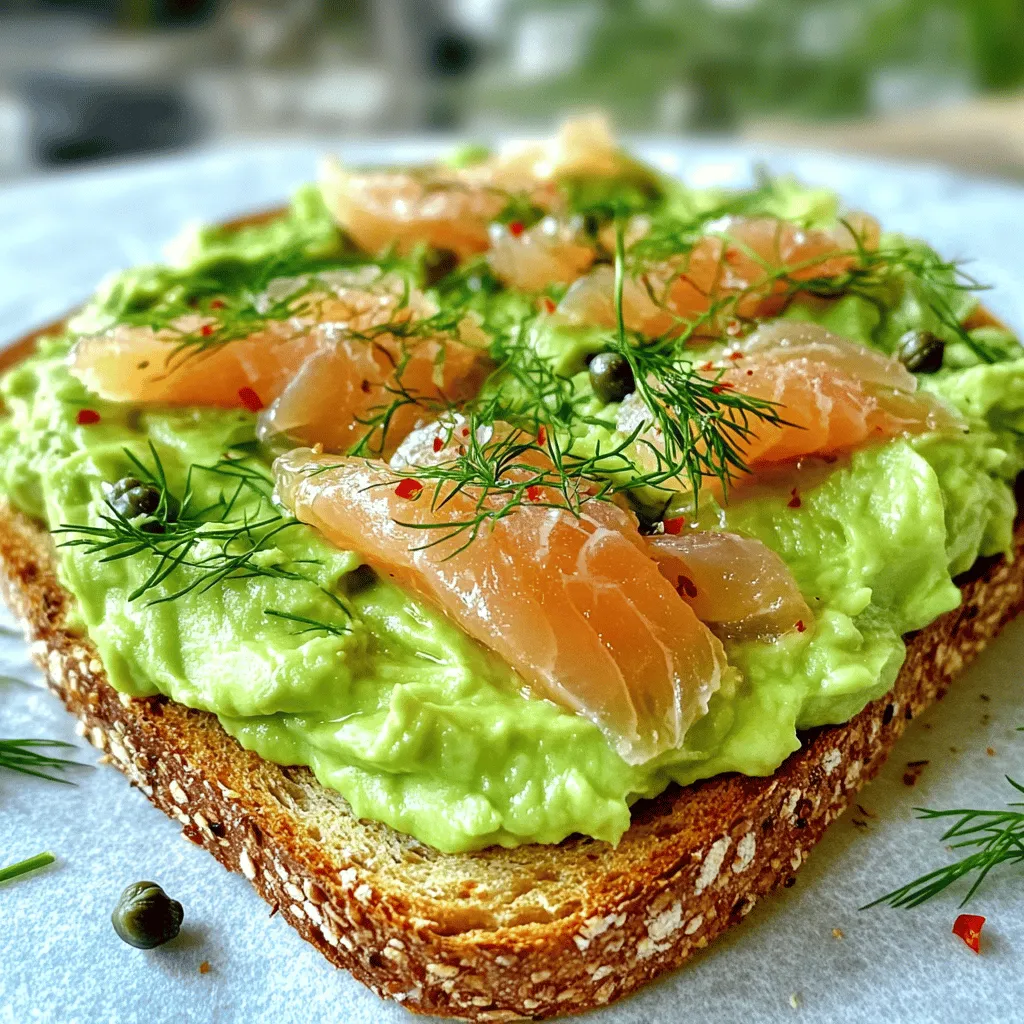
Looking for a healthy breakfast that packs a punch? Smoked salmon avocado toast is your answer! This colorful dish combines

When making creamy tomato basil pasta, you need a few key items: - 8 oz. fettuccine pasta - 2 tablespoons olive oil - 3 cloves garlic, minced - 1 can (14 oz.) crushed tomatoes - 1 cup heavy cream - ½ cup grated Parmesan cheese Fettuccine is perfect for this dish. Its wide noodles hold the sauce well. Olive oil gives the dish a nice richness. Garlic adds a warm, savory flavor. Crushed tomatoes bring a fresh, tangy taste. Heavy cream makes the sauce smooth and rich. Finally, Parmesan cheese adds a salty kick that everyone loves. Seasonings make this dish pop. You will want: - 1 cup fresh basil leaves, chopped - 1 teaspoon dried oregano - 1 teaspoon sugar - Salt and pepper to taste Fresh basil is a must for this recipe. It gives a burst of flavor and a nice color. Dried oregano adds a touch of earthiness. A little sugar balances the acidity of the tomatoes. Salt and pepper enhance all the flavors, making every bite delightful. For a full recipe, check the complete list of ingredients and steps. To cook the pasta, fill a pot with water. Bring it to a boil, then add salt. The salt helps flavor the pasta. Add the fettuccine and stir it gently. Cook for 8-10 minutes until it’s al dente. This means it should be firm but not hard. Drain the pasta, but save ½ cup of the pasta water. This water will help make the sauce creamy later. In a large skillet, pour in the olive oil and heat it on medium. When the oil is hot, add the minced garlic. Sauté the garlic for about 1 minute. You want it to smell great but not burn. If it burns, it tastes bitter. Next, add the crushed tomatoes to the skillet. Stir in the heavy cream and mix well. Add the dried oregano, sugar, salt, and pepper. Let this mixture simmer for about 5 minutes. Stir it occasionally so it doesn't stick. After the sauce is ready, add the cooked fettuccine to the skillet. Toss the pasta in the sauce to coat it well. If the sauce seems too thick, use the reserved pasta water. Add it a little at a time. This will help get the right creamy texture. Finally, stir in the grated Parmesan cheese until it melts. Then, mix in the fresh basil leaves. Your creamy tomato basil pasta is now ready to serve! For the full recipe, make sure to check the recipe section. To get a smooth sauce, heat your olive oil first. Add minced garlic and cook it just until fragrant. This step adds great flavor. Next, pour in crushed tomatoes and heavy cream. Stir them well to blend. If the sauce feels thick, use reserved pasta water to thin it out. Add it slowly until you reach the right creaminess. Want more taste? Consider adding spices like crushed red pepper or Italian seasoning. You can also toss in sautéed onions or bell peppers. For a fresh twist, try adding a splash of lemon juice. These small changes can lift the dish. Watch out for burning the garlic. It can turn bitter very fast. Also, don’t skip simmering the sauce; it helps the flavors meld. Lastly, be careful not to overcook the pasta. It should be al dente for the best texture. Follow these tips, and your creamy tomato basil pasta will shine. For the full recipe, check out the instructions above. {{image_2}} You can easily add protein to creamy tomato basil pasta. Chicken, shrimp, or sausage all work great. For chicken, grill or sauté it until cooked through. Slice it into bite-sized pieces and toss it with the pasta. If you like shrimp, sauté it in olive oil until pink and tender. For sausage, simply cook it until browned and crumble it into the sauce. Each option adds a unique flavor and makes your meal more filling. If you want a vegetarian dish, use plant-based cream or cheese. Almond or coconut cream are great choices for a creamy texture. For cheese, try nutritional yeast or vegan parmesan. These options give you the same rich taste without dairy. You can enjoy the same comfort of creamy tomato basil pasta while keeping it plant-based. To spice things up, add red pepper flakes or diced jalapeños to the sauce. Start with a small amount, then taste and adjust as needed. You can also use a spicy Italian sausage for extra heat. A splash of hot sauce can also elevate the dish. This way, you get a satisfying kick without overpowering the tomato and basil flavors. By exploring these variations, you can make creamy tomato basil pasta your own. Check the Full Recipe for the base to get started! Store leftover creamy tomato basil pasta in an airtight container. Make sure the pasta cools to room temperature before sealing. This helps keep the flavor and texture intact. You can refrigerate it for up to three days. If you want to enjoy it later, label the container with the date. To reheat your pasta, use the stovetop for best results. Place the pasta in a skillet over low heat. Add a splash of water or extra cream to help revive the sauce. Stir gently as it warms to keep the creamy texture. You can also use the microwave. Just cover the bowl and heat in short intervals, stirring in between. This prevents the pasta from drying out. You can freeze creamy tomato basil pasta, but it may change slightly. The cream can separate when thawed. If you freeze it, do so in a freezer-safe container. Use it within three months for the best taste. When ready to eat, thaw it in the fridge overnight. Reheat as described above for a tasty meal. For the full recipe, check back to the beginning of the article. Yes, you can use many types of pasta. Here are some good options: - Penne - Spaghetti - Bowtie - Rigatoni Each shape holds the sauce well. Choose one that you love. Just remember to cook it until it is al dente for the best texture. If you want a lighter option, try these substitutes: - Half-and-half - Coconut cream - Cashew cream - Silken tofu blended These options still give you creaminess without the heaviness. Coconut cream adds a nice flavor. Silken tofu blends well and is a great dairy-free choice. Making this dish vegetarian or vegan is easy. Here are some swaps: - Use vegetable broth instead of chicken broth. - Replace heavy cream with coconut cream or cashew cream. - Omit Parmesan cheese or use a vegan cheese. These changes keep all the yummy flavor while making it plant-based. Enjoy your creamy tomato basil pasta with these simple tweaks! For the full recipe, check out the details above. Creamy tomato basil pasta combines simple ingredients for a rich dish. You learned how to cook perfect fettuccine, make a smooth sauce, and mix them well. Tips on textures, flavors, and mistakes helped you refine your cooking skills. Explore variations with protein or spices to customize your meal. Proper storage and reheating ensure every bite stays delicious. Use this guide to enjoy a tasty pasta dish any time, whether for dinner or a special occasion. Enjoy your cooking journey!

Creamy Tomato Basil Pasta Flavorful and Simple Meal

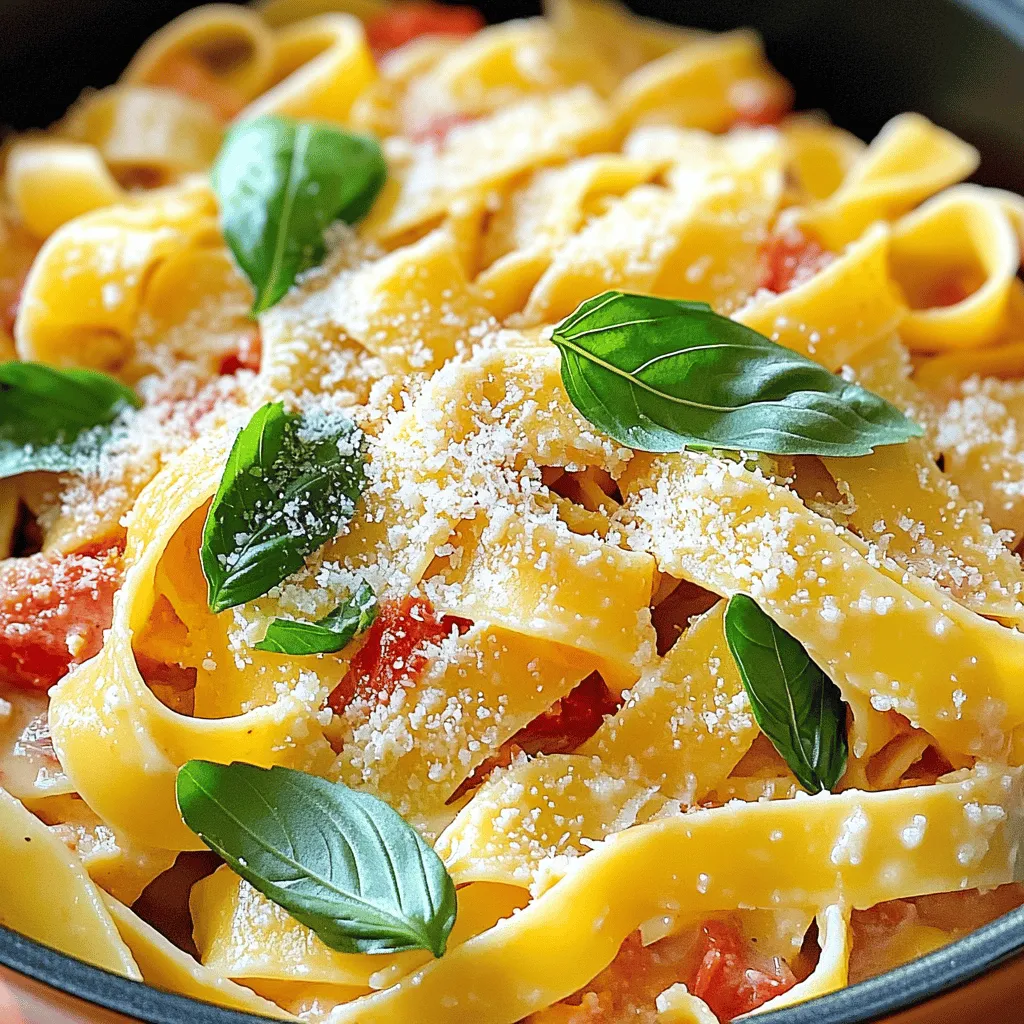
Looking for a meal that’s both tasty and easy to make? Let me show you how to create creamy tomato

- 200g chow mein noodles - 1 cup bell peppers (mixed colors), thinly sliced - 1 cup snap peas, trimmed - 1 medium carrot, julienned - 1 cup broccoli florets - 3 cloves garlic, minced - 1 tablespoon fresh ginger, grated Chow mein noodles form the base of this dish. They are thin and cook quickly. Fresh vegetables add color and crunch, making the dish lively. Aromatics like garlic and ginger add a rich flavor. - 4 tablespoons soy sauce - 1 tablespoon sesame oil - 1 teaspoon sugar - Salt and pepper to taste Soy sauce gives a salty depth to the chow mein. Sesame oil adds a nutty hint. A touch of sugar balances the flavors. Salt and pepper enhance the taste, but use them wisely to avoid overpowering. - 2 green onions, chopped (for garnish) - Sesame seeds (for garnish) Green onions add freshness and crunch when sprinkled on top. Sesame seeds offer a nice nutty contrast. These toppings not only look good but also enhance the overall flavor. For the complete recipe, check out the Full Recipe. First, you need to cook the chow mein noodles. Follow the package instructions carefully. After they are cooked, drain them well. Rinse the noodles under cold water. This step keeps them from sticking together. Set the noodles aside for later. Next, heat the vegetable oil in a large skillet or wok over medium-high heat. Add the minced garlic and grated ginger. Stir them for about 30 seconds. You want to smell that great aroma! Now, add the bell peppers, snap peas, carrots, and broccoli. Stir-fry the veggies for about 5 to 7 minutes. They should be tender but still crisp. Push the cooked vegetables to one side of the skillet. In the empty space, add the cooked chow mein noodles. Pour in the soy sauce, sesame oil, and sugar. Mix everything together well. Toss the noodles with the veggies. Season with salt and pepper. Stir-fry for an extra 2 to 3 minutes. Make sure everything is heated and mixed well. Finally, transfer your easy veggie chow mein to a serving platter. - Best stir-frying practices: Use a hot skillet or wok. This helps the food cook fast. Add oil before the garlic and ginger. This keeps them from burning. Stir constantly. This ensures even cooking and flavor. - Maintaining vegetable crunch: Don't overcook your veggies. Stir-fry them until they are bright and slightly soft. This keeps them crunchy. Use high heat to seal in their freshness. - Adding spice or heat: Want some heat? Add red pepper flakes or sriracha. Start with a little and adjust to taste. This makes your chow mein exciting! - Using fresh herbs: Adding fresh herbs can brighten the dish. Try cilantro or basil. Chop them finely and mix in just before serving. This adds a fresh burst of flavor. - Serving suggestions: Serve your chow mein on a large platter. This shows off the colorful veggies. Pair it with chopsticks for fun! - Garnishing for appeal: Use chopped green onions and sesame seeds on top. This adds color and crunch. A squeeze of lime can also brighten the dish visually and in flavor. Try these tips to make your Easy Veggie Chow Mein even more delightful! For the complete method, check the Full Recipe. {{image_2}} You can make Easy Veggie Chow Mein more filling by adding protein. Tofu is a great choice. It absorbs flavors well and adds texture. Use firm or extra-firm tofu for the best results. Press it to remove excess water, then cube it. Sauté the tofu first until golden brown. Then, add it to the stir-fry with your veggies. Tempeh is another tasty option. This fermented soy product has a nutty flavor. Cut it into thin slices or cubes. Cook it in the skillet with oil until it’s crispy. You can also try seitan, which is made from wheat gluten. It has a chewy texture and works well in many dishes. Just sauté it until heated through, then mix it in. Feel free to swap out the veggies based on what you have. Seasonal vegetables are a fun way to change this dish. You can use zucchini, asparagus, or bell peppers in summer. In the cooler months, try carrots, kale, or winter squash. Frozen veggies are a great time-saver. They are picked at peak freshness and are often just as good as fresh. You can use a mix of frozen peas, carrots, and corn. Just add them to the stir-fry without thawing. They will cook quickly and keep your meal colorful. If you need a gluten-free option, use gluten-free soy sauce. It tastes similar but is safe for those with gluten issues. You can also make a homemade stir-fry sauce. Combine soy sauce, sesame oil, and a bit of honey for sweetness. This mix adds a nice zing to your chow mein. For more flavor, try adding a splash of rice vinegar or some chili paste. These small changes can elevate your dish and make it your own. Enjoy the process of creating your perfect Easy Veggie Chow Mein! Store your veggie chow mein in the fridge. Use airtight containers for best results. Leftovers should cool first, then go in the fridge. They stay fresh for about three days. When ready to eat, check for any off smells or colors. You can reheat chow mein on the stove or in the microwave. For the stove, add a splash of water in a pan and heat over medium. Stir often to keep it from sticking. In the microwave, cover the dish to keep moisture. Heat in short bursts, stirring in between. To keep that crunchy texture, reheat gently. If it seems dry, add a bit of soy sauce or water. This helps bring back the flavor and moisture. You can freeze chow mein for later use. Let it cool completely before packing it away. Use freezer-safe containers or bags. This helps prevent freezer burn. It can last for about a month in the freezer. To reheat from frozen, thaw it overnight in the fridge. Then, use the stove or microwave to heat it up. If you microwave it, remember to stir and add water if it looks dry. Enjoy your meal just like fresh! Yes, you can make this recipe gluten-free. Here are some easy swaps: - Noodles: Use rice noodles or gluten-free chow mein noodles. - Soy Sauce: Choose gluten-free soy sauce or tamari for a safe option. - Sugar: Most sugar is gluten-free, but check labels if you use special types. These changes will help you enjoy chow mein without gluten. To add heat, you can: - Chili Sauce: Stir in chili garlic sauce or sriracha while cooking. - Fresh Peppers: Add sliced jalapeños or red chili peppers. - Crushed Red Pepper: Sprinkle crushed red pepper flakes over the dish before serving. Adjust the heat to match your taste! Chow mein is great with many veggies. Here are my top picks: - Bell Peppers: They add color and sweetness. - Carrots: Their crunch is a nice contrast. - Broccoli: It gives a hearty bite. - Snap Peas: They bring a fresh, crisp texture. Feel free to mix and match to suit your taste! For the complete list of ingredients and detailed steps, check the [Full Recipe](#). In this blog post, I covered chow mein, from key ingredients to cooking steps. You learned about main ingredients like noodles and fresh veggies, and the importance of sauces. I shared tips on techniques and flavor boosts to enhance your dish. We explored protein options and storage tips for leftovers. When it comes to chow mein, you can easily make it your own. Experiment with different flavors and enjoy this tasty dish in many ways. Happy cooking!

Easy Veggie Chow Mein Simple and Delicious Recipe

Craving a quick and tasty meal? This Easy Veggie Chow Mein recipe is your answer! With just a few simple

To make honey garlic shrimp noodles, gather these tasty ingredients: - 8 oz. rice noodles - 1 lb. large shrimp, peeled and deveined - 4 cloves garlic, minced - 1/4 cup honey - 1/4 cup soy sauce - 2 tablespoons sesame oil - 1 tablespoon fresh ginger, grated - 1 red bell pepper, thinly sliced - 3 green onions, chopped - 2 cups broccoli florets - Sesame seeds for garnish - Salt and pepper to taste Each item plays a key role in the dish's flavor. Rice noodles provide a soft base. Shrimp adds protein and a lovely texture. Aromatics like garlic and ginger create a fragrant backdrop. Honey and soy sauce bring sweetness and umami, making every bite delicious. The red bell pepper adds color and crunch. Broccoli brings a fresh taste and nutrition. Green onions give a pop of flavor and garnish appeal. Sesame seeds add a nutty finish, making your dish look and taste gourmet. Having all these ingredients ready will make cooking smooth and fun. You can enjoy a delightful meal in just 30 minutes! {{ingredient_image_1}} First, cook the rice noodles. Follow the package instructions closely. Once they are cooked, drain them well. Set the noodles aside for later use. This step is key for a great texture. Next, grab a large skillet or wok. Heat 2 tablespoons of sesame oil over medium-high heat. Add 4 cloves of minced garlic and 1 tablespoon of grated ginger. Sauté these for about 1-2 minutes. You want them to smell good, not burn. Now, it’s time for the shrimp. Add 1 pound of large shrimp to the skillet. Season with salt and pepper. Cook the shrimp for 2-3 minutes on each side. They should turn pink and look opaque. Once they are done, remove them from the skillet and set them aside. In the same skillet, add 1 thinly sliced red bell pepper and 2 cups of broccoli florets. Stir-fry these for about 4-5 minutes. You want them tender-crisp. They should keep some bite and color. Return the cooked shrimp to the skillet. Drizzle in 1/4 cup of honey and 1/4 cup of soy sauce. Toss everything together to coat well. Next, gently fold in the cooked rice noodles. Mix until everything is heated through, about 2-3 minutes. This is where the magic happens! To make your Honey Garlic Shrimp Noodles shine, start with salt and pepper. Adjust these to your taste. A little salt can enhance the sweetness of the honey. Always taste your dish before serving. If it feels flat, a pinch of salt can help. Garnishes add beauty and flavor. I love using chopped green onions and sesame seeds. They give a fresh look and a nice crunch. Try adding a squeeze of lime for extra zing. This small step can really brighten the dish. You can cook shrimp in many ways. Grilling or baking shrimp adds a smoky flavor. If you prefer, pan-searing works well too. Just remember, shrimp cook fast. Keep an eye on them to avoid overcooking. For stir-frying, use high heat. This helps keep your shrimp juicy. Move the ingredients quickly in the pan. A good stir-fry should take only a few minutes. Don't overcrowd the pan; work in batches if needed. If you want a change from shrimp, chicken or tofu works great. Chicken adds a different texture, while tofu is perfect for a vegetarian option. Just ensure chicken is fully cooked before serving. Feel free to swap vegetables too. Broccoli and bell pepper are great, but think about adding snap peas or carrots. Seasonal veggies make your dish look colorful and fresh. Use what you have on hand for a quick meal! Pro Tips Fresh Ingredients: Always use fresh shrimp and vegetables for the best flavor and texture in your dish. Customize Your Veggies: Feel free to add or substitute other vegetables like snap peas, carrots, or bok choy based on your preference. Perfect Noodles: Rinse the cooked rice noodles under cold water to prevent them from sticking together before adding them to the skillet. Adjust Sweetness: Taste the sauce before serving and adjust the honey or soy sauce to your desired sweetness or saltiness. {{image_2}} You can make your dish even better by adding colorful vegetables. Think red bell pepper, green broccoli, and vibrant carrots. Each vegetable adds flavor and crunch. You can also use seasonal produce. Fresh zucchini in the summer or root veggies in fall can change the taste. If you like heat, try adding chili flakes or sriracha. This gives your noodles a kick. The spice balances well with the sweet honey. You can start with a little and add more if you want more heat. This adds a nice depth to your dish. For those needing gluten-free options, use gluten-free noodles. Rice noodles are a great choice and work well here. You can also look for alternative sauces. Tamari is a good option for soy sauce. This way, you can enjoy the same great flavor without any gluten. To keep your honey garlic shrimp noodles fresh, store them in airtight containers. This step prevents air from getting in and keeps the flavors intact. You can refrigerate the noodles for up to three days. After that, they may lose quality and taste. When it's time to enjoy your leftovers, the best methods are using a skillet or microwave. If using a skillet, heat it to medium and add a splash of water. Stir the noodles gently to warm them up. In the microwave, place the noodles in a bowl and cover them with a damp paper towel. Heat for 1-2 minutes, checking to avoid overcooking. Be careful with the shrimp; they can become tough if reheated too long. Yes, you can freeze honey garlic shrimp noodles! Place them in freezer-safe containers. Make sure to leave some space for expansion. They can last in the freezer for up to three months. To reheat, let them thaw overnight in the fridge. Then, follow the reheating tips mentioned above. This way, you can enjoy a quick meal later! Yes, you can use frozen shrimp. First, thaw the shrimp before cooking. To thaw, place them in a bowl of cold water for about 15-20 minutes. Change the water halfway through to speed up the process. Once thawed, pat the shrimp dry with paper towels to remove excess moisture. This helps them cook evenly. Cook the shrimp as you would fresh shrimp. They will turn pink and opaque in just a few minutes. You can prepare this dish ahead of time. Cook the rice noodles and shrimp, then store them separately. Keep the noodles in a sealed container in the fridge for up to three days. Store the shrimp in another container. You can also chop the veggies in advance. When you're ready to eat, stir-fry the veggies, add the shrimp and noodles, and finish with the sauce. This way, you can enjoy a fresh meal quickly. Yes, you can easily adjust the sweetness. If you prefer a sweeter sauce, add more honey. If you want it less sweet, reduce the honey amount. You can also adjust the soy sauce ratio. For a well-balanced flavor, try using a 2:1 ratio of soy sauce to honey. Taste the sauce as you mix to find your perfect balance. Adjust as needed to match your taste. This blog post covered a tasty shrimp noodle dish. We looked at ingredients, step-by-step cooking, and useful tips. You can swap shrimp for chicken or tofu. Also, try spicy or gluten-free versions for more variety. In the end, cooking is about using your favorite ingredients. Don’t hesitate to experiment. Happy cooking!

Honey Garlic Shrimp Noodles Flavorful and Easy Dish

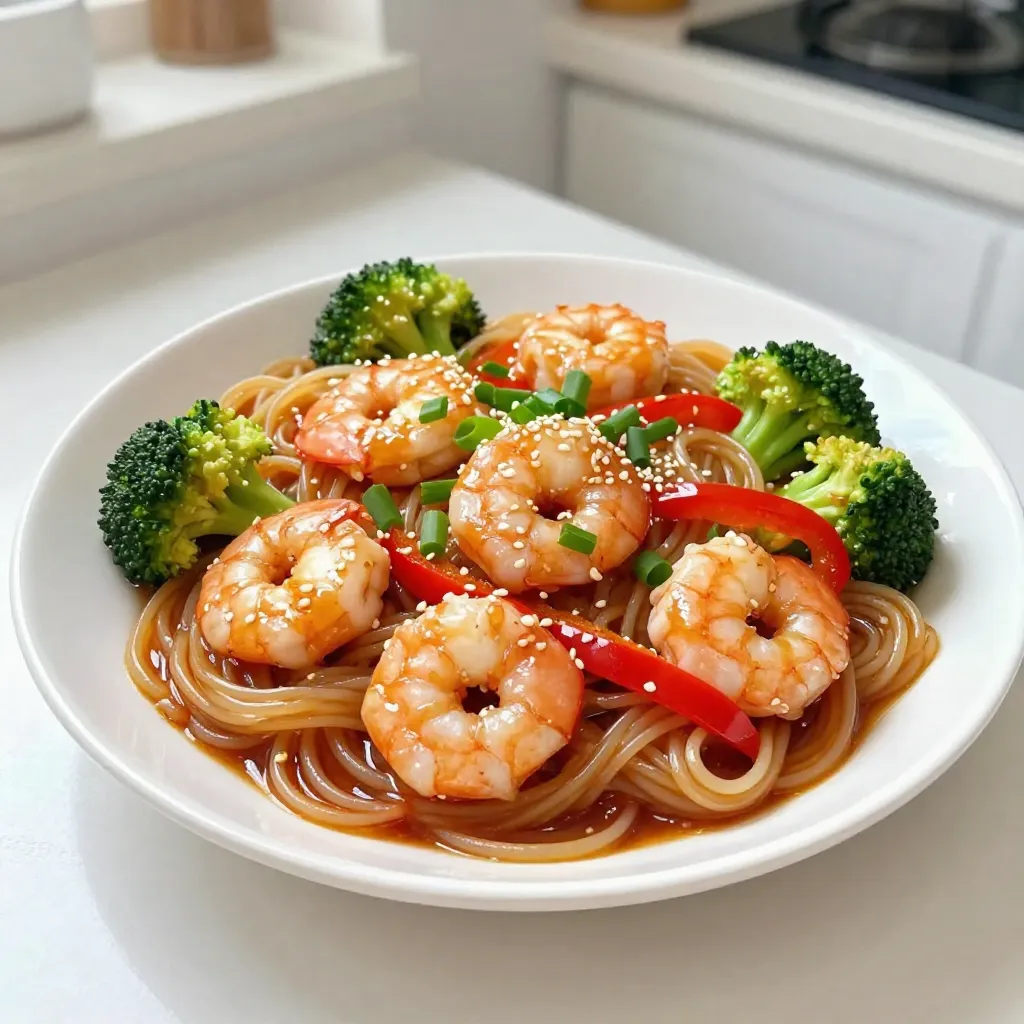
Dive into the world of flavor with Honey Garlic Shrimp Noodles! This dish combines sweet honey, tender shrimp, and crunchy

- 4 bone-in, skin-on chicken thighs - 4 cloves garlic, minced - Zest of 1 lemon - 1/4 cup freshly squeezed lemon juice - 2 tablespoons olive oil - 1 teaspoon dried oregano - 1 teaspoon smoked paprika - Salt and pepper to taste - Fresh parsley, chopped (for garnish) You can serve the chicken with sides like rice, roasted veggies, or a fresh salad. For extra flavor, try adding herbs like thyme or rosemary. A sprinkle of red pepper flakes can add some heat. Enjoy exploring these options! 1. First, preheat your oven to 425°F (220°C). This temperature helps the chicken cook evenly. 2. In a small bowl, mix 4 minced garlic cloves, lemon zest, lemon juice, olive oil, oregano, smoked paprika, salt, and pepper. This creates a tasty marinade. 3. Place 4 chicken thighs in a large bowl or zip-top bag. Pour the marinade over the chicken, ensuring each piece is coated. 4. Let the chicken marinate for at least 30 minutes, or up to 4 hours in the fridge. The longer it sits, the more flavor it gains. 1. Heat a large oven-safe skillet over medium-high heat. Add a little olive oil if needed to prevent sticking. 2. Once hot, place the chicken thighs skin-side down in the skillet. Sear them for about 5-7 minutes until the skin turns golden brown and crispy. 3. Flip the chicken thighs over. Then, transfer the skillet to your preheated oven. Bake for 25-30 minutes. Use a meat thermometer to confirm the internal temperature reaches 165°F (75°C). 1. To plate the dish, arrange the chicken thighs on a large serving platter. This makes a beautiful presentation. 2. For extra flavor, drizzle any pan juices over the chicken before serving. This adds a rich taste and keeps the meat moist. Be sure to check out the Full Recipe for more details on this delicious dish! To get the best flavor from your chicken thighs, marinate them well. Here are some best practices: - Use a sealable bag or a bowl to coat the chicken evenly. - Make sure the marinade covers every piece. - For the best taste, marinate for at least 30 minutes. - If you have time, let the chicken sit in the fridge for up to 4 hours. Longer marination helps the flavors soak in deeply. Crispy skin on chicken makes every meal special. Follow these tips for success: - Start by searing the skin side down in a hot skillet. - Cook for about 5-7 minutes until it turns golden brown. - Flip the chicken before baking. - Bake it at 425°F until the inside reaches 165°F. This method keeps the chicken juicy while ensuring a crispy finish. A great presentation makes any dish pop. Here are some serving ideas: - Garnish with fresh parsley for a bright touch. - Pair the chicken with roasted veggies or rice. - Serve with a light salad to balance the meal. Adding a refreshing drink, like lemonade, complements the dish nicely. For the full recipe, check out the earlier sections. {{image_2}} Grilling and baking give different results. - Grilling: This method adds a smoky flavor. The chicken gets nice grill marks. It cooks fast, usually in about 20 minutes. - Baking: This method keeps the chicken juicy. It takes longer, around 30 minutes. Baking is great for a hands-off approach. You can also use a slow cooker. It’s perfect for busy weeknights. Just place the marinated chicken in the cooker. Cook on low for 6-8 hours. The chicken will be tender and full of flavor. You can change the taste of your dish easily. - Herbs and Spices: Try adding rosemary or thyme for a different taste. You can also use chili powder for heat. - Vegetables: Add bell peppers or zucchini in the last 15 minutes of cooking. They will soak up the chicken's flavor and add color. Making this dish fit your diet is simple. - Gluten-Free: All the basic ingredients are gluten-free. Just check your spices to be sure. - Low-Calorie: Use skinless chicken thighs or remove the skin after cooking. This lowers the fat and calorie count. You can find the full recipe to help you get started. To store leftovers, let the chicken cool first. Place it in an airtight container. This keeps the chicken fresh. I recommend eating it within three days. If you plan to enjoy it later, store it properly. You can freeze the chicken for future meals. Wrap the cooked chicken in plastic wrap tightly. Then, place it in a freezer bag. Make sure to remove as much air as possible. This helps prevent freezer burn. When you want to eat it, thaw it in the fridge overnight. To reheat and keep the chicken juicy, use the oven. Preheat it to 350°F (175°C). Place the chicken in an oven-safe dish. Add a splash of broth or water to help with moisture. Cover it with foil to trap steam. Heat for about 15-20 minutes. This warms it up and keeps the flavor. Enjoy your Lemon Garlic Chicken Thighs warm and tasty! For the full recipe, check out the earlier section. How long to bake chicken thighs for best results? Bake chicken thighs at 425°F (220°C) for 25-30 minutes. This time ensures juicy meat and crispy skin. Always check the internal temperature. It should reach 165°F (75°C) for safe eating. Can I use boneless chicken thighs instead? Yes, you can use boneless thighs. They will cook faster, around 20-25 minutes. Adjust the cooking time to avoid drying them out. How long can Lemon Garlic Chicken Thighs be stored in the fridge? You can store them in the fridge for up to 4 days. Keep them in an airtight container to maintain freshness. Can you freeze cooked Lemon Garlic Chicken Thighs? Absolutely! Freeze them for up to 3 months. Let them cool fully before packing them in freezer-safe bags. What can I substitute for olive oil? If you need a substitute, use canola oil or avocado oil. Both work well and add nice flavor. Can I use lemon juice from a bottle instead of fresh? You can use bottled lemon juice, but fresh is best. Fresh juice gives a brighter taste and better aroma. For the best flavor, always choose fresh when you can. In this blog post, we explored the easy steps to make Lemon Garlic Chicken Thighs. We covered the ingredients, preparation, cooking methods, and serving ideas. Remember to marinate your chicken for the best flavor and to check for doneness as it cooks. These tips ensure juicy, tender meat every time. Feel free to try different herbs and cooking methods to suit your taste. With these insights, you'll impress anyone at the dinner table and enjoy delicious meals together. Happy cooking!

Lemon Garlic Chicken Thighs Tasty and Simple Recipe

Looking for a simple yet delicious dinner idea? These Lemon Garlic Chicken Thighs are packed with flavor and require just

To make a classic potato salad, you need a few key ingredients. Each one adds a special touch to the final dish. Here’s what you will need: - 2 pounds Yukon Gold potatoes - 1 cup mayonnaise - 1 tablespoon Dijon mustard - 1 tablespoon apple cider vinegar - 2 celery stalks - 1/2 red onion - 3 hard-boiled eggs - 1/4 cup sweet pickles - Salt and pepper - 2 tablespoons fresh dill (optional) Yukon Gold potatoes are my favorite. They have a creamy texture that works perfectly. Mayonnaise gives the salad its rich creaminess. Dijon mustard adds a nice tangy kick. Apple cider vinegar brings brightness to the mix. Chopped celery adds crunch, while red onion gives it a slight bite. The hard-boiled eggs make the salad even heartier. Sweet pickles add a touch of sweetness that balances the flavors well. Don’t forget salt and pepper to taste. Fresh dill is optional but adds a lovely herbal note. For the full recipe, check out the Deliciously Creamy Potato Salad section. This salad is easy to make and so delicious! - Step 1: Cooking the Potatoes First, take your 2 pounds of Yukon Gold potatoes. Peel them and cut them into cubes. Place the cubes in a large pot and cover them with cold water. Add a pinch of salt. Turn on the heat to medium-high and bring the water to a boil. Once boiling, reduce the heat to low. Let the potatoes simmer for about 10 to 15 minutes. Check if they are fork-tender. When done, drain the water and let the potatoes cool completely. - Step 2: Cooling the Potatoes It is important to let the potatoes cool down. This helps the dressing stick better later. You can spread them out on a baking sheet to speed up the cooling. Make sure they are not stacked too high. This way, they cool evenly. - Step 3: Combining Ingredients In a separate bowl, take 1 cup of mayonnaise. Add 1 tablespoon of Dijon mustard and 1 tablespoon of apple cider vinegar. Mix well. Season with salt and pepper to taste. Stir until the mixture is smooth. This dressing brings all the flavors together. - Step 4: Incorporating Potatoes Now, add the cooled potatoes to the dressing. Use a spatula to fold them in gently. You want to coat the potatoes without breaking them apart. This step is key to keeping your salad nice and chunky. - Step 5: Adding Veggies and Eggs Next, chop 2 celery stalks, 1/2 red onion, and 3 hard-boiled eggs. Add these to the potato mixture along with 1/4 cup of diced sweet pickles. Carefully stir everything together. This adds crunch and flavor to your salad. - Step 6: Refrigeration If you like, sprinkle 2 tablespoons of fresh dill on top for extra flavor. Adjust the seasoning if needed. Then, cover the salad with plastic wrap. Refrigerate for at least 1 hour before serving. This waiting time helps the flavors blend. For the full recipe, check out the Deliciously Creamy Potato Salad section. Best Potato Varieties to Use I recommend using Yukon Gold potatoes. They have a creamy texture and hold their shape well. Red potatoes are also great for a firmer bite. Avoid starchy potatoes like Russets, as they can turn mushy. How to Avoid Soggy Salad To keep your salad fresh, let the potatoes cool completely before mixing. Drain them well after cooking. You can also use less mayo if you want a lighter salad. Suggestions for Herbs and Spices Add fresh herbs like dill, parsley, or chives for a bright taste. A dash of paprika or celery seed can give your salad an extra layer of flavor. Acidity Balance Tips A splash of apple cider vinegar adds zing. It balances the creaminess of the mayo. Taste and adjust the acidity to your liking for the best results. Serving Suggestions Serve your potato salad in a big, colorful bowl. This makes it eye-catching at parties or gatherings. Garnishing Ideas Top with fresh dill and slices of hard-boiled eggs for a beautiful finish. You can also sprinkle some paprika for a pop of color and flavor. For the full recipe, check out the Deliciously Creamy Potato Salad section above. {{image_2}} For a vegan twist, use plant-based mayo. Brands like Vegenaise or Just Mayo work well. You can also mix silken tofu with lemon juice and a pinch of salt. Both options offer a creamy texture without eggs. If you need a gluten-free version, check your mayonnaise brands. Most are gluten-free, but it’s good to confirm. You can also avoid adding any gluten-containing ingredients, like certain pickles or dressings. Always read labels to ensure safety. You can spice up your potato salad with fun mix-ins. Try crispy bacon for a smoky taste. Diced avocado adds creaminess and healthy fats. For a seasonal touch, mix in fresh peas or diced bell peppers. These options not only enhance flavor but also add color to your dish. Switching up the dressing can transform your potato salad. Try adding Greek yogurt for a tangy flavor. Or, use a vinaigrette made from olive oil, lemon juice, and herbs for a lighter dish. You can also explore flavors like curry powder or smoked paprika. Each dressing change gives a new twist to the classic recipe. For the complete recipe, refer to the [Full Recipe]. To keep your potato salad fresh, store it in a sealed container in the fridge. This helps keep flavors intact. Make sure to cover it tightly. If you use a bowl, plastic wrap works well. Avoid letting it sit out for long periods. Serve it cold for the best taste. How long does potato salad last? When stored properly, potato salad can last about three to five days in the fridge. Always check for signs of spoilage. If it smells off or has a strange color or texture, it’s best to throw it away. Can you freeze potato salad? I do not recommend freezing potato salad. The texture of potatoes can change. If you freeze it, thawing might make it watery. However, if you must, place it in an airtight container. How to thaw and revive it? To thaw, place it in the fridge overnight. After thawing, stir it well. You might need to add a splash of mayo or vinegar to bring back some moisture and flavor. For the best experience, serve it fresh. For a detailed recipe, check the Full Recipe. What type of potatoes are best for potato salad? I recommend using Yukon Gold potatoes. They have a creamy texture and great flavor. Their thin skin means you can leave it on for more color. Other good choices are red potatoes and new potatoes. They hold their shape well and make the salad look nice. Can I make potato salad ahead of time? Yes, you can make potato salad a day in advance. This helps the flavors blend better. Just remember to keep it covered in the fridge. Take it out about 30 minutes before serving. This way, it can warm up a little and taste even better. Is potato salad healthy? Potato salad can be healthy if you use fresh ingredients. Potatoes provide fiber and nutrients. To make it lighter, use less mayonnaise or a yogurt mix. You can also add more veggies for extra crunch and color. Can I make it dairy-free? Yes, you can easily make a dairy-free potato salad. Use plant-based mayo instead of regular mayonnaise. There are many tasty options available now. You can also add avocado for creaminess without dairy. How much potato salad per person? A good rule is to serve about 1/2 cup of potato salad per person. This amount works well for most meals. If it’s a side dish for a big meal, you might want to offer a little more. What to serve with potato salad? Potato salad goes well with many dishes. Grilled meats, sandwiches, or veggie burgers are great choices. It also pairs nicely with fresh salads and pickled veggies. For a picnic, add some fruit for a sweet touch. This blog post covered everything you need for a perfect potato salad. We discussed the key ingredients, how to prepare them, and tips for the best flavor and texture. Don’t forget the variations to tailor the dish to your taste. Remember to store it well for freshness and always check for spoilage. Potato salad is versatile and fun to make, so experiment with different flavors and ingredients. Enjoy creating your own tasty version, and share it with friends and family. You’ll impress everyone with your skills!

Classic Potato Salad Flavorful and Fresh Recipe Guide

Are you ready to make the perfect classic potato salad? This flavorful and fresh recipe guide is your go-to for

The ingredients for Cheesy Spinach Lasagna Rolls are simple yet flavorful. You can find everything at your local grocery store. Here’s the complete list of ingredients you’ll need: - 8 lasagna noodles - 2 cups fresh spinach, chopped - 1 cup ricotta cheese - 1 cup mozzarella cheese, shredded - 1/2 cup Parmesan cheese, grated - 1 egg - 1 teaspoon garlic powder - 1 teaspoon Italian seasoning - Salt and pepper to taste - 2 cups marinara sauce - Fresh basil for garnish These ingredients create a delicious mix that makes each bite satisfying. The fresh spinach adds a nice touch of color and nutrition. The cheeses provide a creamy and cheesy texture that makes this dish stand out. You have the option to adjust the cheese types based on your taste. For instance, adding a bit of goat cheese can add a tangy flavor. If you want a kick, try mixing in some red pepper flakes. This recipe is flexible, allowing you to make it your own. For those who want to explore more, check out the Full Recipe for step-by-step instructions. Each ingredient plays a key role in making this dish savory and enjoyable. Step 1: Preheat the oven Start by preheating your oven to 375°F (190°C). This step is key for even baking. Step 2: Cook the lasagna noodles In a large pot, bring salted water to a boil. Add the lasagna noodles and cook them according to the package instructions until they are just al dente. This usually takes about 8 to 10 minutes. Once done, drain the noodles and lay them flat on a kitchen towel to cool. Step 3: Combine filling ingredients In a mixing bowl, add the following ingredients: - 2 cups fresh spinach, chopped - 1 cup ricotta cheese - 1/2 cup Parmesan cheese, grated - 1 cup mozzarella cheese, shredded - 1 egg - 1 teaspoon garlic powder - 1 teaspoon Italian seasoning - Salt and pepper to taste Mix all these ingredients well until smooth. The spinach will add a fresh taste, and the cheeses bring creaminess. Step 4: Spread sauce and fill noodles Take a baking dish and spread 1/4 cup of marinara sauce on the bottom. For each lasagna noodle, spread a generous layer of your cheese-spinach filling. Step 5: Roll and place in dish Now, roll the noodle tightly from one end to the other. Place each roll seam-side down in the baking dish. Step 6: Top with sauce and cheese Once all noodles are rolled and in the dish, pour the remaining marinara sauce over the top. Don’t forget to sprinkle the rest of the mozzarella cheese on top for that gooey finish. Step 7: Cover and bake Cover the baking dish tightly with aluminum foil. This helps keep moisture in while baking. Bake for 25 minutes. Step 8: Remove foil and bake until golden After 25 minutes, take off the foil. Bake for an extra 10 to 15 minutes until the cheese on top is bubbly and golden. Step 9: Let it rest before serving Once done, remove the dish from the oven and let it sit for about 5 minutes before you serve. This resting time helps the flavors settle. For the complete guide on making these delicious rolls, check out the Full Recipe. To make great lasagna rolls, start by cooking the noodles just right. Use a large pot with salted boiling water. Cook the noodles for about 8 to 10 minutes until they are al dente. This means they should still have a slight bite. Drain the noodles and lay them flat on a kitchen towel. This helps them cool and prevents sticking. To avoid sticking during assembly, spread a bit of olive oil on each noodle. This simple step makes it easier to roll them later. You can also use parchment paper to separate the noodles while they cool. Flavor is key to a tasty dish. For seasoning, feel free to add extra garlic powder or fresh herbs like parsley. You can also mix in some red pepper flakes for a little heat. When it comes to cheese, you have options. If you want a creamier texture, try mascarpone instead of ricotta. For a sharper taste, use goat cheese. Mixing different cheeses can add depth to your rolls. Garnishing your dish can make it look stunning. I like to add fresh basil leaves on top. You could also sprinkle some extra Parmesan cheese for a nice touch. For serving, cut the rolls into portions of about two to three pieces each. This makes it easy for guests to enjoy. Pair the lasagna rolls with a light salad or garlic bread for a well-rounded meal. For the full recipe and more cooking tips, check out the Full Recipe link. {{image_2}} You can mix things up in your cheesy spinach lasagna rolls. Try adding different veggies. Zucchini, mushrooms, or bell peppers work great. They add color and flavor. You can also use frozen spinach if fresh isn’t available. Just make sure to drain it well. Substituting cheeses is another fun idea. Instead of ricotta, you can use cottage cheese. For a creamier texture, blend in some cream cheese. You can also swap mozzarella for provolone or gouda for a new taste. If you need to make the dish gluten-free, use gluten-free lasagna noodles. Many brands offer great options that work well. You can also try zucchini slices instead of noodles. They add a nice twist. For vegan options, replace the egg with flaxseed meal. Mix one tablespoon of flaxseed with three tablespoons of water. Let it sit for five minutes. For cheese, look for plant-based alternatives. They melt well and taste great. Changing the sauce can give your rolls a new vibe. You can use Alfredo sauce or pesto instead of marinara. Each adds a unique flavor profile. Try mixing in some roasted red peppers for an extra kick. Adding herbs and spices to the marinara can enhance its taste. Fresh basil, oregano, or red pepper flakes can bring it to life. Experimenting with your sauce can turn a simple dish into something special. For the full recipe, check the main article. After you enjoy your cheesy spinach lasagna rolls, let the dish cool. This step is key. I recommend placing the rolls in a single layer on a plate. Cover them with plastic wrap. This keeps the rolls fresh. Once cooled, transfer them to airtight containers. This helps preserve flavor and texture. To reheat lasagna rolls, the oven is your best friend. Preheat the oven to 350°F (175°C). Place the rolls in an oven-safe dish. Add a splash of marinara sauce to keep them moist. Cover the dish with foil. Heat for about 20 minutes or until warm. This method keeps the rolls soft and cheesy. Avoid the microwave if you can. It can make them rubbery. If you want to freeze leftovers, first let them cool completely. Then, wrap each roll in plastic wrap. Place them in a freezer-safe bag. Remove as much air as possible. This helps prevent freezer burn. To thaw, move them to the fridge overnight. For reheating, follow the same oven method. This will keep your cheesy spinach lasagna rolls delicious even after freezing! You can find the full recipe for these rolls earlier in the article. Can I prepare the rolls ahead of time? Yes, you can prepare the rolls ahead. Just assemble them and keep them in the fridge. Cover them tightly with foil to keep them fresh. Bake them when you are ready to serve. How do I know when the lasagna rolls are done? The rolls are done when the cheese is bubbly and golden. You can also insert a knife in the center. If it comes out hot, the rolls are ready. What are the best sides to serve with this dish? I love serving a fresh salad or garlic bread with these rolls. A light vegetable side also works well. They balance the meal nicely. Can I use frozen spinach instead of fresh? Absolutely! Frozen spinach works great. Just thaw it and drain any extra water. This keeps the filling from getting too watery. What can I use instead of ricotta cheese? You can use cottage cheese or cream cheese as a substitute. They provide a similar texture. You may want to adjust seasoning to match your taste. How many calories are in Cheesy Spinach Lasagna Rolls? Each serving has about 350 calories. This can vary based on portion size and ingredients used. What are the macronutrients per serving? Each serving typically has: - Protein: 18 grams - Carbohydrates: 40 grams - Fat: 15 grams You can find the full recipe at the start of this article. This blog post shared a simple recipe for Cheesy Spinach Lasagna Rolls. We covered the ingredients needed, step-by-step cooking instructions, and tips for perfecting your dish. I emphasized different variations, easy storage options, and some common questions. In the end, making this lasagna can be fun and rewarding. You can impress your family and friends while creating a tasty meal. Use these guidelines to craft your own spinach lasagna rolls and enjoy!

Cheesy Spinach Lasagna Rolls Savory and Satisfying Dish

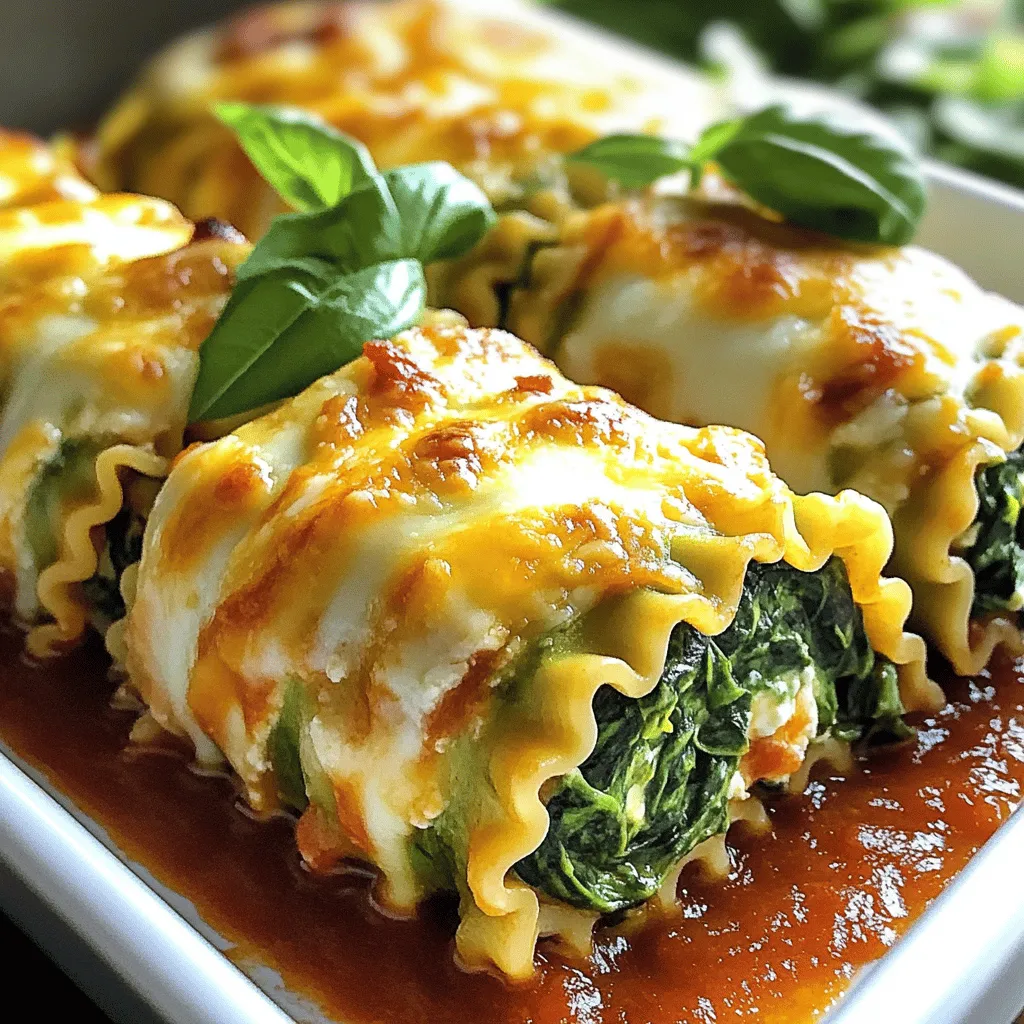
Are you craving a hearty dish that’s both rich and flavorful? Look no further! These Cheesy Spinach Lasagna Rolls pack

- 2 cups cooked chicken, shredded - 1 can (15 oz) black beans, rinsed and drained - 1 can (15 oz) corn, drained - 1 can (10 oz) diced tomatoes with green chiles - 1 medium onion, diced - 2 cloves garlic, minced - 2 cups chicken broth - 1 packet taco seasoning - 1 teaspoon cumin - Salt and pepper to taste - Shredded cheese - Sour cream - Diced avocado - Chopped cilantro Gather these ingredients to create a rich and tasty soup. The chicken adds protein and flavor. Black beans and corn bring fiber and sweetness. Diced tomatoes with green chiles offer a spicy kick. Onion and garlic give depth to the dish. Next, use chicken broth to make the soup hearty. Taco seasoning and cumin enhance the flavor profile. Don't forget salt and pepper to season it to your taste. You can customize your bowl with optional toppings. Shredded cheese adds creaminess. Sour cream cools the heat. Diced avocado adds richness. Chopped cilantro gives a fresh touch. Follow the [Full Recipe] to bring these flavors together in just 30 minutes. Each step will help you create a delicious meal that everyone will love. Enjoy! - Heat olive oil in a large pot over medium heat. - Add the diced onion and sauté for about 5 minutes. - Cook until the onion is soft and translucent. - Add minced garlic and sauté for another minute. - The garlic should smell nice and fragrant. - Stir in the shredded chicken. - Add the black beans, corn, and diced tomatoes. - Pour in the chicken broth, taco seasoning, and cumin. - Mix everything well to combine. - Bring the soup to a simmer over medium heat. - Let it cook for 15-20 minutes. - Stir occasionally to help the flavors blend. - Season with salt and pepper to taste. - For the best flavor, adjust seasoning before serving. You can find the full recipe above and enjoy making this tasty dish! - Ensure chicken is shredded for quick mixing. This helps blend flavors well. - Adjust simmering time for thicker soup. A longer simmer can deepen flavors. - Add lime juice for brightness. It brings a fresh taste to the soup. - Incorporate additional spices like chili powder. This boosts the overall flavor. - Serve in colorful bowls. This makes the meal more appealing. - Arrange toppings attractively. A nice look makes the soup more inviting. For a full recipe, check out the Easy Chicken Taco Soup section. {{image_2}} You can easily change up the protein in this soup. Use ground turkey or beef instead of chicken. This swap gives you a new taste. You can also use canned vegetables. This makes cooking faster and easier. Just rinse and drain them before adding. Want to make it vegetarian? Just leave out the chicken. You can use beans for protein instead. For a healthier choice, use low-sodium broth. This keeps the flavors rich without too much salt. If you like heat, add jalapeños or extra peppers. This gives the soup a nice kick. You can also add chipotle seasoning. This adds a smoky flavor that pairs well with the other ingredients. After enjoying your Easy Chicken Taco Soup, store leftovers in an airtight container. This keeps the soup fresh. You can refrigerate it for up to 3 days. Make sure to let it cool a bit before sealing it up. This helps avoid any extra moisture from forming inside the container. If you want to save some for later, you can freeze the soup. It stays good for up to 3 months in the freezer. Use freezer-safe containers to prevent freezer burn. When you are ready to eat it, simply take it out and thaw it. Thaw the soup in the refrigerator before reheating. This helps it warm evenly. When reheating, do so gently on the stove. If the soup seems too thick, add a splash of broth. This keeps it creamy and delicious. Enjoy it hot and fresh! You can easily add heat by incorporating diced jalapeños or an extra packet of taco seasoning. This boosts the flavor and gives your soup a nice kick. If you want to go even further, try adding some crushed red pepper flakes. Yes, you can use raw chicken. Just make sure it is cooked thoroughly before serving. You can add the raw chicken to the pot at the start with the onions. Cook it until it’s no longer pink, then shred it. You have many options for sides. Consider serving with tortilla chips for crunch, cornbread for sweetness, or a fresh side salad for balance. Each of these pairs well and enhances the meal. Total time to make this soup is about 30 minutes. You’ll spend around 10 minutes on prep and 20 minutes cooking. It’s a quick dish, perfect for busy nights. Absolutely! You can double the recipe easily. Just increase all ingredients proportionally for larger servings. This is a great option for gatherings or meal prep. For the full recipe, check the section above. This blog post covered how to make Easy Chicken Taco Soup using simple ingredients and steps. You can create a tasty dish with cooked chicken, beans, corn, and spices. Remember the tips for storage and serving ideas to enjoy your soup for days. Don’t be afraid to try variations for added flavor or dietary needs. Simple cooking can lead to great meals. Enjoy making this comforting soup for you and your loved ones!

Easy Chicken Taco Soup Flavorful and Quick Recipe

Looking for a quick and tasty dinner option? This Easy Chicken Taco Soup is your answer! With simple ingredients and

Older posts
Newer posts
← Previous Page1 … Page74 Page75 Page76 … Page82 Next →

dsad

© 2026 Recipes Pursuit • Built with GeneratePress

Our Policies

  • Copyright Policy
  • Cookie Policy
  • GDPR Policy
  • Privacy Policy
  • Disclaimer
  • Terms Of Use

More Information

  • Home
  • About
  • Contact
  • Appetizers
  • Dessert
  • Dinner
  • Drinks
©2026, Recipes Pursuit About Back To Top