Skip to content
DisclaimerTerms Of UseGDPR PolicyCookie Policy

Recipes Pursuit

  • Home
  • Drinks
  • Appetizers
  • Dinner
  • Dessert
  • About
  • Contact
  • Privacy Policy
DisclaimerTerms Of UseGDPR PolicyCookie Policy

NO-ING-IMG

This Chicken and Broccoli Alfredo Bake is a tasty, easy meal. It combines chicken, pasta, and broccoli in a creamy sauce. You can use store-bought or homemade Alfredo sauce. This dish is perfect for busy nights. - 2 cups cooked rotini pasta - 1 lb chicken breast, diced - 2 cups broccoli florets (fresh or frozen) - 4 cups Alfredo sauce (store-bought or homemade) - 1 cup shredded mozzarella cheese - 1 cup grated Parmesan cheese - 1 teaspoon garlic powder - 1 teaspoon Italian seasoning - Salt and black pepper to taste - 1 tablespoon olive oil - ¼ cup breadcrumbs (optional for topping) This dish serves six people. Each serving has about: - Calories: 450 - Protein: 30g - Carbohydrates: 45g - Fat: 20g - Fiber: 3g The chicken provides protein. The broccoli adds fiber and vitamins. Enjoy this dish for a balanced meal. Start by preheating your oven to 350°F (175°C). This step warms the oven for baking. Next, heat olive oil in a large skillet over medium heat. Add the diced chicken, then season it with garlic powder, Italian seasoning, salt, and black pepper. Cook the chicken for about 5 to 7 minutes. You want it browned and cooked through. If you use fresh broccoli, blanch it in boiling water for 2 to 3 minutes. This makes it tender. Drain the broccoli and set it aside. If using frozen broccoli, just thaw it and drain the water. In a large mixing bowl, combine the cooked rotini pasta, cooked chicken, broccoli, and Alfredo sauce. Stir everything well until coated. This helps each piece absorb the creamy sauce. Once mixed, transfer the mixture into a greased 9x13 inch baking dish. This size dish holds all the tasty layers. Now, sprinkle the top with shredded mozzarella and grated Parmesan cheese. If you like a crispy topping, add breadcrumbs. Cover the dish with aluminum foil and place it in the oven. Bake for 20 minutes. After that time, remove the foil. Bake for another 10 to 15 minutes. You will know it's ready when the cheese is bubbly and golden brown. Once done, take it out of the oven and let it cool for a few minutes. Then, it’s ready to serve and enjoy! For the full recipe, check out the complete details above. To make your Chicken and Broccoli Alfredo Bake shine, focus on balance. Use fresh ingredients when possible. Fresh broccoli adds a nice crunch and flavor. Don't skip the cheeses; they create a creamy texture. For a crispy top, consider adding breadcrumbs. They give a nice contrast to the creamy filling. Cook the chicken until it’s golden brown. This adds flavor. Cut it into even pieces for uniform cooking. Use a meat thermometer to ensure it reaches 165°F. This keeps your chicken juicy and safe to eat. Season well with garlic powder and Italian seasoning. This simple step boosts flavor. For fresh broccoli, blanch it first. Boil it for 2-3 minutes, then cool it quickly in ice water. This keeps the bright green color and crispness. If using frozen broccoli, thaw it and drain well. Excess water can make your bake soggy. Make sure all the water is gone before mixing it in. These tips will help you create a delicious Chicken and Broccoli Alfredo Bake that everyone will love. For the full recipe, check out the detailed instructions above. {{image_2}} You can easily swap some ingredients to fit your taste. If you want a lighter dish, use turkey instead of chicken. You can also choose whole wheat pasta for more fiber. For a dairy-free option, use a plant-based Alfredo sauce. This change still keeps the taste creamy but cuts out the dairy. Feel free to add more veggies to your bake. Spinach, bell peppers, or zucchini all work great. Just chop them up and mix them in with the chicken and pasta. More vegetables add color and nutrients, making your dish even better. Remember to adjust the cooking time if some veggies need longer to cook. If Alfredo sauce isn't your favorite, you have options. Try using marinara sauce for a tangy twist. You can mix in pesto for a fresh, herby flavor. Each sauce gives a new spin to the same recipe. Don’t be afraid to experiment with what you have on hand. Just stay true to the flavors you love for the best results. For the full recipe, check the earlier section. After enjoying your Chicken and Broccoli Alfredo Bake, let the leftovers cool. Store them in an airtight container. This helps keep the flavors fresh. You can keep leftovers in the fridge for up to three days. If you want to eat them later, freezing is a great option. To reheat, you can use the microwave or the oven. If using a microwave, place a portion on a microwave-safe plate. Heat for about 1-2 minutes, stirring halfway through. If you prefer the oven, preheat it to 350°F (175°C). Place the bake in a baking dish, cover it with foil, and heat for about 15-20 minutes. This helps keep it moist. You can freeze the Chicken and Broccoli Alfredo Bake for up to three months. To do this, let it cool completely. Then, wrap it tightly in plastic wrap and aluminum foil. When you’re ready to eat, thaw it in the fridge overnight. To reheat, follow the instructions above. Enjoy your delicious meal again! For the full recipe, check the earlier section. Yes, you can make this dish ahead of time. Prepare the Chicken and Broccoli Alfredo Bake up to step six. Then, cover it and store it in the fridge for up to two days. When you're ready to enjoy it, bake it straight from the fridge. Just add a few extra minutes to the baking time to ensure it's hot all the way through. If you want to swap out the Alfredo sauce, there are great options. You can use a creamy cheese sauce, like a béchamel. You could also try a homemade white sauce made with milk and flour. For a lighter touch, consider a simple olive oil and garlic mix. Just make sure it blends well with the chicken and broccoli. Making the Chicken and Broccoli Alfredo Bake lighter is simple. Use whole wheat or gluten-free pasta for more fiber. Choose low-fat or fat-free Alfredo sauce to cut down on calories. You can also add more vegetables, like spinach or bell peppers, for added nutrients. Reducing the cheese or switching to a sprinkle of nutritional yeast can also help lighten it up. This article covers how to make a tasty Chicken and Broccoli Alfredo Bake. You learned about the ingredients, the recipe steps, and some helpful tips. I shared ways to change the dish with different veggies or sauces. Lastly, I discussed storing leftovers and reheating them. Cooking should be fun and easy. With this guide, you can enjoy a delicious meal that fits your taste and needs. Happy cooking!

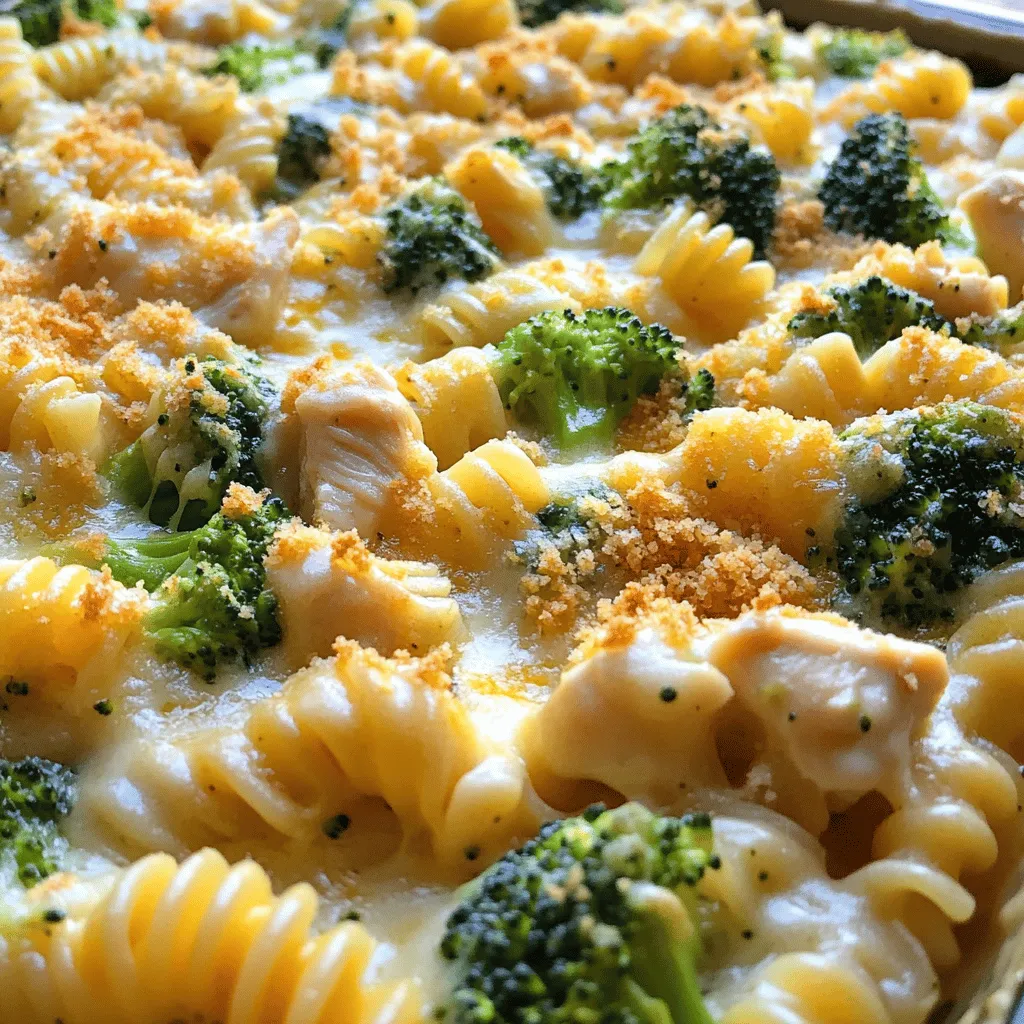
Chicken and Broccoli Alfredo Bake Simple Dinner Delight

Are you ready for a dish that’s simple and delicious? Chicken and Broccoli Alfredo Bake is your answer. This meal

- 1 pound large shrimp, peeled and deveined - 4 tablespoons olive oil - 4 cloves garlic, minced - Zest and juice of 2 lemons - 1 teaspoon smoked paprika - 1 teaspoon salt - ½ teaspoon black pepper - ½ teaspoon red pepper flakes (optional for heat) - Fresh parsley, chopped (for garnish) - Lemon wedges (for serving) To make Lemon Garlic Grilled Shrimp, you need fresh ingredients. Start with large shrimp. They should be peeled and deveined for the best taste. Olive oil adds richness, while garlic gives a bold flavor. The zest and juice of lemons add brightness and freshness. Smoked paprika provides a hint of smokiness. You will also need salt and pepper for seasoning. If you like heat, add red pepper flakes. For garnishing, fresh parsley adds color and flavor. Lemon wedges are great for serving, adding extra tang. Each ingredient plays a role in creating a balanced dish. The combination makes this meal savory, quick, and perfect for any day. You can find the full recipe for this delightful dish above. Enjoy cooking! - Combine 4 tablespoons of olive oil, 4 minced garlic cloves, the zest and juice of 2 lemons, 1 teaspoon of smoked paprika, 1 teaspoon of salt, ½ teaspoon of black pepper, and ½ teaspoon of red pepper flakes in a bowl. - Toss 1 pound of cleaned shrimp into the marinade and let sit for 30 minutes. This step allows the shrimp to soak up all that tasty flavor. - Preheat your grill to medium-high heat. This ensures your shrimp cook evenly. - If you decide to use skewers, thread the marinated shrimp onto them. Soaking wooden skewers in water for 30 minutes helps prevent burning. - Grill the shrimp for 2-3 minutes on each side. Look for them to turn pink and opaque. - Once done, remove and discard the skewers. Garnish with fresh parsley. This adds a nice pop of color and flavor! For the full recipe, check out the details above. Enjoy your meal! To make your shrimp tender, avoid overcooking them. Shrimp cook fast. Grill them just 2-3 minutes per side. You want them pink and opaque. Using high-quality olive oil makes a big difference. It adds depth to the flavor. Pair your grilled shrimp with a fresh side salad or cooked rice. These sides balance the meal nicely. Serve with extra lemon wedges for added zest. The fresh citrus lifts the dish even more. Enjoy every bite! {{image_2}} You can make Lemon Garlic Grilled Shrimp even better by changing a few things. Try adding fresh herbs like cilantro or basil. These herbs add a bright taste that pairs well with the shrimp. You can also switch up the citrus juice. Lime or orange juice gives a fun twist. Each option brings a different zing to your dish. If you like some heat, increase the red pepper flakes in your marinade. A little goes a long way! You can also add a dash of hot sauce for an extra kick. This adds depth and makes the shrimp exciting. Adjust the spice to fit your taste. Don't be afraid to play around until it’s just right for you. For more ideas, check the Full Recipe. Keep leftover shrimp in an airtight container in the refrigerator for up to 2 days. This way, you can enjoy the tasty flavors later. Just remember to reheat gently. Overheating can make shrimp tough. You can freeze uncooked marinated shrimp for up to 2 months. This is great if you plan meals ahead. When you're ready to cook, thaw the shrimp in the refrigerator before grilling. This makes sure the shrimp stay juicy and flavorful. For even more ideas, check out the Full Recipe for tips on using shrimp in various dishes! Yes, just ensure they are fully thawed before marinating. Frozen shrimp work great! They save time and are easy to find. Just be sure to pat them dry after thawing for the best results. Grilled vegetables, rice, or a light pasta dish complement well. You can also add a simple salad. The fresh flavors of the shrimp pair nicely with these sides. Consider a nice white rice or couscous to soak up the juices. Shrimp should be pink and opaque when fully cooked. They cook quickly, so watch them closely. Overcooked shrimp can become tough. If they curl tightly, they are likely done. Yes, all ingredients used are naturally gluten-free. This makes it a safe choice for those with gluten sensitivities. Enjoy the flavors without worry! For more details, check out the Full Recipe. This post guides you through making tasty Lemon Garlic Grilled Shrimp. You learned the key ingredients, step-by-step instructions, and tips for perfect grilling. Explore variations to suit your taste and how to store leftovers. Final thoughts: Making grilled shrimp is easy and fun. Enjoy it with friends or family for a great meal. Grab your ingredients and start grilling!

Lemon Garlic Grilled Shrimp Savory and Quick Meal

Looking for a quick and tasty meal? My Lemon Garlic Grilled Shrimp recipe is just what you need! This dish

- 2 cups cooked chicken, shredded - 2 cups broccoli florets (fresh or frozen) - 1 cup cooked rice (white or brown) - 1 cup cheddar cheese, shredded - 1 cup cream of chicken soup (or homemade equivalent) - 1/2 cup milk - 1/2 teaspoon garlic powder - 1/2 teaspoon onion powder - 1/4 teaspoon black pepper - 1/4 teaspoon salt - 1/2 cup breadcrumbs (for topping) - 2 tablespoons olive oil For this cheesy chicken broccoli casserole, use simple ingredients. The chicken is the star, giving each bite a hearty flavor. Next, fresh or frozen broccoli adds a nice crunch. The rice makes it filling, while cheddar cheese brings all the flavors together. You can make this dish with pantry staples. The cream of chicken soup adds creaminess. Milk helps keep the mixture smooth. Garlic and onion powders add a little kick. Salt and pepper balance the dish. The topping is key for texture. Breadcrumbs give a nice crunch after baking. Olive oil helps them brown well. This tasty combo makes the casserole a true comfort food delight. For the full recipe, check the details above. - Preheat your oven to 350°F (175°C). - Lightly steam or blanch fresh broccoli florets for about 3 minutes. This keeps them bright and tender. If you use frozen broccoli, just thaw it. - In a large bowl, combine 2 cups of shredded chicken, 1 cup of cooked rice, and 2 cups of broccoli. - Add 3/4 cup of shredded cheddar cheese, 1 cup of cream of chicken soup, and 1/2 cup of milk. - Sprinkle in 1/2 teaspoon of garlic powder, 1/2 teaspoon of onion powder, 1/4 teaspoon of black pepper, and 1/4 teaspoon of salt. - Mix well until all ingredients are combined. - Transfer the mixture to a greased 9x13 inch casserole dish. - For the topping, mix 1/2 cup of breadcrumbs with 2 tablespoons of olive oil. Spread this over the top of the casserole. - Sprinkle the remaining 1/4 cup of cheddar cheese on top for extra flavor. - Bake in the preheated oven for 25-30 minutes. Look for a bubbly center and a golden brown top. - Let it cool for 5-10 minutes before you serve it. This helps it set nicely. For the full recipe, refer to the beginning of this article. To keep your chicken moist, use cooked chicken that is not overcooked. Shredded chicken works well because it blends easily with other ingredients. For the broccoli, steam or blanch it just until bright and slightly tender. This keeps its color and crunch. When it comes to cheese, cheddar is a classic choice. But feel free to mix it up! Try mozzarella for a milder taste or pepper jack for some heat. Mixing cheeses can create fun new flavors! You can save time by using pre-cooked chicken. Store-bought rotisserie chicken is great for this dish. If you’re short on time, use frozen broccoli. Just thaw it before mixing into the casserole. Making this dish in advance is easy. You can prepare it a day before and store it in the fridge. Just bake it when you’re ready to serve. If you have leftovers, they reheat well in the oven or microwave. For a complete meal, serve the casserole straight from the baking dish. Garnish with fresh parsley to add color and freshness. Pair it with a side of crusty bread or a simple green salad for balance. A sprinkle of extra cheese on top before serving can make it even more appealing. Enjoy your comforting creation with family and friends! {{image_2}} You can switch up the protein in your casserole. If you want, you can use turkey instead of chicken. Turkey gives a nice flavor and is just as easy to cook. You can also try sausage for a spicy touch. For a vegetarian dish, use mushrooms or load up on more veggies like bell peppers and zucchini. These swaps keep the dish tasty and fun. Cheese makes this dish creamy and rich. While cheddar is the classic choice, you can explore other cheeses. Mozzarella adds a nice stretch, while pepper jack gives a spicy kick. You can also mix different cheeses to create a unique blend. A blend of sharp cheddar and creamy mozzarella can take your casserole to the next level. Rice is great, but you can try other grains too. Quinoa adds protein and a nutty flavor. Cauliflower rice is a low-carb option that also works well. If you need a gluten-free version, just pick grains that fit your diet. Each choice adds its own twist to the casserole. Feel free to experiment! For the full recipe, check the detailed instructions above. After making Cheesy Chicken Broccoli Casserole, you might have some leftovers. To store them, first let the casserole cool down. Then, place it in an airtight container. It’s best to use glass or plastic containers with tight lids. This keeps the dish fresh and prevents any odors from other foods in the fridge. You can store it in the fridge for up to three days. If you want to keep it longer, freezing is a great option. When it’s time to enjoy the leftovers, reheating is simple. You can use the oven or microwave. For the oven, preheat it to 350°F (175°C). Place the casserole in a baking dish and cover it with foil. Bake for about 20 minutes, or until hot throughout. If you use the microwave, put a single portion on a microwave-safe plate. Heat it for 1-2 minutes. Make sure to check that it’s warm all the way through. This method helps keep the texture nice and the flavors intact. If you freeze your Cheesy Chicken Broccoli Casserole, it can last for up to three months. Be sure to use a freezer-safe container. When you want to eat it, thaw it in the fridge overnight before reheating. If you notice any changes in color or smell after thawing, it’s best to throw it away. These signs mean it has gone bad. You can easily prepare Cheesy Chicken Broccoli Casserole ahead of time. First, follow the steps in the recipe until you assemble the casserole in the dish. After mixing, cover it with foil and place it in the fridge for up to 24 hours. This method keeps the flavors fresh. When you are ready to bake, remove the foil and bake it at 350°F for about 30-35 minutes. This will give the casserole time to warm through. Yes, you can use frozen ingredients. For the chicken, you can use pre-cooked frozen chicken. Just thaw it before adding it to the mix. If you use frozen broccoli, there is no need to steam it first. Just thaw it and add it directly to the casserole. Using frozen ingredients makes this recipe even easier and faster. You can serve many tasty sides with this casserole. A simple green salad adds freshness. Crusty bread is great for soaking up the cheesy sauce. You could also serve some roasted vegetables or mashed potatoes. These sides complement the casserole well and create a complete meal. Enjoy! Cheesy Chicken Broccoli Casserole is a simple, tasty dish. We explored essential ingredients, from chicken to cheese. I shared easy steps to prepare it perfectly. You learned tips for a moist casserole and how to save time. Variations let you customize with different proteins or grains. Storing leftovers isn’t hard, ensuring they stay fresh. This dish not only satisfies hunger, but also brings comfort. Enjoy making it your own, and happy cooking!

Cheesy Chicken Broccoli Casserole Comfort Food Delight

Looking for a warm, cheesy dish that hits the spot? You’re in luck! My Cheesy Chicken Broccoli Casserole combines tender

To make Easy Chicken Alfredo Pizza, you need the following ingredients: - 1 pre-made pizza crust (or homemade if preferred) - 1 cup cooked chicken breast, shredded - 1 cup Alfredo sauce - 1 ½ cups shredded mozzarella cheese - ½ cup grated Parmesan cheese - 1 cup fresh spinach leaves - 1 teaspoon garlic powder - 1 teaspoon Italian seasoning - Salt and pepper to taste - Olive oil for drizzling When choosing ingredients, focus on freshness. Fresh chicken tastes better. You can use leftover chicken or rotisserie chicken for ease. Check the expiration date on your store-bought Alfredo sauce. For cheese, select high-quality mozzarella. It melts better and gives a nice texture. Fresh spinach adds color and nutrition. Always wash and dry it well before using. You can easily swap ingredients if needed. Use a gluten-free pizza crust if you want a gluten-free option. For a lighter version, try using low-fat Alfredo sauce. If you prefer a different cheese, consider provolone or gouda. You can add veggies like bell peppers or mushrooms for more flavor. For a vegetarian option, leave out the chicken and add extra greens. This way, you can tailor the pizza to your taste. For the full recipe, check out the Easy Chicken Alfredo Pizza section. To start, preheat your oven to 450°F (232°C). If you use a pre-made crust, follow the package directions. If you prefer homemade dough, roll it out on a floured surface. Shape it to fit your baking sheet or pizza stone. Make sure it’s even and not too thick. This helps it cook well. In a medium bowl, combine the shredded chicken and Alfredo sauce. Add garlic powder, Italian seasoning, salt, and pepper to taste. Mix well until the chicken is fully coated. This step adds flavor and keeps the chicken moist. You can use leftover chicken or rotisserie chicken for ease. Now, spread the chicken Alfredo mixture evenly over the pizza crust. Next, sprinkle the mozzarella cheese on top. Follow this with the grated Parmesan cheese. Finally, add fresh spinach leaves for color and nutrition. Drizzle a little olive oil on top for extra flavor. Place the pizza in the oven and bake for 12-15 minutes. Look for melted cheese and a golden-brown crust. When done, take the pizza out and let it cool for a few minutes before slicing. Enjoy this delightful dish! For the full recipe, check the details above. To make great pizza, start with the dough. If you use pre-made crust, follow the package steps. For homemade dough, use a simple recipe. The key is to knead it well. This helps create a soft and chewy crust. Let the dough rise for at least 30 minutes. This makes it light and airy. When rolling out, use flour to prevent sticking. Aim for a round shape for even cooking. Cheese is a star in any pizza. Use shredded mozzarella for that classic stretch. Mix it with grated Parmesan for more flavor. To melt cheese evenly, ensure it covers the chicken mixture well. Bake at the right temperature for the best melt, around 450°F. Keep an eye on it. You want it bubbly and slightly golden. If it cooks too long, it may become hard. Your Alfredo sauce can shine with a few tweaks. Start with a good base sauce. You can use store-bought or homemade. To boost flavor, add garlic powder and Italian seasoning. These spices add depth. For a touch of brightness, mix in some fresh herbs like basil or parsley. A squeeze of lemon juice gives it a zing. These small changes make a big difference. They elevate your pizza to a gourmet level. For the full recipe, check out the Easy Chicken Alfredo Pizza section. {{image_2}} If you want to switch up the protein, you have options. Try using cooked shrimp or diced ham. They both add a unique flavor. For a vegetarian option, consider grilled mushrooms or roasted chickpeas. These choices keep the pizza tasty while adding variety. Adding veggies boosts the nutrition of your pizza. Spinach is great, but you can add more. Try bell peppers, onions, or broccoli. Just chop them small so they cook well. This way, you pack in more vitamins without losing flavor. It also makes the pizza colorful! While Alfredo sauce is classic, don't be afraid to experiment. You can use pesto for a fresh taste. BBQ sauce can give a smoky flavor. Tomato sauce is another option if you want something simple. Each sauce brings its own twist, so have fun mixing it up! To keep your Easy Chicken Alfredo Pizza fresh, start by letting it cool. Once it's cool, slice the pizza into pieces. Wrap each slice in plastic wrap or foil. Place the wrapped slices in an airtight container. This helps to keep them from drying out. Store the container in the fridge. Leftover pizza will stay fresh for about 3 to 4 days. When you want to enjoy your leftover pizza, reheating it right is key. I recommend using an oven for the best taste. Preheat your oven to 375°F (190°C). Place the pizza slices on a baking sheet. Heat them for about 10 minutes. This ensures the crust stays crispy. You can also use a skillet on the stove. Cook on medium heat for 5 to 7 minutes with a lid on. This helps melt the cheese while keeping the crust crunchy. If you want to save your pizza for later, freezing is a great option. First, cool the pizza completely and slice it. Wrap each slice in plastic wrap, then in foil. This double layer keeps the pizza safe from freezer burn. Place the wrapped slices in a freezer bag or container. Frozen pizza can last for up to two months. When you're ready to eat, thaw it in the fridge overnight before reheating. Enjoy your Easy Chicken Alfredo Pizza again! You can find the Full Recipe earlier in this article. To reheat your pizza, use an oven or skillet. Preheat the oven to 350°F (175°C). Place the pizza on a baking sheet. Heat it for about 10 minutes. This keeps the crust crispy. If using a skillet, heat over medium-low heat. Cover it with a lid to warm the cheese. Yes, store-bought Alfredo sauce works great. It saves time and still tastes good. Look for a sauce that has simple ingredients. This keeps the flavor fresh and real. You can also add spices if you want a kick. Pair your pizza with a fresh salad. A simple green salad works well. You can also serve garlic bread on the side. It adds a crunchy texture. For drinks, try sparkling water or a light soda. These options balance the pizza's richness. For a fun twist, offer dipping sauces like marinara or ranch. This blog post covered how to make Easy Chicken Alfredo Pizza. We looked at key ingredients, tips for selection, and even possible swaps. I shared step-by-step instructions from crust to baking. You learned how to perfect the dough and achieve the best cheese melt. Consider trying variations with different proteins and veggies. Storing and reheating your leftovers can keep the taste fresh. With this guide, you are ready to enjoy a fun and tasty meal. Happy cooking!

Easy Chicken Alfredo Pizza Simple and Tasty Recipe

Are you ready to transform pizza night? My Easy Chicken Alfredo Pizza is a simple yet mouthwatering twist on the

- 1 cup (225g) unsalted butter, melted - 2 cups (400g) granulated sugar - 4 large eggs - 1 teaspoon vanilla extract - 1 cup (125g) all-purpose flour - 1 cup (90g) unsweetened cocoa powder - 1/2 teaspoon baking powder - 1/4 teaspoon salt - 1 cup (175g) semi-sweet chocolate chips - 1/2 cup (120ml) brewed coffee (optional) - Sea salt flakes for sprinkling (optional) Each ingredient plays a key role. The butter gives the brownies their rich flavor. Granulated sugar sweetens and helps create a nice crust. Eggs provide moisture and help the brownies rise. Vanilla adds depth to the flavor. All-purpose flour gives structure. The cocoa powder is what makes them chocolatey. Baking powder helps them rise slightly. Salt balances the sweetness. Chocolate chips add gooey goodness. If you use brewed coffee, it enhances the chocolate taste. - Healthier ingredient swaps: Use applesauce instead of butter for a lower-fat option. - Nut options: Add walnuts or pecans for a crunchy texture. - Alternative sweeteners: Try using coconut sugar or honey for a natural sweet taste. These swaps can keep the brownies tasty. You can mix and match to suit your needs. Each choice can change the flavor and texture just enough to make it special. For more details, check the Full Recipe. 1. Preheat your oven to 350°F (175°C). Grease a 9x13 inch baking pan or line it with parchment paper. This makes for easy removal later. 2. In a large bowl, mix the wet ingredients. Whisk together 1 cup of melted butter and 2 cups of granulated sugar. Mix until it looks glossy. Add 4 eggs, one at a time. Stir well after each addition. Finally, add 1 teaspoon of vanilla extract. 3. Now, let's integrate the dry ingredients. In a separate bowl, sift together 1 cup of all-purpose flour, 1 cup of cocoa powder, 1/2 teaspoon of baking powder, and 1/4 teaspoon of salt. Gradually fold this dry mix into the wet mix with a spatula. Be gentle; overmixing can ruin the texture. 1. Pour the batter into the prepared pan. Spread it out evenly with a spatula to ensure even baking. 2. Bake in the preheated oven for 25-30 minutes. The brownies are done when a toothpick inserted into the center comes out mostly clean, with a few moist crumbs. 1. Let the brownies cool properly. Once done, remove them from the oven. Place the pan on a wire rack to cool. 2. Cut and present the brownies. Once cooled, cut them into squares. For a nice touch, serve them on a rustic wooden board or a decorative plate. A scoop of vanilla ice cream and a drizzle of chocolate sauce can make them even better! 3. Enjoying fresh vs. storing for later. Fresh brownies taste amazing, but you can store extras. Keep them in an airtight container. They last a few days, but I bet they won’t last that long! For the full recipe, refer to the earlier section. To get that rich, fudgy texture, you must not overmix the batter. Overmixing can add air to the mixture and make the brownies cakey. Mix just until the dry ingredients blend in. Adjust your baking time based on your oven. If your brownies look too wet, add a few more minutes. Just watch them closely. Want to boost the flavor? Try adding a bit of espresso. It deepens the chocolate taste and makes them even richer. You can also switch up your chocolate chips. Use flavored ones like mint or caramel for an extra kick. These small changes can make a big difference. One mistake to steer clear of is using cold ingredients. Cold eggs or butter can shock the batter. Always use room temperature items for better mixing. Another big mistake is overbaking. If you bake too long, your brownies will dry out. Aim for a toothpick test that leaves a few moist crumbs for the best fudgy result. For the full recipe, check out the detailed instructions above. {{image_2}} You can easily mix up the flavor of your brownies. Try mint chocolate brownies by adding mint extract. Just a teaspoon gives the brownies a fresh twist. Another fun option is peanut butter swirl brownies. Drop spoonfuls of peanut butter into the batter and swirl it around before baking. This gives you a sweet and salty treat. Do you need gluten-free brownies? You can substitute all-purpose flour with almond or coconut flour. These options keep the brownies soft and tasty. If you want vegan brownies, use flax eggs instead of regular eggs. Just mix one tablespoon of ground flaxseed with three tablespoons of water. Let it sit for a few minutes until it thickens. Toppings can take your brownies to the next level. A scoop of vanilla ice cream pairs perfectly with warm brownies. You can also drizzle chocolate sauce or caramel on top. For a rich finish, try whipped cream or chocolate ganache. Just warm some cream and mix it with chocolate. Pour it over the brownies for a decadent touch. For more ideas, check the Full Recipe! To keep your homemade fudgy brownies fresh, you need the right storage. Place them in an airtight container. This keeps moisture out and helps maintain their rich texture. If you don’t have one, wrap them tightly in plastic wrap. Avoid leaving them exposed to air. Storing brownies at room temperature works well for a few days. This makes them easy to grab for a sweet snack. If you want them to last longer, refrigeration is an option. However, this can change their texture, making them a bit more firm. Freezing is a great way to save brownies for later enjoyment. Start by cutting them into squares. Wrap each square in plastic wrap. Then, place them in a freezer bag or container. Make sure to label the bag with the date. To thaw, simply take out a square and let it sit at room temperature for about 30 minutes. You can also heat them in the microwave for a few seconds. This brings back their fudgy goodness. Enjoy your frozen treats anytime! Check the full recipe for more tips on how to make these brownies perfect. Fudgy brownies come from a mix of key ingredients. The melted butter adds richness. Eggs create moisture. Cocoa powder gives deep chocolate flavor. Using less flour also helps. This keeps the texture dense and chewy. Yes, you can use cocoa powder in place of chocolate. For every ounce of chocolate, use 3 tablespoons of cocoa powder. Add one tablespoon of fat, like butter or oil, to balance. This swap keeps your brownies rich and tasty. Look for a few signs to check if brownies are ready. The edges should look firm, while the center stays slightly soft. If you insert a toothpick, it should have some moist crumbs. A clean toothpick means they are overbaked. Homemade brownies can last about 3 to 4 days at room temperature. Store them in an airtight container to keep them fresh. If you want them to last longer, consider freezing them. They can stay good in the freezer for up to 3 months. Absolutely! You can add more chocolate chips for extra flavor. I recommend using up to 1 ½ cups. Be careful, as too many can make the brownies too soft. Balance is key to keep that fudgy texture. To make great brownies, start with quality ingredients. Follow the step-by-step guide for perfect results. Avoid common mistakes like overmixing or using cold ingredients. Try fun variations like mint or peanut butter swirl. Store them properly to keep them fresh. Brownies can be a tasty treat any time. Using this guide, you can wow your friends with your baking skills. Enjoy every bite and share them with loved ones!

Homemade Fudgy Brownies Rich and Simple Recipe

Do you crave rich, fudgy brownies that are simple to make? Look no further! In this post, I’ll share my

To make BBQ chicken quesadillas, you need these main ingredients: - 2 cups cooked chicken, shredded - 1/2 cup BBQ sauce (your favorite brand) - 1 cup shredded Monterey Jack cheese - 1 cup shredded sharp cheddar cheese - 4 large flour tortillas - 1 small red onion, thinly sliced - 1/2 cup fresh cilantro, chopped - Cooking spray or olive oil for frying These items create a tasty, filling meal that pleases everyone. The chicken and BBQ sauce blend well, giving a sweet and smoky flavor. The cheese melts nicely, making each bite creamy. You can add some optional ingredients to boost the taste. Here are some great ideas: - Sliced jalapeños for extra spice - Avocado slices for creaminess - Black beans for added texture and nutrition Using these extras can make your quesadillas unique. If you are missing some ingredients, don't worry! Here are some easy swaps: - Use rotisserie chicken instead of cooking your own - Swap BBQ sauce for a spicy sauce if you like heat - Try different cheeses like pepper jack or gouda These substitutions keep the recipe flexible and still delicious. If you want the full recipe, check out the link! To start, grab 2 cups of cooked chicken. Shred the chicken into small pieces. In a mixing bowl, add the shredded chicken and 1/2 cup of your favorite BBQ sauce. Mix well until the chicken is coated. This will give your quesadillas that tasty BBQ flavor. Next, heat a large skillet over medium heat. Lightly spray it with cooking spray or drizzle a bit of olive oil. Place one large tortilla in the skillet. On one half, sprinkle 1/2 cup of Monterey Jack cheese and 1/2 cup of sharp cheddar cheese. Next, spread half of the BBQ chicken mixture over the cheese. Add some thin slices of red onion and half of the chopped cilantro on top. Now, sprinkle the remaining cheese over everything. Fold the tortilla in half. Cook for 3-4 minutes on each side until the tortilla is golden brown and the cheese melts. Repeat this with the rest of the tortillas and filling. After cooking, let the quesadillas cool for a minute. Cut them into wedges to serve. For a nice touch, garnish with the leftover cilantro. If you like spicy, add sliced jalapeños on the side. Serve these delicious quesadillas with extra BBQ sauce for dipping. You can find the Full Recipe for more details. Enjoy your tasty BBQ chicken quesadillas! To get that golden brown quesadilla, heat your skillet well. Use medium heat for even cooking. A bit of oil or cooking spray helps too. Cook each side for about 3-4 minutes. Flip carefully to keep the filling inside. When done, the cheese should melt and the tortilla should be crispy. Want more flavor? Add seasonings to your chicken mix. Try smoked paprika or garlic powder for a kick. A pinch of salt and pepper can also boost the taste. If you like heat, add some cayenne pepper. Fresh herbs like cilantro brighten up the dish too. Use these tips to make your quesadillas stand out. For cooking, I recommend a good non-stick skillet. It makes flipping easier and prevents sticking. A spatula with a flat edge is great for lifting the quesadilla. If you have a griddle, that works well too. Always keep your tools clean for the best results. Follow these tips for a tasty BBQ chicken quesadilla from the Full Recipe! {{image_2}} You can easily make vegetarian BBQ quesadillas. Instead of chicken, use black beans or grilled veggies. Bell peppers, zucchini, and corn work well. Mix these with BBQ sauce for great flavor. Add cheese for that creamy touch. This option is tasty and filling without meat. Cheese makes quesadillas rich and melty. You can try many cheese types. Use pepper jack for a spicy kick. Gouda adds a smoky flavor, while mozzarella gives a stretchy texture. Mix different cheeses for a unique taste. Experiment and find your favorite combo. Want some heat? Add sliced jalapeños to the BBQ chicken mix. You can also use a spicy BBQ sauce. This will bring a zesty punch. For extra spice, sprinkle red pepper flakes on top before cooking. Your taste buds will thank you for this fiery twist. Remember, for the full recipe, check out the Full Recipe section. To keep your leftover BBQ chicken quesadillas fresh, place them in an airtight container. You can also wrap them in plastic wrap. Make sure to let them cool down to room temperature before storing. This helps keep them from getting soggy. Store the quesadillas in the fridge for up to three days. When you're ready to enjoy your leftover quesadillas, you can reheat them easily. Use a skillet for the best results. Heat the skillet over medium heat and add a little oil. Place the quesadilla in the skillet and cook for about three minutes on each side. This will give you a crispy texture. You can also use a microwave, but the quesadilla may become soft. Heat it in the microwave for about 30 seconds or until warm. If you want to save some quesadillas for later, freezing is a great option. First, let them cool completely. Then, wrap each quesadilla tightly in plastic wrap. Place them in a freezer-safe bag or container. This way, they won't stick together. You can freeze them for up to three months. When you’re ready to eat, thaw them in the fridge overnight before reheating. This keeps them tasty and ready to enjoy! For more details, check the Full Recipe. The best chicken for BBQ chicken quesadillas is cooked and shredded chicken. Use rotisserie chicken for the quickest option. You can also grill or bake chicken breasts for a healthier choice. Just make sure to season it well for extra flavor. Shredded chicken mixes well with BBQ sauce, making it juicy and tasty. Yes, you can make BBQ chicken quesadillas in the oven. Preheat your oven to 400°F (200°C). Place the filled tortillas on a baking sheet. Bake them for about 10 minutes, flipping halfway through. This method gives you a crispy texture without frying. Just keep an eye on them to prevent burning. You can easily customize BBQ chicken quesadillas to fit dietary needs. For a gluten-free version, use corn tortillas. If you want a lighter meal, swap out cheese for a vegan option or use less cheese. To make it vegetarian, use grilled veggies or tofu instead of chicken. Always check labels on sauces for hidden allergens. For the full recipe, check out the BBQ Chicken Quesadillas section! You learned how to make BBQ chicken quesadillas with great flavors and easy steps. We covered key ingredients, cooking methods, and cool tips for the best results. Don’t forget to try different cheeses or make them vegetarian for variety. Storing and reheating them is simple, too. Enjoy making this dish your own! These delicious quesadillas will surely please anyone. Get creative and enjoy every bite.

BBQ Chicken Quesadillas Quick and Flavorful Recipe

Are you ready to spice up your dinner routine? In just a few simple steps, you can make delicious BBQ

To make crispy coconut chicken tenders, you need the following: - 1 lb chicken breast, cut into tenders - 1 cup shredded coconut (unsweetened) - 1 cup breadcrumbs (preferably panko for extra crunch) - 1/2 cup all-purpose flour - 2 large eggs - 1 teaspoon garlic powder - 1 teaspoon onion powder - 1 teaspoon paprika - Salt and pepper to taste - Cooking spray or oil for frying You can change some ingredients if needed. Use almond flour instead of all-purpose flour for a gluten-free option. If you want a different flavor, try sweetened coconut or add some cayenne pepper for heat. You can also replace chicken with turkey or tofu for a vegetarian dish. Using fresh chicken is key for the best taste. Look for chicken that is firm and pink. For coconut, choose unsweetened shredded coconut for a nice crunch without extra sugar. Panko breadcrumbs work best for crispiness, but regular breadcrumbs can also work. Fresh spices like garlic and onion powder will bring out more flavor. Quality ingredients make a big difference in your final dish. For the full recipe, check out the cooking instructions! First, gather your ingredients. You need chicken, coconut, breadcrumbs, flour, and spices. Cut the chicken into tenders and set them aside. Preheat your oven to 400°F (200°C). Line a baking sheet with parchment paper. This keeps the tenders from sticking. Next, set up your breading station. In one bowl, place the flour. In another bowl, whisk the eggs until smooth. In a third bowl, mix the shredded coconut, breadcrumbs, garlic powder, onion powder, paprika, salt, and pepper. This mixture will give the tenders their crunchy coating. Now it’s time to bread the chicken. Take a chicken tender and dredge it in the flour. Shake off any extra flour. Then, dip it into the whisked eggs, making sure it gets fully coated. Finally, press the chicken into the coconut-breadcrumb mixture. Make sure it’s evenly covered. Place the breaded chicken tenders on your prepared baking sheet. Lightly spray them with cooking spray or drizzle a bit of oil on top. This will help them crisp up in the oven. Bake the tenders for about 20 to 25 minutes. Flip them halfway through to ensure even cooking. They should be golden brown when done. To get that perfect crunch, use panko breadcrumbs. They are lighter and crispier. Also, make sure to coat the chicken well. The more even the coating, the better the crispiness. Using cooking spray or oil will help brown the breading. If you follow these steps, you’ll have tenders that are crispy on the outside and juicy on the inside. For a full recipe, check the section above. Enjoy your delicious Crispy Coconut Chicken Tenders! To make the best crispy coconut chicken tenders, follow these simple steps. First, set up your breading station. Use three bowls for this. In the first bowl, place flour. In the second, whisk the eggs. In the third, mix coconut, breadcrumbs, and spices. This setup helps you coat chicken evenly. When you bread the chicken, dredge it in flour first. Shake off the extra flour. Then, dip it in the egg. Make sure the chicken is fully coated. Finally, press it into the coconut mixture. This step is key for a crunchy texture. Cooking chicken tenders at the right temperature is vital. Preheat your oven to 400°F (200°C). Line a baking sheet with parchment paper. Place the breaded chicken on this sheet. Lightly spray them with cooking spray or drizzle oil on top. This tip adds crispiness. Bake the tenders for 20-25 minutes. Flip them halfway through for even cooking. You want them golden brown and cooked through. Use a meat thermometer to check the internal temperature, which should be 165°F (74°C). Serve your crispy coconut chicken tenders with tasty dips. Honey mustard or sweet chili sauce works well. These dips add extra flavor. For a nice touch, garnish your plate with fresh cilantro or parsley. This makes your meal look colorful and inviting. Enjoy these tenders with a fresh salad or rice for a full dinner experience. For the full recipe, check the earlier section. {{image_2}} You can switch the chicken with shrimp or tofu. Shrimp gives a sweet taste. Tofu adds a nice crunch and is great for vegans. Just follow the same steps for breading and baking. Mix things up with spices like curry or lime zest. Add a pinch of cayenne for heat. For a sweeter touch, try adding a little honey to the egg mix. These changes will make your tenders even more fun. To make this recipe gluten-free, use almond flour instead of regular flour. Use gluten-free breadcrumbs too. For a low-carb option, try crushed pork rinds instead of breadcrumbs. These swaps keep the taste while fitting your diet. For the full recipe, check out the detailed instructions. After your meal, let the chicken tenders cool down. You can store them in an airtight container. Place a paper towel in the container. This helps absorb moisture and keeps them crispy. Store the container in the fridge. They should stay fresh for about three days. To reheat, use an oven or an air fryer for the best results. Preheat your oven to 375°F (190°C). Place the chicken tenders on a baking sheet. Heat them for about 10-15 minutes until warm and crispy. If using an air fryer, set it to 350°F (175°C) and cook for about 5-7 minutes. If you want to freeze them, make sure they are completely cool. Place the tenders in a freezer-safe bag or container. Remove as much air as possible to avoid freezer burn. You can freeze them for up to three months. When ready to eat, thaw them overnight in the fridge before reheating. For the best flavor, use them sooner rather than later. For the full recipe, check the detailed cooking steps above. Yes, you can prepare these tenders in advance. Bread the chicken and place it in the fridge. This keeps the breading fresh. When you're ready to eat, bake them straight from the fridge. Just add a few extra minutes to the cooking time. To help the breading stick, make sure the chicken is dry. Pat the chicken with a paper towel before breading. You can also dip each tender in flour, then egg, and then the coconut mixture. Press down firmly on the breading for a good coat. These chicken tenders pair well with many sides. Try a fresh salad, rice, or sweet potato fries. You can also serve them with dipping sauces like honey mustard or sweet chili sauce. For a fun touch, garnish with fresh herbs for color. This post covered everything you need for crispy coconut chicken tenders. We looked at the key ingredients, how to prepare and cook them, and tips for perfect results. You learned about storage and tasty ways to serve this dish. Crispy coconut chicken tenders can be your next family favorite. Use the steps and tips here to make it great. Enjoy cooking!

Crispy Coconut Chicken Tenders Perfect for Dinner

If you’re searching for a dinner recipe that’s both easy and delicious, look no further! Crispy Coconut Chicken Tenders are

- 2 cups sushi rice - 2 1/2 cups water - 1 teaspoon salt - 1 tablespoon rice vinegar - 1/2 pound imitation crab meat or cooked shrimp - 1 avocado, diced - 1/2 cucumber, diced - 1/4 cup mayonnaise - 2 tablespoons sriracha (or to taste) - 1 tablespoon soy sauce - 1 sheet nori, cut into strips (for garnish) - Sesame seeds (for garnish) - Chopped green onions (for garnish) To make the Viral TikTok Sushi Bake, gather these ingredients first. Sushi rice is key for that perfect sticky texture. Rinse it well under cold water to remove excess starch. This step helps the rice cook evenly. Next, you need some protein. You can use imitation crab or cooked shrimp based on what you prefer. Both options taste great in this dish. Fresh veggies add flavor and color. Dice up an avocado and cucumber. They bring a nice crunch and balance to the creamy filling. For the sauce, mix mayonnaise, sriracha, and soy sauce. This blend gives the bake a rich taste. Adjust the sriracha to your liking if you want more heat. Lastly, don't forget the garnishes. Nori strips, sesame seeds, and green onions look pretty on top. They also add texture and flavor. Now you have everything you need for this fun and tasty meal! Check out the Full Recipe for more details on how to prepare this delightful dish. First, rinse the sushi rice under cold water. Keep rinsing until the water runs clear. This step removes excess starch. Next, combine the rinsed rice with 2 ½ cups of water in a pot. Add 1 teaspoon of salt for flavor. Bring this mixture to a boil over high heat. Once it boils, reduce the heat and cover the pot. Let it simmer for 20 minutes. After that, remove the pot from the heat. Let it sit, covered, for another 10 minutes. This resting time helps the rice finish cooking. Now, it’s time to season the rice. In a small bowl, mix 1 tablespoon of rice vinegar with the cooked sushi rice. Gently fold the mixture to ensure the vinegar spreads evenly. Allow the rice to cool slightly before using it. To make the filling, you can use imitation crab meat or shrimp. I prefer shredding about ½ pound of imitation crab meat by hand. Place it in a mixing bowl. If you use shrimp, chop it into small pieces. Next, add ¼ cup of mayonnaise to the bowl. Then, mix in 2 tablespoons of sriracha. Adjust the sriracha to your taste; you can add more if you like it spicy. Finally, add 1 tablespoon of soy sauce and mix everything well until it’s smooth. Now, preheat your oven to 350°F (175°C). Grab a baking dish and spread an even layer of the seasoned sushi rice. Aim for a thickness of about 1 to 1.5 inches. On top of that, evenly spread the crab mixture. Next, add fresh ingredients. Scatter diced avocado and cucumber over the crab mixture. This adds color and crunch. Sprinkle sesame seeds on top for an extra layer of flavor. Finally, place the baking dish in the oven. Bake for 15 to 20 minutes. You want the top to be slightly golden and heated through. When it’s done, remove the dish from the oven. Garnish with chopped green onions and nori strips. Cut into squares and serve! This dish is sure to impress. For the complete recipe, check the Full Recipe link. Rinsing your rice is key to great sushi. It removes excess starch. This helps the rice not stick together too much. Use cold water and rinse until it runs clear. For cooking, I love using a pot with a tight lid. Combine rinsed rice and water in a pot. Add salt, then bring it to a boil. Once boiling, lower the heat and cover it. Let it simmer for about 20 minutes. Afterward, let it sit for an extra 10 minutes. This step makes your rice fluffy and perfect for the bake. You can adjust the sriracha to fit your taste. If you like it spicy, add more. If you prefer mild, use less. You can also swap out ingredients. If you don’t like crab, try shrimp. Or, use tofu for a vegetarian option. Making these changes can make the dish your own. Don’t be afraid to get creative! Making your sushi bake look good is fun. Spread the rice evenly in your dish. Add the crab mixture on top smoothly. Scatter the avocado and cucumber for color. For garnish, sprinkle sesame seeds and add nori strips. To serve, cut into neat squares. This makes it easy to share. Remember, we eat with our eyes first! For more details, check out the Full Recipe. {{image_2}} You can switch up the protein in your sushi bake. If you want a twist, use shrimp instead of imitation crab. Shrimp adds a nice flavor and a different texture. Just cook your shrimp, then chop it before mixing with the other ingredients. For a meatless option, try using tofu or chickpeas. You’ll still get a tasty dish without the seafood. Want to spice things up? Add some spicy tuna to your filling. This adds heat and a bold flavor. You can also try different sauces. For example, mix in some ponzu or teriyaki sauce. These sauces can change the taste and give you new flavor profiles. Garnishes make your sushi bake look special. You can play with toppings and textures. Try adding sliced radishes or crispy tempura flakes for some crunch. Seasonal vegetables also work great. Think about fresh asparagus in spring or roasted butternut squash in the fall. These garnishes not only add color but also enhance the overall flavor. Try these variations to make your sushi bake unique and exciting! For a full recipe, check out the Viral TikTok Sushi Bake. To keep your sushi bake fresh, place it in an airtight container. This helps to prevent it from drying out. Make sure it cools down before covering it. Store it in the fridge for up to three days. For longer storage, you can freeze it. Just wrap it tightly in plastic wrap before placing it in a freezer-safe container. It should keep well for up to two months. When you are ready to enjoy your leftovers, preheat your oven to 350°F (175°C). Place the sushi bake in an oven-safe dish. Cover it with aluminum foil to keep moisture in. Heat for about 15 minutes or until it is warmed through. This method helps keep the rice soft and the toppings fresh. You can also reheat individual portions in the microwave. Just use a microwave-safe dish and heat in short bursts of 30 seconds. Check often to avoid overcooking. A sushi bake is a fun dish that combines sushi flavors in a baked form. It started on social media, especially TikTok, where many chefs share their takes. Instead of rolling sushi, you layer rice and toppings in a baking dish. You then bake it until warm and tasty. It’s easy to serve and share with friends. People love it for its unique twist on sushi. Yes, you can prepare parts of the sushi bake ahead of time. You can make the sushi rice and filling a day before. Just store them in the fridge. When you are ready, layer them in a dish. Then bake it fresh for about 15-20 minutes. This way, you save time and still enjoy a hot meal. The spiciness of this sushi bake depends on how much sriracha you add. The recipe suggests 2 tablespoons, but you can adjust it. If you want it mild, use less sriracha. If you love heat, feel free to add more. You can taste the mix and change it to your liking. This makes the dish fun for everyone! In this blog post, we explored how to create a delicious sushi bake. You learned about essential ingredients, step-by-step preparation, and tips for perfecting your dish. We also discussed variations and storage methods for leftovers. Remember, you can get creative with flavors and adjust ingredients as you like. Enjoy experimenting in the kitchen with your sushi bake. Each attempt will bring you closer to perfecting this fun recipe. Happy cooking!

Viral TikTok Sushi Bake Simple and Tasty Recipe

Have you heard about the viral TikTok Sushi Bake? It’s a delicious dish that blends sushi flavors in a fun,

- 1 lb (450g) boneless chicken thighs, cut into bite-sized pieces - 1 cup plain yogurt - 2 tablespoons lemon juice - 2 teaspoons garam masala - 1 teaspoon ground cumin - 1 teaspoon ground coriander - 1 teaspoon paprika - ½ teaspoon turmeric powder - 1 tablespoon ginger-garlic paste - 3 tablespoons oil (vegetable or coconut) - 1 large onion, finely chopped - 1 can (14 oz) crushed tomatoes - 1 cup coconut milk - Salt to taste I love using chicken thighs for this dish. They stay juicy and tender. The yogurt adds creaminess and helps the spices stick to the chicken. Lemon juice brightens the flavors. Garam masala is key, giving a warm taste. Each spice plays a role, making the dish rich and flavorful. Onions and tomatoes are the base of the sauce. Onions add sweetness, while tomatoes give a nice acidity. Coconut milk makes the sauce creamy. It balances the spices well, creating a perfect blend. - Fresh cilantro - Lemon wedges - Additional spices Garnishes make your dish pop. Fresh cilantro adds color and freshness. Lemon wedges add a zesty kick. You can sprinkle more spices for extra flavor. These simple touches elevate the meal and make it look great. You can find the Full Recipe linked in this section for a detailed guide on making this delicious dish. Marinating the chicken First, you need to marinate the chicken. In a large bowl, mix plain yogurt, lemon juice, and spices. Add garam masala, ground cumin, ground coriander, paprika, turmeric powder, and ginger-garlic paste. This mix will add a lot of flavor. Cut the chicken thighs into bite-sized pieces and add them to the marinade. Ensure all pieces are coated well. Cover the bowl and refrigerate it for at least one hour. For even better taste, marinate overnight. Sautéing the onions While the chicken marinates, prepare the onions. Heat two tablespoons of oil in a large skillet over medium heat. Add the finely chopped onion and cook until it turns golden brown. This step takes about five to seven minutes. The onions will add sweetness to the dish. Cooking the chicken Next, remove the marinated chicken from the fridge. Add it to the skillet with the onions. Cook the chicken until it is brown on all sides. This should take about seven to ten minutes. Make sure to stir it often for even cooking. Adding tomatoes and coconut milk Once the chicken is browned, stir in a can of crushed tomatoes. This will give the dish its rich color and acidity. Bring the mixture to a simmer and cook for another five to ten minutes. After that, pour in a cup of coconut milk. This adds creaminess and balances the spices. Adjusting seasoning Now, taste the sauce and add salt as needed. If the sauce is too thick, you can add a splash of water or more coconut milk. This helps achieve your desired consistency. Simmering for optimal flavor Reduce the heat to low and let the mixture simmer for about 15 minutes. This allows all the flavors to meld together. The sauce will thicken and become deliciously aromatic. Before serving, drizzle with the remaining tablespoon of oil and garnish with fresh cilantro for a burst of color. For the full recipe, check out the Easy Chicken Tikka Masala. For the best flavor, marinate the chicken for at least one hour. If you can wait longer, try marinating overnight. This allows the spices to soak in fully. To enhance the flavors, add a bit of salt and a dash of chili powder to the marinade. This extra kick can make your dish really shine. Choose a large, heavy skillet for cooking. A cast-iron or non-stick skillet works best. This helps the chicken cook evenly and keeps it juicy. To avoid overcooking the chicken, watch for a nice golden color. Cook it just until browned, then add the sauce. The chicken will finish cooking in the sauce. Plating your dish can create a feast for the eyes. Use a shallow bowl for a nice look. Spoon the tikka masala into the center. Garnish with fresh cilantro for a pop of color. Serve with fluffy rice or warm naan bread. This makes the meal even more inviting. {{image_2}} You can make a tasty vegetarian version of chicken tikka masala. Simply replace chicken with paneer or tofu. Paneer gives a nice, creamy texture. Tofu absorbs spices well, making it flavorful. Cut either into small cubes. Use the same marinade for them. Let them soak up the spices. This way, you keep all the great tastes while making it meat-free. If you love heat, add more chili peppers or cayenne. Start with one extra pepper, or a teaspoon of cayenne. Mix it in with your spices. You can also adjust heat levels based on your taste. This spicy twist brings a new kick to the dish. It makes each bite exciting and bold. For a coconut-free option, use heavy cream instead of coconut milk. This change makes the sauce rich and creamy. It also shifts the flavor a bit. The dish will still taste amazing but without the coconut hint. Pour the cream in towards the end, stirring well. This way, you get a thick and luscious sauce. For the full recipe, check out Easy Chicken Tikka Masala. To keep your Easy Chicken Tikka Masala fresh, follow these steps: - Refrigerate: Place leftovers in airtight containers. They can last for up to 3 days in the fridge. - Freeze: If you want to store it longer, freeze it. Use freezer-safe containers. It can last for about 2 months. Make sure to cool the dish before putting it in the fridge or freezer. This helps avoid condensation, which can create ice crystals. When it's time to enjoy your leftovers, reheating properly is key: - Microwave: Use a microwave-safe dish. Heat for 1-2 minutes, stirring halfway. Check if it's heated all the way through. - Stovetop: For best flavor, reheat in a skillet over medium heat. Stir occasionally for about 5-7 minutes. Add a splash of water or coconut milk if it seems dry. These methods help keep the flavors rich and delicious. Enjoy your meal again! Chicken Tikka Masala is a rich and creamy dish. It comes from India and has British roots. The chicken gets marinated in yogurt and spices, then cooked in a tomato-based sauce. It’s famous for its warm, spicy flavors and bright color. Yes, you can use chicken breast. However, chicken thighs are juicier and more tender. Breasts can dry out if overcooked. Thighs add a deeper flavor, making the dish richer. You can use dairy-free yogurt or cashew cream instead of regular yogurt. For coconut milk, you can use almond milk or soy milk. These options keep the dish creamy without dairy. Garam masala is available in most grocery stores. Check the spice aisle. You can also find it at Indian markets. If you can’t find it, you can make your own blend using common spices like cumin and coriander. You can marinate the chicken the night before. Store it in the fridge until you're ready to cook. After cooking, let it cool and put it in containers. Reheat it on the stove or in the microwave. For the complete details, check out the Easy Chicken Tikka Masala recipe [here](#). In this blog post, we explored how to make easy Chicken Tikka Masala. We covered main ingredients like chicken, yogurt, and spices. You learned step-by-step instructions for marinating and cooking. I shared tips for the best flavor and how to present your dish. We also discussed tasty variations and storage tips. Chicken Tikka Masala is simple and fun to make. With practice, your meals will impress everyone. Enjoy cooking and sharing this flavorful dish!

Easy Chicken Tikka Masala Simple and Flavorful Dish

Craving a warm and flavorful dish that’s quick to make? You’re in the right place! This Easy Chicken Tikka Masala

To make these scones, you need just a few key ingredients. Here’s what you’ll gather: - 2 cups all-purpose flour - 1/3 cup granulated sugar - 1 tablespoon baking powder - 1/2 teaspoon salt - 1/4 cup unsalted butter, cold and cubed - 1 cup fresh blueberries - Zest of 1 large lemon - 1/2 cup heavy cream - 1 large egg - 1 teaspoon vanilla extract - 1 tablespoon lemon juice (freshly squeezed) These ingredients work together to create a soft and flavorful scone. The blueberries add a burst of sweetness. The lemon zest gives it a bright flavor. You can add a few optional ingredients to make your scones even better. Here are some suggestions: - A pinch of cinnamon for warmth - A handful of chopped nuts for crunch - A tablespoon of honey for extra sweetness These extras can give your scones a unique twist. Feel free to experiment based on your taste. If you need to swap some ingredients, here are some easy substitutions: - Use whole wheat flour instead of all-purpose flour for a nutty flavor. - Greek yogurt can replace heavy cream for a lighter option. - Frozen blueberries work well if fresh ones are not available. These swaps can help you adjust the recipe to fit your pantry and preferences. The goal is to create scones you’ll love! For the complete recipe, check out the [Full Recipe]. To start, preheat your oven to 425°F (220°C). Line a baking sheet with parchment paper. In a large bowl, mix 2 cups of flour, 1/3 cup of sugar, 1 tablespoon of baking powder, and 1/2 teaspoon of salt. Whisk until everything is well combined. Next, add 1/4 cup of cold, cubed butter. Use your fingers or a pastry cutter to mix until it looks like coarse crumbs. Now, gently fold in 1 cup of fresh blueberries and the zest of one lemon. Be careful not to smash the blueberries. In another bowl, whisk together 1/2 cup of heavy cream, 1 large egg, 1 teaspoon of vanilla extract, and 1 tablespoon of freshly squeezed lemon juice. Pour this mixture into the dry ingredients. Stir gently until just combined. Turn the dough onto a lightly floured surface. Shape it into a circle about 1 inch thick. Use a knife or a pizza cutter to cut the dough into 8 wedges. Place the wedges on your prepared baking sheet, leaving about 2 inches between each one. Bake your scones in the preheated oven for 15-17 minutes. They should turn golden brown on the edges. Once done, take them out and let them cool slightly on the baking sheet. After a few minutes, transfer the scones to a wire rack to cool completely. For a special touch, serve them warm with a dusting of powdered sugar and extra blueberries. Enjoy with clotted cream or lemon curd for extra flavor! To make your scones light and fluffy, use cold butter. Cold butter helps create steam during baking. This steam makes your scones rise nicely. Also, don’t overmix the dough. Mix just until combined; lumps are okay. Remember to fold in the blueberries gently. You want them whole, not smashed. One big mistake is not measuring ingredients correctly. Use a kitchen scale or measuring cups for accuracy. Another mistake is opening the oven door too often. This lets heat escape and can affect baking time. Also, don’t skip chilling the dough if your kitchen is warm. A cool dough helps keep the scones fluffy. For a golden brown finish, brush the tops with cream before baking. You can also sprinkle sugar on top for a bit of crunch. Make sure your oven is preheated to 425°F (220°C). This high heat helps brown the edges quickly. Check the scones around the 15-minute mark for that perfect color. For more details, see the full recipe. {{image_2}} You can swap blueberries for other berries. Raspberries and strawberries work well. Blackberries add a nice twist too. Each berry brings a unique taste. Fresh or frozen berries are both fine. Just remember to adjust the sugar. Some berries are sweeter than others. A simple glaze can make your scones shine. Mix powdered sugar with lemon juice for a bright topping. You can also use milk for a less tangy flavor. Drizzle the glaze on when the scones cool. For a richer taste, try cream cheese icing. Just mix cream cheese, sugar, and a bit of lemon juice. If you need a gluten-free option, use a gluten-free flour blend. Make sure your baking powder is gluten-free too. You might need to add more liquid, since gluten-free flour can absorb more moisture. Watch the texture while mixing. The dough should still feel soft but not sticky. Enjoy your gluten-free scones just as much! For the full recipe, check out the details above. After you enjoy your scones, store any leftovers. Place them in an airtight container. This keeps them fresh for up to two days. If you want to keep them longer, refrigerate them. Just remember, scones taste best fresh! To reheat your scones, use your oven. Preheat it to 350°F (175°C). Place the scones on a baking sheet. Heat for about 5 to 10 minutes. This brings back their warm, flaky texture. You can also microwave them for about 15-20 seconds if you're in a hurry. To freeze scones, let them cool completely first. Wrap each scone tightly in plastic wrap. Then, place them in a freezer bag. Scones can last for about three months in the freezer. When you're ready to eat one, thaw it in the fridge overnight. Then, reheat it as mentioned above. This way, you can enjoy your lemon blueberry scones anytime! For the full recipe, check out the earlier section. You can tell when your scones are done by looking at their color. They should be golden brown on the edges. If you insert a toothpick into the center, it should come out clean. This means the scone is baked through. Bake them for about 15-17 minutes at 425°F (220°C) for the best results. Yes, you can make Lemon Blueberry Scones ahead of time. You can prepare the dough and shape it into wedges. Then, wrap the wedges tightly in plastic wrap and refrigerate them. When you're ready, you can bake them straight from the fridge. This saves time and gives you fresh scones quickly. Lemon Blueberry Scones pair well with many tasty items. You can serve them warm with clotted cream or lemon curd for added flavor. Fresh fruit or a light fruit salad also makes a great side. For drinks, consider serving tea, coffee, or a refreshing lemonade. Each of these options complements the zesty and sweet flavors of the scones perfectly. For more details, check the Full Recipe. In this post, we explored how to make delicious lemon blueberry scones. We discussed key ingredients and substitutions you can use for better flavor. I shared clear steps for preparing, shaping, and baking the scones perfectly. Don’t forget my tips to avoid common mistakes, achieve a golden finish, and variations for different tastes. Lastly, I covered how to store and reheat your scones. Enjoy baking these treats, and share them with friends and family for all to love!

Lemon Blueberry Scones Tasty and Simple Recipe

Looking for a bright and tasty treat? My Lemon Blueberry Scones are simple to make and packed with flavor. In

Older posts
Newer posts
← Previous Page1 … Page73 Page74 Page75 … Page82 Next →

dsad

© 2026 Recipes Pursuit • Built with GeneratePress

Our Policies

  • Copyright Policy
  • Cookie Policy
  • GDPR Policy
  • Privacy Policy
  • Disclaimer
  • Terms Of Use

More Information

  • Home
  • About
  • Contact
  • Appetizers
  • Dessert
  • Dinner
  • Drinks
©2026, Recipes Pursuit About Back To Top