![To make classic chicken enchiladas, you will need the following ingredients: - 2 cups cooked chicken, shredded - 1 cup black beans, drained and rinsed - 1 cup corn, frozen or fresh - 2 cups enchilada sauce (store-bought or homemade) - 2 cups shredded cheese (cheddar and Monterey Jack mix) - 8 flour tortillas (10-inch) - 1 small onion, finely chopped - 2 cloves garlic, minced - 1 teaspoon cumin - 1 teaspoon chili powder - Salt and pepper to taste These ingredients work together to create a tasty and filling dish. The chicken provides protein, while the beans and corn add texture and flavor. The spices bring warmth and depth to every bite. You can enhance your enchiladas with some fun garnishes and sides. Consider adding: - Fresh cilantro for garnish - Sour cream for serving - Sliced avocados or guacamole - Chopped green onions - A side of Mexican rice or refried beans These extras add flavor and color to your plate. They make the meal more delightful and can cater to different tastes. If you don't have some ingredients, don't worry! Here are some easy substitutes: - Use rotisserie chicken instead of cooking your own. - Swap black beans for pinto beans or kidney beans. - Try using corn tortillas instead of flour for a different texture. - Replace shredded cheese with a dairy-free option if needed. These substitutes keep your enchiladas delicious while making them fit your needs. Don't be afraid to get creative! Start by preheating your oven to 375°F (190°C). This step is key to ensure even cooking. A hot oven helps the cheese melt and bubble perfectly on top. In a large skillet, pour in a splash of oil and heat it over medium heat. Add the finely chopped onion and sauté it for about 3-4 minutes. You want the onion to turn translucent. Then, toss in the minced garlic. Cook this for one more minute. It will smell amazing! Next, stir in the cumin, chili powder, salt, and pepper. These spices bring out the flavors. Add the shredded chicken, black beans, and corn to the skillet. Mix everything well. Heat it all through for about 5 minutes. Now it’s time to build your enchiladas! Take a tortilla and place a generous scoop of the chicken filling in the center. Roll the tortilla tightly around the filling. Place it seam-side down in a greased 9x13 inch baking dish. Repeat this with the other tortillas and filling until you use it all up. Once all the enchiladas are snug in the dish, pour the enchilada sauce evenly over the top. Sprinkle the shredded cheese all over the sauce. This creates a delicious, cheesy crust. Cover the dish with foil and bake for 20 minutes. After that, remove the foil and bake for another 10-15 minutes. The cheese should be bubbly and slightly golden when done. Let your enchiladas sit for a few minutes before serving. For an extra touch, garnish with fresh cilantro and serve with sour cream if you like. Enjoy these tasty bites! Check out the Full Recipe for more details. To make the perfect enchiladas, start with fresh ingredients. Use cooked chicken, black beans, and corn. These add great flavor and texture. Sauté the onion and garlic well. This step brings out their sweetness. Use a mix of cheddar and Monterey Jack cheese for a nice melt. When rolling the tortillas, don’t overfill them. This helps keep them from breaking. One common mistake is skipping the preheating step. Always preheat your oven to 375°F (190°C). Another mistake is not heating the filling before rolling. It should be warm to melt the cheese. Avoid using cold tortillas. They can crack easily. Lastly, don’t forget to cover the dish with foil. This keeps your enchiladas moist while baking. To adjust spice levels, start with mild spices. You can always add more later. If you like it spicy, mix in some diced jalapeños or hot sauce. For a milder dish, skip the chili powder or use less. Remember, you can customize the heat for your taste. Enjoy experimenting with different spices to find your perfect balance! {{image_2}} If you want a tasty vegetarian dish, use beans and veggies. Replace chicken with 2 cups of black beans or pinto beans. Add in 1 cup of chopped bell peppers, zucchini, or spinach. This option is filling and full of flavor. It also keeps the spirit of enchiladas alive. You can switch up the protein in your enchiladas. Try shredded beef or ground turkey for a different taste. For a lighter option, use shredded rotisserie chicken. You can even mix different proteins for a fun twist. Just make sure to season well, so each bite is flavorful. Mixing flavors can elevate your enchiladas. Add diced green chilies for heat. You can also include corn and black olives for extra texture. A sprinkle of lime juice adds a zesty kick. Experimenting with spices like smoked paprika or oregano can create unique flavor profiles. For a creamy touch, include a layer of sour cream inside. These combinations keep your enchiladas exciting and new. Check out the Full Recipe for more ideas. To store leftover enchiladas, let them cool first. Place them in an airtight container. This keeps them fresh for up to three days. You can also cover the dish tightly with plastic wrap. Just make sure they are completely cool before storing. This helps keep the texture nice. You can freeze enchiladas to save them for later. First, prepare and assemble them as usual. Once you pour on the sauce and cheese, cover the dish well with foil. This prevents freezer burn. You can freeze them for up to three months. When you're ready to eat, thaw them overnight in the fridge. To reheat enchiladas, preheat your oven to 350°F (175°C). Cover the dish with foil to keep the heat in. Bake for about 20 minutes or until hot. If you want a crisp top, remove the foil for the last 5 minutes. You can also use a microwave. Just heat them on a plate for 2-3 minutes. Enjoy your tasty meal! You can serve rice or beans with enchiladas. A simple salad also works well. Guacamole and chips are great choices too. You can add a dollop of sour cream on top. Fresh cilantro adds color and flavor. Consider serving with a side of Mexican corn salad for a tasty mix. Yes, you can make enchiladas ahead of time. Prepare the filling and assemble them. Cover and refrigerate before baking. This saves time on busy nights. Just bake them when you’re ready to eat. You may need to add a few extra minutes to the bake time. To make enchiladas gluten-free, use corn tortillas instead of flour tortillas. Check the enchilada sauce for gluten. Many brands offer gluten-free options. You can also make your own sauce at home. This way, you control all the ingredients. The best cheese for enchiladas is a mix of cheddar and Monterey Jack. This combo melts well and adds great flavor. You can also use queso fresco for a milder taste. Pepper Jack adds a nice kick if you like spice. Enchiladas are done when the cheese is bubbly and golden. The edges of the tortillas should look crisp. You can also check the filling; it should be hot. If you use a thermometer, the center should reach 165°F. Let them sit for a few minutes before serving for the best taste. For the full recipe, check out the [Full Recipe]. This blog covered all you need to make great chicken enchiladas. We listed the key ingredients, shared step-by-step cooking instructions, and gave helpful tips and tricks. I also shared variations to fit your taste and how to store leftovers. Enjoy your cooking and have fun creating your enchiladas. They can be easy and tasty, with many ways to change them up. Now, get cooking and impress your friends and family!](https://recipespursuit.com/wp-content/uploads/2025/06/bfe8b97e-0fc7-4f10-a8d2-79e5a40a1e73.webp)
Classic Chicken Enchiladas Easy and Flavorful Dish
Are you ready to master the art of Classic Chicken Enchiladas? This easy and flavorful dish brings Mexican comfort food
Are you ready to master the art of Classic Chicken Enchiladas? This easy and flavorful dish brings Mexican comfort food
![- Baby carrots (or regular carrots) - Garlic - Olive oil - Grated Parmesan cheese - Dried thyme - Salt and black pepper - Fresh parsley (for garnish) To make sure your Roasted Garlic Parmesan Carrots turn out great, measure your ingredients carefully. Use a kitchen scale for weight, if possible. For volume, use measuring cups and spoons. If you have dietary needs, you can swap some ingredients: - Use low-fat cheese instead of Parmesan for fewer calories. - Replace olive oil with a spray oil to cut down on fat. - If you need a vegan option, try nutritional yeast instead of cheese. These swaps can help you enjoy this dish while meeting your needs. Don't forget to check the [Full Recipe] for detailed cooking steps. 1. Preheating the oven: Start by preheating your oven to 425°F (220°C). This helps the carrots roast quickly and evenly. 2. Tossing ingredients in the mixing bowl: In a large mixing bowl, add 1 pound of baby carrots. Then, add 4 minced garlic cloves, 2 tablespoons of olive oil, 1 teaspoon of dried thyme, 1 teaspoon of salt, and 1/2 teaspoon of black pepper. Toss everything until the carrots are coated well. This step is crucial for flavor. 3. Arranging the carrots on the baking sheet: Line a baking sheet with parchment paper. Spread the carrots out evenly. Make sure they are not overcrowded. This helps them roast nicely without steaming. 1. Roasting time and technique: Place the baking sheet in the preheated oven. Roast the carrots for 20 minutes. Be sure to stir them halfway through. This ensures they cook evenly. 2. Adding Parmesan and final roasting: After 20 minutes, take out the baking sheet. Sprinkle 1/2 cup of grated Parmesan cheese over the carrots. Return them to the oven and roast for an additional 5-7 minutes. You want the cheese to melt and turn slightly golden. - Ensuring even roasting: Stir the carrots during roasting. This helps them brown on all sides and enhances the flavor. - Checking for doneness: The carrots should be tender when pierced with a fork. If they are soft but not mushy, they are done. You want a nice balance between tenderness and texture. Following these steps will give you Roasted Garlic Parmesan Carrots full of flavor and easy to make. For the full recipe, refer to the earlier section. To enhance the flavor of roasted garlic parmesan carrots, use fresh herbs. Fresh thyme adds a nice touch. You can also try rosemary or oregano for a different taste. A squeeze of lemon juice after roasting brightens the dish. For crispiness, the key is space. Spread the carrots out on the baking sheet. This helps them roast evenly and stay crunchy. Stir them halfway through cooking. This ensures every side gets that nice golden color. One common mistake is overcrowding the baking sheet. If you pile on too many carrots, they will steam instead of roast. Aim for a single layer for the best texture. Another issue is under-seasoning. Carrots need salt and pepper to bring out their natural sweetness. Don’t skip the seasoning or the garlic. Each adds depth and flavor. For a richer taste, consider adding a bit more parmesan cheese. This will create a wonderful crust. For the full recipe, check out the details above. {{image_2}} You can play with flavors to make this dish unique. For instance, fresh herbs can change the taste. Try adding rosemary or oregano for a fresh twist. Both herbs bring a nice earthiness that pairs well with garlic. You might also swap the cheese. Feta cheese adds a tangy kick. Cheddar cheese brings a sharpness that is delightful. Experiment with these options to find your favorite flavor. If you're short on time, the air fryer is a great choice. It cooks the carrots quickly while keeping them crisp. Set the air fryer to 400°F and cook for about 15 minutes. Shake the basket halfway through for even cooking. Grilling is another fun method. It adds a nice char and smoky flavor. Toss the carrots with oil and spices, then place them on a hot grill. Cook for about 10-12 minutes, turning often. This method gives a unique taste that’s perfect for summer meals. For the full recipe, check out the earlier section. To keep your roasted garlic Parmesan carrots fresh, store them in the fridge. Place the leftovers in an airtight container. This helps stop moisture and keeps them tasty. They will stay good for up to four days. If you want to save them for longer, you can freeze the carrots. First, let them cool completely. Then, place them in a freezer-safe bag or container. Make sure to press out any air. Frozen carrots can last up to three months. When you're ready to eat, just thaw them in the fridge overnight. You can reheat your carrots in the microwave or the oven. The microwave is fast, but it may make them a bit soggy. To reheat, place them in a bowl and cover it with a damp paper towel. Heat in 30-second bursts until warm. For a better texture, use the oven. Preheat it to 350°F (175°C). Spread the carrots on a baking sheet and heat for about 10-15 minutes. This keeps them crispy and full of flavor. You want to bring back that nice roasted taste. How long do Roasted Garlic Parmesan Carrots last in the fridge? Roasted Garlic Parmesan Carrots can last for about 3 to 5 days in the fridge. Store them in an airtight container to keep them fresh. Can I use regular carrots instead of baby carrots? Yes, you can use regular carrots. Just cut them into sticks that are similar in size to baby carrots. This helps them cook evenly. What can I serve with Roasted Garlic Parmesan Carrots? These carrots pair well with grilled chicken, steak, or fish. They also complement pasta dishes and salads, adding a nice touch of flavor. Is this recipe suitable for meal prep? Absolutely! Roasted Garlic Parmesan Carrots are great for meal prep. Make a big batch and enjoy them throughout the week. How do I know when the carrots are done roasting? The carrots are done when they are tender and slightly caramelized. You can test them by poking a fork in one. If it slides in easily, they are ready. Can I make this recipe vegan? Yes, you can make it vegan by omitting the Parmesan cheese. You can also use nutritional yeast for a cheesy flavor without dairy. What is the best type of Parmesan to use? Freshly grated Parmesan cheese works best. It melts nicely and has a rich flavor. Avoid pre-grated cheese, as it may not melt as well. For the full recipe, check out the detailed instructions above! In this post, we explored how to make tasty roasted garlic Parmesan carrots. We covered essential ingredients and accurate measurements, plus step-by-step preparation and cooking instructions. Expert tips helped avoid common mistakes. Variations let you get creative, swapping herbs or cooking methods. In the end, these carrots are easy to prepare and perfect as a side dish. With a few careful steps, you’ll impress everyone at your table. Enjoy this delicious dish anytime!](https://recipespursuit.com/wp-content/uploads/2025/06/c6c33b24-b539-489d-97df-92a2b4c61db0.webp)
Craving a simple yet flavorful side dish? You’re in for a treat! Roasted Garlic Parmesan Carrots are easy to make
![- 1 lb large shrimp, peeled and deveined - 2 ears of corn, cut into thirds - 1 lb baby potatoes, halved - 1 red onion, sliced - 3 cloves garlic, minced - 4 tablespoons olive oil - 1 tablespoon Old Bay seasoning - 1 teaspoon smoked paprika - Salt and pepper to taste - 2 tablespoons fresh parsley, chopped (for garnish) - Lemon wedges (for serving) Let’s break down what makes this dish so great. The shrimp is the star. I love using large shrimp because they cook fast and stay juicy. The corn adds sweetness and crunch. You can use fresh or frozen, but fresh is best. The baby potatoes are hearty and soak up all the flavors. I cut them in half to ensure they cook evenly. The red onion gives a nice sharp taste. Garlic adds a wonderful aroma. Olive oil helps everything cook and adds richness. Old Bay seasoning is a classic choice; it brings a blend of spices that pairs perfectly with seafood. Smoked paprika adds a hint of smokiness, which is just delicious. Lastly, fresh parsley brightens up the dish, and lemon wedges give a zesty kick. You will need a large bowl for mixing. A sheet pan is key for even cooking. Parchment paper can help with cleanup. A sharp knife will make cutting the veggies easier. Finally, use measuring spoons for accurate seasoning. Following these tips will lead to a yummy meal. For the full recipe, check out [Full Recipe]. Start by gathering all your ingredients. You need fresh shrimp, corn, potatoes, onion, and garlic. Wash your veggies well. Cut the corn into thirds and halve the baby potatoes. Slice the onion thinly. Mince the garlic to bring out its strong flavor. In a large bowl, mix the potatoes, corn, onion, and garlic. Add two tablespoons of olive oil. Season with salt, pepper, Old Bay seasoning, and smoked paprika. Toss everything until well coated. Next, spread your veggie mix in a single layer on a large sheet pan. This helps them cook evenly. Preheat your oven to 400°F (200°C) and bake the vegetables for 20 minutes. While they bake, prepare the shrimp. In the same bowl, toss the shrimp with the remaining olive oil. Season them with salt, pepper, and more Old Bay if you like. After 20 minutes, take the pan out and add the shrimp. Make sure they are evenly placed among the veggies. Bake again for 8-10 minutes, until the shrimp turn pink and are cooked through. To check if the shrimp are done, look for a bright pink color. They should also curl into a nice "C" shape. Another way is to cut one shrimp open. It should be opaque and firm inside. If they look clear or gray, they need more time. Always watch closely during the last few minutes of baking. Remove the pan from the oven, garnish with fresh parsley, and serve with lemon wedges for a bright touch. Enjoy your Easy Sheet Pan Shrimp Boil! For the full recipe, check out the earlier section. Seasoning makes your dish shine. Use Old Bay seasoning for that classic flavor. This blend gives a nice kick and goes well with shrimp. Don’t be shy with salt and pepper. They bring out all the great tastes. For fresh flavor, add chopped parsley right before serving. To get juicy shrimp, don’t overcook them. Cook shrimp until they turn pink and opaque. This takes about 8 to 10 minutes in the oven. If you overcook them, they become rubbery. To avoid this, watch the time closely. A large sheet pan is key for even cooking. Use one with a rim to catch juices. Parchment paper can help with cleanup and prevent sticking. A good sharp knife makes chopping easy. Finally, use mixing bowls to combine your ingredients well. For the full recipe, check out the Easy Sheet Pan Shrimp Boil. {{image_2}} You can mix up your Easy Sheet Pan Shrimp Boil by adding different seafood. Try using scallops for a sweet twist. Clams and mussels also work well, adding a briny flavor. If you want a meatier option, include chunks of crab or lobster. These changes keep the dish fresh and exciting. Feel free to swap out veggies to suit your taste or what you have on hand. Zucchini and bell peppers add color and crunch. You can use asparagus or green beans for a different texture. Sweet potatoes can replace baby potatoes for a hint of sweetness. Each vegetable brings its own flavor profile to the dish. For those who love heat, add some spice to your shrimp boil. Toss in sliced jalapeños or red pepper flakes before baking. You can also use spicy sausage to amp up the flavor. If you want a smoky kick, try adding chipotle powder. These spicy options create a bold and exciting dish that will warm your soul. For full details on making this dish, check out the [Full Recipe]. To keep your Easy Sheet Pan Shrimp Boil fresh, store it in an airtight container. Let it cool to room temperature before closing the lid. This step prevents moisture buildup, which can make the shrimp soggy. You can keep the leftovers in the fridge for up to three days. If you want to enjoy it later, consider freezing it. When reheating, use the oven or a skillet for the best results. Avoid the microwave, as it can overcook the shrimp. Preheat your oven to 350°F (175°C) and place the leftovers in an oven-safe dish. Cover it with foil to keep moisture in. Heat for about 10-15 minutes until warm. If using a skillet, add a bit of olive oil and heat over medium heat, stirring gently. For meal prep, freeze the shrimp boil right after it cools. Use a freezer bag or airtight container. Squeeze out as much air as possible to prevent freezer burn. It can last for up to three months in the freezer. When ready to eat, thaw it overnight in the fridge. Reheat it using the tips above to keep the flavors intact. Enjoy your tasty shrimp boil at your convenience! Yes, you can use frozen shrimp. Just make sure to thaw them first. Place the frozen shrimp in a bowl of cold water for about 15-20 minutes. This quick thawing method works great. After thawing, peel and devein if needed. Then, follow the recipe as usual. Shrimp cook fast, so watch them closely. They turn pink and curl up when done. The flesh should be opaque. A good tip is to cut one in half. If it’s white, it’s ready. Be careful not to overcook, as shrimp can become tough if left too long. Shrimp boil goes well with many sides. Here are some great options: - Garlic bread for a crunchy bite - Coleslaw for a cool crunch - A fresh green salad for balance - Cornbread for a sweet touch These sides complement the shrimp boil's flavors and add variety to your meal. For the full recipe, check out the Easy Sheet Pan Shrimp Boil section above. This shrimp boil guide covered all you need. We discussed key ingredients, easy steps, and tips for success. You can explore variations to suit your taste. Proper storage and reheating methods keep your meal fresh. Now, you are ready to make a great shrimp boil. Enjoy cooking and sharing this dish with others!](https://recipespursuit.com/wp-content/uploads/2025/06/86ac41ea-6362-48b7-b68b-5dee81c15f22.webp)
If you’re craving a quick and flavorful meal, an Easy Sheet Pan Shrimp Boil is perfect! It’s simple, tasty, and
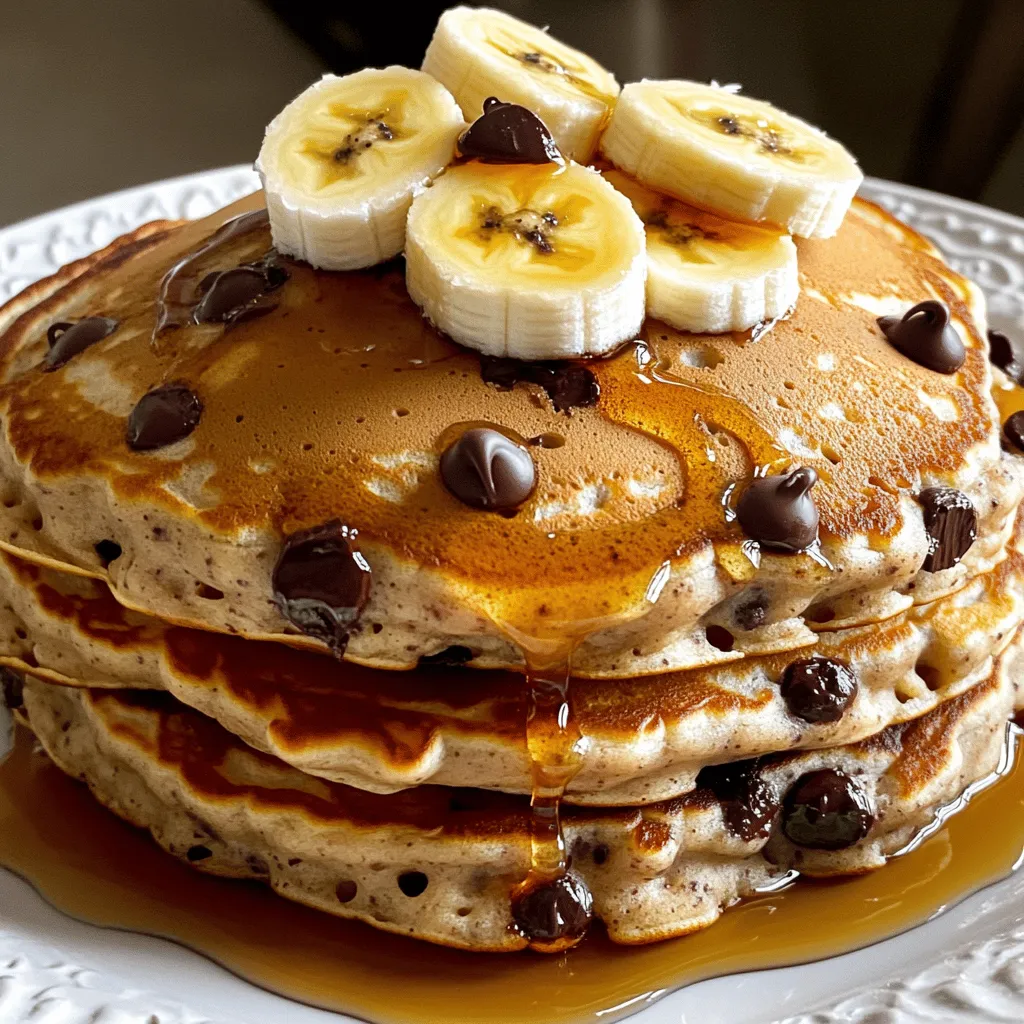
Are you ready to elevate your breakfast game? Banana chocolate chip pancakes are easy, fun, and delicious! This simple recipe
![- 1 lb (450g) shrimp, peeled and deveined - 2 ripe avocados, diced - 1 red bell pepper, diced - 1 cup cherry tomatoes, halved - 1 small red onion, finely chopped - 2 cloves garlic, minced - 1 tablespoon olive oil - 1 tablespoon lime juice - 1 teaspoon chili powder - 1/2 teaspoon cayenne pepper (adjust to taste) - Salt and pepper to taste - Fresh cilantro, chopped (for garnish) You need fresh and quality ingredients for the best taste. The shrimp should be firm and smell clean. Look for bright green avocados that yield slightly when pressed. A ripe red bell pepper adds sweetness, while cherry tomatoes give a juicy burst. Red onion adds crunch and sharpness, and garlic brings a savory kick. Using lime juice brightens all the flavors. Chili powder and cayenne add heat, but you can adjust as you like. Sprinkle salt and pepper to enhance all the flavors. Finally, fresh cilantro adds a lovely touch. Check the [Full Recipe] for all the details! This salad is low in calories and high in protein. It’s packed with healthy fats from avocados, which are good for your heart. Each serving offers vitamins and minerals that keep you energized. You can change it up! Swap shrimp for chicken or tofu for a different taste. Use different veggies like corn or cucumbers for added crunch. Just keep it fresh and colorful for the best results. To start, we need to marinate the shrimp with spices. In a bowl, mix the shrimp with olive oil, lime juice, chili powder, cayenne pepper, salt, and pepper. This blend brings out the bold flavors. Let the shrimp sit for about 15 minutes. This time allows the shrimp to soak in all the tasty spices. Next, we cook the shrimp. Heat a skillet over medium-high heat. Add the marinated shrimp and cook for 2-3 minutes on each side. You will know the shrimp are cooked when they turn pink and opaque. This is a good sign that they are ready. Remove the shrimp from the heat and let them cool slightly. Now it’s time to combine all the ingredients. In a large bowl, mix the diced avocados, red bell pepper, cherry tomatoes, and red onion. Once mixed, add the cooled shrimp to the bowl. Gently toss everything together. Be careful not to mash the avocados. This light mixing makes sure all flavors blend well without losing any nice chunks. To choose ripe avocados, look for a dark green color. Gently press the skin with your thumb. If it yields slightly, it is ripe. Avoid hard avocados, as they need more time to ripen. If you find overripe avocados, they may have dark spots or feel mushy. Use ripe avocados quickly to enjoy their best flavor in your spicy shrimp avocado salad. If you have leftover shrimp, store it in the fridge. Use it in tacos or pasta dishes. Leftover vegetables can also be tossed into omelets or stir-fries. To keep avocados fresh, sprinkle lime juice on them. This will slow browning. You can also mash them for guacamole or spread them on toast. This salad tastes best when served fresh and cool. After cooking the shrimp, let it cool slightly before mixing. Serve it right away for maximum flavor. If you want to serve it later, chill it in the fridge for about 30 minutes. This will help the flavors blend nicely. Enjoy your spicy shrimp avocado salad at the perfect temperature! {{image_2}} You can switch up the shrimp for other proteins. Try grilled chicken or firm tofu. Both options pair well with avocado. You can season them the same way as the shrimp. This keeps the dish fresh and tasty. If you want more flavor, try smoked salmon. It adds a nice twist. For a veggie version of this salad, focus on beans and nuts. Black beans or chickpeas add protein and texture. You can also add nuts like almonds or walnuts. They give a nice crunch. Toss in some extra veggies like corn or cucumber. This makes the salad colorful and hearty. Herbs and spices can really boost the flavor. Fresh basil or dill works well with the avocado. You can also sprinkle some cumin for a warm touch. If you like more heat, try adding jalapeños or red pepper flakes. These small changes can make a big difference. For a citrus kick, consider adding zest from lime or lemon. Each herb or spice brings its own unique taste. For the full recipe, check out the instructions above. To keep your Spicy Shrimp Avocado Salad fresh, place any leftovers in an airtight container. This helps prevent the salad from getting soggy. Store it in the fridge for up to two days. If you notice the avocado browning, squeeze a bit of lime juice on it. This will slow down the oxidation process and keep it looking bright. You should avoid reheating this salad, as it is best served cold. If you do need to reheat the shrimp, quickly warm them in a skillet over low heat. Do not cook for too long, or the shrimp may become tough. Remember, the salad tastes great when served fresh. For the shrimp, use them within one day of purchase for the best flavor. Avocados are best when ripe, but they can last for a few days at room temperature. Keep them in the fridge to extend their life. Cherry tomatoes and bell peppers last about a week in the fridge. Always check for signs of spoilage before using any ingredient in your salad. For the full recipe, check the instructions above. Yes, you can make this salad ahead of time. Prepare the shrimp and veggies but leave the dressing out until you are ready to serve. This keeps the salad fresh. Store it in the fridge for up to a few hours. If you want to make it a day ahead, I suggest storing the shrimp and veggies separately. This way, they stay crisp and tasty. If you don't like shrimp, you have options. You can use grilled chicken, tofu, or even chickpeas. Each option brings a unique flavor. If you choose chicken, cook it just like the shrimp for the best taste. Tofu works well when marinated and grilled too. Chickpeas add a nice texture and protein. Adjusting the heat is easy! If you like it milder, cut back on the cayenne pepper. You can also skip the chili powder. For more heat, add extra cayenne pepper or some hot sauce. Just remember to taste as you go to find the right balance for your palate. Enjoy experimenting to make it your own! For the full recipe, check out the [Full Recipe]. This blog post explored a fresh shrimp salad recipe. We covered essential ingredients, cooking steps, and tips for perfecting your dish. I shared ideas for variations and explained how to store leftovers wisely. Remember, this salad is not just tasty; it’s flexible too! Feel free to swap out proteins or adjust spices. Use the tips shared to impress at your next meal. Enjoy crafting a delicious, healthy dish that fits your taste!](https://recipespursuit.com/wp-content/uploads/2025/06/84b9ddcc-681a-43f9-a947-337d510ede67.webp)
If you crave a lively dish that’s both fresh and packed with flavor, you’re in for a treat! My Spicy
![- 1 lb fresh strawberries, hulled - 1 cup dairy-free dark chocolate chips - 1 tablespoon coconut oil - 1 teaspoon vanilla extract - Sea salt for sprinkling - Shredded coconut or crushed nuts for decoration These ingredients make the magic happen! The fresh strawberries bring a sweet, juicy taste. They are the star of the show. The dairy-free dark chocolate chips will melt to create a rich coating. Adding coconut oil helps the chocolate get smooth. It makes it easy to dip. The vanilla extract adds a hint of flavor. You can get creative with the optional add-ons. A sprinkle of sea salt gives a nice contrast. It balances the sweetness. Shredded coconut adds a tropical twist. Crushed nuts add a crunchy texture. Each choice enhances the taste. For the full recipe, check out the Vegan Chocolate Covered Strawberries section. You will find all you need to make this delightful treat! To start, wash the strawberries gently under cool running water. Make sure to hold them by the green tops. After rinsing, pat them dry with a paper towel. This step is very important because if the strawberries are wet, the chocolate won’t stick well. You want them completely dry before dipping. This will help create a smooth coating. Now, let’s melt the chocolate. In a microwave-safe bowl, add the dairy-free dark chocolate chips and coconut oil. Microwave this mixture on high for 30 seconds. After that, take it out and stir. Repeat this process until the chocolate melts smoothly. Stirring between intervals stops the chocolate from overheating. Overheating may cause the chocolate to seize and become unusable. Once your chocolate is melted, it’s time to dip. Take each strawberry and dip it into the chocolate. Swirl it around so it gets a good coating. Allow any extra chocolate to drip off back into the bowl. Place the coated strawberries on a parchment-lined baking sheet to cool. This will keep your work area clean and help avoid a mess. You can also sprinkle sea salt on them right after dipping for a nice touch. If you want, roll them in shredded coconut or crushed nuts for a crunchy finish. For the full experience, follow the [Full Recipe]. To make sure the chocolate sticks well, dry the strawberries thoroughly. Any moisture will stop the chocolate from adhering. I suggest using a paper towel to pat them dry. This way, you get a nice, even coat of chocolate. For a smoother consistency, mix in coconut oil with the chocolate. It helps the chocolate melt evenly. This tip makes your chocolate shiny and easy to work with. You can add other flavors to the chocolate for a twist. Try mixing in a bit of peppermint extract or almond extract. Both can add a fun surprise to the taste. To get a sweet and salty balance, sprinkle sea salt on the chocolate right after dipping. This enhances the flavor and makes each bite special. You can also roll the strawberries in shredded coconut or crushed nuts for extra flavor and texture. When you arrange the chocolate-covered strawberries, use a decorative platter. It makes your treat look inviting. You can also drizzle extra melted chocolate on top for a beautiful design. For extra flair, dust with sifted cocoa powder or sprinkle some crushed nuts. These small details make your strawberries stand out, perfect for any gathering. Enjoy making your Vegan Chocolate Covered Strawberries Delightfully Easy with these tips! Want the full recipe? Check out the Full Recipe to get started! {{image_2}} You can change the chocolate you use for fun flavors. Try white chocolate chips for a sweet twist. You could also use milk chocolate for a creamy taste, or ruby chocolate for something unique. Mix your chocolate with other fruits too. Dipping bananas or pineapple chunks in chocolate tastes great. You can also add toppings like crushed nuts or sprinkles for a fun crunch. If you need nut-free options, use pumpkin seeds instead of nuts. For soy-free alternatives, look for chocolate made without soy. You can even skip the coconut oil. Use a little water instead to help melt the chocolate. This way, you keep it smooth without any added fats. Seasonal fruits can add a special touch. In summer, use juicy peaches or ripe cherries. In fall, think about adding a sprinkle of cinnamon or using apples. For garnishing, you can use fresh mint leaves for a pop of color. They look pretty and add a fresh taste to your dish. Use these ideas to create a fun treat for any party or occasion. For the full recipe, check out the earlier section. To store chocolate-covered strawberries, keep them in the fridge. Use an airtight container to keep them fresh. Avoid stacking them, as they may stick together. Place parchment paper between layers if needed. This helps prevent them from getting soggy. Keep them away from moisture to maintain their crispness. When stored correctly, chocolate-covered strawberries last up to three days. They taste best fresh, so enjoy them soon after making. You can freeze them, but the texture may change. To freeze, place them in a single layer on a baking sheet. Once frozen, transfer them to a freezer bag. When thawing, do it slowly in the fridge. This helps avoid excess moisture. For the best flavor, serve chocolate-covered strawberries cold. This enhances their taste and makes them refreshing. Arrange them on a decorative platter for parties. Drizzle extra melted chocolate on top for a fun touch. You can also sprinkle coconut or nuts for added flair. These treats are perfect for gatherings or as a sweet gift. Yes, you can make vegan chocolate-covered strawberries ahead of time. To keep their taste and look, follow these tips: - Choose ripe strawberries: Pick fresh strawberries that are not overripe. This keeps them firm and tasty. - Store properly: Place the strawberries in an airtight container. This helps avoid moisture that can make them soggy. - Keep cool: Store them in the fridge. The coolness keeps the chocolate firm and the berries fresh. - Timing: Aim to eat them within two days. This ensures you enjoy them at their best. For vegan chocolate-covered strawberries, look for dairy-free chocolate. Here are some great options: - Brands: Try brands like Enjoy Life, Hu Chocolate, or Pascha. These brands focus on quality and taste. - Chocolate types: Dark chocolate works best due to its rich flavor. You can also use baking chocolate or chips. - Sweetness level: Choose chocolate that matches your taste. You might like semi-sweet or bittersweet for a strong flavor. To keep your chocolate coating neat, use these tips: - Dry strawberries well: Make sure your strawberries are completely dry. Any water will make the chocolate slide off. - Use a dipping tool: A fork or skewer helps you dip without getting too messy. It also makes it easy to lift and shake off excess. - Work quickly: Dip each strawberry and place it on parchment paper fast. This helps the chocolate set before it can drip. - Chill before dipping: If strawberries are cold, the chocolate will set faster and stay intact. In this post, I shared how to make delicious chocolate-covered strawberries. We covered the best fresh ingredients, tips for melting chocolate, and effective dipping techniques. I also provided fun variations and storage tips to keep them tasty. Remember, you can customize this treat with different chocolates and toppings. Enjoy these easy steps to create a sweet snack for any event. With practice, you'll impress everyone with your tasty treats. Dive in and try making them yourself!](https://recipespursuit.com/wp-content/uploads/2025/06/62177aa7-e8cd-4fc2-ad39-e20bbe6788b4.webp)
Are you ready to treat yourself to a delicious, guilt-free dessert? Vegan chocolate-covered strawberries are a quick and easy way
![To make this cheesy chicken broccoli rice skillet, you need fresh and simple ingredients. Here’s what you will need: - 1 lb (450g) boneless, skinless chicken breasts, diced - 1 cup uncooked brown rice - 2 cups broccoli florets - 1 medium onion, chopped - 3 cloves garlic, minced - 3 cups chicken broth - 1 cup shredded cheddar cheese - 1 teaspoon paprika - 1 teaspoon olive oil - Salt and pepper to taste - Fresh parsley for garnish (optional) These ingredients come together for a delightful meal that is both satisfying and simple to prepare. I love using brown rice for its nutty flavor and added health benefits. Fresh broccoli adds vibrant color and crunch. The chicken provides protein, while cheddar cheese melts into a gooey topping that brings it all together. Trust me, this dish will be a hit at your table! If you want to dive deeper into how to prepare this tasty meal, check out the Full Recipe. First, heat the olive oil in a large skillet over medium-high heat. The oil will help cook the chicken evenly. Next, add the diced chicken. Season it with salt, pepper, and paprika. Cook the chicken until it is browned and cooked through. This should take about 6 to 8 minutes. Once done, remove the chicken from the skillet and set it aside. This step adds nice flavor to your dish. In the same skillet, toss in the chopped onion and minced garlic. Sauté them for about 3 to 4 minutes until the onion is soft and clear. This brings out the sweet taste of the onion. After that, stir in 1 cup of uncooked brown rice. Mix it well with the onion and garlic. Now, pour in 3 cups of chicken broth. Bring it to a boil, then lower the heat. Cover the skillet and let it simmer for 20 minutes. This will cook the rice perfectly. After 20 minutes, it’s time to add the broccoli florets. Stir gently to combine everything, then cover the skillet again. Cook for another 5 to 7 minutes until the broccoli is tender. Next, mix the cooked chicken back into the skillet. Finally, sprinkle 1 cup of shredded cheddar cheese on top. Cover the skillet for a few minutes to let the cheese melt. This creates a creamy finish to your meal. For the full recipe, you can refer to the earlier section. For the best rice texture, adjust the cooking time. Brown rice takes longer to cook than white rice. If your rice is still firm after 20 minutes, let it simmer a few more minutes. To keep broccoli vibrant, add it during the last 5-7 minutes. This way, it stays bright green and crisp. Overcooking makes it dull and mushy, which is not what we want. Spice things up with your favorite seasonings. You can try garlic powder, onion powder, or even a pinch of cayenne for heat. Mix and match to find the flavor you love. Fresh herbs like thyme or basil add a nice touch too. Sprinkle them in at the end for a fresh burst. They can brighten up your dish and make it taste amazing. Garnishing can make your dish shine. Use fresh parsley to add color and flavor on top. A sprinkle of paprika can also give it a nice pop. For serving, consider using bright plates. This makes the colors of the dish stand out. You can even add a side salad for extra crunch and color. For the full recipe, check out the complete guide. {{image_2}} You can switch up the protein in this recipe. Instead of chicken, try turkey or tofu. Both options add their own unique flavors. Turkey gives a leaner taste, while tofu absorbs the sauce well. Cheese is another area for swaps. Use mozzarella for a milder flavor, or gouda for a smokier taste. Each cheese brings something special to your skillet. If you need a gluten-free option, use quinoa or cauliflower rice instead of brown rice. Both will work well with the other ingredients and keep the dish hearty. For a vegan version, replace chicken with chickpeas or lentils. Use plant-based cheese to keep that cheesy vibe. These swaps let everyone enjoy this tasty meal! To keep your cheesy chicken broccoli rice skillet fresh, store it in an airtight container. Refrigerate within two hours after cooking. This helps prevent bacteria growth. The dish stays good for about 3 to 4 days in the fridge. If you want to keep it longer, freezing is a great option. For freezing, allow the skillet to cool completely. Then, place it in a freezer-safe container or bag. This keeps the flavors locked in. You can freeze it for up to three months. Label the container with the date so you remember when you made it. When it's time to eat leftovers, you have two good options: microwave or stovetop. For the microwave, place a portion in a safe dish and cover it. Heat for 1-2 minutes, checking often. Stir halfway through to warm evenly. If you prefer the stovetop, use a skillet over medium heat. Add a splash of chicken broth or water to keep it moist. Stir often until heated through. This method helps keep the texture nice and the cheese melty. Whichever way you choose, enjoy your cheesy chicken broccoli rice skillet just like it was fresh! How long does the dish keep in the fridge? The cheesy chicken broccoli rice skillet lasts about 3 to 4 days in the fridge. Store it in an airtight container. Make sure it cools down before you place it in the fridge. Can I use white rice instead of brown rice? Yes, you can use white rice. Just adjust the cooking time. White rice cooks faster than brown rice, so check it after about 15 minutes. The texture will be slightly different, but still tasty. What to do if the rice is undercooked? If the rice is undercooked, add a little more chicken broth or water. Cover the skillet and cook for a few more minutes. Check the rice often to ensure it cooks evenly. How can I add more vegetables to the dish? You can add veggies like bell peppers, carrots, or peas. Just chop them small and add them when you add the broccoli. This way, they cook evenly and blend well with the flavors. Can I substitute fresh broccoli for frozen? Yes, you can use frozen broccoli. Just make sure to thaw it first. This will help it cook evenly and avoid excess water in the dish. What cheese works best in this recipe? Shredded cheddar cheese works great in this recipe. You could also try mozzarella or Monterey Jack for a different flavor. Just make sure it melts well for that creamy texture. For the full recipe, check out [Full Recipe]. This article covered a delicious cheesy chicken skillet. You learned how to cook chicken, prepare rice, and mix in veggies and cheese. I shared tips for texture, enhancing flavors, and creative presentation. You can even swap ingredients to fit your diet. Proper storage and reheating advice will keep leftovers tasty. Cooking can be fun and easy. With this one-pot meal, you can enjoy good food without fuss. Now, get cooking and share this dish with others!](https://recipespursuit.com/wp-content/uploads/2025/06/f774a6bf-5906-4ada-ab7c-3a6c0b0444ab.webp)
Looking for a quick and tasty dinner? This Cheesy Chicken Broccoli Rice Skillet is your answer! With juicy chicken, vibrant

Looking for a creamy and flavorful dip that’s easy to make? This Greek Yogurt Ranch Dip is your answer! With
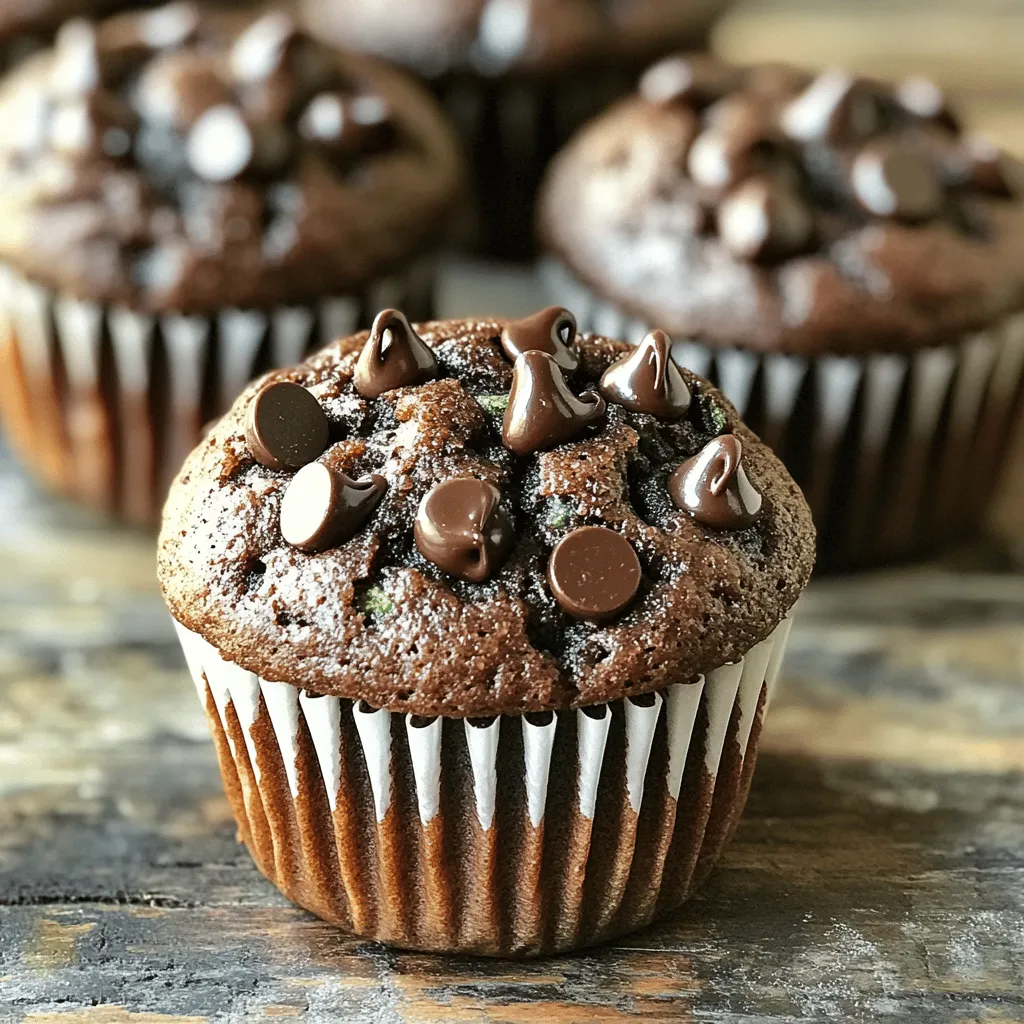
Looking for a sweet treat with a sneaky veggie twist? These Double Chocolate Zucchini Muffins are rich, moist, and full
. Mixing the Tuna Blend Start by draining the tuna well. Take a medium bowl and add the tuna. Then, mix in the Greek yogurt, Dijon mustard, and fresh lemon juice. Stir until it’s nice and smooth. This creamy base gives the dish its rich flavor. Adding the Fresh Ingredients Next, chop the red onion, Kalamata olives, cherry tomatoes, cucumber, and parsley. Add these to the tuna blend. Stir gently, so you don’t mash the tomatoes. Each veggie brings freshness and crunch to the mix. Seasoning the Mixture Now it’s time to season. Add salt and pepper to taste. This step is key to enhancing the flavors. Taste the mixture and adjust the seasoning as needed. A little tweak can make a big difference. Preparing the Pita for Stuffing Take each whole wheat pita pocket and cut it in half. This creates a nice pocket for the filling. Be gentle to avoid tearing the pita. Filling the Pita Pockets Now, carefully stuff each pita half with your tuna mixture. Pack it in well, but don’t overfill. You want to enjoy every bite without a mess. Optional: Adding Feta Cheese If you love cheese, sprinkle crumbled feta on top. It adds a salty kick that pairs perfectly with the tuna. This step is optional but highly recommended for extra flavor. For the full recipe, check [Full Recipe]. Choosing the Right Tuna When selecting tuna, I recommend using canned tuna in water. It keeps the flavor light and fresh. Look for brands that use sustainable fishing methods. This choice is good for the ocean and your meal. Selecting Fresh Vegetables Choose bright, crisp vegetables for the best taste. Look for firm cucumbers and vibrant cherry tomatoes. Fresh parsley adds a burst of flavor and color. Always wash your veggies well to remove dirt and pesticides. Adjusting Flavors to Taste Taste the mixture as you go. You may want more lemon juice for brightness or extra salt for flavor. Everyone has different tastes, so feel free to adjust to your liking. Adding a touch of spice or fresh herbs can elevate the dish. Pairing with Side Dishes Serve your pita pockets with a side of fresh fruit or a simple salad. Greek salad pairs well with the tuna mix. You can also enjoy them with baked sweet potato fries for a fun twist. Presentation Ideas Cut the pita pockets in half and arrange them on a colorful plate. Add a small bowl of olives or extra feta on the side. This makes your meal look as good as it tastes. You can also garnish with extra parsley for a pop of green. For the full recipe, check out the Mediterranean Tuna Pita Pockets section above. {{image_2}} Substituting Greek Yogurt You can swap Greek yogurt with plain yogurt or cottage cheese. This change keeps it creamy. It also adds a different flavor. Using Different Veggies Feel free to mix in other veggies. Bell peppers, carrots, or even spinach work well. Each veggie brings its crunch and taste. You can customize the dish to your liking. Adding Spices or Herbs Adding spices can really enhance the flavor. Try cumin for warmth or dill for freshness. Fresh herbs like basil or mint also add a nice touch. Experiment to find your favorite mix. Creating Wraps Instead of Pockets If you want a fun twist, use wraps instead of pita pockets. Just spread the tuna mixture on a tortilla. Roll it up tightly for a tasty handheld meal. Using Lettuce Wraps for Low-Carb Option For a low-carb option, use large lettuce leaves. Romaine or butter lettuce works best. Fill the leaves with the tuna mix and roll them up. This makes a fresh and light meal. For the full recipe, refer to Mediterranean Tuna Pita Pockets. After you make your Mediterranean tuna pita pockets, you can store them easily. Place the filled pitas in an airtight container. Refrigerate them right away to keep them fresh. They can last in the fridge for about three days. If you want to keep the filling separate, store it in a bowl. This way, the pita stays soft. For longer storage, you can freeze the tuna mixture. Use a freezer-safe container or bag. Make sure to remove as much air as possible. This tuna mix can stay in the freezer for up to two months. When ready to eat, thaw the mixture in the fridge overnight. To reheat, you can use a microwave. Heat it in short bursts, stirring in between. Avoid reheating the pita pockets as they can get soggy. Instead, serve them fresh with the thawed mixture. This keeps your meal tasty and enjoyable. Can I use canned tuna in oil instead of water? Yes, you can use canned tuna in oil. It adds a richer taste. Just drain the oil before mixing. This option can make your tuna mixture creamier. What can I substitute for Kalamata olives? If you can't find Kalamata olives, try black olives or green olives. They add a nice salty flavor. You can also skip the olives if you prefer. How do I make this recipe gluten-free? To make this dish gluten-free, use gluten-free pita pockets. Many stores sell these options now. Be sure to check the labels to ensure they are safe. Can I make this in advance? Yes, you can prepare the tuna mixture ahead of time. Store it in the fridge for up to two days. Just stuff the pitas before serving for the best texture. How to enhance flavors? Add a pinch of cayenne pepper for heat. You can also squeeze in more lemon juice. Fresh herbs like dill or basil can brighten the dish. Best ways to serve leftovers? Store leftovers in an airtight container. Use them in salads or wraps for a quick meal. They also make a tasty dip with crackers or veggies. This blog post shared an easy tuna salad recipe with fresh ingredients. You learned how to mix tuna, Greek yogurt, and veggies for tasty pita pockets. Tips helped you choose the best ingredients and serve suggestions made it fun. For a healthy meal, this recipe is simple and quick. Enjoy trying new flavor ideas or variations. Get creative with your meals and share with friends!](https://recipespursuit.com/wp-content/uploads/2025/06/326ca552-b197-4442-8f6e-313b24ce427a.webp)
Looking for a quick, healthy meal? Mediterranean Tuna Pita Pockets are fresh, flavorful, and packed with good ingredients. With just
