. To get a soft and moist texture, use fresh zucchini. Grate it and let it drain. This helps remove excess moisture. You want just enough to keep the bread moist but not soggy. Also, don’t overmix the batter. A few lumps are fine. This keeps the bread light and fluffy. If your bread is too dense, you may have added too much flour. Make sure to measure flour correctly. Use the spoon and level method. If your bread is too dry, try adding a little more oil or zucchini. If the top browns too fast, cover it with foil during baking. This prevents burning while the inside cooks. You can make this bread even tastier with extra ingredients. Try adding: - 1/2 cup dried cranberries or raisins - 1/2 cup shredded coconut - 1/2 teaspoon almond extract for a nutty flavor - Citrus zest for a fresh twist These additions can make your zucchini pumpkin bread unique and enjoyable. For the full recipe, check out the recipe section above. {{image_2}} You can easily make this zucchini pumpkin bread gluten-free. Use a 1-to-1 gluten-free flour blend instead of all-purpose flour. This swap keeps the texture light and fluffy. Make sure the blend contains xanthan gum. This helps mimic the stretch of wheat flour. Check the labels to avoid any gluten cross-contamination. Boost the flavor by adding spices. You can try a teaspoon of allspice or cloves. These spices add warmth and depth. If you love a kick of heat, consider adding a pinch of cayenne pepper. It adds a nice contrast to the sweet flavors of pumpkin and zucchini. Feel free to adjust the amounts to suit your taste. Dietary needs vary, and that's okay! If you're looking for a lower-sugar option, use a sugar substitute. You can also swap the vegetable oil for applesauce. This change reduces fat and adds moisture. For nut allergies, simply leave out the nuts or use seeds instead. You can also replace eggs with flaxseed meal mixed with water for a vegan option. For more details, refer to the Full Recipe. To keep your zucchini pumpkin bread fresh, wrap it tightly in plastic wrap. This will help keep moisture in. You can also place it in an airtight container. Store it at room temperature if you plan to eat it within a few days. If you want to keep it longer, consider freezing it. To freeze your zucchini pumpkin bread, first let it cool completely. Then, wrap it in plastic wrap, followed by aluminum foil. This double layer helps prevent freezer burn. You can freeze it for up to three months. When ready to eat, simply thaw it overnight in the fridge or at room temperature. For the best taste, reheat the bread before serving. Preheat your oven to 350°F (175°C). Place the bread on a baking sheet and warm it for about 10-15 minutes. This will bring back its soft texture and rich flavor. You can also use a microwave for a quick fix. Heat it in short bursts of 10-15 seconds to avoid drying it out. Enjoy your delicious zucchini pumpkin bread warm! Yes, you can use fresh pumpkin. To do this, cook the pumpkin first. Peel, seed, and chop it into pieces. Then, boil or steam it until soft. After that, mash it well. This will give you a fresh taste, but make sure it is smooth like puree. Zucchini pumpkin bread can last for about a week. Keep it in an airtight container at room temperature. If you want it to last longer, you can store it in the fridge. It can stay fresh for about two weeks when chilled. You can use several options for eggs. Some good choices are: - 1/4 cup unsweetened applesauce - 1/4 cup mashed banana - 1/4 cup yogurt - 1 tablespoon ground flaxseed mixed with 3 tablespoons water These options will help keep the bread moist and tasty. Yes, you can make mini loaves! Just divide the batter evenly into mini loaf pans. Bake them for about 25-30 minutes. Check them with a toothpick to ensure they are done. They will be cute and perfect for sharing. To check if the bread is done, insert a toothpick into the center. If it comes out clean or with a few crumbs, the bread is ready. If it has wet batter on it, bake for a few more minutes. This ensures your Zucchini Pumpkin Bread is perfectly baked. This blog post covered how to make delicious Zucchini Pumpkin Bread. We went through the ingredients, steps, tips, and variations. You learned how to mix wet and dry items, and bake the bread perfectly. Remember to check for doneness with a toothpick. Try different spices and options to make it your own. With proper storage, your bread will stay fresh and tasty. Enjoy this baking journey and savor every bite!](https://recipespursuit.com/wp-content/uploads/2025/06/032c1b52-4ffe-4851-bcd9-f6d6b794d161.webp)
Zucchini Pumpkin Bread Delicious and Easy Recipe
If you love fall flavors, you’ll enjoy this Zucchini Pumpkin Bread. It’s a simple and tasty recipe that combines two
If you love fall flavors, you’ll enjoy this Zucchini Pumpkin Bread. It’s a simple and tasty recipe that combines two
![To make peach oat muffins, you need a few key ingredients: - 1 cup rolled oats - 1 cup all-purpose flour - 1 1/2 cups ripe peaches, diced (about 2 medium peaches) These main ingredients create the base for soft and tasty muffins. The oats give a hearty texture, while the peaches add natural sweetness. You also need some extra items to enhance the flavor: - 1/2 cup brown sugar - 1/2 teaspoon baking soda - 1 teaspoon baking powder - 1/2 teaspoon salt - 1 teaspoon cinnamon - 1/2 cup milk (dairy or non-dairy) - 1/4 cup vegetable oil - 1 large egg These ingredients help the muffins rise and taste great. The spices and sugar balance the fruit's sweetness. If you want to add a twist, consider these optional items: - 1/4 cup chopped walnuts for added crunch - 1 teaspoon vanilla extract for a warm aroma Adding walnuts gives the muffins a nice crunch. Vanilla and cinnamon create a comforting taste that pairs well with peaches. For the full recipe, check the provided link. 1. First, preheat your oven to 350°F (175°C). Line your muffin tin with paper liners or grease it with cooking spray. This step helps prevent sticking. 2. In a mixing bowl, mix the dry ingredients. Combine rolled oats, flour, brown sugar, baking soda, baking powder, salt, and cinnamon. Whisk them until they blend well. 3. In a separate bowl, combine the wet ingredients. Whisk together milk, vegetable oil, egg, and vanilla extract. Make sure this mixture is smooth. 1. Next, pour the wet mixture into the dry mixture. Stir gently until just combined. Be careful not to overmix, as this can make the muffins tough. 2. Now, fold in the diced peaches. If you like, add chopped walnuts for extra crunch. Ensure the fruit and nuts are evenly mixed in. 1. Distribute the batter into the muffin tin. Fill each cup about 3/4 full. This allows room for the muffins to rise. 2. Bake the muffins for 18 to 20 minutes. Check for doneness by inserting a toothpick in the center. If it comes out clean, they are ready! 3. Let the muffins cool in the tin for 5 minutes. After that, transfer them to a wire rack to cool completely. For a full recipe, refer to the specific section above. To make your peach oat muffins soft, avoid overmixing the batter. Mix just until the dry and wet parts blend together. Overmixing makes the muffins tough. Use ripe peaches for the best flavor. They add sweetness and moisture. The riper the peach, the better the taste. If you need a gluten-free option, swap all-purpose flour for almond flour or gluten-free flour. Both work well in this recipe. For a dairy-free version, use almond milk or oat milk. These alternatives keep the muffins moist and tasty without dairy. To keep your muffins fresh, store them in an airtight container at room temperature. They’ll stay soft for about three days. For longer storage, freeze them. Wrap each muffin in plastic wrap and place them in a freezer bag. When it’s time to enjoy, reheat muffins in the microwave for about 15-20 seconds. This method keeps them soft and warm. For a crispier texture, pop them in the oven at 350°F for a few minutes. For the complete recipe, check out the [Full Recipe]. {{image_2}} You can easily change the flavor of your peach oat muffins. Adding spices can really boost their taste. Try using: - 1/2 teaspoon nutmeg for warmth. - 1 tablespoon of almond extract for a nutty touch. If you want to swap out peaches, consider using other fruits. Apples, blueberries, or even strawberries work well. Each fruit brings a unique flavor that makes the muffins special. Texture is important for a great muffin. Adding nuts can give your muffins a nice crunch. Chopped walnuts or pecans add a lovely bite. You can also fold in chocolate chips for a sweet surprise. Adjusting the oat-to-flour ratio can change the texture too. For a heartier muffin, use 1 1/2 cups of oats and 1/2 cup of flour. This will make the muffins dense and chewy. If you want a lighter muffin, reduce the sugar. You can use just 1/4 cup of brown sugar. This change still keeps the muffins sweet without being too much. For a vegan version, replace the egg with 1/4 cup of applesauce. Swap the milk for almond milk or oat milk. These simple swaps keep the muffins tasty and friendly for all diets. For the full recipe, check out the instructions above. Enjoy your baking! Store your peach oat muffins at room temperature. Keep them in an airtight container. This helps them stay soft. If you store them in the fridge, they may dry out. Room temperature muffins last about 3 days. Check for any signs of spoilage if they sit longer. If you want to keep muffins longer, freezing is a great option. Place muffins in a freezer-safe bag. Make sure to press out as much air as possible. They can last up to three months in the freezer. To reheat, remove them from the bag. Microwave them for about 30 seconds, or bake at 350°F for 10-15 minutes. Check muffins for mold or an off smell. If they feel dry or hard, toss them out. A fresh muffin should feel soft and smell sweet. Always trust your senses before eating. Yes, you can use frozen peaches. Just remember to thaw them first. Drain any extra juice to avoid a wet batter. Chopping them into small pieces helps them mix better. Using frozen peaches can be a great option when fresh ones are out of season. Their sweetness and flavor will still shine in your muffins. To reduce sweetness, cut back on the brown sugar. You can try using only 1/3 cup instead of 1/2 cup. Another option is to swap brown sugar for a sugar substitute. This keeps the taste good without too much sweetness. You can also add more spices like cinnamon to enhance flavor without adding sugar. These muffins pair well with many drinks. I suggest serving them with coffee or tea. A glass of cold milk is always a hit too. For toppings, try a dollop of yogurt or a spread of cream cheese. Fresh fruit on the side can add a nice touch as well. If you double the recipe, keep the same bake time. Check the muffins at 18 minutes. If they need more time, add a few extra minutes. Just ensure a toothpick comes out clean from the center. Doubling the recipe can be fun for gatherings or meal prep. For the full recipe, check the earlier sections. Peach oat muffins are a tasty treat that blends healthy oats and sweet peaches. You learned about key ingredients, step-by-step baking, and tips for perfect muffins. I shared some simple variations and storage secrets to keep them fresh. Remember, choose ripe peaches for the best flavor and don't rush the mixing. Enjoy your baking and don’t be afraid to try new ideas! Your homemade muffins can become a family favorite with just a little effort.](https://recipespursuit.com/wp-content/uploads/2025/06/59a2f0a3-ab8f-4289-9268-7a953de7cd7a.webp)
Are you ready to bake something delightful? These Peach Oat Muffins are soft, tasty, and packed with flavor! Using ripe
![To make these tasty zucchini feta muffins, you need the following ingredients: - 2 medium zucchinis, grated - 1 cup all-purpose flour - 1/2 cup whole wheat flour - 1 teaspoon baking powder - 1/2 teaspoon baking soda - 1/2 teaspoon salt - 1 teaspoon dried oregano - 1/2 teaspoon black pepper - 1/2 cup crumbled feta cheese - 2 large eggs - 1/3 cup olive oil - 1/2 cup Greek yogurt - 1 tablespoon fresh lemon juice - 1/4 cup fresh parsley, chopped (optional) These ingredients create a delicious blend of flavors and textures. You can enhance your muffins with some fun add-ins: - Chopped sun-dried tomatoes for a burst of flavor. - Sliced black olives to add a salty kick. - Chopped spinach for extra color and nutrients. - Cheddar cheese for a different cheesy taste. Feel free to mix and match based on what you enjoy. Here’s a quick look at the nutrition of key ingredients: - Zucchini: Low in calories, high in vitamins A and C. It adds moisture. - Feta Cheese: Provides calcium and protein. It adds a salty, tangy flavor. - Whole Wheat Flour: Offers more fiber than all-purpose flour, helping digestion. - Greek Yogurt: Adds creaminess and protein while keeping muffins moist. These ingredients not only taste good but also offer health benefits. For the full recipe, check [Full Recipe]. Before you start, gather all your ingredients. This makes cooking easy and fun. You need: - 2 medium zucchinis, grated - 1 cup all-purpose flour - 1/2 cup whole wheat flour - 1 teaspoon baking powder - 1/2 teaspoon baking soda - 1/2 teaspoon salt - 1 teaspoon dried oregano - 1/2 teaspoon black pepper - 1/2 cup crumbled feta cheese - 2 large eggs - 1/3 cup olive oil - 1/2 cup Greek yogurt - 1 tablespoon fresh lemon juice - 1/4 cup fresh parsley, chopped (optional) Make sure to wash the zucchinis. Grate them using a box grater. Set them aside in a bowl. This will add moisture and flavor to your muffins. Take a large bowl. Add the all-purpose flour, whole wheat flour, baking powder, baking soda, salt, oregano, and black pepper. Mix these dry ingredients well. This step is very important. It helps ensure that your muffins rise and taste great. If you skip this, your muffins may not turn out right. In another bowl, whisk together the eggs, olive oil, Greek yogurt, and lemon juice. Mix until it is smooth. Then, add the grated zucchini and parsley if you want. Stir to combine. Now, here comes the fun part! Gradually fold the wet mixture into the dry mixture. Use a spatula and be gentle. You want to mix it just enough. Do not overmix! This keeps the muffins fluffy. Finally, fold in the crumbled feta cheese. Make sure it is well spread in the batter. Now, you are ready for the next steps in the Full Recipe. Enjoy the process! To keep your muffins from being soggy, start by squeezing out excess moisture from the grated zucchini. Use a clean kitchen towel or cheesecloth to press down on the zucchini. This step is simple but very important. Also, do not overmix your batter. Just combine the ingredients until they are mixed. Overmixing can create a dense texture. To grate zucchini well, use a box grater or a food processor. A box grater gives you better control. Grate the zucchini on the larger holes. This size helps the zucchini cook well in the muffins. If you are using a food processor, choose the grating attachment for even results. Remember to wash the zucchini before grating to remove any dirt. Store your muffins in an airtight container at room temperature. They stay fresh for up to three days. If you need to keep them longer, you can freeze them. Wrap each muffin in plastic wrap and place them in a freezer bag. To reheat, thaw them in the fridge overnight. Then, warm them in the oven at 350°F for about 5-10 minutes. This method keeps them soft and tasty. For more details, check the Full Recipe. {{image_2}} You can make these muffins dairy-free or vegan. To replace the feta, try using nutritional yeast. It adds a cheesy flavor without dairy. For Greek yogurt, use a plant-based yogurt. Choose a brand with a creamy texture. Instead of eggs, use flax eggs. Mix 1 tablespoon of flaxseed meal with 2.5 tablespoons of water. Let it sit until it thickens. This swap works well in baking. Fresh herbs can change the taste of your muffins. Instead of parsley, try basil or dill. These herbs pair well with zucchini and feta. You can add thyme for a savory touch. If you want a bit of spice, add red pepper flakes. They give the muffins a kick without overwhelming the flavor. Boost the nutrition by adding more veggies. Finely grated carrots can add sweetness and color. Chopped spinach adds a healthy green touch. You could also add bell peppers for crunch. Just remember to keep the total moisture in check. Too much moisture can make your muffins soggy. Test your batter for the right consistency. Adjust by adding a little more flour if needed. For the full recipe, check out the details above. To keep your zucchini feta muffins fresh, store them in an airtight container. You can place parchment paper between layers to avoid sticking. If you need to stack them, this keeps the tops nice and clean. Keep the container at room temperature for short-term storage. When stored properly, zucchini feta muffins last for about three days at room temperature. If you want to keep them longer, consider refrigeration. In the fridge, they can last for up to a week. Just remember to let them cool completely before sealing them up. Freezing zucchini feta muffins is easy and a great way to save leftovers. First, let the muffins cool completely. Then, wrap each muffin in plastic wrap. Place them in a freezer-safe bag or container. They can last in the freezer for about three months. When you're ready to enjoy them, take them out and thaw them in the fridge overnight. You can also microwave them for about 30 seconds to a minute. This makes for a quick snack or breakfast option. For more details on making these delightful muffins, refer to the Full Recipe. Yes, you can use other cheeses. Try goat cheese for a tangy kick. Cheddar adds a rich flavor, while mozzarella gives a gooey texture. Each cheese will change the muffin's taste. Experiment to find your favorite! Zucchini feta muffins are great warm or at room temp. Serve them with a dollop of Greek yogurt for creaminess. You can add a sprinkle of herbs on top for color. Pair them with a fresh salad for a light meal. They also work well as a snack at any time! Yes, zucchini feta muffins are quite healthy. They have fiber from zucchini and whole wheat flour. The feta cheese adds protein, and olive oil provides healthy fats. Using Greek yogurt lowers the fat content while keeping them moist. Enjoy them as a tasty, nutritious treat! You can find the full recipe [here](#). Zucchini feta muffins blend tasty ingredients for a healthy snack. We discussed the key ingredients, step-by-step instructions, and tips to avoid sogginess. You learned about cool variations and how to store your muffins well. Overall, these muffins offer both flavor and nutrition. Enjoy these delicious treats, and don’t hesitate to get creative with your add-ins. Happy baking!](https://recipespursuit.com/wp-content/uploads/2025/06/3656566b-ffc5-45b1-ae24-1b15eaf29365.webp)
If you’re craving a simple and tasty treat, zucchini feta muffins are the answer! These muffins pack a punch of
![- 4 ripe peaches, pitted and sliced - 2 tablespoons brown sugar - 1 tablespoon lemon juice - 1 cup heavy whipping cream - 2 cups all-purpose flour - 2 tablespoons baking powder - 1 tablespoon granulated sugar - 1/2 teaspoon salt - 1/2 cup unsalted butter, cold and cubed - 3/4 cup heavy cream, plus extra for brushing - 2 tablespoons powdered sugar - Fresh mint leaves for garnish For this peach shortcake, I focus on using ripe peaches. They give the best flavor and sweetness. You will need four peaches, so pick the ones that feel slightly soft when you press them. The brown sugar adds a nice caramel touch. A little lemon juice helps to brighten the sweetness of the fruit. In the dry section, we have basic ingredients. The all-purpose flour and baking powder help the shortcake rise well. The sugar adds a hint of sweetness, while the salt balances the flavors. For the additional ingredients, keep your butter cold. It helps make the shortcake flaky. The heavy cream is for the dough and the whipped topping. The powdered sugar sweetens the whipped cream. Finally, fresh mint leaves add a pop of color and flavor. You can check the [Full Recipe] for all steps and tips. To start, grab your ripe peaches. Slice them and place them in a bowl. Add 2 tablespoons of brown sugar and 1 tablespoon of lemon juice. Toss the peaches gently to coat them well. This step helps to bring out their natural sweetness. Let the peaches sit for about 15 minutes. This wait time allows the peaches to release their tasty juices. Next, let’s make the dough. In a clean bowl, mix together 2 cups of all-purpose flour, 2 tablespoons of baking powder, 1 tablespoon of granulated sugar, and 1/2 teaspoon of salt. Use a whisk to combine these dry ingredients. Now, we need to cut in 1/2 cup of cold, cubed unsalted butter. You can use a pastry cutter or your fingers for this. Aim for a crumbly texture. Once that's done, make a well in the center, and pour in 3/4 cup of heavy cream and 1 teaspoon of vanilla extract. Stir gently until the dough forms. Don’t overmix; we want it light and fluffy. Now it's time to shape the shortcakes. Turn the dough onto a lightly floured surface. Pat it into a rectangle about 1 inch thick. Use a biscuit cutter or glass to cut out rounds. Place these rounds on a baking sheet lined with parchment paper. Brush the tops with a bit of extra heavy cream. This will help them turn golden in the oven. Bake for 10-12 minutes at 425°F (220°C) until they are lightly golden. Once baked, let them cool slightly before serving. For the full recipe, check the earlier section. When picking peaches, look for firm ones that feel slightly soft. A ripe peach should have a sweet smell. This scent tells you the fruit is ready to eat. If the peaches are hard, they need more time to ripen. Leave them at room temperature for a few days. Mix the dough just enough. Overmixing will make your shortcake tough. You want it to be light and fluffy. For a golden finish, brush the tops with heavy cream before baking. This step adds flavor and an appealing shine. Layer your shortcake with fresh peaches and whipped cream. This combination creates a delightful treat. For a fresh twist, add mint leaves on top. They add color and a bright taste that enhances the dessert. Enjoy this peach shortcake delight with friends and family for a special touch. For the complete recipe, check out the Full Recipe. {{image_2}} You can make this dessert gluten-free by switching out all-purpose flour for gluten-free flour. Many brands offer blends that work well. When you do this, pay close attention to the liquid. Gluten-free flour can absorb more moisture. If your dough seems dry, add a bit more cream until it feels right. To make your whipped cream pop, try adding a touch of vanilla bean or almond extract. Both options add a nice twist to the flavor. You can also mix in different berries like strawberries or blueberries for layering. This not only adds flavor but also makes your dessert look beautiful. For a healthier twist, consider using Greek yogurt instead of whipped cream. It adds a nice tang that pairs well with peaches. If you want something richer, try adding chocolate shavings on top. This gives your dessert a delicious depth and a fun surprise in every bite. For the full recipe, check out the main article. Store leftovers in an airtight container. This keeps your dessert fresh. It tastes best within 2-3 days. After that, the peaches may lose their flavor. The shortcakes also lose their nice texture. You can freeze shortcakes without toppings. This helps them stay fresh. Wrap each shortcake tightly in plastic wrap. Place them in a freezer bag afterward. To reheat, let them thaw in the fridge overnight. Then, warm them in the oven at 350°F for about 10 minutes. To keep your dessert perfect, store the peach mixture separately. This helps retain the texture of the peaches. Assemble shortcake pieces just before serving. This way, the shortcakes stay fluffy and delicious. Enjoy the best part of Peach Shortcake Delight with every bite! To make Peach Shortcake from scratch, use the ingredients provided in the Full Recipe. Start by preheating your oven to 425°F (220°C). Mix sliced peaches with brown sugar and lemon juice. Let them sit for 15 minutes. In another bowl, whisk flour, baking powder, granulated sugar, and salt. Cut in cold butter until it looks like coarse crumbs. Add heavy cream and vanilla, stirring gently until just combined. Pat the dough into a rectangle, then cut out rounds. Bake for 10-12 minutes until golden. Cool slightly, slice, and assemble with peaches and whipped cream. Yes, you can use canned peaches! If you choose canned, look for peaches packed in juice or water. Drain them well to prevent sogginess. You may want to reduce the brown sugar since canned peaches are often sweeter. Add a little lemon juice to brighten the flavor. This will help mimic the fresh taste that’s so important in this dessert. If you need a substitute for heavy cream, there are several options. You can use half-and-half or whole milk mixed with butter. For a dairy-free choice, use coconut cream or almond milk with a thickener like cornstarch. Each option will give a different flavor and texture, so choose based on what you like best. This article covered the essential steps to make delicious peach shortcake. We talked about fresh and dry ingredients, step-by-step instructions, and helpful tips. I shared variations and storage advice to keep your shortcake fresh. Remember, ripe peaches and proper mixing are crucial for the best results. Enjoy crafting this sweet treat that can delight family and friends. With practice, you’ll perfect your shortcake skills!](https://recipespursuit.com/wp-content/uploads/2025/06/2eca9914-2ef2-4dc9-ae2a-fe1b31db0f1c.webp)
Are you craving a simple and tasty dessert that showcases the juicy goodness of fresh peaches? Look no further! My
![- 2 medium zucchinis, grated - 1 cup sweet corn kernels (fresh or frozen) - 1/2 cup all-purpose flour - 1/2 cup cornmeal The main ingredients are key to making these zucchini corn cakes tasty. Zucchini adds moisture and flavor. It is also low in calories. Sweet corn gives a sweet crunch. Flour and cornmeal help bind the mix. Together, they create a delicious cake. - 1/4 cup green onions, finely chopped - 1/4 cup feta cheese, crumbled (optional) - Seasoning options: salt, pepper, garlic powder, smoked paprika You can add optional ingredients for extra flavor. Green onions provide a mild onion taste. Feta cheese adds a creamy, tangy kick. You can also play with spices. Garlic powder and smoked paprika give a warm, smoky flavor. - Box grater - Non-stick skillet - Mixing bowls Having the right tools makes cooking easier. A box grater helps you grate the zucchini quickly. A non-stick skillet prevents sticking and makes flipping easy. Mixing bowls allow you to combine all the ingredients smoothly. For the full details, check the Full Recipe. Start by grating the zucchinis using a box grater. This method helps break them down nicely. Once you have a bowl full of grated zucchini, place it in a clean kitchen towel. Squeeze out the extra moisture. This step is key! Removing moisture helps the cakes stay crispy. If you skip this, the cakes may turn soggy. In a large mixing bowl, combine the grated zucchini, sweet corn, flour, cornmeal, and chopped green onions. Mix them well. In another bowl, beat the eggs and pour them into the vegetable mix. Stir until everything is blended. Now, add baking powder, garlic powder, and smoked paprika. Don’t forget to add salt and pepper to taste. If you want a creamy touch, fold in the crumbled feta cheese. This will give your cakes a tasty kick. Heat a non-stick skillet over medium heat. Add a drizzle of olive oil to the pan. Once the oil is hot, drop spoonfuls of the batter onto the skillet. Flatten them slightly with the back of the spoon. Cook for about 3-4 minutes on each side. Look for that golden brown color and crispy edges. When they’re done, remove them from the skillet and place them on paper towels to drain any excess oil. Repeat this with the rest of the batter, adding more olive oil as needed. Enjoy these tasty treats! For the full recipe, refer to the instructions above. To get crispy zucchini corn cakes, moisture removal is key. Zucchini holds a lot of water. After grating the zucchini, place it in a clean kitchen towel. Squeeze it firmly to remove excess liquid. This step helps your cakes brown nicely. If you skip this step, your cakes may turn soggy. Adding spices and herbs can boost the taste of your cakes. I love using garlic powder and smoked paprika. These spices give a warm and savory flavor. You can also try adding fresh herbs like parsley or cilantro. Just chop them finely and mix them in. This simple step makes a big difference in flavor. Pair your zucchini corn cakes with tasty dips or sides. A dollop of sour cream or Greek yogurt works great. You can also serve them with salsa for a zesty kick. If you want something lighter, a fresh salad makes a good match. These cakes can be a fun snack or a light meal. To see the full recipe, check out the [Full Recipe]. {{image_2}} If you want to make these zucchini corn cakes gluten-free, simply swap out the all-purpose flour. You can use gluten-free all-purpose flour or almond flour instead. Both options work well and give great texture. You can add other veggies to these cakes for more flavor and nutrition. Try grated carrots or chopped bell peppers. Spinach also works nicely here. Just make sure to squeeze out any extra moisture, especially if you use leafy greens. This keeps the cakes from becoming soggy and helps them hold their shape. Experimenting with spices can take your zucchini corn cakes to the next level. You might try adding cumin for a warm, earthy taste. If you love heat, a pinch of cayenne pepper or chili powder will do the trick. Fresh herbs, like cilantro or parsley, can brighten up the flavor. Don't be afraid to get creative! Each twist adds a unique touch and makes the dish your own. For the full details, check out the Full Recipe. To store leftovers, let the zucchini corn cakes cool completely. Place them in an airtight container. You can keep them in the fridge for up to 3 days. If you want to keep them fresh longer, separate layers with parchment paper. This helps prevent sticking. For freezing, make sure the cakes are fully cool. Wrap each cake in plastic wrap. Then, place them in a freezer-safe bag. You can freeze them for up to 2 months. When you want to eat them, just take out the number you need. To reheat, you can use the oven or a skillet. If using the oven, preheat to 350°F (175°C). Place the cakes on a baking sheet for about 10 minutes. For the skillet, heat it over medium. Add a small amount of oil and cook each side for about 2-3 minutes. This keeps the cakes crispy and tasty. Enjoy your delicious zucchini corn cakes! You can find the full recipe above. You can use peas or diced bell peppers. Both add nice flavor and color. Peas give a sweet taste, while bell peppers add crunch. If you're looking for a different texture, try using grated carrots. They work well with zucchini. Just adjust the amount in the recipe to keep the balance right. Yes, you can bake them! Preheat your oven to 400°F (200°C). Line a baking sheet with parchment paper. Drop spoonfuls of the batter onto the sheet. Flatten them just like in the frying method. Bake for 20-25 minutes, flipping halfway. Look for a golden color on both sides. This method cuts down on oil but still gives a tasty result. Look for a golden brown color on both sides. The edges should be crispy. You can also poke a cake with a fork. If it comes out clean, they are ready. If they feel soft or wet, cook them a bit longer. Enjoy them fresh for the best flavor! For the full recipe, check out the Zesty Zucchini Corn Cakes section. Zucchini corn cakes are easy and fun to make. We covered all the important steps, from gathering ingredients to cooking. You learned about choosing flavors and keeping them crispy. Remember, you can swap ingredients or try different spices. Proper storage keeps your cakes fresh for later. Now, you are ready to enjoy these tasty cakes any time. Dive into the kitchen and make your own delicious zucchini corn cakes!](https://recipespursuit.com/wp-content/uploads/2025/06/66bd379b-2fa9-4445-b34e-7be51fcc047b.webp)
Looking for a snack that’s both tasty and easy to make? Zucchini corn cakes are the perfect choice! Packed with

Looking for a simple and healthy treat to brighten your day? Peach Chia Pudding is the perfect solution! Packed with
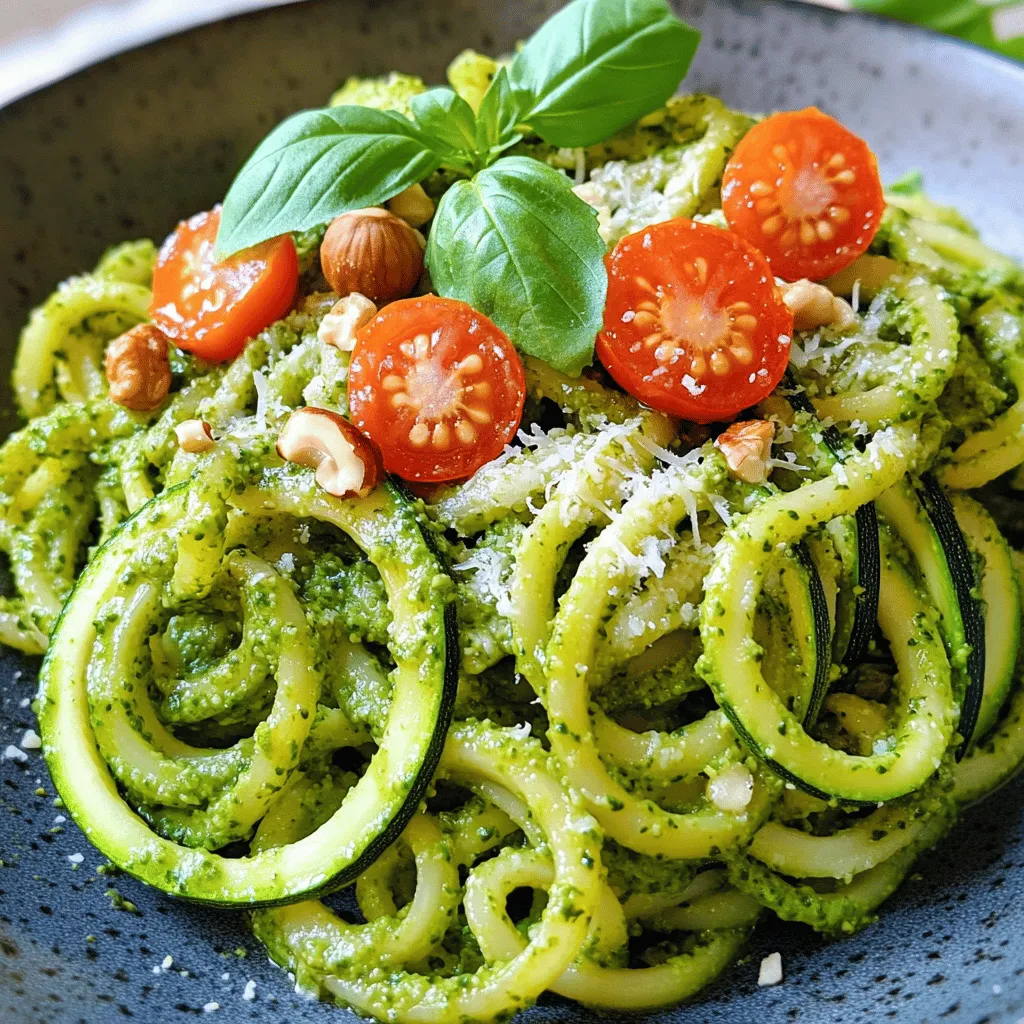
Are you ready to elevate your pasta game? Zucchini Pesto Pasta is a fresh and flavorful delight that’s easy to
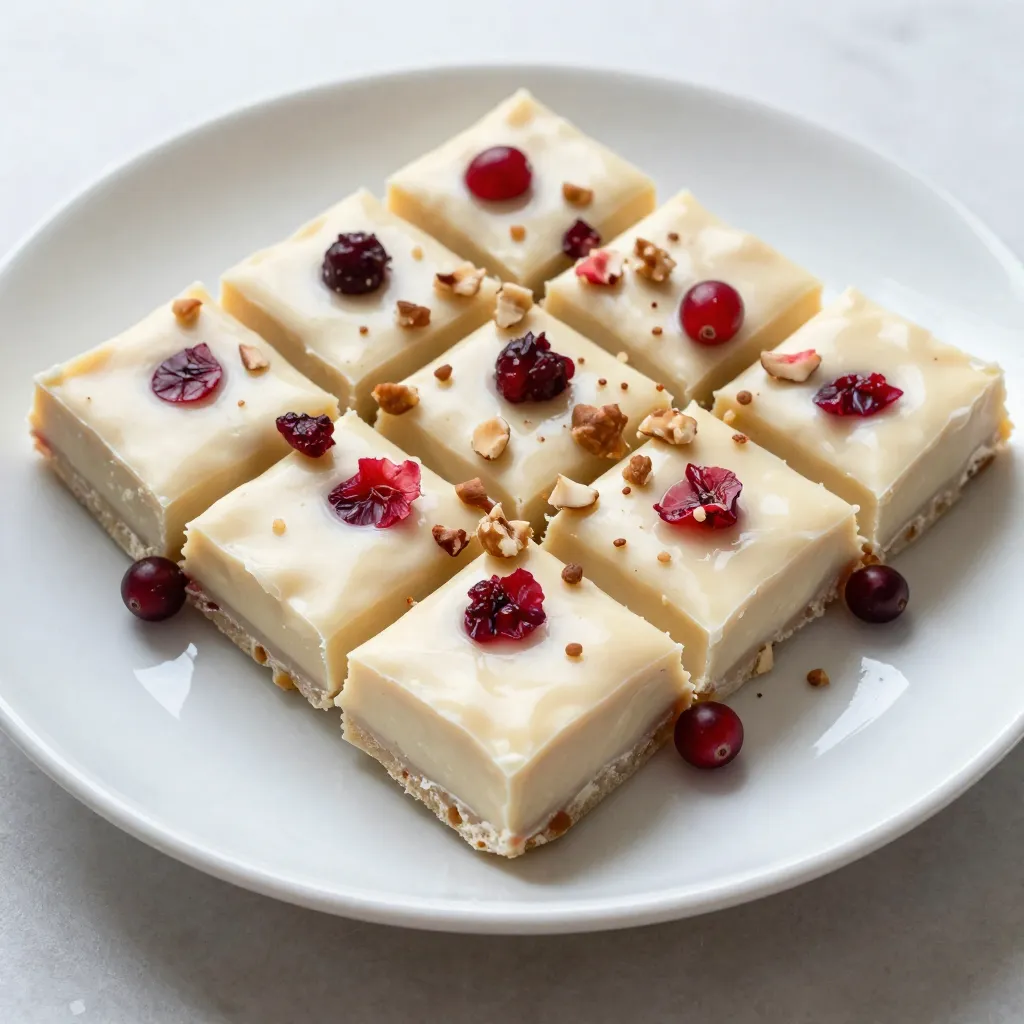
Are you craving a sweet treat that’s both easy to make and incredibly delicious? Look no further! In this post,
![To make baked feta pasta, you need simple ingredients that pack a punch. Here’s what you’ll need: - 200g pasta of your choice (penne or fusilli work well) - 200g block of feta cheese - 1 cup cherry tomatoes, halved - 1/2 cup fresh spinach - 1/4 cup black olives, pitted and sliced - 3 cloves garlic, minced - 3 tablespoons olive oil - 1 teaspoon dried oregano - Salt and pepper to taste - Fresh basil leaves for garnish - Optional: Red pepper flakes for some heat I love using fresh ingredients. The cherry tomatoes burst with flavor, and the feta melts into a creamy sauce that coats the pasta beautifully. Fresh spinach adds a nice touch, both in taste and color. You can easily swap out some ingredients based on what you have or prefer. Here are some ideas: - Alternative cheese options: If you want to try something different, use goat cheese or ricotta. They both give a nice creaminess. - Vegetable swaps: You can add bell peppers, zucchini, or even artichokes. These add more color and flavor. - Gluten-free pasta suggestions: For a gluten-free version, use rice pasta or chickpea pasta. They work just as well! Feel free to experiment! Cooking should be fun, and personal touches make the dish uniquely yours. For the full recipe, check the [Full Recipe]. 1. Preheat the oven properly: Set your oven to 400°F (200°C). This heat helps the feta and tomatoes cook well. 2. Preparing the baking dish with vegetables: Grab a large baking dish. Add 1 cup of halved cherry tomatoes, 3 minced garlic cloves, 1/4 cup of sliced black olives, and 1/2 cup of fresh spinach. Drizzle 2 tablespoons of olive oil over the mix. Season with salt, pepper, and 1 teaspoon of dried oregano. Stir everything together until coated. 1. Tips for al dente pasta: Boil water in a pot. Add 200g of your favorite pasta, like penne or fusilli. Cook it according to the package instructions. Al dente means the pasta should be firm to the bite. 2. Timing with baking instructions: While the feta and veggies bake, cook the pasta. Keep an eye on the oven. The feta and vegetables need about 25-30 minutes to bake. This timing helps everything finish together. 1. How to mix the baked feta with the pasta: Once the baking time is up, take the dish out of the oven. Use a fork to mash the feta cheese. Mix it with the roasted tomatoes and spinach. This creates a creamy sauce. 2. Importance of seasoning adjustments: After mixing in the cooked pasta, taste the dish. You might need more salt or pepper. Adjust to your liking, and serve it hot. Enjoy this simple dish with fresh basil leaves on top for a pop of flavor. For the full details on making this delicious meal, check the Full Recipe. To ensure feta melts perfectly, use a block of feta cheese. Crumbled feta does not melt the same way. Place the block in the center of your veggie mix. Drizzle with olive oil to help it melt evenly. Bake at 400°F for 25-30 minutes. You want the edges to turn golden brown. For roasting tomatoes, pick ripe cherry tomatoes. Halve them for more surface area. Toss them with garlic, olive oil, and seasonings. This mix helps them blister and caramelize beautifully. The sweet flavor of roasted tomatoes pairs well with the creamy feta. To boost flavor, add herbs and spices. Fresh basil or parsley brightens the dish. You can also try thyme or rosemary for a different taste. Red pepper flakes add a nice kick. Sprinkle some on top before serving for extra heat. If you like it spicy, consider adding sliced jalapeños or a dash of hot sauce. Mix these into the veggie blend before baking. This way, the heat infuses into the sauce as it cooks. For serving, use a large bowl or platter. This makes it easier for guests to serve themselves. Top with fresh basil leaves for a pop of color. When plating for social media, think about height and color. Use contrasting bowls or plates to make the dish stand out. A sprinkle of red pepper flakes adds visual interest. Don’t forget to capture that creamy sauce as you mix it in. This makes for a mouthwatering photo! You can find the full recipe for this delicious dish to create your own masterpiece. {{image_2}} If you want a plant-based version, try using plant-based cheese. It melts nicely and gives a good flavor. Look for brands that mimic feta. You can also add legumes like chickpeas or lentils to boost protein. They mix well and add a nice texture. Want to make it a full meal in one dish? Combine proteins like chicken or shrimp with the pasta. Just add them to the baking dish with the other ingredients. The meat cooks alongside the veggies and cheese. This method keeps clean-up easy and your dinner flavorful! Adjust the dish with seasonal vegetables for fresh flavors. In summer, add zucchini or bell peppers for crunch. In winter, consider hearty veggies like broccoli or kale. These changes keep the recipe exciting and help you use what’s in season. To keep your baked feta pasta fresh, store leftovers safely. First, let the dish cool down. Then, put it in an airtight container. This helps keep the pasta from drying out. You can store it in the fridge for up to three days. If you want to save space, divide it into smaller portions. This also makes it easy to reheat later. The best way to reheat baked feta pasta is in the oven. Preheat the oven to 350°F (175°C). Put the pasta in an oven-safe dish. Cover it with foil to keep it moist. Heat for about 15-20 minutes. If you prefer, you can also use the microwave. Heat it in short bursts, stirring in between. This helps heat it evenly and avoids overcooked pasta. Yes, you can freeze baked feta pasta! To do this, let it cool completely. Then, place it in a freezer-safe container. Make sure to leave some space at the top, as the pasta may expand. It can last up to three months in the freezer. To thaw, move it to the fridge overnight. You can reheat it in the oven or microwave as mentioned before. Enjoy your delicious dish again with ease! For baked feta pasta, I recommend using short shapes like penne or fusilli. These shapes hold sauces well and mix nicely with the baked feta and veggies. You can also try shells or farfalle. They add fun shapes and textures to your dish. Just make sure you cook the pasta until it’s al dente. This way, it stays firm when mixed with the creamy sauce. Yes, you can use other cheeses. Goat cheese is a great choice. It has a similar tangy taste and creamy texture. Cream cheese can also work, making the sauce extra smooth. If you want a nutty flavor, try parmesan or pecorino. Just remember, different cheeses change the taste, so choose one you love! To add spice, use red pepper flakes. Just sprinkle them over the feta before baking. For more heat, add sliced jalapeños or crushed chili peppers to the dish. You can also use a spicy olive oil to drizzle over the top. These simple tweaks bring a nice kick to your baked feta pasta. This article covered how to make delicious baked feta pasta. We explored ingredients, preparation, cooking tips, and variations. You learned about substitutes for cheese and pasta, along with storage methods. Remember, you can customize this dish to fit your taste and needs. Whether you choose a vegan option or add protein, the possibilities are endless. Enjoy creating your unique version and share it with loved ones for a meal that delights!](https://recipespursuit.com/wp-content/uploads/2025/06/cd3a7ee9-9f6d-44e2-8dd0-8ed0376b45f5.webp)
Are you ready to elevate your pasta game? Baked Feta Pasta is simple and bursting with flavor! This recipe is
![- 1 cup rolled oats - 1/2 cup natural peanut butter - 1/4 cup honey or maple syrup - 1/4 cup almond flour - 1/4 cup mini chocolate chips - 1/4 teaspoon vanilla extract - A pinch of salt To make these no bake peanut butter oat bars, you need simple ingredients. First, you need rolled oats. They give the bars a nice chewy base. Then, you will need natural peanut butter. This adds creaminess and flavor. Honey or maple syrup acts as a sweetener and binder. Next is almond flour, which adds a nutty taste and helps with texture. Mini chocolate chips make everything better, adding sweetness and fun. A bit of vanilla extract enhances the flavor. Lastly, a pinch of salt balances the sweetness. - Dried fruits - Seeds (like chia or flaxseed) - Nut butters variations If you want to mix things up, consider some optional add-ins. Dried fruits, like raisins or cranberries, can add a chewy texture. Seeds, such as chia or flaxseed, give a boost of nutrition. You can also try different nut butters. Almond or cashew butter can change the flavor profile. These tweaks make your bars unique and tasty. For the full recipe, check out the full recipe link. To start, gather all your ingredients. You need rolled oats, almond flour, and a pinch of salt. Mix these dry ingredients in a large bowl. Stir them well until they blend nicely. This step ensures the oats and flour combine evenly. Next, take a microwave-safe bowl. Combine the peanut butter and honey. Heat this mixture for about 20 to 30 seconds. The goal is to warm it just enough to make mixing easier. Stir until it becomes smooth. This step helps the peanut butter and honey mix well together. Now, add the vanilla extract to your peanut butter mixture. Stir it in to combine. Once this is done, pour the peanut butter mix over the oat mixture. Use a spatula to combine everything. Make sure the oats are fully coated with the peanut butter mix. After that, gently fold in the chocolate chips. This step adds a nice sweet touch. You can use mini chocolate chips or dark chocolate chunks. Both work great in this recipe. Next, line an 8x8-inch baking dish with parchment paper. Leave some overhanging on the sides. This makes it easier to remove the bars later. Transfer the mixture to the lined dish. Use your hands or a spatula to press it down firmly. It should form an even layer. Finally, refrigerate the bars for at least 1 to 2 hours. This time allows them to set properly. Once firm, lift the bars out using the parchment paper edges. Cut them into squares or rectangles as you like. For the full recipe, check the details above. To ensure your bars hold together, press the mixture firmly into the dish. A good, even layer helps them stay intact. If you want to adjust sweetness, add more honey or maple syrup in small amounts. Always taste as you mix to find your best level of sweetness. Using parchment paper is key. Line your baking dish with it, leaving some paper to hang over the edges. This helps you lift the bars out later. For better sets, let the bars cool in the fridge for at least two hours. This makes them firm and easy to cut. For presentation, stack the bars on a plate and drizzle extra peanut butter or melted chocolate on top. This makes them look great and taste even better. Pair these bars with milk or your favorite plant-based drink for a perfect snack. {{image_2}} You can make these bars even better with some fun swaps. Try using almond butter instead of peanut butter. Almond butter gives a nice nutty flavor and adds healthy fats. You can also add coconut flakes for a tropical twist. They bring a sweet taste and chewy texture. This creates a delicious combo you won’t want to miss. Want to spice things up? Add some cinnamon or nutmeg to your mix. A little bit of spice can make your bars taste amazing. If you love chocolate, drizzle some melted chocolate or caramel on top. This extra layer adds a rich flavor to each bite. It makes your no bake peanut butter oat bars feel like a treat. If you want a vegan treat, use maple syrup instead of honey. Maple syrup works great and keeps the bars sweet. You can also try using sunflower seed butter. This is a fantastic nut-free option. It binds the ingredients well, just like peanut butter. These options let you enjoy tasty bars, no matter your diet. For the full recipe, check out the [Full Recipe]. To keep your No Bake Peanut Butter Oat Bars fresh, use an airtight container. Glass or plastic containers work well. Make sure they seal tightly to prevent air from getting in. Store them in the fridge for the best taste and texture. A cool environment keeps the bars firm and tasty. You can freeze these bars for longer shelf life. Cut them into squares first, then layer them in a freezer-safe container. Place parchment paper between layers. This stops them from sticking together. To thaw, take out a bar and let it sit at room temperature. You can also heat it in the microwave for a few seconds if you want a warm treat. In the fridge, these bars last about one week. If you freeze them, they can last up to three months. Watch for signs of spoilage, like a change in smell or color. If they look dry or crumbly, it’s best to toss them. Enjoy these tasty bars while they’re fresh! Yes, you can use quick oats. They cook faster and absorb moisture more quickly. This can lead to a softer texture. Rolled oats, however, give a chewier bite. If you like a firmer bar, stick with rolled oats. Quick oats can make the bars more crumbly. You can use maple syrup instead of honey. It adds sweetness and is vegan. Other options include agave syrup or brown rice syrup. Each option changes the flavor slightly. Maple syrup gives a rich taste. Experiment to find your favorite! To make these bars nut-free, use sunflower seed butter. It has a similar creamy texture. You can also try soy nut butter. Both options provide a great flavor without nuts. Just be mindful of allergies when serving. In this post, we explored how to make no-bake peanut butter oat bars. We covered the essential ingredients you need and optional add-ins for variety. I laid out step-by-step instructions, tips for perfecting your bars, and ways to store them. Remember, these bars are versatile and can fit many diets. You can be creative with flavors and ingredients. Enjoy making your easy, tasty treats!](https://recipespursuit.com/wp-content/uploads/2025/06/8a7fcc37-1a15-4e86-9df5-6e4fd557a510.webp)
Are you craving a sweet, no-bake treat that’s easy to make? Look no further! My No Bake Peanut Butter Oat
