Skip to content
DisclaimerTerms Of UseGDPR PolicyCookie Policy

Recipes Pursuit

  • Home
  • Drinks
  • Appetizers
  • Dinner
  • Dessert
  • About
  • Contact
  • Privacy Policy
DisclaimerTerms Of UseGDPR PolicyCookie Policy

NO-ING-IMG

- Ripe mangoes: Choose two ripe mangoes. They should be soft to the touch. A sweet, juicy mango brings the best flavor. - Fresh herbs and spices: Use fresh cilantro for a bright taste. Add ground cumin for warmth and depth. - Optional ingredients for variation: You can add a diced avocado for creaminess. If you like it hot, include more jalapeño. These ingredients create a colorful and tasty salsa. Each component adds its own flair. You can adjust the heat and flavor to suit your taste. For the full recipe, check out the details above. Enjoy making this vibrant dish! 1. Dicing and chopping instructions To start, grab your ripe mangoes. Slice them in half and remove the pit. Then, score the flesh in a grid pattern. Use a spoon to scoop out the cubes. Next, finely chop the red onion and dice the red bell pepper. Slice the jalapeño in half, remove the seeds, and mince it finely. 2. Mixing the ingredients In a medium-sized mixing bowl, combine the diced mangoes, chopped onion, diced bell pepper, and minced jalapeño. Add in the chopped cilantro for a fresh taste. Squeeze the juice of two limes over the mix to add brightness. Drizzle in the olive oil and sprinkle the ground cumin. Season with salt to taste. 3. Letting the flavors meld Gently toss everything together until it’s well mixed. Cover the bowl with plastic wrap. Place it in the fridge for at least 30 minutes. This lets all the flavors blend together. The longer it sits, the better it tastes. Enjoy this fresh and zesty dish! For the full recipe, check out the details above. To make your spicy mango salsa pop, consider these easy tips. First, you can swap out mangoes with peaches or nectarines. This gives you a sweet twist. If you want more heat, add another jalapeño or a dash of hot sauce. Remember to taste as you go! Choosing the right mango is key. Look for ripe ones that feel soft but not mushy. They should smell sweet near the stem. The best mangoes make your salsa burst with flavor. Serving your salsa in a colorful bowl makes it more inviting. Pair it with crispy tortilla chips for a fun snack. You can also serve it on fish tacos or grilled chicken. For garnishing, sprinkle some extra cilantro on top. Add lime wedges for a splash of color. This makes your dish look fresh and appetizing. Check out the Full Recipe for more ideas on how to serve this tasty salsa! {{image_2}} You can add fun flavors to your spicy mango salsa. Try adding pineapple or kiwi for a bright taste. These fruits pair well with mango. They bring a sweet and tart zing. Chop them into small pieces and mix them in with the mango. You can also experiment with different peppers. Use a green bell pepper for a milder taste. If you like more heat, try using a serrano pepper. Each pepper adds its own unique kick. Want a creamier salsa? Incorporate avocado for a rich texture. Dice the avocado and gently fold it into the salsa. This makes the salsa smooth and delightful. Another creamy option is using Greek yogurt. It adds a nice tang and helps balance the spice. Stir a few spoonfuls into the salsa for a luscious touch. These variations will make your spicy mango salsa unique and delicious. For the full recipe, check out the Zesty Spicy Mango Salsa. Enjoy trying these ideas! To keep your spicy mango salsa fresh, store it in an airtight container. Make sure it is sealed tightly. Place it in the fridge right after making it. This keeps the flavors bright and tasty. If you want to freeze it, use a freezer-safe container. Leave some space at the top for expansion. You can freeze the salsa for up to three months. Just remember that the texture may change after thawing. In the fridge, your spicy mango salsa lasts about three to five days. Always check for freshness before serving. If it looks slimy or smells off, it’s time to toss it out. Signs of spoilage include: - Change in color - Unpleasant smell - Molding on the surface Keeping an eye on these signs helps you enjoy your salsa at its best. For the full recipe, check back to make sure you have all the ingredients ready for your next batch! Can I make spicy mango salsa ahead of time? Yes, you can make spicy mango salsa ahead of time. It actually tastes better after sitting for a while. Just cover it and store it in the fridge. Let it chill for at least 30 minutes. This gives the flavors time to mix. What can I serve with spicy mango salsa? You can serve spicy mango salsa with many dishes. It pairs well with grilled chicken or fish. It also goes great with tacos or burritos. Don't forget tortilla chips for dipping. You can even add it to salads for a fresh twist. How can I adjust the spiciness? To adjust the spiciness, you can change the jalapeño amount. If you want it milder, use less jalapeño or remove the seeds. For more heat, add more minced jalapeño or use a hotter pepper. Taste as you go to find your perfect level. Caloric content per serving Each serving of spicy mango salsa has about 80 calories. This makes it a healthy choice for snacks or meals. Breakdown of ingredients and nutritional benefits - Mangoes: Full of vitamins A and C, they help your immune system. - Red onion: Good for heart health and adds flavor. - Red bell pepper: High in antioxidants and vitamin C. - Jalapeño: Contains capsaicin, which may boost metabolism. - Cilantro: Offers vitamins and adds freshness. - Lime juice: Provides vitamin C and enhances flavor. - Olive oil: A healthy fat that’s good for your heart. - Ground cumin: Adds flavor and may aid digestion. This salsa not only tastes great but also brings many health benefits to your meal. For the complete recipe, check out the Full Recipe. Spicy mango salsa is easy to make and fun to share. We explored key ingredients, like ripe mangoes and fresh herbs, to build great flavor. You can add your touch with variations, like tropical fruits or creamy options. Remember to store it properly to enjoy it longer. With the right tips, your salsa will shine at any gathering. Get ready to impress your friends with your salsa skills. You now have the tools to make a fresh, tasty salsa that everyone will love. Enjoy the process and the flavors!

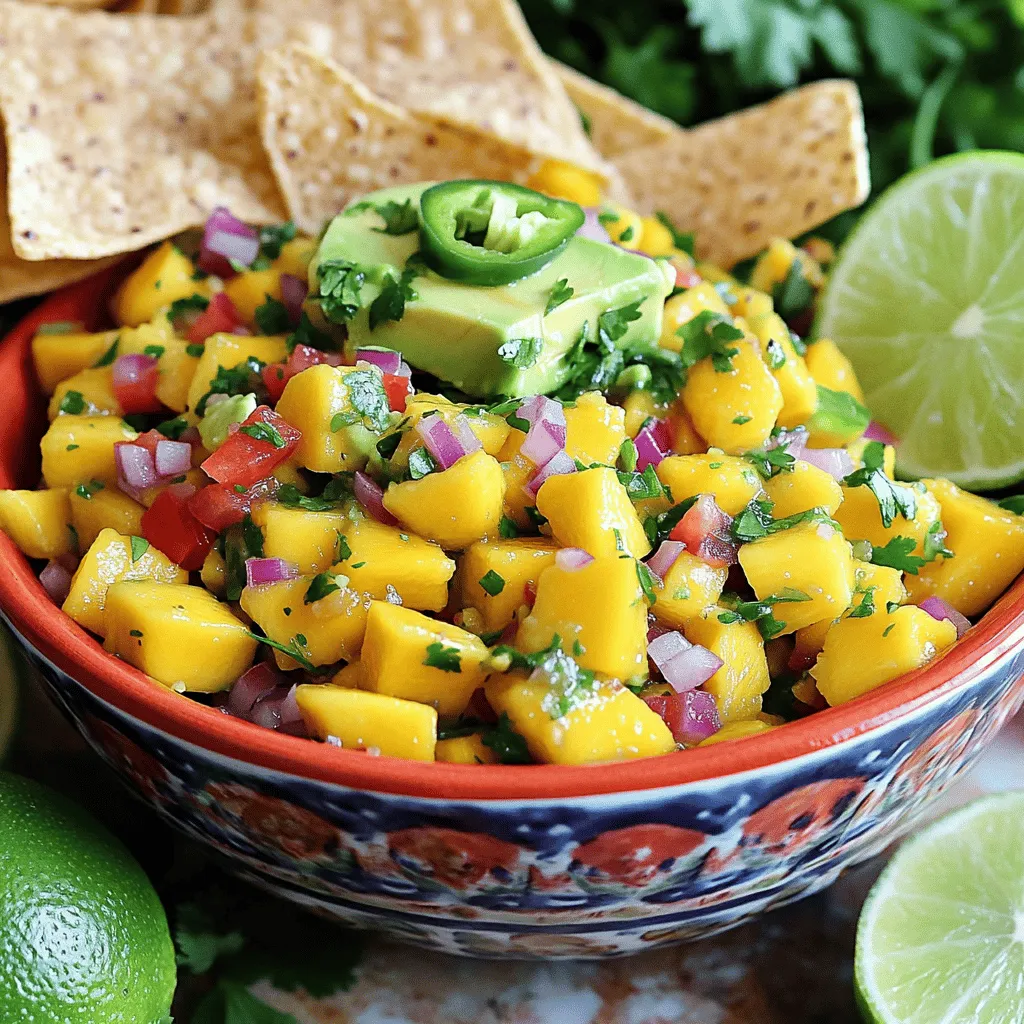
Spicy Mango Salsa Fresh and Flavorful Recipe Guide

Are you ready to elevate your next meal with a burst of flavor? In this guide, I’ll show you how

To make a great garlic herb roasted chicken, gather these key ingredients: - 1 whole chicken (about 4-5 lb) - 4 tablespoons olive oil - 6 cloves garlic, minced - 2 teaspoons dried thyme - 2 teaspoons dried rosemary - 2 teaspoons dried oregano - 1 lemon, cut into wedges - 1 onion, quartered - Salt and freshly ground black pepper to taste - Fresh herbs (like parsley or thyme) for garnish These ingredients create a tasty blend of flavors that make the chicken juicy and aromatic. You can add more flavor with these optional ingredients: - 1 teaspoon smoked paprika - 1 tablespoon Dijon mustard - 1 tablespoon honey Each of these items brings a unique twist. Smoked paprika adds warmth, while honey gives a hint of sweetness. Using fresh herbs can elevate the dish. I recommend: - Fresh parsley - Fresh thyme - Fresh rosemary These herbs not only add flavor but also enhance the look of your roasted chicken. For the best taste, chop the fresh herbs and sprinkle them on top before serving. You will love how they brighten up the dish! For the full recipe, check out the details above. First, gather your ingredients for the garlic herb roasted chicken. You will need: - 1 whole chicken (about 4-5 lb) - 4 tablespoons olive oil - 6 cloves garlic, minced - 2 teaspoons dried thyme - 2 teaspoons dried rosemary - 2 teaspoons dried oregano - 1 lemon, cut into wedges - 1 onion, quartered - Salt and freshly ground black pepper to taste - Fresh herbs (like parsley or thyme) for garnish Next, preheat your oven to 425°F (220°C). Rinse the chicken under cold water. Pat it dry with paper towels. This step is key for crispy skin. In a small bowl, mix olive oil, minced garlic, dried herbs, salt, and pepper. This makes a flavorful herb paste. Now, gently slide your fingers under the skin of the chicken. Be careful not to tear it. Rub half the herb paste under the skin. Spread the rest on the outside. Stuff the chicken's cavity with lemon wedges and quartered onion. This adds a burst of flavor from the inside. Place the chicken in a roasting pan. You can tie the legs with kitchen twine if you want. This helps it cook evenly. Now, it's time to roast the chicken. Place it in your preheated oven. Roast for about 1 hour and 15 minutes. The chicken is done when the juices run clear. You can check this by piercing between the leg and the body. It should reach an internal temperature of 165°F (75°C). Halfway through cooking, baste the chicken with its own juices. This adds flavor and keeps it moist. Once the chicken is golden and cooked, take it out of the oven. Let it rest for 10-15 minutes. This step keeps the juices inside. Now, carve the chicken. Start by removing the legs and thighs. Then, slice the breast meat. Arrange the pieces on a platter. Garnish with fresh herbs for a nice touch. You can serve it with roasted vegetables around the chicken for a beautiful presentation. For the full recipe, refer to the previous section. Enjoy your meal! To get that golden, crispy skin, dry the chicken well. After rinsing, use paper towels to pat it dry. This step is key! Loosening the skin gently with your fingers helps too. Apply half of the herb paste under the skin. This not only adds flavor but also keeps the skin crispy while cooking. Basting keeps the chicken moist. Use a spoon to scoop up the juices from the pan. Halfway through cooking, pour these juices over the chicken. This adds flavor and helps create that beautiful crust. You can baste every 15 minutes for the best results. For the best flavor, stuff the chicken cavity with lemon and onion. These ingredients release moisture and aroma as they cook. Fresh herbs like parsley or thyme can boost the taste too. Sprinkle them on top before serving for a fresh touch. For more detailed steps, check the Full Recipe. {{image_2}} You can change the flavors of your garlic herb roasted chicken easily. For a different taste, try using fresh herbs instead of dried ones. Fresh thyme, rosemary, or parsley can really brighten the dish. Other spices like paprika or cumin can add warmth and depth. You might also enjoy a bit of lemon zest for a fresh twist. Stuffing your chicken can bring more flavor and moisture. Instead of lemon and onion, consider using garlic cloves, fresh herbs, or even sliced apples for sweetness. A mix of bread crumbs, herbs, and nuts can create a nice stuffing too. Try adding some cooked rice or quinoa for a hearty filling. You can cook garlic herb roasted chicken in different ways. Grilling gives it a smoky flavor and crispy skin. Just marinate the chicken with the herb paste, then grill over medium heat. For a slow cooker, rub the chicken with the herbs and place it inside. Cook on low for 6-8 hours for tender meat. Each method brings out unique flavors, so choose what you like best! For the complete recipe, check out the Full Recipe. After you enjoy your garlic herb roasted chicken, let it cool. Place leftovers in an airtight container. Store the chicken in the fridge for up to 3 days. If you leave it out too long, it can spoil. Always check for signs of spoilage before eating. To reheat your chicken, preheat your oven to 350°F (175°C). Place the chicken in a baking dish. Add a splash of chicken broth to keep it moist. Cover the dish with foil to prevent drying. Heat for about 20-25 minutes, or until hot. You can also use a microwave, but the oven makes it crispier. If you want to save your chicken for later, freezing is a great option. Wrap pieces of chicken tightly in plastic wrap. Then place them in a freezer bag. Label the bag with the date. You can freeze the chicken for up to 3 months. When ready to eat, thaw it in the fridge overnight before reheating. For best flavor, enjoy it soon after freezing. Roasting time is key for juicy chicken. You should roast the chicken for about 15-20 minutes per pound. For example, a 4-pound chicken needs around 1 hour to 1 hour and 20 minutes. Always check the internal temperature. It should reach 165°F (75°C) in the thickest part of the meat. Yes, you can! You can use a smaller chicken or even chicken parts. Cooking time will change if you use parts. Chicken thighs or breasts cook faster, so keep an eye on them. Ensure all parts reach that safe internal temperature of 165°F (75°C). Many sides pair well with garlic herb roasted chicken. Some tasty options include: - Roasted vegetables (like carrots, potatoes, or Brussels sprouts) - Creamy mashed potatoes - Fresh green salad - Garlic bread - Rice pilaf These sides complement the chicken well and create a lovely meal. For a great presentation, serve the chicken on a platter surrounded by your chosen sides. Don't forget to check out the Full Recipe for all the details! This blog post showed you how to make a great garlic herb roasted chicken. We covered essential ingredients for flavor and optional extras to boost taste. You learned each step from preparation to carving and serving. Our tips helped you get crispy skin and the best basting techniques. Variations let you explore new flavors and cooking methods. Finally, proper storage keeps leftovers fresh. Now, you're ready to impress with your chicken skills and enjoy delicious meals!

Garlic Herb Roasted Chicken Tasty Dinner Recipe

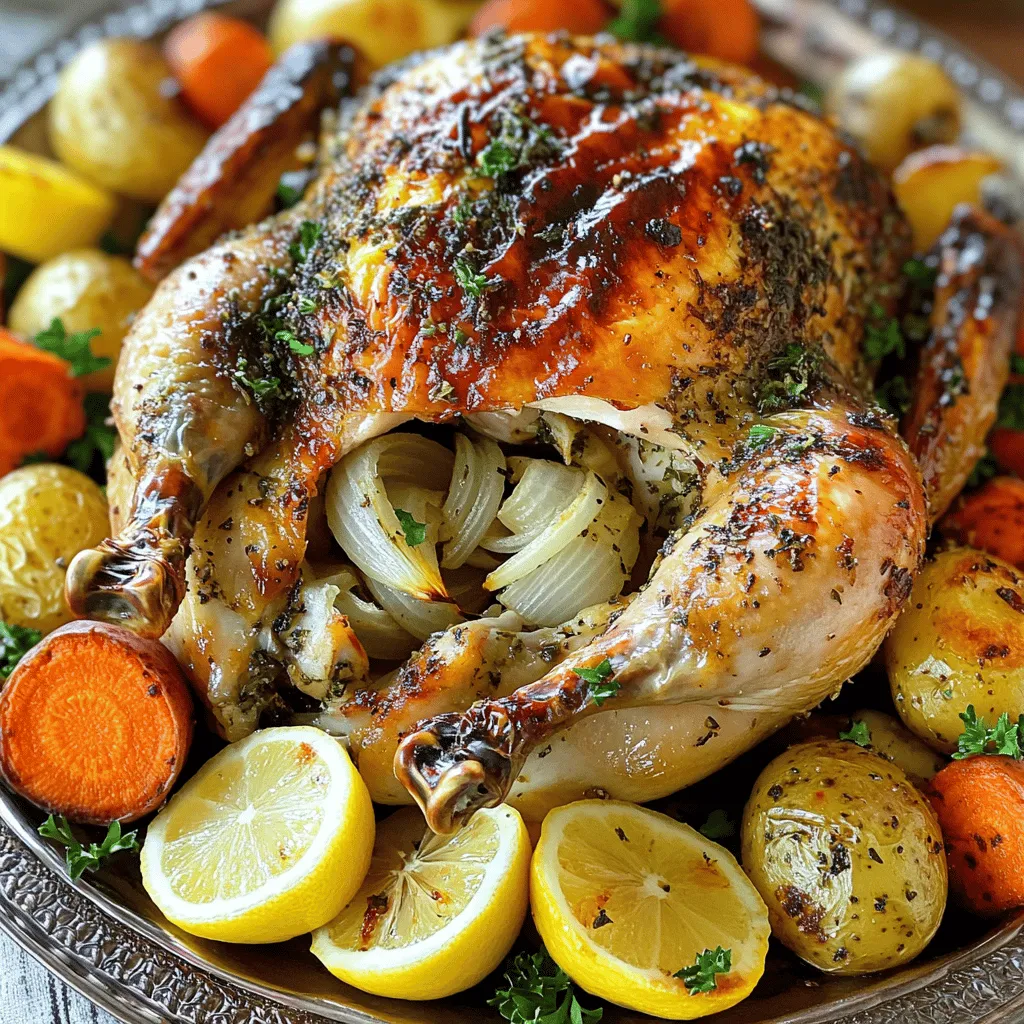
Looking for a delicious dinner idea? Let’s make Garlic Herb Roasted Chicken! This dish is simple to prepare and packed

To make a tasty sweet potato casserole, you need a few key items: - 4 large sweet potatoes, peeled and cubed - 1/2 cup brown sugar - 1/4 cup maple syrup - 1/2 teaspoon cinnamon - 1/4 teaspoon nutmeg - 1 teaspoon vanilla extract - 1/2 cup milk (or a non-dairy alternative) - 1/4 cup unsalted butter, melted - 1/2 cup pecans, chopped - 1/2 cup mini marshmallows These ingredients blend together to create a rich, sweet dish. The sweet potatoes form a smooth base. The brown sugar and maple syrup add depth. Cinnamon and nutmeg give warmth and flavor. You can switch things up with some optional ingredients: - 1/2 cup crushed pineapple for a fruity twist - 1/4 cup coconut flakes for added texture - 1/2 cup oats for a crunchier topping - A sprinkle of sea salt to enhance sweetness These choices let you customize your casserole. You can find new flavors that you like. When you shop for sweet potatoes, look for these signs: - Choose firm potatoes with smooth skin. - Avoid any with soft spots or blemishes. - Go for medium to large sizes for even cooking. Fresh sweet potatoes will give your casserole the best taste. They should feel heavy for their size, which means they are packed with moisture. I always recommend using organic sweet potatoes when possible for the best flavors. For the full recipe, check out Sweet Potato Delight Casserole. Start by peeling and cubing four large sweet potatoes. This helps them cook faster. Next, put the sweet potatoes in a large pot of boiling water. Cook them until soft, which takes about 15 to 20 minutes. After cooking, drain the water and let them cool for a bit. This makes them easy to handle later. In a large bowl, mash the sweet potatoes until they are smooth. It should feel creamy and soft. Then, add 1/2 cup of brown sugar and 1/4 cup of maple syrup. Stir in 1/2 teaspoon of cinnamon and 1/4 teaspoon of nutmeg. These spices add warmth and flavor. Don’t forget to mix in 1 teaspoon of vanilla extract, 1/2 cup of milk, and 1/4 cup of melted unsalted butter. Keep mixing until everything is well blended. This sweet potato mixture is the heart of your casserole. Now comes the fun part! Take a greased 9x13 inch baking dish and pour the sweet potato mixture into it. Spread it out evenly across the bottom. Next, sprinkle 1/2 cup of chopped pecans on top. This adds a nice crunch. Finally, add 1/2 cup of mini marshmallows on top of the pecans. These will melt and create a sweet, gooey layer. Bake the casserole in your preheated oven at 350°F for 25 to 30 minutes. Look for golden marshmallows and a warm casserole. - Common Mistakes to Avoid: - Don’t skip cooling the sweet potatoes; it helps with mashing. - Ensure you mix ingredients well for even flavor. - Avoid overbaking; keep an eye on those marshmallows! Following these steps will lead you to a delicious sweet potato casserole. For the complete recipe, check out the Full Recipe. To make your sweet potato casserole creamier, use more milk. I suggest adding an extra 1/4 cup of milk. You can also blend the mixture until it’s very smooth. This helps create a rich texture. If you like, try using cream cheese. It adds a tangy flavor and a creamy feel. Seasonings can really boost your sweet potato casserole. I love using cinnamon and nutmeg. They add warmth and sweetness. You can also add a pinch of salt. This helps balance the sweetness. Don’t forget about vanilla extract, too! It adds a nice depth to the flavor. For a twist, try adding a bit of ginger or allspice. How you serve your casserole matters! Serve it warm for the best taste. I like to sprinkle extra pecans on top. They add crunch and look great. A drizzle of maple syrup is also nice. It makes the dish even sweeter and more inviting. Use a colorful plate to make your casserole stand out. It’s all about making it look as good as it tastes. For the full recipe, check out the Sweet Potato Delight Casserole. {{image_2}} You can easily make a vegan version of this sweet potato casserole. Start by using coconut milk or almond milk instead of regular milk. For the butter, switch to a plant-based alternative. Instead of marshmallows, you can top with toasted coconut or more nuts. This keeps the fun flavors while being vegan-friendly. If you need a gluten-free casserole, you are in luck! The main ingredients like sweet potatoes and sugar are naturally gluten-free. Just ensure the toppings, like pecans, are not mixed with any gluten products. Always read labels on packaged items to stay safe. This way, everyone can enjoy this tasty dish without worry. Toppings can make your casserole stand out. Instead of marshmallows, try using crushed graham crackers for a crunchy layer. You can also add a sprinkle of cinnamon or a drizzle of honey for extra flavor. If you love chocolate, mini chocolate chips work great too. Get creative! The toppings can change the whole taste of the dish, making it fun every time you make it. If you want the full recipe, check out the Sweet Potato Delight Casserole! To store your sweet potato casserole, let it cool completely. Then, cover it tightly with plastic wrap or aluminum foil. You can also use an airtight container. This helps keep it fresh. Refrigerate leftovers within two hours of baking. They will last up to four days in the fridge. If you want to save your casserole for later, freezing is a great option. Start by letting it cool down. Then, cut it into serving-sized pieces. Wrap each piece in plastic wrap and place them in a freezer-safe bag. Label the bags with the date. Your casserole can be frozen for up to three months. When you're ready to enjoy your casserole again, there are easy ways to reheat it. For the best flavor, thaw it overnight in the fridge if you froze it. Preheat your oven to 350°F (175°C). Place the casserole in an oven-safe dish and cover it with foil. Heat for about 20-25 minutes. If you want those marshmallows toasted, remove the foil for the last 5 minutes. You can also microwave individual portions, heating them for about 1-2 minutes at a time, stirring in between. Yes, you can prepare Sweet Potato Casserole in advance. Make the casserole a day ahead. Follow the recipe, but don’t bake it yet. Cover it with plastic wrap and place it in the fridge. When you are ready to bake, remove the wrap. Bake as normal, but add a few extra minutes to the cooking time. This makes hosting easier and keeps flavors fresh. If you don’t want to use marshmallows, there are good options. You can use pecans for a crunchier topping. Another choice is to sprinkle coconut flakes on top. You might also try using a mix of oats and brown sugar for a crumbly texture. These swaps bring different flavors and still taste great. To check if your casserole is done, look for golden marshmallows or a golden top. Insert a knife or toothpick into the center. If it comes out clean, the casserole is done. Bake for 25-30 minutes at 350°F (175°C). If you see bubbling around the edges, that’s a good sign too. Let it cool a few minutes before serving. Enjoy the warm, sweet goodness! Sweet potato casserole is simple and rewarding to make. You learned about key ingredients, tips for the perfect dish, and creative variations. Remember to choose fresh sweet potatoes and avoid common mistakes while baking. Don't hesitate to experiment with flavors and toppings to personalize your casserole. With the right storage, your leftovers can stay delicious too. Dive into this comforting dish and enjoy it with friends or family. Your sweet potato casserole will become a favorite at every meal!

Sweet Potato Casserole Delightful and Easy Recipe

Are you ready to impress your friends and family with a delicious sweet potato casserole? This delightful and easy recipe

- 4 boneless, skinless chicken thighs - 2 tablespoons olive oil - 1 teaspoon garlic powder - 1 teaspoon paprika - 1 teaspoon dried oregano - Salt and pepper to taste - 1 cup cherry tomatoes, halved - 1 zucchini, sliced - 1 bell pepper (red or yellow), diced - 1 cup baby carrots - Fresh parsley for garnish The main ingredients for this dish are simple and fresh. The chicken thighs make it juicy and tender. Using skinless thighs keeps things light. You can substitute chicken breasts if you prefer. The vegetables add color and flavor. Cherry tomatoes burst with sweetness. Zucchini and bell peppers bring crunch and freshness. Baby carrots add a nice touch of sweetness. Feel free to mix and match veggies based on what you have. - 1 teaspoon garlic powder - 1 teaspoon paprika - 1 teaspoon dried oregano - Salt and pepper to taste These seasonings bring the dish to life. Garlic powder adds a savory kick. Paprika gives it a warm, smoky flavor. Oregano adds a hint of earthiness. You can also explore other seasonings. Consider adding thyme or rosemary for a different taste. A sprinkle of red pepper flakes can add heat. Get creative based on your taste buds! This mixture of simple ingredients and seasonings makes the One Pan Chicken and Veggies recipe both easy and delicious. Check out the Full Recipe for complete details. Preheating the oven Set your oven to 425°F (220°C). This high heat helps the chicken and veggies cook quickly and evenly. Preparing the marinade In a small bowl, mix together 2 tablespoons of olive oil, 1 teaspoon of garlic powder, 1 teaspoon of paprika, and 1 teaspoon of dried oregano. Add salt and pepper to taste. This blend will give your chicken great flavor. Marinating the chicken Place 4 boneless, skinless chicken thighs in a mixing bowl or a resealable bag. Pour the marinade over the chicken, making sure each piece is coated well. Let them sit for at least 15 minutes. This step is key for juicy, tasty chicken. Arranging ingredients in the pan While the chicken marinates, wash and cut your veggies. You will need 1 cup of halved cherry tomatoes, 1 sliced zucchini, 1 diced bell pepper (red or yellow), and 1 cup of baby carrots. On a large baking sheet, place the marinated chicken in the center. Spread the veggies around the chicken, and drizzle any leftover marinade over them. Cooking duration Roast the chicken and veggies in the oven for 25-30 minutes. This timing allows the chicken to cook through while the vegetables become tender. Checking doneness Use a meat thermometer to ensure the chicken reaches 165°F (75°C). The juices should run clear. If the chicken is done, take it out of the oven and let it rest for 5 minutes before serving. This resting time helps keep the chicken juicy and flavorful. For the complete recipe, check out the Full Recipe section. Marinating chicken is key for flavor. It helps the meat absorb spices and moisture. I suggest marinating for at least 15 minutes. Longer is fine, too. Just don't let it sit too long, or the meat may get mushy. Always check the chicken's temperature. Use a meat thermometer to confirm it reaches 165°F (75°C). This ensures it is safe to eat. Make sure to insert the thermometer into the thickest part of the meat. To boost the flavor, add more herbs and spices. Fresh herbs like thyme or rosemary work great. You can also try a sprinkle of chili flakes for heat. If you like a tangy kick, use lemon or lime zest. It brightens the dish and adds freshness. Prep your ingredients in advance. Chop your vegetables while the chicken marinates. This cuts down on cooking time. You can also line your baking sheet with parchment paper. This makes cleanup a breeze and helps prevent sticking. Use a sharp knife for quick vegetable cutting. A good knife saves time and effort. You can also roast the chicken and veggies at the same time. This creates a complete meal in one pan, saving you time and dishes. For the full recipe, check the One Pan Chicken and Veggies Delight. {{image_2}} You can change the veggies to match the season or your taste. Try using asparagus in spring or butternut squash in fall. Mixing colors makes the dish pop. Use purple eggplant or orange carrots for a vibrant look. Seasonal vegetables taste best and keep your meals exciting. If you want a different protein, chicken is not your only choice. You can use pork chops or turkey breast for a change. If you prefer plant-based meals, try tofu or chickpeas. Marinating these options gives them great flavor too. You can switch up how you cook your meal. A sheet pan is easy for roasting. You can also use a skillet for stovetop cooking if you want to keep an eye on things. For a faster option, try an Instant Pot. Just adjust the cooking time and enjoy a quicker meal. For more details, check the Full Recipe. To keep leftovers fresh, use airtight containers. Glass or BPA-free plastic works well. Make sure to cool the food to room temperature before sealing. This helps prevent moisture buildup. Store the chicken and veggies in the fridge. They last up to three days if stored properly. You can reheat your meal in the microwave or oven. For the microwave, put your portion in a safe dish. Heat it for 1-2 minutes. Stir halfway through for even heating. If you prefer the oven, preheat it to 350°F (175°C). Place the chicken and veggies on a baking sheet. Bake for about 10-15 minutes. This keeps the chicken juicy and the veggies tender. To freeze this dish, let it cool completely first. Use freezer-safe containers or bags. Make sure to remove as much air as possible. This helps prevent freezer burn. It can store well for up to three months. When you're ready to eat, thaw it in the fridge overnight. For a quick method, you can use the microwave's defrost setting. This will ensure your meal stays tasty. You should marinate the chicken for at least 15 minutes. This allows the flavors to soak in. If you have more time, marinating for up to 2 hours will enhance the taste even more. Yes, you can prepare the chicken and veggies in advance. Just marinate the chicken and chop the veggies. Store them in the fridge. When you're ready to cook, just spread them on the pan and roast. Great choices for roasting include: - Cherry tomatoes - Zucchini - Bell peppers - Baby carrots Other options can be broccoli, asparagus, or sweet potatoes. Pick colorful veggies for a nice mix. Using olive oil is not strictly necessary, but it helps with flavor and browning. You can use other oils, like avocado or canola oil. They also work well for roasting. This recipe is already gluten-free! None of the ingredients contain gluten. Always check labels on packaged items to be safe. The best way to check if the chicken is done is by using a meat thermometer. The chicken should reach an internal temperature of 165°F (75°C). You can also cut into it; the juices should run clear. This blog post shared how to make a juicy roasted chicken with veggies. You learned about key ingredients, like chicken, vegetables, and marinades, plus tasty seasonings. I provided clear steps for preparing and cooking your meal, ensuring perfect results. We also explored variations for protein and methods, along with tips for storing leftovers. With these techniques, you can create a dish everyone will love. Enjoy your cooking, and remember that experimenting in the kitchen can lead to delicious surprises!

One Pan Chicken and Veggies Easy Roasted Meal

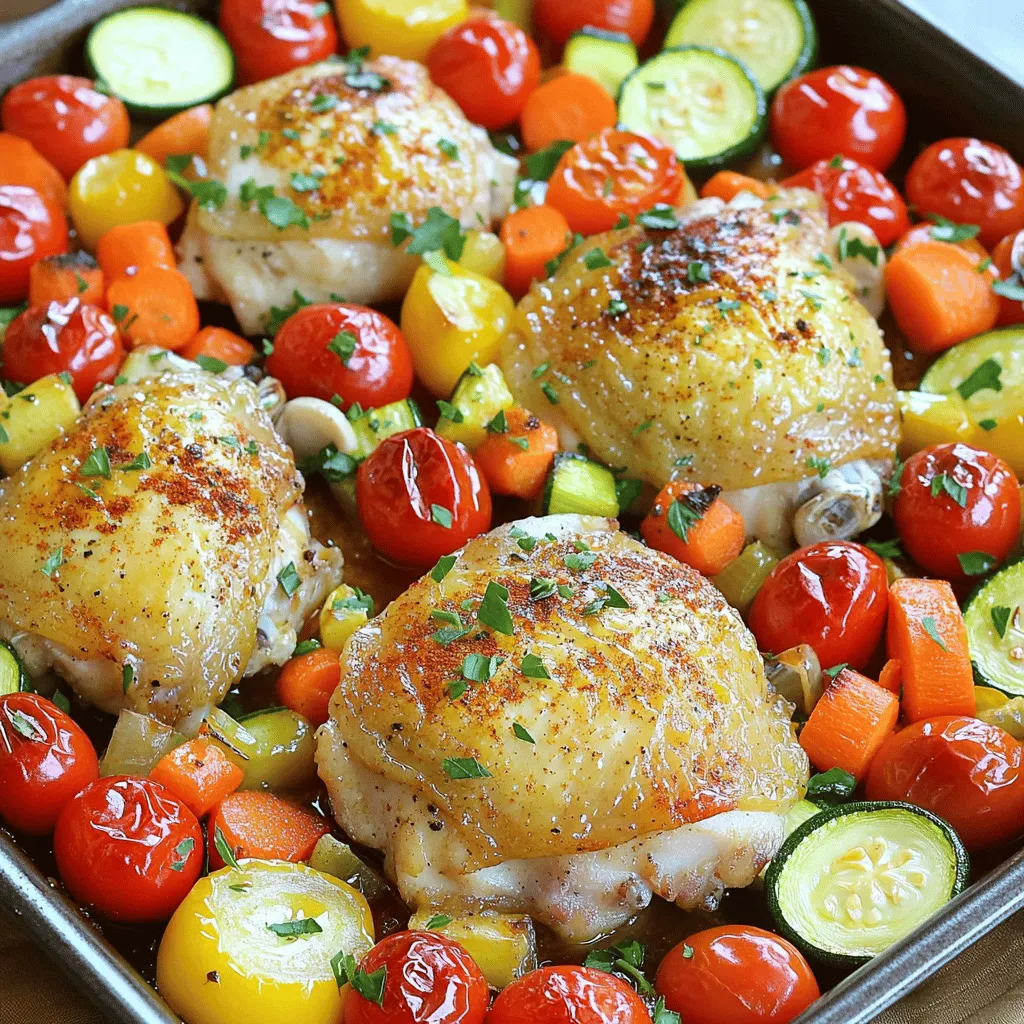
Looking for an easy and satisfying meal? You’ve come to the right place! This One Pan Chicken and Veggies recipe

- 1 cup miniature marshmallows - 1 cup coconut flakes - 1 cup diced pineapple (fresh or canned, drained) - 1 cup mandarin oranges (canned or fresh, drained) - 1 cup sour cream - 1 cup whipped cream (or Cool Whip) - ½ cup chopped pecans or walnuts (optional) - 1 teaspoon vanilla extract - ½ cup cherries for garnish Classic ambrosia salad is all about simple, tasty ingredients. You want to use fresh or canned fruits, so they blend well. The miniature marshmallows add sweetness and fun texture. Coconut flakes give a tropical touch, while the sour cream and whipped cream make it creamy. Adding chopped pecans or walnuts is optional, but they offer a nice crunch. I suggest using fresh fruits when possible. They add brightness and flavor, making your salad pop. - Different fruits (e.g., strawberries, grapes) - Flavored yogurt as a substitute for sour cream - Vegan substitutes for a dairy-free version Feel free to mix it up! You can add any fruit you like. Strawberries or grapes can give a whole new taste. You can also use flavored yogurt if you want a twist on the creamy part. If you need a dairy-free version, there are great vegan options available. For the full recipe, check out the Tropical Ambrosia Bliss section. This dish is all about having fun with flavors and textures! - Step 1: Mixing the Fruits and Marshmallows Start by gathering a large mixing bowl. Add 1 cup of miniature marshmallows, 1 cup of coconut flakes, 1 cup of diced pineapple, and 1 cup of mandarin oranges. Gently toss these ingredients together. Make sure they mix evenly. This step sets the sweet base of your ambrosia salad. - Step 2: Creating the Cream Mixture In another bowl, add 1 cup of sour cream, 1 cup of whipped cream, and 1 teaspoon of vanilla extract. Stir this mixture until it becomes smooth. This creamy blend will bind the fruit and marshmallow mix. It adds a rich flavor to your salad. - Step 3: Combining Both Mixtures and Adding Nuts Pour the cream mixture over the fruit and marshmallow mix. Gently fold everything together. Be careful not to mash the fruits. If you want some crunch, add ½ cup of chopped pecans or walnuts. Fold these into the salad for extra texture. - Step 4: Refrigeration Process for Best Flavor After mixing, cover the bowl with plastic wrap. Place it in the fridge for at least 1 hour. This chilling time lets the flavors meld together. It also helps the salad firm up a bit, making it easier to serve. - Step 5: Garnishing Before Serving Just before you serve, take the salad out of the fridge. Garnish the top with ½ cup of cherries. Their bright color adds a lovely touch. You can also sprinkle a few extra coconut flakes on top for added texture. Serve in a clear bowl to show off the beautiful colors. To make your ambrosia salad the best it can be, pay attention to mixing. Start with the fruits and marshmallows. Gently toss them together. This way, they mix without breaking. You want each piece to keep its shape. For a creamier texture, use full-fat sour cream and real whipped cream. These choices make the salad rich and smooth. If you want a lighter version, try using Greek yogurt. It adds creaminess while keeping it healthy. One common mistake is over-mixing the salad. This can turn it into a mushy mess. Mix gently until everything is coated, but don't stir too hard. Another mistake is using overly sweet or soggy fruits. Choose fresh, firm fruits for the best taste. If using canned fruits, make sure they are well-drained. This keeps the dressing from becoming too watery. {{image_2}} What’s the difference between traditional and tropical ambrosia? Traditional ambrosia often includes fruits like cherries and oranges. Tropical ambrosia adds fun flavors like pineapple and coconut. This twist brings a bright, fresh taste. You can mix and match fruits to suit your taste. Try adding strawberries or bananas for a sweet surprise. How can you use coconut in unique ways? Coconut flakes add a chewy texture. You can also use coconut yogurt for a creamy twist. Another option is to add coconut milk for extra flavor. These choices make ambrosia even more delightful. What are some ways to make ambrosia healthier? You can use low-fat sour cream. This swap cuts calories without losing taste. Reduced sugar products also work well. They keep the sweetness while being lighter. What plant-based ingredients can you explore? Use coconut yogurt for a dairy-free option. Almond or cashew yogurt can also add a creamy touch. These swaps make ambrosia salad friendly for vegan diets. If you want to dive deeper into this delicious dish, check out the Full Recipe for a complete guide on making ambrosia salad. To keep your ambrosia salad fresh, store it in the fridge. Use an airtight container to prevent the salad from drying out. If you cover it with plastic wrap, press it against the salad. This helps keep moisture in. For short-term storage, ambrosia salad stays good in the fridge for three to five days. Don’t let it sit out for too long. If you plan to enjoy it later, mix in nuts just before serving. This keeps them crunchy. For long-term storage, you can freeze ambrosia salad. However, the texture may change when thawed. To freeze, place it in a freezer-safe container. Make sure to leave space for expansion. It can last up to two months in the freezer, but I recommend enjoying it fresh. Ambrosia salad lasts about three to five days in the fridge. After that, it can spoil. Look out for signs like an off smell or visible mold. If it looks or smells bad, do not eat it. Use clear glass or plastic containers to store your salad. These containers help you see the salad easily. It is best to use a lid to cover it tightly. This protects it from other strong odors in the fridge. How long should I refrigerate ambrosia salad before serving? You should refrigerate ambrosia salad for at least 1 hour. This allows the flavors to blend well. The longer it sits, the better it tastes. Can I make ambrosia salad in advance? Yes, you can make ambrosia salad a day ahead. Just store it in the fridge. This makes it perfect for parties or gatherings. What are some good substitutes for sour cream? You can use plain yogurt or Greek yogurt as a substitute. They add creaminess and a nice tang. If you're vegan, try a dairy-free yogurt. Can I use frozen fruits in the recipe? Yes, you can use frozen fruits. Just make sure to thaw and drain them first. This helps avoid excess water in the salad. Is ambrosia salad suitable for vegan diets? You can make ambrosia salad vegan. Use coconut cream or a dairy-free whipped topping. Replace sour cream with a plant-based yogurt. How do I adjust the sweetness level in the salad? To adjust sweetness, you can add more or fewer marshmallows. You can also mix in a bit of honey or maple syrup. Taste as you go to find the right balance. This blog post covered the key ingredients and steps for making ambrosia salad. You learned about customization options, cooking tips, and how to store your dish. Remember to mix your ingredients well but avoid over-mixing. Explore different fruit combinations for unique flavors and healthier alternatives. Ambrosia salad is versatile and easy to make. Enjoy experimenting with this classic dish for your next gathering or family meal. Your creativity can make it truly special!

Classic Ambrosia Salad Tasty and Easy Recipe Guide

Are you ready to whip up a nostalgic treat that’s both tasty and easy? Classic ambrosia salad is the perfect

The creamy avocado chickpea salad is fresh and easy to make. It takes about 20 minutes from start to finish. This salad serves four people and is perfect for a light meal or a side dish. You can find the full recipe at the end of this section. To create this delicious salad, gather the following key ingredients: - 1 can (15 oz) chickpeas, drained and rinsed - 1 ripe avocado, diced - 1 small cucumber, diced - 1 cup cherry tomatoes, halved - 1/4 red onion, finely chopped - 2 tablespoons fresh lemon juice - 2 tablespoons olive oil - 1 teaspoon ground cumin - Salt and pepper to taste - Fresh parsley, chopped for garnish These ingredients come together to create a flavorful mix. The chickpeas add protein, while the avocado gives creaminess. The veggies add crunch and freshness. You can make this salad even better with some optional add-ins. Here are a few ideas: - Feta cheese for a salty bite - Bell peppers for extra crunch - Corn for sweetness - Spinach or kale for added greens Feel free to experiment with these add-ins to suit your taste. Each adds a unique twist to the salad. First, gather all your ingredients. You will need: - 1 can (15 oz) chickpeas, drained and rinsed - 1 ripe avocado, diced - 1 small cucumber, diced - 1 cup cherry tomatoes, halved - 1/4 red onion, finely chopped - 2 tablespoons fresh lemon juice - 2 tablespoons olive oil - 1 teaspoon ground cumin - Salt and pepper to taste - Fresh parsley, chopped for garnish Make sure to rinse the chickpeas well. This helps remove any canning liquid. Next, chop the vegetables. Dice the avocado and cucumber. Halve the cherry tomatoes and finely chop the onion. In a large mixing bowl, combine the drained chickpeas and diced avocado. Use a fork to gently mash the avocado. You want a creamy mix but keep some chunks for texture. Now, add the diced cucumber, halved cherry tomatoes, and finely chopped red onion to the bowl. In a separate small bowl, whisk together the lemon juice, olive oil, ground cumin, salt, and pepper. This dressing adds a bright flavor. Pour the dressing over the chickpea mixture. Gently toss everything together until it’s well combined. Taste and adjust the seasoning if needed. Let the salad sit for about 10 minutes. This allows the flavors to blend nicely. When you’re ready to serve, sprinkle freshly chopped parsley on top. This adds a nice color and fresh taste. You can enjoy this salad on its own or serve it with whole grain pita or crackers. For a fun twist, try adding it to a wrap! For the full details on making this delightful dish, check the Full Recipe. To find the best avocado, feel the outside gently. It should yield slightly under your fingers. Look for a dark green skin, which often means ripeness. Avoid avocados with dark spots or bruises. These signs can mean the fruit is bad. When you cut into it, the flesh should be creamy and green. If it's brown or mushy, it's overripe. Store ripe avocados in the fridge. This keeps them fresh longer. If you have a whole avocado, keep it in a paper bag at room temperature until it ripens. After cutting, brush the exposed flesh with lemon juice to prevent browning. Wrap it tightly in plastic wrap before placing it in the fridge. This helps maintain its quality. To boost the flavor of your avocado chickpea salad, add fresh herbs like cilantro or dill. They add a pop of freshness. You can also include spices like paprika or chili powder for heat. A splash of vinegar can brighten the taste as well. Don't forget to use quality olive oil; it makes a big difference. For a zing, try adding a bit of mustard to the dressing. Each of these tips can elevate your dish, making it even more enjoyable. For the full recipe, check out the Creamy Avocado Chickpea Delight. {{image_2}} You can boost the protein in your salad easily. Try adding cooked quinoa or diced firm tofu. Both options mix well with chickpeas. Grilled chicken or shrimp also adds a tasty twist. These proteins make the salad heartier and more filling. If you want to keep it vegetarian, use black beans or lentils. Both are great substitutes for chickpeas. They provide a different flavor and texture. You can also add feta cheese for a salty kick. This adds creaminess without losing the vegetarian aspect. Seasonal ingredients can freshen up your salad. In spring, add fresh peas or radishes for crunch. In summer, diced bell peppers or zucchini work well. For fall, consider roasted sweet potatoes or butternut squash. These swaps keep your salad exciting and vibrant. Feel free to experiment with these ideas! You can find the full recipe for the creamy avocado chickpea delight [here](#). To keep your avocado chickpea salad fresh, store it in an airtight container. This helps to lock in moisture and flavor. Place the container in the fridge right after serving. If you have leftovers, try to eat them within two days for the best taste. This salad is best enjoyed cold. If you prefer it warm, heat it gently on low. Use a skillet or microwave for a quick warm-up. However, be careful not to overheat. Avocado can become mushy when cooked too much. The salad lasts about 2 to 3 days in the fridge. Check for changes in color or smell. If the avocado turns brown or the salad smells off, it’s time to toss it. Always trust your senses when it comes to food freshness. Yes, you can use frozen chickpeas! First, thaw them in the fridge overnight. Drain and rinse them well before adding to the salad. This keeps the texture nice and firm, just like canned chickpeas. If you have time, you can also cook dried chickpeas. Soak them overnight and cook until tender. This salad is already vegan! Just skip any cheese or non-vegan dressings. Use the creamy texture of the avocado to keep it rich and satisfying. You can add more veggies or seeds for extra flavor and crunch. Avocados are full of healthy fats, vitamins, and fiber. They help keep your heart healthy and your skin glowing. Chickpeas are packed with protein and fiber. They help you feel full and are good for digestion. Together, they make a great mix for a healthy meal. You can enjoy this salad knowing it fuels your body well. For the full recipe, check out Creamy Avocado Chickpea Delight! This blog post covered all you need to make a great avocado and chickpea salad. We discussed important ingredients and optional add-ins to enhance flavor. Step-by-step instructions helped you see how to prepare and mix everything together. We also shared tips for choosing avocados and keeping your salad fresh. You learned about tasty variations and best storage practices. Lastly, we answered common questions about the recipe. Use these ideas to make a salad that you will love!

Savory Avocado Chickpea Salad Fresh and Flavorful Mix

Are you ready to enjoy a dish that is both tasty and good for you? My Savory Avocado Chickpea Salad

To make these easy lemon bars, gather the following ingredients: - 1 cup all-purpose flour - 1/2 cup powdered sugar - 1/2 cup unsalted butter, melted - 2 large eggs - 1 cup granulated sugar - 1/4 cup fresh lemon juice (about 2 lemons) - 1 tablespoon lemon zest - 1/2 teaspoon baking powder - A pinch of salt - Extra powdered sugar for dusting When measuring flour, spoon it into a cup and level it off. This step helps avoid using too much flour. For the lemon juice, always use fresh lemons for the best taste. Zest the lemons before juicing; it adds a fragrant kick to your bars. You can swap all-purpose flour with a gluten-free blend if needed. Instead of unsalted butter, you can use coconut oil for a dairy-free option. For the lemon juice, a mix of lime and lemon juice works if you prefer a twist. If you like a sweeter bar, add more granulated sugar or use honey as a natural sweetener. Start by preheating your oven to 350°F (175°C). This ensures even baking. Next, grab an 8x8 inch pan. Line it with parchment paper, leaving extra paper on the sides. This helps you lift the bars out later. In a mixing bowl, combine 1 cup of all-purpose flour with 1/2 cup of powdered sugar. Pour in 1/2 cup of melted unsalted butter. Mix it well until it looks like coarse crumbs. Now, press this mixture firmly into the bottom of your pan. Bake it for about 15 minutes. You want it to be lightly golden. While the crust bakes, it’s time to make the lemon filling. In a separate bowl, whisk together 2 large eggs and 1 cup of granulated sugar. Add 1/4 cup of fresh lemon juice and 1 tablespoon of lemon zest. Don’t forget to add 1/2 teaspoon of baking powder and a pinch of salt. Mix until it’s smooth and well combined. Once the crust is done, take it out of the oven. Pour the lemon filling over the hot crust. Return the pan to the oven and bake for another 20-25 minutes. You want the center to be set and the edges lightly golden. After baking, let the lemon bars cool completely in the pan on a wire rack. Once cool, lift them out using the parchment paper. Cut into squares or rectangles and dust with extra powdered sugar before serving. Enjoy your homemade lemon bars! To get a great crust, use cold butter. Cold butter makes a flaky base. Mix the flour and powdered sugar well before adding the melted butter. This helps the crust stay crisp. Press the crust mixture into the pan firmly. It should be even and smooth. Bake it until golden, but don't overdo it. A light color means a perfect crust. You can change the sweetness and tartness of your lemon bars. If you like it sweeter, add a bit more sugar to the filling. For more tartness, use extra lemon juice. I often use the zest of two lemons for more flavor. Taste the filling before baking. This ensures it meets your taste. Remember, the flavor may change slightly once baked. Fresh ingredients make a big difference in your lemon bars. Use fresh lemons for the juice and zest. Bottled lemon juice lacks the bright flavor of fresh juice. It can make your dessert taste flat. Also, check your eggs; they should be fresh for the best taste. Fresh ingredients lead to a tastier treat overall. Trust me; it’s worth the effort. You can find the full recipe above for all the delicious details! {{image_2}} You can easily add your favorite fruits to the lemon bars. Berries like raspberries or blueberries work well. Just fold in one cup of fresh or frozen berries into the lemon filling. The berries add a lovely color and taste. You can also try adding a splash of vanilla for a warm note. This twist makes the bars more fun and unique! If you need gluten-free lemon bars, swap the all-purpose flour for almond flour or a gluten-free baking mix. These options work well and keep the texture light. You may need to adjust the baking time slightly since different flours can change how the bars set. Always check for doneness by looking for a firm center. Serving lemon bars can be fun! Try topping your bars with fresh fruit or a dollop of whipped cream. You can also serve them with a scoop of vanilla ice cream for a tasty treat. For a more elegant touch, drizzle some raspberry sauce over the bars before serving. Dusting with extra powdered sugar adds a nice finish too. These ideas make each bite even more delightful! For the full recipe, check out the detailed instructions above. Store your lemon bars in an airtight container. This keeps them fresh and moist. You can place parchment paper between layers to avoid sticking. Always let them cool completely before storage. This prevents condensation that can make them soggy. In the fridge, lemon bars last about one week. Make sure to keep them covered. If you notice any signs of spoilage, it’s best to throw them out. Enjoy them fresh for the best taste! You can freeze lemon bars to enjoy later. Cut them into squares and wrap each piece tightly in plastic wrap. Place the wrapped bars in a freezer bag. They will stay good for up to three months. When ready to eat, let them thaw in the fridge overnight. You can tell lemon bars are done when the center is set. The edges should be slightly golden. A small jiggle in the middle is okay. Bake them for 20 to 25 minutes. Let them cool completely to firm up more. Yes, you can use bottled lemon juice. However, fresh juice tastes better. Fresh juice adds bright flavor. It also gives a nice zest to the bars. If using bottled juice, pick a high-quality brand for the best taste. To cut lemon bars, use a sharp knife. First, let them cool in the pan. Dust with powdered sugar for a pretty look. Use your knife to score lines first. Then, cut through for even squares or rectangles. To make lemon bars firmer, add an extra egg. You can also bake them a bit longer. Ensure you cool them fully before cutting. If you like a thicker crust, increase the flour slightly. The Full Recipe has all the details you need! You’ve learned how to make delicious lemon bars. We covered all the ingredients and measurements. You can now prepare the crust and filling with ease. Remember the tips for a perfect dessert and try the fun variations. Don’t forget about storing leftovers or freezing extras. With this guide, you’re ready to bake and enjoy lemon bars that impress. Keep experimenting and savor every bite!

Easy Lemon Bars Perfectly Delicious and Simple Recipe

If you crave a sweet and tangy treat, my easy lemon bars are for you! This simple recipe brings bright

- 2 medium zucchinis - 1 cup panko breadcrumbs - 1/2 cup grated Parmesan cheese - 1 teaspoon garlic powder - 1 teaspoon onion powder - 1/2 teaspoon dried oregano - 2 large eggs When making these crispy Parmesan zucchini bites, focus on the main ingredients first. The zucchinis provide a fresh taste and a healthy base. Slice them into 1/4-inch rounds for the best texture. The panko breadcrumbs give a crunchy bite, while the grated Parmesan cheese adds a savory flavor. Next, let’s talk about the seasonings. Garlic powder brings warmth and depth. Onion powder adds a hint of sweetness, while dried oregano gives a nice herbal touch. Together, they enhance the taste of the zucchini bites. The binding agent is key for keeping everything together. The eggs work perfectly here. They help the breadcrumbs stick to the zucchini, ensuring each bite is coated well. For the full recipe, check out the detailed instructions. These ingredients work together to create a snack that’s both tasty and easy to make! 1. Preheat your oven to 425°F (220°C). This step is key for that crispy finish. 2. Take a baking sheet and line it with parchment paper. This helps prevent sticking. 3. In a shallow bowl, mix the breadcrumbs and seasonings. Combine panko breadcrumbs, Parmesan cheese, garlic powder, onion powder, oregano, salt, and pepper. 1. In a separate bowl, beat the eggs until smooth. This will be your egg wash. 2. Take each zucchini slice and dip it in the egg wash. Let any extra drip off. 3. Coat the zucchini slice in your breadcrumb mixture. Press lightly to ensure it sticks well. 1. Arrange the coated zucchini bites in a single layer on the baking sheet. Space them out for even cooking. 2. Lightly spray or drizzle olive oil over the zucchini bites. This helps make them crispy. 3. Bake in the oven for 20-25 minutes. Flip the bites halfway to ensure even browning. 4. Once golden brown and crispy, remove them from the oven. Let them cool for a few minutes before serving. For the full recipe, check the earlier section. Enjoy your crispy Parmesan zucchini bites! To get the best crunch, use panko breadcrumbs. Panko is lighter and coarser than regular breadcrumbs. This helps your zucchini bites turn out super crispy. Another key tip is to use oil spray. A light coat of oil helps the breadcrumbs brown. It also gives them that lovely crunch we all crave. Just a quick spray before baking works wonders! These bites are great with dips. Try serving them with marinara sauce or ranch dressing. Both add flavor and moisture. For a nice touch, plate them on a colorful dish. Add a sprinkle of fresh parsley for a pop of green. This not only looks good but adds a fresh taste too! One big mistake is overcrowding the baking sheet. If you place too many bites close together, they won’t crisp up. Always leave space between each piece. Don’t forget to flip them halfway through baking. This ensures they cook evenly on both sides. It’s a simple step that makes a huge difference! For the full recipe, check the section above. {{image_2}} You can boost the taste of your Crispy Parmesan Zucchini Bites with some spices. Adding cayenne gives them a nice kick. If you prefer a smoky flavor, try smoked paprika. Fresh herbs like basil or parsley can add a burst of freshness. Just chop them finely and mix them into the breadcrumb mixture. This will make each bite even more tasty. If you need gluten-free options, swap panko breadcrumbs for gluten-free ones. There are many brands available that work great for this recipe. For a vegan take, use a flaxseed mixture instead of eggs. Mix one tablespoon of ground flaxseed with three tablespoons of water, let it sit for a few minutes, and it becomes a great egg substitute. These adjustments keep your zucchini bites delicious for everyone. You can easily scale this recipe for larger groups by doubling or tripling the ingredients. Just make sure you have enough baking sheets. For smaller portions, make mini zucchini bites. Slice the zucchini into smaller rounds. These make perfect finger foods for parties or gatherings. You can serve them as appetizers and watch everyone enjoy! Check out the Full Recipe for more details. After making your crispy Parmesan zucchini bites, let them cool down first. This step helps prevent sogginess. Place the cooled bites in an airtight container. Glass or BPA-free plastic containers work best. You can keep them in the fridge for up to three days. To reheat and keep them crispy, use an oven or an air fryer. Preheat your oven to 350°F (175°C) or your air fryer to 375°F (190°C). Place the bites in a single layer. Heat them for about 10-15 minutes. Check to ensure they are hot and crispy. You can freeze the zucchini bites for later use. To do this, let them cool completely. Arrange them in a single layer on a baking sheet. Freeze until solid, then transfer to a freezer bag. Remove as much air as possible. For best flavor and texture, use them within two months. When ready to enjoy, thaw in the fridge overnight. Reheat them using the same methods mentioned above for the best results. To get crispy zucchini bites, focus on a few key factors: - Use panko breadcrumbs. They are lighter and create a crunchier texture. - Oil is your friend. A light spray or drizzle of oil helps them crisp up. - Don’t overcrowd the baking sheet. Give each bite space for hot air to circulate. - Flip halfway through baking. This ensures even cooking and browning on both sides. These steps will help you achieve that perfect crunch every time. Yes, you can use regular breadcrumbs, but they will change the texture and flavor. Regular breadcrumbs are denser and may not crisp up as well as panko. This can lead to a chewier bite instead of that desired crunch. For the best results, stick with panko. You can store these zucchini bites in an airtight container for about 3 days. Keep them in the fridge to maintain freshness. For longer storage, consider freezing them. Absolutely! Air frying is a great option for zucchini bites. Preheat your air fryer to 400°F (200°C). Arrange the coated zucchini in a single layer in the basket. Cook for about 10-12 minutes, shaking halfway through. This method gives you a nice crunch without using much oil. We explored how to make crispy Parmesan zucchini bites using fresh ingredients. You learned about the key ingredients, interesting variations, and helpful tips for perfect results. Remember, follow the steps for coating and baking to achieve that golden hue. Don’t forget to try out the dips and garnishes for extra flavor. With these insights, you can enjoy a healthy snack that will impress everyone. Enjoy your cooking adventure and savor every bite!

Crispy Parmesan Zucchini Bites Flavorful and Easy Snack

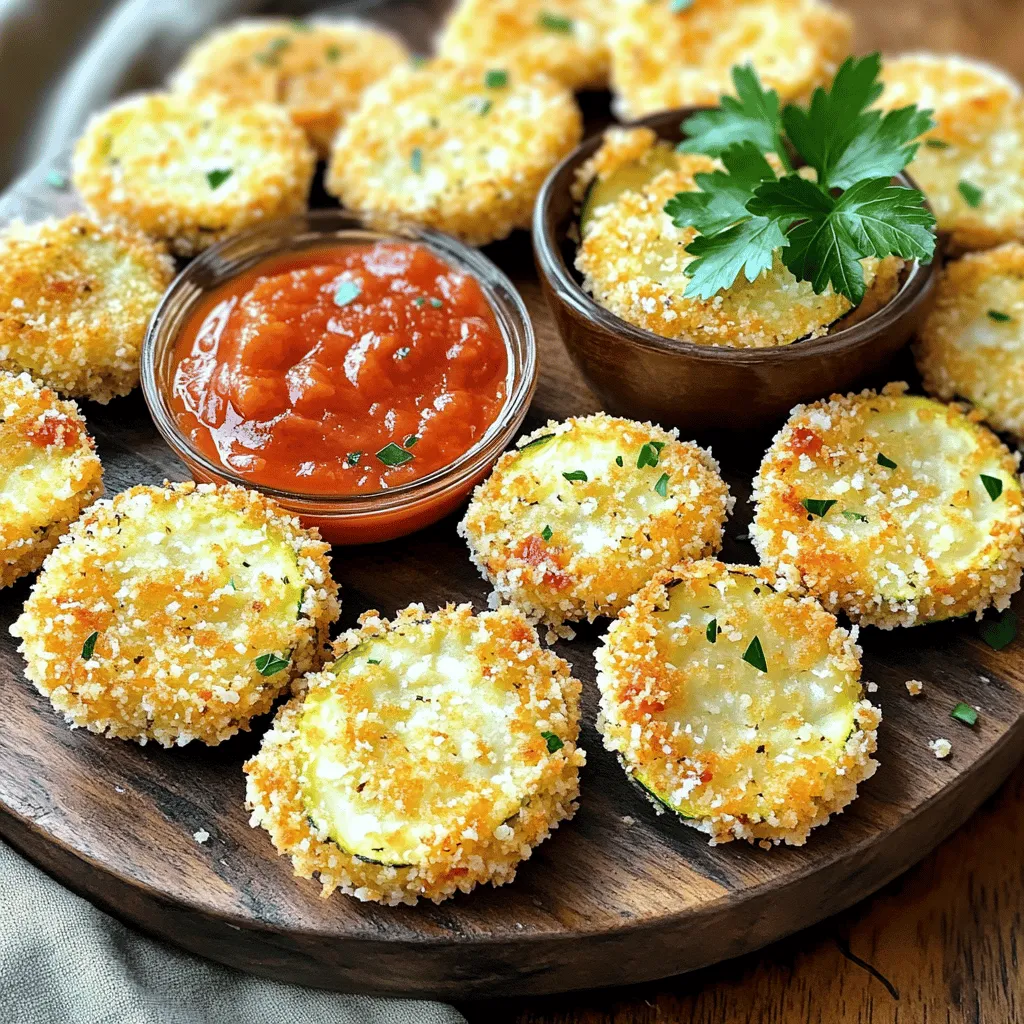
Looking for a tasty and healthy snack? You’ve just found it! These Crispy Parmesan Zucchini Bites are not only easy

To make a tasty zucchini sweet potato hash, gather these key ingredients: - 2 medium sweet potatoes, diced - 2 small zucchinis, diced - 1 bell pepper (any color), chopped - 1 small red onion, finely chopped - 2 cloves garlic, minced - 1 teaspoon smoked paprika - 1 teaspoon dried oregano - Salt and pepper to taste - 2 tablespoons olive oil - Fresh parsley for garnish - Optional: 2 eggs (for topping) These ingredients create a colorful and flavorful dish. The sweet potatoes add a nice sweetness, while the zucchini provides a fresh crunch. To enhance the taste, add fresh herbs and seasonings. Here are some great options: - Fresh thyme or basil for a fragrant touch. - Chopped cilantro for a bright, zesty flavor. - A pinch of chili flakes for a bit of heat. These herbs and spices can elevate your hash, making it even more delightful. You can mix and match to find your favorite combination. Toppings can make your dish even better. Here are some fun ideas: - Avocado slices for creaminess. - Crumbled feta cheese for a salty kick. - Sliced green onions for a fresh crunch. You can also top it with fried or poached eggs for added protein. This simple dish can be transformed with just a few extras. For the full recipe, check out the full recipe link. Start by washing all your veggies. Clean, peel, and dice the sweet potatoes into small cubes. Aim for a size that cooks evenly. Next, wash the zucchinis and chop them into small pieces. Cut the bell pepper into small chunks and finely chop the red onion. Finally, mince two cloves of garlic. Having these ready makes cooking easier. Heat a large skillet over medium heat. Pour in two tablespoons of olive oil. Once hot, add the sweet potatoes. Cook them for about 10 minutes. Stir occasionally until they soften. After that, add the red onion and bell pepper. Sauté for five more minutes, until the onion turns translucent. Now it's time to mix in the zucchini, garlic, smoked paprika, oregano, salt, and pepper. Cook everything together for another 5 to 7 minutes. You want all the veggies to be tender and well mixed. If you want to add eggs, this step is for you. Make two small wells in the hash. Crack an egg into each well. Cover the skillet with a lid. Cook for about 3 to 4 minutes. You want the whites to set but the yolks to stay runny. Once done, remove the skillet from heat. Garnish with fresh parsley for a nice touch. For the full recipe, check out the earlier sections. To get great flavor in your zucchini sweet potato hash, use medium heat on your skillet. This heat helps the veggies cook well without burning. Start with sweet potatoes since they take longer to cook. Once they soften, add the onion and bell pepper. This order keeps flavors bright and fresh. Cut your veggies into similar sizes. This helps them cook evenly. Stir the mix every few minutes to prevent sticking and burning. If you notice any browning, reduce the heat slightly. Finish cooking when the zucchini is tender but not mushy. This adds a nice crunch to every bite. You can mix it up with different veggies. Try using butternut squash instead of sweet potatoes. If you don’t have a bell pepper, use any color of chili. For herbs, fresh thyme or basil can replace oregano. Feel free to swap eggs for avocado slices on top for a creamy finish. For the full recipe, check out the complete instructions. {{image_2}} You can make this dish even tastier by adding more veggies. Try adding chopped spinach or kale for a fresh look and flavor. You can also toss in sliced mushrooms for a nice texture. Another fun idea is to add cherry tomatoes. They add a burst of sweetness. Don't be afraid to mix and match your favorite veggies! If you love heat, add some spice! Toss in diced jalapeños or a pinch of cayenne pepper. You can also use a spicy paprika instead of smoked paprika. This adds warmth without changing the flavor too much. For an extra kick, try adding a splash of hot sauce when serving. Just a few drops can make a big difference. Want to lower the carbs? Swap sweet potatoes for cauliflower. Cauliflower has a mild taste and will soak up all the flavors. You can also use zucchini as a base. It keeps the dish light while still being filling. If you're avoiding starchy vegetables, just use more bell peppers and onions. You still get a hearty meal without the extra carbs. For the full recipe, check out the Zucchini Sweet Potato Hash section. Enjoy exploring these variations to suit your taste! To keep your zucchini sweet potato hash fresh, store it in an airtight container. Let the hash cool down first. Once cooled, transfer it to the container. Place it in the fridge. It should stay good for about three to four days. Make sure to label the container with the date to track freshness. When reheating, use a skillet over medium heat. Add a splash of olive oil to keep it moist. Stir often to heat evenly. You can also use the microwave. Just place the hash in a microwave-safe dish and cover it loosely. Heat in short bursts, stirring in between. This keeps the flavors bright and tasty. You can freeze the hash for longer storage. First, let it cool completely. Then, portion it into freezer bags or containers. Squeeze out as much air as possible before sealing. Label with the date. It will last for about three months in the freezer. When ready to eat, thaw it overnight in the fridge before reheating. For the full recipe, check out the detailed instructions provided. Yes, you can make Zucchini Sweet Potato Hash ahead of time. Prepare the hash and let it cool. Store it in an airtight container in the fridge. It stays fresh for about 3 to 5 days. When you are ready to eat, just reheat it in a skillet or microwave. This saves time on busy mornings. You can serve Zucchini Sweet Potato Hash in many ways. Here are some ideas: - Fried or poached eggs on top for protein. - A side of fresh fruit for a sweet touch. - Avocado slices for creaminess. - A dollop of Greek yogurt for tanginess. - Crusty bread or toast to soak up flavors. Mix and match these options to fit your meal! Customizing Zucchini Sweet Potato Hash is easy. For a vegan dish, skip the eggs. Use more veggies like spinach or mushrooms. For a gluten-free option, the recipe is naturally gluten-free. You can also add your favorite proteins like chicken or sausage. Adjust spices to fit your taste. This flexibility makes the dish fun and personal. Zucchini Sweet Potato Hash is a tasty and easy dish. We covered vital ingredients, cooking steps, and storage tips. You can tweak the recipe with fresh herbs or toppings. Think about your preferences when adding spices or flavors. With these tips, you can make a meal everyone will enjoy. Try different variations to keep it fun. Enjoy your cooking and make this dish a regular in your kitchen!

Zucchini Sweet Potato Hash Flavorful and Simple Dish

If you’re craving a dish that’s both tasty and easy to make, you’ve found it! Zucchini Sweet Potato Hash combines

- 2 ripe peaches, diced - 2 ripe avocados, diced - 1 small red onion, finely chopped - 1 jalapeño, deseeded and minced - 1/4 cup fresh cilantro, chopped - Juice of 2 limes - Salt and pepper to taste The main ingredients in Peach Avocado Salsa are vibrant and fresh. The peaches add sweetness and juiciness. The avocados provide a creamy texture that balances the dish. The red onion gives a nice crunch and sharp flavor. If you want heat, the jalapeño adds a kick. You can adjust how much you use based on your taste. The cilantro adds a fresh, herbal note. Lime juice brightens the flavor and keeps everything fresh. Salt and pepper enhance all the tastes. - Mixing bowl - Knife and cutting board - Measuring cups and spoons To make this salsa, you need a few simple tools. A mixing bowl is important for combining all the ingredients. A sharp knife and cutting board make it easy to chop everything. Measuring cups and spoons help you get the right amounts. These tools make the process smooth and fun. For the full recipe, check out the detailed steps provided earlier. - First, dice the peaches and avocados. - Take two ripe peaches, slice them, and remove the pit. Cut them into small pieces. - Next, slice the avocados carefully and remove the pit. Dice them just like the peaches. - In a medium bowl, combine the diced peaches and avocados. - Now, prepare the onion and jalapeño. Finely chop the onion and mince the jalapeño, removing seeds for less heat. - Add the chopped onion and minced jalapeño to the bowl with peaches and avocados. - Now, add the cilantro and lime juice to the bowl. - Chop about 1/4 cup of fresh cilantro and sprinkle it over the mix. - Squeeze the juice of two limes over everything. - Gently toss the mixture, making sure to keep the avocado pieces whole. - Finally, season with salt and pepper to taste. - Let the salsa sit for about 10 minutes. - This resting time helps the flavors meld together. - You will notice a burst of fresh taste when you serve it! For the full recipe, you can refer to the detailed instructions earlier. Choosing ripe peaches and avocados is key. Look for peaches that feel slightly soft but not mushy. They should have a fragrant smell. For avocados, a gentle squeeze helps. You want them to yield slightly to the touch. This gives the best flavor and texture for the salsa. Adjusting the spice level is easy. For a mild salsa, use less jalapeño. For more heat, add more jalapeño or include some seeds. Don’t fear the heat; just taste as you go! Pair your Peach Avocado Salsa with tortilla chips. The sweet and creamy mix contrasts nicely with the crunchy chips. It's a hit at parties! Serving with grilled meats makes this salsa shine. It adds freshness to chicken, fish, or pork. Just spoon it on top for a burst of flavor. Garnishing with cilantro and lime wedges makes your dish pop. The green of the cilantro looks fresh, while the lime adds vibrancy. This simple touch makes the salsa look restaurant-quality. Serving in colorful bowls adds fun to your table. Bright bowls catch the eye and make the dish more inviting. Plus, it makes your meal feel special. For the full recipe, check out the details above. Enjoy your cooking adventure! {{image_2}} You can mix in other fruits or veggies to change your salsa. Adding mango brings a sweet twist. Its juicy texture works well with peaches. Pineapple also adds a tropical taste. Just chop it up like you do with peaches. You can include bell peppers for crunch. Red or yellow peppers add color and flavor. Dice them small to blend with the other ingredients. This gives your salsa a fresh and vibrant look. Adjust the spice level to fit your taste. If you love heat, add more jalapeño. Just remember to remove the seeds first. You can also try adding hot sauce for an extra kick. Start with a little, then taste as you go. Peach Avocado Salsa is naturally gluten-free. All the ingredients are safe for those with gluten issues. It also fits a vegan diet perfectly. The fruits and veggies offer fresh and healthy flavors without any animal products. Enjoy this salsa with confidence, no matter your dietary needs! To keep your Peach Avocado Salsa fresh, store it in the fridge. Use an airtight container to seal in all the flavors. This salsa lasts about 2 days. After that, the taste may fade, and the avocado may brown. Can you freeze Peach Avocado Salsa? Yes, but it’s not the best option. Freezing changes the texture of the avocado. If you must freeze it, use a freezer-safe container. Thaw it in the fridge overnight before serving. The salsa will be safe to eat, but the texture will be softer. To keep avocado from browning, add lime juice right after cutting. The acid slows oxidation. You can also store the salsa with the pit from the avocado. It helps keep the mixture fresh longer. You can serve Peach Avocado Salsa with many dishes. Here are some great ideas: - Tortilla chips - Grilled chicken - Fish tacos - Quesadillas - Tacos - Wraps - Shrimp This salsa adds a fresh touch to any meal. It pairs well with the heat of grilled meats. You can also use it as a topping for baked potatoes. Making Peach Avocado Salsa is quick and easy. Here’s a quick recap: - Prep Time: 10 minutes - Total Time: 20 minutes You chop and mix, and it's ready to enjoy. Yes, you can make this salsa ahead! Here are some tips for meal prep: - Prepare the salsa up to two hours before serving. - Store it in an airtight container in the fridge. - Add lime juice right before serving to keep it fresh. Making it ahead gives flavors a chance to blend. Just remember to check for ripeness on the avocados! This blog post covered the fun and fresh recipe for Peach Avocado Salsa. We explored main ingredients like peaches, avocados, and jalapeño. I provided step-by-step instructions for easy prep and mixing. You learned tips for perfecting the dish and creative variations to fit any taste. Finally, we discussed storage options to keep your salsa fresh. Enjoy making this vibrant salsa, and remember to have fun experimenting with flavors! Your next meal is about to get a tasty upgrade.

Peach Avocado Salsa Fresh and Flavorful Delight

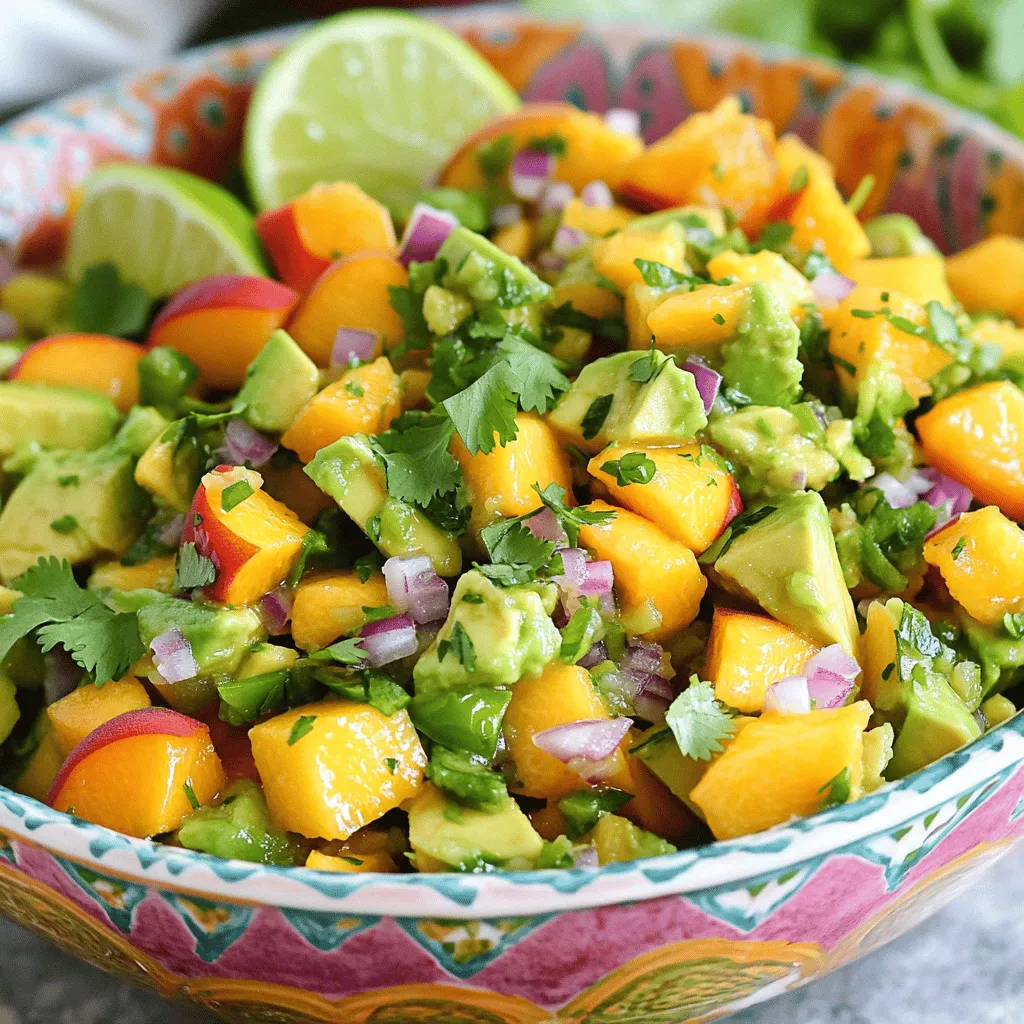
Craving a fresh, zingy treat? Peach Avocado Salsa is your answer! This vibrant blend of juicy peaches and creamy avocados

Older posts
Newer posts
← Previous Page1 … Page69 Page70 Page71 … Page82 Next →

dsad

© 2026 Recipes Pursuit • Built with GeneratePress

Our Policies

  • Copyright Policy
  • Cookie Policy
  • GDPR Policy
  • Privacy Policy
  • Disclaimer
  • Terms Of Use

More Information

  • Home
  • About
  • Contact
  • Appetizers
  • Dessert
  • Dinner
  • Drinks
©2026, Recipes Pursuit About Back To Top