Skip to content
DisclaimerTerms Of UseGDPR PolicyCookie Policy

Recipes Pursuit

  • Home
  • Drinks
  • Appetizers
  • Dinner
  • Dessert
  • About
  • Contact
  • Privacy Policy
DisclaimerTerms Of UseGDPR PolicyCookie Policy

NO-ING-IMG

To make a great vegan burrito bowl, you need a few key ingredients. Here’s what you'll use: - 1 cup quinoa, rinsed - 2 cups vegetable broth - 1 can (15 oz) black beans, drained and rinsed - 1 cup corn (fresh or frozen) - 1 bell pepper, diced (any color) - 1 avocado, diced - 1 cup cherry tomatoes, halved - 1 small red onion, finely chopped - 1 teaspoon ground cumin - 1 teaspoon chili powder - 1 tablespoon olive oil - Juice of 1 lime - Salt and pepper to taste - Fresh cilantro, chopped (for garnish) - Sliced jalapeños (optional for spice) These ingredients create a colorful and tasty meal. Quinoa serves as a healthy base. The black beans add protein, while the veggies provide crunch and flavor. Adding garnishes can elevate your bowl. Here are some ideas: - Fresh cilantro for a burst of flavor - Sliced jalapeños for heat - Lime wedges for extra zest - Avocado slices for creaminess - Vegan sour cream for richness These garnishes not only look nice but also enhance the taste. Experiment with different toppings to find what you love most. Vegan burrito bowls pack a nutritional punch. Here are some benefits: - Quinoa: A complete protein, high in fiber - Black beans: Rich in protein and iron - Avocado: Full of healthy fats - Vegetables: Provide vitamins and minerals This meal is balanced and filling. It offers a great mix of protein, fiber, and healthy fats. Plus, it’s vegan and packed with nutrients. Enjoy the flavors while nourishing your body! For the full recipe, check the section above. To start your vegan burrito bowls, rinse 1 cup of quinoa under cold water. This step removes any bitterness. In a medium saucepan, bring 2 cups of vegetable broth to a boil. Once it boils, add the rinsed quinoa. Lower the heat, cover, and let it simmer for about 15 minutes. When the quinoa is fluffy, remove it from the heat. Let it sit for 5 minutes, then fluff it with a fork. This creates a light and airy base for your bowl. While the quinoa cooks, heat 1 tablespoon of olive oil in a large skillet over medium heat. Add 1 small chopped red onion and sauté for about 3-4 minutes. You want the onion to soften and become fragrant. Next, toss in 1 diced bell pepper and 1 cup of corn. Sprinkle 1 teaspoon of ground cumin and 1 teaspoon of chili powder over the mixture. Season with salt and pepper to taste. Sauté for another 5-7 minutes. Stir often until the bell peppers are tender and vibrant. In a large bowl, combine the cooked quinoa, 1 can of black beans (drained and rinsed), and the sautéed vegetable mix. Gently fold in 1 diced avocado and 1 cup of halved cherry tomatoes. This not only adds flavor but also color to your dish. Drizzle the juice of 1 lime over the mixture and toss it gently. Taste your creation and adjust the seasoning if you need to. Serve in bowls and garnish with fresh cilantro. For those who love spice, add sliced jalapeños on top. Enjoy your flavorful and nutritious meal! For the complete recipe, check the Full Recipe section. To get great texture, cook the quinoa well. Rinse it first to remove the bitter coating. Use vegetable broth for added flavor. Simmer it on low heat until fluffy. Let it sit for five minutes after cooking. Fluff it gently with a fork. This ensures each grain stands out. Use spices like cumin and chili powder to boost flavor. Sauté your veggies in olive oil. This brings out their natural sweetness. Add lime juice just before serving for brightness. Taste your dish as you go. Adjust salt and pepper to your liking. Fresh cilantro adds a burst of freshness. Don’t skip rinsing the quinoa. It makes a big difference in taste. Avoid overcooking the vegetables; they should be tender yet crisp. If you add too much salt, it can overpower your dish. Lastly, don’t forget the garnishes! They make your bowl look and taste amazing. Check the [Full Recipe] for more details on how to create these vibrant bowls! {{image_2}} You can boost your vegan burrito bowls with protein. Tofu is a great choice. It soaks up flavors well. Just cube it, season it, and sauté it until golden. Tempeh is another tasty option. It has a nutty flavor and adds texture. Crumble it or slice it, then sauté with spices for a hearty kick. Spices can take your burrito bowl to the next level. Try adding smoked paprika for a rich taste. A pinch of cayenne can add heat. You can also mix in fresh herbs like cilantro or parsley. For dressings, a simple lime vinaigrette works well. Just mix lime juice, olive oil, and a touch of salt. You can also blend avocado with lime for a creamy dressing. While quinoa is a fantastic base, you have other options. Brown rice offers a chewy texture and nutty taste. Cauliflower rice is low in carbs and adds a light feel. Just pulse cauliflower florets in a food processor and sauté. Both choices work great with the same toppings from the full recipe. Exploring these variations keeps your meals exciting and nutritious! Store your vegan burrito bowls in airtight containers. This keeps them fresh. Let the bowls cool before sealing. If you add avocado, it may brown. To prevent this, store avocado separately. You can keep the bowls in the fridge for up to three days. When you want to eat leftovers, reheat in the microwave. Use a microwave-safe bowl and cover it. Heat in short bursts, about 30 seconds each. Stir between heating until warm. You can also heat on the stove. Just add a splash of water and stir until hot. Freezing is a great way to save time. Divide the burrito bowls into portions. Use freezer-safe containers or bags. They can last for up to three months in the freezer. To eat, thaw in the fridge overnight. Reheat as mentioned before. This keeps your meal tasty and ready to enjoy! For the full recipe, check the Vibrant Vegan Burrito Bowls. Serve Vegan Burrito Bowls in deep bowls. Place a scoop of quinoa at the bottom. Then, layer on the black beans and sautéed veggies. Add diced avocado and halved cherry tomatoes on top. Finish with a sprinkle of fresh cilantro. A slice of lime on the side adds a fresh kick. You can also serve your bowls with tortilla chips for crunch. This mix of flavors looks great and tastes amazing! Yes, you can make these burrito bowls gluten-free. The main ingredients are naturally gluten-free. Use quinoa, black beans, and fresh veggies. Just ensure that the vegetable broth is gluten-free, as some brands may contain gluten. Most canned beans and corn are also gluten-free. Always check labels to be sure. This way, everyone can enjoy a tasty meal without worry. To customize for picky eaters, keep it simple. Start with the quinoa base and offer toppings on the side. Let them choose what they want. Some may prefer just beans and avocado. Others might like extra veggies or no spice. You can add a creamy dressing for those who want more flavor. This way, each person can build their perfect bowl. Enjoy experimenting with flavors to find what works best! For a complete guide, check out the Full Recipe. To wrap it up, we explored all the key parts of making vegan burrito bowls. We looked at the essential ingredients, cooking steps, and helpful tips. We also talked about tasty variations and how to store your bowls well. Remember, you can mix things up to fit your taste. Keep it fun and don’t be afraid to experiment. With these simple steps, you can create a healthy and delicious meal anytime!

Vegan Burrito Bowls Flavorful and Nutritious Meal

Are you ready to explore a meal that’s both flavorful and good for you? Vegan burrito bowls are not just

To make Garlic Parmesan Brussels Sprouts, gather these items: - 1 lb Brussels sprouts, trimmed and halved - 4 tablespoons olive oil - 4 cloves garlic, minced - 1/2 cup grated Parmesan cheese - 1 teaspoon salt - 1/2 teaspoon black pepper - 1/2 teaspoon red pepper flakes (optional) - 2 tablespoons balsamic glaze (for drizzling) For this dish, I use olive oil. It has a smooth flavor that works well. Olive oil helps the Brussels sprouts roast evenly. The garlic adds a strong taste that pairs perfectly with the cheese. Salt and pepper bring out the natural sweetness of the sprouts. If you like heat, add red pepper flakes. They give a nice kick without overpowering the dish. You can customize this recipe easily. Want a tangy touch? Try adding lemon zest. It brightens the flavors. If you prefer a different cheese, consider using feta or goat cheese. Both give a unique twist. For an extra crunch, sprinkle some toasted nuts on top. They add texture and flavor. Finally, you can drizzle balsamic glaze before serving. It adds sweetness and enhances the dish's taste. {{ingredient_image_1}} Start by preheating your oven to 400°F (200°C). This step is key to getting crispy Brussels sprouts. While the oven warms up, trim the Brussels sprouts. Cut off the stem and slice them in half. This helps them cook evenly and get that nice char. In a large bowl, combine the halved Brussels sprouts with olive oil, minced garlic, salt, black pepper, and red pepper flakes if you want spice. Toss everything together until the sprouts are well-coated. This mixture gives the sprouts a tasty flavor. Make sure each sprout gets a good amount of oil and seasoning. Spread the seasoned Brussels sprouts in a single layer on a baking sheet, cut side down. This positioning helps them roast better. Place the sheet in the oven and roast for 20 to 25 minutes. Halfway through, stir the sprouts for even cooking. When they finish, they should be tender and crispy. Right after you take them out, sprinkle grated Parmesan cheese on top. This cheese adds a rich, salty flavor. Return the baking sheet to the oven for 2 to 3 minutes. You want the cheese to melt and get slightly golden. Finally, drizzle some balsamic glaze over the sprouts for a sweet touch. Serve right away, and enjoy this delicious, flavorful side dish! To get your Brussels sprouts nice and crispy, cut them in half. This exposes more surface area to the heat. Use a good amount of olive oil to help them brown. Make sure to spread them out on the baking sheet. If they touch, they will steam instead of roast. Stir them halfway through cooking to get even crispiness. You can prep your Brussels sprouts in advance. Trim and halve them, then toss them with oil and spices. Store them in the fridge for up to 24 hours. When you are ready, simply roast them straight from the fridge. This saves time and keeps your meal on track. Serve these Brussels sprouts as a side dish with your favorite main course. They pair well with chicken, steak, or fish. Drizzle some extra balsamic glaze over them right before serving. You can also garnish with fresh herbs like parsley for a pop of color and flavor. Pro Tips Freshness Matters: Always choose Brussels sprouts that are firm and bright green for the best flavor and texture. Cut Evenly: Make sure to halve the Brussels sprouts evenly to ensure consistent cooking and browning. Don’t Skip the Glaze: The balsamic glaze adds a sweet and tangy finish that complements the savory Parmesan beautifully. Experiment with Cheese: Try using different types of cheese like Pecorino Romano or Asiago for a unique twist on flavor. {{image_2}} If you want to change the flavor, try other cheeses. Pecorino Romano adds a nice sharpness. Cheddar gives a rich and creamy taste. Feta brings a tangy twist. Experiment with your favorite cheese to find what you love best. You can cook Brussels sprouts in different ways. Air frying gives them a crispy texture with less oil. Set your air fryer to 375°F (190°C) and cook for about 15-20 minutes. Shake the basket halfway through. Grilling adds a smoky flavor. Toss the sprouts in olive oil, then grill them over medium heat for about 10-12 minutes. Both methods keep the sprouts tender inside. Want to spice things up? Add herbs like thyme or rosemary for fresh flavor. You can also toss in some bacon for a savory kick. If you like heat, sprinkle in more red pepper flakes. For a sweet touch, drizzle honey or maple syrup before serving. Adjust these flavors to match your taste. After you make Garlic Parmesan Brussels sprouts, let them cool. Place them in an airtight container. They stay fresh in the fridge for about 3 days. Make sure to store them right away for the best taste. If you see any moisture in the container, it’s best to dry it out. This helps keep the sprouts crispy. You can freeze Brussels sprouts, but they lose some texture. To freeze them, cool them first. Place them in a single layer on a baking sheet. Freeze for about an hour. After they are frozen, transfer them to a freezer bag. This way, they won’t stick together. They can last up to 3 months in the freezer. To reheat, use the oven for the best results. Preheat your oven to 375°F (190°C). Spread the Brussels sprouts on a baking sheet. Heat for about 10 minutes or until warm. This method helps keep them crispy. You can also use a skillet on medium heat. Just stir them gently until they are hot. Avoid the microwave, as it can make them soggy. To add heat, use red pepper flakes. Start with 1/2 teaspoon for mild spice. If you like it hotter, double the amount. You can also try adding fresh chopped chili peppers. Mixing in a dash of hot sauce is another tasty option. This way, you can control the spice level to suit your taste. Yes, you can use frozen Brussels sprouts. Just make sure to thaw and drain them first. Pat them dry with a towel to remove excess moisture. This helps them crisp up better in the oven. Keep in mind that frozen sprouts may take a little longer to cook. Check for tenderness and crispiness before serving. Garlic Parmesan Brussels sprouts pair great with many dishes. They go well with roasted meats like chicken or pork. They also complement fish, especially salmon. If you want a vegetarian option, serve them with quinoa or risotto. These sprouts can brighten up any meal with their rich flavor. Enjoy experimenting with your favorite dishes! This blog post explored all you need for perfect Garlic Parmesan Brussels Sprouts. We covered key ingredients, including oils and seasonings, and discussed fun variations. Step-by-step instructions guided you through each cooking phase for that crispy texture. I shared tips for meal prep and serving ideas that elevate your dish. Plus, we touched on storage and reheating to keep your sprouts fresh. With these insights, you can easily create a delicious side dish that impresses everyone. Enjoy experimenting with flavors and make this recipe your own!

Garlic Parmesan Brussels Sprouts Flavorful Side Dish

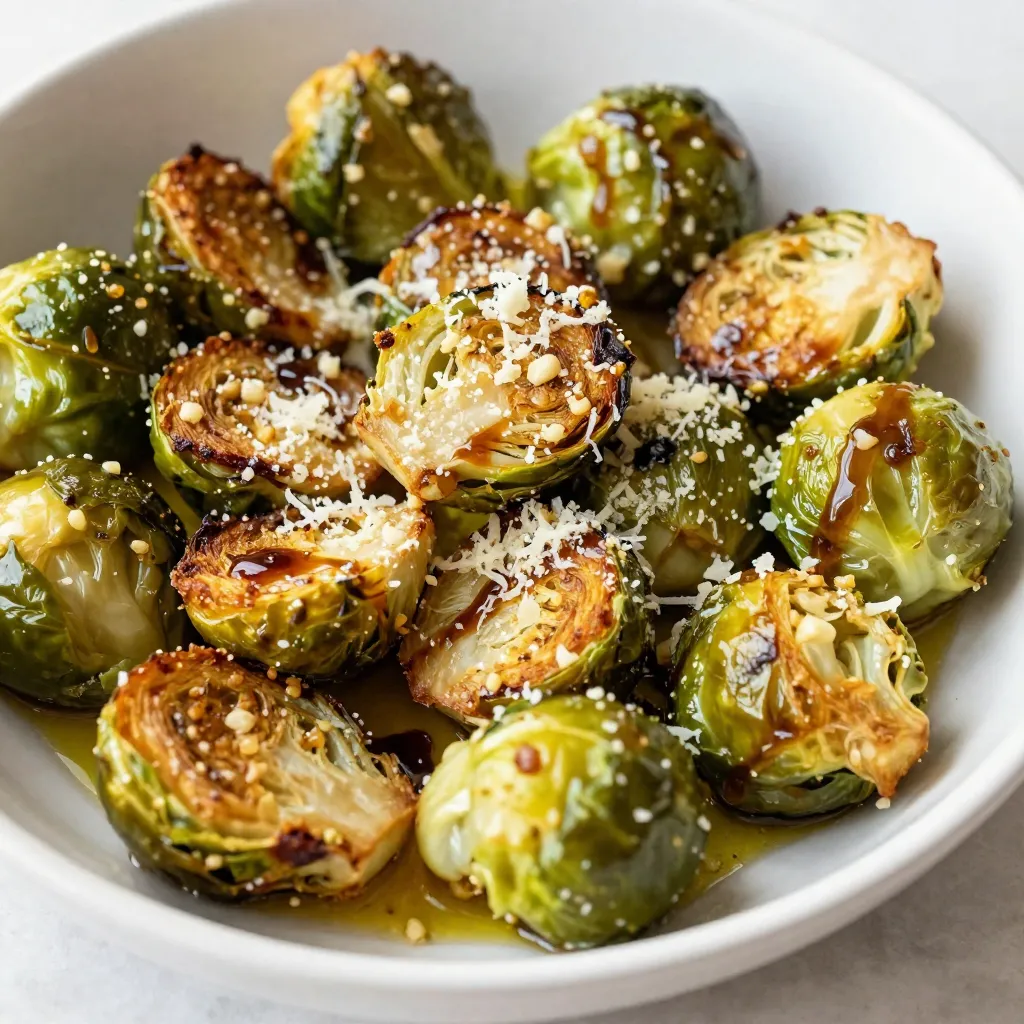
Looking to elevate your vegetable game? Garlic Parmesan Brussels Sprouts are the ultimate flavorful side dish. With a crisp exterior

To make a tasty vegetable stir fry, gather these ingredients: - 1 cup broccoli florets - 1 red bell pepper, sliced - 1 yellow bell pepper, sliced - 1 carrot, julienned - 1 cup snap peas - 2 cloves garlic, minced - 1 tablespoon fresh ginger, minced - 2 tablespoons soy sauce (low-sodium if preferred) - 1 tablespoon sesame oil - 1 teaspoon cornstarch (optional, for thickening) - Salt and pepper to taste - Sesame seeds for garnish - Green onions, chopped for garnish Using the right quantities is key for flavor. Here are some tips: - For more crunch, add more snap peas. - Swap broccoli for green beans if you like. - Use tamari instead of soy sauce for gluten-free. - Coconut aminos can replace soy sauce for a sweeter taste. - If you want heat, add red pepper flakes or fresh chili. This simple vegetable stir fry is healthy and low in calories. Each serving has: - Calories: 150 - Protein: 4g - Carbohydrates: 14g - Dietary Fiber: 4g - Sugars: 2g - Fat: 8g - Sodium: 400mg (can be less with low-sodium soy sauce) This dish is packed with vitamins and minerals, perfect for a quick meal. For the full recipe, check out the link. Enjoy cooking! Start with washing all your vegetables. This step is key for freshness. Cut broccoli into small florets. Slice the red and yellow bell peppers into thin strips. Julienning the carrot helps it cook faster. Lastly, trim the ends of the snap peas. Make sure you have minced garlic and ginger ready to go. Having everything prepped will keep the cooking smooth and quick. Heat your large skillet or wok over medium-high heat. Pour in the sesame oil. Once it shimmers, add the minced garlic and ginger. Stir them for about 30 seconds. Watch closely to avoid burning. Toss in the broccoli, bell peppers, carrot, and snap peas. Stir-fry for 5-7 minutes. You want the veggies to be tender but still crisp. Drizzle the soy sauce over the stir-fried veggies. If you like a thicker sauce, mix cornstarch in a tablespoon of water. Stir this mixture into your veggies. Taste and add salt and pepper as needed. Stir for another minute to heat everything through. Remove from heat and serve hot. Garnish with sesame seeds and chopped green onions for extra flavor. Enjoy your colorful, crunchy dish! For a detailed cooking guide, check the Full Recipe. To get the best texture in your stir fry, cut vegetables into similar sizes. This helps them cook evenly. I like to use bite-sized pieces. This way, they stay crisp but tender. Cook the harder vegetables first, like carrots and broccoli. They need more time. Add softer ones later, like bell peppers and snap peas. Stir-frying fast keeps them crunchy and bright. For flavor, sesame oil is my top choice. It adds a nutty taste. You can also use olive oil or canola oil if you prefer. For seasoning, soy sauce works wonders. It offers a savory depth. Fresh garlic and ginger give a nice kick. Don't forget to sprinkle sesame seeds and green onions on top for extra flair! To save time, prep your veggies in advance. You can wash and cut them a day ahead. Store them in the fridge in airtight bags. This way, they are ready to go when you are. Another tip is to use a wok or large pan. This allows you to cook more at once. You can make a big batch for lunch or dinner. Want the full recipe? Check out the Complete Recipe section! {{image_2}} You can easily add protein to your vegetable stir fry. Tofu is a great choice for a meatless option. Just press it to remove water, then cut it into cubes. Cook the tofu until golden and crispy before adding vegetables. If you prefer meat, chicken and shrimp work well too. Cut chicken into small pieces and cook until no longer pink. Shrimp cooks quickly, so add it near the end. This adds flavor and makes the dish more filling. Mixing different veggies can change the taste and look of your stir fry. You might try adding zucchini, mushrooms, or cauliflower. Each veggie brings its own flavor and crunch. You can also use seasonal vegetables. Frozen vegetables are handy too if you’re short on time. Just remember to thaw them before cooking. This keeps them from getting mushy. Experiment with your favorites to find the best mix. While soy sauce is classic, you may want to try other sauces. Teriyaki sauce adds sweetness, while oyster sauce gives a rich flavor. If you like a kick, add some chili sauce or sriracha. For a tangy twist, mix in a bit of lime juice or rice vinegar. You can also enhance the dish with herbs like basil or cilantro. These flavors will make your stir fry stand out. For the full recipe, check the details in our complete guide. After cooking, let your stir fry cool down. Use an airtight container to store leftovers. Keep them in the fridge. Proper storage keeps your dish fresh for about three days. Always label your container with the date. When reheating, use a pan or microwave. For the pan, add a little oil and heat on medium. Stir often until warm. If using a microwave, cover the container and heat in short bursts. Stir in between to avoid hot spots. This keeps the veggies crisp and tasty. You can freeze the stir fry too! First, cool it completely. Then, pack it in a freezer-safe container or bag. Remove as much air as possible. It can last up to three months. When ready to eat, thaw in the fridge overnight before reheating. Enjoy your meal anytime! You can use vegetable broth or coconut aminos instead of soy sauce. These options add flavor without the saltiness of soy. You can also mix in lemon juice or vinegar for a bright taste. Try adding a bit of garlic or ginger for an extra kick. Yes, frozen vegetables work well for stir fry. They are quick and convenient. Just cook them a bit longer to ensure they heat through. Look for frozen mixes that include bell peppers, broccoli, and snap peas. This makes it easy to enjoy your stir fry anytime. The best vegetables for stir fry are: - Broccoli florets - Bell peppers (red and yellow) - Carrots - Snap peas - Zucchini - Mushrooms These veggies cook quickly and keep their crunch. You can mix and match them based on your taste. You can find the full recipe for Colorful Crunch Vegetable Stir Fry in the article above. This recipe gives you all the details you need to make a delicious dish. Enjoy cooking! This vegetable stir fry is easy to make and full of flavor. We covered essential ingredients, tips for perfect texture, and even variations to suit your taste. You can add protein or use frozen veggies if needed. Remember, meal prep can save you time, and storing leftovers is simple. I hope these steps make cooking enjoyable and stress-free. Enjoy your healthy dish and feel proud of your cooking skills!

Simple Vegetable Stir Fry Flavorful and Quick Recipe

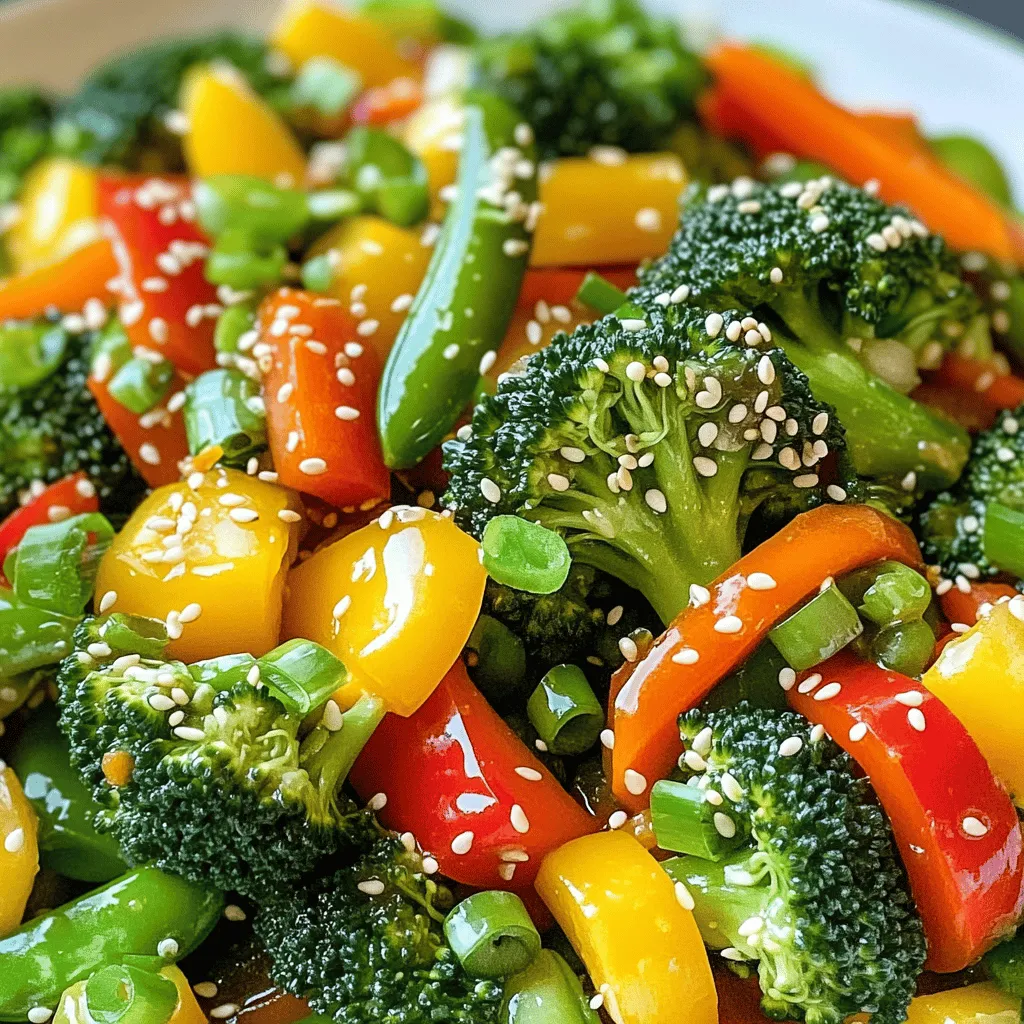
Are you looking for a quick and tasty meal? My Simple Vegetable Stir Fry is just what you need! Packed

To make these peach scones, you need: - 2 cups all-purpose flour - 1/3 cup granulated sugar - 1 tablespoon baking powder - 1/2 teaspoon salt - 6 tablespoons cold unsalted butter, cubed - 1 cup fresh peaches, diced - 1/2 cup heavy cream - 1 large egg - 1 teaspoon vanilla extract - 1/4 teaspoon almond extract - Additional sugar for sprinkling These simple ingredients create a flaky texture and sweet flavor. The fresh peaches bring a juicy burst to every bite. You can also try: - Alternative fruits like blueberries or raspberries - Spices such as cinnamon or nutmeg These options let you customize your scones. Mixing in different fruits or spices can lead to fun new flavors. When you innovate, you make each batch unique and exciting. For the full recipe, check out the detailed instructions on how to create these delightful scones. - Preheat your oven to 400°F (200°C). Line a baking sheet with parchment paper. - In a large bowl, whisk together the flour, sugar, baking powder, and salt. - Add the cold, cubed butter to the dry mix. Use a pastry cutter or your fingers. Mix until it looks like coarse crumbs. - Gently fold in the diced peaches. Make sure they are evenly mixed. - In a separate bowl, whisk together the heavy cream, egg, vanilla extract, and almond extract. Mix until well combined. - Pour the wet mixture into the dry mix. Stir gently until just combined. Do not overmix; the dough should feel sticky. - Turn the dough out onto a floured surface. Knead it gently 2-3 times until it holds together. Shape it into a disk about 1 inch thick. - Cut the disk into 8 wedges. Place them on the prepared baking sheet. - Brush the tops with a little extra cream. Sprinkle with sugar for a sweet touch. - Bake for 15-20 minutes. They are done when golden brown. A toothpick should come out clean. - Remove from the oven and let cool on a wire rack for a few minutes before serving. For the full recipe, follow the steps carefully to enjoy these delightful peach scones! To make perfect peach scones, avoid overmixing the dough. When you mix, do it just enough to combine the ingredients. Overmixing makes the scones tough. You want them light and fluffy. Chill the butter for flakier scones. Cold butter makes the dough rise better. It creates tiny pockets of air, which adds to the flaky texture. Cut the butter into small cubes and place it in the fridge before you start. Serve your peach scones with whipped cream or peach preserves. This adds a sweet touch that perfectly complements the peach flavor. The creaminess balances the scone's texture. These scones are best served warm or at room temperature. Heat brings out the flavors and makes them even more delightful. Enjoy them fresh from the oven or after they cool. You can find the Full Recipe to guide you through the process! {{image_2}} You can switch up the fruit in these scones. Try using blueberries for a juicy twist. You can also mix in raspberries or blackberries for a mixed berry scone. Each fruit brings its own flavor and texture. This keeps your scones fresh and exciting for every occasion. Add some zest to your scones! A bit of lemon or orange zest brightens the flavor. You can also play with extracts. Try using coconut or lemon extract for a different taste. Simple changes can create a whole new experience. If you need gluten-free scones, use almond or coconut flour instead of regular flour. Both options work well, and the scones still taste great. For vegan scones, swap out the egg and cream for plant-based alternatives. Use almond milk and a flax egg for binding. These changes make the recipe fit various diets without losing flavor. For the full recipe, check out the Peachy Paradise Scones ! To keep your easy peach scones fresh, store them in an airtight container at room temperature. This method helps retain moisture and flavor. If you live in a hot, humid area, consider refrigerating them. Just make sure they are in a sealed container to avoid drying out. You can freeze baked scones for later use. First, let them cool completely. Then, wrap each scone in plastic wrap. Place the wrapped scones in a freezer-safe bag or container. When you want to enjoy them, simply take out a scone and thaw it at room temperature. To reheat, preheat your oven to 350°F (175°C). Place the scone on a baking sheet and warm for about 10 minutes. This method brings back the flaky texture. For a quick fix, you can also microwave the scone for about 15-20 seconds. Enjoy a warm peachy treat anytime! For the full recipe, check out the main section. You can tell scones are done by their golden color. They should not be pale. Another great test is to use a toothpick. Insert it into the middle of a scone. If it comes out clean, your scones are ready! Yes, you can use frozen peaches. However, keep in mind that they may add extra moisture. This can make your scones a bit softer. If you choose frozen peaches, try to thaw and drain them first. This helps keep the texture light and fluffy. If your dough is too sticky, don’t panic! You can add a little more flour, one tablespoon at a time. Mix gently after each addition. You want the dough to be slightly sticky but manageable. Avoid overmixing, as this can make scones tough. These scones can last up to three days when stored properly. Keep them in an airtight container at room temperature. For longer freshness, you can freeze them. Just make sure to wrap them well. They will taste great even after freezing! For the full recipe, check out the Peachy Paradise Scones. These peach scones are easy to make and fun to customize. You saw how to mix key ingredients for a tasty treat. I shared tips for perfecting the dough and enhancing flavors. You can also try different fruits and make it your own. Enjoy warm scones with cream or fruit preserves. With proper storage, they stay fresh longer. Dive into this recipe to bring sweet peach goodness to your kitchen!

Easy Peach Scones Flaky Delight for Every Occasion

Let’s make some delicious peach scones that everyone will love! This easy recipe gives you soft, flaky scones bursting with

To make a great homemade tomato soup, you need some key ingredients that bring flavor and depth. Here’s what you should gather: - 6 ripe tomatoes, chopped - 1 medium onion, finely chopped - 3 cloves garlic, minced - 1 carrot, peeled and diced - 2 cups vegetable broth - 1 cup coconut milk (or heavy cream for a richer taste) - 1 tablespoon olive oil - 1 teaspoon dried basil - 1 teaspoon sugar - Salt and pepper to taste - Fresh basil leaves for garnish These ingredients work together to create a rich and warm soup. The tomatoes give a fresh taste, while the coconut milk adds creaminess. You can adjust the soup based on what is in season. In summer, use fresh garden tomatoes for a sweeter flavor. In fall, add roasted peppers or pumpkin for a cozy touch. Winter is perfect for using canned tomatoes when fresh ones are hard to find. You can also mix in seasonal herbs like thyme or rosemary to change the flavor profile. Having the right tools makes cooking easier. Here are some things I recommend: - A large pot for cooking the soup - A wooden spoon for stirring - A sharp knife for chopping - A cutting board for prep - An immersion blender for pureeing (or a regular blender) - Measuring cups and spoons for accuracy These tools help you create a smooth and tasty soup. Each one plays a role in ensuring your cooking process is simple and efficient. For the complete guide to this recipe, check out the Full Recipe. Start by gathering your ingredients. You will need: - 6 ripe tomatoes, chopped - 1 medium onion, finely chopped - 3 cloves garlic, minced - 1 carrot, peeled and diced - 2 cups vegetable broth - 1 cup coconut milk (or heavy cream for a richer taste) - 1 tablespoon olive oil - 1 teaspoon dried basil - 1 teaspoon sugar - Salt and pepper to taste - Fresh basil leaves for garnish Wash your tomatoes well. Chop them into small pieces. Next, finely chop the onion and garlic. Peel and dice the carrot into small bits. Heat the olive oil in a large pot over medium heat. Add the chopped onion and minced garlic. Cook until they turn soft and clear, about 5 minutes. This step adds great flavor to your soup. Now, stir in the diced carrot. Cook for another 3 to 4 minutes. You want the carrot to soften a bit, but not mushy. Then, add the chopped tomatoes, vegetable broth, dried basil, and sugar. Bring the mixture to a simmer. Cover the pot and let it cook for about 20 minutes. This allows the tomatoes and carrots to soften completely. After cooking, use an immersion blender to puree the soup until smooth. If you don’t have one, transfer the soup in batches to a blender. Blend until creamy. Return the soup to the pot over low heat. Stir in the coconut milk and season with salt and pepper to taste. Heat through for another 5 minutes. Serve your homemade tomato soup hot. Use large bowls for a cozy feel. For a nice touch, add a swirl of coconut milk on top. Sprinkle some freshly chopped basil for color and flavor. Enjoy with a slice of crusty bread or a grilled cheese sandwich for a comforting meal. This recipe, known as Heavenly Creamy Tomato Soup, is both simple and satisfying. To make your soup taste great, you can add a few simple things. Fresh herbs, like basil or thyme, can boost the flavor. You can also squeeze some lemon juice for brightness. If you like spice, a pinch of red pepper flakes adds heat. Roasting the tomatoes before cooking can deepen their taste. Use good quality broth; it makes a big difference in flavor. When making tomato soup, avoid using unripe tomatoes. They can taste sour and not sweet. Don't skip the sugar; it balances the acidity from the tomatoes. Overcooking can lead to a dull flavor, so keep an eye on the time. If you blend too long, your soup can become too thin. Make sure to season well with salt and pepper to bring out all the flavors. Tomato soup pairs well with many sides. A classic choice is a grilled cheese sandwich. The crunch and cheese complement the soup nicely. You could also serve it with crusty bread for dipping. A side salad with fresh greens adds a nice touch. For a fun twist, try serving it with crispy bacon bits on top. Enjoy your comforting meal! {{image_2}} To make a creamy tomato soup, you should add coconut milk or heavy cream. This gives the soup a rich flavor and smooth texture. Start with the basic recipe. Once you blend the soup, stir in the coconut milk. Heat it gently for a few minutes. You can also sprinkle some cheese on top before serving for extra creaminess. For a vegan version, just skip the coconut milk and heavy cream. Use vegetable broth as your base. Instead of cream, you can blend in some soaked cashews for a creamy feel. This gives the soup a nice body without dairy. You can also add extra veggies like bell peppers or zucchini for more nutrients and flavor. If you like heat, try adding some spices. A pinch of red pepper flakes or a dash of hot sauce can spice things up. You can also toss in diced jalapeños when cooking the onions. This will give your soup a nice kick without overpowering the tomato flavor. Serve it with a dollop of sour cream to cool it down a bit. For more ideas, check out the Full Recipe. Store your leftover soup in a container with a tight lid. Make sure it cools down first. Place it in the fridge if you plan to eat it within a few days. It stays fresh for about three to four days. If you want to keep it longer, freezing is best. When you are ready to enjoy your soup again, use a pot for the best taste. Pour the soup in and heat it over low to medium heat. Stir it often to prevent sticking. You can also use a microwave. Heat it in short bursts, stirring in between. Make sure it gets hot all the way through. To freeze tomato soup, cool it completely first. Then, pour it into freezer-safe bags or containers. Leave some space at the top, as the soup expands when frozen. Label the bags with the date. It keeps well for up to three months. When you want some, just thaw it overnight in the fridge and reheat. For the full recipe, check the details above. Yes, you can use canned tomatoes for this recipe. They work well when fresh tomatoes are not in season. Look for whole or diced canned tomatoes. Just drain them and add them to the pot. This will save you time and still give you great flavor. Homemade tomato soup lasts about 5 days in the fridge. Make sure to store it in an airtight container. Before serving, just heat it on the stove or in the microwave. If you want to keep it longer, consider freezing it. You can serve many things with tomato soup. Grilled cheese is a classic choice. It pairs well with crusty bread or a fresh salad. For a fun twist, try adding some croutons or a sprinkle of cheese on top. Each option enhances the comforting taste of the soup. For the complete recipe, check out the Full Recipe link. Homemade tomato soup is simple and rewarding. We explored key ingredients and cooking tools. You learned how to prepare, cook, and serve this comforting dish. I shared tips for better flavors and common mistakes to avoid. We also discussed tasty variations and storage tips for later enjoyment. Homemade tomato soup brings warmth and joy to any meal. Now, you can create your own perfect bowl! Enjoy each spoonful and make it your own.

Homemade Tomato Soup Comforting and Simple Recipe

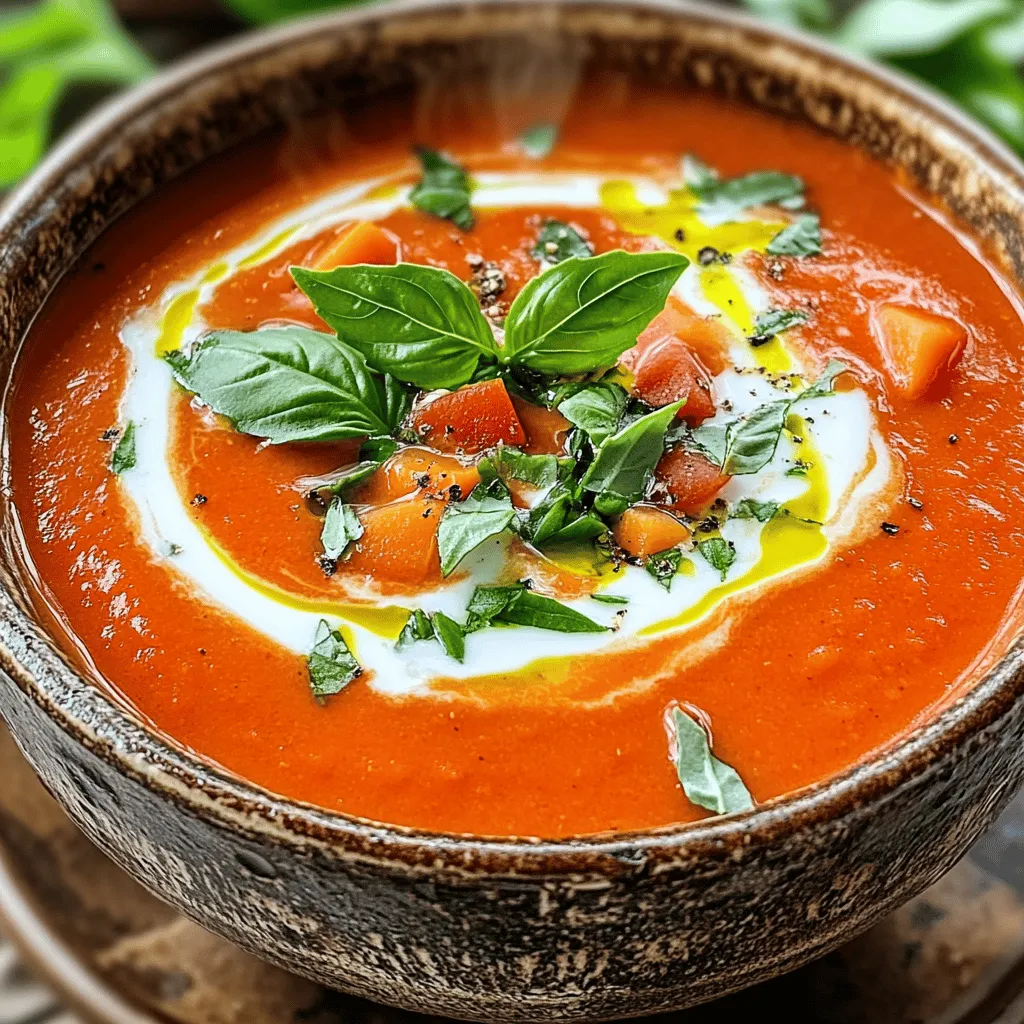
Tomato soup is a classic comfort food that warms your heart and soul. In this article, I will share my

To make fresh peach salsa, gather these ingredients: - 3 ripe peaches, diced - 1 small red onion, finely chopped - 1 red bell pepper, diced - 1 jalapeño, deseeded and minced - 1/4 cup fresh cilantro, chopped - Juice of 2 limes Each ingredient adds a burst of flavor. The peaches bring sweetness, while the jalapeño adds heat. You can adjust the spice by changing the amount of jalapeño. For a personal twist, consider these options: - 1 teaspoon honey (for extra sweetness) - Additional herbs like mint or basil - Diced avocado for creaminess These optional ingredients can change the taste and texture of your salsa. Feel free to experiment based on your likes. To make fresh peach salsa, you’ll need: - A medium mixing bowl - A sharp knife - A cutting board - A spoon for mixing Having the right tools makes the process easier and more fun. You can find the full recipe in this article. Enjoy your cooking! Start by gathering all your ingredients. You will need: - 3 ripe peaches, diced - 1 small red onion, finely chopped - 1 red bell pepper, diced - 1 jalapeño, deseeded and minced - 1/4 cup fresh cilantro, chopped - Juice of 2 limes - 1 teaspoon honey (optional) - Salt and pepper to taste Make sure the peaches are ripe for the best flavor. Cut them into small pieces. Dice the red onion and red bell pepper. Remove the seeds from the jalapeño for less heat, or leave some if you want it spicier. Chop the cilantro finely, and squeeze the lime juice just before mixing. In a medium bowl, combine your diced peaches, chopped onion, red bell pepper, and minced jalapeño. Add the chopped cilantro next. Pour in the fresh lime juice and honey if you want a sweeter touch. Use a spoon to mix everything gently. Be careful not to mash the peaches; you want them to stay in nice pieces. After mixing, season your salsa with salt and pepper to taste. Once seasoned, cover the bowl with plastic wrap or a lid. Place it in the fridge for at least 30 minutes. This time helps the flavors mix well. The longer it sits, the better the taste. Enjoy your fresh peach salsa with tortilla chips or grilled meats. For the full recipe, check the section above. When making fresh peach salsa, you want ripe peaches. Look for peaches that give a little when you press them. They should smell sweet and fragrant. Avoid hard peaches, as they won't have the right flavor. You can also check for a nice golden hue. The color shows they are ready to eat. The jalapeño in this salsa adds heat. If you want a milder version, remove the seeds and ribs. This part of the pepper holds most of the heat. For more spice, leave some seeds in or add a second pepper. You can also use a different pepper, like a serrano, for a different kick. Fresh peach salsa is very versatile. I love serving it with tortilla chips for a fun snack. You can also pair it with grilled chicken or fish for a tasty meal. Try it on tacos or as a topping for burgers. The flavors mix well with many dishes, so feel free to get creative! For the full recipe, check out the details above. {{image_2}} Mango peach salsa adds a tropical twist. Start with ripe mangoes and peaches. Dice them up the same way as you do for the fresh peach salsa. Combine them with red onion and lime juice. This mix tastes sweet and tangy. You can add jalapeño for some heat. This salsa pairs great with fish tacos or grilled shrimp. Tomato and peach salsa is another tasty option. Use fresh, ripe tomatoes with your peaches. Dice them and mix with red onion and bell pepper. The juicy tomatoes add a rich flavor. Lime juice brings brightness to the dish. This salsa works well on burgers or with chips. If you love heat, try spicy peach salsa with chili powder. Use your fresh peaches and jalapeños. Then add a teaspoon of chili powder. This gives the salsa a nice kick. Mix in lime juice and salt to balance the flavors. Serve this salsa with grilled meats or as a bold dip for chips. Explore these variations for fun new flavors with your fresh peach salsa. For the full recipe, check out the earlier section. To keep your peach salsa fresh, store it in an airtight container. Make sure to press out any air before sealing. Place the container in the fridge. Leftover salsa stays fresh for about three days. Always give it a quick stir before serving again. This helps mix the flavors well. You can freeze fresh peach salsa if you have extra. Use a freezer-safe container. Leave some space at the top for expansion. Fresh peach salsa can last for about three months in the freezer. When you’re ready to use it, let it thaw in the fridge overnight. Use it within a few days after thawing for the best taste. Fresh peach salsa has a short shelf life. It’s best when eaten fresh within three days. If you notice any change in color or smell, discard it. Always check for any signs of spoilage. Storing it properly will help keep it tasty and safe to eat. Enjoy your fresh salsa while it’s at its best! For a full recipe, check out the [Full Recipe]. Yes, you can use canned peaches. However, fresh peaches taste best. Canned peaches can be softer and sweeter. If you use them, drain the syrup well. This helps keep the salsa from being too soggy. Fresh fruit gives a nice crunch and bright flavor. To make your salsa spicier, add more jalapeño. You can also try diced serrano peppers for heat. If you like it really spicy, add a pinch of cayenne pepper. Just remember to taste as you go. This way, you can control the spice level to your liking. Fresh peach salsa pairs well with many dishes. Serve it with tortilla chips for a tasty snack. It also goes great on grilled chicken or fish. Use it as a topping for tacos or salads. The sweet and spicy mix enhances many meals. Enjoy the flavors! For the full recipe, see the details above. This blog post covered how to make fresh peach salsa. We discussed the key ingredients, steps to prepare, and tips for flavor. I shared awesome variations like mango peach salsa and spicy peach salsa. I also gave storage advice for your leftovers. In the end, enjoy your peach salsa! It's fresh, tasty, and fun. You can customize it easily to fit your taste. Happy salsa making!

Fresh Peach Salsa Flavorful and Easy Recipe

Get ready to add a burst of flavor to your meals with this Fresh Peach Salsa recipe! You don’t have

To make Crispy Garlic Parmesan Cauliflower, you will need: - 1 medium head of cauliflower, cut into florets - 1 cup all-purpose flour - 1 cup buttermilk (or non-dairy milk mixed with 1 tablespoon of vinegar) - 1 teaspoon garlic powder - 1 teaspoon onion powder - 1 teaspoon smoked paprika - 1 teaspoon black pepper - ½ teaspoon salt - 1 cup panko breadcrumbs - ½ cup grated Parmesan cheese - 2 tablespoons chopped fresh parsley (for garnish) - Olive oil spray Each ingredient plays a key role in making the dish tasty and crispy. The flour and buttermilk create a great base. The panko breadcrumbs give that crispy texture we all love. You can switch ingredients based on your needs. For gluten-free options, use gluten-free flour and gluten-free breadcrumbs. If you want to skip dairy, try almond milk or oat milk instead of buttermilk. Both give a nice taste without the dairy. If you don’t have smoked paprika, regular paprika works too. You can also add a pinch of cayenne for a spicy kick. Just adjust the amount to your liking. Using fresh ingredients is very important. Fresh cauliflower tastes better and has better texture. Fresh parsley adds a pop of color and flavor. Always check the quality of your ingredients. They make a big difference in your dish. The better your ingredients, the better your Crispy Garlic Parmesan Cauliflower will taste. For the full recipe, you can refer to the details above. Enjoy cooking! Start with a medium head of cauliflower. Cut it into bite-sized florets. Make sure the pieces are even. This helps them cook well. Rinse the florets under cold water. Pat them dry with a towel. Removing moisture is key to crispiness. In a large bowl, mix the dry ingredients. Combine flour, garlic powder, onion powder, smoked paprika, black pepper, and salt. Whisk them until they blend well. In a separate bowl, pour in the buttermilk. Dip each floret in the buttermilk, letting the excess drip off. Coat it in the flour mix, shaking off extra flour. Repeat this step. Dip the floret back into the buttermilk. Then, coat it in panko breadcrumbs mixed with Parmesan cheese. Press gently so it sticks well. Preheat your oven to 425°F (220°C). Line a baking sheet with parchment paper. Arrange the coated florets in a single layer. Make sure they are not touching. Lightly spray them with olive oil. This helps achieve a nice golden color. Bake for 20-25 minutes. Turn them halfway for even cooking. Once golden brown, remove them from the oven. Let them cool for a few minutes. Garnish with fresh parsley for a lovely touch. For the full recipe, check the link. To get your cauliflower super crispy, use panko breadcrumbs. They are lighter than regular ones. Also, spray olive oil on the florets. This helps them brown nicely. Bake at a high heat of 425°F (220°C). Flip halfway through for even crispiness. Let them cool for a few minutes after baking. This step makes them crunchier. You can add more taste easily. Try adding herbs like thyme or rosemary. A sprinkle of cayenne pepper can give a kick. For a cheesy twist, use more Parmesan or nutritional yeast for a vegan option. You can even toss in some lemon zest for a bright flavor. Mix and match to find your favorite combo. Don’t skip the buttermilk soak. This step helps the flour stick well. Avoid overcrowding the pan; give them space to crisp up. If they touch, they will steam instead of bake. Lastly, don’t skip the olive oil spray. It is key for that golden brown finish. For the full recipe, check above. {{image_2}} You can make this dish gluten-free easily. Just swap the all-purpose flour for almond flour or gluten-free flour. Both options work well for coating the cauliflower. Make sure your panko breadcrumbs are gluten-free too. This way, everyone can enjoy this crispy delight without worry. To make Crispy Garlic Parmesan Cauliflower vegan, use a non-dairy milk. Mix non-dairy milk with vinegar to mimic buttermilk. Replace Parmesan cheese with nutritional yeast or vegan cheese. This keeps the dish full of flavor while being plant-based. You’ll still get that crispy, tasty bite everyone loves. You can change the flavor of this dish by adding different herbs and spices. Try adding Italian seasoning for a herby twist. You could also use curry powder for a warm, spicy kick. For a zesty taste, sprinkle lemon zest before serving. Each change gives the cauliflower a new and exciting flavor to enjoy. After you enjoy your Crispy Garlic Parmesan Cauliflower, store any leftovers in an airtight container. Let the cauliflower cool to room temperature first. This helps keep it fresh. Place it in the fridge for up to three days. If you need to keep it longer, consider freezing it. To reheat your cauliflower, use an oven or an air fryer. Preheat the oven to 350°F (175°C). Place the cauliflower on a baking sheet. Heat for about 10 minutes. This method helps restore its crispiness. If using an air fryer, set it to 350°F (175°C) and cook for about 5-7 minutes. Avoid using a microwave, as it can make the cauliflower soggy. If you want to freeze your cauliflower, first let it cool completely. Then, place the florets in a single layer on a baking sheet. Freeze for about an hour. Once frozen, transfer them to a freezer-safe bag. Remove as much air as possible. They will stay good for up to three months. When you're ready to eat, bake them straight from the freezer without thawing for a quick snack. For more details, check the Full Recipe. Yes, you can use frozen cauliflower. Just make sure to thaw and drain it first. Pat it dry with a towel. This helps remove excess moisture. The goal is to keep the cauliflower crispy. You may need to adjust the baking time. Keep an eye on it while it cooks. To add heat, try using cayenne pepper or red pepper flakes. Mix these into the flour or breadcrumb coating. You can also add hot sauce to the buttermilk. This gives a nice kick without changing the texture. Experiment with your spice level. You can always add more, but it’s hard to take heat out! This dish pairs well with many meals. Serve it as a side with grilled chicken or fish. It’s great with a fresh salad or pasta. You can also serve it as a snack with a dip. Try ranch or a spicy aioli for extra flavor. The options are endless! To make crispy cauliflower without breading, roast it with seasonings. Toss florets in olive oil, garlic, and spices. Bake at a high temperature until golden. This method keeps it simple and healthy. You can enjoy the cauliflower's natural flavor. Add a sprinkle of cheese at the end if you like. For the full recipe, check out the Crispy Garlic Parmesan Cauliflower! This blog post covered all you need for crispy garlic parmesan cauliflower. We looked at ingredients, step-by-step instructions, and tips for the best results. Remember, fresh ingredients make a big difference in taste. Experiment with variations to fit your diet and flavor. With proper storage, your leftovers stay tasty. Now you have everything to enjoy a healthy snack or side. Dive in and make this dish your own!

Crispy Garlic Parmesan Cauliflower Flavorful Delight

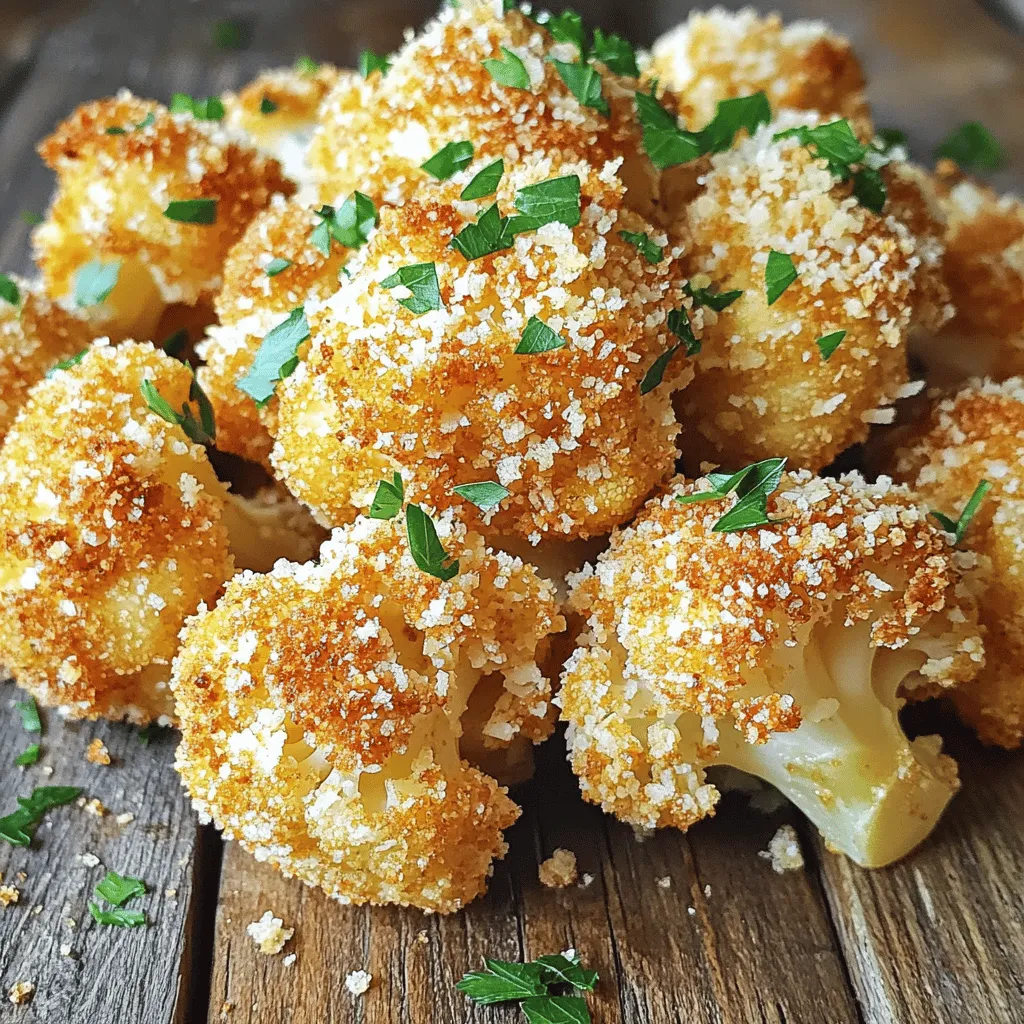
Are you ready to transform your snack game? My Crispy Garlic Parmesan Cauliflower will blow you away! This tasty treat

To make these tasty bites, you’ll need some simple, common ingredients. Here’s what you will use: - 8 oz cream cheese, softened - 1/2 cup powdered sugar - 1 tsp vanilla extract - 1 cup whipped cream (or whipped topping) - 1 cup graham cracker crumbs - 2 tbsp unsalted butter, melted - 1/2 cup fresh berries (strawberries, blueberries, or raspberries) for topping These main ingredients create a rich and creamy cheesecake filling that pairs perfectly with the crunchy crust. You can get creative with some optional ingredients. Here are a few ideas to try: - Chocolate drizzle for a sweet touch - Nuts for added crunch - Different extracts like almond or lemon for unique flavors Feel free to swap ingredients based on your taste! You don’t need fancy tools for this recipe. Just gather these basic items: - A large mixing bowl - An electric mixer - A mini muffin tin - Cupcake liners or non-stick spray - A spatula for smoothing Having the right equipment makes the process smooth and fun. With the Full Recipe, you’ll create a delightful treat that everyone will love! To start, you need to make the cheesecake mix. First, grab a large bowl. Add 8 oz of softened cream cheese. Use an electric mixer to beat the cream cheese until it is smooth. Next, slowly add in 1/2 cup of powdered sugar and 1 tsp of vanilla extract. Mix until everything is well combined. Now, gently fold in 1 cup of whipped cream. This makes the mixture light and fluffy. Now it's time to make the crust. In a separate bowl, combine 1 cup of graham cracker crumbs with 2 tbsp of melted unsalted butter. Stir this well until the crumbs are coated. Take a mini muffin tin and either line it with cupcake liners or grease it. Take a spoonful of the crumb mixture and press it into the bottom of each muffin cup. This forms a nice, sturdy crust. Next, it’s time to assemble the bites. Spoon the cheesecake mixture over each graham cracker crust in the muffin tin. Fill each cup almost to the top. Smooth the surface with a spatula for a neat finish. Place the muffin tin in the refrigerator for at least 2 hours. This helps the bites set well. When they are firm, remove them from the tin. Top each cheesecake bite with fresh berries or a drizzle of chocolate for that extra flair. Enjoy these delightful bites as a sweet treat! For the full recipe, check out the details provided earlier. When making no bake cheesecake bites, keep these tips in mind. First, make sure your cream cheese is soft. If it’s cold, the mixture won't blend well. This can lead to lumps in your bites. Also, don’t rush the mixing process. Mix until smooth and fluffy for the best flavor. Another mistake is overfilling the muffin cups. Leave some space at the top. The bites will expand a bit while setting. Finally, don't skip the chilling step! They need time to firm up in the fridge. To get a creamy and light texture, gently fold in the whipped cream. This keeps air in the mixture. If you stir too hard, you may lose that fluffiness. Use a spatula and fold slowly until fully combined. For a richer taste, try adding a bit of sour cream. This adds smoothness and a slight tang. You can also adjust the sweetness by changing the amount of powdered sugar. Taste the mixture before you fill the cups. When it's time to serve, presentation matters. Arrange the cheesecake bites on a nice platter. You can add mint leaves for color and freshness. This makes your dessert look even more inviting. For a fun twist, drizzle chocolate over the bites. This adds a nice touch to the flavor. You can also serve these bites with fresh berries on the side. They pair well and add a burst of color. For the full recipe, check the earlier section. Enjoy your delicious no bake cheesecake bites! {{image_2}} You can change the flavor of your cheesecake bites easily. Here are some ideas: - Chocolate: Add melted chocolate to the cream cheese mixture. - Lemon: Stir in lemon zest and juice for a bright taste. - Pumpkin: Mix in canned pumpkin and pumpkin spice for a fall treat. - Peanut Butter: Blend in peanut butter for a nutty twist. Each of these flavors brings a new vibe to your bites. Feel free to mix and match! Toppings can elevate your cheesecake bites. Here are some tasty options: - Fresh Fruit: Use berries, sliced bananas, or kiwi for a pop of color. - Chocolate Chips: Sprinkle mini chocolate chips on top for extra sweetness. - Caramel Sauce: Drizzle caramel sauce for a rich, sweet finish. - Nuts: Add crushed nuts for a crunchy texture. Toppings help you customize each bite. You can have fun with them! Need to change the recipe for dietary needs? No problem! Here are some easy swaps: - Dairy-Free: Use vegan cream cheese and coconut whipped cream. - Gluten-Free: Use gluten-free graham cracker crumbs for the crust. - Sugar-Free: Replace powdered sugar with a sugar substitute like erythritol. These swaps can help you enjoy cheesecake bites without worry. Always check labels for hidden ingredients! Store your no bake cheesecake bites in an airtight container. This keeps them fresh. Place parchment paper between layers to avoid sticking. Keep them in the fridge for the best taste. They will stay tasty for up to five days. If you're like me and love to prep ahead, this makes life easier! You can freeze these bites for longer storage. First, place them on a baking sheet. Make sure they don’t touch each other. Freeze them until solid. Then, transfer them to a freezer-safe container. They can last up to three months in the freezer. Just remember to thaw them in the fridge before serving. No bake cheesecake bites have a short shelf life. They taste best when fresh. For the best quality, eat them within five days. If you freeze them, they stay good for three months. Avoid leaving them at room temperature for too long. This keeps them safe and tasty. For more on how to make these delightful bites, check out the Full Recipe. Yes, you can make these bites ahead. They stay fresh in the fridge for about three days. This makes them a great choice for parties. Just keep them covered to avoid drying out. I love making them the day before an event. This way, I can relax and enjoy the gathering. If you want a cream cheese swap, try Greek yogurt or mascarpone. Both add creaminess with a different flavor. You can also try ricotta for a lighter option. Just remember that the taste will change a bit. It can be fun to mix flavors and find what you like best. To make your cheesecake bites firmer, add more cream cheese or less whipped cream. You can also chill them longer in the fridge. If you want, add a little gelatin to the mix, too. This will help them hold their shape better. Experimenting a bit can lead to the perfect texture for you. No Bake Cheesecake Bites are easy to make and fun to eat. We discussed key ingredients and the equipment you need. You learned step-by-step instructions for mixing, crusting, and assembling. I shared tips to avoid common mistakes and achieve the best texture. We also explored variations and storage tips to keep your bites fresh. Enjoy your cheesecake bites with different flavors and toppings. Keep this guide handy for tasty treats anytime. These bites are a sweet win in the kitchen!

No Bake Cheesecake Bites Easy and Tasty Treat

If you’re craving something sweet and easy, these No Bake Cheesecake Bites are for you! They’re quick to make and

- 2 boneless, skinless chicken breasts - 1 head romaine lettuce, chopped - 1 cup croutons - 1/2 cup grated Parmesan cheese - 1/4 cup Caesar dressing The main ingredients are simple and fresh. I love using boneless, skinless chicken breasts because they cook quickly and stay juicy. Romaine lettuce adds a nice crunch, while croutons give texture. The Parmesan cheese melts slightly with the warm chicken, creating a creamy bite. Caesar dressing ties everything together with its tangy flavor. - Anchovy fillets - Additional seasonings (salt, pepper, lemon juice) You can add anchovy fillets for a bold taste. Some people love this flavor, while others may prefer to skip it. Salt and pepper are classic seasonings that help bring out the best in the chicken. A splash of lemon juice adds brightness to the salad. - Store-bought vs. homemade Caesar dressing You can choose between store-bought and homemade Caesar dressing. Store-bought is quick and easy, saving you time. However, making your own allows you to control the flavors. I like to use a homemade dressing when I have extra time. It adds a personal touch to my salad. For the full recipe, check out the complete guide. Start by preheating your grill or skillet over medium-high heat. This step is key for getting good sear marks on your chicken. Next, brush both sides of the chicken breasts with olive oil. Then sprinkle salt and pepper on each side. This simple seasoning will enhance the chicken's flavor. Once your grill or skillet is hot, place the chicken on it. Cook each side for about 6 to 7 minutes. You want the chicken to reach an internal temperature of 165°F (75°C). After cooking, let the chicken rest for a few minutes. Resting helps keep the juices inside, making the chicken more tender. After that, slice it thinly for the salad. In a large salad bowl, add the chopped romaine lettuce. This will be the base of your salad. Next, toss in the croutons, sliced chicken, and grated Parmesan cheese. These ingredients mix well and create a hearty meal. Now for the dressing! Drizzle Caesar dressing and lemon juice over the salad. Toss everything gently to coat the ingredients in the dressing. Be careful not to bruise the lettuce; you want it to stay crisp. This salad is a great mix of flavors and textures. For the full recipe, you can check out the details. To make juicy chicken, start with fresh chicken breasts. Use a meat thermometer to check the internal temp. It should reach 165°F (75°C). This ensures the chicken stays moist and safe to eat. For marinating, you can use simple flavors. A mix of olive oil, lemon juice, garlic, and herbs works great. Let the chicken sit in the marinade for at least 30 minutes. This adds flavor and tenderness. You can also marinate it overnight for even better taste. Homemade croutons are easy to make. Just cut bread into cubes, toss with olive oil, salt, and herbs, and bake until golden. This adds a nice crunch to your salad. For the best croutons, choose bread with a crust. Sourdough or French bread gives a great texture. Avoid soft bread as it won’t hold up in the salad. Making your own Caesar dressing is simple. Start with mayonnaise, garlic, lemon juice, Worcestershire sauce, and Parmesan cheese. Blend until smooth. This way, you control the flavor and ingredients. Adjust the dressing to fit your taste. If you like it tangy, add more lemon juice. For a creamier texture, mix in extra mayo. Tweak it until it’s just right for you. Try these tips with the full recipe for a tasty Chicken Caesar Salad. Enjoy! {{image_2}} You can make a grilled chicken Caesar salad by changing the cooking method. Grilling gives chicken a smoky flavor that enhances the dish. You simply follow the same steps from the classic recipe, but grill the chicken instead of cooking it in a skillet. To add more flavor, brush the chicken with a mix of olive oil, garlic, and herbs. You can also sprinkle some paprika for a bit of heat. Grilled veggies, like zucchini or bell peppers, make a great addition too. If you want to switch things up, use shrimp instead of chicken. Shrimp cooks quickly and adds a nice twist. Start with peeled and deveined shrimp for ease. Cook the shrimp in a pan with olive oil over medium-high heat. Sauté for about 2-3 minutes on each side until they turn pink. Then, toss the cooked shrimp into your salad just like you would with chicken. This keeps the dish light and fresh. For a vegetarian version, you can replace chicken with chickpeas or grilled tofu. Both options add protein and texture. To make it even tastier, roast some vegetables like carrots, broccoli, or bell peppers. Roasting brings out their natural sweetness. Mix these with the romaine lettuce, croutons, and Caesar dressing for a hearty meal. For the full recipe, check out the complete details to enjoy this delicious salad! To keep your Chicken Caesar Salad fresh, store the components separately. Here’s how: - Chicken: Place sliced chicken in an airtight container. - Lettuce: Keep chopped romaine in a dry container. - Croutons: Store in a sealed bag to keep them crunchy. - Dressing: Keep Caesar dressing in its original bottle or a jar. You can store these items in the fridge for up to three days. After that, the quality may drop. When you're ready to enjoy the chicken again, follow these steps: - Reheat Chicken: Warm it in a skillet over medium heat. Cook for about 3-4 minutes until heated through. - Fresh Salad: Avoid reheating the lettuce or croutons. Just add the warm chicken on top of fresh greens. This way, your salad stays crisp and the chicken remains juicy. Enjoy the taste of a freshly made meal with every bite! For the full recipe, check out Crispy Delight Chicken Caesar Salad. Caesar salad began in the 1920s. It was made by Caesar Cardini, an Italian immigrant in Mexico. He wanted to create a dish that was fresh and tasty. The salad quickly gained fame and spread worldwide. Many places now offer their own versions. Some add grilled chicken, bacon, or even shrimp. You can find many spins on this classic dish. Yes, you can make this salad ahead of time! To do this, prepare the chicken and lettuce separately. Cook the chicken and let it cool. Slice it thinly and store it in a container. Keep the lettuce washed and chopped in another container. You can mix the croutons and dressing separately too. Combine everything right before serving. This way, your salad stays fresh and crunchy. Caesar salad offers a mix of nutrients. The romaine lettuce provides vitamins A and K. Chicken adds protein, which is great for muscles. However, the dressing and cheese can add extra calories and fat. To make it healthier, you can use less dressing or a lighter version. You can also skip the cheese or add more veggies. This way, you keep the taste while making it better for you. This blog post covers making a classic Caesar salad, from choosing ingredients to cooking methods. You learned how to prep and grill chicken, assemble your salad, and make croutons. I shared tips for juicy chicken and homemade dressing options. Remember to store leftovers properly to last longer. You can even make this salad your own with variations. Enjoy your tasty creation and impress your family with a fresh salad next meal!

Classic Chicken Caesar Salad Tasty and Fresh Meal

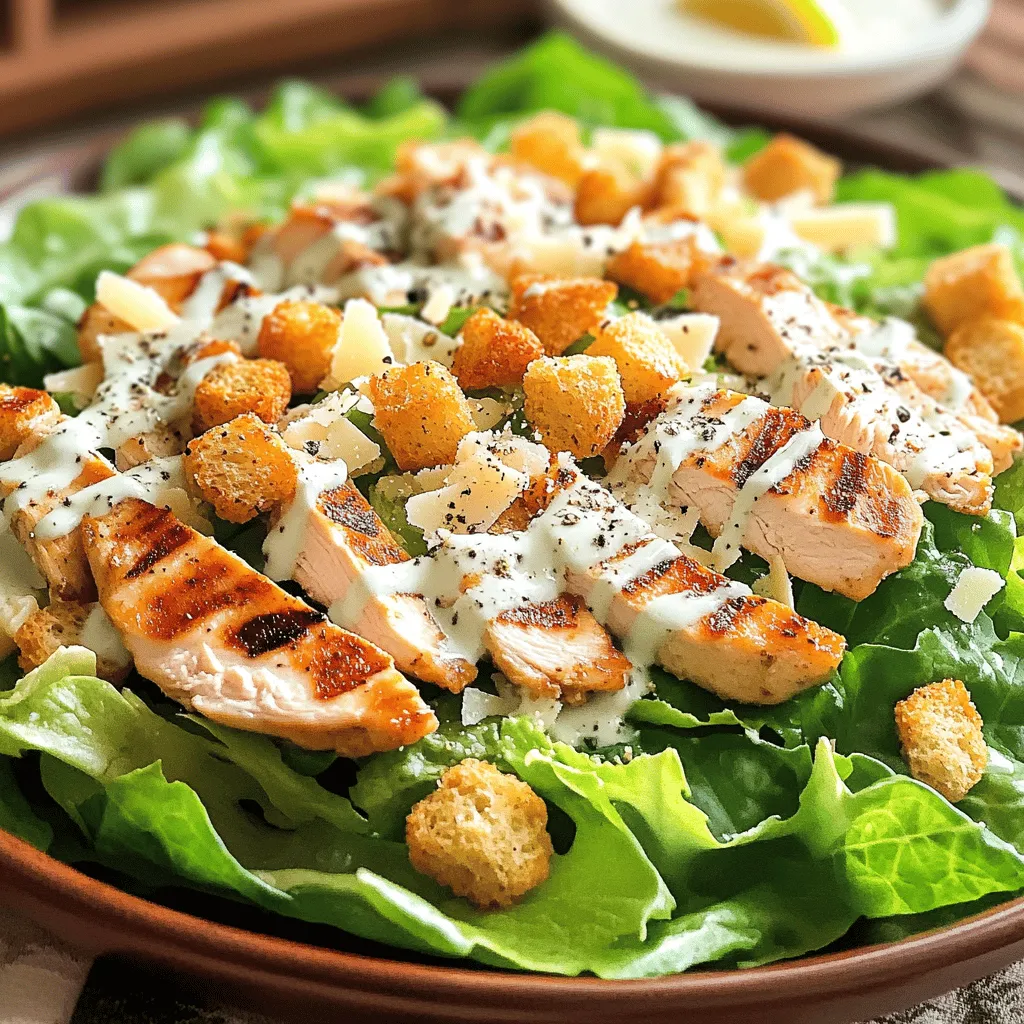
Ready to indulge in a classic Chicken Caesar Salad that’s both tasty and fresh? This dish combines juicy chicken, crisp

- 1 pint cherry tomatoes - 8 oz fresh mozzarella balls (bocconcini) - Fresh basil leaves - 2 tablespoons balsamic glaze - 1 tablespoon olive oil - Salt and pepper to taste - Skewers (6-inch or 8-inch) To make these easy Caprese skewers, gather your ingredients first. I love using ripe cherry tomatoes for their sweetness. Fresh mozzarella balls add creaminess. You can find bocconcini at most grocery stores. Don't skip the fresh basil; it gives a bright flavor. Balsamic glaze adds a nice tang, while olive oil brings richness. A sprinkle of salt and pepper finishes it perfectly. Use skewers that are 6 or 8 inches long. This size is ideal for assembling the skewers without making them too heavy. When you have all your ingredients ready, you will create a dish that looks great and tastes even better. For the full recipe, you can follow my detailed instructions. 1. Start by washing the cherry tomatoes and basil leaves under cold water. 2. Gently dry them with a paper towel. 3. If the mozzarella balls are larger than the tomatoes, slice them in half. 1. Begin threading a cherry tomato onto a skewer. 2. Follow with a basil leaf, then a mozzarella ball. 3. Repeat this until the skewer is filled. 4. Leave some space on each end for easy handling. 5. Drizzle the assembled skewers with olive oil and balsamic glaze. 6. Sprinkle with salt and pepper for extra flavor. 1. Arrange the skewers on a serving platter. 2. Drizzle any leftover balsamic glaze for a nice touch. 3. Optionally, chill the skewers in the fridge for 15 minutes. 4. Chilling enhances the refreshing taste! These simple steps make perfect Easy Caprese Skewers for any event. Enjoy the fresh flavors! You can find the Full Recipe above for more details. To make your skewers look great, use similar-sized ingredients. This keeps each skewer balanced. If the mozzarella balls are too big, slice them in half. This helps fit them perfectly with the cherry tomatoes. Keep your ingredients fresh before you assemble. Store cherry tomatoes and mozzarella in the fridge. Place them in a sealed container. This keeps them crisp and ready for your skewers. Add more flavor with simple seasonings. Fresh herbs like oregano or thyme work well. Just sprinkle them over the skewers before serving. You can also mix some garlic powder with the olive oil for a tasty twist. These skewers pair well with many dishes. Serve them as a side with grilled chicken or fish. They also go great with a fresh salad or pasta. The flavors complement each other nicely. Use a long white platter for serving. This makes the colors pop. Arrange your skewers in a line for a nice visual effect. You can also stand them upright in a glass for a fun touch. For garnishing, add extra basil leaves around the platter. This adds color and freshness. You can also drizzle a bit of balsamic glaze on top for an elegant finish. These simple tips elevate your Caprese skewers and make them look stunning for any gathering. {{image_2}} For your Easy Caprese Skewers, you can swap out mozzarella with other cheeses. Here are some options: - Feta cheese for a tangy twist. - Goat cheese adds creaminess. - Vegan mozzarella for a plant-based choice. You can also add seasonal ingredients for extra flavor. Consider using: - Grilled zucchini in summer. - Roasted butternut squash in fall. - Fresh berries for a sweet touch. You can make these skewers even more fun by adding other vegetables. Try these ideas: - Bell peppers give a crunchy bite. - Cucumber slices add refreshing coolness. - Cherry peppers for a spicy kick. You can also serve the skewers in creative ways. Here are a few: - Toss them in a salad for a fresh meal. - Wrap them in a tortilla for a quick lunch. To change the flavor, try adding pesto or vinaigrettes. This creates a new taste you might love. Here are some ideas: - Drizzle pesto on top for a herby touch. - Use lemon vinaigrette for brightness. You can also adjust the ingredient ratios to fit your liking. If you love basil, add more leaves. Prefer less cheese? Just use fewer mozzarella balls. These little tweaks make your skewers perfect for you. Check out the Full Recipe to get started! To store leftover skewers in the fridge, wrap them tightly in plastic wrap. This keeps them fresh for a while. You can also place them in a shallow container with a lid. Use an airtight container for best results. It helps maintain the flavors and textures. You cannot freeze Caprese skewers. Freezing changes the taste and texture of fresh ingredients. If you want to prepare in advance, you can assemble the skewers a few hours before serving. Just keep them chilled in the fridge until ready to serve. Prepared skewers last up to three days in the fridge. Keep an eye out for signs of spoilage. If the tomatoes look mushy or the cheese has a strange smell, it's time to toss them. Always trust your senses when checking for freshness. Enjoy your Easy Caprese Skewers! You can find the Full Recipe for a quick guide. You can easily prepare Caprese skewers ahead. Start by washing the cherry tomatoes and basil. Dry them well. Assemble the skewers but don’t drizzle them with olive oil or glaze yet. Store the skewers in the fridge in a sealed container. This keeps them fresh. Drizzle with oil and glaze right before serving. This way, they taste fresh and look great. Yes, you can use different cheeses! Try using feta, goat cheese, or even cheddar. Each cheese brings its own unique flavor. Feta adds a tangy bite, while goat cheese gives creaminess. Cheddar can give a sharp taste. Just ensure the cheese pairs well with tomatoes and basil. Look for a thick, rich balsamic glaze. A good store-bought option is often labeled as “balsamic reduction.” You can also make your own by simmering balsamic vinegar until it thickens. This homemade version is fresh and customizable. A high-quality glaze enhances the flavor of your skewers perfectly. You can find more tips in the Full Recipe. Caprese skewers are a fun and tasty treat. You learned the right ingredients, simple steps, and helpful tips to make them shine. Don't forget the storage info to keep your leftovers fresh. Feel free to experiment with flavors and ingredients for a personal touch. Enjoy these skewers at your next gathering or as a quick snack. With their fresh taste and colorful look, they’re sure to impress. Happy skewer-making!

Easy Caprese Skewers Perfect for Quick Appetizers

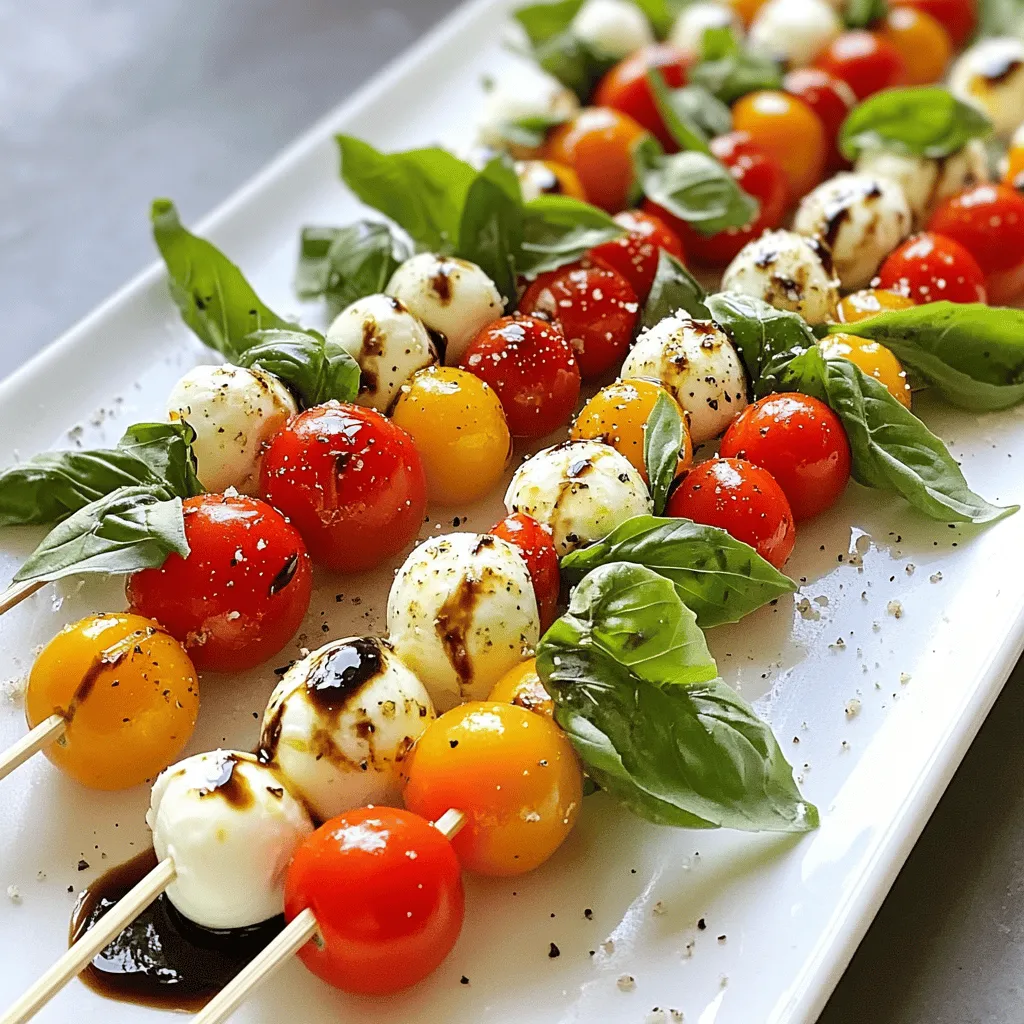
If you’re looking for a simple yet delicious appetizer, Easy Caprese Skewers are a quick fix! With just a few

Older posts
Newer posts
← Previous Page1 … Page68 Page69 Page70 … Page82 Next →

dsad

© 2026 Recipes Pursuit • Built with GeneratePress

Our Policies

  • Copyright Policy
  • Cookie Policy
  • GDPR Policy
  • Privacy Policy
  • Disclaimer
  • Terms Of Use

More Information

  • Home
  • About
  • Contact
  • Appetizers
  • Dessert
  • Dinner
  • Drinks
©2026, Recipes Pursuit About Back To Top