Skip to content
DisclaimerTerms Of UseGDPR PolicyCookie Policy

Recipes Pursuit

  • Home
  • Drinks
  • Appetizers
  • Dinner
  • Dessert
  • About
  • Contact
  • Privacy Policy
DisclaimerTerms Of UseGDPR PolicyCookie Policy

NO-ING-IMG

- 2 cups cooked chicken, shredded - 1 red bell pepper, diced - 1 yellow bell pepper, diced - 1 small zucchini, diced - 1 cup corn (fresh or frozen) - 1 cup shredded cheese (cheddar or Monterey Jack) - 8 large flour tortillas - 2 tablespoons olive oil - 1 teaspoon cumin - 1 teaspoon chili powder - Salt and pepper to taste - Fresh cilantro - Sour cream - Salsa To make savory chicken and veggie quesadillas, gather your main ingredients first. You need shredded chicken, colorful bell peppers, zucchini, and corn. Feel free to mix and match your favorite veggies. Next, grab the tortillas. Flour tortillas are great for this recipe, but you can use corn if you prefer. For seasonings, cumin and chili powder bring warmth to your quesadillas. Don’t forget salt and pepper to enhance the flavors. Finally, fresh cilantro, sour cream, and salsa make great garnishes. They add a nice touch and extra flavor. Check out the Full Recipe for step-by-step cooking instructions that will guide you through the process! Cooking Vegetables Start by heating one tablespoon of olive oil in a large skillet over medium heat. Add the diced red and yellow bell peppers, zucchini, and corn. Sauté these veggies for about five to seven minutes. You want them to become soft but still bright in color. This process helps bring out their sweet flavors. Mixing with Shredded Chicken Next, stir in the two cups of shredded chicken. Add one teaspoon of cumin, one teaspoon of chili powder, salt, and pepper to taste. Cook this mixture for another two to three minutes. This step lets the chicken soak up the spice flavors. Once done, remove the skillet from heat. Filling the Tortillas Grab a tortilla and lay it flat on a clean surface. On one half, spread a generous amount of your chicken and veggie mix. Don’t be shy with the filling! Top it with a sprinkle of shredded cheese. It adds a great gooey texture. Folding Techniques Carefully fold the tortilla in half, covering the filling. Make sure it’s sealed well to keep everything inside. Repeat this with the remaining tortillas and filling until you have a stack of quesadillas ready to cook. Skillet Cooking Tips In the same skillet, add the remaining tablespoon of olive oil and heat it over medium-high heat. Place two or three quesadillas in the skillet, depending on its size. Achieving the Perfect Crispness Cook each side for about three to four minutes. You want them to turn golden brown and crispy. After cooking, remove them from the skillet and keep warm. Slice the quesadillas into wedges. You can garnish with fresh cilantro. Serve them with sour cream and salsa on the side for dipping. Enjoy your savory chicken and veggie quesadillas! For the full recipe, refer to the provided details. - Choosing the Right Pan A non-stick skillet works best for quesadillas. It helps prevent sticking and makes flipping easy. Use a medium-sized pan for even cooking. - Temperature Control Keep your heat at medium. This ensures the tortillas get crispy without burning. If the pan is too hot, the outside cooks too fast while the inside stays cold. - Prepping Ingredients Ahead Chop your veggies and shred the chicken before cooking. This saves time and helps you stay organized. You can even prep the filling a day ahead. - Storage Solutions Store leftover filling in an airtight container in the fridge for up to three days. Keep cooked quesadillas in a separate container. This keeps them fresh and ready to eat. - Plating Ideas Arrange quesadilla wedges on a large plate. Add a bowl of sour cream and salsa in the center. Garnish with fresh cilantro for a colorful touch. - Best Dips to Pair Serve with sour cream and salsa for a classic combo. Guacamole also adds a creamy, tasty twist. You can also try a spicy salsa for extra kick! {{image_2}} You can switch up the protein in your quesadillas. Instead of chicken, try: - Ground beef - Shredded pork - Black beans (for a vegetarian option) Adding extra vegetables boosts flavor and nutrition. Some great choices are: - Spinach - Mushrooms - Broccoli Tortillas can change your quesadilla's taste. Whole wheat tortillas add fiber. They also give a nuttier flavor. Corn tortillas add a classic taste. They are naturally gluten-free and crispy. You can make your quesadillas even tastier with spices. Try adding: - Paprika for smokiness - Garlic powder for depth - Oregano for a fresh taste Cheese choices can also enhance flavor. Some great varieties include: - Pepper Jack for heat - Gouda for creaminess - Feta for a tangy twist These simple swaps and additions make your chicken and veggie quesadillas unique and fun. Check the Full Recipe for more details! To store leftover quesadillas, let them cool first. Place them in an airtight container. Store in the fridge for up to three days. If you want to keep them longer, consider freezing instead. To freeze quesadillas, wrap each one in plastic wrap. Then put them in a freezer-safe bag. They can stay in the freezer for up to two months. When you're ready to eat, thaw them overnight in the fridge. For the best crispiness, reheat quesadillas in a skillet. Heat the skillet over medium heat. Add a little oil to help crisp the outside. Cook each side for about three minutes until golden and warm. You can also use an oven at 375°F for about 10 minutes. This method keeps them nice and crispy. For more details, check the Full Recipe. To make chicken and veggie quesadillas from scratch, you start by cooking your veggies. Dice bell peppers and zucchini, then sauté them in olive oil. After about 5-7 minutes, add cooked chicken, cumin, and chili powder. Mix well and then fill tortillas with this tasty mixture. Fold them in half and cook in the skillet until golden brown. This simple process gives you delicious quesadillas, ready to enjoy. Yes, you can prepare these quesadillas in advance. Cook the filling a day ahead and store it in the fridge. When you are ready to eat, fill your tortillas and cook them. This makes meal prep easy and quick. You can also freeze the filled quesadillas. Just make sure to separate them with parchment paper before freezing. The best cheese for quesadillas includes cheddar and Monterey Jack. Both melt well and add great flavor. You can also try pepper jack for a spicy kick or mozzarella for a milder taste. Mixing different cheeses can enhance the taste and texture. Don't be afraid to experiment with your favorites. To make gluten-free quesadillas, use gluten-free tortillas. Many brands offer tasty options made from rice or corn. Check the label to ensure they are truly gluten-free. You can fill these tortillas just like regular ones. Enjoy the same great taste without the gluten. In this post, we explored how to make chicken and veggie quesadillas. We covered the main ingredients, seasonings, and optional garnishes that enhance flavor. You learned step-by-step instructions for preparing the filling, assembling, and cooking the quesadillas for the perfect crispness. We also discussed tips, variations, storage info, and answered common questions. Now, you can create delicious quesadillas at home. Enjoy your tasty meals while being creative with ingredients and flavors. Happy cooking!

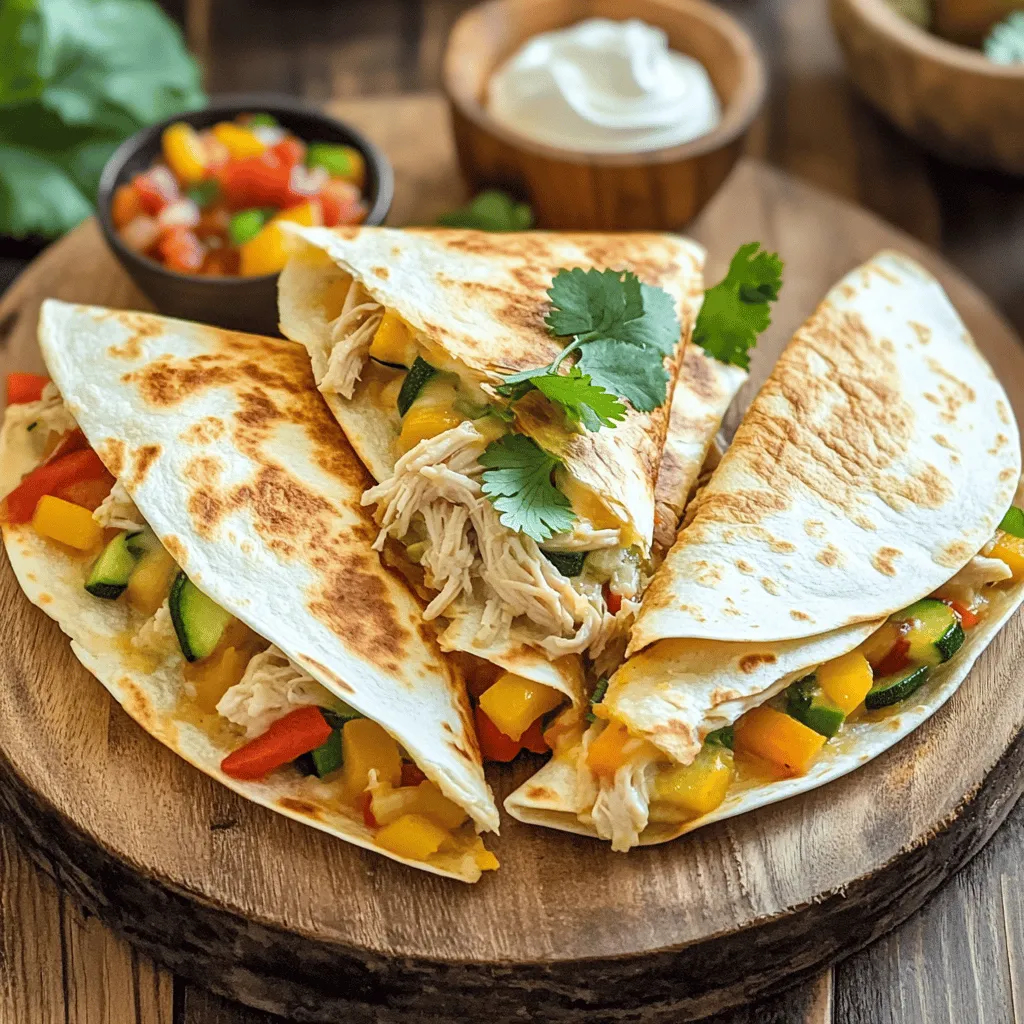
Savory Chicken and Veggie Quesadillas Easy Recipe

Looking for a quick and tasty meal? You can whip up savory chicken and veggie quesadillas in no time! This

- 1 can chickpeas - 1 large roasted red pepper - 3 tablespoons tahini - 2 tablespoons lemon juice - 2 cloves garlic - Paprika - Fresh parsley - Food processor - Baking sheet - Bowl for steaming To make roasted red pepper hummus, gather these simple and fresh ingredients. The chickpeas provide a creamy base. The roasted red pepper adds a smoky touch. Tahini gives it a rich flavor. Lemon juice brightens the taste and garlic adds depth. For garnish, paprika and parsley look great and add flavor. You also need a food processor to blend everything smoothly. A baking sheet helps roast the peppers, and a bowl for steaming makes peeling easy. This setup ensures you create a tasty and colorful dish that everyone will love. Check the Full Recipe for more details on how to prepare this delightful dip! First, preheat your oven to 400°F (200°C). If you use fresh red peppers, cut them in half. Remove the seeds and place them on a baking sheet, skin side up. Roast them for about 25-30 minutes. You want the skin to char and blister. Once done, transfer the peppers to a bowl and cover it with plastic wrap. This helps them steam for 10 minutes. After they cool, peel off the skin. If you use jarred roasted red peppers, just drain them and set aside. Next, grab your food processor. This is where the magic happens. Add the chickpeas, roasted red pepper, tahini, lemon juice, minced garlic, olive oil, and ground cumin. Blend everything together until it’s smooth. If the mix is too thick, add a tablespoon of water at a time. Keep blending until you reach your desired consistency. Taste it and add salt as needed. Blend again to mix. Now, transfer the hummus to a serving bowl. Drizzle some extra-virgin olive oil on top. Sprinkle paprika and fresh parsley for a nice touch. This makes it look pretty and appetizing. Enjoy your roasted red pepper hummus with your favorite dippers! For the full recipe, refer to the detailed instructions provided. To make the best roasted red pepper hummus, use tahini and olive oil. Tahini adds richness. Olive oil brings a smooth finish. Both are key to a creamy texture. When blending, start with the chickpeas and tahini. Pulse them first to break them down. Then, add the roasted red pepper, garlic, and spices. Blend until smooth. If it feels thick, add water slowly. Just one tablespoon at a time. This helps you control the texture. Store your homemade hummus in the fridge. Use an airtight container to keep it fresh. It can last up to a week. If you have extra, consider freezing it. Use small containers to make portions easy to thaw. Just remember, once you thaw it, eat it quickly. You can change the taste of your hummus easily. Want it spicier? Add more cumin or some cayenne pepper. Like it tangy? A little more lemon juice does the trick. Feel free to mix in extra veggies too. Carrots or spinach can add fun flavors. Just blend them in with the other ingredients. {{image_2}} Want to make your roasted red pepper hummus even better? You can add some spices! Smoked paprika gives a warm, smoky flavor. A pinch goes a long way. Try fresh herbs too. Basil or cilantro can add a nice touch. Chop them finely and mix them in. These simple changes can elevate your dish and impress your guests. Chickpeas are great, but you can switch them out! White beans or black beans work well too. Each type of bean brings a unique taste. If you use different beans, you may need to adjust the consistency. Add a bit more water if it gets too thick. Experimenting with beans can open up new flavors. If you have dietary needs, this hummus can still fit! It is already vegan and gluten-free. For low-sodium options, rinse your beans well. You can skip the salt or use a salt substitute. This way, everyone can enjoy your tasty dip without worry. To keep your hummus fresh, store it in the fridge. Use an airtight container. It can last up to a week. Before serving, check the taste and texture. If it seems dry, stir in a bit of water or olive oil. If you have more than you can eat, freeze it for later. Use a freezer-safe container. Leave some space at the top, as the hummus will expand. It should stay good in the freezer for about three months. When ready to eat, thaw it in the fridge overnight. Fresh hummus beats store-bought in taste and health. Homemade hummus has no preservatives. It offers better flavor and more nutrients. Store-bought hummus can contain additives that some may want to avoid. Always watch for signs of spoilage. If you see mold or a change in color, it’s time to toss it. A sour smell or off taste is also a red flag. Trust your senses to keep your hummus safe and tasty. You can enjoy roasted red pepper hummus with many tasty dippers. Here are some popular choices: - Fresh veggie sticks like carrots, celery, and cucumbers - Pita bread or pita chips for a classic touch - Crackers for a crunchy bite - Toasted baguette slices for a gourmet feel - Pretzels for a salty contrast Homemade hummus stays fresh for about 4 to 5 days in the fridge. Store it in an airtight container to keep it safe. Check for any signs of spoilage, like off smells or mold, before eating. Yes, making roasted red pepper hummus in advance is easy! You can prepare it up to a week ahead. Just store it in the fridge in a sealed container. This allows the flavors to mix nicely. Often, homemade hummus is healthier than store-bought. You control the ingredients and can reduce salt and oils. Plus, it has no preservatives. The chickpeas provide protein and fiber, making it a great snack! For the full recipe, check out the detailed instructions [here](#). This blog post covered how to make delicious roasted red pepper hummus. You learned about the main and optional ingredients, along with the equipment needed. We went through detailed steps, tips for creaminess, and storage secrets. You can even try different flavors and beans for variety. Making hummus at home is fun and rewarding. It’s healthier and tastes so much better than store-bought. Enjoy your creamy creation with friends, and don’t hesitate to experiment with new flavors!

Roasted Red Pepper Hummus Simple and Tasty Delight

Are you ready to elevate your snack game? Roasted Red Pepper Hummus is a simple and tasty delight that packs

- 2 boneless, skinless chicken breasts, sliced - 1 cup broccoli florets - 1 cup bell peppers (red and yellow), sliced - 1 cup cooked jasmine rice The chicken is the star here. I like to use boneless, skinless breasts for easy cooking. They cook fast and stay juicy. Broccoli and bell peppers add color and crunch. You can use other veggies too. Just pick what you like! The rice is a perfect base for the dish. I prefer jasmine rice for its subtle sweetness and aroma. - 2 tablespoons soy sauce - 2 tablespoons honey - 1 tablespoon rice vinegar - 1 teaspoon ginger, grated - 1 teaspoon garlic, minced The sauce brings all the flavors together. Soy sauce adds saltiness and depth. Honey gives it a nice sweet touch. Rice vinegar adds a bit of tang. Ginger and garlic add warmth and aroma. Mix these ingredients well for a tasty teriyaki sauce. - 2 green onions, chopped (for garnish) - Sesame seeds (for garnish) Garnishes make the dish look pretty and add more flavor. Chopped green onions add a fresh bite. Sesame seeds give a nice crunch and nutty flavor. You can sprinkle them on right before serving. For a full recipe, check out the Easy Teriyaki Chicken Bowls. To make the teriyaki sauce, gather your ingredients. You need soy sauce, honey, rice vinegar, grated ginger, and minced garlic. Combine these in a medium bowl. Mix them well until the honey dissolves. This sauce adds rich flavor to your chicken and veggies. For juicy chicken, start with boneless, skinless breast. Slice the chicken into even pieces. Heat sesame oil in a large skillet over medium heat. Add the chicken slices and cook for 5 to 7 minutes. Stir occasionally until the chicken turns golden brown. Make sure it's cooked all the way through. This step is key for great flavor and texture. Now, it’s time to add color and crunch! Toss in the broccoli florets and sliced bell peppers. These veggies not only taste great but also add nutrients. Pour the teriyaki sauce over the chicken and vegetables. Stir everything to coat evenly. Cook for another 5 to 7 minutes. This helps the sauce thicken and the veggies to soften just right. Serve your teriyaki chicken and vegetables over warm jasmine rice. The rice soaks up the tasty sauce, making each bite special. For a beautiful finish, garnish with chopped green onions and a sprinkle of sesame seeds. This adds a nice touch, making your meal look inviting. For the full recipe, check the details above. To make juicy chicken, start with good quality meat. Choose fresh, boneless, skinless chicken breasts. Slice them evenly for quick cooking. Heat the skillet over medium heat. Add sesame oil and let it warm. Cook the chicken for 5-7 minutes. Stir often to avoid burning. Use a meat thermometer to check if it reaches 165°F. This way, your chicken stays moist and tender. You can tweak the teriyaki sauce to fit your taste. If you like it sweeter, add more honey. For a bolder flavor, increase the soy sauce. You might also try adding chili flakes for heat. Want a tangy taste? Add more rice vinegar. Each small change can make a big difference, so have fun experimenting. Meal prep can save you time on busy nights. Chop your chicken and vegetables ahead of time. Store them separately in the fridge. You can mix the sauce in advance, too. Keep it in a jar for easy access. When you are ready to cook, just heat everything up in the skillet. This helps you whip up your teriyaki chicken bowls fast. For the full recipe, check out the section above. {{image_2}} You can switch the chicken for other proteins. Tofu works great for a vegetarian dish. Just press the tofu to remove excess water. Then, cut it into cubes and cook until golden. Beef is another option. Use thin strips of flank steak for quick cooking. Shrimp also makes a tasty choice. Cook the shrimp until pink and firm for a delicious twist. Feel free to swap out the broccoli and bell peppers. Use seasonal veggies like snap peas or carrots. You can even try zucchini or mushrooms for added flavor. Just remember to cut the vegetables into small pieces. This helps them cook evenly and blend well with the dish. Rice is not your only choice! Serve your teriyaki chicken over jasmine rice, or try brown rice for a nutty flavor. Quinoa makes a healthy base too. If you prefer noodles, use soba or rice noodles. They soak up the sauce nicely and add a different texture. For the full recipe, check out the detailed instructions in the cooking section. To keep your teriyaki chicken bowls fresh, place leftovers in a container. Make sure to seal it tightly. Store in the fridge for up to three days. If you want to save them longer, consider freezing instead. When you’re ready to enjoy your meal again, take out the leftovers. Heat them in the microwave for about two to three minutes. Stir halfway through to ensure even heating. You can also reheat in a skillet over medium heat for the best taste. Just add a splash of water to keep the chicken moist. If you want to freeze your teriyaki chicken bowls, let them cool first. Separate the chicken, veggies, and rice into different bags. This way, they stay fresh longer. Use freezer-safe bags and label them with the date. They can last up to three months in the freezer. When ready, thaw in the fridge overnight before reheating. For the full recipe, check out the earlier sections. Teriyaki chicken can last up to four days in the fridge. Store it in an airtight container. This keeps the chicken fresh and safe to eat. Always check for any off smells before enjoying leftovers. If you see any changes in color, it's best to toss it. Yes, you can make teriyaki chicken bowls ahead of time. Prepare the chicken and veggies, then store them in the fridge. You can cook the rice fresh when you're ready to serve. This makes it easy to enjoy a quick meal after a long day. You can serve teriyaki chicken bowls in many ways. Here are some great ideas: - Steamed edamame - Cucumber salad - Miso soup - Pickled vegetables - A side of egg rolls These options add extra flavor and texture to your meal. Try them out for a fun twist! For the full recipe, check out the main ingredients and instructions above. In this blog post, we covered the main ingredients and steps to make delicious teriyaki chicken bowls. You learned about key components like chicken, vegetables, and rice, along with the sauce ingredients. We also shared tips for cooking, meal prep, and variations to suit your taste. Remember, you can easily adapt this dish with different proteins and veggies. Enjoy experimenting with this easy recipe, and make it your own! Happy cooking!

Easy Teriyaki Chicken Bowls Flavorful Weeknight Meal

Looking for a quick dinner that’s packed with flavor? You’re in the right place! My Easy Teriyaki Chicken Bowls are

To make your Brownie Batter Hummus, gather these simple items: - 1 can (15 oz) chickpeas, drained and rinsed - 1/4 cup almond butter (or peanut butter) - 1/4 cup cocoa powder - 1/4 cup maple syrup (or agave syrup) - 1/4 cup almond milk (or regular milk) - 1 teaspoon vanilla extract - 1/4 teaspoon salt - Mini chocolate chips for garnish (optional) When measuring, use dry measuring cups for powders like cocoa. For liquids, use a liquid measuring cup. Always level off dry ingredients with a straight edge. This makes sure you get the right amount. It helps the hummus taste its best. You can switch out some ingredients if needed. If you want a nut-free version, use sun butter instead of almond butter. For a vegan sweetener, try agave syrup instead of maple syrup. If you don’t have chickpeas, white beans work too! They will give you a similar texture. Start by gathering your ingredients. You will need: - 1 can (15 oz) chickpeas, drained and rinsed - 1/4 cup almond butter (or peanut butter) - 1/4 cup cocoa powder - 1/4 cup maple syrup (or agave syrup) - 1/4 cup almond milk (or regular milk) - 1 teaspoon vanilla extract - 1/4 teaspoon salt - Mini chocolate chips for garnish (optional) This dip is quick and easy. It takes only 10 minutes to prepare. Make sure to rinse the chickpeas well. This helps remove the canning liquid and any extra salt. Place all your ingredients into a food processor. Start with the chickpeas, then add the nut butter, cocoa powder, and maple syrup. Next, pour in the almond milk, vanilla extract, and salt. Blend on high speed until the mixture is smooth and creamy. If it feels too thick, add more almond milk, one tablespoon at a time. Blend each time until you reach the right consistency. Taste the dip. If you want it sweeter, add more maple syrup. Blend again to mix it in well. Once it's smooth, transfer your hummus to a serving bowl. If you want, sprinkle mini chocolate chips on top for extra sweetness. You can serve brownie batter hummus with many tasty options. Try dipping apple slices for a fruity twist. Pretzels add a nice salty crunch. Graham crackers are also a fun choice. This dip is great for parties or a sweet snack at home. Remember, this recipe is not just about flavor. It’s also about fun! Enjoy your delicious brownie batter hummus with friends and family. For the complete recipe, check out the Full Recipe. To get a smooth and creamy dip, blend the mixture well. Use a high-speed food processor. If your hummus feels thick, add more almond milk. Do this a tablespoon at a time. Scrape down the sides of the bowl to mix evenly. This step helps make the dip silky. The right texture makes it great for dipping. Taste your hummus as you blend. If you want it sweeter, add more maple syrup. Blend again after adding syrup. You can also adjust the sweetness based on your taste. Some prefer it a bit less sweet. Always remember, a little goes a long way! Serve your brownie batter hummus in a fun bowl. You can use a colorful dish to make it pop. Top it with mini chocolate chips for a nice look. Arrange some dippers around the bowl. Good choices include apple slices, pretzels, or graham crackers. This makes it easy for everyone to enjoy. For a party, you could even add some fresh fruit on the side. This dip looks as good as it tastes! For the full recipe, check the earlier section. {{image_2}} To make brownie batter hummus even more fun, add flavors. Try mixing in a bit of espresso powder for a coffee kick. You can also use peppermint extract for a fresh twist. A dash of cinnamon adds warmth, while a spoonful of peanut butter boosts the nutty profile. For a fruity touch, add mashed bananas or pureed strawberries. Each of these additions will change the taste and make your dip unique. If you want a lighter version, swap some ingredients. Use Greek yogurt instead of almond butter. This change lowers the fat content and adds protein. You can also reduce maple syrup by half and rely on ripe bananas for sweetness. Instead of chocolate chips, try chopped nuts or seeds for added crunch. These swaps maintain flavor while making the dish healthier. Catering to dietary needs is easy with brownie batter hummus. To make it vegan, use maple syrup and almond milk, which are already in the recipe. For a nut-free version, replace almond butter with sunflower seed butter. If you have gluten issues, enjoy it with gluten-free dippers like rice cakes. These modifications ensure everyone can enjoy this tasty treat without worry. Explore the full recipe for brownie batter hummus to see how simple it is to create delicious variations! To keep your brownie batter hummus fresh, store it in an airtight container. Make sure to seal it well to avoid air exposure. You can store it in the fridge for easy access. This dip tastes great chilled, so it’s perfect for snacking anytime. When stored properly, brownie batter hummus lasts about five to seven days in the fridge. After that, the flavor and texture may change. Always check for any signs of spoilage, like off smells or unusual colors. If it looks or smells odd, it’s best to toss it. You can freeze brownie batter hummus if you want to keep it longer. Place it in a freezer-safe container, leaving some space for expansion. It can last for up to three months in the freezer. When you’re ready to enjoy it, thaw in the fridge overnight. Stir well before serving to restore its creamy texture. For the full recipe, check the main article. Brownie batter hummus tastes sweet and rich. You get the chocolate flavor first. The texture is creamy and smooth, just like a brownie. It feels soft on your tongue, making it fun to eat. The hint of vanilla adds warmth, and the salt balances the sweetness. This dessert dip is a treat for your taste buds! Yes, you can make brownie batter hummus nut-free! Just swap almond butter for sunflower seed butter. This keeps the flavor rich and creamy without nuts. You can also use soy nut butter if you prefer. Both options work well and keep it tasty for everyone. It takes just 10 minutes to make brownie batter hummus. You can prep and blend all the ingredients quickly. This dip is perfect for last-minute snacks or parties. Plus, it’s so easy that anyone can do it! For the full recipe, check out the details above. In this post, we explored how to make Brownie Batter Hummus. We covered key ingredients, measurement tips, and substitutions to enhance your mix. You learned step-by-step instructions for perfect blending and serving ideas. Tips for the right texture, sweetness, and presentation helped elevate your dish. Variations for flavor and healthier options catered to different diets, plus smart storage advice keeps it fresh. Now, you can create delightful hummus that everyone will enjoy!

Brownie Batter Hummus Delicious and Easy Dip Recipe

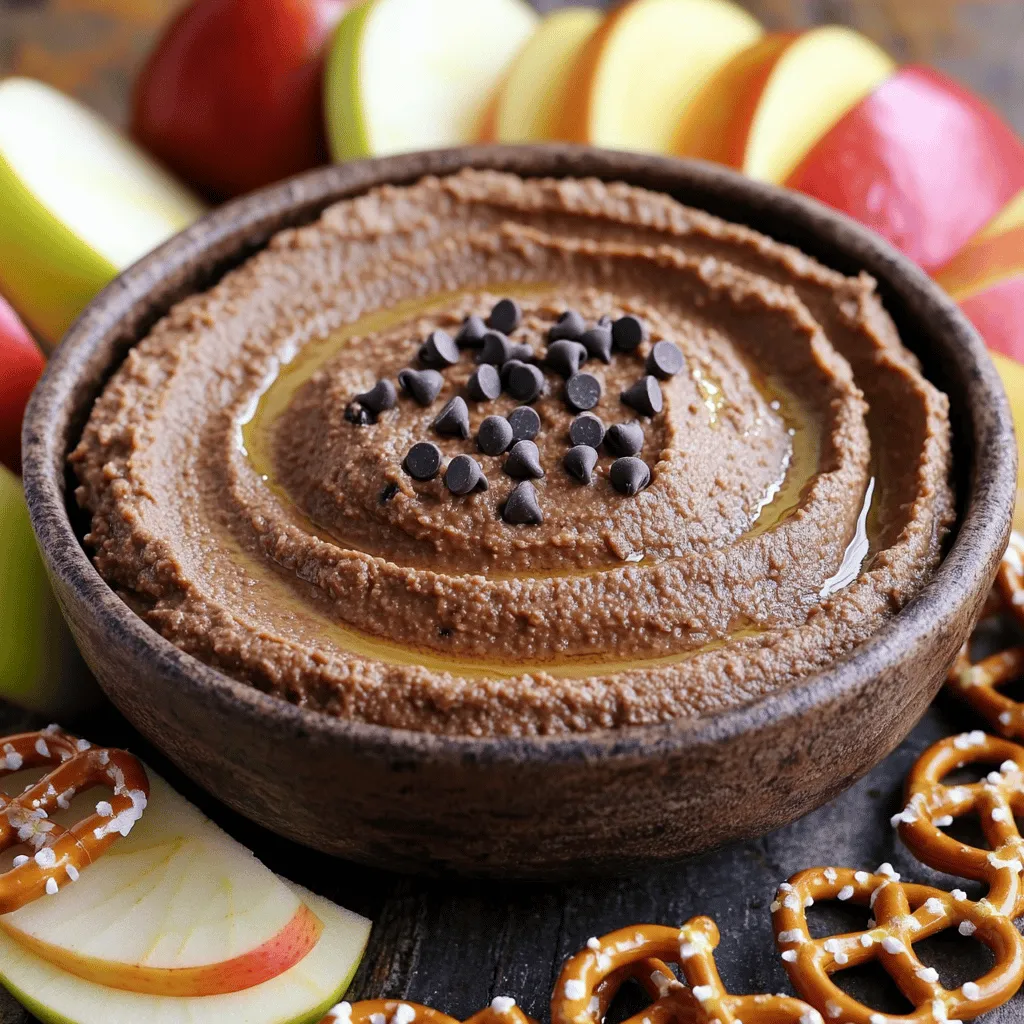
Are you ready to dive into a creamy, chocolatey treat that’s healthy too? Brownie Batter Hummus is the perfect dip

- 2 cups plain Greek yogurt - 2 tablespoons honey - 1 teaspoon vanilla extract - 1 cup fresh strawberries The main ingredients of strawberry yogurt bark are simple and healthy. I love using plain Greek yogurt because it is thick and creamy. Honey adds sweetness, but you can change the amount based on your taste. Vanilla extract gives a nice flavor that blends well with strawberries. Fresh strawberries are the star of this snack. They give a burst of flavor and a beautiful color. - 1/4 cup granola - Mini dark chocolate chips - Coconut flakes Optional toppings make this recipe fun and unique. Granola adds a crunchy texture. Mini dark chocolate chips give a sweet touch, while coconut flakes add a tropical feel. You can mix and match these toppings to make your yogurt bark special. - Substituting yogurt types - Adjusting sweetness levels You can switch the yogurt type if you want. Regular yogurt or non-dairy yogurt works too. If you prefer less sweetness, cut back on the honey. You can also try maple syrup or agave as sweeteners. This recipe is flexible, so make it your own! To start, grab a mixing bowl. Measure out 2 cups of plain Greek yogurt. Add 2 tablespoons of honey. You can adjust the honey to fit your taste. Next, include 1 teaspoon of vanilla extract. This adds a nice flavor. Mix all these ingredients well until they are creamy and smooth. Now, let’s move on to the fun part! First, line a baking sheet with parchment paper. This step makes it easy to remove your yogurt bark later. Next, pour your yogurt mixture onto the lined sheet. Spread it evenly. Aim for about 1/4 inch thick. After that, it’s time to add your toppings. Place 1 cup of fresh strawberries, hulled and sliced, evenly over the yogurt. Press them gently into the mixture. Finally, sprinkle 1/4 cup of granola on top for some crunch. You can also add optional toppings like mini dark chocolate chips or coconut flakes. Now, put the baking sheet into the freezer. Let it freeze for at least 4 hours or until it is completely solid. When it’s ready, take it out and let it sit for a couple of minutes. This makes it easier to cut. Break the bark into pieces or cut it into squares. You can serve it right away or store it in an airtight container in the freezer for up to two weeks. For added flair, place the pieces on a white platter. Drizzle a little extra honey over the top. You can also garnish with fresh mint leaves for a pop of color. Enjoy your delicious Strawberry Yogurt Bark! For the full recipe, refer back to the ingredients section. To get the right thickness, aim for about 1/4 inch. This size gives the bark a nice crunch. If it's too thin, it may break easily. If too thick, it takes longer to freeze. Use a spatula to spread the yogurt mixture evenly. Take your time and make sure every part is the same thickness. You can change the fruit to fit the season. Try raspberries, blueberries, or peaches. Each fruit adds a new flavor to the bark. You can also switch yogurt flavors. Use vanilla, strawberry, or even coconut yogurt for fun twists. This lets you create your own unique snack. Pair your yogurt bark with fresh fruit or nuts. Sliced bananas or a handful of almonds work great. This adds taste and more nutrients. You can also serve it with a drizzle of honey on top. Not only does this add sweetness, but it also makes it look fancy. Check out the Full Recipe for more ideas! {{image_2}} You can easily change the flavors of your yogurt bark. Try using different berries like blueberries, raspberries, or blackberries. Each berry brings its own taste and color. You can also mix in citrus zest, like lemon or orange. This adds a fresh zing that wakes up the flavors. If you need dairy-free options, use coconut yogurt or almond yogurt instead of Greek yogurt. These alternatives still give a creamy texture. Want to add crunch? Look for gluten-free granola. It works well and keeps your snack gluten-free. Make your yogurt bark fun for any holiday. Use festive toppings like crushed peppermint for winter or colorful sprinkles for birthdays. You can also use frozen fruit if fresh berries are out of season. Frozen fruit works great and keeps the bark cold and refreshing. For detailed steps on making this delightful treat, check out the Full Recipe. To keep your Strawberry Yogurt Bark fresh, use an airtight container. This helps prevent ice crystals from forming. You can also wrap individual pieces in plastic wrap. This way, you can grab a piece without losing the rest. In the freezer, your Strawberry Yogurt Bark will stay good for up to two weeks. After that, the taste and texture may change. For the best flavor, eat it within this time frame. To defrost, take out the yogurt bark and let it sit at room temperature. This usually takes about 10 to 15 minutes. If you're in a hurry, you can place it in the fridge for quicker thawing. Avoid using a microwave, as it can make the bark too soft. Enjoy your healthy snack once it's thawed! Strawberry Yogurt Bark stays fresh for up to two weeks in the freezer. After that, it may lose flavor and texture. I recommend placing it in an airtight container. This keeps it safe from freezer burn. Yes, you can use non-dairy yogurt. Almond, coconut, or soy yogurt work well. Just make sure it’s plain and unsweetened. This way, you can control the sweetness with honey. You can substitute honey with maple syrup or agave nectar. Both options add sweetness without changing the taste much. If you want a sugar-free option, try a sugar substitute like stevia. Strawberry Yogurt Bark is a healthy snack. It’s full of protein from Greek yogurt and vitamins from strawberries. The granola adds fiber. This makes it a balanced treat. Yes, you can double or halve the recipe. Just keep the same ratios for yogurt, honey, and strawberries. You can adjust the baking sheet size to fit your batch. You can add many toppings to your bark. Try blueberries, raspberries, or banana slices. Nuts and seeds add crunch and flavor. Mini dark chocolate chips or coconut flakes are great too! For a fun twist, mix in some citrus zest. This blog post covered how to make Strawberry Yogurt Bark. You learned about key ingredients like Greek yogurt, honey, and fresh strawberries. We explored optional toppings and how to adjust flavors. You saw a clear step-by-step guide to prepare, assemble, and freeze your bark. Plus, I shared tips for perfect texture and creative variations. In the end, enjoy this healthy treat as a fun snack or dessert. Make it your own by changing flavors and toppings. Enjoy your delicious creation!

Strawberry Yogurt Bark Refreshing Healthy Snack Recipe

Craving a cool treat that’s both tasty and healthy? Let me introduce you to Strawberry Yogurt Bark! This quick snack

- 2 boneless, skinless chicken breasts - 1 cup buttermilk - 1 teaspoon garlic powder - 1 teaspoon onion powder - 1 teaspoon paprika - 1 cup all-purpose flour - 1 teaspoon baking powder - Salt and pepper to taste - 1 tablespoon vegetable oil (for frying) - 4 frozen waffles (or homemade if preferred) - Maple syrup for serving - Fresh parsley, chopped (for garnish) This list has everything you need to make easy chicken and waffles. The chicken will soak in the buttermilk, making it juicy and tender. The spices add flavor, while the flour will create a crispy crust when fried. Don't forget the waffles! You can use frozen ones or make them from scratch. Maple syrup is a must for drizzling on top. Fresh parsley adds a nice touch for color. For the full recipe, check out the details above! First, grab a bowl. Combine 1 cup of buttermilk with 1 teaspoon of garlic powder, 1 teaspoon of onion powder, and 1 teaspoon of paprika. Add salt and pepper to taste. Mix it well. Now, add the two boneless, skinless chicken breasts into the bowl. Make sure they are coated fully. Cover the bowl and refrigerate it for at least 1 hour. If you have time, let it marinate overnight. This helps the chicken soak up all those great flavors. Next, let’s prepare the dredge. In a shallow dish, mix 1 cup of all-purpose flour with 1 teaspoon of baking powder. Add a pinch of salt and pepper to this mix. Stir it until everything blends nicely. This is what will help our chicken get that crispy coating. Now, it’s time to cook the chicken. Heat 1 tablespoon of vegetable oil in a large skillet over medium-high heat. Take the marinated chicken out of the buttermilk. Let the excess drip off. Dredge the chicken in the flour mix, pressing gently to make it stick. Place the chicken in the hot oil. Fry for about 6-7 minutes on each side. You want it golden brown and cooked all the way through. Once done, remove it and place it on a paper towel to drain excess oil. While your chicken cooks, prepare your waffles. Follow the package instructions if you are using frozen waffles. If you prefer homemade, now is the time to make them! Keep the waffles warm until you are ready to serve. Let’s put everything together. Start with a waffle on a plate. Place a piece of fried chicken right on top. Drizzle with maple syrup to add sweetness. You can even sprinkle fresh parsley on top for a pop of color and flavor. Enjoy this delightful dish! You can find the full recipe above. Marinating chicken helps it soak up flavor. I suggest a marination time of at least 1 hour. For the best taste, let it sit overnight. You can enhance flavor by adding spices like cayenne, thyme, or black pepper. These spices give the chicken a nice kick. Oil temperature is key for frying. Keep the oil at 350°F for crispy chicken. If the oil is too cool, the chicken can turn soggy. To avoid sogginess, do not overcrowd the pan. Fry one or two pieces at a time for the best results. You can use store-bought or homemade waffles. Store-bought waffles save time. If you choose homemade, you can control the flavor and texture. Try adding vanilla or cinnamon to the batter for a twist. You can also top your waffles with fresh fruit or nuts for added texture. {{image_2}} If you want a lighter option, try grilled chicken. Grilling keeps the chicken juicy and cuts down on fat. You can also swap regular waffles for whole wheat or gluten-free waffles. This adds fiber and makes it a better choice for everyone. You can easily change up the flavors in your chicken. Adding spices like cayenne or black pepper to the dredge gives the chicken a kick. For a sweet twist, try using different syrups like berry or honey syrup. You can also add toppings like sliced bananas or pecans for extra fun. Chicken and waffles shine at any meal. For breakfast, serve with fresh fruit or a side of eggs. At dinner, pair it with collard greens or a crisp salad. This dish is versatile and can fit any time of day. Check out the Full Recipe for more ideas! After enjoying your chicken and waffles, store leftovers properly. First, let the chicken cool to room temperature. Place chicken and waffles in airtight containers. This keeps them fresh longer. You can store them in the fridge for up to 3 days. For longer storage, freeze them. They stay good in the freezer for about 2 months. To keep the food safe, avoid letting it sit out for too long. To reheat chicken and waffles, you have two main options: the oven or the microwave. The oven is the best choice if you want crispiness. Preheat your oven to 375°F (190°C). Place the chicken and waffles on a baking sheet. Heat for 10-15 minutes, checking to avoid burning. If you're short on time, the microwave works too. Place your food on a microwave-safe plate. Heat in short bursts of 30 seconds. Flip the chicken halfway to heat evenly. However, this method may make the chicken less crispy. To keep your chicken crispy, avoid covering it when reheating. Enjoy your meal again with great flavor and texture! Yes, you can prepare chicken and waffles ahead of time. For the chicken, marinate it in buttermilk and spices. Store it in the fridge for up to 24 hours. Cook the chicken just before serving for the best taste. For waffles, you can make them in advance too. Keep them in an airtight container in the fridge. When ready, just reheat them in the toaster or oven. This way, you can enjoy a quick meal! Chicken and waffles pair well with many sides. Try fresh fruit like berries or sliced bananas. A simple green salad adds a nice crunch. You can also serve coleslaw for a creamy contrast. For drinks, sweet tea or coffee works great. These options enhance the meal and make it more filling! To make perfect waffles, use a good batter. Make sure your batter is not too thick or too runny. Let the batter rest for a few minutes before cooking. Preheat your waffle iron for even cooking. Don’t open the iron too early; wait until the steam stops. This keeps your waffles fluffy and golden every time! Yes, this recipe is great for meal prep! You can cook the chicken and waffles and store them separately. Keep the chicken in an airtight container in the fridge for up to four days. For freezing, wrap cooked chicken tightly in plastic wrap. Waffles can also be frozen for later use. Just reheat them in the toaster or oven when you’re ready to eat. This makes for easy and tasty meals all week! In this post, we explored making delicious chicken and waffles. We covered ingredients, marinating, frying, and toasting the waffles. I shared helpful tips and tasty variations for your meals. Remember, you can customize the flavors and choose healthier options too. Don't forget to store leftovers properly and reheat them for the best taste. Enjoy this comforting dish any time, and feel free to experiment for your perfect recipe!

Easy Chicken and Waffles Quick and Delicious Recipe

Craving a comforting, quick meal? My Easy Chicken and Waffles recipe is just what you need! This dish combines crispy,

To make tasty veggie sushi rolls, you need a few key items. Here’s what you'll need: - 1 cup sushi rice - 1 1/4 cups water - 4 sheets nori (seaweed) - 1 large cucumber, julienned - 1 medium carrot, julienned - 1 avocado, sliced - 1/4 cup bell pepper, thinly sliced - 2 tablespoons rice vinegar - 1 teaspoon sugar - 1/2 teaspoon salt - Soy sauce, for dipping - Pickled ginger and wasabi, for serving (optional) These ingredients create a fresh and fun sushi experience that everyone can enjoy. If you want to add more taste, include these optional items: - Cream cheese for a creamy texture - Sesame seeds for crunch - Radish sprouts for a peppery bite - Other colorful veggies, like zucchini or sprouts These extras can make your sushi rolls even more exciting and delicious. Picking fresh veggies is key to great sushi rolls. Here are a few tips: - Choose firm cucumbers and carrots. They should feel crisp. - Look for ripe avocados that yield slightly when pressed. - Select bell peppers with smooth skin and no blemishes. - Buy locally sourced vegetables when possible for the best flavor. Fresh ingredients will enhance your sushi rolls and make them stand out. Enjoy the process and be creative! For the full recipe, check the section above. - Rinsing and Cooking the Rice Start by rinsing the sushi rice under cold water. Keep rinsing until the water runs clear. This step removes excess starch. Then, drain the rice well. Next, combine the rinsed rice with 1 1/4 cups of water in a pot. Bring this mixture to a boil. Once boiling, cover the pot and reduce the heat to low. Let it cook for 18-20 minutes. The water will absorb, and the rice will be ready. After cooking, remove the pot from heat and let it sit, covered, for 10 minutes. - Mixing the Seasoning In a small bowl, mix 2 tablespoons of rice vinegar, 1 teaspoon of sugar, and 1/2 teaspoon of salt. Stir until the sugar dissolves. Pour this mixture over the cooked rice. Use a wooden spatula to gently fold the seasoning into the rice. This gives the rice a nice flavor. Let the rice cool to room temperature before using it. - Using the Bamboo Sushi Mat Place your bamboo sushi mat on a flat surface. Lay a sheet of nori, shiny side down, on the mat. This setup helps you roll the sushi easily. Make sure the nori is centered on the mat. - Layering Ingredients Correctly With wet hands, take about 1/4 of the sushi rice. Spread it evenly over the nori, leaving about 1 inch at the top edge. This open space helps seal the roll later. Now, arrange a line of your favorite veggies like cucumber, carrot, avocado, and bell pepper across the middle of the rice. - Tips for a Tight Roll Carefully lift the edge of the sushi mat closest to you. Start rolling away from yourself, pressing firmly but gently. Aim for a tight roll but don’t squish it. Roll until you reach the end of the nori. To seal the roll, use a bit of water on the edge. - Cutting Even Pieces Use a sharp knife to slice the roll into 6-8 pieces. To make clean cuts, wipe the knife with a damp cloth between slices. This keeps your rolls looking nice. Repeat this process with the remaining nori, rice, and vegetables. Enjoy your simple veggie sushi rolls! For the full recipe, check the recipe section above. To roll sushi well, start with a clean space. Use a bamboo mat for support. Always wet your hands before handling rice. This prevents sticking. Spread rice evenly on the nori. Leave an inch at the top. Layer your veggies in the center. Roll tightly but not too hard. Use the mat to guide the roll. Seal the edge with a bit of water. One common mistake is too much rice. This makes rolling hard. Avoid overfilling with ingredients, too. If you add too much, the roll may burst. Another mistake is not wetting your hands. This can lead to sticky fingers and messy rolls. Lastly, don’t rush. Take your time to roll tightly and evenly. Perfect sushi rice should be sticky yet fluffy. Rinse the rice well to remove excess starch. This helps the grains stay separate. Cook it with the right water ratio. Use 1 cup of rice to 1 1/4 cups of water. After cooking, let it sit covered for 10 minutes. This allows steam to finish the cooking. Mix in vinegar, sugar, and salt while the rice is warm. This adds flavor and helps with texture. For more details, check the Full Recipe. {{image_2}} You can play with many veggies for your sushi rolls. Try using bell peppers, radishes, or even sweet potatoes. Each vegetable adds a unique flavor and texture. Mix colors for a pretty look on your plate. For example, use purple cabbage for crunch and color. You can also add leafy greens like spinach for extra nutrition. Don’t be afraid to experiment! Soy sauce is great, but you can switch it up. Try using sesame oil for a nutty taste. A spicy mayo made with mayonnaise and sriracha can add a kick. You might enjoy a sweet soy glaze for a fun twist. Each sauce can change the whole dish. Just remember to keep the sauces balanced. You want to enhance, not overpower the fresh veggies. Cooked ingredients can make sushi rolls easier and different. Try using grilled zucchini or roasted carrots. You can also add cooked shrimp or crab for a seafood option. Cooked veggies are soft and mix well with rice. They can add a smoky or sweet flavor to your rolls. Just make sure they cool before adding them to your sushi. For the complete recipe, check out the Simple Veggie Sushi Rolls 🥒. To keep your leftover sushi rolls fresh, wrap them in plastic wrap. This seals in moisture and keeps the rolls from drying out. Place them in an airtight container in the fridge. Enjoy your sushi within 24 hours for the best taste. If you have cut pieces, store them separately to maintain their shape. When you make sushi, use fresh ingredients for the best flavor. Store vegetables like cucumber, avocado, and carrot in the fridge. Keep them in a container with a damp paper towel. This helps them stay crisp. Avoid cutting vegetables too early. Cut them just before making the rolls to keep them fresh longer. Sushi is best when served fresh, but if you need to reheat it, do so carefully. Microwave sushi for about 10-15 seconds on low power. This warms it without turning it soggy. Avoid reheating sushi rolls with raw fish, as they are best enjoyed cold. For the full recipe, check the Simple Veggie Sushi Rolls section. Yes, you can use brown rice for sushi. Brown rice has a nutty flavor. It is also more nutritious than white rice. However, it takes longer to cook. I suggest soaking it for a few hours before cooking. This can help soften it. The texture will be chewier than sushi rice. You may need to adjust the water ratio to get the right consistency. If you need a substitute for nori, try soy paper or rice paper. Soy paper is thin and has a mild taste. It works well for sushi rolls. Rice paper is another option. It is often used in spring rolls. Just wet it to make it flexible before using. You can also use lettuce leaves for a fresh twist. They add crunch and keep the sushi light. Making sushi rice without a rice cooker is easy. Start by rinsing the sushi rice until the water is clear. Then, combine the rice and water in a pot. Bring it to a boil. Once boiling, cover and reduce the heat to low. Cook for about 18-20 minutes until the water is absorbed. Remove it from heat and let it sit for 10 minutes. Finally, mix in the rice vinegar, sugar, and salt. This method gives you perfect sushi rice every time. For a full recipe, check out the Simple Veggie Sushi Rolls section. You learned about making simple veggie sushi rolls using fresh ingredients. We discussed tips for preparing sushi rice and assembling the rolls. I shared common mistakes to avoid and ways to make your sushi unique. Storing and reheating sushi properly is key to enjoying leftovers. Remember, practice makes perfect when rolling. Experiment with flavors and have fun. Enjoy your sushi journey!

Simple Veggie Sushi Rolls Fresh and Tasty Treat

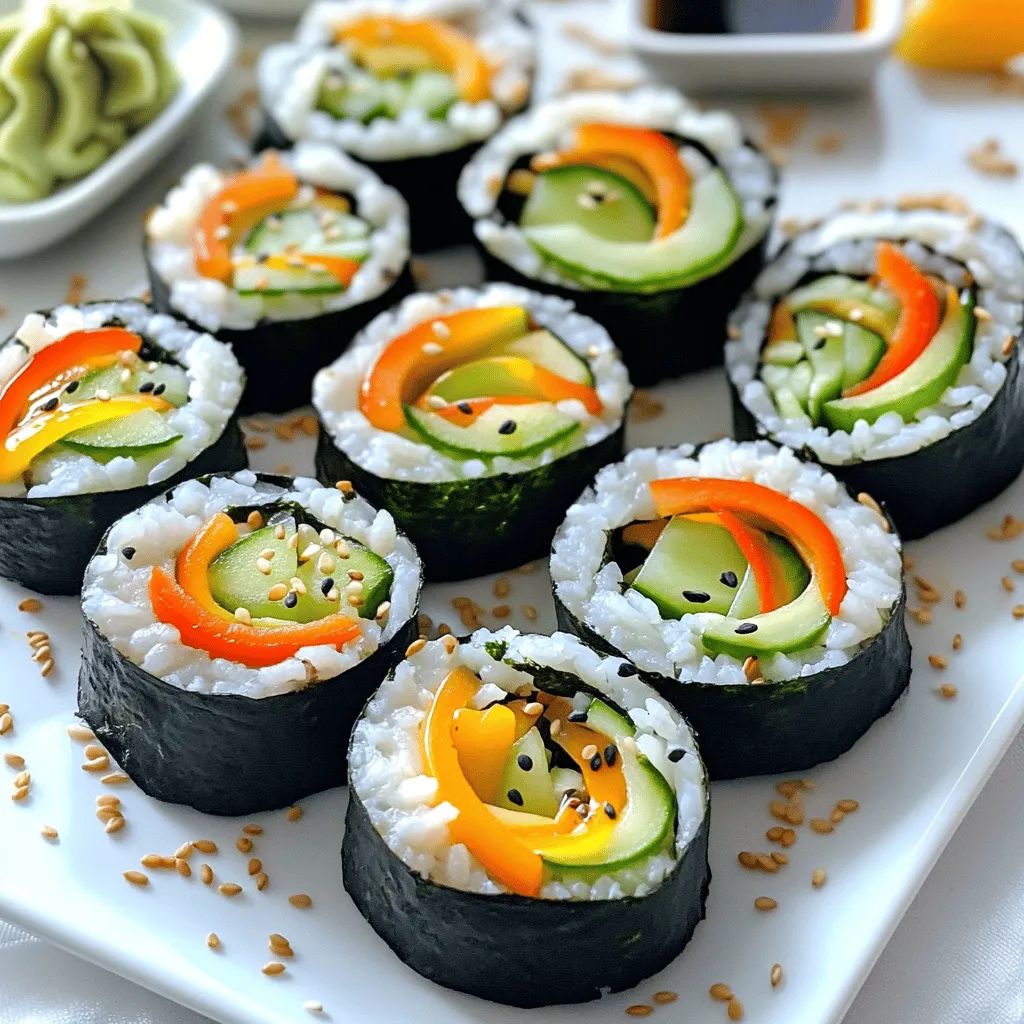
Looking to make a delicious, fresh treat at home? Simple veggie sushi rolls are your answer! With just a few

To make classic stuffed cabbage rolls, you need some key ingredients. Here’s what you will need: - 12 large cabbage leaves - 1 cup cooked rice - 1 lb ground beef (or ground turkey) - 1 small onion, finely chopped - 2 cloves garlic, minced - 1 can (14 oz) diced tomatoes (with juice) - 2 tablespoons tomato paste - 1 teaspoon paprika - 1 teaspoon dried oregano - Salt and pepper to taste - Fresh parsley, chopped for garnish These ingredients combine to create a hearty and tasty dish. You can add some optional ingredients to change the flavor or texture. Here are some ideas: - Shredded carrots for sweetness - Bell peppers for extra crunch - Chopped mushrooms for umami flavor - A splash of Worcestershire sauce for depth Feel free to get creative with your ingredients! If you need substitutions, there are many options. For gluten-free diets, use rice instead of breadcrumbs. You can swap ground beef with ground turkey or plant-based meat for a lighter meal. For those who avoid meat, try using lentils or chickpeas as a filling. This keeps the dish tasty while being meat-free. Always check for allergens, especially with canned goods. With these ingredients and tips, you can create a dish that fits your needs and tastes. For the full recipe, check out the details above. To prepare the cabbage leaves, start by boiling water in a large pot. Add a bit of salt to the water for flavor. Carefully peel off 12 large leaves from the head of cabbage. Place each leaf in the boiling water for about 2-3 minutes. This softens them, making them easier to roll. Once they are soft, remove them and set them on a clean towel to drain and cool. Next, let's make the filling. In a skillet, add a splash of oil and heat over medium. Sauté one small chopped onion and two minced garlic cloves until they turn clear, about 5 minutes. In a large bowl, combine 1 cup of cooked rice, 1 pound of ground beef or turkey, and the sautéed onion and garlic. Add one can of diced tomatoes (with juice), two tablespoons of tomato paste, one teaspoon of paprika, and one teaspoon of dried oregano. Don't forget to season with salt and pepper. Mix everything together until it is well blended. Now, it’s time to assemble the rolls. Take one cabbage leaf and lay it flat. Place about 2 tablespoons of the meat mixture at the base of the leaf. Fold the sides in and roll it up tightly from the base toward the tip. Repeat this for all the leaves and filling. It’s fun to see them all come together! Preheat your oven to 375°F (190°C). In a large, oven-safe dish, spread a thin layer of tomato sauce or some of the canned diced tomatoes at the bottom. Arrange the stuffed cabbage rolls seam side down in the dish, packing them closely. Pour any remaining tomato sauce or diced tomatoes over them. You can sprinkle more salt, pepper, and oregano if you want. Cover the dish with aluminum foil and bake for 45-55 minutes. Check that the meat is cooked and the cabbage is tender. After cooking, let the rolls cool for a few minutes. Garnish with fresh parsley before serving. Enjoy your meal! For the full recipe, check the previous section! To make perfect stuffed cabbage rolls, follow these tips: - Choose the Right Cabbage: Use large heads of green cabbage. They have sturdy leaves. - Blanch the Leaves: Boil the leaves briefly. This softens them and makes rolling easier. - Don’t Overfill: Use about 2 tablespoons of filling per leaf. This helps them roll tightly. - Seal the Rolls: Tuck in the sides of the leaf as you roll. This keeps the filling inside. - Layer the Sauce: Spread sauce on the bottom of the dish. This adds flavor and keeps them moist. Here are some common mistakes to watch out for: - Skipping the Blanching Step: This can lead to tough leaves that crack easily. - Using Cold Filling: Always use warm filling. It helps the rolls cook evenly. - Not Packing the Rolls Tightly: Loose rolls may fall apart while baking. - Overcooking the Cabbage: This can make the leaves mushy and unappealing. If you have leftover cabbage rolls, here are some fun ideas: - Cabbage Roll Soup: Chop the rolls and simmer them in broth for a hearty soup. - Cabbage Roll Casserole: Layer the rolls with extra sauce and cheese for a baked dish. - Stuffed Peppers: Use the filling to stuff bell peppers. Bake as you would the cabbage rolls. - Tacos: Shred the rolls and use in soft tortillas for a unique taco twist. For more guidance on making these rolls, check the Full Recipe. {{image_2}} You can easily make stuffed cabbage rolls vegetarian or vegan. Instead of meat, use a mix of beans, lentils, or quinoa. These ingredients provide protein and texture. For flavor, add chopped vegetables like bell peppers, carrots, or mushrooms. Use vegetable broth instead of meat-based broth. You can also replace the rice with farro or bulgur for a nutty taste. This way, you keep the spirit of the dish while making it plant-based. If you want to switch up the meat, try ground turkey, chicken, or pork. Each option gives a unique taste. You can also blend meats for extra flavor. For a richer roll, add sausage or chorizo. Remember to adjust the seasonings, as some meats are more flavorful than others. You can even use seafood, like shrimp, for a fun twist. Just ensure the filling is cooked properly before rolling it in the cabbage. Different cultures have their own take on stuffed cabbage rolls. In Eastern Europe, you may find rice mixed with smoked meats, giving a strong flavor. In the Middle East, spices like cinnamon and allspice often appear in the filling. You might also find variations that include raisins or nuts for added texture. In some regions, the rolls are served with a yogurt sauce, giving a fresh taste. Each variation reflects the local ingredients and traditions, making every recipe unique and special. Explore these global flavors to find your favorite twist on this classic dish. For the original recipe, check the Full Recipe. To keep your cabbage rolls fresh, let them cool first. Once cool, place them in an airtight container. You can store them in the fridge for up to four days. If you plan to eat them later, this method works well. Make sure to label the container with the date you made them. This way, you won't forget they are there. If you want to keep your cabbage rolls longer, freezing is a great option. Wrap each roll tightly in plastic wrap. Then, place them in a freezer bag. Remove as much air as possible from the bag. You can freeze them for up to three months. When you're ready to eat them, simply thaw in the fridge overnight. To reheat your cabbage rolls, you have a few choices. You can use the oven, microwave, or stovetop. For the oven, preheat it to 350°F (175°C). Place the rolls in a baking dish with some sauce on top to keep them moist. Cover with foil and heat for about 20 minutes. If using a microwave, place a roll on a plate and cover with a damp paper towel. Heat for one to two minutes, checking often. This keeps the flavor intact and ensures they are warm throughout. Yes, you can make the filling ahead of time. Just store it in the fridge for up to two days. This makes it easy to assemble your cabbage rolls later. Having the filling ready helps save time on busy days. Stuffed cabbage rolls pair well with many sides. Here are some great options: - Mashed potatoes - Crusty bread - A fresh garden salad - Steamed vegetables These sides enhance the meal and make it more filling. To check if the rolls are done, look for tender cabbage and cooked meat. You can cut one roll in half to see if the meat is no longer pink. The dish should be bubbly and hot throughout. Yes, you can cook cabbage rolls in a slow cooker. Just layer the rolls in the pot and add sauce. Cook on low for 6-8 hours or on high for 3-4 hours. This method makes the cabbage very tender and the flavors meld nicely. Savoy cabbage is best for stuffed cabbage rolls. Its leaves are soft and easy to roll. Regular green cabbage works too but may be a bit tougher. Look for large, firm heads for the best results. For the complete recipe, check out the Full Recipe. Stuffed cabbage rolls are a tasty dish full of flavor. We covered key ingredients, careful steps, and helpful tips. Feel free to make changes based on your taste. Remember to store leftovers well for later meals. With practice, you’ll avoid common mistakes and make perfect rolls every time. Enjoy creating and sharing this dish; your kitchen will smell amazing!

Classic Stuffed Cabbage Rolls Flavorful Family Meal

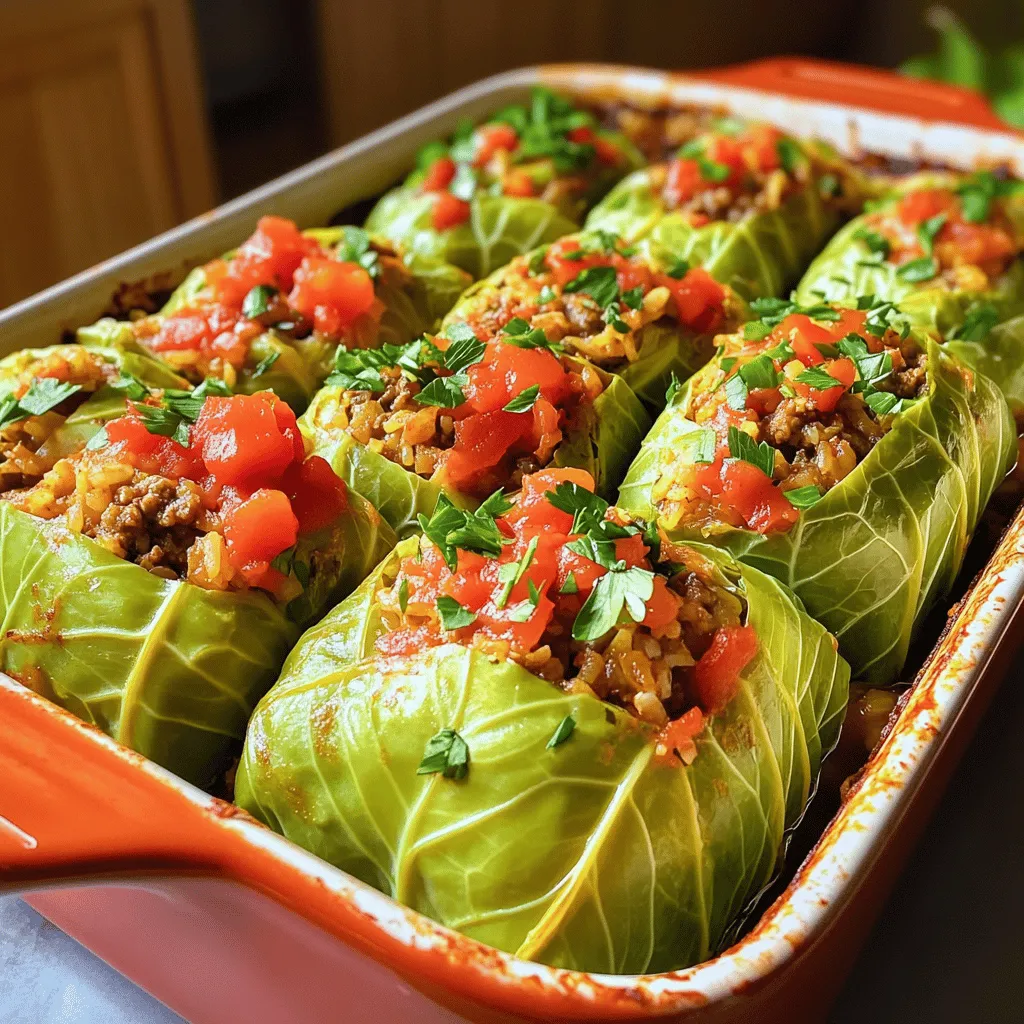
Are you ready to create a meal that warms hearts and brings families together? Classic stuffed cabbage rolls are a

To make your Chicken Tikka Masala, you need a few main ingredients. These will help create a rich and tasty dish. - 500g chicken breast, cut into bite-sized pieces - 1 cup plain yogurt - 2 tablespoons garam masala - 1 tablespoon ground cumin - 1 tablespoon ground coriander - 1 teaspoon turmeric powder - 1 teaspoon chili powder (adjust to taste) - 3 tablespoons vegetable oil - 1 large onion, finely chopped - 4 garlic cloves, minced - 1-inch piece fresh ginger, grated - 1 can (400g) diced tomatoes - 1 cup coconut milk - Salt to taste These ingredients create a creamy and flavorful sauce. The chicken breast gives a tender bite, while yogurt and spices add depth. Feel free to enhance your dish with these optional ingredients. They add extra flavor and freshness. - Fresh cilantro, chopped (for garnish) - Coconut milk Cilantro adds a bright touch. Coconut milk can be used for a creamier sauce. To enjoy your Chicken Tikka Masala, consider these serving suggestions. They pair well with the dish. - Basmati rice - Naan bread Basmati rice soaks up the sauce beautifully. Naan bread is perfect for dipping. Serve your dish hot for the best experience. For the full recipe, check the details above. Mixing the yogurt and spices To start, take a large bowl. Add 1 cup of plain yogurt. Then, mix in the spices. Use 2 tablespoons of garam masala, 1 tablespoon of ground cumin, and 1 tablespoon of ground coriander. Next, sprinkle in 1 teaspoon of turmeric powder and adjust the heat with 1 teaspoon of chili powder. Blend everything well to create a smooth marinade. Marinating the chicken Now, chop 500g of chicken breast into bite-sized pieces. Toss the chicken into the bowl with the marinade. Make sure each piece is fully coated. Cover the bowl with plastic wrap. Let it sit in the fridge for at least 1 hour. For best results, marinate overnight. This lets the flavors soak in deeply. Sautéing onions and aromatics Heat 3 tablespoons of vegetable oil in a large skillet over medium heat. Once hot, add 1 large finely chopped onion. Cook until golden brown, which takes about 5-7 minutes. Then, stir in 4 minced garlic cloves and 1-inch grated ginger. Sauté for an additional 1-2 minutes until fragrant. Adding marinated chicken Next, add the marinated chicken to the skillet. Cook for 5-6 minutes. Stir occasionally until the chicken is nearly cooked through. This step ensures the chicken absorbs the onion and spice flavors. Incorporating tomatoes and coconut milk Pour in 1 can of diced tomatoes. Let this mixture come to a simmer. Cook for about 10 minutes, stirring now and then. This helps the flavors meld together. After that, reduce the heat and add 1 cup of coconut milk. Stir to combine well. Thickening the sauce Let the sauce simmer for another 10 minutes. This allows it to thicken to your desired consistency. Taste and season with salt as needed. Once finished, remove from heat and let it sit for a few minutes. This resting time helps develop the flavors even more. For the full recipe, check the complete instructions above. Enjoy your cooking adventure! To make your chicken tikka masala really tasty, marinate the chicken well. I suggest letting it sit for at least one hour. If you have time, try to marinate it overnight. This helps the flavors soak in deeply. Spice levels can change the dish a lot. If you like it mild, use less chili powder. If you love heat, add more! Taste the marinade before adding the chicken. This way, you can adjust the spices to fit your taste. When sautéing, use medium heat. This helps the onions cook slowly and get golden brown. Stir them often to avoid burning. For even cooking, make sure the chicken pieces are similar in size. This way, they cook at the same rate. Stir the chicken well, too. It helps each piece get that nice, golden color. For a beautiful finish, garnish with fresh cilantro. It adds a pop of green and a fresh taste. Just chop some leaves and sprinkle them on top before serving. When you serve, think about your sides. Chicken tikka masala goes great with basmati rice or naan bread. You can also serve it in a bowl, making it easy for everyone to enjoy. {{image_2}} You can switch chicken for other proteins. Tofu works great for a vegetarian option. It absorbs flavors well and adds nice texture. Shrimp is another tasty choice. It cooks quickly and pairs perfectly with the sauce. If you need a dairy-free option, use coconut yogurt. It keeps the creaminess without dairy. Almond milk can replace regular yogurt too, but it may change the taste a bit. Spices vary by region. In India, they use more heat and complex spices. You might find cinnamon and cardamom added in some recipes. Feel free to mix spices to match your taste. If you want less heat, reduce the chili powder. You can also add more coconut milk to cool the dish down. Rice is a classic side for Chicken Tikka Masala. Basmati rice is the most popular choice. You can use jasmine rice for a fragrant twist. Quinoa is a healthy alternative too. Adding vegetables can make your meal more colorful. Try peas, bell peppers, or spinach. They cook quickly and add nutrients. Just toss them in during the last few minutes of cooking for the best results. Explore the Full Recipe for more details on how to make this dish delicious! You can store Chicken Tikka Masala in the fridge for up to 3 days. Use an airtight container to keep it fresh. Make sure it cools down to room temperature before putting it in the fridge. This helps keep the taste and texture nice. To freeze Chicken Tikka Masala, let it cool first. Then, place it in a freezer-safe container. It can last up to 3 months in the freezer. When you are ready to eat it, thaw it in the fridge overnight. You can reheat it on the stove or in the microwave. Make sure it gets hot all the way through. You can get creative with leftover sauce. Use it as a dip for naan or pour it over rice. It makes a great base for a quick veggie curry or soup. You can also add leftover chicken to salads or wraps. This adds flavor and makes meals easy and fun! For more ideas, check out the Full Recipe for Chicken Tikka Masala. How to make Chicken Tikka Masala less spicy? To reduce the heat, you can adjust the amount of chili powder. Start with half a teaspoon. You can also add more coconut milk to balance the spice. Using yogurt in the marinade helps too. It cools the dish and adds creaminess. Can I use frozen chicken for this recipe? Yes, you can use frozen chicken. Just make sure to thaw it fully first. This helps the chicken cook evenly. If you are in a hurry, you can cook it from frozen. Just increase the cooking time. What is the ideal cook time for chicken? The ideal cook time for chicken in this recipe is about 15 minutes. You should cook it until it reaches an internal temperature of 165°F (75°C). Always check the thickest part of the chicken to ensure it is fully cooked. Is Chicken Tikka Masala unhealthy? Chicken Tikka Masala can be healthy if made at home. You control the ingredients and portions. Using lean chicken and less oil makes it a smart choice. The spices also offer health benefits, like anti-inflammatory properties. Nutritional information for homemade versions A serving of homemade Chicken Tikka Masala has about 400 calories. It provides protein, healthy fats, and vitamins from the spices. If you use coconut milk, it adds creaminess but also some fat. For a lighter version, use less coconut milk. For more details on making this dish, check out the Full Recipe. This blog post covered how to make Chicken Tikka Masala. We explored ingredients, including chicken, yogurt, and spices. You learned the steps needed to prepare the dish and create a rich sauce. Tips for flavor, cooking methods, and presentation added to your cooking skills. Variations let you adapt the recipe to your taste. Lastly, we discussed storage and handling leftovers. Now you're ready to enjoy a delicious meal and impress your friends with your cooking!

Easy Chicken Tikka Masala Flavorful and Comforting Dish

Are you craving a flavorful and comforting dish? Look no further! My Easy Chicken Tikka Masala recipe will satisfy your

- 2 cups cooked chicken, shredded - 1/4 cup buffalo sauce (adjust to taste) - 1/2 cup cream cheese, softened - 1/2 cup cheddar cheese, shredded - 1/4 cup chopped green onions - 4 large tortillas (flour or whole wheat) - 1 cup lettuce, shredded - 1/2 cup ranch dressing (optional) To make simple buffalo chicken wraps, you need a few key ingredients. Start with cooked chicken. I prefer to use rotisserie chicken for ease. Next, buffalo sauce gives the wraps their signature kick. Adjust the amount based on how spicy you want it. Cream cheese adds creaminess, while cheddar cheese brings flavor. Chopped green onions add freshness and a nice crunch. Choose between flour or whole wheat tortillas based on your taste. Shredded lettuce provides a refreshing crunch. You can add ranch dressing on top for extra flavor. This is optional, but highly recommended. - Try different sauces like barbecue or teriyaki for unique flavors. - Use mozzarella or pepper jack cheese for a twist on taste and texture. - Swap tortillas for lettuce wraps for a low-carb option. These swaps keep the recipe fun and fresh. Feel free to experiment and find what you like best. - Each wrap has about 350 calories, but this can vary based on ingredients. - Contains proteins from chicken and cheese, along with fats from cream cheese. - Buffalo sauce adds flavor but also some sodium. Balance this with fresh veggies. Understanding the nutritional value helps you enjoy your meal while being mindful of what you eat. Plus, the key ingredients offer health benefits. Chicken provides protein, while green onions have vitamins and antioxidants. How to prep the chicken for shredding First, use cooked chicken. You can use rotisserie chicken or boil your own. Let the chicken cool a bit. This makes it easier to handle. Next, use two forks to shred the chicken. Pull the chicken apart into small pieces. This helps the flavors mix well later. Steps to soften cream cheese Take the cream cheese out of the fridge. Leave it at room temperature for about 10 minutes. You can also microwave it for 10 to 15 seconds. Make sure it is soft but not melted. This soft cream cheese will mix easily with the chicken. Mixing the buffalo chicken filling In a large bowl, combine the shredded chicken and buffalo sauce. Stir well until the chicken is fully coated. Then, add the softened cream cheese. Mix it until smooth and creamy. After that, add shredded cheddar cheese and chopped green onions. Be sure to mix everything well. Season it with salt and pepper to taste. Assembling the wraps properly Lay out the tortillas on a flat surface. Start by adding a layer of shredded lettuce on each tortilla. Next, scoop some buffalo chicken mixture onto one end. Do not overfill it, or it will be hard to roll. Rolling techniques for tight wraps To roll, fold the sides of the tortilla in first. Then, roll it tightly from the end with the filling. This helps keep everything inside. If you want, you can cut the wrap in half. This makes it easier to hold and eat. Drizzling ranch dressing and garnishing tips If you like, drizzle ranch dressing over the chicken filling before rolling. This adds a nice creamy taste. For a pop of color, sprinkle extra chopped green onions on top. You can also serve extra buffalo sauce on the side for dipping. Enjoy your simple buffalo chicken wraps! For the full recipe, check out the instructions above. You can easily make these wraps your own. Here’s how: - Adding vegetables for crunch: Try adding sliced bell peppers, cucumbers, or shredded carrots. These veggies give a nice crunch and extra flavor. You can also add some diced celery for that classic buffalo wing taste. - Changing the heat level of buffalo sauce: If you like it spicy, add more buffalo sauce. If you prefer it mild, use less sauce or mix in some honey. You could also try a milder hot sauce for a different flavor. Storing leftovers correctly keeps your wraps fresh and tasty: - Best practices for wrapping and storing leftovers: Wrap each buffalo chicken wrap tightly in plastic wrap. This keeps air out and helps them stay fresh. Place them in an airtight container in the fridge. - Reheating suggestions without losing texture: To reheat, unwrap the wrap and place it in a skillet over low heat. Heat for about 5 minutes on each side. This helps keep the tortilla soft and warm without getting soggy. Pair your wraps with tasty sides and drinks for a complete meal: - Complementary sides that pair well: Serve with carrot sticks, celery, or a fresh salad. These sides add crunch and balance out the spice of the wraps. - Beverage ideas to enhance the meal experience: Cold drinks like iced tea or lemonade are great choices. You could also serve a light beer or a crisp soda to cool down the heat. For the full recipe, check out the detailed steps above. {{image_2}} You can switch up the wrap base for your buffalo chicken. Lettuce wraps are great for a low-carb choice. They keep the meal light and fresh. Just use large leaves of romaine or butter lettuce. Also, if you need gluten-free options, there are many tortillas made from rice or corn. These still taste great and hold all the fillings. Feel free to change the protein in your wraps. Turkey is a tasty alternative. It works well with buffalo sauce and adds a different flavor. If you want a plant-based option, use chickpeas or tofu. You can also grab quick deli meats from the store. These can save time and make meal prep easier. Get creative with flavors! You can try different sauces like BBQ or honey mustard. These add a unique taste to your wraps. If you like a hint of sweetness, toss in apple slices. The crunch of apples balances the spice of the buffalo sauce. It’s fun to mix and match until you find your favorite combination. To make your Buffalo chicken wraps shine, choose a nice platter. A colorful plate adds charm. Lay the wraps side by side for a neat look. You can cut them in half to show the filling. This helps guests see the tasty mix inside. For gatherings, stack them up or arrange in a circle. Add some chips or veggies on the side for fun. Guests will love the mix of colors and textures. Garnishing can take your wraps to the next level. Use fresh herbs like cilantro or parsley for a pop of green. Sprinkle some extra chopped green onions on top for color. You can also add a few slices of jalapeño for spice. When using plates, think about height and balance. A tall stack of wraps looks impressive. You can use small bowls for sauces to add flair. This makes dipping easy and neat. Sauces can make your meal even better. Ranch dressing is a classic choice for dipping. You can also try blue cheese for a bold flavor. For those who like heat, serve extra buffalo sauce. Create a sauce platter with small bowls of different dips. This gives guests options to choose from. Each dip adds a new taste to the wraps. Your guests will enjoy mixing flavors and trying new things. For the full recipe, check out the link! To store Buffalo Chicken Wraps, wrap each one tightly in plastic wrap or foil. Place them in an airtight container to keep them fresh. Store in the fridge for up to three days. This method helps maintain the flavor and texture of the wraps. Yes, you can freeze Buffalo Chicken Wraps. To freeze, wrap each one in plastic wrap and place them in a freezer-safe bag. They can last up to two months in the freezer. When you're ready to eat, thaw them in the fridge overnight before reheating. You can heat them in the oven or microwave until warm. Buffalo Chicken Wraps pair well with many sides. Consider serving them with carrot sticks, celery, or a fresh salad. For a hearty meal, try some crispy fries or potato wedges. For drinks, iced tea and soda are great choices, or try a light beer for a fun twist. The prep time for this recipe is just 15 minutes. Here’s a quick breakdown: - Shred the chicken: 5 minutes. - Mix the buffalo sauce and cream cheese: 3 minutes. - Assemble the wraps: 7 minutes. This quick process makes it easy to whip up a tasty meal in no time. For the full recipe, check out the detailed steps above. This blog post shared how to make tasty Buffalo Chicken Wraps. We covered the key ingredients and tips for swaps. I also detailed preparation steps and easy cooking methods. You learned fun ways to customize your wraps and how to store them. Incorporating various flavors and options keeps meals exciting. Whether for a quick lunch or a festive gathering, these wraps deliver. Enjoy experimenting, and make this your go-to recipe for deliciousness!

Simple Buffalo Chicken Wraps Tasty and Easy Recipe

Are you craving a tasty, easy meal? Look no further than these Simple Buffalo Chicken Wraps! They combine spicy buffalo

Older posts
Newer posts
← Previous Page1 … Page65 Page66 Page67 … Page82 Next →

dsad

© 2026 Recipes Pursuit • Built with GeneratePress

Our Policies

  • Copyright Policy
  • Cookie Policy
  • GDPR Policy
  • Privacy Policy
  • Disclaimer
  • Terms Of Use

More Information

  • Home
  • About
  • Contact
  • Appetizers
  • Dessert
  • Dinner
  • Drinks
©2026, Recipes Pursuit About Back To Top