Skip to content
DisclaimerTerms Of UseGDPR PolicyCookie Policy

Recipes Pursuit

  • Home
  • Drinks
  • Appetizers
  • Dinner
  • Dessert
  • About
  • Contact
  • Privacy Policy
DisclaimerTerms Of UseGDPR PolicyCookie Policy

NO-ING-IMG

- 2 cups fresh strawberries, hulled and sliced - 2 ripe kiwis, peeled and sliced - 1/4 cup fresh mint leaves, chopped - 2 tablespoons honey or agave syrup - Juice of 1 lime - 1 1/2 cups coconut water - Additional strawberry and kiwi slices - Fresh mint sprigs To make a perfect Strawberry Kiwi Refresher, you need fresh, vibrant ingredients. Start with ripe strawberries. They should be sweet and juicy. Slice them into bite-sized pieces. Next, pick ripe kiwis. They should feel slightly soft when you press them. Peel and slice them too. Fresh mint leaves add a nice touch. Chop them finely to release their aroma. For sweetness, choose between honey and agave syrup. Honey gives a rich flavor, while agave is a great vegan option. You also need the juice of one lime. It adds tang and balances the sweetness. For the liquid base, coconut water is key. It hydrates and enhances the drink's tropical vibe. Lastly, consider garnishes. Slices of strawberries and kiwis make your drink look pretty. A sprig of fresh mint adds a pop of color and freshness. You can find the full recipe for this refreshing drink below. Enjoy creating your Strawberry Kiwi Refresher! First, you need to prepare the fruits. Start by hulling and slicing the strawberries. Remove the green tops and cut them into thin slices. Next, peel the kiwis and slice them too. The bright green inside will add a nice color to your drink. Then, chop the fresh mint leaves. This will add a refreshing taste to your Strawberry Kiwi Refresher. Now, it’s time to blend! Combine the sliced strawberries, sliced kiwis, chopped mint leaves, honey, lime juice, and coconut water in a blender. Blend all the ingredients until the mixture is smooth. You want it to be creamy and well combined. If you prefer a smoother texture, you can strain the mixture through a fine mesh sieve. This will remove any pulp. Pour the drink over ice in your favorite glasses. For a beautiful touch, garnish each glass with extra slices of strawberry and kiwi, along with a sprig of fresh mint. Enjoy your refreshing drink right away! For the complete process, check the Full Recipe. To make your Strawberry Kiwi Refresher taste great, choose ripe fruits. Ripe strawberries and kiwis are sweeter and more flavorful. If you want more sweetness, adjust the honey or agave. Start with two tablespoons and taste. Add more if you like it sweeter. For a smooth drink, strain the mixture well. Use a fine mesh sieve and press the pulp with a spoon. This helps remove any bits that may not blend well. If you prefer a thicker drink, blend less or add more fruit. For a thinner drink, add extra coconut water. This refresher pairs well with light snacks. Try it with chips and salsa, or fresh veggie sticks. For a pretty presentation, use clear glasses. The bright colors of the drink will shine through. You can also add a sprig of mint on top for a nice touch. {{image_2}} The Strawberry Kiwi Refresher is a fun drink to make. You can change it up easily. Here are some cool variations you can try. - Infused drinks with sparkling water: Mix your refresher with sparkling water. This adds a nice fizz. It makes the drink feel special and light. - Experimenting with herbal teas: Brew your favorite herbal tea. Cool it down and mix it with the refresher. This adds new flavors and makes it unique. - Adding vodka or rum for a cocktail twist: If you want an adult drink, add vodka or rum. Just a splash can change the whole drink. It gives it a fun kick. - Suggested mixers for a fruity cocktail: Try mixing in fruit juices. Orange or pineapple juice can add extra sweetness. These flavors match well with strawberries and kiwis. - Incorporating different fruits, like mango or pineapple: For a tropical twist, mix in mango or pineapple. They add color and a sweet touch to your refresher. - Adaptations for holiday flavors: During holidays, think about adding spices. A pinch of cinnamon or nutmeg can bring warmth to your drink. It makes it feel festive. These variations keep your Strawberry Kiwi Refresher fresh and exciting. You can always find a new way to enjoy this tasty drink. For the complete recipe, check out the Full Recipe. To keep your Strawberry Kiwi Refresher fresh, store leftovers in an airtight container. This helps prevent air and moisture from spoiling the drink. Make sure to refrigerate it within two hours of making it. For the best flavor, consume it within two days. Avoid adding ice to the main mix. This keeps the drink from becoming watery. You can also freeze the refresher for later use. Pour the drink into ice cube trays to create fun frozen treats. These cubes can be added to smoothies or blended drinks later. If you want to make popsicles, pour the mixture into molds. Freeze for several hours until solid. Enjoy a refreshing treat on a hot day! In the fridge, the Strawberry Kiwi Refresher stays fresh for up to two days. After that, its flavor and texture may change. Signs of spoilage include an off smell or separation in the liquid. If you notice these signs, it’s best to toss it out. Always trust your senses when it comes to food safety! To make the Strawberry Kiwi Refresher vegan, you can swap honey for agave syrup. Agave syrup is a sweetener made from the agave plant. It works well in this drink and keeps it plant-based. You can use the same amount of agave syrup as honey in the recipe. This change is simple and still keeps the drink sweet and tasty. Yes, you can prepare the refresher in advance! Just blend all the ingredients and store the mixture in the fridge. It stays fresh for up to 24 hours. When you are ready to serve, pour it over ice. If you want, you can strain it for a smoother drink. This way, you save time and enjoy a cool drink whenever you want. The ingredients in the Strawberry Kiwi Refresher are not only tasty but also healthy. - Strawberries: These bright fruits are low in calories and high in vitamin C. They help boost your immune system. - Kiwis: Kiwis are rich in fiber and vitamin C. They aid digestion and support your skin. - Coconut water: This natural drink is hydrating and contains electrolytes. It can help replenish energy. Together, these ingredients make a refreshing drink that is good for you! You can find ready-made Strawberry Kiwi Refreshers at many local stores. Check the juice or beverage aisle in grocery stores. Some health food stores might also carry them. If you prefer online shopping, websites like Amazon often have ready-made options. Just search for “Strawberry Kiwi Refresher” to find what you need. This blog post shared how to make a fresh Strawberry Kiwi Refresher. You learned about the main ingredients, like strawberries, kiwis, and coconut water. We walked through easy steps to prepare, blend, and serve the drink. I also provided tips to enhance flavor and suggested fun variations. Now you can enjoy a tasty drink any time and impress your friends. Remember, using fresh ingredients makes all the difference. Enjoy blending your own flavors!

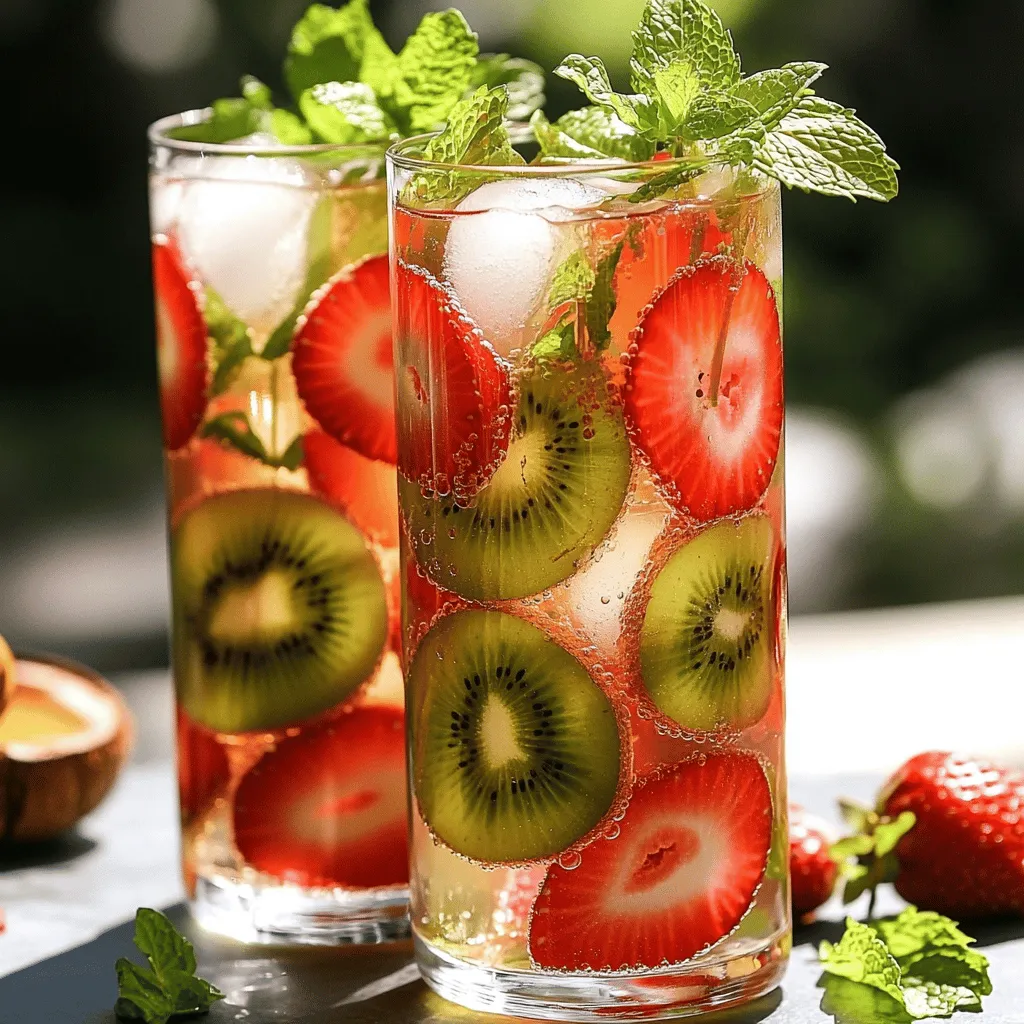
Strawberry Kiwi Refresher Fresh and Flavorful Drink

Looking for a cool, tasty drink that beats the heat? You’ll love the Strawberry Kiwi Refresher! This refreshing blend combines

To make a delicious Cranberry Spice Refresher, you need the following ingredients: - 2 cups cranberry juice (100% juice) - 1 cup sparkling water - 1 tablespoon fresh ginger, grated - 1 tablespoon honey (or agave syrup for a vegan option) - 1 teaspoon ground cinnamon - 1/2 teaspoon ground nutmeg - Juice of 1 lime - Fresh cranberries and lime slices for garnish - Ice cubes These ingredients blend well to create a refreshing drink. The cranberry juice gives a tangy flavor. Fresh ginger adds warmth and zest. Honey sweetens the mix, while spices like cinnamon and nutmeg provide depth. The lime juice brightens the drink, making it festive and fun. The sparkling water adds fizz, making each sip exciting. Feel free to get creative with your drink! Here are some optional add-ins: - A splash of orange juice for extra flavor - A few mint leaves for a fresh twist - A dash of vanilla extract for warmth For garnishes, you can use: - More fresh cranberries for color - Lime wedges for a citrus touch - A sprig of mint for a pop of green Personalizing your drink makes it special. Experiment with these options to find your favorite mix. Each serving of the Cranberry Spice Refresher has about: - Calories: 80 - Total fat: 0g - Carbohydrates: 20g - Sugars: 18g - Protein: 1g This drink is low in calories and fat. It offers hydration and a boost of flavor. The fresh ingredients provide vitamins and minerals. Enjoy this drink guilt-free, knowing you treat yourself to something tasty and healthy. For the complete recipe, check the [Full Recipe]. To make the Cranberry Spice Refresher, start by gathering all your ingredients. You'll need 2 cups of cranberry juice, 1 cup of sparkling water, and a few spices. In a large pitcher, combine the cranberry juice, 1 tablespoon of grated ginger, 1 tablespoon of honey, 1 teaspoon of ground cinnamon, and 1/2 teaspoon of ground nutmeg. Squeeze in the juice of 1 lime. Stir well until the honey dissolves. This mix brings a warm spice to the drink. Next, fill glasses with ice cubes. Pour the cranberry spice mixture over the ice, filling each glass about two-thirds full. The ice keeps your drink cold and refreshing. Now, top each glass with sparkling water. This adds a fun fizz! Gently stir the drink to mix the flavors without losing the bubbles. Finally, garnish each drink with fresh cranberries and a slice of lime. This adds a splash of color and looks festive. Serve your Cranberry Spice Refresher right away and enjoy every sip! Mixing is key to a great drink! When adding honey, make sure to stir until it fully dissolves. If you have trouble, try warming the honey a bit. It will mix in smoothly. When pouring the sparkling water, do it slowly. This helps keep the bubbles intact. Use a long spoon to mix. Stir gently to combine the drink without losing its fizz. If you prefer a sweeter drink, taste and adjust the honey or add more ginger for a spicy kick. Presentation matters! Use tall glasses to show off your colorful drink. Add ice cubes first for a nice chill. When garnishing, place fresh cranberries and a lime slice on the rim for a fun look. You can also use a sprig of mint for a fresh touch. Serve your Cranberry Spice Refresher at parties or gatherings. It’s a great non-alcoholic option that everyone will love. If you want to make it extra special, consider using festive straws or adding fun drink stirrers. Enjoy creating this beautiful drink that tastes as good as it looks! For the complete recipe, check [Full Recipe]. To make the Cranberry Spice Refresher just right, you can tweak the sweetness and spice. If you like it sweeter, add more honey or agave syrup. Start with a teaspoon and taste as you go. For a spicier kick, increase the ginger or cinnamon. Just remember, a little spice goes a long way. If you want a lighter drink, add more sparkling water. This will keep the flavors bright and fresh. Garnishing adds flair to your drink. I love using fresh cranberries and lime slices. They look great and taste good too. Place a few cranberries at the bottom of the glass. Then, add a slice of lime on the rim. You can also use mint leaves for a pop of green. Just make sure to serve the drink right away. This keeps the garnish fresh and pretty. Having the right tools helps make things easier. A large pitcher works best for mixing the drink. A fine grater is great for ginger. It helps you get a nice, fine texture. Use a citrus juicer to squeeze the lime juice easily. For serving, clear glasses show off the drink’s color. Finally, a stirring spoon helps mix it well without losing fizz. With these tools, you’ll have a smooth and tasty drink every time! {{image_2}} You can easily add a fun twist to your Cranberry Spice Refresher by making it alcoholic. Adding a splash of vodka or rum gives your drink a festive kick. For a spicy twist, try spiced rum. Just mix 1-2 ounces of your chosen spirit into the drink mixture before pouring it over ice. This change makes it perfect for holiday parties or gatherings. Making the Cranberry Spice Refresher vegan is simple. Use agave syrup instead of honey. This change keeps the drink sweet and plant-based. You can also replace the honey with maple syrup for a unique flavor. Both options ensure everyone can enjoy this tasty drink while sticking to their diet. You can play with flavors based on the season. In the fall, add a pinch of cloves or allspice for warmth. During winter, try a splash of orange juice for a citrusy touch. For summer, replace cranberry juice with pomegranate juice for a fresh twist. These variations keep each sip exciting and help you enjoy the drink all year long. For the full recipe, refer to the section above. To store leftover Cranberry Spice Refresher, pour it into a clean container with a lid. Make sure to seal it tightly. Place it in the fridge. This drink tastes best when cold. Drink it within two days for the best flavor. If you leave it too long, the ginger may lose its fresh taste. You can reuse the ingredients from this drink in many ways. For example, cranberry juice is great in smoothies or salad dressings. You can use fresh ginger in stir-fries or marinades. Ground cinnamon and nutmeg work well in baked goods like cookies or muffins. Lime juice makes a tasty addition to many drinks or sauces. By reusing these ingredients, you reduce waste and save money. The cranberry juice has a shelf life of about 7-10 days once opened. Always check the label for any specific dates. Fresh ginger can last about a week in the fridge. Ground spices like cinnamon and nutmeg have a long shelf life, usually up to 2-3 years. Keep them in a cool, dark place. If you notice any change in smell or color, toss them out. For best results, use fresh ingredients whenever possible. A Cranberry Spice Refresher is a festive drink made with cranberry juice, spices, and fizz. It combines tart cranberry juice with warm flavors like ginger, cinnamon, and nutmeg. This drink is refreshing and perfect for any holiday gathering. You can find the full recipe in this article for easy access. Yes, you can prepare the base of the Cranberry Spice Refresher ahead of time. Mix the cranberry juice, ginger, honey, and spices in a pitcher. Keep it in the fridge for up to two days. When you are ready to serve, add sparkling water and ice. This keeps the fizz fresh and vibrant. Absolutely! The Cranberry Spice Refresher is kid-friendly and fun. It contains no alcohol and has a delicious taste kids will enjoy. You can adjust the sweetness to match their preferences. With its bright color and festive vibe, it’s a great drink for young ones at holiday events. The Cranberry Spice Refresher blends simple ingredients for a tasty drink. You learned how to prepare it step-by-step, including tips for adjusting sweetness and spice. We explored variations like vegan options and seasonal flavors. Remember, store leftovers well to enjoy later. Incorporating these ideas can make your drink exciting and personal. Enjoy making this refresher for yourself and others. It's a delightful treat that everyone can share.

Cranberry Spice Refresher Flavorful Festive Drink

Get ready to wow your taste buds this holiday season with my Cranberry Spice Refresher! This flavorful festive drink combines

- 1 cup fresh blueberries - 1-inch piece of ginger, peeled and sliced - 1 cup freshly squeezed lemon juice (about 4-6 lemons) - 1 cup granulated sugar (adjust based on sweetness preference) - 4 cups water Fresh blueberries give this drink a sweet and tangy taste. Ginger adds a nice kick that makes the drink feel special. Freshly squeezed lemon juice brightens up the flavor and gives you a refreshing taste. Adjust the sugar to match your preferred sweetness. The water helps blend everything together. - Lemon slices - Mint leaves Garnishes like lemon slices and mint leaves add a pop of color and extra freshness. They make your drink look nice and inviting. You can add them right before serving to keep everything fresh. If you want, you can also mix and match garnishes based on your taste. For the full recipe, check out the complete guide! First, gather your ingredients. You need fresh blueberries, ginger, water, and sugar. - In a medium saucepan, combine 1 cup of fresh blueberries, 1-inch piece of sliced ginger, and 1 cup of water. - Heat this mixture over medium heat. Stir it often. You want the sugar to dissolve. - Once the sugar dissolves, it’s time to simmer. Let it simmer for about 10 minutes. This allows the blueberries to soften and the ginger to release its flavor. After simmering, remove the saucepan from the heat. - Let the mixture cool down for a few minutes. - Next, strain the mixture through a fine sieve into a pitcher. Press the blueberries and ginger to get all the juice. Discard the solids. - Now, add 1 cup of freshly squeezed lemon juice and the remaining 3 cups of cold water to the pitcher. Stir well to combine all the flavors. Your blueberry-ginger syrup is almost ready! - Taste the lemonade and adjust the sweetness. If you want it sweeter, add more sugar. Stir until it dissolves completely. - Chill the lemonade in the fridge for at least 1 hour. This helps the flavors meld together. - When you’re ready to serve, pour the lemonade over ice. Garnish with lemon slices and fresh mint leaves for a lovely touch. Enjoy your refreshing Blueberry Ginger Lemonade! For a detailed recipe, check the Full Recipe above. To get your blueberry ginger lemonade just right, adjust the sugar. If you like it sweet, add more sugar. Taste as you go. You can always add more, but you can't take it out! If you want a bolder taste, let the ginger infuse longer. A few extra minutes can make a big change. Serve your lemonade over ice for a chilly treat. Ice helps keep the drink cool and refreshing. For a fun twist, use unique glassware. Mason jars, fancy cups, or even clear plastic can make it special. Dress it up with a straw for an extra touch. Blueberries are packed with nutrients. They have vitamins and antioxidants that are great for your body. Ginger can help with digestion and adds a warm kick to the drink. Lemons are rich in vitamin C, which boosts your immune system. This drink not only tastes good but is good for you too! {{image_2}} You can make your Blueberry Ginger Lemonade even better by adding some fresh herbs. Mint or basil adds a nice touch. Just toss in a few sprigs when you mix the lemonade. This gives it a refreshing twist. You can also explore other fruits. Strawberries or raspberries work great with blueberries. Just mash them up like you did with the blueberries. You can mix and match the fruits to find your favorite combo. If you want to try something new, consider using honey or agave syrup. They add a unique flavor and are often less processed. Start with half the amount you would use for sugar, then taste and adjust. Everyone likes their drinks sweet in different ways. If you want more sweetness, just add more. Stir well so it mixes in completely. This way, you can find your perfect level of sweetness. You can turn your lemonade into a cocktail easily. Just add a splash of vodka or gin for a fun twist. This is great for summer parties or gatherings. If you want to keep it family-friendly, stick to the mocktail version. Kids love the fruity flavor and it’s perfect for any occasion. You can serve it in fancy glasses to make it feel special. For the full recipe, check out the complete steps to make this delightful drink. To keep your blueberry ginger lemonade fresh, store it in a sealed pitcher. This helps maintain its flavor and prevents spills. You can refrigerate it for up to five days. After that, the flavor may fade. Always give it a good stir before serving again. This will mix the settled ingredients back together. You can freeze blueberry ginger lemonade for longer storage. Pour it into ice cube trays for easy use later. Once frozen, transfer the cubes into a freezer bag. This way, you can grab just what you need. To thaw, simply place the cubes in the fridge overnight or add them directly to a glass. They will melt and cool your drink quickly. Enjoy the refreshing taste whenever you want! You can use natural sweeteners instead of sugar. Honey, agave syrup, or maple syrup work well. They add sweetness and flavor. You can also use stevia or monk fruit for a low-calorie option. To sweeten naturally, start by mashing the blueberries. This helps release their juice. Then, add your sweetener of choice to the blueberry-ginger syrup. Stir well to mix everything. Taste and adjust as needed. Yes, frozen blueberries are great for this drink! They are often picked at peak ripeness and frozen quickly. This can keep their flavor strong. When using frozen fruit, let them thaw a bit before using. You may need to adjust the sweetness. Frozen blueberries can taste less sweet than fresh ones. Consider adding a bit more sweetener to balance the flavors. If you do not have ginger, you can use ground ginger. It has a similar flavor, though it is more concentrated. Use about 1/4 teaspoon of ground ginger for every inch of fresh ginger. Another option is using turmeric. It has a warm flavor but also adds a health boost. Omitting ginger entirely is possible, but it will change the drink's taste. You can try adding a splash of lemon juice for extra zing. Blueberry ginger lemonade is a refreshing drink made from fresh ingredients. You learned how to prepare the syrup, mix the drink, and adjust flavors. I shared tips for serving and suggested fun variations to try. Remember, you can customize sweetness and add other fruits. This drink is not just tasty; it offers health benefits too. Enjoy making your lemonade, and have fun experimenting with flavors and garnishes!

Blueberry Ginger Lemonade Refreshing Summer Drink

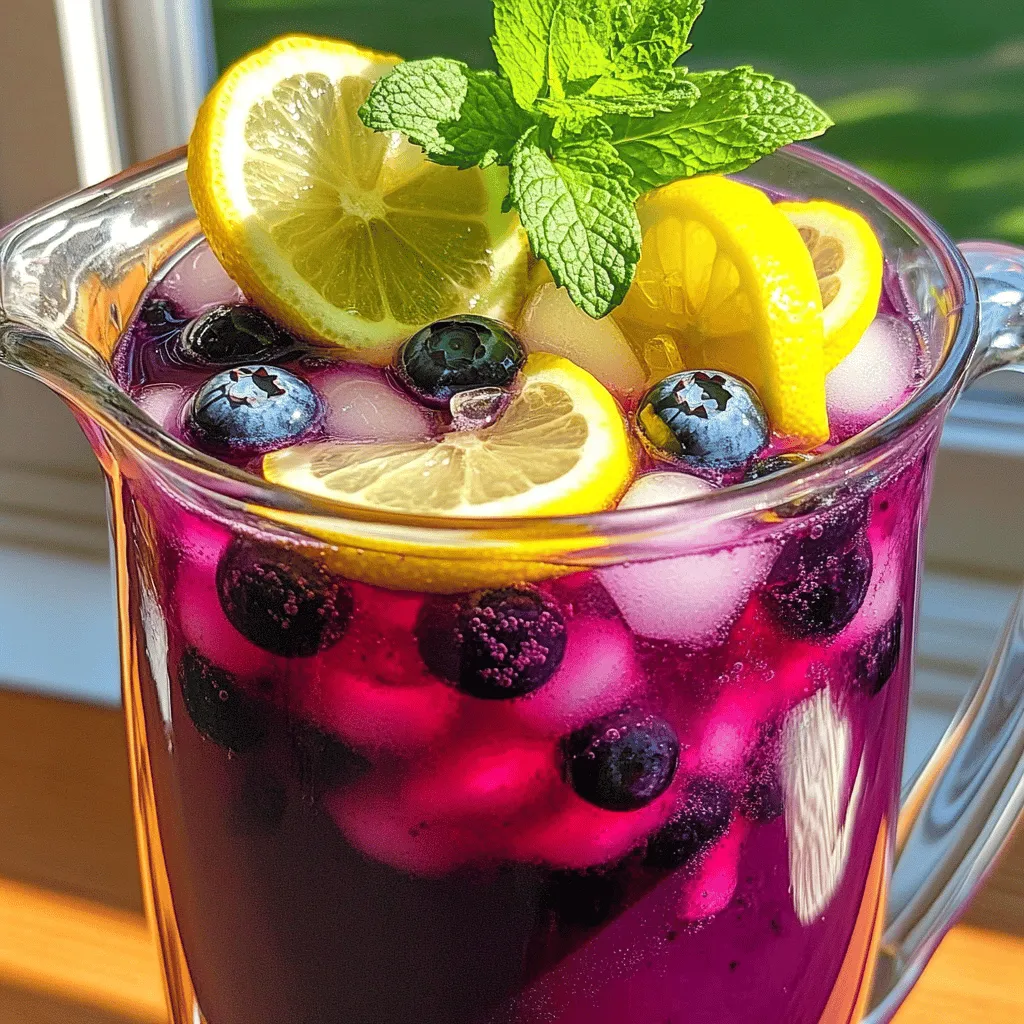
Looking for a refreshing drink to cool off this summer? You’re in the right place! This Blueberry Ginger Lemonade is

- 2 cups vanilla ice cream - 1 cup milk - 1/4 cup cookie dough - 1/4 cup caramel sauce - 1 teaspoon vanilla extract - Pinch of sea salt To make the best Caramel Cookie Dough Shake, start with these main ingredients. The vanilla ice cream gives it a rich and creamy base. The milk helps blend everything smoothly. Cookie dough adds a fun texture and sweet flavor. The caramel sauce brings a sweet, buttery taste. Don’t forget the vanilla extract for extra depth. A pinch of sea salt balances the sweetness. - Whipped cream - Mini chocolate chips - Crushed cookies Once you blend your shake, it’s time for toppings. Whipped cream makes it look pretty and tastes great. Mini chocolate chips add a nice crunch and extra chocolate flavor. Crushed cookies give it a fun twist. These toppings make your shake feel special and indulgent. - Blender - Chilled glasses - Measuring cups You will need a few tools to make this shake. A blender is key for mixing the ingredients. Chilled glasses keep your shake cold and refreshing. Measuring cups help you get the right amounts for each ingredient. These tools make the whole process easy and enjoyable. For the full recipe, check out the detailed instructions to create this sweet treat! - In a blender, combine: - 2 cups vanilla ice cream - 1 cup milk - 1/4 cup cookie dough - 1/4 cup caramel sauce - 1 teaspoon vanilla extract - Pinch of sea salt Blend these ingredients until smooth and creamy. I like to start on a medium speed. This helps mix everything well without making a mess. You can change how thick your shake is. If you want a thicker shake, add more ice cream. If you prefer it thinner, use more milk. After blending, taste your shake. If you want it sweeter, add more caramel sauce and blend again. Pour the shake into chilled glasses. Leave some space at the top for toppings. I love to top each shake with whipped cream. Drizzle extra caramel sauce on top. Then, add mini chocolate chips and crushed cookies for a nice crunch. Enjoy your rich and creamy shake right away! To make a smooth shake, blend on medium speed. Avoid big chunks by not overloading the blender. If you see lumps, blend a bit longer. Using chilled glasses keeps your shake cold longer. You’ll enjoy each sip more when it stays icy. If you want a different flavor, try using chocolate ice cream instead of vanilla. You can also use frozen yogurt for a lower-fat option. For non-dairy milk, almond milk or oat milk works great. These choices keep the shake tasty and creamy. This shake is rich and can be high in calories. Keep portion sizes in mind. A smaller glass can still give you that sweet treat. For a lighter version, use less ice cream and more milk. You’ll still enjoy the flavor but with fewer calories. {{image_2}} You can make this shake even more fun! Try adding chocolate syrup for a rich twist. Just drizzle it in before blending. Peanut butter also works well. It adds a creamy texture and nutty taste. You can swap out the ice cream too. Use chocolate or coffee flavors for a new experience. How you serve this shake can change its vibe! You can go classic with a tall glass for a milkshake. If you want something fancy, try a dessert bowl. Layer it with whipped cream, cookie dough bits, and drizzles of caramel. You can even create a sundae with your shake. Just add a scoop of ice cream on top for extra delight! You can switch things up with the seasons. In fall, add a dash of pumpkin spice to your shake. It gives a warm flavor that feels cozy. For the holidays, try peppermint. A few drops of peppermint extract can make your shake festive. These variations keep the shake exciting all year round! If you have shake left, store it in the fridge. Use an airtight container. It will stay fresh for up to two days. If you want to keep it longer, consider freezing it. Pour the shake into ice cube trays or freezer bags. This way, you can enjoy it later. To bring back the shake's creamy texture, re-blend it. Just pour it into the blender and mix until smooth. You can also use leftover shake as a base for a smoothie. Add fruits like bananas or berries for a fun twist. Drink your shake within two days for the best taste. Look for signs of spoilage, like an off smell or strange texture. If it seems off, do not consume it. Keeping food safe is key to enjoying your treats! A Caramel Cookie Dough Shake is a sweet, creamy drink. It combines rich vanilla ice cream with milk, cookie dough, and caramel sauce. The blend of flavors creates a dessert-like experience. You will also taste the hint of vanilla and a touch of sea salt. This shake is a great treat for cookie lovers. You can prepare the shake in advance, but it tastes best fresh. If you make it early, store it in the fridge. Keep it in a sealed container to avoid freezer burn. When you're ready to enjoy, blend it again for a smooth texture. This shake offers a few benefits, but it's a treat. Vanilla ice cream provides calcium, while milk adds protein. The cookie dough offers some carbs. However, it is high in sugar and fat, so enjoy it in moderation. You can find this shake at many popular cafes and chains. Look for it at places like Starbucks, Dunkin’, or local ice cream shops. Many places have their twist on this classic shake, so explore and enjoy! This blog post covers how to create a delicious Caramel Cookie Dough Shake. We detailed the main ingredients, preparation steps, and helpful tips to make your shake perfect. You can customize flavors and even create seasonal versions. Remember to store leftovers safely and look for spoilage signs. In the end, this shake is a fun treat that you can enjoy anytime. Get creative with your ingredients, and have fun making this shake your own!

Caramel Cookie Dough Shake Rich and Creamy Delight

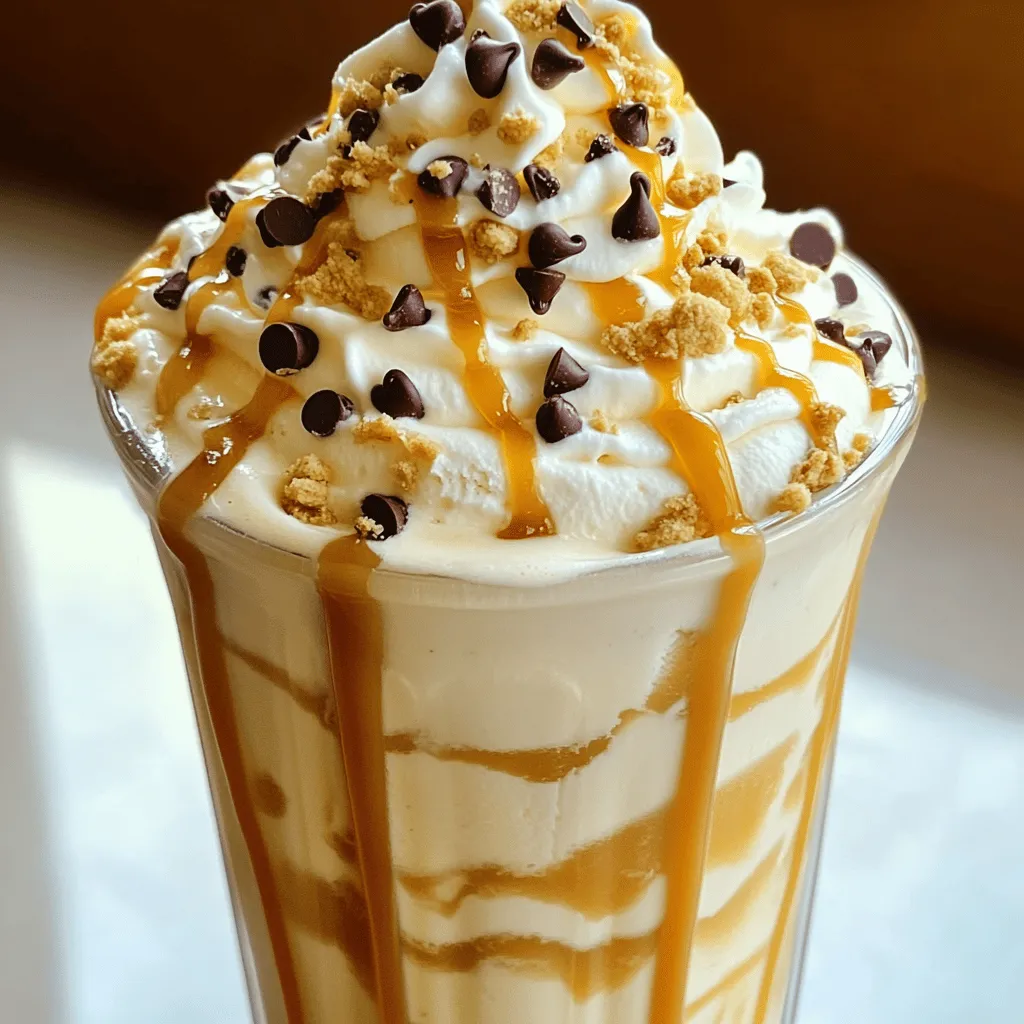
Craving a sweet and indulgent treat? The Caramel Cookie Dough Shake is your answer! This rich and creamy delight brings

To make a Honey Lavender Matcha Latte, you need a few simple ingredients. Here’s what you’ll require: - 1 teaspoon matcha powder - 1 cup milk of your choice (dairy, almond, or oat) - 1 tablespoon honey - 1/2 teaspoon dried lavender flowers (food-grade) - 1/2 cup water These ingredients work together to create a smooth and fragrant drink. Matcha gives it a bright green color and a rich, earthy taste. The honey adds sweetness, while lavender brings in a calming floral note. You can also add some optional ingredients to make your latte unique. Consider these: - Pinch of sea salt - Lavender sprigs for garnish The sea salt enhances the flavor, making each sip even better. Garnishing with lavender sprigs adds a lovely touch to your drink. When selecting your ingredients, quality matters. Here are some tips: - Matcha Powder: Look for ceremonial grade matcha for the best flavor. It’s vibrant and full of nutrients. - Honey: Choose raw honey for its natural taste and health benefits. - Lavender: Ensure your lavender is food-grade. You can find it at specialty stores or online. Using high-quality ingredients makes a big difference. It elevates the taste and gives you a latte that feels special. If you want the full recipe, check out the details above. To make your Honey Lavender Matcha Latte, start with the lavender honey syrup. In a small saucepan, mix 1 tablespoon of honey and 1/2 teaspoon of dried lavender flowers with 1/2 cup of water. Turn the heat to low and stir gently. Let it simmer for about five minutes. This helps the lavender flavors mix with the honey. After that, strain the mixture through a fine sieve into a cup. This step removes the flower bits and leaves you with a fragrant syrup. Next, sift 1 teaspoon of matcha powder into a small bowl. This prevents clumps and helps it mix better. Then, heat your milk of choice until it's warm but not boiling. You can use dairy, almond, or oat milk. Now, it's time to combine everything. Add 1-2 tablespoons of the lavender honey syrup to the matcha powder. Slowly pour in 2 tablespoons of hot water. Whisk this mixture vigorously using a bamboo whisk or milk frother until it becomes frothy and smooth. Pour the hot milk into the whisked matcha. Stir well to mix all the flavors. If you want it sweeter, you can add more lavender honey syrup. For an extra taste boost, a pinch of sea salt works wonders. Finally, serve your latte in a glass or mug and garnish it with a lavender sprig. This adds a lovely aroma and looks great. Whisking matcha correctly is key for the best latte. Use a bamboo whisk or a milk frother. Start by gently moving the whisk in a zigzag pattern. This helps mix the powder and water well. Whisk until you see small bubbles forming on the surface. This means your matcha is frothy and ready. If you find clumps, keep whisking. They will break apart, giving you a smooth texture. For the best milk froth, heat the milk slowly. Avoid boiling it. You want it steaming to create a creamy texture. Once it's warm, you can froth it using a milk frother or whisk. If you do not have a frother, whisk it quickly in a circular motion. This adds air and creates nice foam. Frothing gives your latte a lovely, rich feel. The frothy milk blends well with the matcha, enhancing the drink's flavor. To get the best lavender flavor, use fresh, food-grade dried lavender. Heat the honey and lavender slowly to bring out the oils. Simmer for about five minutes. This short time allows the flavors to blend well without becoming too strong. Strain the mixture, so you only have the honey syrup. This syrup will be sweet and fragrant, perfect for your latte. Everyone has different taste buds. If you like your drinks sweet, you can add more honey. Start with one tablespoon and taste it. You can always add more. If you prefer a less sweet drink, use less honey or skip it. The lavender flavor is already nice and floral, so you can enjoy it without too much sweetness. One common mistake is not sifting the matcha powder. If you skip this step, you may get clumps in your drink. Always sift it before mixing. Another mistake is using boiling water. Hot water can make the matcha taste bitter. Instead, use water that is hot but not boiling. Lastly, don’t forget to whisk it well. If you don’t whisk enough, your latte may not be smooth. Follow these tips for the best honey lavender matcha latte experience. For the full recipe, check out the earlier section! {{image_2}} You can easily enjoy a honey lavender matcha latte without dairy. Almond milk works great if you want a nutty flavor. Oat milk is a fantastic choice too, as it adds creaminess. Coconut milk offers a tropical twist that pairs well with lavender. Just remember, each milk can change the taste a bit, so choose what you like best. If you want a healthier option, try using agave syrup. It has a low glycemic index. Maple syrup is another natural sweetener that adds a unique flavor. For a sugar-free choice, use stevia or monk fruit sweetener. These options will still give you the sweetness without the extra calories. You can change this drink with the seasons. In fall, add a pinch of cinnamon for warmth. During winter, a dash of nutmeg can bring cozy vibes. In spring, fresh mint leaves can brighten the drink. You can also try adding vanilla extract for an extra layer of flavor. There are endless ways to customize your honey lavender matcha latte! For the full recipe, visit the section above. To store leftover lavender honey syrup, pour it into a clean jar. Make sure the jar has a tight lid. Keep it in the fridge. It will last for about two weeks. Always check for any signs of spoilage before using. You can warm it up before adding it to your latte. Store matcha powder in an airtight container. Keep it in a cool, dark place. Avoid humidity and light, as they can spoil the flavor. The fridge is a great option if you want to keep it fresh longer. Matcha can last for a few months when stored correctly. If you have leftover Honey Lavender Matcha Latte, reheat it gently. Pour it into a saucepan over low heat. Stir constantly to avoid burning. You can also use the microwave. Heat it in short bursts, stirring in between. Enjoy your latte warm for the best taste. A Honey Lavender Matcha Latte is a warm drink that mixes matcha with honey and lavender. Matcha is powdered green tea. It has a rich, smooth taste. The honey adds sweetness, while the lavender gives a calming floral note. This drink is perfect for relaxing moments or a cozy afternoon tea. You can find ready-made Honey Lavender Matcha Lattes at some cafes and tea shops. Many coffee chains offer flavored matcha drinks. Be sure to check local shops that focus on specialty teas or health foods. You can also buy bottled versions online. However, making it fresh at home gives the best flavor. Matcha is rich in antioxidants, which help protect your body. It can boost your energy and focus without the jitters of coffee. Lavender is known for its calming effects. It can help reduce stress and improve sleep. Together, they create a drink that is not just tasty but also good for you. In this post, we covered how to make a Honey Lavender Matcha Latte. We talked about the key ingredients, detailed preparation steps, and tips for great flavor. I shared common mistakes to avoid and offered several variations for customization. The right ingredients and care make this drink delicious and fun to make. Try it out, and enjoy your tasty creation!

Honey Lavender Matcha Latte Relaxing and Flavorful Drink

Looking for a drink that soothes your soul while tantalizing your taste buds? The Honey Lavender Matcha Latte blends creamy

To make a Spiced Vanilla Bean Latte, you need some simple ingredients. Here’s what you will use: - Milk options: You can choose dairy, almond, or oat milk. Each one gives a different flavor and texture. - Espresso or strong brewed coffee: Use a shot of espresso for a bold taste, or make strong coffee at home. - Vanilla bean paste vs. vanilla extract: Vanilla bean paste has tiny seeds for extra flavor. If you don’t have it, pure vanilla extract works well too. - Spices required: You will need ground cinnamon and nutmeg. These spices add warmth and depth to your drink. - Sweetener choices: Maple syrup is my favorite, but you can use other sweeteners like honey or agave. These ingredients come together to create a warm drink that feels like a hug in a cup. For the complete recipe, check out the Full Recipe section. 1. Heating the milk properly: Start by pouring your milk into a small saucepan. Set the heat to medium-low. Keep an eye on it and stir often. You want the milk warm but not boiling. This step is key for a smooth latte. 2. Combining spices with the milk: Once the milk is warm, add the vanilla bean paste, ground cinnamon, and nutmeg. Whisk these together until they blend well. This will create a nice frothy mix. The spices will give your latte a cozy flavor. 3. Preparing and adding coffee: While your milk heats, brew your espresso or strong coffee. Pour this into your favorite coffee mug. This rich base will enhance the latte's flavor. 1. Incorporating sweetener: Add the maple syrup to your coffee. This will sweeten it just right. You can also use any sweetener you prefer. Stir well to mix. 2. Frothing and layering the milk: Carefully pour the spiced milk mixture over the coffee. Use a spoon to hold back the frothy foam at first. Then, gently spoon the foam on top. This layering makes the drink look and taste amazing. 3. Optional toppings and garnishes: If you like, add a dollop of whipped cream on top. You can also sprinkle some extra cinnamon or nutmeg for a beautiful finish. A cinnamon stick makes a great garnish, too. It adds a nice touch and a little extra flavor. Now, you can savor your warm, spiced vanilla bean latte! For the full recipe, check the previous section. - Milk frothing techniques: For a great froth, use cold milk. Heat it gently and whisk fast. You can also use a milk frother for best results. Aim for a creamy texture, not too bubbly. - Choosing the right coffee beans: Select beans that are fresh and high-quality. Dark roast beans work well for a rich flavor. Try different blends to find what you enjoy most. - Adjusting sweetness to taste: Start with one tablespoon of maple syrup. Taste your latte and add more if needed. You can also try honey or agave for different flavors. - Best milk frothers: I recommend handheld or electric frothers. They are easy to use and clean. A steam wand on an espresso machine also gives great results. - Espresso machines vs. coffee brewers: Espresso machines make strong shots for your latte. If you prefer brewed coffee, use a French press or pour-over method for a bold flavor. - Essential kitchen tools for preparation: You will need a small saucepan for heating milk. A whisk or frother helps combine the milk and spices. A good coffee mug is key for enjoying your drink! For the full recipe, check the section above. {{image_2}} You can easily switch up your Spiced Vanilla Bean Latte. Try adding seasonal spices like pumpkin spice in the fall or chai spices in the winter. These flavors bring warmth and comfort. If you want something lighter, use dairy-free milk or low-calorie sweeteners. Almond and oat milk work great, adding a nutty twist. Feeling bold? Make an iced version of the Spiced Vanilla Bean Latte. Just chill the milk and coffee. Pour over ice for a refreshing treat on hot days. The spices still shine through, making it a delightful pick-me-up. Many cafes serve their own versions of this drink. Popular spots often add unique twists. Some might use flavored syrups or extra spices. Others might use cold brew coffee for a smoother taste. Check out local coffee shops for their take on this classic. You might find something new that you love! You can prepare for your Spiced Vanilla Bean Latte in advance. First, gather all your ingredients. Measure out your milk, espresso, and spices. This makes it easy to whip up your latte when you want it. To store your spiced milk mixture, heat the milk and blend in the vanilla, cinnamon, and nutmeg. Allow it to cool slightly, then transfer it to an airtight container. You can keep it in the fridge for up to three days. This saves time on busy mornings. When it's time to enjoy your latte, reheating the milk correctly is key. Pour the milk mixture into a small saucepan. Heat it gently over low heat. Stir it often to prevent burning. If you want to keep the flavors intact, avoid boiling the milk. Boiling can change the taste and texture. Once warm, whisk it again to froth before adding it to your coffee. This step helps bring back that delightful foam. Vanilla bean paste contains real vanilla seeds. It has a thicker texture and stronger flavor. Vanilla extract is liquid and made by soaking vanilla beans in alcohol. Both add great taste, but paste gives a more intense vanilla experience. Yes, you can! Almond, oat, or soy milk work well. Choose your favorite non-dairy milk for a creamy texture. Each type will change the flavor a bit, so experiment until you find your perfect mix! A Spiced Vanilla Bean Latte can be healthy. It has natural sweeteners like maple syrup. You control the sugar and milk type, which helps keep it balanced. Enjoying this drink in moderation is key to a healthy diet. For the best flavor, use medium to dark roast coffee beans. They have rich, bold tastes that complement the spices well. Espresso beans or freshly ground coffee will make your latte even better. You can easily adjust spices to fit your taste. Start with the base amounts and add more if you want extra flavor. If you like it sweeter, add more maple syrup. Play around until you find your ideal mix! You have everything you need to make a delicious Spiced Vanilla Bean Latte. From choosing the right milk to mastering your coffee technique, each step plays a part in creating this cozy drink. Remember to experiment with flavors and adjust sweetness to fit your taste. Don’t forget to explore variations, such as seasonal spices or an iced version, to keep things fresh. Now, grab your tools and start brewing a cup that warms your soul!

Spiced Vanilla Bean Latte For a Warm Indulgence

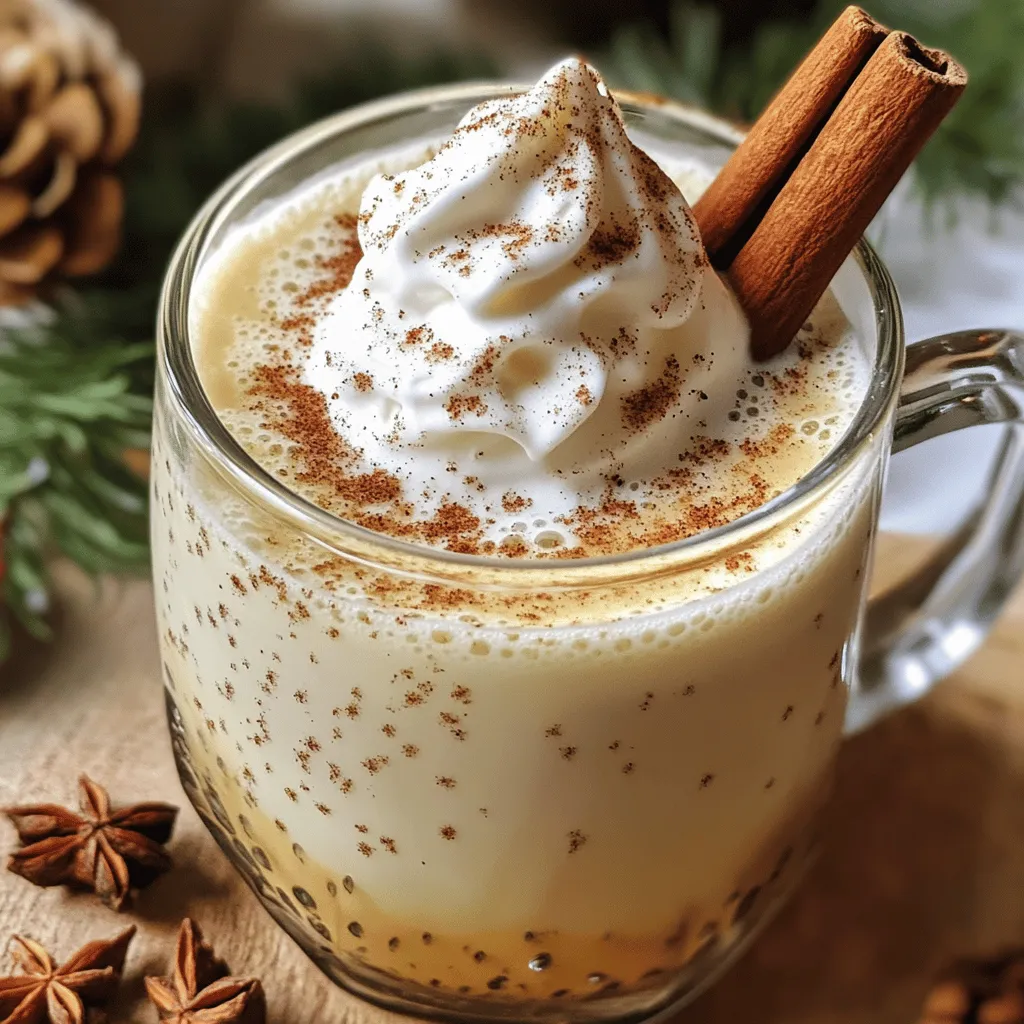
Warm your soul this season with a Spiced Vanilla Bean Latte! This cozy drink blends rich flavors to create the

To make a delicious Raspberry Almond Milkshake, gather these simple ingredients: - 1 ½ cups fresh or frozen raspberries - 1 cup almond milk - ½ cup vanilla ice cream (or dairy-free alternative) - 1 tablespoon almond butter - 1 tablespoon honey or maple syrup - ½ teaspoon pure vanilla extract - ½ cup crushed ice (if using fresh raspberries) - Whipped cream (optional) - Sliced almonds (for garnish) These ingredients come together to create a creamy and fruity treat. Fresh raspberries give a bright flavor. Almond milk offers a nutty base, while vanilla ice cream adds richness. Almond butter deepens the taste and gives extra creaminess. You can adjust the sweetness with honey or maple syrup. This way, it fits your taste just right. The crushed ice works well if you choose fresh raspberries, making your shake extra cold and refreshing. Using sliced almonds as a garnish adds a nice crunch. You can also top your shake with whipped cream for a fun touch. This Raspberry Almond Milkshake is not just tasty; it looks great too! For the full recipe, check out the details. - Step 1: Prepare Raspberries If you use fresh raspberries, rinse them well under cool water. If you use frozen raspberries, there’s no need to thaw them. Just measure 1 ½ cups for the blender. - Step 2: Combine Ingredients in Blender Place the prepared raspberries in the blender. Next, add 1 cup of almond milk, ½ cup of vanilla ice cream, and 1 tablespoon of almond butter. Also, add 1 tablespoon of honey or maple syrup and ½ teaspoon of pure vanilla extract. If using fresh raspberries, add ½ cup of crushed ice. - Step 3: Blend Until Smooth Blend all the ingredients on high speed. Stop to scrape down the sides if needed. Keep blending until the mixture is creamy and frothy. - Step 4: Adjust Sweetness Taste the milkshake. If you want it sweeter, add more honey or maple syrup. Blend again briefly to mix any extra sweetness in. - Step 5: Serve in Glasses Pour the milkshake into chilled glasses. This keeps it cool and refreshing. - Step 6: Add Toppings For a special touch, add whipped cream on top if you like. Sprinkle some sliced almonds for crunch and a nice look. Follow these steps for a creamy and delightful Raspberry Almond Milkshake. For the complete recipe, check out [Full Recipe]. To make a great raspberry almond milkshake, I have some helpful tips. - Use frozen raspberries for a thicker texture: Frozen raspberries give your milkshake a nice, thick feel. They blend well and chill your drink without needing extra ice. - Chill your glasses for a frosty experience: Before you pour your milkshake, chill your glasses in the freezer. This keeps your milkshake colder for longer. - Adjust sweetness based on personal preference: Taste your milkshake as you make it. If it needs more sweetness, add honey or maple syrup. Blend again to mix it well. These tips ensure you create the perfect raspberry almond milkshake every time. For a full recipe, check the details above. Enjoy your treat! {{image_2}} You can change the Raspberry Almond Milkshake in fun ways. Here are some ideas to try: - Chocolate Raspberry Almond Milkshake: Add two tablespoons of cocoa powder or a few chocolate chips. Blend it in with the other ingredients. This will give your shake a rich chocolate flavor. The sweet raspberries mix well with chocolate for a treat everyone loves. - Banana Almond Milkshake with Raspberries: Toss in one ripe banana. It adds creaminess and a nice sweetness. Blend it with the raspberries. This version boosts potassium and makes your shake even more filling. - Vegan Almond Milkshake Alternatives: Use a dairy-free ice cream. Coconut or cashew ice cream works great. You can also skip the ice cream. Just blend the raspberries, almond milk, and almond butter for a lighter version. This keeps it creamy and delicious while being vegan. Experiment with these options to find your favorite twist! Check out the Full Recipe for more tips and steps. If you have leftover raspberry almond milkshake, you can store it easily. - Best practices for refrigerating: Pour the milkshake into an airtight container. Make sure to seal it well. Store it in the fridge for up to two days. The milkshake tastes best when fresh. - How to freeze for later use: You can freeze the milkshake, but it may change. Pour it into a freezer-safe container and leave some space for expansion. It will stay fresh for up to a month. When ready to enjoy, let it thaw in the fridge. - Consistency changes when stored: After freezing, the texture may become a bit grainy. Blend it again after thawing to make it smooth and creamy. You might need to add a splash of almond milk to restore the right consistency. For the full recipe, check the section above to recreate this delicious treat! What can I substitute for almond milk? You can use any plant milk. Options include soy, oat, or coconut milk. Each adds a unique flavor. Choose one that you like best! Can I make this milkshake without ice cream? Yes! If you skip the ice cream, add more almond milk. You can also use frozen bananas for creaminess. This keeps your shake thick and smooth. How long will the milkshake last in the fridge? The milkshake stays good for about 1 day. It may separate, so stir before drinking. For the best taste, drink it fresh. Is this recipe suitable for vegans? Yes, this milkshake is vegan. Just use dairy-free ice cream and maple syrup. You can enjoy it without any animal products. How to make it less sweet? To reduce sweetness, cut back on honey or syrup. You can also leave out the almond butter. This way, you keep the flavor without too much sugar. For the complete recipe, check out the Full Recipe section! This blog post covered a simple raspberry almond milkshake recipe. You learned about the key ingredients, step-by-step instructions, and helpful tips. I also shared fun variations and storage tips for leftovers. Making your milkshake tasty and unique is easy. You can try different flavors or adjust the sweetness. Enjoy your delicious creation and share it with friends!

Raspberry Almond Milkshake Refreshing and Smooth Treat

Craving a cool treat that bursts with flavor? Look no further! In this blog post, I’ll guide you through making

The key to a great classic broccoli salad lies in fresh and vibrant ingredients. Here’s what you need: - 4 cups fresh broccoli florets - 1 cup shredded carrots - ½ cup red onion, finely chopped - ½ cup raisins - ½ cup sunflower seeds - ¾ cup Greek yogurt - 2 tablespoons apple cider vinegar - 2 tablespoons honey - Salt and pepper to taste For those who like to customize, here are some optional ingredients: - Chopped bell peppers for a crunchy twist - Bacon bits for extra flavor - Chopped apples for a sweet crunch Feel free to mix and match as you please! The classic broccoli salad is all about balancing flavors and textures. Each ingredient adds something special, making this dish a colorful delight. You can find the full recipe [here]. Start with fresh broccoli florets. Rinse them well under cold water. This removes dirt and bugs. Cut the broccoli into small, bite-sized pieces. Use a sharp knife for clean cuts. Next, blanch the broccoli. Boil water in a pot. Add the chopped broccoli to the boiling water for 1-2 minutes. This brightens the color and keeps it crunchy. Immediately transfer the broccoli to an ice bath. This stops the cooking process and sets the bright green color. Now, let's mix in other veggies and fruits. In a large bowl, add the blanched broccoli. Toss in shredded carrots, chopped red onion, raisins, and sunflower seeds. Each adds a nice crunch and flavor. Next, prepare the dressing. In a separate bowl, whisk together Greek yogurt, apple cider vinegar, honey, salt, and pepper. Mix until smooth and creamy. This dressing ties all the flavors together nicely. Pour the dressing over the broccoli mixture. Gently toss it all together. Ensure that every piece is coated with the dressing. This helps the flavors blend well. Now, chill the salad. Place it in the refrigerator for at least 30 minutes. This allows the flavors to meld. Enjoy the refreshing taste of your Classic Broccoli Salad! For a detailed recipe, check the Full Recipe. To make the best dressing for your broccoli salad, keep it simple. You can use Greek yogurt, apple cider vinegar, and honey. This mix gives a creamy taste with a hint of sweet and tangy. If you want a lighter dressing, try using plain yogurt mixed with lemon juice. To adjust the sweetness and acidity, add more honey for sweetness. If you want it more tangy, add more vinegar. Taste as you go. You want a balance that suits your style. For extra flavor, consider adding crispy bacon bits or diced apples. Both add a nice crunch and flavor boost. You can also use nuts like walnuts or almonds for a richer taste. When storing your salad, keep the dressing separate until you are ready to serve. This keeps the veggies crisp. If you need to store leftovers, use a tight container. The salad will stay fresh for about three days in the fridge. For the full recipe, check out the complete guide on Crunchy Classic Broccoli Salad. {{image_2}} You can make your broccoli salad even better. One easy swap is using low-fat yogurt. It keeps the creamy texture while cutting calories. You can also add nuts, like almonds or walnuts, instead of sunflower seeds. They give a nice crunch and boost protein. Don't be afraid to mix it up! Adding fruits like apples or grapes can add sweetness. You can also toss in peppers for a bit of a kick. If you like spicy, try a sriracha dressing. For a savory twist, use a garlic or herb dressing. Feel free to play with flavors! For the full recipe, check out the Crunchy Classic Broccoli Salad. To keep your Classic Broccoli Salad fresh, use an airtight container. Glass or plastic containers work well. Make sure the lid fits tight. Store the salad in the fridge. It stays good for up to three days. If you notice any browning, it’s time to toss it. Can you freeze broccoli salad? No, it’s not a great idea. Freezing changes the texture of the broccoli and other veggies. This can make them mushy when thawed. If you must freeze it, try freezing just the dressing. Store it separately in a sealed bag. When you’re ready to eat, thaw the dressing in the fridge overnight. Reheat it gently on the stove. Then, mix it with fresh broccoli and other ingredients from the Full Recipe. This keeps your salad tasting fresh! To cut broccoli for a salad, start with fresh broccoli. First, rinse it well. Next, use a sharp knife to slice off the florets. Cut them into bite-sized pieces. Aim for uniform sizes to ensure even cooking. If you want, you can also chop the stems. They add crunch and nutrients to your salad. This technique keeps the broccoli fresh and bright. Yes, you can make Classic Broccoli Salad ahead of time. I recommend preparing it a day in advance. The flavors meld better when they sit together. Store it in an airtight container. Keep it in the fridge until you are ready to serve. However, add crunchy toppings, like sunflower seeds, just before serving. This keeps them crisp. Serving Classic Broccoli Salad warm is not typical. The taste and texture change when heated. Warm broccoli loses its crunch and bright color. However, if you prefer it warm, blanch the broccoli less. This keeps some firmness. Just be mindful that the dressing may not taste the same. It's best enjoyed cold. To wrap up, we explored how to make a tasty Classic Broccoli Salad. You learned the key ingredients and step-by-step preparation. I shared tips for the best dressing and how to boost the flavor. We also discussed variations to suit your taste and proper storage methods. Enjoying a healthy salad is easy with the right steps. Try customizing it to fit your needs for the best results. Eating fresh food supports your health. Happy salad making!

Classic Broccoli Salad Refreshing and Flavorful Delight

Are you ready to brighten your next meal? My Classic Broccoli Salad is a refreshing and flavorful delight that will

- 500g mixed mushrooms (cremini, shiitake, and button), cleaned and trimmed - 4 tablespoons unsalted butter - 4 cloves garlic, minced - 2 tablespoons fresh parsley, chopped - 1 teaspoon fresh thyme leaves - Salt and pepper to taste - 1 tablespoon lemon juice - Zest of 1 lemon Mushrooms are the star in this dish. The blend of cremini, shiitake, and button mushrooms creates a rich flavor. Each type adds a unique taste and texture. Butter and garlic work together to enhance the umami. Fresh parsley and thyme bring a bright touch. Lemon juice and zest add a lovely zing. Each serving gives you about 120 calories. You’ll get roughly 10 grams of fat, 3 grams of protein, and 5 grams of carbs. These mushrooms offer vitamins and minerals too. This recipe serves four people. Pair the mushrooms with grilled chicken or steak for a full meal. They also go well with pasta or a fresh salad. A simple side dish makes this a complete dining experience. 1. Preheat your oven to 200°C (400°F). This step gets the oven hot for roasting. 2. Clean and trim the mushrooms. Use a damp cloth to wipe them. Cut off the stems if needed. 1. In a large mixing bowl, combine the cleaned mushrooms with the melted butter. Make sure they are well coated. 2. Add the minced garlic, chopped parsley, thyme leaves, salt, and pepper. Mix everything until the mushrooms are covered in the garlic butter. 3. Spread the mushrooms in a single layer on a baking sheet lined with parchment paper. Don't crowd them; give them space for even roasting. 1. Roast the mushrooms in the preheated oven for about 20 minutes. Stir halfway through. They should turn golden brown and smell great. 2. Once done, remove them from the oven. Drizzle with lemon juice and zest. Toss to coat well. 3. Adjust seasoning if needed. Serve the mushrooms warm. They are perfect as a side dish or a tasty snack. For the full recipe, you can refer to the detailed steps provided above. To get the perfect roast for mushrooms, choose fresh, firm ones. Mix them well with melted garlic butter. Spread them out in a single layer on your baking sheet. This helps them cook evenly. Stir them halfway through roasting. This step ensures all sides get nice and golden. An even coating with garlic butter is crucial. It adds rich flavor and helps the mushrooms brown nicely. If you skimp on the butter, your mushrooms may dry out. So, don’t be shy with that garlic butter! Garlic butter roasted mushrooms pair well with many dishes. Serve them alongside steak or chicken for a tasty meal. They also shine in pasta dishes. Try adding them to risotto or a creamy sauce. For a beautiful presentation, place the mushrooms in a rustic bowl. Top with extra chopped parsley and a lemon wedge. This adds a pop of color and freshness to your dish. If you have leftovers, store them in an airtight container. Keep them in the fridge for up to three days. For best results, eat them fresh. To reheat, use a skillet over low heat. This keeps their texture nice. Avoid the microwave, as it can make them soggy. {{image_2}} You can swap mushrooms to change the taste. Try portobello for a meaty bite. Oyster mushrooms add a hint of sweetness. If you want dairy-free, use vegan butter or olive oil. Both options work well with garlic. Add fresh herbs like rosemary or sage for a twist. They boost the flavor and aroma. A pinch of chili flakes can give a nice kick. For toppings, sprinkle grated cheese before serving. It melts beautifully and adds richness. Make this dish a pasta topping. Toss the roasted mushrooms with cooked pasta and a splash of olive oil. You can also use mushrooms in omelets or crepes. Their savory flavor pairs well with eggs and cheese. This adds variety to your meals. Enjoy experimenting! To make garlic butter roasted mushrooms, follow these simple steps: 1. Preheat your oven to 200°C (400°F). 2. In a bowl, mix cleaned mushrooms with melted butter. 3. Add minced garlic, chopped parsley, thyme, salt, and pepper. Stir well. 4. Spread mushrooms on a parchment-lined baking sheet. 5. Roast for 20 minutes, stirring halfway through. 6. After roasting, drizzle with lemon juice and zest, then toss. 7. Adjust seasoning if needed. This dish is easy and full of flavor. You can find the Full Recipe for detailed instructions. Yes, you can use frozen mushrooms, but fresh ones are better. Frozen mushrooms lose texture. They may become soft and watery when cooked. Fresh mushrooms roast well and have a firmer bite. If using frozen mushrooms, thaw and pat them dry. This helps improve texture. To serve more people, scale the ingredients up. For example: - Double the mushrooms to 1 kg. - Use 8 tablespoons of butter. - Add 8 cloves of garlic. Keep other ingredients in proportion. This way, the flavor stays balanced. Adjust cooking time if needed, but check for doneness. Garlic Butter Roasted Mushrooms are a simple dish that bursts with flavor. You can find the detailed recipe [here](#). The mix of mushrooms creates a rich taste while the garlic and butter enhance their natural goodness. This dish is easy to prepare and takes just 30 minutes from start to finish. You only need a few ingredients to make this dish shine. The roasted mushrooms are golden and fragrant, making them a great side or a tasty snack. Pair them with crusty bread or serve them over pasta for a more filling meal. The fresh herbs add brightness, while the lemon juice gives a zesty kick. This article shared a simple and tasty recipe for garlic butter roasted mushrooms. You learned about essential ingredients, cooking steps, and tips for the best results. The dish is easy to make and full of flavor that can fit into various meals. Consider trying different mushrooms or adding herbs to enhance taste. Remember, leftovers are great to store and reheat. Enjoy this dish as a side or transform it into a main event. Cooking should be fun and delicious; I hope this recipe inspires you to explore!

Garlic Butter Roasted Mushrooms Savory and Simple Dish

Are you ready to elevate your dinner with a dish that’s both simple and delightful? Garlic Butter Roasted Mushrooms are

- 1 cup green or brown lentils, rinsed - 2 cups vegetable broth - 1 tablespoon olive oil - 1 medium onion, finely chopped - 1 red bell pepper, finely chopped - 2 cloves garlic, minced - 1 teaspoon smoked paprika - 1 teaspoon ground cumin - 1 teaspoon chili powder - 1 tablespoon tomato paste - 2 tablespoons maple syrup - 3 tablespoons apple cider vinegar - ½ cup tomato sauce - Salt and pepper to taste - Burger buns or whole grain bread for serving You can swap green lentils for brown lentils if needed. Use vegetable broth or water for cooking. Olive oil can be replaced with canola or coconut oil. For a twist, add diced carrots or celery with the onion. Each serving of these vegan lentil sloppy joes has about 300 calories. You get around 15 grams of protein, 4 grams of fat, and 55 grams of carbs. Lentils are a great source of fiber and protein. They help keep you full and satisfied. Plus, they are low in fat and help with digestion. Lentils also provide iron and folate, which are key for good health. The mix of flavors and nutrients makes this dish not just tasty but also good for you. To start, you need to cook the lentils. In a medium saucepan, combine 1 cup of rinsed lentils and 2 cups of vegetable broth. Bring this mix to a boil. Once boiling, reduce the heat, cover, and let it simmer for about 20 to 25 minutes. The lentils should be tender but not mushy. If there’s extra liquid, just drain it. While the lentils cook, it’s time to sauté some veggies for flavor. Heat 1 tablespoon of olive oil in a large skillet over medium heat. Add in 1 medium onion and 1 red bell pepper, finely chopped. Sauté these for about 5 to 7 minutes until they soften. Then, stir in 2 minced garlic cloves and cook for another 1 to 2 minutes until the garlic is fragrant. Now, let’s combine all the ingredients. Stir in 1 teaspoon of smoked paprika, 1 teaspoon of ground cumin, and 1 teaspoon of chili powder. Make sure to mix these spices well with the veggies. Next, add the cooked lentils to the skillet. Then, mix in 1 tablespoon of tomato paste, 2 tablespoons of maple syrup, 3 tablespoons of apple cider vinegar, and ½ cup of tomato sauce. Stir everything together until well combined. Simmer this mixture on low heat for about 10 minutes. Stir occasionally to prevent sticking. Finally, add salt and pepper to taste. This will help enhance the overall flavor. For serving, you can prepare your burger buns or whole grain bread. Toasting them lightly adds a nice crunch. Once ready, scoop the lentil mixture generously onto the bottom half of each bun. Then, add the top half to complete your Sloppy Joe. For a fun presentation, serve the Sloppy Joes on a wooden board. You can sprinkle fresh herbs on top for color. Pair them with sweet potato fries or a refreshing coleslaw for added texture. These simple touches make your meal more inviting. To cook lentils well, start with rinsing them. This helps remove dust and debris. Use green or brown lentils for the best texture. - Avoiding mushy lentils: Keep an eye on the cooking time. Lentils should be tender but not mushy. Check them around 20 minutes. If they feel soft, stop cooking and drain any extra water. - Ensuring even cooking: Stir the lentils occasionally while they cook. This helps them cook evenly and prevents sticking. Spices can really boost the taste of your lentil sloppy joes. Here are some great options: - Recommended spices and herbs for added depth: Try adding smoked paprika for a nice smokiness. Cumin gives warmth, while chili powder adds a bit of heat. Fresh herbs like cilantro or parsley make a lovely garnish. - Options for heat levels: If you like things spicy, add more chili powder or even a dash of hot sauce. You can also mix in sliced jalapeños for extra kick. Preparing meals in advance can save time during busy weeks. Here’s how to make it easy: - Preparing in advance for busy weeks: Cook a big batch of lentil mixture. Store it in an airtight container. It stays fresh in the fridge for about 4-5 days. - Storing and reheating leftovers: To reheat, simply warm it in a pot on low heat. You can also use the microwave. If it’s too thick, add a splash of vegetable broth to loosen it up. For the full recipe, check out the complete guide. Enjoy your cooking! {{image_2}} You can switch up the protein in your lentil sloppy joes. Try adding black beans or chickpeas for a new taste. These beans not only boost protein but also add texture. You can also mix in vegetables like finely chopped carrots or zucchini. They add nutrition and flavor without changing the dish too much. If you need a gluten-free option, look for gluten-free buns or bread. Many stores offer great choices that taste just as good. You can also use lettuce wraps for a fun twist. This makes the dish lighter and refreshingly crunchy. Just make sure to check the labels to ensure they are truly gluten-free. Kids might like milder flavors. You can reduce the spices for a gentler taste. Consider adding a bit of ketchup or BBQ sauce to sweeten the mix. Serving the lentil sloppy joes with colorful toppings can make them fun. Try adding shredded cheese, diced tomatoes, or avocado slices. This makes the meal more appealing and tasty for little ones. For the full recipe, check out the lively vegan lentil sloppy joes! To store your Vegan Lentil Sloppy Joes, let them cool first. Then, place the mixture in an airtight container. This keeps it fresh and safe. In the fridge, it lasts about 3 to 5 days. Make sure to label the container with the date. You can freeze the lentil mixture if you want to save some for later. Portion it into freezer-safe bags or containers. Squeeze out as much air as possible. This helps prevent freezer burn. It can stay frozen for up to 3 months. When you're ready to eat, thaw it in the fridge overnight. Then, reheat it on the stove or in the microwave until hot. Don't let leftovers go to waste! You can use them in many ways. Stir the lentil mixture into pasta for a hearty meal. Or, spread it on a baked potato for a filling snack. You can also serve it with a fresh salad or on a grain bowl. For side dishes, try sweet potato fries or a crunchy coleslaw. These pair well with the flavors of the Sloppy Joes. Enjoy your creative meals! Yes, you can use canned lentils. They save time and effort. Canned lentils are already cooked, so you skip the boiling step. Just drain and rinse them before use. However, they might be softer than dried lentils. This can change the texture of your Sloppy Joes. If you prefer more bite, stick with dried lentils. To add heat, you can use several options. Start with chili powder for a mild kick. If you want more spice, try adding crushed red pepper flakes. Another great option is diced jalapeños. You can mix these into the lentil mixture while it simmers. Adjust the amount to suit your taste. Many sides complement these Sloppy Joes. Sweet potato fries pair nicely and add sweetness. A green salad adds freshness and crunch. Coleslaw offers a tangy contrast that balances the dish. You can also serve them with pickles for extra tang. Choose sides that you love and enjoy! Yes, this recipe works great for meal prep. The flavors deepen when stored overnight. You can keep the lentil mixture in the fridge for up to four days. Just reheat it on the stove or in the microwave. It also freezes well for longer storage. You can make a big batch and pull it out when you need a quick meal. Check the full recipe for more tips! In this post, we explored how to make vegan lentil sloppy joes. We discussed essential ingredients, cooking steps, and tips for perfect lentils. You learned about nutritional benefits and how to store leftovers. Vegan lentil sloppy joes are not only tasty but also healthy. You can easily adapt the recipe for your needs. Enjoy experimenting with different flavors and serving styles. Cooking can be fun, and this dish makes it easy to share with family and friends.

Vegan Lentil Sloppy Joes Tasty and Simple Recipe

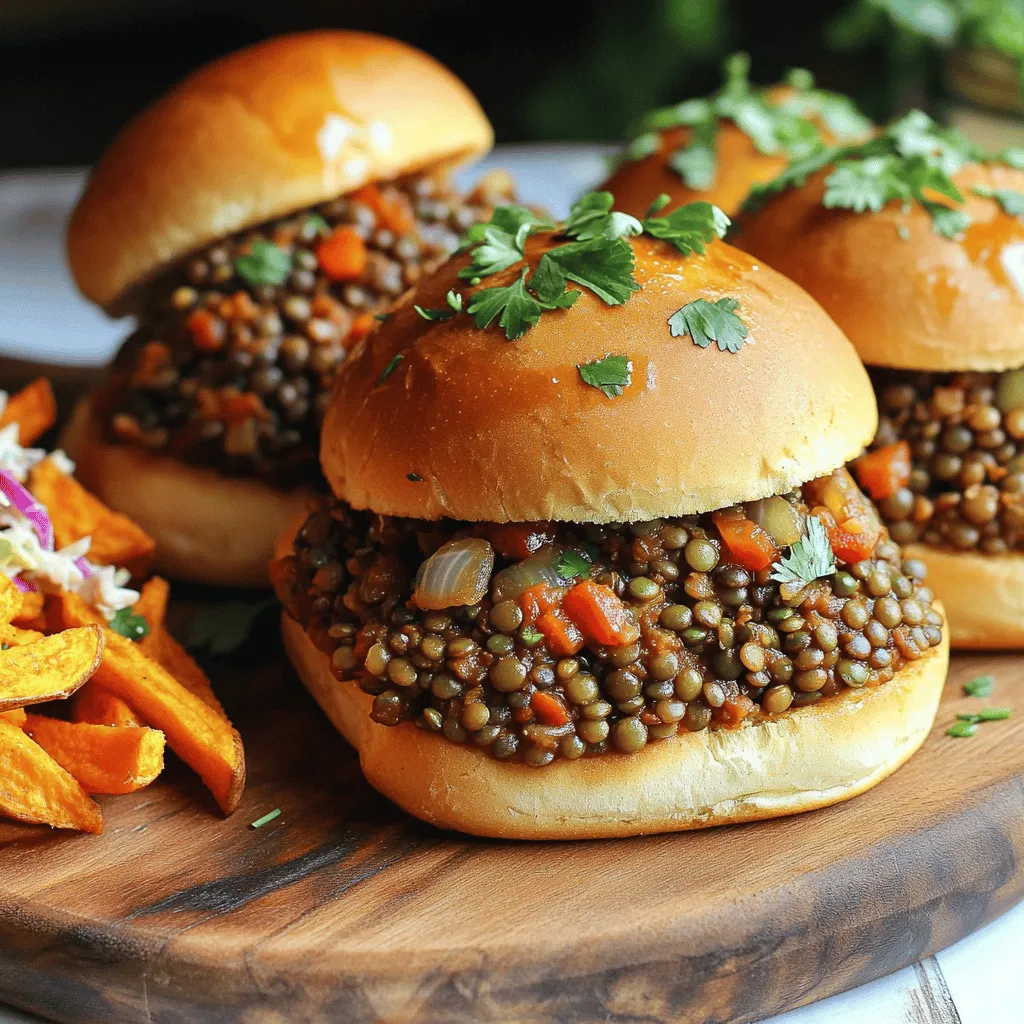
Looking for a hearty meal that’s both tasty and simple? You’ve come to the right place! Vegan Lentil Sloppy Joes

Older posts
Newer posts
← Previous Page1 … Page64 Page65 Page66 … Page82 Next →

dsad

© 2026 Recipes Pursuit • Built with GeneratePress

Our Policies

  • Copyright Policy
  • Cookie Policy
  • GDPR Policy
  • Privacy Policy
  • Disclaimer
  • Terms Of Use

More Information

  • Home
  • About
  • Contact
  • Appetizers
  • Dessert
  • Dinner
  • Drinks
©2026, Recipes Pursuit About Back To Top