Skip to content
DisclaimerTerms Of UseGDPR PolicyCookie Policy

Recipes Pursuit

  • Home
  • Drinks
  • Appetizers
  • Dinner
  • Dessert
  • About
  • Contact
  • Privacy Policy
DisclaimerTerms Of UseGDPR PolicyCookie Policy

NO-ING-IMG

To make this tasty dish, you'll need: - 1 lb baby carrots (or regular carrots, peeled and cut into sticks) - 3 tablespoons pure maple syrup - 2 tablespoons olive oil These main ingredients create a sweet and rich flavor. The baby carrots are sweet and tender, while the maple syrup adds a nice glaze. For extra flavor, add: - 1 teaspoon ground cinnamon - ½ teaspoon salt - ¼ teaspoon black pepper - 1 tablespoon fresh thyme leaves (or 1 teaspoon dried thyme) The spices bring warmth and depth. Cinnamon adds a cozy note, while thyme gives a hint of earthiness. You can make your dish even better with: - ½ tablespoon balsamic vinegar (optional, for acidity) - Fresh parsley or thyme for garnish Balsamic vinegar can brighten the dish with a bit of tang. Fresh herbs add color and freshness for presentation. Check out the Full Recipe for all details! - First, preheat your oven to 425°F (220°C). This high heat helps caramelize the carrots. - Next, prepare the carrots. If you use regular carrots, peel them and cut them into sticks. Baby carrots can go straight on the tray. - In a large bowl, combine three tablespoons of pure maple syrup, two tablespoons of olive oil, one teaspoon of ground cinnamon, half a teaspoon of salt, and a quarter teaspoon of black pepper. - If you want a bit more flavor, add one tablespoon of fresh thyme leaves or a teaspoon of dried thyme. For extra zing, mix in half a tablespoon of balsamic vinegar. This step is key for a well-rounded taste. - Spread the coated carrots out evenly on a baking sheet. Make sure they are in a single layer. This helps them roast well. - Roast the carrots for 20 to 25 minutes. Flip them halfway through for even cooking. You want them to be tender and caramelized. - When they are done, take them out and let them cool a bit. Drizzle any leftover glaze from the sheet over the carrots. This step adds even more flavor. For the full recipe, check the complete guide above. To get that nice caramel color, you need the right heat. Set your oven to 425°F (220°C). This high temperature helps the carrots sweeten and brown well. Spacing matters too. Make sure the carrots are in a single layer on the baking sheet. If they touch, they will steam instead of roast. This will keep them soft, but you want that crispy edge! Maple syrup is sweet, but you can adjust it. If you like it sweeter, add more maple syrup. Just be careful not to overdo it. Adding balsamic vinegar gives a nice tang. It cuts through the sweetness and adds depth. Just use a little for a balanced flavor! For serving, arrange the glazed carrots on a large platter. This makes them look inviting. You can fan them out or stack them for a fun look. Garnish with fresh thyme sprigs or sprinkle chopped parsley on top. These colors look great and add a fresh taste. For more serving ideas, check out the Full Recipe! {{image_2}} You can change the flavor of maple glazed roasted carrots in a few fun ways. Try adding honey or brown sugar. This makes the carrots even sweeter. You can also add garlic for a savory twist. Just a little minced garlic goes a long way. It adds depth and a nice kick to the dish. Herbs can change the whole vibe of your dish. Instead of thyme, use rosemary for a fresh taste. Rosemary pairs well with the sweetness of the carrots. You can also play with other fresh herbs. Basil or parsley can add a unique flavor that surprises your guests. Carrots are great, but don’t stop there! You can include parsnips or sweet potatoes for variety. These root veggies roast well and blend nicely with the maple glaze. You can even mix them all together. This combo adds color and texture to your dish, making it more exciting. For a fun twist, try combining different root vegetables like beets or turnips. Each one adds a new layer of taste. To store your maple glazed carrots, place them in an airtight container. This keeps them fresh. You can also use a covered bowl. If you do this, the carrots stay moist. Maple glazed carrots keep well in the fridge for about three to four days. After that, they may lose their best flavor. When it’s time to eat leftovers, you have two good options: the oven or the microwave. The oven heats them evenly. Preheat the oven to 350°F (175°C) and place the carrots on a baking sheet. Heat for about 10 minutes. This method keeps the texture nice and crisp. If you need a quicker way, use the microwave. Place the carrots in a microwave-safe dish. Cover with a damp paper towel to keep them moist. Heat in bursts of 30 seconds until warm. Just be careful not to overcook them, or they may get mushy. You can also freeze maple glazed carrots if you have extra. First, allow them to cool completely. Then, spread them out on a baking sheet in a single layer. Freeze until solid. Once frozen, transfer the carrots to a freezer bag. Squeeze out the air before sealing. This helps prevent freezer burn. Frozen carrots are best used within three to six months. After that, they will lose flavor and texture. When you are ready to use them, thaw in the fridge overnight before reheating. You can follow the same reheating methods mentioned above for best results. For the full recipe, check out the details earlier in the article. Yes, you can use regular carrots. Just peel and cut them into sticks. Regular carrots have a firmer texture. They may take longer to cook. For best results, cut them smaller. Aim for uniform sizes to ensure even cooking. This way, all the carrots will be tender at the same time. To thicken the maple glaze, cook it longer on the stove. You can also add a bit of cornstarch mixed with water. This will help it set up nicely. Another method is to reduce the maple syrup. Heat it gently until it thickens. Just be careful not to burn it. Stir constantly for the best outcome. Maple glazed roasted carrots pair well with many dishes. Try serving them with grilled chicken or roasted pork. They also go great with salmon. For a vegetarian option, pair them with quinoa or lentils. These combinations make a balanced meal. You can even serve them alongside mashed potatoes or rice. The sweetness from the glaze adds a nice contrast. Enjoy the harmony of flavors on your plate. This side dish truly shines with a variety of main courses. For the full recipe, check out the earlier section. Maple glazed roasted carrots are a tasty addition to any meal. We covered the key ingredients, spices, and tips to achieve the best flavor and presentation. Remember, you can switch up the herbs and add other veggies too. Storing and reheating your leftovers is easy with the right methods. With these steps and variations, you can enjoy this dish made just how you like it. Experiment, enjoy the flavors, and make it your own!

Maple Glazed Roasted Carrots Delicious Simple Side

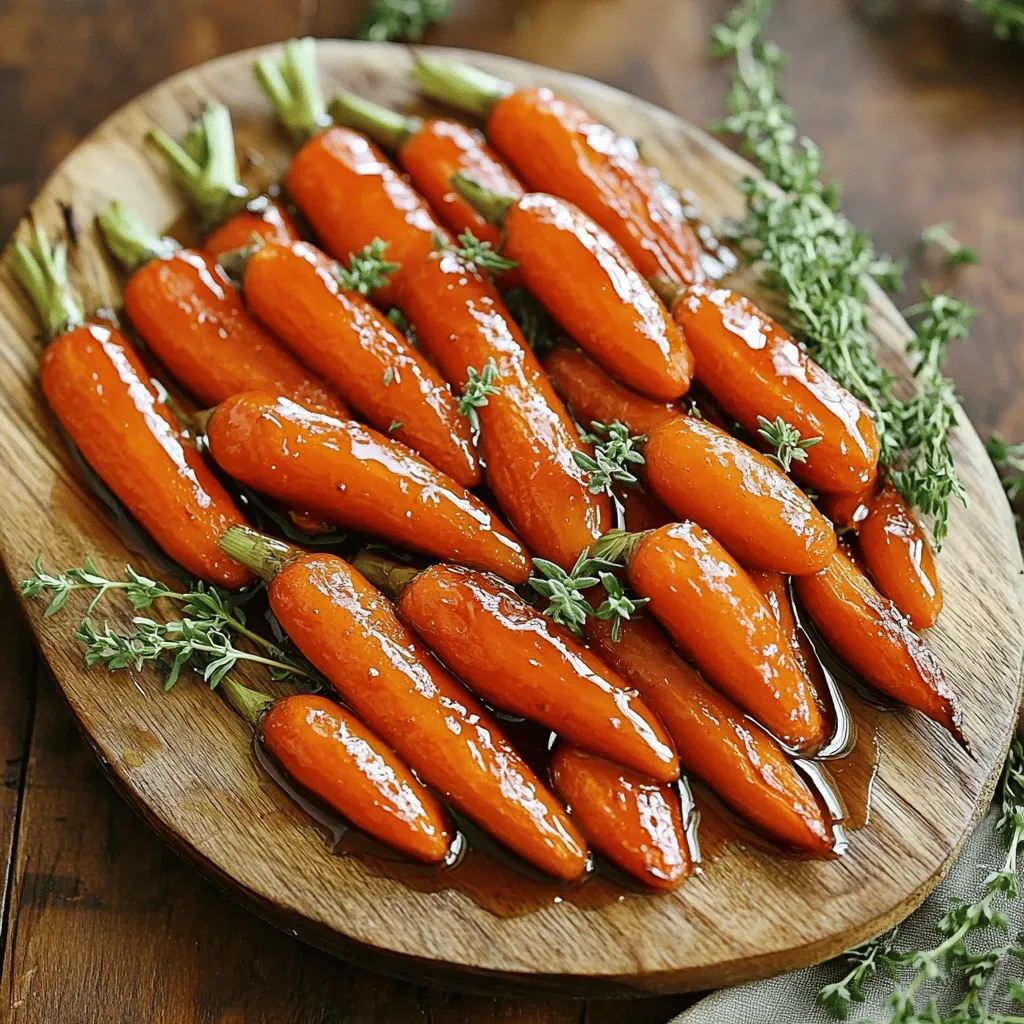
Looking for a tasty side that’s quick and easy? These Maple Glazed Roasted Carrots are not only simple but also

The Lemon Poppyseed Protein Pancakes are easy to make. They taste great and are healthy. You can whip them up in just 20 minutes. This recipe makes four servings, perfect for sharing or saving for later. Here is what you need for the pancakes: - 1 cup oat flour - 2 tablespoons poppy seeds - 2 teaspoons baking powder - 1/2 teaspoon baking soda - 1/4 teaspoon salt - 1 scoop vanilla protein powder - 1 large egg - 3/4 cup unsweetened almond milk (or any milk of choice) - Zest of 1 lemon - 2 tablespoons fresh lemon juice - 1 tablespoon maple syrup (optional, for added sweetness) - Cooking spray or coconut oil for the pan You can customize these pancakes to suit your taste. Here are some add-ins you might like: - Fresh blueberries or raspberries for sweetness - Chopped nuts for a crunchy texture - A sprinkle of cinnamon for extra flavor - Coconut flakes for a tropical twist These options let you make the pancakes your own. Enjoy experimenting! Start by gathering your dry ingredients. In a large bowl, add 1 cup of oat flour. This will be the base of your pancakes. Next, sprinkle in 2 tablespoons of poppy seeds. These seeds add a nice crunch and flavor. Then, add 2 teaspoons of baking powder and 1/2 teaspoon of baking soda. These help the pancakes rise. Don't forget the 1/4 teaspoon of salt to enhance the taste. Finally, mix in 1 scoop of vanilla protein powder for a healthy boost. Whisk everything together until it's well combined. This step is key for even flavor. Now, let’s move to the wet ingredients. Take another bowl and crack in 1 large egg. This binds the pancakes together. Pour in 3/4 cup of unsweetened almond milk. You can use any milk you like. Add the zest of 1 lemon for a bright flavor. Squeeze in 2 tablespoons of fresh lemon juice for a tangy kick. If you want it sweeter, drizzle in 1 tablespoon of maple syrup. Whisk these ingredients until they blend smoothly. The freshness of lemon really shines here. It's time to cook! Heat a non-stick skillet over medium heat. Lightly grease it with cooking spray or coconut oil. Use a ladle to pour about 1/4 cup of the batter onto the skillet for each pancake. Cook until bubbles form on top and the edges look set, which takes about 3-4 minutes. Flip them carefully and cook for another 2-3 minutes until they turn golden brown. Repeat this process with the rest of your batter. Adjust the heat if needed to avoid burning. Once cooked, serve the pancakes warm. Top them with more lemon zest, a drizzle of maple syrup, or fresh fruit for extra flavor. You can find the full recipe details above. Enjoy your delicious Lemon Poppyseed Protein Pancakes! To make your pancakes fluffy, you need a few key tips. First, don't overmix the batter. Mix it just until combined to keep the air in. Second, let the batter rest for about five minutes. This helps the baking powder work better. Lastly, make sure your pan is at the right heat. Too hot can burn them; too cool will make them soggy. A medium heat is usually best. If you have extras, store them right. Let the pancakes cool down first. Then, place them in a single layer on a plate. Cover the plate with plastic wrap. You can also stack them with parchment paper in between. This keeps them from sticking. They will stay fresh in the fridge for about three days. For longer storage, freeze them! Just place them in a freezer bag with a label. A few mistakes can ruin your pancakes. First, using expired baking powder will make them flat. Always check the date. Second, adding too much liquid can make them runny. Stick to the recipe for the best results. Lastly, avoid cooking them too fast. This can cause the outside to burn while the inside stays raw. Follow these tips, and you’ll make perfect Lemon Poppyseed Protein Pancakes every time! For the complete recipe, check out the Full Recipe section. {{image_2}} You can easily make these pancakes gluten-free. Just swap oat flour with almond flour. Almond flour gives a lovely nutty taste. It also keeps the pancakes moist. Use the same amount, one cup, when you make this switch. You can play with flavors in your pancakes! Add fresh blueberries or raspberries for a fruity twist. Try a dash of cinnamon for warmth. You can even mix in some chopped nuts for crunch. Each of these changes brings new life to the recipe. Serve these pancakes warm for the best taste. Stack them high and drizzle with maple syrup. Top with extra lemon zest and fresh fruit, like strawberries or bananas. You might also add a dollop of Greek yogurt for creaminess. Each bite will taste bright and fresh. For more details, check out the Full Recipe. These pancakes pack a punch with protein. Each serving has about 15 grams of protein. This comes mainly from the scoop of protein powder and the egg. Protein helps build muscle and keeps you feeling full longer. I love using vanilla protein powder for a touch of flavor. One serving of these pancakes contains around 180 calories. This makes them a great option for breakfast. Most of the calories come from the oat flour and almond milk. If you add maple syrup, count on an extra 20 calories. By keeping it simple, you can enjoy a tasty meal without overloading on calories. The ingredients in these pancakes offer many health benefits. - Oat Flour: This is high in fiber. It helps digestion and keeps you full. - Poppy Seeds: These tiny seeds are rich in calcium and magnesium. They support bone health. - Lemon Juice: This adds vitamin C, which boosts your immune system. - Almond Milk: It is lower in calories than regular milk and is dairy-free. By choosing these ingredients, you create a meal that is both healthy and satisfying. You can find the full recipe above if you want to make these pancakes! Yes, you can use regular flour. However, oat flour gives a unique taste and texture. Oat flour is lighter and adds more nutrition. It is rich in fiber and protein. If you use regular flour, you may need to adjust the liquid. Start with less milk and add more as needed. To make these pancakes vegan, swap the egg for a flax egg. Mix one tablespoon of ground flaxseed with three tablespoons of water. Let it sit for five minutes. Use a plant-based milk like almond milk or soy milk. This keeps the pancakes light and fluffy without the egg. Toppings can take your pancakes to the next level. Here are some great ideas: - Fresh berries, like strawberries or blueberries - Sliced bananas for a sweet touch - A drizzle of honey or maple syrup for sweetness - Greek yogurt for creaminess and protein - Extra lemon zest for a burst of flavor Feel free to mix and match these options! Enjoy your pancakes with whatever you like best. You can find the full recipe above for a delicious start to your day. You learned about the key steps to make tasty pancakes. We covered ingredients, tips, and variations. Remember, use the right mix of dry and wet ingredients for fluffiness. Avoid common mistakes to make the best pancakes. Feel free to try gluten-free options or fun flavor twists. Enjoying pancakes can be easy and fun. Now, you can impress friends and family with your skills. Make these pancakes your own, and enjoy every bite!

Lemon Poppyseed Protein Pancakes Healthy Breakfast Fix

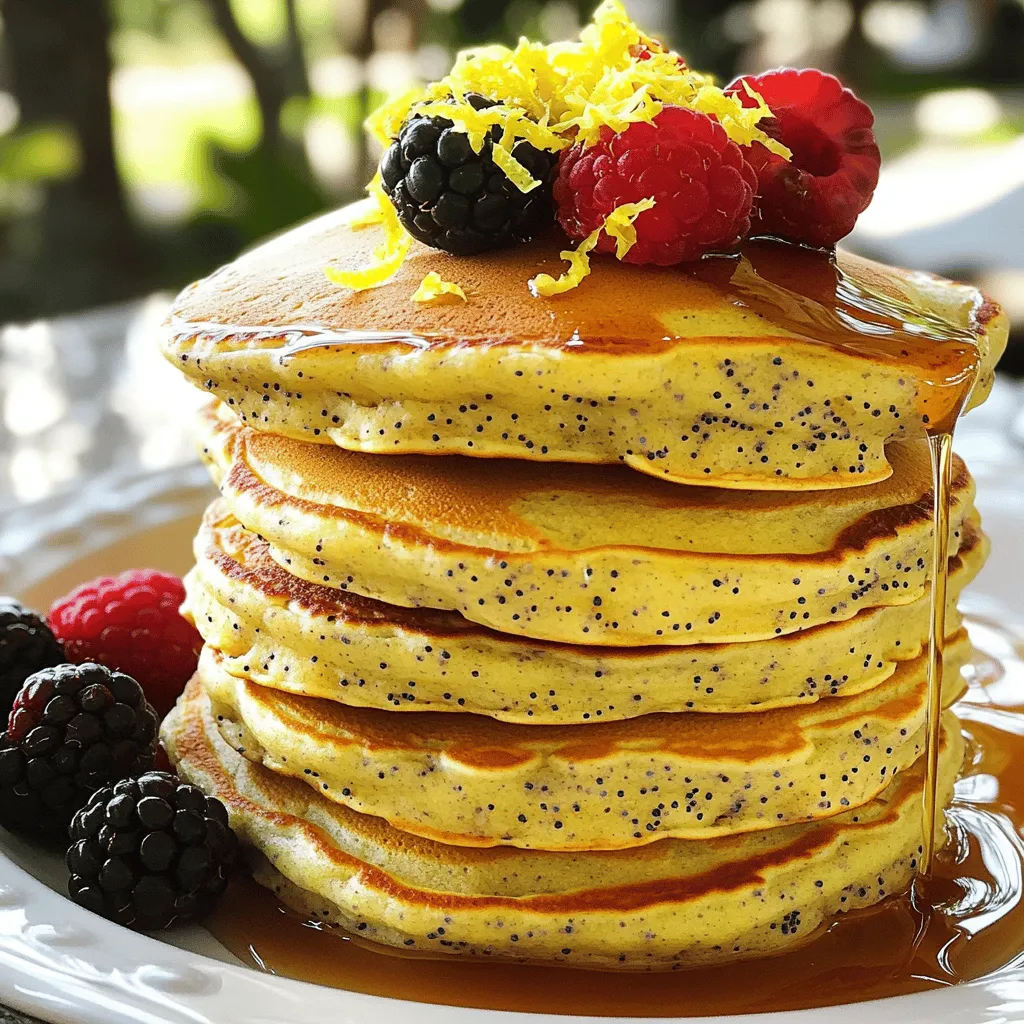
Are you looking for a healthy breakfast that’s both tasty and filling? Try my Lemon Poppyseed Protein Pancakes! These fluffy

- 1 can (15 oz) white beans, drained and rinsed - 2 cups fresh spinach, chopped - 1 cup shredded Monterey Jack cheese (or cheese of your choice) - 1 small onion, finely diced - 2 cloves garlic, minced - 1 teaspoon ground cumin - 1 teaspoon chili powder - Salt and pepper to taste - 4 large flour tortillas - 1 tablespoon olive oil (for cooking) You need these ingredients for a tasty white bean spinach quesadilla. Each one plays a key role in the flavor and health of the dish. White beans add creaminess and protein. Fresh spinach gives a boost of vitamins. Cheese adds richness, and onion and garlic bring depth to the taste. The spices add warmth and zest. - Alternatives for white beans: You can use black beans or chickpeas. Both add great flavor and protein. - Cheese variations: Try cheddar, pepper jack, or a dairy-free cheese if you prefer. - Fresh vs. frozen spinach: Fresh spinach is best, but frozen works too. Just thaw it and squeeze out the water before using. - Calories per serving: Each quesadilla has around 300 calories. - Breakdown of macronutrients: Expect about 12 grams of protein, 10 grams of fat, and 40 grams of carbs. - Health benefits of key ingredients: White beans support heart health. Spinach is rich in iron and vitamins. Cheese provides calcium for strong bones. Olive oil is a healthy fat that can lower bad cholesterol. For a complete guide on making these delicious quesadillas, check out the Full Recipe. - Mashing the white beans Start by draining and rinsing the can of white beans. Place them in a medium bowl. Use a fork or potato masher to mash the beans. Aim for a mix that is slightly chunky yet mostly smooth. This texture adds a nice feel to the quesadillas. - Sautéing onions and garlic In a skillet over medium heat, drizzle some olive oil. Add the finely diced onion. Sauté it for about 3 to 4 minutes until it softens. Next, throw in the minced garlic, ground cumin, and chili powder. Stir for another minute until the mix smells great. This step builds a strong flavor base for your filling. - Adding spinach and seasoning Stir in the chopped spinach to the skillet. Cook it for 1 to 2 minutes until it wilts. Remove the skillet from heat. Combine this onion and spinach mix with the mashed white beans in your bowl. Add half of the shredded cheese, mixing well. Season the filling with salt and pepper to taste. - Spreading the filling on tortillas Heat a clean skillet over medium heat. Place one tortilla in the skillet. Spread about a quarter of the white bean-spinach filling onto half of the tortilla. Top it with some more cheese. Fold the tortilla over to create a half-moon shape. - Cooking the quesadillas Cook each quesadilla for about 2 to 3 minutes on each side. You want them golden brown, and the cheese should melt nicely. Repeat this with the remaining tortillas until done. - Tips for achieving crispy tortillas To get crispy tortillas, ensure your skillet is hot enough. Don't overcrowd the pan; cook one or two at a time. Use a bit more oil if needed to help crisp up the edges. Enjoy your delicious, healthy quesadillas! For the full recipe, check out the detailed instructions provided above. To keep your quesadillas from sticking, use a non-stick skillet or pan. Adding a bit of olive oil helps create a barrier. Heat your skillet on medium, but don’t rush it. If it’s too hot, the tortillas may burn before the cheese melts. You want a warm, gentle heat for even cooking. You can serve these quesadillas with sour cream and salsa. They add a nice zing! For a fun twist, try guacamole or a fresh salad on the side. For presentation, cut the quesadillas into wedges and arrange them on a colorful plate. A sprinkle of fresh herbs on top can also enhance the look. One mistake is overfilling your tortillas. This can make them hard to fold and cook evenly. Use just enough filling to keep them manageable. Another common mistake is not cooking at the right temperature. If your skillet is too hot or too cold, the quesadillas won’t come out crispy and golden. Aim for that perfect medium heat for the best results. {{image_2}} You can easily customize your white bean spinach quesadillas. First, consider adding proteins like shredded chicken or tofu. This change boosts protein and makes the meal heartier. If you choose tofu, make sure to press it first. This helps remove excess water and improves the texture. Next, you can incorporate additional vegetables. Bell peppers, mushrooms, or zucchini add color and nutrition. Just chop them up and sauté them with the onions and garlic. This step enhances the flavor and texture of your quesadillas. Adjusting the spice level can change the whole dish. If you like heat, add jalapeños or cayenne pepper. Start with a small amount, taste, and adjust to your liking. For a milder flavor, simply reduce or skip the chili powder. You can also experiment with different cheese blends. While Monterey Jack is great, try pepper jack for extra kick or even a blend of cheddar and mozzarella. Mixing cheeses can create a unique taste and gooey texture. To make your quesadillas more fun, try mini versions. Simply use smaller tortillas and fill them the same way. Cut them into bite-sized pieces. These make perfect appetizers or snacks for parties. Lastly, think about cooking methods. You can grill the quesadillas for a smoky flavor or pan-fry them for a crispy finish. Either method brings out the flavors but in different ways. Just choose what fits your style. For the full recipe, check the section above. To keep your white bean spinach quesadillas fresh, store them in the fridge. Place them in a tight container. This helps keep moisture out. If you have extra filling, store it in a separate container. Use parchment paper between layers to prevent sticking. To freeze quesadillas, let them cool first. Wrap each quesadilla in plastic wrap. Then, place them in a freezer bag. Be sure to squeeze out any air. When you're ready to eat, take one out and thaw overnight in the fridge. Reheat in a skillet over medium heat until hot. You can also use the microwave, but this may make them soft. In the fridge, these quesadillas last about 3 to 4 days. If you freeze them, they can last up to 2 months. Check for signs of spoilage, like an off smell or mold. If they look or smell bad, it’s best to throw them away. For a quick check, just look at the tortillas and filling. Fresh quesadillas should be firm and smell great! You can easily make these quesadillas vegan. Here are some suggested substitutions: - Cheese: Use a plant-based cheese instead of Monterey Jack. Many brands offer great options that melt well. - Tortillas: Ensure your tortillas are vegan. Most flour tortillas work, but check the labels. - Sour Cream: Substitute with a plant-based sour cream or guacamole for a creamy touch. These changes keep the quesadillas tasty and plant-based! Yes, you can prep these quesadillas ahead of time. Here are some tips: - Preparation: Make the filling and store it in the fridge for up to 3 days. - Assembling: You can assemble the quesadillas and wrap them in foil. Keep them in the fridge for up to 24 hours. - Reheating: When ready to eat, cook them in a skillet over medium heat. This brings back the crispiness. These quesadillas pair well with several side dishes and dips: - Salsa: Fresh or store-bought salsa adds a nice kick. - Sour Cream: Use dairy or plant-based versions for a creamy dip. - Salad: A simple side salad with greens and a light dressing complements the meal. - Guacamole: This adds richness and flavor to every bite. For more details about the recipe, you can check the Full Recipe. This blog post covered how to make tasty White Bean Spinach Quesadillas. We explored key ingredients, substitutes, and nutritional facts. I shared easy step-by-step instructions for preparation and cooking. You learned tips for perfect quesadillas and ways to avoid common mistakes. We also discussed tasty variations and proper storage methods. Remember, cooking should be fun. Try these recipes and make them your own. Enjoy your delicious quesadillas and share them with friends!

White Bean Spinach Quesadillas Flavorful and Healthy Meal

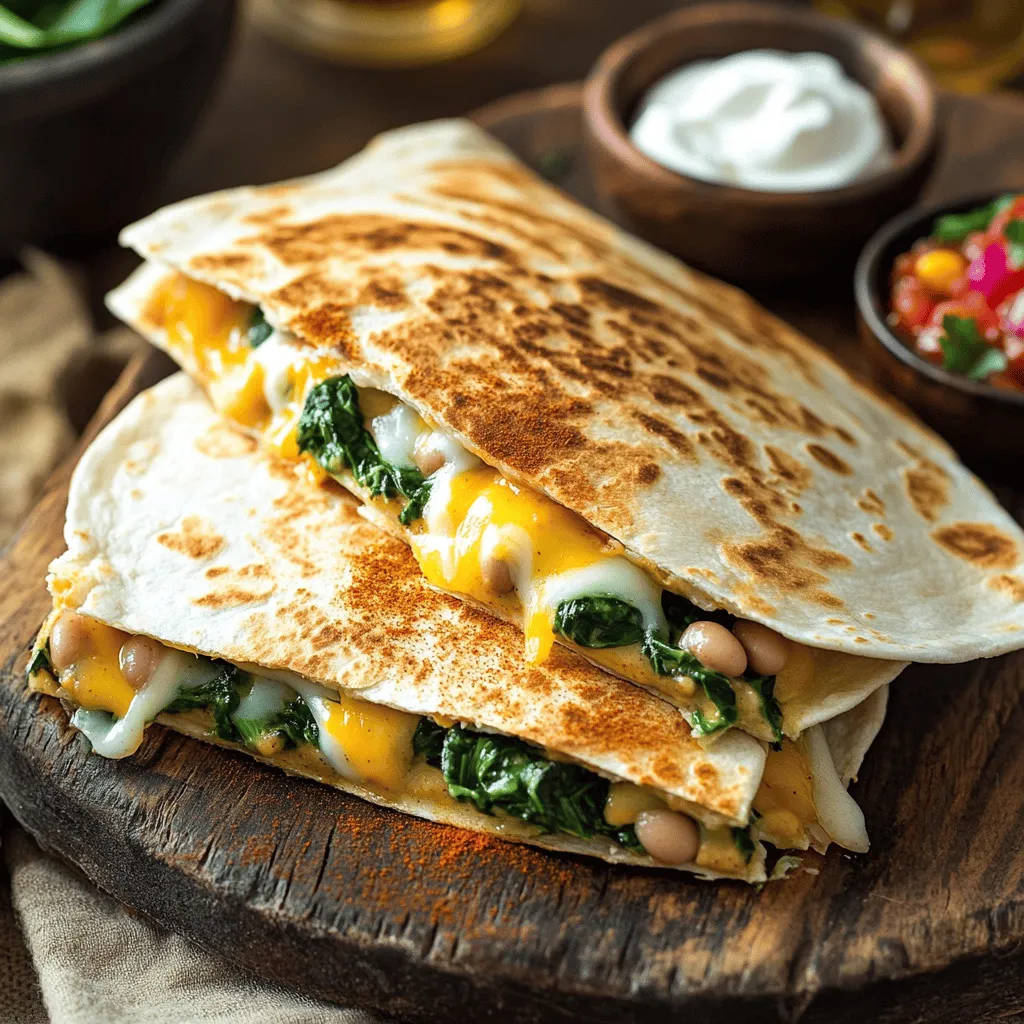
Looking for a tasty meal that’s both fun to make and good for you? These White Bean Spinach Quesadillas pack

- 1 cup fresh strawberries, hulled - 1 ripe banana, sliced - 1 scoop vanilla protein powder - 1 cup almond milk (or any milk of your choice) - 1 tablespoon almond butter - 1 tablespoon honey (optional) - 1/2 teaspoon vanilla extract - Ice cubes (as needed) To make a tasty strawberry banana protein smoothie, you need fresh ingredients that pack flavor and nutrients. Start with one cup of fresh strawberries. Make sure to hull them, which means you remove the green tops. Next, grab a ripe banana and slice it. This adds natural sweetness and creaminess to the mix. Now, let's add some protein. Use one scoop of vanilla protein powder. This will help keep you full and give you energy. I like to use almond milk, so I add one cup of that. You can pick any milk you enjoy, like cow's milk or oat milk. For extra flavor and creaminess, I include one tablespoon of almond butter. If you want a touch of sweetness, add one tablespoon of honey, but this is optional. A half teaspoon of vanilla extract gives the smoothie a lovely aroma. Finally, toss in some ice cubes to chill and thicken it. This combination creates a delicious, nutritious drink that you can enjoy anytime. For the full recipe, check out the details above. - Rinse and hull the strawberries. - Slice the banana. First, we prepare our fruits. Rinse the strawberries under cold water to wash off dirt. Then, hull them by removing the green tops. This makes them sweet and ready to blend. Next, slice the banana into small pieces. This helps the banana mix well in the smoothie. - Combine ingredients in a blender. - Blend on high until smooth and creamy. Now, it’s time to blend! Add the hulled strawberries and sliced banana to your blender. Include the other ingredients: vanilla protein powder, almond milk, almond butter, honey, and vanilla extract. Blend on high speed. Watch as the colors swirl and mix. Blend until it’s smooth and creamy. If needed, scrape down the sides to blend everything well. - Add more almond milk for thinness or ice cubes for thickness. After blending, check the smoothie’s thickness. If it feels too thick, pour in a bit more almond milk. Blend again until you reach your desired texture. If it’s too thin, toss in a few ice cubes. Blend again until it’s nice and thick. You can enjoy your smoothie right away, or store it for later. This Strawberry Banana Protein Smoothie is tasty and full of nutrition. For the full recipe, check the detailed instructions above. - Taste and Sweetness: You can change the honey amount to fit your taste. If you like it sweeter, add more honey. If you want less sweetness, use less honey. It’s all about what you enjoy. - Garnishing: For a fun look, add fresh fruit or seeds on top. A few strawberry slices or banana wheels make your drink pop. Chia seeds add a nice crunch and extra nutrients too. - Thick vs. Thin: You can make the smoothie thicker or thinner based on what you like. If you want a thicker smoothie, add more ice cubes. For a thinner one, just add a bit more almond milk. Blend again until you reach the right texture. Use a good blender for the best smooth texture. A high-speed blender works great for smoothies. Brands like Vitamix or Ninja are popular choices. They blend well and create a creamy consistency. If you have a lower-power blender, blend in short bursts. This way, you can check the texture and avoid lumps. {{image_2}} You can make your strawberry banana protein smoothie even better. Add some greens like spinach or kale. This will give you extra vitamins and minerals. A handful is all you need. It blends well and you won’t taste it much. Using Greek yogurt adds creaminess and protein. It makes the smoothie thick and rich. Plus, it packs in more protein. This is great for muscle recovery after a workout. Try about a half cup for a smooth texture. Want to change the flavor? Use different fruits! Mango, pineapple, or blueberries work great. Each fruit gives a unique taste and nutrition. Mix and match to find your favorite blend. If you want a dairy-free option, try coconut milk or oat milk. These milks add a different flavor and keep it creamy. They are perfect for those who are lactose intolerant. Need a bit more sweetness? Natural sweeteners like agave or maple syrup are great. They are better than refined sugar and taste delicious. Use them based on how sweet you like your smoothie. For low-calorie options, try sugar-free sweeteners. They give you that sweet taste without the extra calories. Look for options like stevia or monk fruit. You can still enjoy your smoothie without the guilt. These variations can elevate your smoothie. Check out the Full Recipe for all the details. To store any leftover smoothie, pour it into a clean glass jar. Seal it tightly with a lid. This keeps air out. Store the jar in the fridge. The smoothie will stay fresh for up to 24 hours. It’s best to consume your smoothie right away. This helps you enjoy the best flavor and nutrients. You can freeze your smoothie for later use. Pour the smoothie into ice cube trays or freezer-safe bags. This is great for quick snacks or meals. To make smoothie packs, add all ingredients into bags. Label them with the date and contents. When you want a smoothie, just blend the frozen pack with some milk. If you freeze or refrigerate your smoothie, it may separate. To fix this, re-blend it. Pour the smoothie into a blender. Blend on high until it is smooth again. If it’s too thick, add a splash of almond milk. This will bring back the creamy texture. Enjoy your Strawberry Banana Protein Smoothie after blending! Yes, you can! Instead of protein powder, use Greek yogurt or silken tofu. These options add protein, creaminess, and keep your smoothie tasty. Greek yogurt adds a nice tang, while silken tofu gives a smooth texture. Both alternatives keep the nutrition high without losing flavor. To thicken your smoothie, add more fruits or frozen ingredients. Ice cubes work well too. You can also try a banana, which adds creaminess. If you want more nutrition, throw in some oats or chia seeds. These will help make your smoothie more filling and satisfying. Yes! This smoothie can work as a meal replacement. It has protein, healthy fats, and carbs. One serving has around 300 calories, depending on your choices. The almond butter and banana provide energy, while protein keeps you full longer. Adjust the ingredients if you need more calories or nutrients. You can store a smoothie in the fridge for up to 24 hours. Use an airtight container to keep it fresh. If you want to store it longer, freeze it! Just pour it into a freezer-safe container. Thaw it overnight in the fridge when you're ready to enjoy. This blog post shared how to create a delicious strawberry banana protein smoothie. We covered fresh ingredients and their roles, plus easy blending steps. You learned tips for perfecting your smoothie and how to adjust its texture. We also explored variations for more nutrients and flavors, along with storage ideas. In the end, customizing smoothies can make them a fun, healthy treat. You have the tools to create your ideal blend, so enjoy every sip!

Strawberry Banana Protein Smoothie Tasty and Nutritious

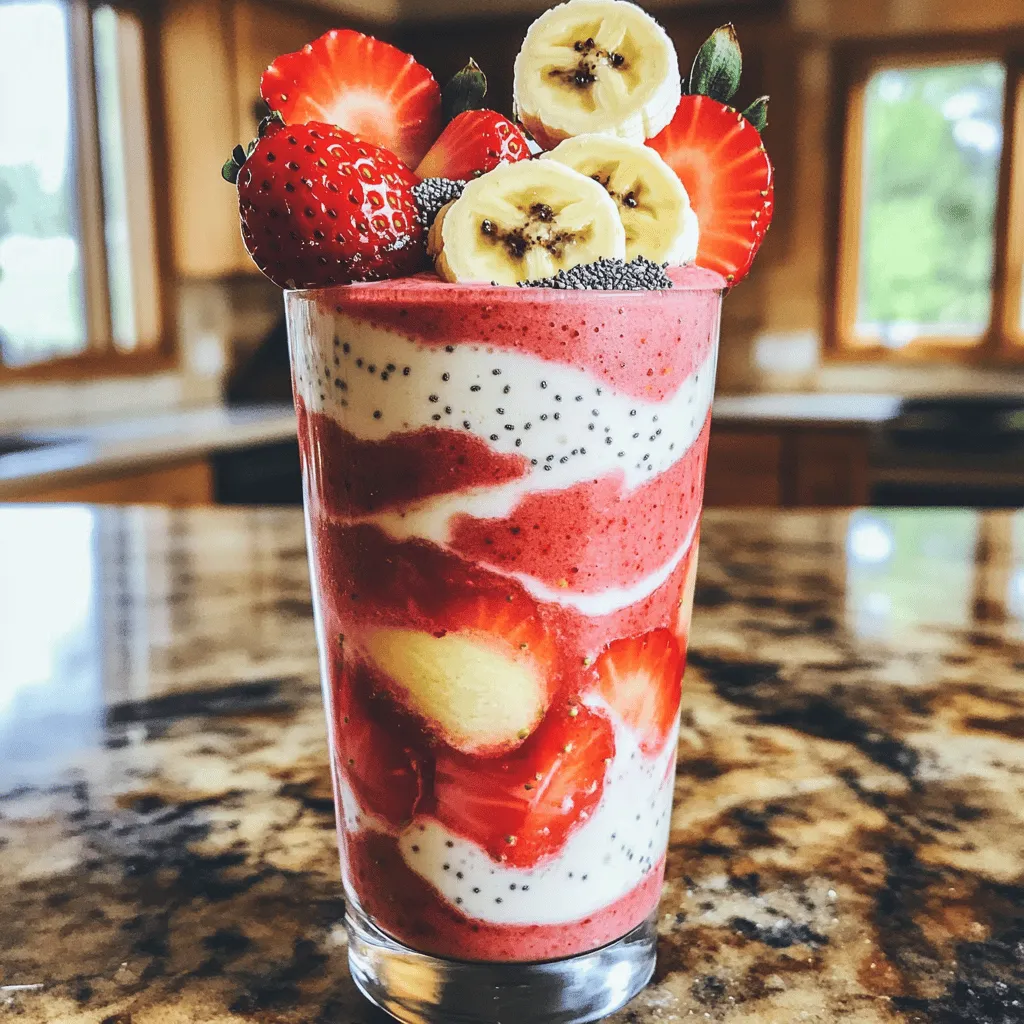
Looking for a quick and tasty way to boost your nutrition? The Strawberry Banana Protein Smoothie is your perfect match!

To make crispy air fryer Brussels sprouts, you need fresh ingredients. This dish is simple and quick. With just a few steps, you can enjoy a tasty side dish that everyone will love. - 1 lb Brussels sprouts - 2 tablespoons olive oil - Seasoning options: - garlic powder - onion powder - smoked paprika - salt - black pepper You can find these ingredients at any grocery store. Fresh Brussels sprouts are key for the best flavor. - Balsamic glaze for drizzling - Grated Parmesan cheese Adding balsamic glaze gives a sweet touch. Grated cheese adds a nice crunch. Both options make the dish even more delicious. Try them to take your Brussels sprouts to the next level! For the full recipe, check the complete guide. Start by preheating your air fryer to 375°F (190°C). This takes about 5 minutes. A hot air fryer helps cook the Brussels sprouts evenly and makes them crispy. Take 1 pound of Brussels sprouts. Trim the ends and cut them in half. Place them in a large bowl. Add 2 tablespoons of olive oil. Then, mix in 1 teaspoon of garlic powder, 1 teaspoon of onion powder, ½ teaspoon of smoked paprika, ½ teaspoon of salt, and ¼ teaspoon of black pepper. Toss the sprouts well until they are fully coated with the mix. This ensures great flavor in every bite. Next, place the seasoned Brussels sprouts in a single layer in the air fryer basket. Do not overcrowd the basket. If you have too many sprouts, cook them in batches. This helps them crisp up better. Air fry the sprouts for 12-15 minutes. Halfway through, shake the basket gently to ensure even cooking. This step is key for crispiness. You want them golden brown and crunchy on the edges. If you choose to use cheese, sprinkle ¼ cup of grated Parmesan cheese over the top and air fry for an extra 2 minutes. This will give a nice cheesy touch. Once done, remove the Brussels sprouts and drizzle with balsamic glaze before serving. Enjoy this easy and delicious dish! You can find the full recipe in the earlier section. To get that perfect crunch, start with fresh Brussels sprouts. Make sure they are firm and bright green. Trim the ends and cut them in half. This helps them cook evenly. Toss them with olive oil and seasoning well. The oil helps them crisp up in the air fryer. When you place them in the air fryer, avoid crowding the basket. Give each sprout space for hot air to flow. This allows them to get that golden brown color. Shaking the basket halfway through cooking also helps. It ensures all sides get nice and crispy. I love to use garlic powder and onion powder for a savory punch. Adding smoked paprika gives a nice depth of flavor. You might also try a bit of cayenne for heat. Here’s a quick list of my favorite seasonings: - Garlic powder - Onion powder - Smoked paprika - Salt - Black pepper Feel free to mix and match based on your taste. The right seasoning can make your Brussels sprouts shine. One key mistake is not drying the sprouts well after washing. Extra moisture can lead to soggy Brussels sprouts. Also, using too much oil can make them greasy. Stick to the recommended amount for the best results. Another pitfall is not preheating the air fryer. Preheating helps the sprouts cook quickly and evenly. Finally, don’t skip the shaking step! It’s vital for an even cook and crispy finish. By following these tips, you can easily make crispy air fryer Brussels sprouts that everyone will love! For more details on making this dish, check out the Full Recipe. {{image_2}} You can change the flavor of your Brussels sprouts with different seasonings. Try adding lemon zest for a fresh taste. A dash of cayenne pepper adds heat if you like spice. You can also use Italian seasoning for a herby touch. Mix and match these spices to find your favorite blend. Want to make your dish heartier? You can add protein. Cooked bacon bits or crispy chickpeas both work great. You can also toss in other veggies, like baby carrots or bell peppers. Just cut them to match the size of your Brussels sprouts. This way, everything cooks evenly in the air fryer. Serve your crispy Brussels sprouts in a fun way. You can add them to a salad for crunch. Try them on a pizza for a unique topping. They also pair well with grilled chicken or fish. Drizzle extra balsamic glaze on top for extra flavor. For a special touch, sprinkle fresh herbs before serving. For the complete recipe with detailed steps, check the Full Recipe. To keep your leftover Brussels sprouts fresh, place them in an airtight container. Store them in the fridge. They should stay good for about 3 days. If you have extra, use a paper towel to absorb moisture. This keeps them from getting soggy. Reheating Brussels sprouts can be tricky. To keep them crispy, use the air fryer again. Set it to 350°F (175°C) for about 5 to 7 minutes. This helps restore their crunch. You can also use a skillet on medium heat. Toss them gently until they warm up and crisp up again. If you want to save them longer, freezing is a good choice. First, let the Brussels sprouts cool completely. Then, spread them out on a baking sheet. Freeze them for about an hour. Once frozen, transfer them to a freezer bag. They can last up to 3 months. To cook from frozen, air fry at 375°F (190°C) for about 15 minutes. This works great for quick meals! To make Brussels sprouts crispy, coat them well in oil and seasonings. Use olive oil, garlic powder, onion powder, smoked paprika, salt, and black pepper. Toss the sprouts until they are fully coated. Then, place them in a single layer in the air fryer basket. This allows hot air to circulate and helps them crisp up. Cook at 375°F for 12-15 minutes, shaking the basket halfway through. This ensures they cook evenly and become golden brown. You can use frozen Brussels sprouts, but they may not get as crispy. Thaw them first, and pat them dry with a paper towel. This helps remove excess moisture. Then, follow the same steps from the Full Recipe. Cook them a bit longer if needed, as frozen sprouts may take more time to become tender and crispy. Air-fried Brussels sprouts taste great with many dips. Here are a few tasty options: - Balsamic glaze for a sweet touch - Garlic aioli for a creamy flavor - Honey mustard for a tangy kick - Ranch dressing for a classic combo These sauces can enhance the taste and make your dish even more enjoyable! Crispy air fryer Brussels sprouts are easy and fun to make. We covered the basic recipe, seasoning options, and enhancements like balsamic glaze or cheese. I shared tips for perfect texture and common mistakes to avoid. You can swap in proteins or other veggies for variety. Finally, we discussed storing leftovers, reheating, and freezing. Try this recipe to elevate your meals. Enjoy the crunch and flavor!

Crispy Air Fryer Brussels Sprouts Easy and Delicious Dish

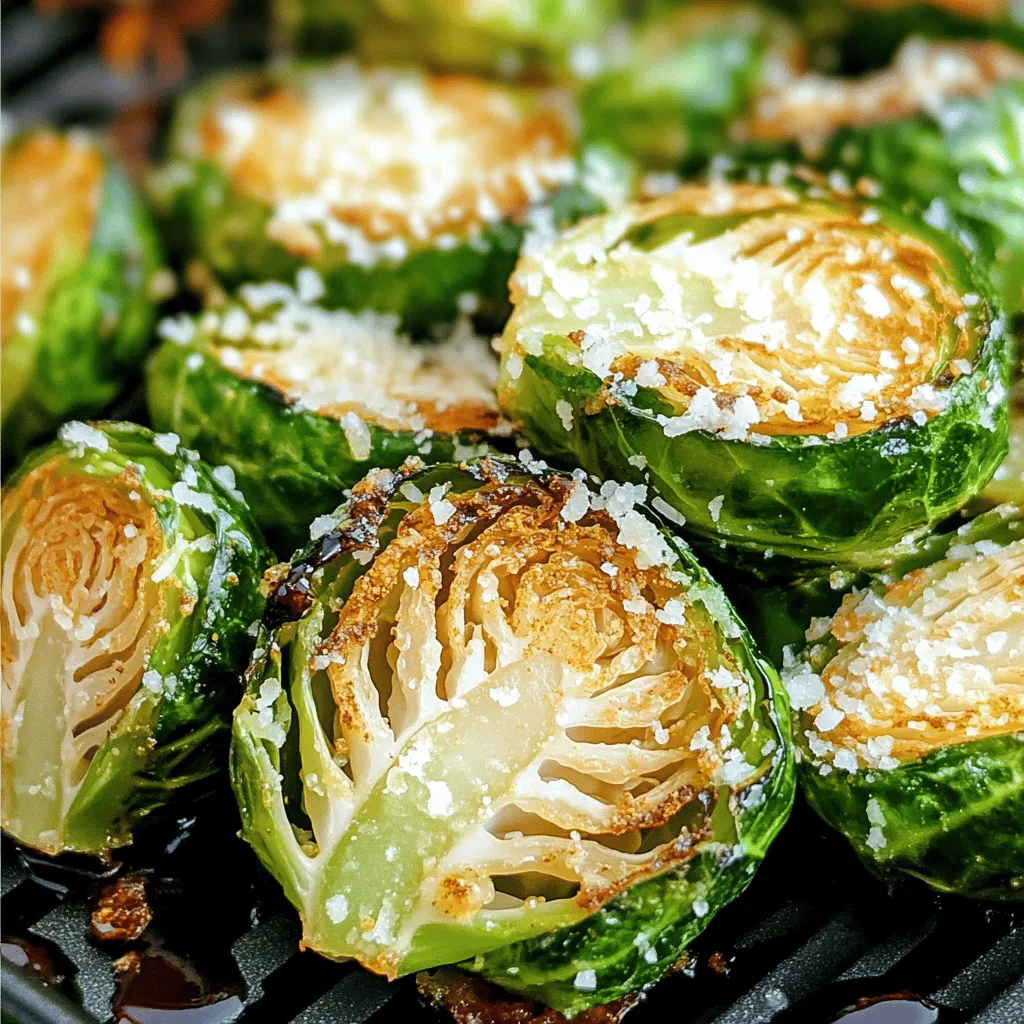
If you’re looking for a tasty and healthy side dish, try these crispy air fryer Brussels sprouts! They’re easy to

- 2 medium sweet potatoes, peeled and diced - 1 cup green or brown lentils, rinsed - 1 medium onion, chopped - 2 cloves garlic, minced - 2 carrots, diced - 1 celery stalk, diced - 4 cups vegetable broth - 1 teaspoon ground cumin - 1 teaspoon smoked paprika - ½ teaspoon turmeric - 2 tablespoons olive oil - Salt and pepper to taste - Fresh cilantro or parsley for garnish (optional) Sweet potatoes and lentils are the stars of this soup. They blend together to create a rich and hearty flavor. Sweet potatoes add natural sweetness and creaminess. Lentils give protein and fiber, making this soup filling. Chop the vegetables into small pieces for even cooking. Use a sharp knife for safety and speed. The onion will add depth, while garlic brings a fragrant touch. Carrots and celery add a nice crunch and sweetness as well. Don’t forget about the spices! Ground cumin adds warmth, while smoked paprika gives a lovely depth. Turmeric not only adds color but also has great health benefits. Olive oil is key for sautéing the veggies. It helps release flavors and makes the soup rich. You can adjust salt and pepper to fit your taste. If you want to add a fresh touch, consider garnishing with cilantro or parsley. It brightens up the dish and adds a nice pop of color. You can find the full recipe for this cozy soup to guide you through the steps. Enjoy the experience of making this delicious Sweet Potato Lentil Soup! 1. Sautéing the vegetables: Start by heating olive oil in a large pot on medium heat. Add the chopped onion and sauté it for about 5 minutes until it is soft and clear. This step builds a sweet base for your soup. Next, toss in the minced garlic, diced carrots, and diced celery. Cook them for 3-4 minutes. This softens the veggies, adding flavor and texture. 2. Blooming the spices: Now, it’s time to add the spices. Sprinkle in the ground cumin, smoked paprika, and turmeric. Stir well to coat the veggies. Let them cook for 1 minute. This process wakes up the spices and enhances their flavor, making your soup rich and warm. 3. Cooking the lentils and sweet potatoes: Stir in the diced sweet potatoes and rinsed lentils. Mix everything well. Pour in 4 cups of vegetable broth, and bring it to a boil on high heat. Once boiling, lower the heat and cover the pot. Let it simmer for 25-30 minutes. This allows the lentils and sweet potatoes to soften and blend their flavors. - How to achieve creamy texture: If you want a smooth soup, use an immersion blender after cooking. Blend until creamy. This will give your soup a velvety feel. If you prefer a thinner texture, add more broth to reach your desired consistency. - Leaving it chunky for more richness: If you like a heartier soup, skip the blending. Enjoy the chunky textures of sweet potatoes and lentils. This adds depth and makes each bite interesting. - Ideal pairings for the soup: This soup pairs well with crusty bread or a fresh salad. The bread mops up the soup, making it a perfect meal. You can also add a dollop of yogurt or a sprinkle of cheese for extra creaminess. - Portion sizes and presentation tips: Serve the soup in bowls that show off its vibrant colors. A standard serving is about 1.5 cups. Garnish with fresh cilantro or parsley for a pop of color and flavor. You can also add a drizzle of olive oil for a lovely finish. For the full recipe, check out the detailed instructions in the earlier section. To make your sweet potato lentil soup shine, choose great spices. My favorites are: - Ground cumin - Smoked paprika - Turmeric These spices add warmth and depth. When you sauté the onion and garlic, let the spices bloom. This means cooking them for a short time in oil. It helps release their oils and flavors. You can also add a splash of lemon juice at the end. This brightens the soup and makes it taste fresh. One big mistake is overcooking lentils. They should be tender but not mushy. Keep an eye on them after 20 minutes of cooking. Another common error is not balancing spices. Taste the soup as it cooks. If it needs more salt or spice, add a little at a time. This helps you find the perfect flavor. For a creamy texture, blend the soup well. But if you like chunks, leave some lentils and sweet potatoes whole. This adds richness. For the full recipe, check the previously given details to create your own bowl of warmth! {{image_2}} For a gluten-free option, this soup works well as is. Lentils and sweet potatoes are naturally gluten-free. You do not need to change the recipe. For vegan and vegetarian diets, this soup is already vegan. Use vegetable broth to keep it vegetarian. You can swap lentils for other legumes like chickpeas or black beans. Each legume has a unique taste. If you want more veggies, add kale or spinach for added nutrition. Both greens mix well with the soup. To add heat, try cayenne pepper or red pepper flakes. A pinch can make a big difference. For freshness, add herbs like basil or thyme. Both herbs brighten the flavors in the soup. To keep your sweet potato lentil soup fresh, store it in the fridge. Use an airtight container. The soup can last for about 4 to 5 days. Make sure it cools to room temperature before sealing it. For longer storage, consider freezing it. - Refrigerator storage tips: - Let soup cool down first. - Use a clean, airtight container. - Label with the date before storing. - Freezing for longer shelf life: - Portion soup into freezer bags or containers. - Remove as much air as possible to prevent freezer burn. - It can last for up to 3 months. When you're ready to enjoy the soup again, reheating is simple. Use a pot on the stove or the microwave. If using a microwave, stir halfway through. This ensures even heating. - Best practices for reheating soup: - Heat gently over medium heat on the stove. - Stir occasionally to avoid sticking. - For the microwave, heat in short bursts, stirring in between. - Keeping soup's freshness and flavor: - Add a splash of broth or water if it thickens too much. - Taste and adjust seasoning if needed. - Serve hot for the best experience. What are the health benefits? Sweet Potato Lentil Soup is very healthy. Sweet potatoes are rich in vitamins. They provide fiber and antioxidants. Lentils are great for protein and iron. Together, they make a filling meal. This soup supports digestion and helps your heart. Can I use canned lentils? Yes, you can use canned lentils. They save time and are easy to use. Drain and rinse them before adding to the soup. Canned lentils cook faster than dried ones. Just add them in the last 10 minutes of cooking. How can I make it spicier? To add spice, try using cayenne pepper or chili flakes. You can also add jalapeños for a fresh kick. Mix in some hot sauce at the end. Taste as you go, so it suits your spice level. How long does it take to cook lentils? Dried lentils usually take 25 to 30 minutes to cook. They should be tender but not mushy. Soak them for a few hours in water if you want to cut down the time. Can I prepare the soup in a slow cooker? Yes, you can make this soup in a slow cooker. Combine all ingredients in the slow cooker. Set it on low for 6 to 8 hours. The flavors will deepen, and the soup will be very tasty. What if I’m allergic to lentils? If you are allergic, you can try using split peas. Split peas have a similar texture and taste. You could also use beans or quinoa for protein. Can I use other types of broth? Yes, you can use chicken or beef broth instead of vegetable broth. Each type of broth will change the flavor slightly. Choose what you prefer to make the soup your own. For the full recipe, check out the Sweet Potato Lentil Bliss Soup. This article covered how to make a delicious sweet potato lentil soup. We discussed the key ingredients, preparation steps, and blending options for the perfect texture. You learned about enhancing flavors and avoiding common mistakes. We also explored variations, storage tips, and answered frequently asked questions. In the end, this soup is flexible and healthy. It can fit many diets and tastes. Enjoy making it your own and share it with others!

Sweet Potato Lentil Soup Cozy and Nourishing Bowl

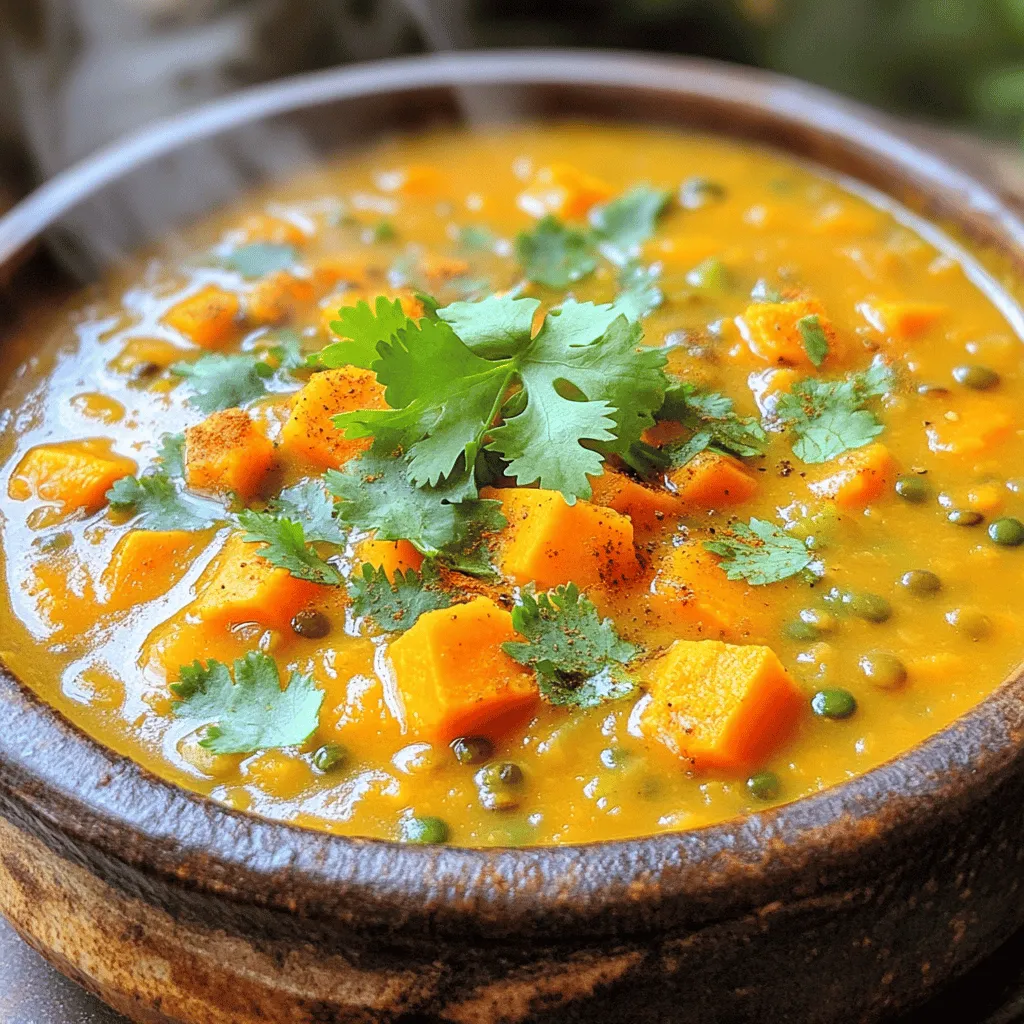
Warm, cozy, and packed with nutrients, Sweet Potato Lentil Soup is your perfect bowl of comfort. This simple, tasty dish

- 3 cups broccoli florets - 1/2 cup cherry tomatoes - 1/4 cup red onion - 1/3 cup parsley - 1/4 cup tahini - 3 tablespoons lemon juice - 2 tablespoons olive oil - 1 tablespoon maple syrup - 1 garlic clove - Salt and pepper - 1/4 cup sunflower seeds This salad is not only tasty but also good for you. A serving of Lemon Tahini Broccoli Salad has about 200 calories. It packs around 5 grams of protein. Broccoli gives you vitamin C and vitamin K. Tahini adds healthy fats and some calcium. The lemon juice boosts your immune system with vitamin C. This salad is a great way to enjoy fresh veggies while keeping your meals healthy and balanced. Eating greens like broccoli can help keep you strong and energized. To steam broccoli perfectly, use a pot with a steamer basket. Bring water to a boil, then add the broccoli florets. Cover and steam for about 3 to 4 minutes. You want them bright green and tender, yet crisp. After steaming, rinse the broccoli under cold water. This helps stop the cooking and keeps the bright color. Let it cool completely before using it in your salad. For the tahini dressing, gather your ingredients. In a medium bowl, add tahini, lemon juice, olive oil, maple syrup, and minced garlic. Whisk these together until smooth. If your dressing is too thick, don’t worry! Add water, one tablespoon at a time, until you reach your desired consistency. The goal is a creamy dressing that coats your veggies well. Now it's time to combine everything! In a large mixing bowl, add the cooled broccoli, halved cherry tomatoes, thinly sliced red onion, and chopped parsley. Drizzle the tahini dressing over your salad mix. Gently toss everything together. Be careful not to break the broccoli. You want to keep those lovely florets whole. If you want some extra crunch, sprinkle sunflower seeds on top. Toss lightly again to distribute. Now your Lemon Tahini Broccoli Salad is ready to enjoy! For the full recipe, check out the details above. To make your Lemon Tahini Broccoli Salad pop, try adding simple herbs. Fresh dill or basil works great. You can also sprinkle in a pinch of smoked paprika for depth. If you want more zing, squeeze in an extra splash of lemon juice. For sweetness, use a bit more maple syrup, or even a touch of honey. These small tweaks boost flavor and keep it fresh. If you want to prep in advance, here’s my tip: make the tahini dressing first. Store it in the fridge for up to a week. You can also steam the broccoli a day ahead. Just cool it down and keep it in an airtight container. Keep the other salad parts separate until you are ready to serve. This way, everything stays crisp and fresh. This salad pairs well with grilled chicken or chickpeas for protein. You can even add it to a wrap for a quick meal. When it comes to serving, think about the looks. Use a large, colorful bowl to show off the bright greens and reds. Adding some sunflower seeds on top gives it a nice crunch and a pop of color. For a fun touch, you can also arrange the ingredients in layers before dressing. This creates an eye-catching dish that everyone will love. For the full recipe, check out the detailed guide. {{image_2}} You can easily make this Lemon Tahini Broccoli Salad vegan by using maple syrup instead of honey. This salad is already plant-based since tahini is made from sesame seeds. For a gluten-free option, just ensure your tahini is gluten-free. Most brands are safe, but it’s good to check the label. If you want to swap tahini, consider using sunflower seed butter or almond butter. These options still give that creamy texture and nutty flavor. You can try other vegetables to mix things up. Cauliflower, bell peppers, or carrots add nice colors and textures. They also pair well with the lemon and tahini. For a bit of sweetness, you might add fruits like diced apples or pomegranate seeds. These fruits add a burst of freshness and a sweet crunch to the salad. You can switch up the dressing if you want different tastes. A simple vinaigrette with olive oil, vinegar, and mustard works well. For an oil-free option, blend avocado with lemon juice and a bit of water. This gives a creamy texture without using oils. For the full recipe, check out the detailed steps. Enjoy your creative salad! To keep your Lemon Tahini Broccoli Salad fresh, store leftovers in an airtight container. Glass or plastic containers work well. I recommend using containers that fit tightly. This helps prevent air from spoiling your salad. You can freeze the salad components, but not the dressing. For best results, freeze the broccoli and other veggies separately. Place them in freezer bags, squeezing out excess air. To serve, thaw the vegetables in the fridge overnight. Let them sit at room temperature for a few minutes before serving. In the fridge, this salad lasts about 3 to 4 days. Always check for signs of spoilage. Look for wilting, off smells, or discoloration. If you notice any of these, it’s best to toss the salad. Enjoy your fresh and healthy delight! You can use frozen broccoli in this salad. Frozen broccoli is pre-steamed. It saves time and is easy to use. However, it may not have the same crunch as fresh broccoli. Fresh broccoli tastes better and has more nutrients. If you use frozen, let it thaw and drain excess water. To add heat, try red pepper flakes or sliced jalapeños. You can mix in some sriracha or hot sauce into the tahini dressing. A dash of cayenne pepper also works well. These options give your salad a nice kick without overpowering the other flavors. This salad pairs well with grilled chicken or fish. You can serve it with quinoa or rice for a hearty meal. A simple garlic bread or pita chips also make great sides. For a light touch, add a fruit salad to balance the flavors. If your tahini dressing is too thick, add water to thin it out. Start with one tablespoon at a time. Whisk it well after each addition. You can also use lemon juice or olive oil for added flavor. Aim for a creamy but pourable texture. For the full recipe, refer to the main article. In this blog post, we explored a vibrant salad packed with fresh ingredients like broccoli, cherry tomatoes, and a zesty tahini dressing. I shared tips for perfecting the cooking process and ways to enhance flavor. We also discussed how to adapt the recipe based on your dietary needs and preferences. In conclusion, this salad is not just healthy but also versatile. Experiment with flavors and enjoy the freshness. It’s a simple dish that brings joy to your table!

Lemon Tahini Broccoli Salad Fresh and Healthy Delight

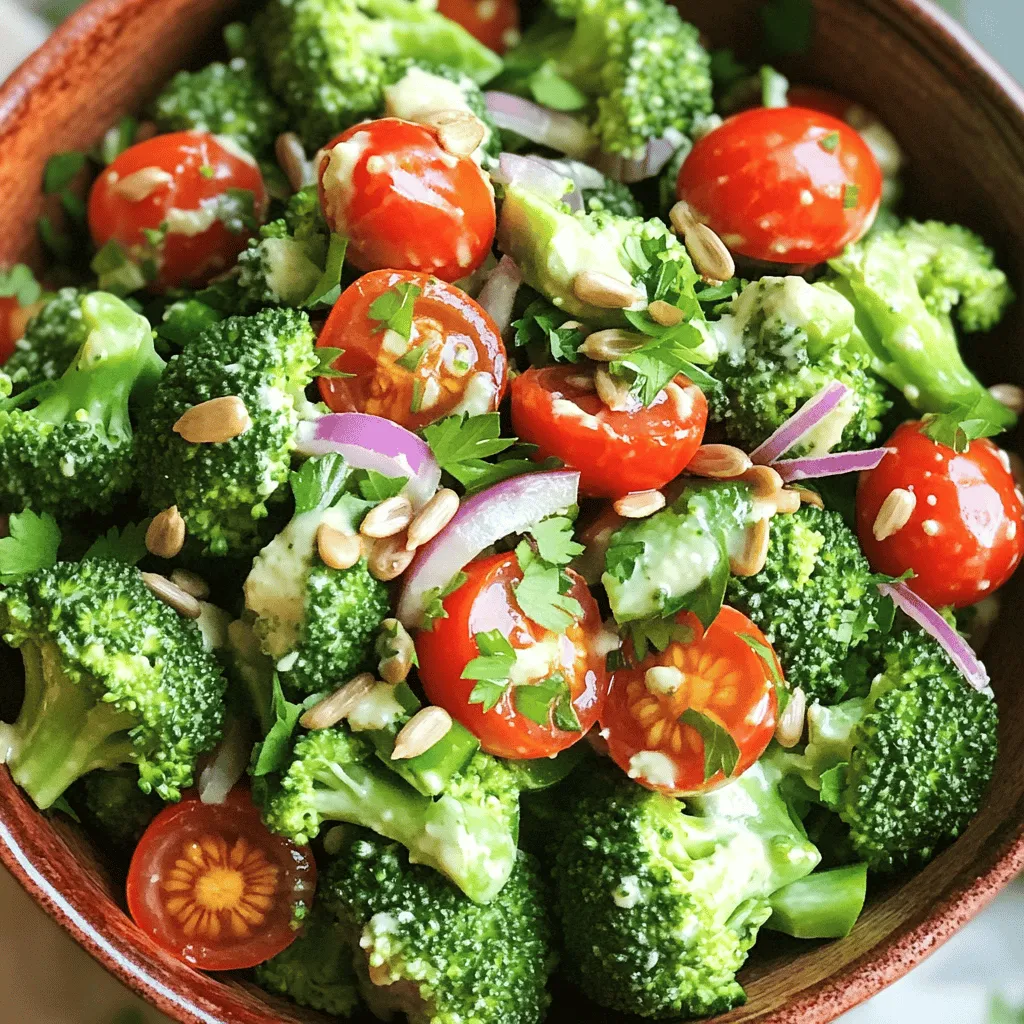
Brighten your day with my Lemon Tahini Broccoli Salad, a fresh and healthy delight. This vibrant dish features crunchy broccoli,

- 1 can (15 oz) chickpeas, drained and rinsed - 2 tablespoons olive oil - 1 teaspoon smoked paprika - 1 teaspoon cayenne pepper - 1 teaspoon garlic powder - 1 teaspoon onion powder - 1 teaspoon salt - 1 tablespoon zesty lemon zest - Fresh parsley, chopped (for garnish) - Calories per serving: About 120 - Protein and fiber content: Each serving has 6 grams of protein and 5 grams of fiber. - Health benefits of chickpeas: Chickpeas are a great source of plant-based protein. They can help with digestion and keep you full longer. Plus, they are low in fat and rich in vitamins. Chickpeas are a powerhouse food. They can boost your meals. They are easy to use, tasty, and healthy. Enjoy the spicy roasted chickpeas as a snack or topping. For the full recipe, check out the detailed steps above. First, preheat your oven to 400°F (200°C). This sets the right heat for crispy chickpeas. Next, take your can of chickpeas, open it, and drain the liquid. Rinse them well under cold water. After rinsing, spread them on a clean kitchen towel. Pat them dry gently. Removing excess moisture helps them get crispy in the oven. In a large bowl, combine the dried chickpeas with olive oil and all of your spices. Use the smoked paprika, cayenne pepper, garlic powder, onion powder, and salt. Toss the chickpeas until they are evenly coated. This mix gives each chickpea a burst of flavor. Now, spread the chickpeas in a single layer on a lined baking sheet. Place them in the preheated oven. Roast for about 20 to 25 minutes. Stir them every 10 minutes for even cooking. Watch them closely to avoid burning. They should turn golden brown and crispy. When they are done, take them out and sprinkle with fresh lemon zest. This adds a bright flavor. Let them cool for a few minutes before serving. Enjoy your crunchy snack! For the full recipe, check out the details above. To make perfect spicy roasted chickpeas, drying them well is key. After rinsing the chickpeas, spread them on a clean kitchen towel. Pat them dry gently. This step removes extra moisture and helps them crisp in the oven. Do not overcrowd the baking sheet. If chickpeas are too close, they will steam instead of roast. Spread them in a single layer for even cooking. This way, each chickpea gets its turn to become crispy and tasty. You can adjust the spice levels to fit your taste. If you prefer less heat, use less cayenne pepper. For more kick, add an extra sprinkle. You can also mix in your favorite herbs or spices. Try cumin for a warm flavor or Italian herbs for a fresh twist. Experimenting will lead to fun new tastes. There are many creative ways to serve spicy roasted chickpeas. They can be a crunchy snack on their own. You can also toss them on salads for added texture. Another great idea is to serve them with dips like tzatziki or hummus. This brings a nice contrast to their spicy crunch. Enjoy them in a bowl or as a topping for your favorite dishes. {{image_2}} You can change the spice mix for your roasted chickpeas. Try using curry powder for a warm, earthy taste. Ranch seasoning adds a fun, herby kick. If you want a sweet twist, sprinkle some cinnamon or drizzle honey over them. The sweet and spicy mix will surprise your taste buds. Making these chickpeas fit your diet is easy. They can be gluten-free by using spices that do not contain gluten. If you prefer vegan options, stick to plant-based ingredients. You can also use dried chickpeas instead of canned ones. Just soak and cook them first. This gives you control over the texture and flavor. Spicy roasted chickpeas are great in many dishes. Toss them into salads for extra crunch and flavor. They add a great protein boost too. You can also use them as a topping for soups. The crunch pairs nicely with warm broth, making every bite more exciting. Check out the Full Recipe for more ideas on how to enjoy this tasty snack. To keep your spicy roasted chickpeas fresh, use an airtight container. This method prevents moisture from getting in and keeps them crispy. If you have leftovers, let them cool first. Then, place them in the container and store them in the fridge. Roasted chickpeas can last up to a week in the fridge. After that, they may lose their crunch. Look for signs of spoilage. If they smell off or have a strange color, it's best to toss them. To enjoy that great crunch again, reheat your chickpeas in the oven. Set it to 350°F (175°C) and spread the chickpeas on a baking sheet. Heat them for about 10 minutes. This method helps restore their crispy texture perfectly. Yes, you can use dried chickpeas. You need to soak and cook them first. 1. Soak dried chickpeas in water overnight. 2. Drain and rinse them. 3. Cook the chickpeas in boiling water for about 1 hour or until tender. 4. Follow the same steps in the recipe after cooking. This method adds some extra time but gives a fresh taste. To make your chickpeas less spicy, reduce the cayenne pepper. You can also use these tips: - Add more olive oil to mellow the heat. - Mix in some honey or brown sugar to balance spice. - Serve with yogurt or sour cream to cool the flavor. These options help you enjoy the chickpeas without the heat. Yes, spicy roasted chickpeas are a healthy snack. They are high in protein and fiber. Here are some benefits: - Chickpeas support digestion and heart health. - They help keep you full, which can aid in weight control. - They are low in fat and contain no cholesterol. Enjoy these tasty bites while knowing they are good for you! In this article, we explored how to make spicy roasted chickpeas. We covered ingredient lists, step-by-step instructions, and tips for crispy results. You learned about health benefits and ways to enjoy them. Spicy roasted chickpeas are tasty snacks or meal toppers. Try different spices or add them to salads. Keep them crispy by storing correctly. With many options, you can customize flavors to match your taste. Enjoy these healthy bites that are fun to make and good for you.

Spicy Roasted Chickpeas Crispy and Flavorful Snack

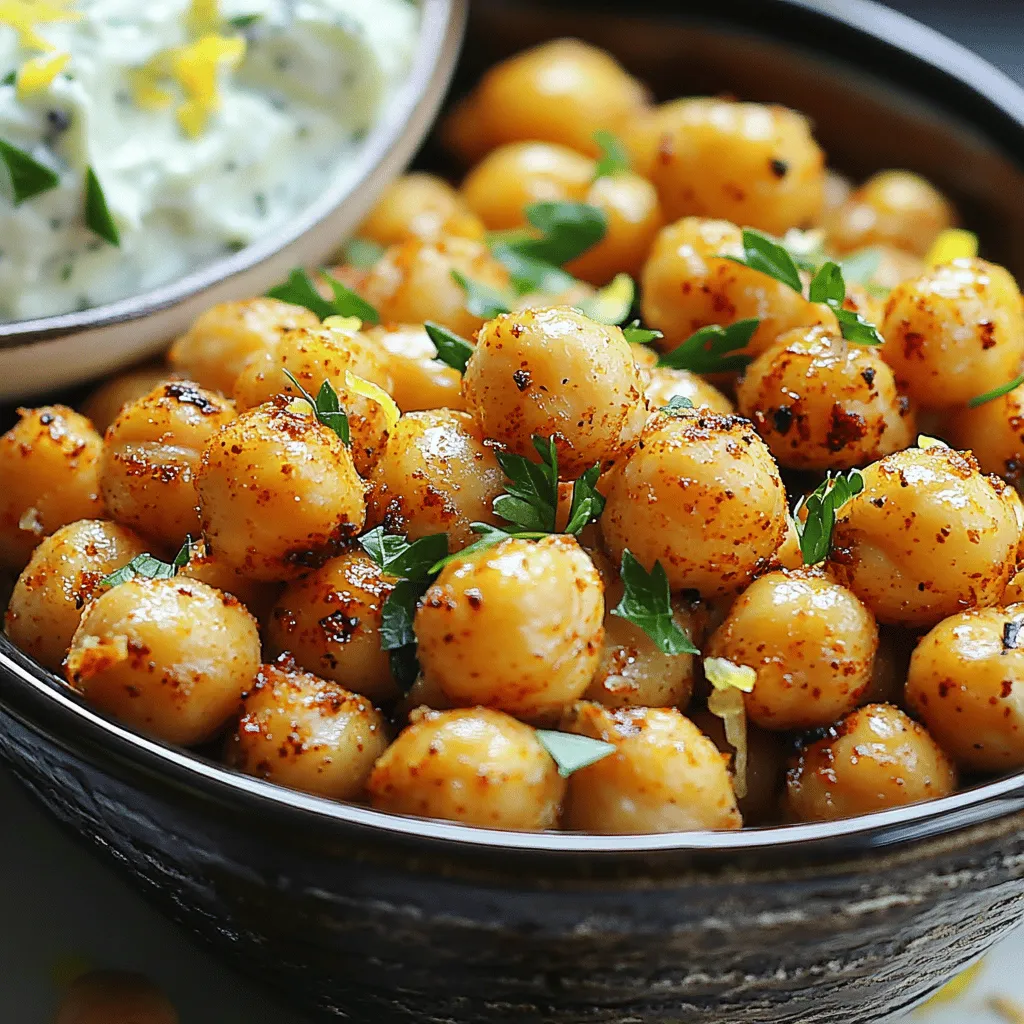
Get ready to spice up your snack game with these crispy roasted chickpeas! This recipe turns simple ingredients into a

- 1 cup grated carrots - 1 cup rolled oats - 1/2 cup almond flour - 1/4 cup maple syrup - 1/4 cup coconut oil, melted These ingredients form the base of your carrot cake breakfast cookies. The grated carrots add natural sweetness and moisture. Rolled oats provide fiber, while almond flour lends a nutty flavor. Maple syrup serves as a natural sweetener, and melted coconut oil keeps the cookies soft. - 1/4 cup shredded coconut - 1/4 cup raisins or dried cranberries Adding shredded coconut gives a tropical twist. Raisins or dried cranberries add bursts of sweetness. Feel free to mix and match to your taste. You can even try nuts or other dried fruits. - 1 teaspoon vanilla extract - 1 teaspoon baking powder - 1 teaspoon ground cinnamon - 1/4 teaspoon nutmeg - Pinch of salt Spices are where the magic happens. Vanilla extract enhances the flavor profile, making the cookies taste rich and inviting. Baking powder helps them rise, while cinnamon and nutmeg add warmth. A pinch of salt balances the sweetness, making each bite delightful. For the complete recipe, check out the [Full Recipe]. - Preheat your oven to 350°F (175°C). - Line a baking sheet with parchment paper. - In a large bowl, combine grated carrots, rolled oats, almond flour, and shredded coconut. Mix well until everything is blended. - In a different bowl, whisk together maple syrup, melted coconut oil, and vanilla extract. - Pour the wet mixture into the dry ingredients and mix thoroughly until combined. - Add baking powder, ground cinnamon, nutmeg, raisins (or cranberries), and a pinch of salt. - Gently fold the mixture until all ingredients are evenly distributed. - Scoop tablespoon-sized amounts of dough onto the prepared baking sheet, leaving space between each. - Flatten each scoop slightly with the back of a spoon to form cookie shapes. - Bake for 12-15 minutes until the cookies turn golden brown. - Cool for 5 minutes on the baking sheet, then transfer to a wire rack to cool completely. These simple steps will help you create delicious Carrot Cake Breakfast Cookies, a treat that's both tasty and easy to make. For the complete list of ingredients and instructions, check the Full Recipe. To make the best carrot cake breakfast cookies, use fresh, finely grated carrots. Fresh carrots keep the cookies moist and add great flavor. You can also try different add-ins like nuts or seeds. Pecans, walnuts, or sunflower seeds can add nice crunch and extra nutrients. These cookies pack a healthy punch. The carrots bring vitamins, and oats provide fiber. You can adjust the recipe to fit your diet. Want less sugar? Use less maple syrup. Need more protein? Add a scoop of protein powder or a bit of nut butter. For even baking, space your cookies well on the sheet. Leave about 2 inches between each cookie. This helps them bake evenly. Watch them closely near the end of baking. You want golden edges, not burnt cookies! Enjoy your tasty treats from the Full Recipe. {{image_2}} You can easily make these cookies gluten-free. To do this, simply swap the almond flour for a gluten-free flour blend. This change keeps the cookies soft and tasty. Also, choose certified gluten-free oats. This ensures there is no cross-contamination. Both swaps let everyone enjoy a delicious treat! Adding different flavors can make these cookies even better. Try mixing in grated zucchini for a veggie boost. It adds moisture and makes the cookies extra soft. You can also spice things up! Adding ginger or cloves gives each bite a warm kick. Experimenting with flavors can lead to your new favorite cookie! If you want a vegan option, I have a couple of easy swaps for you. Instead of eggs, use a flax egg or a chia seed egg. To make a flax egg, mix one tablespoon of ground flaxseed with three tablespoons of water. Let it sit for a few minutes until it thickens. This keeps the cookies binding well. For sweetness, replace maple syrup with agave syrup or another plant-based sweetener. These changes make the cookies suitable for everyone, without losing any flavor. Store cooled cookies in an airtight container at room temperature for up to 3 days. This keeps them fresh and tasty. If you want them to last longer, follow the long-term storage tips below. Freeze cookies in a single layer, then transfer to a freezer-safe bag for up to 2 months. When you’re ready to enjoy them, simply thaw them at room temperature. Freezing helps lock in the flavor and texture. Warm cookies in the microwave for a few seconds to enjoy that fresh-baked taste again. This quick step brings back the soft, chewy goodness. You could also pop them in the oven for a few minutes. Enjoy them warm for a delightful treat! These cookies pack a punch of nutrition. The grated carrots offer vitamins A and K. Rolled oats provide fiber, keeping you full longer. Almond flour adds healthy fats and protein. Together, they create a balanced start to your day. Plus, the natural sweetness from maple syrup gives you energy without a sugar crash. Yes, you can! Honey or agave syrup works well. If you use honey, the taste will change slightly. You may need to adjust the wet ingredients a bit. For a lower-calorie option, try using stevia or monk fruit sweetener. Just watch the amount, as they are much sweeter. Look for golden brown edges. The centers should feel set but not hard. You can also gently press down on them; they should not be soft. If they bounce back, they are ready. This takes about 12-15 minutes in the oven. Absolutely! Kids love the sweet flavor and chewy texture. You can make it even more fun by mixing in chocolate chips or colorful sprinkles. If your kids are picky, leave out the raisins or coconut. They can also help mix the dough, making it a fun activity! In this blog post, we explored a healthy cookie recipe packed with nutritious ingredients. We covered essential and optional add-ins, spices, and step-by-step baking instructions. You learned tips for perfect cookies, variations for dietary needs, and storage options to keep them fresh. These cookies are not only easy to make but also a great way to enjoy healthy snacks. With a few tweaks, you can create a delicious treat that fits your taste. Get baking and enjoy these wholesome cookies!

Carrot Cake Breakfast Cookies Flavorful Easy Treat

Craving a tasty way to kickstart your day? Try my Carrot Cake Breakfast Cookies! They pack the flavors of classic

To make a delicious Mango Coconut Protein Shake, gather these key ingredients: - 1 ripe mango, peeled and diced - 1 cup coconut milk (canned or carton) - 1 scoop vanilla or coconut protein powder - 1 tablespoon unsweetened shredded coconut - 1 tablespoon honey or maple syrup (optional) - 1/2 cup ice cubes - A pinch of salt Each ingredient plays an important role. The ripe mango gives natural sweetness and a vibrant color. Coconut milk provides creaminess and a tropical flavor. Protein powder boosts the shake’s nutritional value, making it great for a post-workout treat. Shredded coconut adds texture and richness. Honey or maple syrup is optional, but it can enhance sweetness if needed. Ice cubes chill the shake and make it refreshing. Finally, a pinch of salt balances the flavors. Follow the [Full Recipe] for detailed steps to create your shake. Enjoy the blend of flavors and nutrients in every sip! To start, you need to prepare your ingredients. First, peel and dice the ripe mango. This fruit adds a sweet and tropical taste to your shake. If you use canned coconut milk, shake or stir it well to mix the cream and liquid. Next, gather your protein powder, shredded coconut, honey or maple syrup, ice cubes, and a pinch of salt. Now it's time to blend. Place the diced mango, coconut milk, protein powder, shredded coconut, and honey or maple syrup into your blender. Add the ice cubes and a pinch of salt to balance the flavors. Blend the mixture on high until it becomes smooth and creamy. You want to ensure there are no chunks of mango left. This should take about 30-45 seconds. After blending, taste your shake. If it needs more sweetness, add a bit more honey or maple syrup. Blend again for a few seconds to mix it all in. Pour your shake into a tall glass or a to-go cup for easy drinking. To make it look nice, you can garnish it with a sprinkle of shredded coconut on top. A slice of fresh mango on the rim adds a pretty touch. Enjoy your mango coconut protein shake chilled for a refreshing boost! For the full recipe, refer to the earlier section. To get the best texture, start with the right order of ingredients. Put the liquids first, then add the solids. This helps the blender mix better. Use a high-speed blender for smooth results. If you want a creamier shake, add more coconut milk. Blend for 30-45 seconds. This should give you a nice, smooth drink. To avoid any chunks, make sure to blend until you see no mango pieces left. If you still find chunks, give it a quick second blend. You can also cut the mango into small pieces to help it blend easily. You can choose between honey and maple syrup for sweetness. Honey gives a rich taste, while maple syrup adds a unique flavor. If you want a healthier option, consider using mashed banana or dates. Both options add natural sweetness. Start with one tablespoon of your chosen sweetener. Then, taste the shake. If it needs more sweetness, add a little more and blend again. This way, you have full control over how sweet your shake will be. To boost nutrition, think about adding greens like spinach or kale. These options blend well and add vitamins. You can also add superfoods like chia seeds or flaxseeds for extra fiber and omega-3s. If you want more protein, try adding Greek yogurt or more protein powder. Both will make your shake even more filling. Just remember to adjust the other ingredients if you add more. This way, you keep the balance of flavors right. {{image_2}} You can easily change the flavor of your mango coconut protein shake. Try adding other fruits like banana or pineapple. Bananas give it a creamy texture. Pineapples add a sweet and tart taste. Both options will make your shake even more delicious. You can also experiment with different protein powders. Try chocolate or berry flavors for new taste experiences. If you want a dairy-free shake, you have great options. You can swap coconut milk for almond or oat milk. Both will still keep your shake creamy. Look for dairy-free protein powders too. Many brands offer tasty plant-based options that work well in this shake. Make the most of seasonal fruits for your shake. In summer, combine mango with fresh berries or peaches. These fruits add bright flavors. In winter, use frozen fruits for convenience. They blend well and stay fresh longer. This way, you can enjoy a tropical feel all year round! To store leftover mango coconut protein shake, follow these tips: - Place the shake in an airtight container. - Leave some space at the top for expansion. - Store in the fridge and consume within 24 hours for best taste. For refrigerator storage, use glass or BPA-free plastic containers. These keep the shake fresh and safe. If you want an easy option, try a mason jar. It's perfect for single servings. You can freeze the shake for later use. Here’s how: - Pour the shake into ice cube trays or freezer-safe bags. - Leave space for expansion if using bags. - Seal tightly and label with the date. To thaw, place the frozen shake in the fridge overnight. For quick use, run the bag under warm water. Blend again for a smooth texture. In the fridge, the shake lasts about 1 day. If you see separation, just shake or stir it. However, if it smells sour or looks strange, it’s best to toss it. Always trust your senses when checking for freshness. How to make a mango coconut protein shake? To make a mango coconut protein shake, gather your ingredients. You need a ripe mango, coconut milk, protein powder, shredded coconut, ice, and salt. 1. Dice the mango and prepare the coconut milk. 2. Blend all ingredients together until smooth. 3. Enjoy your shake cold! Can I use frozen mango for this recipe? Yes, you can use frozen mango. It adds a nice chill and makes the shake thicker. Just toss it in the blender with the other ingredients. No need for ice if you use frozen mango! Is a protein shake healthy for breakfast? Yes, a protein shake can be a healthy breakfast. It provides protein, vitamins, and healthy fats. This can keep you full and energized. Just make sure to balance it with other food throughout the day. What are the benefits of using coconut milk? Coconut milk adds creaminess and a tropical flavor. It’s dairy-free and can help those with lactose intolerance. It also contains healthy fats that support heart health. How can I make this shake vegan? To make this shake vegan, use plant-based protein powder. Also, choose agave syrup instead of honey. The rest of the ingredients are already vegan-friendly! What can I substitute for protein powder? You can use Greek yogurt or silken tofu as a substitute. These options add protein too. Just blend them in with the other ingredients for a smooth texture. For the full recipe, check out the detailed steps above. Enjoy! This blog post covered how to create a delicious mango coconut protein shake. We explored the ingredients needed and the easy steps for making it. Remember to blend well for a smooth texture and adjust sweetness to your liking. Consider adding fruits for extra flavor or nutrients. You can store leftovers in the fridge or freeze them for later. Enjoy experimenting with variations. Don't forget, a tasty shake can boost your day!

Mango Coconut Protein Shake Nutrient-Packed Boost

Looking for a tasty way to fuel your day? The Mango Coconut Protein Shake is your answer! Packed with nutrients,

Older posts
Newer posts
← Previous Page1 … Page63 Page64 Page65 … Page82 Next →

dsad

© 2026 Recipes Pursuit • Built with GeneratePress

Our Policies

  • Copyright Policy
  • Cookie Policy
  • GDPR Policy
  • Privacy Policy
  • Disclaimer
  • Terms Of Use

More Information

  • Home
  • About
  • Contact
  • Appetizers
  • Dessert
  • Dinner
  • Drinks
©2026, Recipes Pursuit About Back To Top