Skip to content
DisclaimerTerms Of UseGDPR PolicyCookie Policy

Recipes Pursuit

  • Home
  • Drinks
  • Appetizers
  • Dinner
  • Dessert
  • About
  • Contact
  • Privacy Policy
DisclaimerTerms Of UseGDPR PolicyCookie Policy

NO-ING-IMG

To make Blueberry Lemon Energy Bites, you need these simple ingredients: - 1 cup rolled oats - 1/2 cup almond butter (or peanut butter) - 1/4 cup honey or maple syrup - 1/2 cup dried blueberries - Zest of 1 lemon - 2 tablespoons lemon juice - 1 tablespoon chia seeds - 1/4 teaspoon salt - 1/4 teaspoon vanilla extract These ingredients work together to create a tasty snack that fuels your day. You can get creative with your energy bites! Here are some fun add-ins: - Chopped nuts for crunch - Dark chocolate chips for sweetness - Coconut flakes for a tropical twist - Protein powder for an extra boost Mix and match these options based on what you have and love. These energy bites are not only tasty but also packed with nutrition. Here’s what they offer: - Rolled oats provide fiber and help keep you full. - Almond butter gives healthy fats and protein. - Chia seeds add omega-3s and antioxidants. - Dried blueberries have vitamins and minerals. This snack is perfect for busy days or post-workout fuel! Making Blueberry Lemon Energy Bites is easy and fun. You only need a few simple steps. Gather your ingredients first. This makes the process smoother. You will need rolled oats, almond butter, honey, dried blueberries, lemon zest, lemon juice, chia seeds, salt, and vanilla extract. Start by taking a large mixing bowl. Add 1 cup of rolled oats, 1/2 cup of almond butter, and 1/4 cup of honey or maple syrup. Mix these well until they come together. Then, add in the dried blueberries, lemon zest from one lemon, 2 tablespoons of lemon juice, 1 tablespoon of chia seeds, 1/4 teaspoon of salt, and 1/4 teaspoon of vanilla extract. Stir it all together until you see an even blend. If the mix feels sticky, add a bit more oats. If it feels too dry, splash in a little lemon juice. This step is key for the right texture. Now comes the fun part. Use your hands to knead the mixture gently. Make sure all ingredients are well combined. Next, take a tablespoon and scoop out portions. Roll these into bite-sized balls in your hands. Aim for about 12 to 15 bites. Place the rolled bites on a baking sheet or parchment paper. Once done, refrigerate them for at least 30 minutes. This helps them firm up nicely. After they're set, store them in an airtight container in the fridge. They make for great grab-and-go snacks! When making Blueberry Lemon Energy Bites, avoid overmixing. This can make the bites tough. Don't skip the chia seeds; they add fiber and help bind the mix. If your mixture feels too dry, do not hesitate to add a splash of lemon juice. Remember, it should be sticky enough to hold together. If your mix is too sticky, add more rolled oats, a little at a time. On the other hand, if it feels dry, a touch of lemon juice will help. You want a dough-like texture. Adjust until it feels just right. This way, your bites will hold their shape and taste great. For a beautiful display, use a colorful bowl to serve your energy bites. You can sprinkle extra chia seeds on top for a nice touch. These bites make a great snack for kids and adults. Pair them with some fresh fruit or yogurt for a fun treat. Enjoy them with friends or as a quick pick-me-up during the day! {{image_2}} You can change up the flavor of your energy bites easily. Try adding different dried fruits, like cranberries or apricots. You could also use fresh lemon zest for a stronger lemon taste. If you love chocolate, add mini dark chocolate chips or cocoa powder. For a warm touch, a pinch of cinnamon works great too. These small changes can make your bites exciting and fun to eat. If you want to switch sweeteners, you have options. Maple syrup is a great choice if you want a vegan option. Agave nectar can also add a unique taste. For a lower-calorie option, consider using stevia or monk fruit sweetener. Just remember to adjust the amount since they are sweeter than honey or syrup. This way, you can enjoy your energy bites without the extra sugar. You can use any nut butter you like in this recipe. Almond butter gives a nice flavor, but peanut butter works well too. If you have allergies, sunflower seed butter is a safe choice. Cashew butter adds creaminess and a mild taste. Each nut butter brings its own twist to the energy bites. Experiment to find the one you love best! To keep your blueberry lemon energy bites fresh, store them in an airtight container. This helps prevent moisture and keeps them tasty. You can place a piece of parchment paper between layers to avoid sticking. If you plan to eat them within a week, keep them in the fridge. For longer storage, consider freezing them. These energy bites can last up to one week in the fridge. If you freeze them, they can last up to three months. To freeze, place your energy bites in a single layer on a baking sheet. After about an hour, transfer them to a freezer bag. Remember to label the bag with the date. To thaw your frozen energy bites, take them out of the freezer. Let them sit at room temperature for about 15 to 30 minutes. They will soften and be ready to eat. You can also place them in the fridge overnight to thaw slowly. Enjoy them as a quick snack or a healthy treat! Yes, you can use fresh blueberries! They add a burst of flavor. However, fresh blueberries can make the mixture wetter. If you choose fresh, consider adding a bit more oats to balance the moisture. This way, your energy bites will still hold together well. Absolutely! These energy bites are packed with nutrients. They contain oats for fiber, almond butter for healthy fats, and dried blueberries for antioxidants. The chia seeds add omega-3 fatty acids. Plus, they have no added sugars beyond honey or maple syrup. They make a great snack for kids and adults alike. These energy bites last about one week in the fridge. Store them in an airtight container to keep them fresh. If you want to keep them longer, consider freezing them. They can last up to three months in the freezer. Just thaw them in the fridge before enjoying! We explored how to make energy bites, focusing on ingredients and preparation. You learned about key ingredients, optional add-ins, and health benefits. I shared tips to avoid common mistakes and how to adjust the texture. We also discussed flavor variations and storage practices. In conclusion, energy bites are simple, fun, and flexible. You can easily tweak them for your taste. Enjoy these nutritious snacks and make them your own!

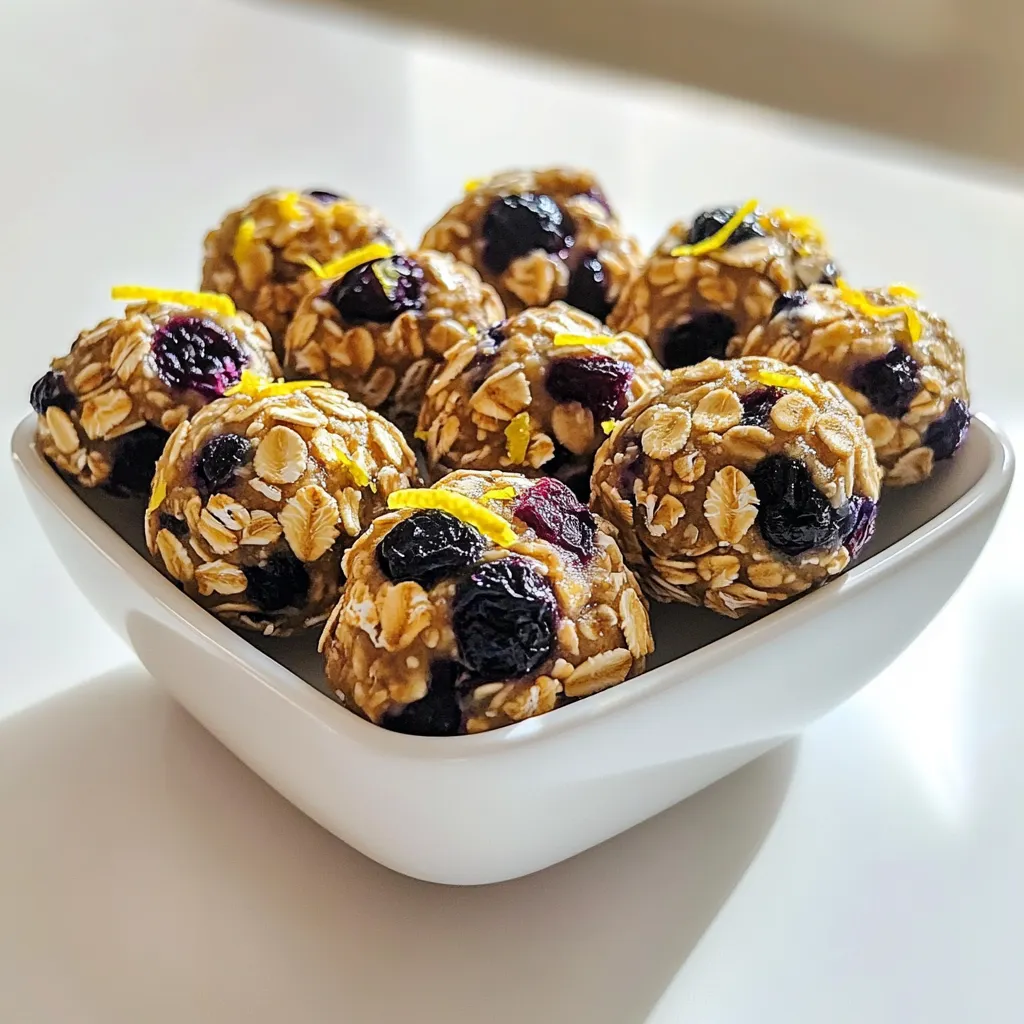
Blueberry Lemon Energy Bites Quick and Healthy Snack

Looking for a quick and healthy snack? These Blueberry Lemon Energy Bites are perfect for you! They are easy to

To make a delicious Strawberry Shortcake Trifle, you will need the following: - 2 cups fresh strawberries, hulled and sliced - 1/4 cup granulated sugar - 1 teaspoon vanilla extract - 1 package (8 oz) cream cheese, softened - 1 cup heavy cream - 1 cup powdered sugar - 1 teaspoon lemon juice - 1 pound sponge cake or ladyfingers, cut into cubes - Mint leaves for garnish Using fresh ingredients is key to a great trifle. Fresh strawberries bring bright flavor and sweetness. They add a juicy texture that balances the creamy layers. Fresh cream makes the dessert light and fluffy. The cream cheese should be soft, giving a smooth consistency. When you use fresh ingredients, your trifle tastes better and looks more inviting. The colors pop, making each layer stand out. This dessert is all about layers, and fresh ingredients make each one shine. Not every home has the same ingredients. Here are some easy swaps you can use: - Strawberries: Try blueberries or raspberries for a different fruit flavor. - Sponge Cake: Use store-bought pound cake if you don’t have sponge cake. - Cream Cheese: Greek yogurt can work in a pinch, but it changes the taste. - Heavy Cream: Use whipped topping if you're looking for a lighter option. - Sugar: You can use honey or maple syrup for a natural sweetness. These substitutions help you create a trifle that works for your taste and what you have on hand. Don't be afraid to get creative! {{ingredient_image_1}} Start with fresh strawberries. You need two cups. Hull and slice them. Place them in a medium bowl. Add a quarter cup of granulated sugar. Toss them together well. Let them sit for 15-20 minutes. This helps the strawberries release their sweet juices. You will see a lovely syrup form. Grab a large bowl and add one package of softened cream cheese. Use an electric mixer to beat it until smooth. Next, add one teaspoon of vanilla extract. Mix it in well. This gives the cream a rich flavor. In another bowl, pour one cup of heavy cream. Start whipping it gently. As it thickens, add one cup of powdered sugar. Also, add one teaspoon of lemon juice. Keep whipping until fluffy peaks form. This will make your cream light and airy. Now, it's time to layer! In a large trifle dish or individual cups, start with a layer of sponge cake or ladyfingers. Cut them into bite-sized cubes. Next, spoon a layer of your cream cheese mixture over the cake. Then, add a layer of your sweet strawberries. Repeat this until you reach the top. End with a thick layer of the cream cheese mix. For a nice touch, garnish with extra strawberries and mint leaves. To get the best texture, use fresh strawberries. They give a juicy burst in each bite. When you mix the cream cheese, whip it until smooth. This helps create a creamy base. For the whipped cream, whip until you see soft peaks. Don't overmix, or it will turn grainy. Gently fold the whipped cream into the cream cheese. This keeps the mixture light and airy. When you layer your trifle, start with the cake at the bottom. This holds the layers well. Use a clear trifle dish or glass cups. This lets the beautiful layers show through. Add fresh strawberries on top for a pop of color. A mint leaf adds a nice touch too. Serve it chilled for the best flavor and texture. You can also drizzle some sauce or syrup for extra flair. Avoid using overripe strawberries; they may taste mushy. Don't skip the chilling time; it helps the flavors meld. Make sure to measure your ingredients carefully. Too much cream cheese can make it heavy. If your whipped cream is too thick, it won't fold in well. Lastly, avoid overlayering; keep it balanced for easy serving. Pro Tips Perfect Strawberries: Choose ripe strawberries that are bright red and slightly firm for the best flavor and texture. Chill the Cream: For a fluffier whipped cream, chill your mixing bowl and beaters in the freezer for about 10 minutes before whipping. Layering Technique: To avoid soggy layers, allow the strawberry mixture to drain slightly before adding it to your trifle. Make Ahead: Prepare the trifle a few hours in advance and refrigerate it to let the flavors meld together beautifully. {{image_2}} You can swap strawberries with other fruits. Ripe peaches, blueberries, or raspberries work well. Each fruit brings a unique taste. For a tropical twist, try mango or pineapple. Mix and match fruits for fun flavors. Your trifle can be a new delight every time. To make this trifle gluten-free, use gluten-free sponge cake. Many brands offer great options. You can also bake your own using gluten-free flour. This way, you keep the texture light and fluffy. Your gluten-free guests will love it just as much! For a dairy-free version, use coconut cream instead of heavy cream. Chill a can of coconut milk overnight. Scoop the solid cream from the top. Whip it as you would with heavy cream. This gives your trifle a creamy texture and a slight coconut flavor. It’s a delicious twist! To keep your trifle fresh, cover it tightly with plastic wrap. Make sure it touches the surface of your trifle. This helps to stop air from drying out your dessert. If you use individual cups, seal them with lids or plastic wrap. Store the trifle in the fridge right after you finish making it. Chill your trifle for at least one hour before serving. This allows flavors to blend and the dessert to set. Serve it cold for the best taste. Use a large spoon for scooping, or serve in cups for easier handling. Always add mint leaves and fresh strawberries just before serving. This keeps them looking fresh and bright. Your trifle will stay fresh for about three days in the fridge. After that, the cake may become soggy. If you want to keep it longer, consider making the layers separately. Store the whipped cream and strawberries in separate containers. Assemble them just before you plan to serve. This way, your dessert stays light and tasty! Yes, you can make this dessert a day in advance. The flavors blend better when it sits overnight. Just cover it tightly with plastic wrap. Keep it in the fridge until ready to serve. This helps the cake soak up the strawberry juices. You will enjoy more flavor in every bite. If you want a different base, use ladyfingers or even pound cake. Both options work well in this trifle. For a gluten-free choice, opt for gluten-free cake. This way, everyone can enjoy it. Each option adds its own texture and taste. To make your trifle pop, layer the colors nicely. Use clear glass cups or dishes to show off the layers. Add fresh strawberry slices on top for color. Mint leaves also add a nice touch. A sprinkle of crushed cookies can add texture and style too. Freezing trifle is not recommended. The cream can separate and lose its texture. However, you can freeze the components separately. Freeze the strawberries and sponge cake, then assemble when ready. This keeps the trifle fresh and tasty. This article covered how to make a delicious Strawberry Shortcake Trifle. We discussed fresh ingredients, layering steps, and important tips for the best taste and look. You can try different fruits or make it gluten-free or dairy-free. For storage, keep it chilled and enjoy it fresh. Remember, each trifle layer can bring joy to your table. Enjoy creating your own tasty masterpiece!

Strawberry Shortcake Trifle Divine Dessert Delight

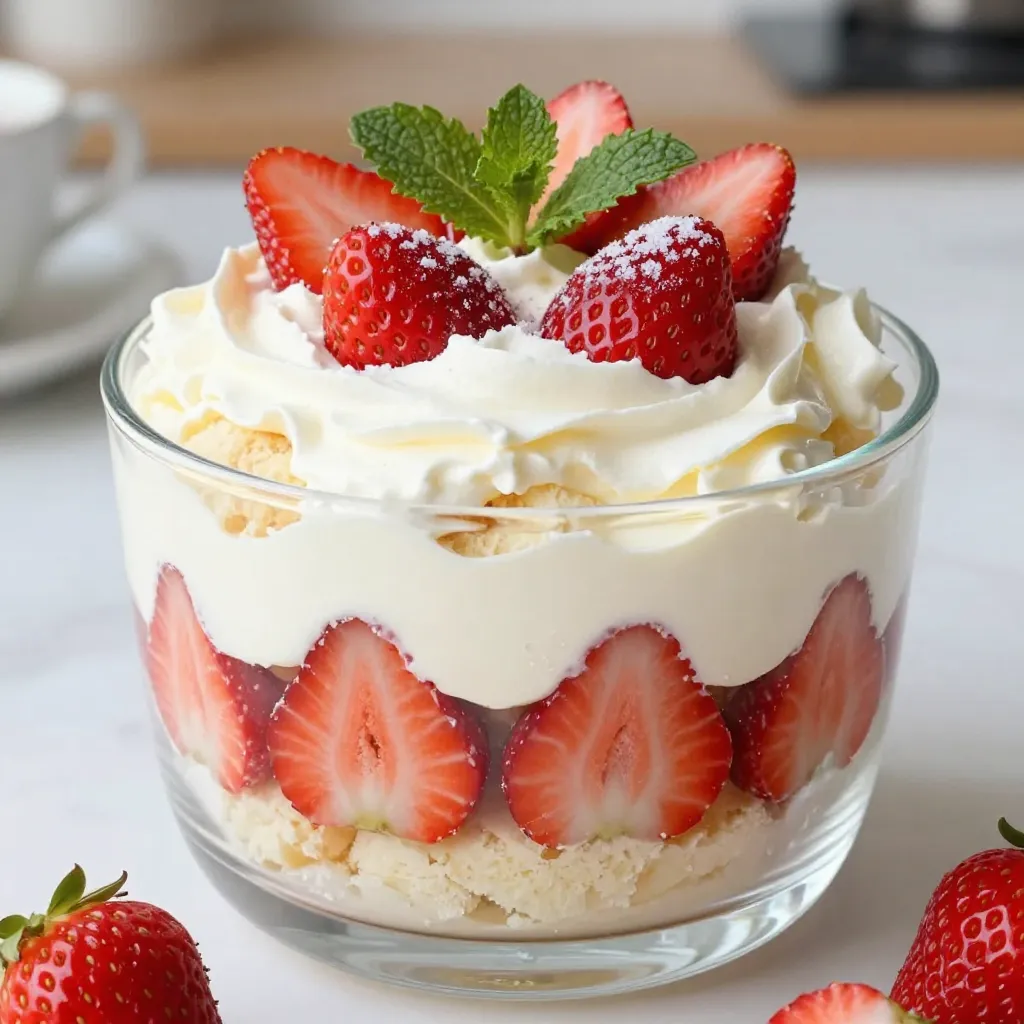
Ready to wow your friends and family with a stunning dessert? The Strawberry Shortcake Trifle Divine Dessert Delight is here

To make these tasty no-bake chocolate-covered strawberry bars, you will need: - 1 ½ cups rolled oats - ½ cup almond butter - ¼ cup honey or maple syrup - 1 teaspoon vanilla extract - 1 cup fresh strawberries, hulled and chopped - ½ cup dark chocolate chips - 2 tablespoons coconut oil - A pinch of sea salt For a fun touch, you can add: - Additional fresh strawberries for garnish You can swap out some ingredients if needed: - Use peanut butter instead of almond butter for a different taste. - Maple syrup works great if you want a vegan option. - If you don't have dark chocolate chips, milk chocolate chips will work too. - Rolled oats can be replaced with quick oats, but the texture will change. First, gather your ingredients. You will need rolled oats, almond butter, honey or maple syrup, and vanilla extract. In a large bowl, mix the rolled oats and almond butter. Add the honey or maple syrup and vanilla extract. Stir until it forms a sticky dough. Next, gently fold in the chopped strawberries. Be careful not to mash them. This mixture will form the base of your bars. Now, let's melt the chocolate. Take dark chocolate chips and coconut oil in a microwave-safe bowl. Heat them in 30-second intervals. Stir after each round until smooth. This way, you avoid burning the chocolate. The melted chocolate should be shiny and creamy. This will coat your bars perfectly. Get an 8x8 inch baking dish and line it with parchment paper. Leave some paper overhanging for easy lifting later. Press the oat mixture into the dish evenly. Use the back of a spatula to smooth it out. Pour the melted chocolate over the oat layer. Spread it evenly to cover all the oats. Finally, place the dish in the fridge. Let it chill for at least one hour. When the chocolate has set, lift the bars out and cut them into squares or rectangles. If you like, add fresh strawberries on top for a nice touch. To get the right texture, use fresh ingredients. Rolled oats must be fine but not powdery. Almond butter adds creaminess and richness. Make sure your honey or maple syrup is sticky. This helps bind everything together. Fold in the strawberries gently. You want them to stay whole for great bites. Melting chocolate can be tricky. Use a microwave-safe bowl. Heat in 30-second bursts to avoid burning. Stir after each burst until it’s smooth. Adding coconut oil helps make the chocolate shiny. This also makes it easy to spread. If the chocolate gets too thick, add a little more coconut oil. After chilling, lift the bars out using parchment paper. Use a sharp knife for clean cuts. If the bars feel soft, let them chill longer. Store them in an airtight container in the fridge. They stay fresh for about a week. For longer storage, freeze them in a safe bag. Just thaw before serving. {{image_2}} You can switch up the flavors in these bars easily. Try using peanut butter instead of almond butter for a nutty twist. This change adds a rich and creamy taste. You can also use different fruits. Chopped bananas or blueberries work well too. They give a fresh, fruity flavor. For a tropical vibe, add dried coconut flakes to the oat mixture. Adding nuts or seeds gives your bars crunch and protein. Try mixing in chopped walnuts or almonds for a nice crunch. You could also add sunflower seeds or pumpkin seeds for extra nutrition. Just fold them into the mixture along with the strawberries. This will give each bite a delightful texture. Making these bars vegan and gluten-free is simple. Use maple syrup instead of honey for a vegan option. For gluten-free bars, make sure your oats are labeled gluten-free. This way, everyone can enjoy the treat without worry. You can also use dark chocolate that is dairy-free. This ensures that the bars fit many diets while still being delicious. To keep your no-bake chocolate covered strawberry bars fresh, store them in the fridge. Use an airtight container for best results. This helps to prevent the bars from drying out. Keep them away from strong-smelling foods to avoid flavor changes. If you want to keep them closer to room temperature, they can sit out for a short time, but they taste best cold. These delicious bars can last up to one week in the fridge. After that, they may lose their flavor and freshness. If you notice any changes in texture or smell, it’s best to toss them. Always check for mold or off-flavors before eating. Proper storage helps maintain their taste and quality for as long as possible. You can freeze these bars for longer storage. Wrap each bar tightly in plastic wrap. Then, place them in a freezer-safe bag or container. They can stay frozen for up to three months. When you want to enjoy them, simply thaw them in the fridge overnight. Avoid thawing at room temperature, as this can affect the texture. Yes, you can use peanut butter instead of almond butter. Both add creaminess and flavor. Peanut butter will give the bars a unique taste. It also has a similar texture, so it works well in this recipe. The chocolate is ready when it is smooth and shiny. Stir it well after each 30-second interval. If you see any lumps, keep stirring. This helps the chocolate melt evenly. Be careful not to overheat it, as burnt chocolate can taste bitter. Frozen strawberries work, but they may change the texture. Thaw and drain them first. This helps remove excess water. Fresh strawberries give a firmer bite and brighter taste. If you use frozen, make sure to chop them small. This way, they blend well into the oat mixture. You learned about key ingredients and optional garnishes for no-bake bars. We covered step-by-step instructions for preparing the oat mixture, melting chocolate, and assembling the bars. I shared useful tips for achieving perfect texture, along with storage advice and variations for added flavor. No-bake bars offer a fun, easy treat you can customize. With simple swaps and storage tips, you can enjoy them for longer. Get creative and make your favorite flavors shine!

No-Bake Chocolate Covered Strawberry Bars Delight

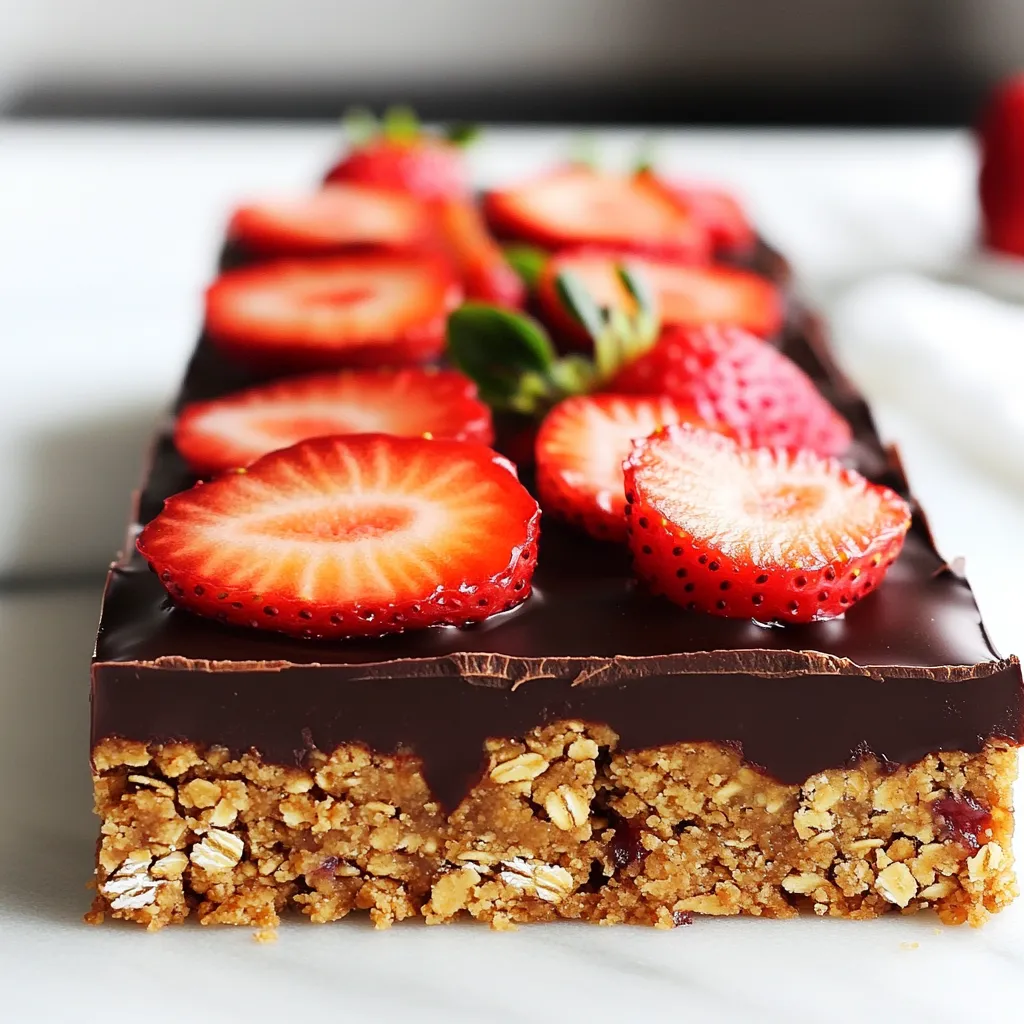
If you adore sweets but dread baking, I have just the treat for you! These No-Bake Chocolate Covered Strawberry Bars

To make Minute Garlic Parmesan Zucchini Noodles, you'll need a few simple ingredients. Each one plays a role in the dish's taste and texture. Here’s what you need: - 2 medium zucchinis, spiralized into noodles - 2 tablespoons olive oil - 3 cloves garlic, minced - 1/4 teaspoon red pepper flakes (optional) - 1/4 cup grated Parmesan cheese - Salt and pepper to taste - Fresh basil leaves for garnish (optional) Zucchini noodles are the star here. They add a fresh and light feel. Olive oil gives a rich base, while garlic adds an amazing aroma. Red pepper flakes bring a nice kick, but you can skip them if you prefer. Parmesan cheese gives a creamy finish that makes this dish special. Finally, fresh basil adds a pop of color and flavor. Gather these ingredients before you start cooking. This way, your cooking time stays quick and easy. Enjoy the process! First, you need to spiralize your zucchinis. Use a spiralizer for the best noodles. If you don’t have one, a julienne peeler works great too. You want long, thin noodles. This makes eating easier and more fun. Once spiralized, set them aside. They are ready for cooking. Next, grab a large skillet and heat olive oil over medium heat. Let it shimmer, which means it’s hot enough. Add the minced garlic next. Sauté it for about 30 seconds. You want it to smell nice, but don’t let it brown. Then, toss in your zucchini noodles. Stir them well into the oil and garlic. Cook for about 2-3 minutes. You want them al dente, a bit crisp. If you enjoy spice, add red pepper flakes during the last minute. Once the noodles are cooked, remove the skillet from heat. Sprinkle the grated Parmesan cheese over the noodles. Toss them well to coat. Add salt and pepper to taste. For a fresh look, garnish with basil leaves. Serve immediately for a warm, tasty meal. Enjoy your Minute Garlic Parmesan Zucchini Noodles! When picking zucchini, look for ones that are firm and smooth. The skin should be shiny and bright green. Avoid zucchini with soft spots or wrinkles. Choose medium-sized zucchinis for the best flavor and texture. Smaller ones tend to be sweeter, while larger ones can be watery. Always wash your zucchini before spiralizing. This step keeps your dish fresh and clean. Cook zucchini noodles quickly to keep them crisp. Avoid overcooking, as they can become mushy. Sauté them for only 2-3 minutes. This keeps them al dente and tasty. Make sure your skillet is hot before adding the noodles. The olive oil should shimmer, which gives a nice sauté. Stir often to coat the noodles with garlic and oil. You can mix in extra flavors to make this dish your own. Try adding lemon zest for brightness. A splash of soy sauce adds a savory note. You can also use fresh herbs like oregano or thyme for a new twist. If you want more heat, add more red pepper flakes. For a creamier texture, mix in a bit of cream cheese or ricotta. Experiment with your favorite ingredients to find what you love! {{image_2}} You can make this dish vegan by skipping the Parmesan cheese. Instead, use nutritional yeast. Nutritional yeast adds a cheesy flavor without any dairy. It also packs a lot of nutrients. You can sprinkle a few tablespoons over the noodles. This keeps the dish tasty and healthy. This recipe is naturally gluten-free. Zucchini noodles are a great substitute for pasta. You can enjoy them without worry. If you want more texture, add some toasted nuts. Chopped walnuts or almonds work well. They add a nice crunch and extra flavor to the dish. Want to make your meal heartier? Add protein! Cooked chicken or shrimp pairs well with zucchini noodles. Simply sauté cooked chicken pieces or shrimp with garlic in the skillet. Mix them in with the noodles at the end. This creates a filling dish that satisfies your hunger. To keep your leftover zucchini noodles fresh, place them in an airtight container. Make sure to remove as much air as you can. Store them in the fridge for up to three days. This way, you can enjoy these tasty noodles later without losing flavor or texture. When you’re ready to eat your leftover zucchini noodles, heat them gently. Use a skillet over low heat to warm them up. Add a splash of olive oil to keep them moist. Stir often for about two to three minutes. This will help the noodles stay tasty and not too soft. You can freeze zucchini noodles if you want to save them for later. However, they may lose some texture after thawing. To freeze, spread the noodles on a baking sheet in a single layer. Freeze them for about one hour, then transfer them to a freezer bag. They can last up to three months in the freezer. When you’re ready to use them, cook directly from frozen. Zucchini noodles last about 2 to 3 days in the fridge. Store them in an airtight container. They may lose some crunch, but they will still be safe to eat. I recommend using them quickly for the best taste and texture. If you notice any sliminess, it's best to toss them out. Yes, you can use other cheeses instead of Parmesan. Try using feta, mozzarella, or even nutritional yeast for a vegan option. Each cheese will change the flavor. Feta adds a nice tang, while mozzarella makes it creamy. Just remember to adjust the amount based on your taste. You can serve these noodles with various dishes. They pair well with grilled chicken or shrimp for protein. You can also add a side salad for freshness. If you want more veggies, roasted bell peppers or cherry tomatoes work great too. These options make it a complete meal. In this post, we explored the key ingredients and easy steps to make zucchini noodles. We covered tips for picking the best zucchini and added flavor suggestions. You can try vegan and gluten-free options or add protein for variety. Proper storage methods help keep leftovers fresh for your next meal. Zucchini noodles are simple, healthy, and fun to make. Now, you can enjoy this dish anytime!

Minute Garlic Parmesan Zucchini Noodles Delightfully Easy

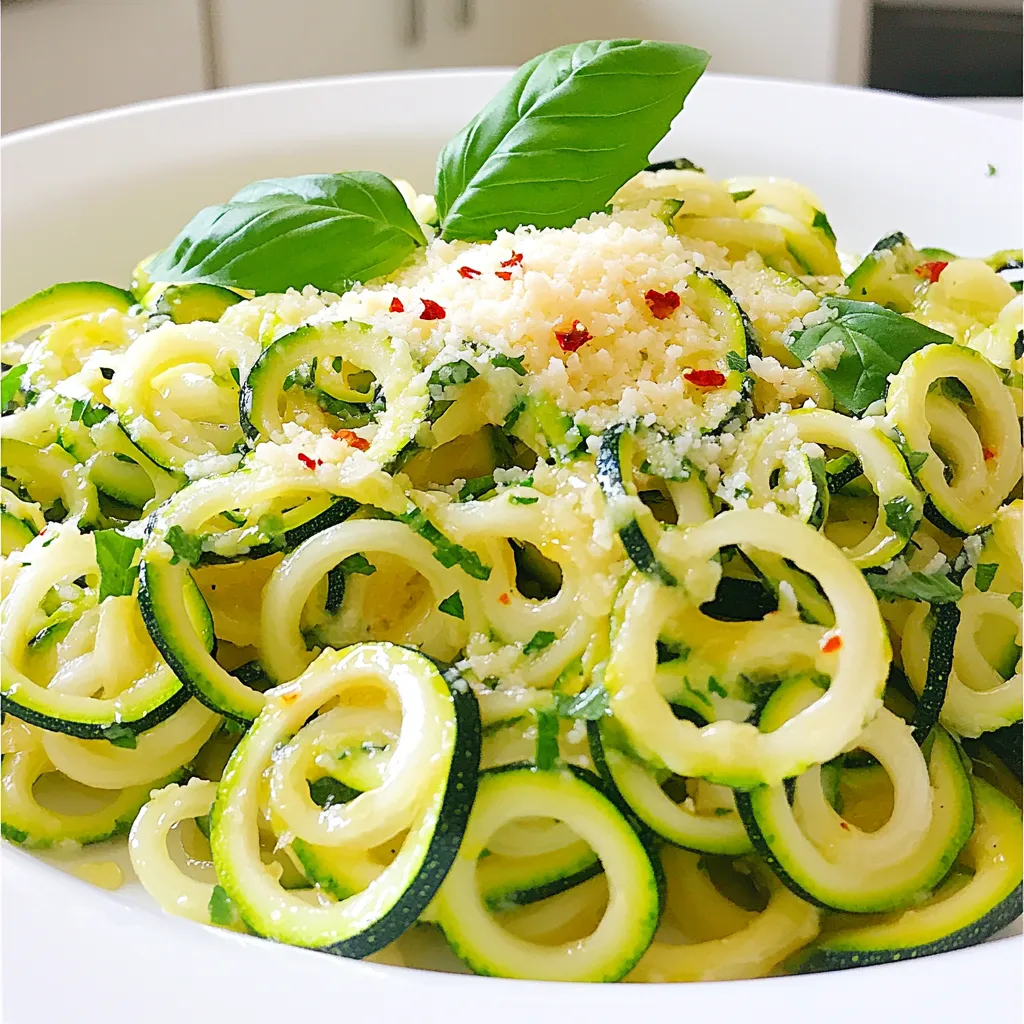
If you’re craving a quick and tasty meal, I’ve got just the dish for you! Minute Garlic Parmesan Zucchini Noodles

To make tasty teriyaki meatballs, you need simple ingredients. Here’s what you will need: - 1 pound ground chicken or turkey - 1/4 cup breadcrumbs - 1/4 cup green onions, finely chopped - 1 egg, beaten - 2 cloves garlic, minced - 1 tablespoon ginger, grated - 1/4 cup low-sodium soy sauce - 1 tablespoon honey or maple syrup - 1 tablespoon sesame oil These main ingredients create a flavorful base for your meatballs. The ground meat gives protein, while breadcrumbs help hold them together. Green onions add a fresh taste, and garlic brings a nice punch. Vegetables play a big role in this dish. They not only add color but also flavor. You will need: - 2 cups broccoli florets - 2 cups bell peppers, sliced (any color) Broccoli adds crunch and nutrition. Bell peppers bring sweetness and color. Together, they make the meal more balanced and delicious. Toss them with olive oil and soy sauce before baking. This helps them get tender and flavorful. To finish your teriyaki meatball bowls, you can add some fun toppings. Here are some ideas: - 1 tablespoon sesame seeds (for garnish) - Lime wedges (for serving) Sesame seeds add a nice crunch. Lime wedges give a zesty kick that brightens the dish. You can also drizzle extra teriyaki sauce if you want more flavor. Feel free to get creative with your garnishes! First, set your oven to 400°F (200°C). This temperature is perfect for cooking meatballs and veggies together. Next, line a large sheet pan with parchment paper. This helps with easy cleanup and prevents sticking. In a big bowl, mix the ground chicken or turkey with breadcrumbs. Add the chopped green onions, beaten egg, minced garlic, and grated ginger. Pour in two tablespoons of low-sodium soy sauce, honey, and sesame oil. Use your hands or a spoon to mix everything well. Make sure all the ingredients blend together nicely for great flavor. Now, take a small amount of the meat mixture and roll it into a ball, about one inch wide. Place each meatball on the lined sheet pan, leaving some space between them. This helps them cook evenly and get that nice brown color. In a separate bowl, toss the broccoli florets and bell pepper slices with one tablespoon of olive oil. Add the remaining two tablespoons of soy sauce to this mix. Spread the veggies around the meatballs on the sheet pan. This way, everything cooks together, and the flavors mix nicely. Place the sheet pan in the preheated oven. Bake for about 20 to 25 minutes. Check that the meatballs are cooked all the way through and the veggies are tender. Once done, take the pan out and let it cool for a few minutes. This step helps the flavors settle before serving. To keep your meatballs moist, use ground chicken or turkey. These meats work well and stay juicy. Add breadcrumbs to the mix; they help hold moisture. Don't overmix the meatball mixture; it can make them tough. Form the meatballs gently, about one inch in size. Bake them just until cooked through, about 20-25 minutes, to avoid dryness. If you're looking for gluten-free options, use gluten-free breadcrumbs. For a vegan choice, swap ground meat with a mixture of beans or lentils. Use flaxseed meal mixed with water as a binding agent instead of egg. You can also choose tamari sauce instead of soy sauce for gluten-free teriyaki flavor. This way, everyone can enjoy the dish. When cooking veggies, cut them into even pieces for uniform cooking. Toss them in olive oil and soy sauce before baking. This adds flavor and helps them roast nicely. Place denser vegetables, like broccoli, alongside the meatballs for even cooking. Soft veggies can go on the edges of the pan. Bake them until tender but still crisp, about 20-25 minutes. This keeps your dish bright and colorful. {{image_2}} You can switch up the protein in these meatballs. Ground beef or pork works well. If you prefer a lighter option, try ground turkey. For a plant-based meal, use lentils or chickpeas. Both give a great texture. Adjust the cooking time based on the protein you choose. Always ensure your meatballs are cooked through. Feel free to mix and match your veggies. Carrots, snap peas, or zucchini add a nice crunch. You can also use asparagus or cauliflower for a different twist. Just cut them into even pieces for even cooking. Toss them with olive oil and soy sauce before roasting. This helps them soak up the flavor. You can spice up your dish easily. Add crushed red pepper flakes for a kick. If you want it sweeter, mix in more honey or maple syrup. You can also try using teriyaki sauces with different flavors. Pineapple teriyaki sauce adds a fruity touch. Experiment with your favorite flavors to make this dish your own! To keep your Sheet-Pan Teriyaki Meatball Bowls fresh, let them cool first. Use airtight containers to store any leftovers. Place the meatballs and veggies together, or keep them separate. This helps keep the flavors intact. Store them in the fridge for up to three days. For the best taste, reheat your meatball bowls in the oven. Preheat the oven to 350°F (175°C). Place the bowls on a baking sheet and cover with foil. Heat for about 15 minutes. You can also use a microwave. Place the meatballs and veggies in a microwave-safe dish. Heat for one to two minutes, stirring halfway. You can freeze the meatballs and vegetables for later. Use freezer-safe bags or containers. Make sure to label them with the date. They can last up to three months in the freezer. When you're ready to eat, thaw them overnight in the fridge. Reheat them as mentioned above for the best flavor. Yes, you can make Teriyaki Meatballs ahead of time. Prepare the meatballs and store them in the fridge. They will stay fresh for up to two days. You can also freeze them for up to three months. Just thaw before cooking. To serve more people, simply double or triple the recipe. Use two or more sheet pans for even cooking. Make sure to space the meatballs and veggies to allow air to flow. This helps them cook evenly. Absolutely! Store-bought teriyaki sauce is a great shortcut. Just pour it over the meatballs and veggies before baking. This saves time and still gives you that delicious teriyaki flavor. Here are some tasty side dish options: - Steamed rice or quinoa - Sautéed bok choy - Miso soup - Cucumber salad - Sticky rice balls These sides will complement the flavor and make your meal even better! Teriyaki meatballs are simple to make and delicious. You learned about the main ingredients, key vegetables, and yummy toppings. I shared step-by-step instructions, tips for moist meatballs, and how to store leftovers. You can even try variations with different proteins or flavors. Remember, you can adjust the recipe to fit your needs. Enjoy making teriyaki meatballs, and explore your unique flavor ideas!

Sheet-Pan Teriyaki Meatball Bowls Flavorful and Simple

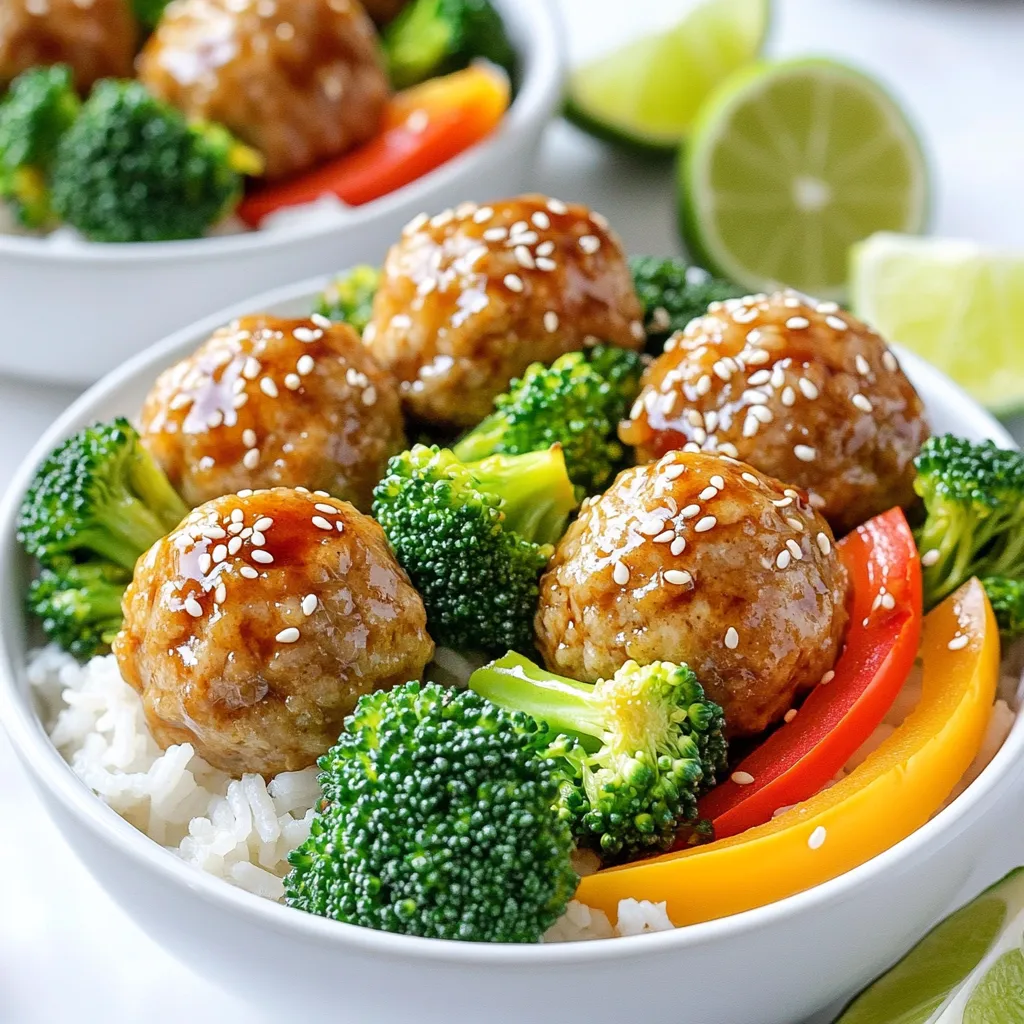
Ready for a meal that’s flavorful and easy? Let’s dive into my Sheet-Pan Teriyaki Meatball Bowls! This dish combines juicy

- 1 head of cauliflower, cut into florets - 3 tablespoons olive oil - 2 tablespoons honey - 3 cloves garlic, minced - 1 teaspoon red chili flakes (adjust to taste) - 1 teaspoon smoked paprika - Salt and pepper to taste - Chopped green onions for garnish - Sesame seeds for garnish Gather these ingredients to make your Air Fryer Spicy Honey Garlic Cauliflower. Using fresh cauliflower helps the dish taste its best. Olive oil adds richness, while the honey brings sweetness. Minced garlic gives that lovely zing. For seasoning, red chili flakes and smoked paprika bring a kick and depth. Adjust the chili flakes to fit your spice level. Don't forget salt and pepper for balance. Lastly, the garnishes elevate the dish's look and flavor. Chopped green onions add freshness, and sesame seeds give crunch. This combination makes your cauliflower not only tasty but also beautiful. - Wash and cut the cauliflower into bite-sized florets. - Pat dry with a clean kitchen towel. To prepare the cauliflower, you need to start with a clean head. Rinse it well under cool water. Use a sharp knife to cut it into small, even florets. This size helps them cook evenly. After cutting, use a kitchen towel to pat them dry. This step is key for achieving that crispy texture later. - Combine olive oil, honey, minced garlic, chili flakes, smoked paprika, salt, and pepper. - Mix until uniform. In a large bowl, add olive oil, honey, and minced garlic. Then, sprinkle in the red chili flakes and smoked paprika. Add salt and pepper to taste. Stir everything together well until it looks smooth and even. This marinade will coat the cauliflower, so every bite bursts with flavor. - Preheat air fryer to 400°F (200°C). - Arrange marinated florets in air fryer basket. - Air fry for 15-18 minutes, shaking halfway through. Before cooking, preheat your air fryer to 400°F (200°C). This step helps the cauliflower crisp up nicely. Once it’s ready, place the marinated florets in the air fryer basket. Make sure you arrange them in a single layer. This helps them cook evenly. Set the timer for 15 to 18 minutes. Remember to shake the basket halfway through to ensure every piece gets that golden brown color. Enjoy the delightful crunch and flavor when they are done! To get crispy cauliflower, you must dry it well. After washing, use a clean kitchen towel. Pat each floret until no moisture remains. This step helps the olive oil and spices stick better. Avoid overcrowding the air fryer basket. If you pack in too many florets, they will steam instead of crisp. Fry in batches if needed. This allows hot air to circulate and cook evenly. You can modify the spice level by changing the amount of chili flakes. If you want it milder, use less. For more heat, add a bit more. You can also try adding other spices, like cayenne or chipotle powder. This gives you more flavor options. For the best texture, air fry the cauliflower for 15-18 minutes. Shake the basket halfway through cooking. This helps them cook evenly and gets them crispy all around. Keep an eye on them toward the end. Cook until they are golden brown and tender. {{image_2}} You can easily change the taste of your spicy honey garlic cauliflower. Try adding different spices like curry powder or cumin for a unique twist. If you love sweet dishes, use more honey or add a splash of maple syrup. For a savory take, skip the honey and add soy sauce or balsamic vinegar. This dish pairs well with various dipping sauces. Try serving it with ranch, tahini, or spicy mayo. It makes a great side dish for grilled meats or a tasty snack for movie night. You can also toss it in a salad for extra crunch and flavor. If you prefer not to use honey, try agave nectar or maple syrup as a sweetener. Both options work well and keep the dish sweet. To make it vegan, use a plant-based honey substitute or skip the honey altogether. You’ll still enjoy great taste! To keep your spicy honey garlic cauliflower fresh, store it right. Use an airtight container. This keeps moisture out and flavors in. Place the cooled cauliflower in the container. Make sure to seal it tightly to avoid spills. You can easily reheat your cauliflower in the air fryer. Set it to 350°F (175°C) for about 5-7 minutes. This keeps the cauliflower crispy. If you don’t have an air fryer, a microwave works too. Just heat it for 1-2 minutes. For oven reheating, place it on a baking sheet and warm at 350°F (175°C) for 10 minutes. In the fridge, your leftovers last about 3-4 days. Always check for any odd smells or changes in texture. If you want to keep them longer, freezing is a good option. Place the cooled cauliflower in a freezer-safe bag. It can last up to 3 months in the freezer. When ready to eat, thaw it in the fridge overnight before reheating. You should air fry cauliflower for about 15 to 18 minutes. Shake the basket halfway through. This helps the cauliflower cook evenly and become crispy. Check for a golden brown color. If you want it crispier, add a few extra minutes. Yes, you can! You can roast the cauliflower in the oven. Preheat your oven to 425°F (220°C). Arrange the marinated florets on a baking sheet in a single layer. Bake for about 25 to 30 minutes. Make sure to flip them halfway to get an even roast. This dish pairs well with many foods. Serve it as a snack or a side. It goes great with grilled chicken or fish. You can also add it to a grain bowl. Try it with rice or quinoa for a tasty meal. Don't forget to serve it with a dipping sauce, like ranch or yogurt sauce, for extra flavor! In this post, we explored how to make spicy honey garlic cauliflower. You learned about the key ingredients, step-by-step preparation, and cooking tips. We also covered variations, storage info, and FAQs for your convenience. This dish is fun, flavorful, and easy to make. Experiment with spices or add your own flair. It’s perfect as a snack or side dish. Enjoy your cooking journey and savor the delicious results!

Air Fryer Spicy Honey Garlic Cauliflower Delight

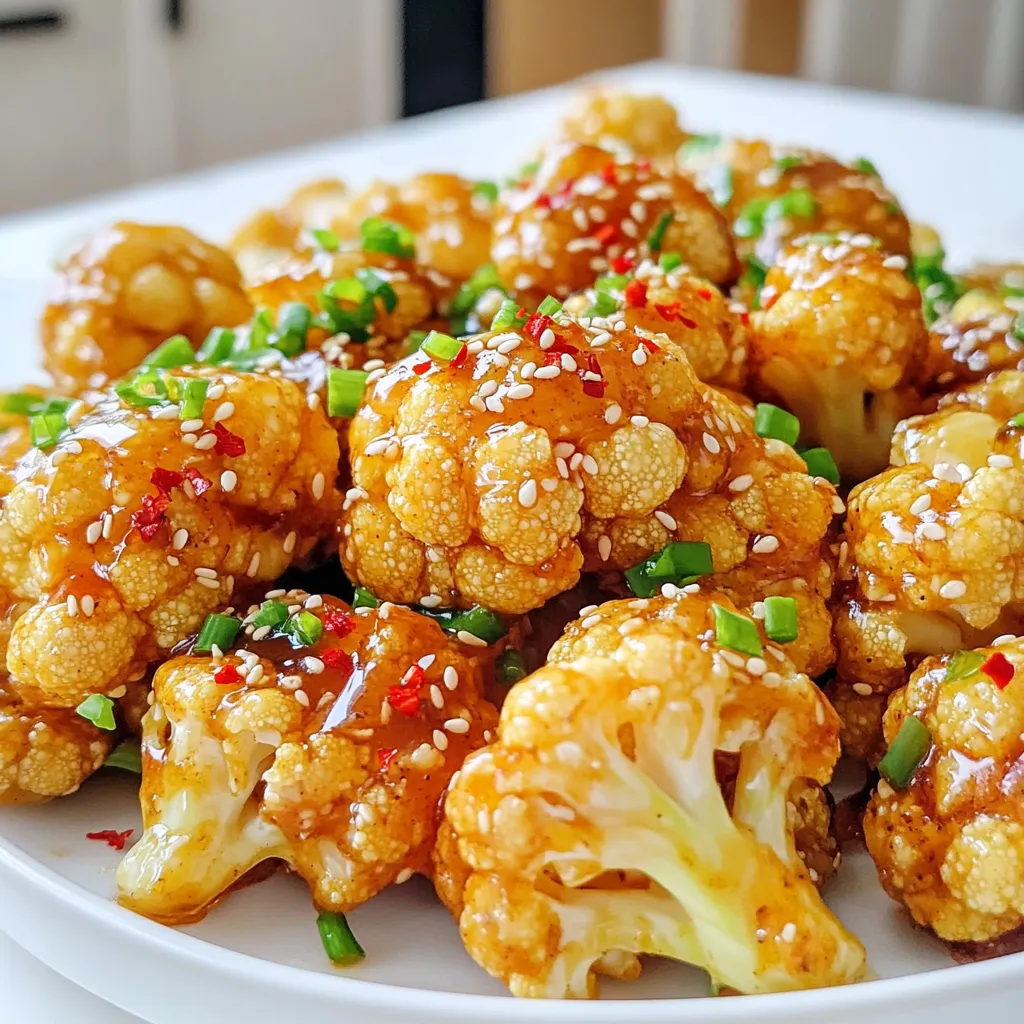
Are you ready to elevate your snack game? In this article, I’ll show you how to whip up Air Fryer

To make Instant Pot Loaded Baked Potato Soup, you need simple, fresh ingredients. Here’s the list: - 4 large russet potatoes, peeled and diced - 1 medium onion, chopped - 3 cloves garlic, minced - 4 cups vegetable broth - 1 cup heavy cream (or coconut cream for dairy-free) - 1 cup shredded cheddar cheese (plus extra for topping) - 4 slices turkey bacon, cooked and crumbled (or tempeh bacon) - 2 green onions, chopped (for garnish) - 1 teaspoon smoked paprika - Salt and pepper to taste - 1 tablespoon olive oil These ingredients come together to create a rich, creamy soup. The russet potatoes give it a great texture, while the cream adds smoothness. You can use coconut cream for a dairy-free option that still tastes amazing. The smoked paprika brings a hint of warmth and depth, making every spoonful delightful. Toppings like bacon and green onions add extra flavor and crunch. This recipe is perfect for a cozy night in or a gathering with friends. Set your Instant Pot to the sauté function. Pour in the olive oil and let it heat. Add the chopped onion and cook until it turns translucent. This takes about 3 to 4 minutes. Then, toss in the minced garlic and sauté for one more minute. This makes the kitchen smell amazing. Now, add the diced russet potatoes to the pot. Pour in the vegetable broth and stir everything together. Make sure to scrape any bits stuck to the bottom. This helps add flavor to your soup. Next, sprinkle in the smoked paprika, salt, and pepper. Give it a good stir to mix everything evenly. This step brings out the deep flavors in the soup. Close the lid of the Instant Pot. Ensure the valve is set to sealing. Set it to high pressure for 12 minutes. This will cook the potatoes to a perfect softness. Once the cooking time is up, let the pressure release naturally for 10 minutes. After that, carefully switch the valve to venting. This releases any remaining steam safely. Open the lid and grab your immersion blender. Blend the soup until it’s smooth and creamy. If you don't have one, you can carefully transfer the soup to a blender. Just be cautious with the hot liquid. Stir in the heavy cream and the shredded cheddar cheese. Mix until it melts and combines well. Taste and adjust the seasoning with more salt and pepper if needed. Ladle the soup into bowls. Top each one with crumbled turkey bacon or tempeh bacon. Add extra shredded cheese and chopped green onions. Enjoy every spoonful of this creamy delight! When making this soup, I love using russet potatoes. They have a creamy texture and absorb flavors well. Russets break down nicely in the Instant Pot, making the soup rich. If you want a different texture, you can try Yukon Gold potatoes. They stay a bit firmer but still taste great. Another option is red potatoes for a colorful twist. For blending, I prefer an immersion blender. It’s easy and keeps my pot clean. Just blend the soup right in the pot. If you use a countertop blender, be careful with hot liquids. Always blend in small batches. Leave the lid slightly open to let steam escape. This keeps the soup from splattering everywhere. To boost the flavor, I recommend adding smoked paprika. It gives the soup a lovely, smoky taste. You can also try adding garlic powder or onion powder for extra depth. For a richer flavor, mix in some chopped chives or fresh herbs like thyme. A squeeze of lemon juice can brighten the soup too. {{image_2}} You can easily adapt this soup for a vegetarian or vegan diet. Instead of turkey bacon, use tempeh bacon. Tempeh adds a nice, smoky flavor. For a creamy base, swap heavy cream for coconut cream. This gives the soup a rich texture. You can also try vegan cheese as a substitute for cheddar. Look for brands that melt well for the best results. Feel free to get creative with add-ins! You can toss in extra vegetables like carrots, corn, or spinach. These add color and nutrients. If you want more protein, consider adding cooked chicken or tofu. Both options blend well with the soup. Just make sure to adjust the cooking time if needed. Want to spice things up? You can easily adjust the seasoning. Add a pinch of red pepper flakes for heat. If you like herbs, try adding fresh thyme or rosemary. These herbs enhance the soup's flavor. Play around with different spices to find your perfect mix. To keep your soup fresh, let it cool first. Transfer the soup into airtight containers. Glass or plastic containers work well. Make sure to leave some space at the top for expansion. Seal the container tightly to prevent air from entering. You can freeze this soup for later use. Pour the cooled soup into freezer-safe containers. Leave some space at the top for expansion. To thaw, move it to the fridge overnight. For quick thawing, place the container in cold water. Reheat frozen soup on the stove or in the microwave. Stir well to ensure even heating. In the refrigerator, your loaded baked potato soup lasts about 3 to 5 days. Check for signs of spoilage before eating. Look for changes in smell, color, or texture. If it smells sour or looks off, it’s best to throw it away. Keeping it stored properly helps maintain its yummy taste! Yes, you can! Use a large pot on the stove. Start by sautéing the onions and garlic in olive oil. Then, add the diced potatoes and broth. Bring it to a boil, then reduce heat and simmer for about 20-25 minutes until the potatoes are soft. Blend the soup as you would in the Instant Pot. To spice things up, add cayenne pepper or crushed red pepper flakes. You can also use spicy cheese or add jalapeños for a kick. Consider using hot sauce as a garnish when serving. For a dairy-free option, use coconut cream. You can also use almond milk or cashew cream, which adds a nice nutty flavor. If you prefer a lighter option, try whole milk or half-and-half. Check that your vegetable broth is gluten-free. Most brands are, but it's good to verify. Use gluten-free bacon or skip it altogether. All other ingredients in this soup are naturally gluten-free. Absolutely! You can try gouda for a smoky flavor or pepper jack for some heat. Cream cheese adds extra creaminess, while mozzarella gives a stretchy texture. Choose your favorite cheese for a personal touch! This soup is easy to make with a few simple ingredients. Start with potatoes, onion, and garlic for flavor. Use the Instant Pot and blend everything for a smooth result. Remember, you can change the recipe with different meats or creams. Store leftovers well and enjoy them later. This dish is warm, filling, and perfect for any meal. Try it today and see how it fits your taste!

Instant Pot Loaded Baked Potato Soup Creamy Delight

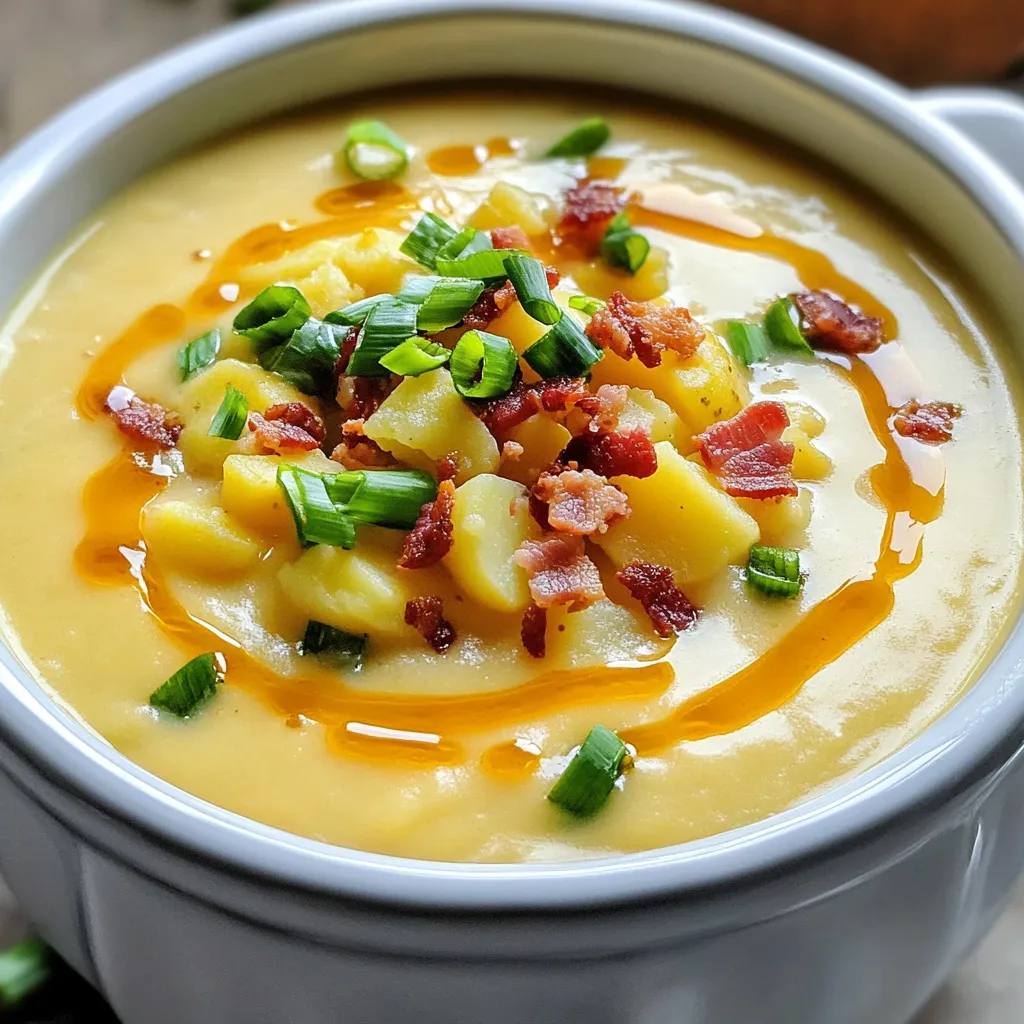
Looking for a comforting bowl of soup that’s quick and easy? Try my Instant Pot Loaded Baked Potato Soup! Just

- 2 cups all-purpose flour - 1 tablespoon baking powder - 1 teaspoon salt - 1/2 teaspoon garlic powder - 1/2 teaspoon onion powder - 1 cup shredded sharp cheddar cheese - 2 tablespoons fresh chives, chopped - 2 tablespoons fresh parsley, chopped - 1 cup buttermilk - 1/4 cup unsalted butter, melted Alternative types of cheese: If you want a twist, try using gouda or pepper jack cheese. They add great flavor and melt well. Fresh vs. dried herbs: Fresh herbs give a bright taste. Dried herbs can work too, but use less since they are more potent. Substituting buttermilk: If you don’t have buttermilk, mix 1 cup of milk with 1 tablespoon of vinegar or lemon juice. Let it sit for 5 minutes. This creates a similar tangy flavor. First, preheat your oven to 425°F (220°C). This step is key for getting nice, fluffy biscuits. While the oven heats, line a baking sheet with parchment paper. This helps prevent the biscuits from sticking and makes cleanup easy. Next, mix your dry ingredients. In a large bowl, combine 2 cups of all-purpose flour, 1 tablespoon of baking powder, 1 teaspoon of salt, 1/2 teaspoon of garlic powder, and 1/2 teaspoon of onion powder. Whisk these together until they blend well. This step makes sure your biscuits rise nicely. Now, let's fold the wet and dry ingredients together. In a separate bowl, mix 1 cup of buttermilk and 1/4 cup of melted unsalted butter. Once combined, pour this into the dry mix. Use a spatula or a wooden spoon to fold the ingredients together gently. Be careful not to overmix; it’s fine if the dough is a little lumpy. Overmixing can make the biscuits tough. For the baking step, scoop the dough using a spoon or an ice cream scoop. Drop heaping tablespoons onto your prepared baking sheet, leaving about 2 inches of space between them. This space helps them rise without sticking together. Bake the biscuits in your preheated oven for about 12 to 15 minutes. Look for a golden-brown color on top. You can check their doneness by inserting a toothpick into the center. If it comes out clean, the biscuits are ready. Once baked, let them cool for a few minutes on the baking sheet before moving them to a wire rack. To make light and fluffy biscuits, start with cold ingredients. Cold butter and buttermilk help create layers in your dough. Mix your dry ingredients well first, then add the cheese and herbs before the wet mix. This step coats the cheese with flour, ensuring it doesn’t sink to the bottom. If you want to enhance flavor, try adding a dash of cayenne pepper for heat or smoked paprika for depth. Both spices pair well with cheddar and herbs. You can also mix in a bit of crumbled bacon for a savory twist. Savory Cheddar Herb Drop Biscuits shine when served warm. They pair well with soups and salads. A bowl of creamy tomato soup or a fresh garden salad makes for a great meal. For a creative presentation, stack the biscuits on a wooden board. Add a small dish of honey or herb-infused butter for spreading. Garnishing with extra chopped herbs on top adds color and freshness. They not only taste great but also look stunning on any table. {{image_2}} You can change up the flavors in these biscuits. Try adding different herbs or spices. For example, rosemary or thyme adds a nice twist. You can even mix in spices like paprika or cayenne for heat. Incorporating vegetables can also be fun. Chopped spinach or sun-dried tomatoes work great here. Just make sure to drain any extra moisture. This keeps your biscuits from getting soggy. If you need gluten-free options, swap the flour with a gluten-free blend. Many blends work well in baking. Just check the package to ensure it’s a 1:1 substitute. For vegan substitutions, use plant-based milk instead of buttermilk. You can replace the butter with a vegan alternative. This keeps the flavor while making it friendly for all diets. To keep your Savory Cheddar Herb Drop Biscuits fresh, store them correctly. Let the biscuits cool completely after baking. Place them in an airtight container. You can refrigerate them for up to 3 days. If you want to store them longer, freezing is a great option. Wrap each biscuit in plastic wrap and place them in a freezer bag. They will last up to 3 months in the freezer. Just remember to label the bag with the date. When it’s time to enjoy your biscuits, reheating them helps restore their taste and texture. The best method is to use the oven. Preheat it to 350°F (175°C). Place the biscuits on a baking sheet and warm them for about 10 minutes. This method keeps them crisp on the outside. If you need a quick option, you can use the microwave. Just heat them for 10-15 seconds. However, this can make them a bit soggy, so try to avoid this method if you can. Enjoy your biscuits warm and fresh! Can I use milk instead of buttermilk? Yes, you can use milk. To make it like buttermilk, add one tablespoon of vinegar or lemon juice to one cup of milk. Let it sit for five minutes before using. This makes a good substitute. What if I don't have fresh herbs? If you lack fresh herbs, dried herbs can work well. Use half the amount. Dried herbs are stronger, so you need less. For a quick option, add a teaspoon of Italian seasoning. Why did my biscuits turn out dense? Dense biscuits often come from overmixing the dough. Mix just until combined. Also, check your baking powder. It should be fresh and active. If it’s old, it won't rise well. How to prevent burning on the bottom? To stop burning, use parchment paper on your baking sheet. It helps to evenly cook the biscuits. If your oven runs hot, check them a minute early. Rotate the tray if your oven has hot spots. Can I use this recipe for a savory breakfast? Absolutely! These biscuits are great for breakfast. Serve them with eggs or as a side to soup. You can even top them with avocado or smoked salmon. Other biscuit recipes you might enjoy Try making sweet biscuits with fruit or spices. There are also recipes for fluffy buttermilk biscuits. Each has its own charm and flavor. Explore different recipes to find your favorite! In this post, we explored the key ingredients for savory cheddar herb drop biscuits. You learned about preparation steps, baking techniques, and tips to achieve the perfect texture. We also discussed variations to suit different diets and how to store and reheat your biscuits for lasting enjoyment. Perfecting these biscuits creates a simple yet delightful treat. Enjoy experimenting with flavors and serving ideas. Happy baking!

Savory Cheddar Herb Drop Biscuits Simple and Tasty

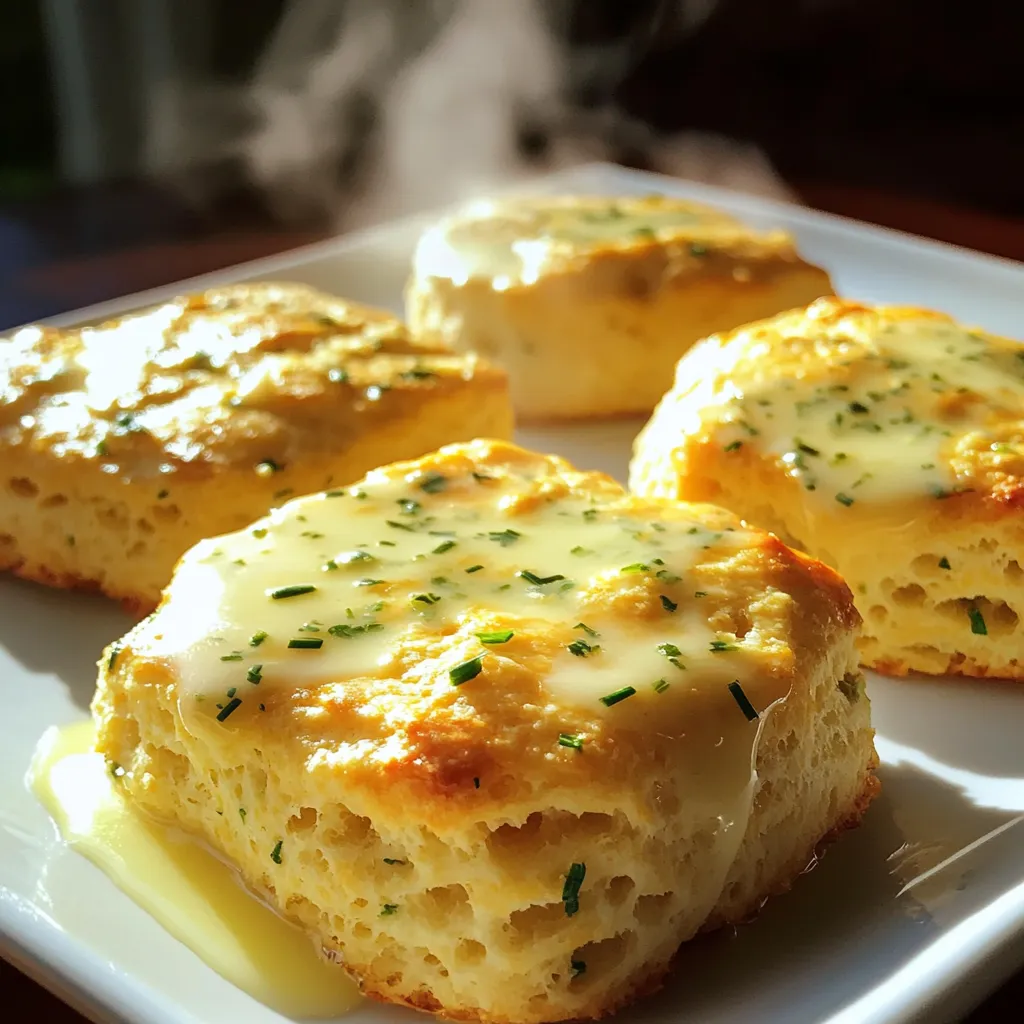
If you crave warm, tasty biscuits, you’re in the right place! My Savory Cheddar Herb Drop Biscuits are simple to

- 2 pounds of baby carrots, trimmed - 1/4 cup pure maple syrup - 1/4 cup brown sugar - 3 tablespoons olive oil - 1 teaspoon cinnamon - 1/2 teaspoon nutmeg - Salt and pepper to taste - Fresh parsley, chopped (for garnish) When choosing baby carrots, look for ones that are bright in color. They should feel firm and smooth. Avoid carrots with soft spots or wrinkles. Fresh carrots taste the best and hold their shape when cooking. Using pure maple syrup is key for this recipe. It adds a rich flavor that mixes well with the brown sugar. Avoid fake syrup; it lacks the depth of real maple. Brown sugar comes in light and dark varieties. Light brown sugar has a milder flavor, while dark brown sugar has more molasses. For this recipe, either works well, but dark brown sugar boosts the sweetness and color. 1. Preheat the oven to 425°F (220°C). This high heat helps caramelize the carrots. 2. In a large bowl, mix together the maple syrup, brown sugar, olive oil, cinnamon, nutmeg, salt, and pepper. Whisk until the sugar dissolves. This creates a sweet glaze for the carrots. 1. Add the trimmed baby carrots to the bowl. Toss them well to coat every carrot in the glaze. 2. Spread the carrots out on a large baking sheet. Make sure they are in a single layer for even roasting. 3. Roast the carrots in the oven for 25-30 minutes. Remember to toss them halfway through. This ensures they cook evenly and get tender. 1. After roasting, take the carrots out of the oven and let them cool for a minute. 2. Transfer the carrots to a serving dish. Garnish with fresh parsley for a pop of color and flavor. Serve these delicious carrots on a rustic platter. Drizzle any leftover glaze from the pan on top for extra sweetness. They make a perfect side for any meal! To get that perfect caramelization, roast your carrots in a single layer. This helps them cook evenly and brown nicely. If you stack them, they will steam instead of roast. The best temperature for roasting is 425°F (220°C). This high heat brings out the natural sugars in the carrots and the sweet glaze. Want to add more flavor? Try adding herbs like thyme or rosemary. A pinch of chili flakes can add heat if you like spice. For sweeteners, you can swap out brown sugar for coconut sugar or honey. Each option gives a different twist to the dish. One common mistake is overcrowding the pan. This leads to uneven cooking and less caramelization. Another mistake is skipping the tossing step. Toss the carrots halfway through cooking to ensure they brown on all sides. This simple step makes a big difference in flavor and texture. {{image_2}} You can switch maple syrup for honey if you want. Honey adds a nice floral taste. You can also use coconut sugar instead of brown sugar. Coconut sugar gives a deeper flavor and is less sweet. It works well with the carrots, too. For a crunchy twist, add walnuts or pecans. They give a nice crunch and extra flavor. Mixing in other vegetables can change things up. Try adding sweet potatoes or parsnips. They roast well and taste great with the sweet glaze. You can make this dish vegan-friendly by using maple syrup and olive oil. Both are plant-based and keep the recipe delicious. For gluten-free options, there’s no need to change anything. All the ingredients are naturally gluten-free, so you can enjoy them worry-free. Store leftover roasted carrots in the fridge. Place them in an airtight container. Make sure the carrots cool before sealing. They will stay fresh for about 3 to 5 days. The best way to reheat roasted carrots is in the oven. Preheat the oven to 350°F (175°C). Spread the carrots on a baking sheet. Heat for about 10 to 15 minutes. This method keeps them crisp. You can also use a microwave. Heat in short bursts to avoid sogginess. Use a covered bowl and add a splash of water. You can freeze roasted carrots for later use. Allow them to cool completely. Place them in a freezer-safe bag. Remove as much air as possible. They can last up to 3 months in the freezer. When ready to eat, thaw in the fridge overnight. For the best texture, reheat in the oven after thawing. Baby carrots are perfect for this dish. They are tender and sweet. Regular carrots can also work, but they need more prep. You must peel and cut them into even pieces. Baby carrots roast quickly and caramelize well. Their small size makes them easy to enjoy. Yes, you can prep these carrots ahead. Wash and trim the baby carrots a day before. Mix the glaze and toss the carrots in it. Store them in the fridge in a covered bowl. When ready, just spread them on a baking sheet and roast. This saves time and makes dinner easier. Roasted carrots can last for about 3 to 5 days in the fridge. Make sure to store them in an airtight container. This keeps them fresh and tasty. If they lose some texture, try reheating them in the oven. This will help bring back some crispness. Roasting baby carrots is simple and rewarding. You learned the right ingredients, like pure maple syrup and brown sugar. I shared preparation steps, roasting tips, and variations. Remember, choose quality ingredients for the best taste. Keeping them in a single layer ensures a perfect roast. Feel free to try different sweeteners and add nuts for crunch. Lastly, store leftovers properly and enjoy them later. Experiment, have fun, and enjoy your delicious roasted carrots!

Brown Sugar Maple Roasted Carrots Irresistible Delight

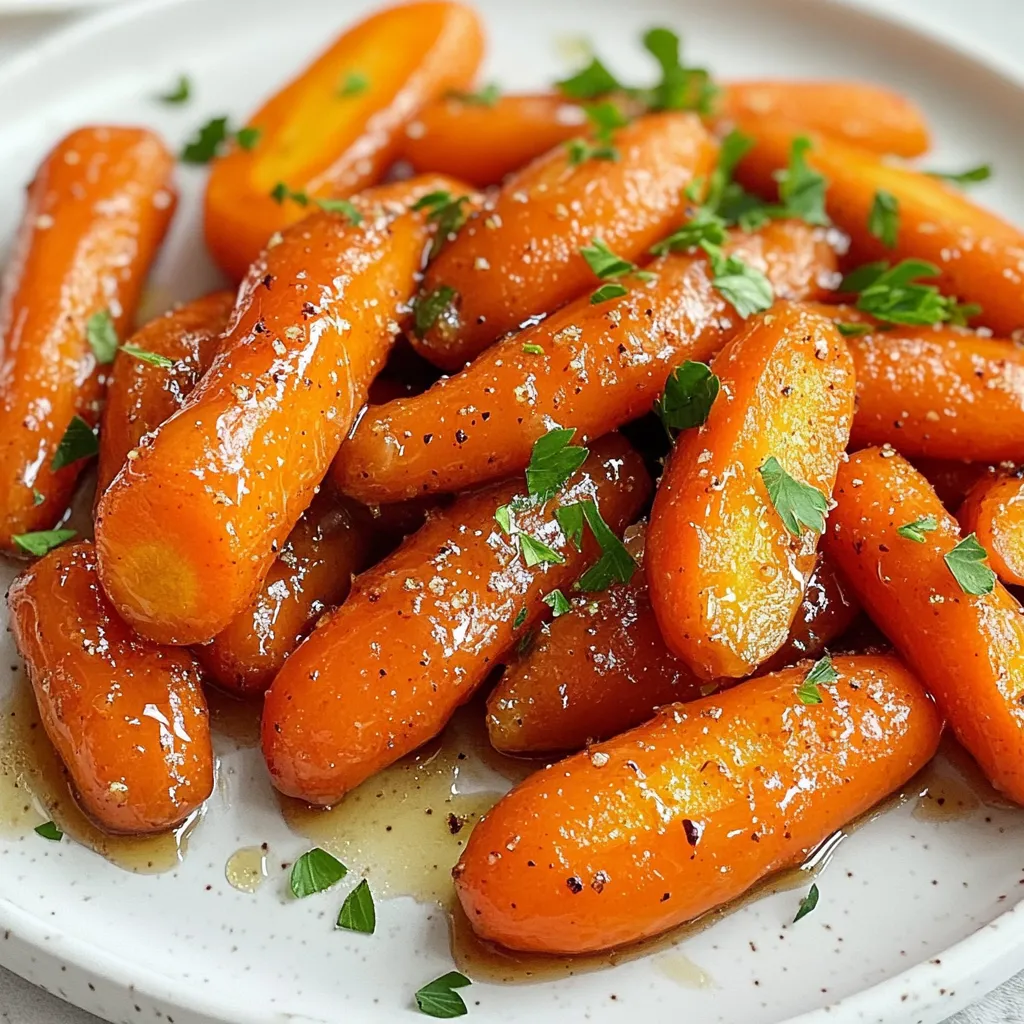
Are you ready to elevate your side dish game? Brown Sugar Maple Roasted Carrots are a sweet and savory delight

- 1 pound Italian sausage (or chicken sausage) - 1 medium onion, finely chopped - 3 cloves garlic, minced - 1 can (14.5 oz) diced tomatoes, undrained - 1 cup chicken broth - 1 cup heavy cream - 8 oz penne pasta, uncooked - 1 cup baby spinach To create a creamy and tasty dish, start with quality ingredients. I love using Italian sausage for its rich flavor. Chicken sausage works well too for a lighter meal. The onion and garlic add depth, while the diced tomatoes give a pop of color and moisture. Chicken broth enhances the taste, making every bite savory. Heavy cream is key for that luscious texture, and the uncooked penne pasta absorbs all the goodness during cooking. - 1 teaspoon Italian seasoning - Salt and pepper to taste - Fresh basil leaves, for garnish - Grated Parmesan cheese, for serving Seasonings make the dish shine. Italian seasoning blends herbs that transport you to Italy. A pinch of salt and pepper balances flavors. Fresh basil offers a burst of freshness on top, while grated Parmesan brings a salty finish. These simple touches elevate your creamy Tuscan sausage pasta to a gourmet level. First, you need to cook the sausage. Heat a skillet over medium-high heat. Add the Italian sausage and break it into pieces. Cook it until it turns brown. Drain any extra fat from the skillet. Then, transfer the cooked sausage to your slow cooker. Next, chop your onion and mince the garlic. Add both to the slow cooker with the sausage. This mix adds great flavor to your dish. Now, grab a can of diced tomatoes and pour it into the slow cooker. Do not drain them; the juice will add to the sauce. Next, add one cup of chicken broth. It helps to keep the pasta moist during cooking. Sprinkle in one teaspoon of Italian seasoning, salt, and pepper. Stir the mixture well to blend all the flavors. Cover the slow cooker and set it to cook. If you choose low, let it go for four hours. If you prefer high, it will be ready in two hours. About 30 minutes before serving, it’s time to add the pasta. Stir in eight ounces of uncooked penne pasta and one cup of heavy cream. Make sure to mix it well. Cover the slow cooker again and continue cooking until the pasta is al dente. Once the pasta is ready, toss in one cup of baby spinach. Stir until the spinach wilts. Taste the dish and adjust the seasoning if needed. Serve the pasta hot. Top it with fresh basil leaves and grated Parmesan cheese for a delightful finish. To boost the taste of your Slow Cooker Creamy Tuscan Sausage Pasta, try adding a pinch of red pepper flakes or a dash of smoked paprika. These spices bring warmth and depth to the dish. Fresh herbs like thyme or oregano can also elevate the flavor. If you want to switch up the sausage, you can use chicken sausage for a lighter meal or even turkey sausage for a leaner option. To get perfect pasta, add it to the slow cooker 30 minutes before serving. Make sure the penne pasta is uncooked when you add it. Stir it gently to prevent sticking. Check the pasta for doneness. It should be tender but still firm, known as al dente. If you prefer a creamier sauce, you can add a bit more heavy cream. For a lighter touch, use half and half instead. Presentation matters! Serve your pasta in shallow bowls. Top each bowl with extra grated Parmesan and a sprig of fresh basil for a pop of color. You can pair this dish with a simple side salad or garlic bread for a full meal. A glass of white wine, like Pinot Grigio, complements the flavors well. Enjoy your delicious creation! {{image_2}} You can easily make this dish vegetarian. Just swap the sausage for a plant-based protein. Options like lentils or chickpeas work great. They add protein and flavor. For extra veggies, consider adding bell peppers, zucchini, or mushrooms. These will give your dish more texture and taste. If you need a gluten-free meal, choose gluten-free pasta instead of penne. Cook it according to the package instructions before adding it to the slow cooker. Note that gluten-free pasta often cooks faster, so check it a bit earlier. This will help keep it from getting mushy. You can switch the heavy cream for a lighter sauce option. Try using half-and-half or even a non-dairy milk. For a tomato-based twist, add more diced tomatoes and skip the cream. This change offers a fresh flavor that is still rich and tasty. To keep your Slow Cooker Creamy Tuscan Sausage Pasta fresh, store it in an airtight container. This method helps lock in flavor and moisture. You can refrigerate it for up to 3 days. Make sure to cool the pasta before sealing it. If you want to save some for later, freezing is a great option. Divide the pasta into portions. Place each portion in a freezer-safe container. You can freeze it for up to 3 months. When you’re ready to eat, take it out and let it thaw overnight in the fridge. When it comes to reheating, you have two main options: microwave or stovetop. For the microwave, place a portion in a bowl and cover it with a lid. Heat it for about 2-3 minutes, stirring halfway through. For stovetop, use a skillet on low heat. Stir often until it's heated through. To keep the texture and flavor, add a splash of broth or cream while reheating. This helps restore the creaminess and avoids dryness. Enjoy your pasta just as delicious as when it was fresh! Yes, you can. For a lighter dish, try using milk or Greek yogurt. Both options add creaminess but keep the calories lower. Another choice is to use cashew cream. Just blend soaked cashews with water until smooth. This gives a nice texture without heavy cream. Adjusting serving sizes is simple. If you need more servings, just double the ingredients. For fewer servings, halve them. Keep the same ratios for flavor. Remember, cooking time may change slightly, especially for the pasta, so check it often. You can use frozen sausage, but it’s best to thaw it first. Cook it in a skillet until browned for even flavor. Then, add it to the slow cooker. If you add it frozen, the cooking time may need to be longer. Always ensure it reaches a safe temperature before serving. In this blog post, I’ve shared how to make a delicious Slow Cooker Creamy Tuscan Sausage Pasta. We covered the main ingredients like sausage, vegetables, and cream. I explained each step, from cooking the sausage to adding pasta. Tips on flavor, storage, and variations are also included. In closing, this dish is simple, tasty, and adaptable. Enjoy making it your own while savoring every bite.

Slow Cooker Creamy Tuscan Sausage Pasta Delight

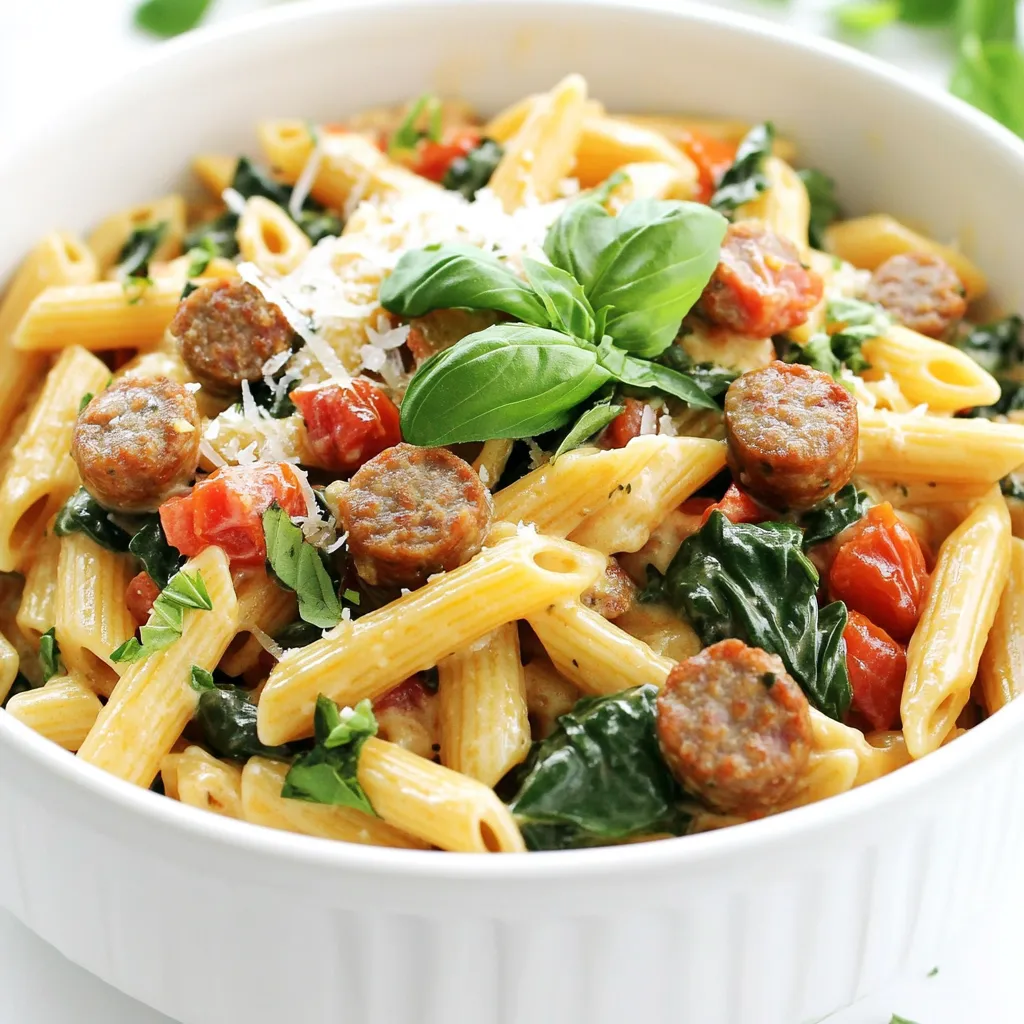
Looking for a warm, filling meal that practically cooks itself? My Slow Cooker Creamy Tuscan Sausage Pasta Delight is just

Older posts
Newer posts
← Previous Page1 … Page5 Page6 Page7 … Page82 Next →

dsad

© 2026 Recipes Pursuit • Built with GeneratePress

Our Policies

  • Copyright Policy
  • Cookie Policy
  • GDPR Policy
  • Privacy Policy
  • Disclaimer
  • Terms Of Use

More Information

  • Home
  • About
  • Contact
  • Appetizers
  • Dessert
  • Dinner
  • Drinks
©2026, Recipes Pursuit About Back To Top