Skip to content
DisclaimerTerms Of UseGDPR PolicyCookie Policy

Recipes Pursuit

  • Home
  • Drinks
  • Appetizers
  • Dinner
  • Dessert
  • About
  • Contact
  • Privacy Policy
DisclaimerTerms Of UseGDPR PolicyCookie Policy

NO-ING-IMG

To make the best spicy chicken lettuce wraps, you need fresh and tasty ingredients. Here’s what you will need: - 1 pound ground chicken - 2 tablespoons soy sauce - 2 teaspoons sesame oil - 1 tablespoon sriracha (adjust to taste) - 1 tablespoon fresh ginger, grated - 2 cloves garlic, minced - 1 red bell pepper, diced - 1 cup carrots, grated - 1 green onion, chopped - 1 tablespoon honey - 1 tablespoon rice vinegar - Salt and pepper to taste - 1 head of butter or romaine lettuce, leaves separated These ingredients provide a perfect mix of flavor and texture. The ground chicken gives protein, while the veggies add crunch and color. You can make your wraps even better with these fun additions: - Chopped cilantro - Lime wedges These garnishes add freshness and a zesty kick to your wraps. You can also try adding sliced jalapeños for more heat or crushed peanuts for crunch. To cook your spicy chicken lettuce wraps, you will need some basic tools. Here’s a quick list: - A large frying pan - A spatula for stirring - Measuring spoons - A cutting board and knife Having these tools ready will help you cook easily and quickly. For the full recipe, check out the [Full Recipe]. To make spicy chicken lettuce wraps, start by heating 2 tablespoons of sesame oil in a pan over medium heat. Once the oil is hot, add 1 pound of ground chicken. Cook it for about 5 to 7 minutes, stirring often. You want the chicken to turn white and no longer be pink. Next, add 2 cloves of minced garlic, 1 tablespoon of grated fresh ginger, and 1 diced red bell pepper. Cook for another 2 to 3 minutes. The peppers should soften but not lose their color. Now, mix the sauce. In a small bowl, whisk together 2 tablespoons of soy sauce, 1 tablespoon of sriracha, 1 tablespoon of honey, and 1 tablespoon of rice vinegar. Pour this sauce over the chicken mixture in the pan. Stir well and let it cook for another 1 to 2 minutes. Season with salt and pepper. Finally, stir in 1 cup of grated carrots and 1 chopped green onion. Heat them for about a minute. Once done, take the pan off the heat. Prepare your lettuce wraps by placing a spoonful of the chicken mix onto each lettuce leaf. Garnish with chopped cilantro and serve with lime wedges. For the full recipe, you can check the details above. To cook quickly, prepare all your ingredients first. Chop the veggies and measure out the sauces. This way, you won't waste time searching for items while cooking. Use a non-stick pan to reduce sticking and make cleanup easier. Keep your heat at medium; this helps cook the chicken evenly without burning anything. You can make these wraps in different ways. A stovetop pan works well, but you can also use a skillet for more surface area. If you prefer, try grilling the chicken in a grill pan for a smoky flavor. You can even bake the chicken mixture in the oven if you want a hands-off approach. Just mix the ingredients in a baking dish and let it cook until done. To make the best spicy chicken lettuce wraps, use fresh ingredients. Fresh herbs and veggies add great flavor. Always cook the chicken until it's no longer pink. This helps avoid any health risks. Stir often to keep everything from sticking. This ensures even cooking and great taste. Make sure to taste as you go. This lets you adjust flavors. If you want more sauce, feel free to add more soy sauce or sriracha. A balance of flavors makes the dish shine. For a lovely crunch, add the carrots last. This keeps them crisp and fresh. Spice levels can change based on your taste. If you love heat, add more sriracha. If you prefer it milder, reduce the sriracha amount. You can also try other sauces, like sweet chili. This can bring a different flavor without too much heat. To really customize your wraps, consider adding sliced jalapeños. They add a nice kick. Another option is to use crushed red pepper flakes. Start small and add more until it suits your taste. One common mistake is overcooking the chicken. If you cook it too long, it can get dry. Always check for doneness but remove it from the heat as soon as it’s done. Don’t forget the seasoning. If you skip salt and pepper, the dish may taste bland. Also, be careful with how you handle the lettuce. If you tear the leaves, they won't hold the filling well. Finally, don't pack the wraps too tightly. This can make them messy to eat. Instead, fill them lightly, allowing room for the flavors to shine. Follow these tips, and you’ll have a delicious meal that is fun to eat! For the complete cooking method, check the Full Recipe. {{image_2}} You can switch the ground chicken for other meats. Ground turkey or beef works well. If you want a different taste, try diced shrimp or pork. Each protein gives a unique flavor to your lettuce wraps. Just adjust the cooking time to make sure it's cooked through. For a vegetarian or vegan option, use mushrooms or tofu instead of chicken. Mushrooms add a nice texture and umami flavor. Tofu absorbs the sauces well and takes on great taste. Press the tofu to remove excess water. Then, crumble or cube it before cooking. This makes it easy to mix into the wrap. Adding different sauces can change the whole dish. Try hoisin sauce for a sweet, savory touch. Peanut sauce can bring a nutty flavor that many enjoy. For a spicy kick, add extra sriracha or chili paste. You can even mix in some lime juice for a zesty twist. Each sauce enhances the dish and makes it fun to try new tastes. For more details, check the Full Recipe to explore all the ingredients and steps. After you enjoy your spicy chicken lettuce wraps, store the leftovers right away. Place them in an airtight container. This keeps the chicken fresh and tasty. You can refrigerate them for up to three days. Make sure to separate the chicken from the lettuce leaves. This helps the lettuce stay crisp. If you want to keep your wraps longer, freezing is a great option. First, let the chicken cool completely. Then, pack it in freezer-safe bags or containers. Try to remove as much air as possible. You can freeze the chicken for up to three months. Just remember, do not freeze the lettuce leaves. They won't taste good after thawing. When you're ready to eat the leftovers, reheating is key. You can use a microwave or stovetop. If using a microwave, place the chicken in a bowl. Heat it for about one to two minutes, stirring halfway. If you use the stovetop, heat a pan over medium heat. Add the chicken and stir until it’s warm, about five minutes. Serve the reheated chicken in fresh lettuce leaves for the best flavor. For extra zest, add lime juice or more sriracha. Enjoy! The best types of lettuce for wraps are butter lettuce and romaine. Butter lettuce has soft, flexible leaves that hold the filling well. Romaine lettuce has a nice crunch and sturdy structure. Both types keep the filling secure and add a fresh taste. Yes, you can prepare spicy chicken lettuce wraps ahead of time. Cook the chicken mixture and store it in the fridge. Just keep the lettuce leaves separate. When you're ready to eat, assemble them fresh. This makes for a quick meal when you're busy. Sides that pair well include rice, steamed veggies, or a simple salad. You could also serve some fresh fruit for a sweet touch. These sides complement the spicy chicken and add variety to your meal. Enjoy your wraps with a cool drink to balance the spice. For the full recipe, check out the ingredients and steps outlined above. Spicy chicken lettuce wraps are easy and fun to make. We explored key ingredients, essential tools, and step-by-step cooking methods. I shared tips to adjust spice levels and avoid common mistakes. You learned about tasty variations and how to store leftovers. These wraps are great for any meal. Try them out, and enjoy your cooking journey!

Spicy Chicken Lettuce Wraps Tasty and Simple Recipe

Ready to spice up your meals? My Spicy Chicken Lettuce Wraps are not just tasty; they’re simple to make! In

For tasty blueberry crumble bars, you need fresh and simple ingredients. Here’s what to gather: - 2 cups fresh blueberries - 1 cup rolled oats - 1 cup all-purpose flour - 1/2 cup brown sugar - 1/2 cup unsalted butter, melted - 1/4 cup honey - 1 teaspoon vanilla extract - 1/2 teaspoon cinnamon - 1/4 teaspoon salt - 1/2 cup chopped nuts (optional) These ingredients come together to create a sweet and satisfying treat. Fresh blueberries add flavor and nutrition. The oats and flour build the right base. Brown sugar gives a warm sweetness. Honey and vanilla add depth. Cinnamon and salt enhance all the flavors. You can also add nuts for a nice crunch. To make it easy, measure each ingredient carefully. Use fresh blueberries for the best taste. You can find these items in any grocery store. For the full recipe, check out the detailed instructions. - Preheat the oven to 350°F (175°C) and grease the baking pan. - In a bowl, mix the rolled oats, flour, brown sugar, cinnamon, and salt. - Add the melted butter, honey, and vanilla to the dry mixture. Stir until it looks crumbly. - Take 2/3 of the crumb mixture and press it into the bottom of the pan. - Spread the fresh blueberries evenly over the base layer. - Sprinkle the remaining crumb mixture on top. If you like nuts, add them now. - Bake in the oven for 30-35 minutes until the top turns golden brown. - Let the bars cool in the pan for 15 minutes before slicing them. For the full recipe, check out the detailed instructions above. Enjoy your baking! - Use fresh versus frozen blueberries: Fresh blueberries give a bright flavor and nice texture. They also hold their shape better when baked. Frozen blueberries can work too, but they might make the bars a bit soggy. If using frozen, do not thaw them before adding. - Adjusting sweetness according to preference: You can make the bars sweeter by adding more honey or brown sugar. If you like it less sweet, cut back on the sugar. Taste the blueberry mixture before baking to find your perfect balance. - Ensure crumb mixture is properly combined: The crumb mixture should be crumbly but not dry. Mix the oats, flour, sugar, and butter well. This creates a great texture. If it feels too dry, add a bit more melted butter. - Serve with whipped cream or ice cream: These bars taste amazing topped with whipped cream or a scoop of ice cream. The coolness balances the warm, sweet blueberries. - Pair with coffee or tea for a delightful snack: Enjoy these bars with a cup of coffee or tea. The flavors complement each other perfectly. They make a great afternoon treat or dessert. For the full recipe, you can refer to the detailed instructions above. {{image_2}} You can easily change the flavor of your blueberry crumble bars. Try substituting blueberries with raspberries or strawberries. Both fruits add a bright color and sweet-tart taste. You can also add spices for extra zest. Consider mixing in nutmeg or lemon zest. These spices can enhance the fruit's natural flavors and make the bars even more delicious. If you want a healthier version, swap all-purpose flour for whole wheat flour. This change boosts fiber and nutrients. Another simple swap is replacing honey with maple syrup or agave. These alternatives can lower the glycemic index, making the bars better for your health. You can enjoy great taste while being mindful of your choices. For the full recipe, check out Blueberry Crumble Bars 🫐. To keep your blueberry crumble bars fresh, store them in an airtight container. This helps prevent them from drying out or absorbing unwanted odors. You can keep them at room temperature for 2 to 3 days. However, for longer freshness, refrigerate them. Just remember to let them cool completely before sealing them up. You can freeze blueberry crumble bars for long-term storage. Cut the bars into squares, then wrap each square in plastic wrap. Place the wrapped bars in a freezer bag or a container. They will stay fresh for up to 3 months. When you want to enjoy them, thaw them in the fridge overnight. For a quick option, you can also thaw them at room temperature for a few hours. This way, you can have a tasty treat ready anytime! For the full recipe, check out the Blueberry Crumble Bars section. Can I make these bars gluten-free? Yes, you can make these bars gluten-free. Use gluten-free oats and a gluten-free flour blend. This way, you keep the yummy texture and taste while making them safe for those with gluten sensitivities. How long do blueberry crumble bars last? Blueberry crumble bars last up to five days when stored in an airtight container. Keep them in a cool, dry place or in the fridge for extra freshness. What can I serve with blueberry crumble bars? I love serving these bars with a dollop of whipped cream or a scoop of vanilla ice cream. You can also pair them with coffee or tea for a cozy snack. Why is my crumble topping too crumbly? If your crumble topping is too crumbly, it might lack moisture. Try adding a bit more melted butter or honey to bind it better. Mix it until it holds together but still feels crumbly. How to fix soggy blueberry bars? If your blueberry bars are soggy, it may be due to too many berries or underbaking. Make sure to measure the blueberries correctly. Bake them longer if needed until the top is golden and firm. You now have a clear path to make delicious blueberry crumble bars. We covered the main ingredients, key steps, and helpful tips. You’ll impress friends and family with this easy recipe. Remember, you can try different fruits or adjust the sweetness. Follow the storage tips to keep them fresh longer. I hope you enjoy every bite of your homemade treat!

Blueberry Crumble Bars Easy and Delicious Recipe

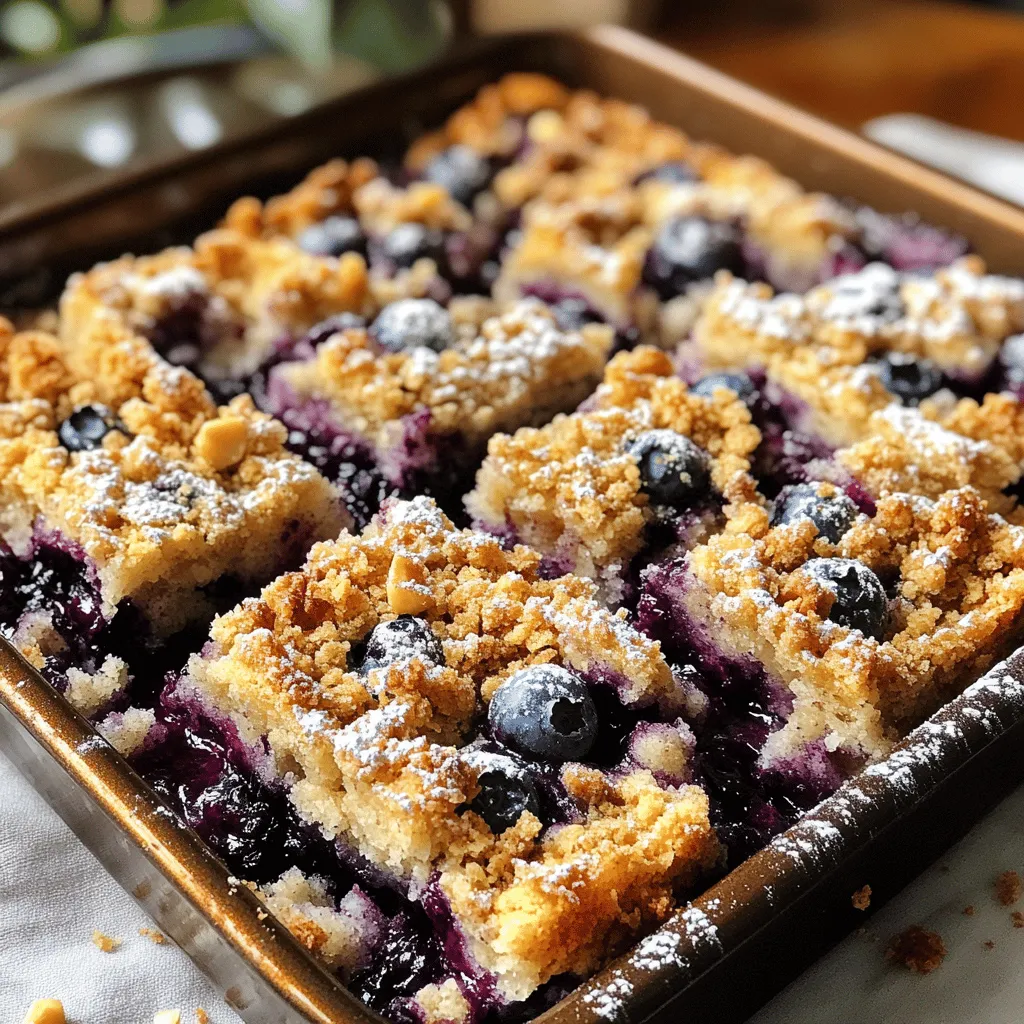
Are you ready to indulge in a treat that’s both easy to make and utterly delicious? Blueberry crumble bars are

- 4 large bell peppers (red, yellow, or orange) - 1 cup quinoa, rinsed - 2 cups vegetable broth - 1 can (15 oz) black beans, drained and rinsed - 1 cup corn kernels (fresh, frozen, or canned) - 1 cup diced tomatoes (fresh or canned) - 1 small red onion, finely chopped - 2 cloves garlic, minced - 1 teaspoon cumin - 1 teaspoon chili powder - 1 teaspoon smoked paprika - Salt and pepper to taste - Fresh cilantro, for garnish - Avocado slices, for serving (optional) When I prepare vegan stuffed peppers, I choose fresh, bright ingredients. The bell peppers give color and sweetness. Quinoa adds protein and a nice texture. Black beans pack in even more protein. You can use fresh corn if you have it, but frozen or canned works well too. Tomatoes add moisture and flavor, while red onion and garlic give a savory kick. Spices like cumin, chili powder, and smoked paprika bring warmth and depth. Salt and pepper enhance all the flavors. I love to finish the dish with fresh cilantro. It adds a pop of freshness. If you enjoy avocado, it makes the meal rich and creamy. For the full recipe, check out the details above. - Calories per serving: About 300 - Macronutrient breakdown: Roughly 10g protein, 50g carbs, 8g fat - Benefits of key ingredients: - Quinoa: High in protein and gluten-free - Black beans: Great source of fiber - Bell peppers: Packed with vitamins A and C These ingredients not only taste good but are also good for you. - Preheating the oven: Start by setting your oven to 375°F (190°C). This temperature helps cook the peppers evenly. - Cutting and de-seeding the peppers: Cut the tops off the bell peppers. Remove the seeds and membranes inside. Place the peppers upright in a baking dish. They need to stand firm for stuffing. - Combining quinoa and vegetable broth: In a medium saucepan, mix 1 cup of rinsed quinoa with 2 cups of vegetable broth. This broth gives the quinoa extra flavor. - Cooking time and texture tips: Bring the mix to a boil. Lower the heat, cover it, and let it simmer for about 15 minutes. The liquid should be gone, leaving fluffy quinoa. - How to combine ingredients in a bowl: In a large bowl, combine the cooked quinoa, black beans, corn, diced tomatoes, red onion, and garlic. Then, add cumin, chili powder, smoked paprika, salt, and pepper. Mix all the ingredients well until they are evenly distributed. - Tasting and adjusting seasonings: Always taste the filling. Adjust the seasonings if needed. You want the flavors to pop and excite your taste buds. For the full recipe, check out the details above. To achieve the perfect texture, choose bell peppers that are firm and shiny. Cut off the tops and remove the seeds. This helps them hold their shape. When baking, steam the peppers in the oven. This gives them a soft inside and keeps them colorful. For timing, I suggest baking them covered for about 25-30 minutes. Then, uncover and bake for an extra 10-15 minutes. This method allows the peppers to cook through while getting a nice char. To boost flavor, try different spices. You can add chili flakes for heat or smoked paprika for depth. A pinch of cinnamon can bring warmth too. Fresh herbs like cilantro or parsley can brighten the dish. Squeeze fresh lime juice over the top for a zesty kick. Garnishing makes your dish pop. Use fresh cilantro to add color. Slices of avocado add creaminess and look great on the plate. For a complete meal, serve with a side salad or some crusty bread. This adds texture and makes your meal more filling. {{image_2}} You can switch up the grains in your stuffed peppers. Brown rice offers a nutty taste. Couscous cooks quickly and adds a fluffy texture. Farro gives a chewy bite and extra nutrients. Each grain brings its own charm to the dish. You can choose any of these to match your taste or what you have at home. Feel free to add more veggies to the filling. Zucchini, mushrooms, or spinach work great. They boost flavor and nutrition. For extra protein, try adding lentils or chickpeas. They mix well with the other ingredients. You can also add some diced tofu for a protein punch. This makes the meal more filling and nutritious. Changing the spices can give your peppers a new life. For a Southwest twist, use cumin, chili powder, and smoked paprika. These spices add warmth and depth. For a Mediterranean flair, try oregano and basil. Both herbs brighten the taste and bring freshness. You can mix and match to find your favorite flavor profile. For the full recipe, check out the vibrant vegan stuffed peppers section above! To store leftover stuffed peppers, wait until they cool down. Place them in an airtight container. This will keep them fresh for you. Glass or plastic containers work well. Make sure they fit the peppers snugly to prevent them from moving around. You can freeze stuffed peppers before or after baking. If you freeze before baking, wrap each pepper tightly in plastic wrap. Place them in a freezer bag. If you freeze after baking, let them cool first. Then, store them in an airtight container. When you're ready to eat, thaw in the fridge overnight. Reheat in the oven at 375°F (190°C) until warm. In the fridge, stuffed peppers last up to four days. If you freeze them, they can last for three months. Watch for signs of spoilage. If the peppers look mushy or smell bad, it’s best to toss them. Always choose safety first when eating leftovers. Vegan stuffed peppers take about one hour to cook. The prep time is about 15 minutes. You will spend about 45 minutes baking them. Yes, you can make these stuffed peppers ahead of time. Prepare them fully and store them in the fridge. When you're ready to eat, just bake them. They reheat well at 375°F for about 20 minutes. You can use brown rice, couscous, or farro instead of quinoa. Brown rice takes about 40-50 minutes to cook. Couscous cooks fast, in just 5 minutes. Farro will take around 30 minutes. Yes, these stuffed peppers can be gluten-free. Use quinoa or brown rice, both are gluten-free. Always check labels on canned goods to ensure no gluten is present. You can use frozen bell peppers for this recipe. Thaw them first, then stuff and bake them. They may take a little longer to cook, so check for tenderness. For the full recipe, check out the complete instructions and details. In this blog post, I shared a tasty recipe for vegan stuffed peppers. You learned about the key ingredients, like quinoa, black beans, and spices. I also provided step-by-step instructions to ensure your success. These stuffed peppers are not just easy; they are healthy too. With tips for flavors and storage, you can enjoy them later. So, gather your ingredients and try making this dish. It’s a fun, tasty way to eat plant-based meals!

Vegan Stuffed Peppers Flavorful and Wholesome Meal

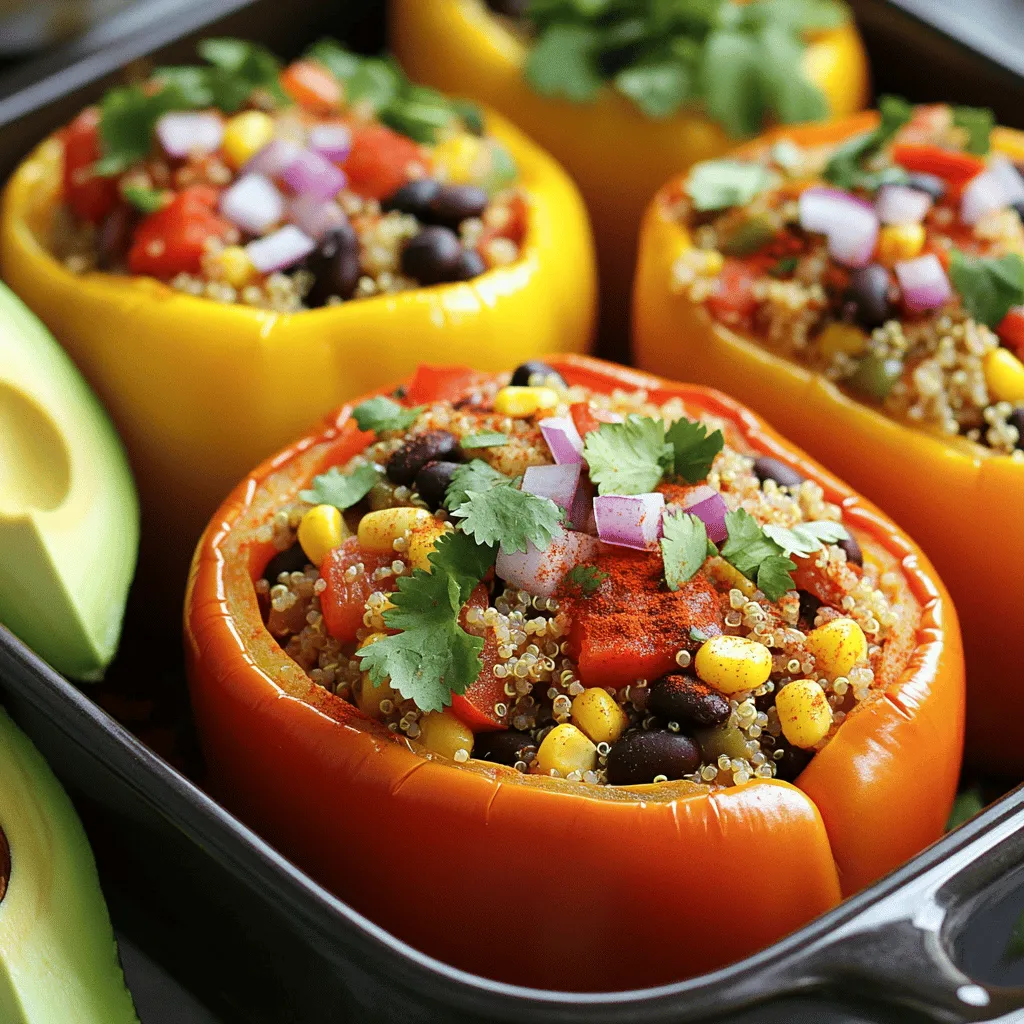
Are you craving a meal that’s both tasty and healthy? Vegan stuffed peppers are the answer! This easy dish combines

To make this Simple Tomato Basil Bruschetta, you need the best fresh ingredients: - 6 ripe Roma tomatoes, diced - 1 cup fresh basil leaves, chopped - 2 cloves garlic, minced These fresh ingredients make the dish vibrant and full of flavor. Roma tomatoes are sweet and meaty, perfect for bruschetta. Fresh basil adds a lovely aroma. Garlic gives a nice kick. You also need a few pantry staples to tie it all together: - 1/4 cup extra virgin olive oil - 1 tablespoon balsamic vinegar - Salt and pepper to taste Extra virgin olive oil adds richness. Balsamic vinegar provides a hint of tang. Salt and pepper balance all the flavors. For those who want to get creative, here are some optional add-ons: - 1 French baguette, sliced into 1-inch pieces - Optional: 1/2 cup shredded mozzarella cheese The baguette gives a nice crunch. If you love cheese, add mozzarella for a creamy twist. You can find the full recipe [here](#). Start by dicing six ripe Roma tomatoes. You want them fresh and juicy for the best taste. Next, chop one cup of fresh basil leaves. Basil adds a sweet, aromatic flavor. Mince two cloves of garlic and add them to the bowl. Pour in a quarter cup of extra virgin olive oil and one tablespoon of balsamic vinegar. Sprinkle in salt and pepper to taste. Mix everything well. Let it sit for about 15 minutes. This wait helps the flavors blend beautifully. Preheat your oven to 400°F (200°C). While it heats, slice your French baguette into one-inch pieces. Arrange these slices on a baking sheet. Brush each piece lightly with olive oil. This step adds flavor and crunch. Once the oven is ready, toast the bread for about 5-7 minutes. You want them golden and crisp. If you like, sprinkle half a cup of shredded mozzarella cheese on the bread before toasting. This gives a cheesy twist. After toasting, take out the bread. Top each slice generously with the tomato and basil mixture. Make sure to add a good amount for the best taste. Serve the bruschetta right away. Enjoy it while the bread is warm. This way, you get the best texture and flavor. For the full recipe, you can check the complete instructions. To make great bruschetta, start with ripe Roma tomatoes. They have firm flesh and fewer seeds. Look for tomatoes that feel heavy for their size. Their skin should be smooth and bright. Avoid tomatoes with bruises or soft spots. Fresh tomatoes make a big difference in taste. Fresh basil is key in this recipe. Always use whole basil leaves when possible. Tear the leaves instead of chopping them. This helps release their oils and flavor. You can add other herbs like oregano or parsley for extra taste. Just remember, fresh herbs make the dish shine. To keep your bread crispy, toast it well. Bake the slices until they are golden brown. This step helps seal the bread and keeps moisture out. Serve the tomato mixture right after topping the bread. If you let it sit too long, the bread will get soggy. Enjoy the perfect crunch with your Simple Tomato Basil Bruschetta! For the complete details, check out the Full Recipe. {{image_2}} You can add cheese to your bruschetta for extra creaminess. I love using mozzarella. It melts nicely when you toast the bread. You can also try feta or goat cheese for a tangy flavor. Just sprinkle the cheese on top of the toasted baguette slices before adding the tomato mix. This adds a rich taste that pairs well with the fresh basil. If you want to make your bruschetta heartier, think about adding protein. Diced grilled chicken works great. You can also use shrimp or crab for a seafood twist. For a veggie option, try chickpeas or black beans. Mix these into your tomato and basil mix. This makes each bite more filling and satisfying. You can customize your bruschetta with spicy or sweet flavors. For heat, add crushed red pepper flakes or jalapeños to your tomato mix. This adds a nice kick. If you prefer sweet, drizzle a little honey or balsamic glaze over the top. This contrast of flavors makes each bite exciting. Get creative and enjoy different tastes! For the full recipe, check out the [Full Recipe]. To store any leftover tomato and basil mix, place it in a clean, airtight container. Make sure to seal it tightly. This way, the mix will stay fresh in the fridge for about three days. The flavors will deepen as it sits, so enjoy it the next day. Just remember to stir it before using. To keep your toasted bread crispy, store it in a paper bag. Avoid plastic bags, as they trap moisture. The paper helps the bread stay crisp. If you need to keep it longer, place the bread in an airtight container. However, it's best to eat it within two days for optimal texture. You can freeze both the mixture and the bread for longer storage. For the tomato mix, scoop it into freezer-safe bags. Remove as much air as possible and seal it tight. It will be good for about three months. For the bread, wrap each slice in plastic wrap, then place in a freezer bag. When ready to use, thaw the bread in the fridge and toast it for a crunchy bite. Yes, you can prepare the tomato mixture ahead of time. Just mix the diced tomatoes, basil, garlic, olive oil, and balsamic vinegar in a bowl. Store it in the fridge for up to six hours. This lets the flavors blend. However, do not toast the bread until you are ready to serve. Toasting ahead will make the bread soggy. The best bread for bruschetta is a French baguette. It has a nice crust and soft inside. You can also try ciabatta or sourdough. These breads hold up well with toppings. Make sure to slice them about one inch thick for the best texture. The tomato mixture lasts about two days in the fridge. It might lose some freshness after that. To keep it tasting great, cover it tightly with plastic wrap or a lid. If you see excess liquid, just drain it before serving again. In this post, we explored how to make simple Tomato Basil Bruschetta. We covered fresh ingredients, pantry staples, and optional add-ons. You learned the step-by-step instructions for preparing the dish and tips for keeping your bread crispy. We also shared variations to make it your own and provided storage tips. This dish is easy to make and perfect for sharing. Use fresh ingredients and enjoy every bite!

Simple Tomato Basil Bruschetta Quick and Tasty Treat

Craving a fresh, light snack that’s easy to whip up? Let me introduce you to Simple Tomato Basil Bruschetta! This

- 4 boneless, skinless chicken breasts - 1 cup grated Parmesan cheese - 1 cup breadcrumbs (preferably Panko for extra crunch) - 1 teaspoon garlic powder - 1 teaspoon dried Italian herbs (oregano, basil, thyme) - 1/2 teaspoon salt - 1/2 teaspoon black pepper - 2 large eggs, beaten - 2 tablespoons olive oil For this baked Parmesan crusted chicken, the main ingredients are simple yet flavorful. The chicken breasts are the star of the dish, providing lean protein. Parmesan cheese gives a rich taste and a nice, crispy texture. I prefer using Panko breadcrumbs for a crunchier crust. Garlic powder and Italian herbs add depth and aroma to the dish. - Fresh parsley - Additional cheese variations For garnishes, fresh parsley adds a pop of color and a hint of freshness. You can also mix in different cheese types, like mozzarella or cheddar, to switch up the flavor. These options let you personalize the dish to your taste. Remember, the more you play with these ingredients, the more fun it gets. You can find the full recipe to dive deeper into the cooking process. Preheating the Oven Start by preheating your oven to 400°F (200°C). This step is key for crispiness. A hot oven helps the crust turn golden brown. Preparing the Baking Sheet Next, line a baking sheet with parchment paper. This makes for easy cleanup. It also helps prevent the chicken from sticking, which is always a win. Egg Dipping Process In a shallow bowl, beat two large eggs. This mixture will help the crust stick. Dip each chicken breast into the egg, making sure it is fully coated. Let any extra egg drip off. Crust Mixture Application In another bowl, mix Parmesan cheese, breadcrumbs, garlic powder, Italian herbs, salt, and black pepper. Press the egg-coated chicken into this mixture. Ensure both sides are coated well. The more you press, the better it sticks. Cooking Time Place the coated chicken breasts on the baking sheet. Drizzle olive oil over the top for added flavor. Bake for 25-30 minutes. Checking Internal Temperature Use a meat thermometer to check the chicken. It should reach 165°F (75°C) for safe eating. Once cooked, let the chicken rest for a few minutes before serving. Garnish with fresh parsley for a nice touch. For the full recipe, look for the detailed instructions above. Choosing the right breadcrumbs is key. I like using Panko. Panko gives a light, crunchy texture. Regular breadcrumbs may work, but they don’t have the same bite. Always look for unseasoned types. This allows your chicken's flavor to shine. For a crunchier coating, try these tips: - Double Coat: Dip the chicken in egg, then breadcrumbs. Repeat for an extra layer. - Oil Drizzle: Olive oil helps the crust brown and stay crunchy. - Hot Oven: A preheated oven at 400°F works best for crispiness. Adding spices and herbs can change the game. I love garlic powder and Italian herbs. They add great depth to the chicken. You can also try paprika for a smoky kick. Experimenting with cheese types can also be fun. While Parmesan is classic, mixing in some mozzarella brings a melty texture. You could even use sharp cheddar for a bolder flavor. Enjoy trying new cheese blends to find your favorite! {{image_2}} You can easily swap ingredients to fit your taste. - Chicken Thighs or Tenders: You can use chicken thighs or tenders instead of breasts. Thighs will stay juicy, while tenders cook faster. Both options taste great with the crust. - Gluten-Free Breadcrumbs: If you need a gluten-free option, use gluten-free breadcrumbs. They still give a nice crunch and flavor. Just check the label to ensure they fit your diet. Changing flavors can make this dish new and fun. - Southwest Style with Chili Powder: Add some chili powder to the crust for a spicy kick. This twist gives the chicken a warm, smoky flavor that pairs well with salsa. - Italian Style with Sundried Tomatoes: Chop sundried tomatoes and mix them into the crust. This adds a tangy, rich flavor that enhances the Italian herbs. It’s a simple way to make the dish feel gourmet. These variations make Baked Parmesan Crusted Chicken even more exciting. You can always explore new tastes while keeping the base recipe intact. For the full recipe, check out the details above. How do I store leftovers? Store your Baked Parmesan Crusted Chicken in an airtight container. This keeps it fresh. Let it cool down before placing it in the fridge. What is the recommended shelf life? You can keep it in the fridge for up to four days. After that, the quality may drop. Can I freeze uncooked vs. cooked chicken? Yes, you can freeze both. For uncooked chicken, wrap it tightly in plastic wrap. This prevents freezer burn. For cooked chicken, place it in a container or freezer bag. What are the reheating tips for best results? When reheating, use the oven for a crispy crust. Preheat your oven to 350°F (175°C). Bake for about 15-20 minutes. Check that it reaches an internal temperature of 165°F (75°C) before serving. You can find the full recipe [here](#). Baked Parmesan Crusted Chicken takes about 25 to 30 minutes to cook. Preheat your oven to 400°F (200°C) before baking. This time ensures that the chicken cooks through and the crust turns golden brown. Always check that the internal temperature reaches 165°F (75°C) for safety. Yes, you can prepare this dish ahead of time. You can coat the chicken and store it in the fridge for a few hours. This makes it easy to pop in the oven when you need to serve a meal. If you want to freeze it, do so before baking. Just remember to thaw it in the fridge overnight before cooking. You have many tasty options to serve with this dish. Here are some ideas: - Steamed broccoli or green beans - Mashed potatoes or rice - A fresh garden salad - Roasted vegetables These sides add color and flavor to your meal. You can find the full recipe for Baked Parmesan Crusted Chicken [here](Full Recipe). This link provides step-by-step instructions and detailed information on how to make this dish perfectly every time. Baked Parmesan Crusted Chicken is simple and delicious. You need a few key ingredients, like boneless chicken, cheese, and breadcrumbs. Follow the steps to coat and bake the chicken for perfect results. Use my tips for a great crust and try different flavors and swaps to make it your own. Store leftovers properly to enjoy later. You can make it ahead and pair it with tasty sides. This dish is a hit and easy to prepare. I hope you enjoy making it!

Baked Parmesan Crusted Chicken Simple and Tasty Meal

Are you looking for a quick and tasty meal? Look no further! Baked Parmesan Crusted Chicken is simple to make

To make Easy Shrimp Fried Rice, you need the following ingredients: - 2 cups cooked jasmine rice (preferably chilled) - 1/2 lb shrimp, peeled and deveined - 2 tablespoons sesame oil - 1 cup mixed bell peppers, diced (red, yellow, green) - 1/2 cup green peas (fresh or frozen) - 3 green onions, chopped - 2 cloves garlic, minced - 2 tablespoons soy sauce (low sodium recommended) - 1 tablespoon oyster sauce (optional) - 1 large egg, lightly beaten - Salt and pepper to taste - Fresh cilantro, for garnish These ingredients come together to create a bright and flavorful dish. The jasmine rice adds a lovely aroma. The shrimp gives a nice protein boost, and the vegetables add color. You can customize your fried rice. Here are some ideas: - Swap shrimp for chicken, tofu, or beef. - Use leftover rice for a quick meal. - Add broccoli, carrots, or snap peas for more crunch. - Try different sauces like teriyaki or chili garlic for a twist. Feel free to mix and match based on what you have in your pantry! When buying shrimp, look for these signs: - Choose shrimp with a mild ocean smell. - The shells should be shiny and firm. - Avoid shrimp with black spots or discoloration. - If possible, buy shrimp that is wild-caught. Fresh shrimp makes a big difference in taste. Always ask your fishmonger for advice if you're unsure. For the best results, use the full recipe for Easy Shrimp Fried Rice. First, gather all your ingredients. This makes cooking easy and fun. You need: - 2 cups cooked jasmine rice (preferably chilled) - 1/2 lb shrimp, peeled and deveined - 2 tablespoons sesame oil - 1 cup mixed bell peppers, diced (red, yellow, green) - 1/2 cup green peas (fresh or frozen) - 3 green onions, chopped - 2 cloves garlic, minced - 2 tablespoons soy sauce (low sodium recommended) - 1 tablespoon oyster sauce (optional) - 1 large egg, lightly beaten - Salt and pepper to taste - Fresh cilantro, for garnish Make sure to use cold rice. Cold rice fries better and stays separate. Heat 1 tablespoon of sesame oil in a large skillet or wok over medium-high heat. Once hot, add the shrimp. Cook until the shrimp turns pink and opaque, about 2-3 minutes. Remove the shrimp and set them aside. In the same skillet, add the other tablespoon of sesame oil. Toss in the minced garlic. Sauté it for about 30 seconds until it smells great. Next, add the diced bell peppers. Cook for 2-3 minutes until they soften. Stir in the green peas and cook for one more minute. Push the veggies to one side of the skillet. Pour the beaten egg on the empty side. Scramble the egg until it is fully cooked, then mix it with the veggies. Add the cold rice to the skillet. Break any clumps apart. Pour the soy sauce and oyster sauce (if you chose to use it) over the rice. Mix everything well. Season with salt and pepper to taste. Finally, add the cooked shrimp and chopped green onions. Stir gently until all is heated through, about 2-3 minutes. Remove the skillet from heat. Garnish your dish with freshly chopped cilantro. This adds color and flavor, making it look great! Serve your easy shrimp fried rice hot. It’s a quick and tasty meal you can enjoy any time. For the full recipe, check the details above. Using the right rice makes a big difference. I recommend jasmine rice for its fluffy texture and aroma. Always cook rice a day ahead and chill it. Chilled rice holds up better when frying. If you don’t have time, spread hot rice on a tray to cool it fast. Seasoning adds life to your shrimp fried rice. Soy sauce is a must. It brings saltiness and umami. Adding oyster sauce gives a nice depth. Don’t forget garlic! It adds a punch of flavor. A dash of sesame oil at the end boosts the taste even more. One common mistake is using fresh rice. Fresh rice clumps together and gets mushy. Another mistake is crowding the pan. Let your ingredients breathe to fry well. Lastly, don’t forget to taste as you cook. Adjust salt and pepper based on your preference. For the full recipe, check out the details above and enjoy your cooking! {{image_2}} You can swap shrimp for chicken, tofu, or even egg. Each option gives a new taste. Chicken works well if you prefer meat. Tofu is a great choice for a veggie meal. Just make sure to cook them fully before adding to the rice. You can add more veggies to boost nutrition. Try carrots, broccoli, or snap peas. They add color and crunch. Chopped spinach or kale works too. Just remember to cook them until tender. This makes the dish more fun and healthy. If you like heat, add chili sauce or sriracha. A dash of red pepper flakes can also spice things up. For a smoky flavor, use smoked paprika. These small changes can really wake up your taste buds. Experiment and find what you love! After you make your shrimp fried rice, you may have some left. Store the rice in an airtight container. This keeps it fresh. You can keep it in the fridge for about 3 to 4 days. Make sure it cools down first before putting it away. This helps prevent moisture buildup. To reheat your fried rice, use a skillet or a microwave. If using a skillet, add a splash of water. This helps steam the rice. Heat it on medium until it’s hot. If you use a microwave, cover it with a damp paper towel. This keeps the rice from drying out. Heat it in short bursts, stirring in between. If you want to keep your shrimp fried rice longer, freezing is a great option. Cool the rice completely before freezing. Use a freezer-safe container or bag. Remove as much air as possible. This prevents freezer burn. You can freeze it for up to 3 months. When you’re ready to eat, thaw it in the fridge overnight. Then, reheat as mentioned above. Enjoy your meal anytime! Yes, you can use frozen shrimp. Just thaw them first. Place frozen shrimp in cold water for about 15-20 minutes. This helps them cook evenly. Make sure to pat them dry before cooking. Thawed shrimp work well and save time. The best rice for fried rice is jasmine rice. It has a nice texture and flavor. Use cooked rice that is chilled. This keeps the grains separate. Day-old rice is even better since it dries out a bit. If you don't have jasmine rice, you can use long-grain rice. To prevent mushy rice, follow a few steps. First, use cold, cooked rice. Second, avoid overcooking the rice when frying. Stir gently to keep the grains intact. Lastly, don’t add too much liquid. Keeping these tips in mind helps achieve the perfect fried rice. You can find the full recipe for easy shrimp fried rice [here](#). The steps are simple and the dish is tasty. Enjoy making this delicious meal! In this post, we explored how to make easy shrimp fried rice. We looked at essential ingredients and tips for picking fresh shrimp. You learned step-by-step cooking methods and final touches to enhance your dish. We discussed common mistakes and ways to add flavor. Finally, storage tips helped keep your rice fresh. Remember, cooking is fun and creative. Experiment with flavors, ingredients, and techniques. Enjoy your shrimp fried rice journey!

Easy Shrimp Fried Rice Quick and Tasty Recipe

If you’re craving a quick and tasty meal, you’re in the right place! This Easy Shrimp Fried Rice recipe is

To make these tasty Lemon Blueberry Breakfast Bars, you need some simple ingredients. Here’s the complete list for you: - 1 ½ cups rolled oats - ½ cup almond flour - ½ cup honey or maple syrup - 1/3 cup coconut oil, melted - 1 cup fresh blueberries - Zest of 1 lemon - 2 tablespoons fresh lemon juice - 1 teaspoon baking powder - ½ teaspoon vanilla extract - Pinch of salt These ingredients work together to create a sweet and tangy flavor. The oats and almond flour give a nice texture. Honey or maple syrup adds sweetness, while coconut oil keeps the bars moist. Fresh blueberries burst with flavor in every bite. Lemon zest and juice bring a bright taste that wakes up your senses. When choosing your blueberries, opt for fresh ones if you can. They add the best flavor and texture. If you want to switch things up, maple syrup works great instead of honey. You can find the full recipe for these delicious bars in the recipe section. Enjoy making this easy breakfast treat! 1. First, preheat your oven to 350°F (175°C). This helps ensure even baking. 2. Line an 8x8 inch baking dish with parchment paper. Leave some overhang, so you can lift the bars out later. 3. In a large mixing bowl, add 1 ½ cups rolled oats, ½ cup almond flour, 1 teaspoon baking powder, and a pinch of salt. Mix these dry ingredients until they are well combined. 1. In another bowl, whisk together 1/3 cup melted coconut oil and ½ cup honey (or maple syrup). 2. Add the zest of 1 lemon, 2 tablespoons fresh lemon juice, and ½ teaspoon vanilla extract. Mix until it is smooth and well blended. 1. Pour the wet mix into the dry ingredients. Stir until all the ingredients are combined. 2. Carefully fold in 1 cup of fresh blueberries. Be gentle to keep them whole. 3. Spread the mixture evenly in the prepared baking dish. Press it down firmly to create a nice shape. 4. Bake for 25-30 minutes. Check for doneness by making sure the edges are golden brown and the center feels firm. 5. Let the bars cool completely in the dish. Use the parchment overhang to lift them out. Cut into squares or rectangles. For the full recipe, check out the complete details. Enjoy your delicious Lemon Blueberry Breakfast Bars! To get the right texture, use rolled oats and almond flour. They create a chewy yet soft bar. Make sure your coconut oil is melted but not too hot. If it's too hot, it can cook the eggs or change the texture. Check for doneness by looking at the edges. They should turn golden brown. You can also gently press the center; it should feel firm. If it leaves a mark, it needs more time. To boost flavors, try adding a pinch of cinnamon or nutmeg. These spices give the bars a warm taste. You can also add chopped nuts like walnuts or almonds. They add crunch and pair well with blueberries. When serving, place the bars on a wooden board or a nice plate. Drizzle some honey over them for extra sweetness. A sprinkle of lemon zest on top adds color and flavor. Enjoy them with tea or coffee for a delightful start to your day. {{image_2}} If you want to switch things up, try different flours. Instead of almond flour, you can use whole wheat flour or oat flour. Both work well and keep the bars tasty. For sweeteners, honey is great, but maple syrup or agave nectar can also work. These swaps let you customize the flavor and sweetness to your liking. You can also change the fruit. In summer, use fresh strawberries or peaches. In fall, swap in chopped apples or pears. Each fruit brings its own sweet and juicy charm to the bars. To make these bars gluten-free, use certified gluten-free oats. Look for brands that ensure no cross-contamination with gluten products. You can also substitute almond flour with a gluten-free blend. These changes keep the bars safe for those with gluten sensitivities while still being delicious. For a vegan version, replace honey with maple syrup or agave nectar. This keeps the bars sweet while staying plant-based. You can also swap the coconut oil for a vegan butter or more plant-based oil. These small changes help you enjoy the bars without animal products. Enjoy your flavorful lemon blueberry breakfast bars, no matter your diet! For the full recipe, be sure to check out the details above! To keep your lemon blueberry breakfast bars fresh, store them in an airtight container. This helps maintain their soft texture and flavor. I suggest using a glass or plastic container. Line the bottom with parchment paper to avoid sticking. You can also wrap the bars in plastic wrap before placing them in the container for extra protection. If you want to enjoy these bars later, freezing is a great option! First, let the bars cool completely. Then, cut them into squares. Wrap each square tightly in plastic wrap. Place the wrapped bars in a freezer-safe bag or container. When you’re ready to eat, thaw them in the fridge overnight or on the counter for a few hours. In the fridge, these bars last about one week. If you freeze them, they can stay fresh for up to three months. Just remember to label the container with the date. This way, you know when to enjoy them at their best. Following these steps will keep your lemon blueberry breakfast bars delicious and ready to eat! For the complete recipe, check out the Full Recipe. What can I substitute for coconut oil? You can use butter or vegetable oil instead of coconut oil. Both work well in this recipe. Butter adds a rich flavor, while vegetable oil keeps it light. Just melt them before mixing with the other wet ingredients. Can I use frozen blueberries instead of fresh? Yes, frozen blueberries are a great option. They save time and still taste good. Just add them directly from the freezer. Be careful not to overmix, or the batter may turn blue. How can I make these breakfast bars healthier? You can replace honey with a sugar-free sweetener. You can also add nuts or seeds for extra protein. Using whole grain oats adds more fiber and nutrients. What is the best way to cut and serve these bars? Let the bars cool completely before cutting. Use a sharp knife for clean edges. Serve them on a plate, or wrap them for a snack on the go. For a fancy touch, drizzle some honey and sprinkle lemon zest on top. For the full recipe, check out the details above. These Lemon Blueberry Breakfast Bars are simple and tasty. We covered their ingredients, step-by-step instructions, and helpful tips. You can mix up flavors and adapt for diets, too. In the end, these bars are easy to make and great for any meal. Store them well and enjoy them fresh. Try making them and see how much you like them. You’ll be glad you did!

Lemon Blueberry Breakfast Bars Easy and Delicious Treat

Start your day with a burst of flavor! These Lemon Blueberry Breakfast Bars are easy to make and delicious. Packed

- 1 can (15 oz) black beans, drained and rinsed - 1 cup corn kernels (fresh, frozen, or canned) - 1 cup shredded pepper jack cheese - 1/2 cup diced red bell pepper - 1 small red onion, finely chopped - 2 tablespoons olive oil - 1 teaspoon cumin - 1 teaspoon chili powder - 1/2 teaspoon garlic powder For my Spicy Black Bean Quesadillas, I start with black beans. They add protein and a nice texture. Next, I use corn. It gives a sweet crunch that blends well. Shredded pepper jack cheese makes everything creamy and adds a kick. I also like to add diced red bell pepper. It gives color and a slight sweetness. Finely chopped red onion boosts the flavor with its sharpness. A bit of olive oil helps cook these ingredients just right. For spices, I always use cumin. It has a warm, earthy taste. Chili powder adds a punch of heat. Lastly, garlic powder brings another layer of flavor that makes the quesadillas tasty. This simple list of ingredients makes for a rich, flavorful dish. You can find the [Full Recipe] for all the steps! To start, let’s sauté the vegetables. Heat 1 tablespoon of olive oil in a skillet over medium heat. Add the chopped red onion and diced red bell pepper. Cook these for about 3 to 4 minutes. You want them soft but not mushy. Next, mix in the beans and spices. Stir in the black beans and corn. Then, add cumin, chili powder, garlic powder, salt, and pepper. Let this cook for another 2 to 3 minutes. You want everything heated and well combined. Take the skillet off the heat and stir in half of the shredded cheese. This makes the filling creamy and tasty. Now, let’s cook the quesadillas. Place a large skillet or griddle over medium heat. Add 1 tablespoon of olive oil. Take a tortilla and place it in the skillet. Spread a quarter of the black bean mixture on one half. Top it with some of the remaining cheese. Next, fold the tortilla over the filling. Cook for about 3 to 4 minutes on each side. You want it golden brown and the cheese melted. Repeat this with the other tortillas and filling. Once cooked, take them out of the skillet and let them rest for a minute. Then, slice them into wedges. For serving, garnish the quesadillas with fresh cilantro. This adds color and flavor. Pair them with a small bowl of sour cream or Greek yogurt. These dips cool down the spice and add creaminess. Enjoy these quesadillas warm for the best taste. Check the Full Recipe for more details! To get your quesadilla golden brown, heat your skillet well. Use medium heat to avoid burning. A non-stick skillet works best for easy flipping. When melting cheese, use a lid. This traps heat and helps the cheese melt faster. You can also lower the heat a bit. This way, the outside cooks well while the cheese melts perfectly. For extra spice, add cayenne pepper or jalapeños to your mix. You can also try smoked paprika for a rich flavor. Toppings make your meal fun! Try fresh avocado slices, diced tomatoes, or pickled onions. A drizzle of hot sauce adds a nice kick too. A cast-iron skillet is my favorite for making quesadillas. It heats evenly and gives a nice crust. If you're cooking for a crowd, use a griddle. It can hold multiple quesadillas at once. This saves time and keeps everyone happy! For the full recipe, check out the recipe section above. {{image_2}} You can easily make your spicy black bean quesadillas more colorful and tasty. Adding more vegetables is a fun way to boost flavor and nutrition. Try adding spinach, zucchini, or mushrooms. They add great texture and taste. You can also substitute cheese options. If you want a lighter version, use reduced-fat cheese. If you’re feeling adventurous, try feta or goat cheese. These cheeses give a unique taste twist. For those who crave more protein, grilled chicken or shrimp works well. Simply cook them first and slice them thin. Then mix them into the black bean filling. This makes the quesadillas heartier. Tofu is a great vegan option. Cube the tofu and sauté it until golden. It soaks up the spices and adds a nice texture. You’ll end up with a delicious, plant-based meal. Switching cheeses can change the flavor profile of your quesadillas. Swap pepper jack for cheddar or mozzarella for a milder taste. Each cheese melts differently, so experiment to find your favorite. If you need dairy-free options, plenty are available. Use almond or cashew cheese to keep it creamy. These alternatives melt well and can make your quesadillas just as delightful. For the full recipe, check out the details and get cooking! To store leftover quesadillas, let them cool first. Then, wrap each quesadilla in foil or plastic wrap. Place them in an airtight container or a resealable bag. This keeps them fresh. They will last in the fridge for about 3 to 4 days. You can freeze quesadillas before or after cooking. If freezing before cooking, wrap them tightly in plastic wrap. Place them in a freezer bag and remove as much air as possible. For cooked quesadillas, let them cool completely before wrapping. To thaw, place them in the fridge overnight. If you need them fast, microwave them for a few minutes. Reheating in the oven or skillet works well. For the oven, preheat it to 350°F (175°C). Place the quesadillas on a baking sheet and heat for about 10 minutes. For the skillet, heat it over medium heat. Cook each quesadilla for about 3 to 4 minutes per side. To keep them crispy, avoid covering them while reheating. To make Spicy Black Bean Quesadillas, follow these simple steps: 1. Heat olive oil in a skillet. 2. Sauté red onion and bell pepper until soft. 3. Add black beans, corn, and spices. Cook until warm. 4. Mix in some cheese until it melts slightly. 5. Heat more oil in a skillet. Place a tortilla in it. 6. Spread a quarter of the bean mix on one half of the tortilla. 7. Top with cheese, fold, and cook until golden brown. 8. Slice and serve warm. This process is quick and easy. You can find the full recipe above for detailed instructions. Spicy Black Bean Quesadillas pair well with several sides. Here are some great ideas: - Fresh guacamole adds creaminess and flavor. - A simple salad brings freshness and crunch. - Salsa, either mild or spicy, is a tasty dip. - Rice or quinoa can make it a full meal. - Serve with sour cream or Greek yogurt for cooling. These sides enhance the meal and make it even more enjoyable. Yes, you can make Spicy Black Bean Quesadillas ahead of time. Here’s how: - Prepare the filling and store it in the fridge for up to three days. - Cook the quesadillas when you are ready to eat. - You can also cook them in advance. Store them in the fridge or freezer. - Reheat in an oven or skillet to keep them crisp. This way, you can enjoy delicious quesadillas anytime! You learned how to make spicy black bean quesadillas. We covered key ingredients, like black beans and cheese. I also shared tips on cooking, serving, and storing them. Remember, you can vary the recipe with different spices, proteins, or veggies. Enjoy your cooking time and share these tasty quesadillas with friends. They will love the flavors and textures. Your kitchen adventure just got more exciting!

Spicy Black Bean Quesadillas Flavorful and Easy Recipe

Are you craving a quick meal packed with flavor? Look no further than my Spicy Black Bean Quesadillas! This easy

- 2 cups rolled oats - 2 apples, peeled, cored, and diced - 2 cups almond milk or any milk of choice - 1/2 cup maple syrup - 1 teaspoon vanilla extract - 1 teaspoon cinnamon - 1/2 cup raisins - 1/4 cup chopped walnuts or pecans When I make baked apple pie oatmeal, I love the simple ingredients. You start with rolled oats, which give a great base. Next, I add two apples. They should be peeled, cored, and diced. Granny Smith or Honeycrisp apples work best for their sweet and tart flavor. Then, we need two cups of almond milk or any milk you prefer. For sweetness, I use maple syrup. It adds a rich flavor. Vanilla extract gives a warm note, while cinnamon brings that cozy apple pie taste. If you want to add more texture, consider optional ingredients like raisins or chopped nuts. They add a nice crunch and extra flavor. This recipe is not only tasty but also easy to customize. You can mix and match as you like. For the full recipe, check the details above. Enjoy creating this comforting breakfast delight! - Preheat the oven to 350°F (175°C). - Grease a 9x9-inch baking dish with coconut oil or butter. - In a large mixing bowl, combine the rolled oats, diced apples, almond milk, maple syrup, vanilla extract, cinnamon, nutmeg, and salt. - Mix well until all ingredients blend together. - If using, fold in the raisins and nuts for extra flavor. - Pour the oatmeal mixture into the prepared baking dish. - Spread it evenly so it cooks well. - Bake for 35-40 minutes until golden and firm. - You’ll know it's done when the top looks crisp and the mixture holds together. This simple method turns whole ingredients into a warm, comforting meal. For the full recipe, check the section above. - Add a sprinkle of brown sugar on top before baking for a crispy topping. This little touch makes a big difference in texture. - Use different types of apples for varied sweetness and tartness. Mixing Granny Smith with Honeycrisp gives depth to the flavor. - Serve warm with a drizzle of maple syrup or a scoop of yogurt or ice cream. The warmth of the oatmeal pairs well with cold toppings. - Top with additional apple slices and a sprinkle of cinnamon. This enhances the apple pie taste and makes it look beautiful. - Serve in individual bowls for a cozy breakfast. This personal touch makes it feel special. - Garnish with fresh herbs like mint for a pop of color. Mint adds a fresh taste and makes the dish more inviting. {{image_2}} To make this baked apple pie oatmeal vegan, simply swap almond milk for coconut milk or oat milk. This keeps it creamy while staying plant-based. For those who need gluten-free options, use gluten-free oats instead of regular oats. This way, everyone can enjoy this delightful dish. Want to change up the taste? Try adding pumpkin spice for a cozy fall flavor. If you're in the mood for something sweet and rich, mix in cacao powder or sprinkle chocolate chips throughout the oatmeal. These small tweaks can give your breakfast a fun twist. The toppings can make your oatmeal even better! You can try adding nuts like pecans, almonds, or hazelnuts for a crunchy texture. A drizzle of nut butter, like almond or peanut butter, adds a creamy richness that pairs well with the apples. These simple changes can elevate your baked apple pie oatmeal experience. For the full recipe, check out the details above. Store leftover baked apple pie oatmeal in airtight containers in the fridge for up to 5 days. This makes it easy to enjoy a quick breakfast any day of the week. Just scoop out what you need, and you're ready to go! To reheat, pop your oatmeal in the microwave or oven. Heat until it is warm throughout. If you want a crispier top, use the oven. It brings back that fresh-baked taste. You can freeze individual portions for quick breakfasts. Just scoop them into small containers. Thaw them in the fridge overnight before reheating. This gives you a tasty, warm meal ready in no time. For the full recipe, check out the details above! You can make baked apple pie oatmeal healthier by reducing the maple syrup. You might also try using a natural sweetener like honey or agave. These options can lower sugar while keeping it tasty. Yes, you can prepare it the night before. Just cover it and refrigerate. In the morning, pop it in the oven to bake. This saves time and makes breakfast easy. You can pair this oatmeal with yogurt or ice cream. Fresh fruit works great too. These options create a complete meal that’s both filling and delicious. For this recipe, Granny Smith or Honeycrisp apples work best. They have a good mix of sweetness and tartness. This balance makes your oatmeal taste just like apple pie. This recipe makes a tasty baked apple pie oatmeal. You combine oats, apples, almond milk, and spices, then bake until golden. For fun, add raisins or nuts. You can change it up with different apples or sweeteners. Store leftovers in the fridge or freeze portions for quick meals. This dish is not only easy to make but also delicious and satisfying. Enjoy your cozy breakfast!

Baked Apple Pie Oatmeal Comforting Breakfast Delight

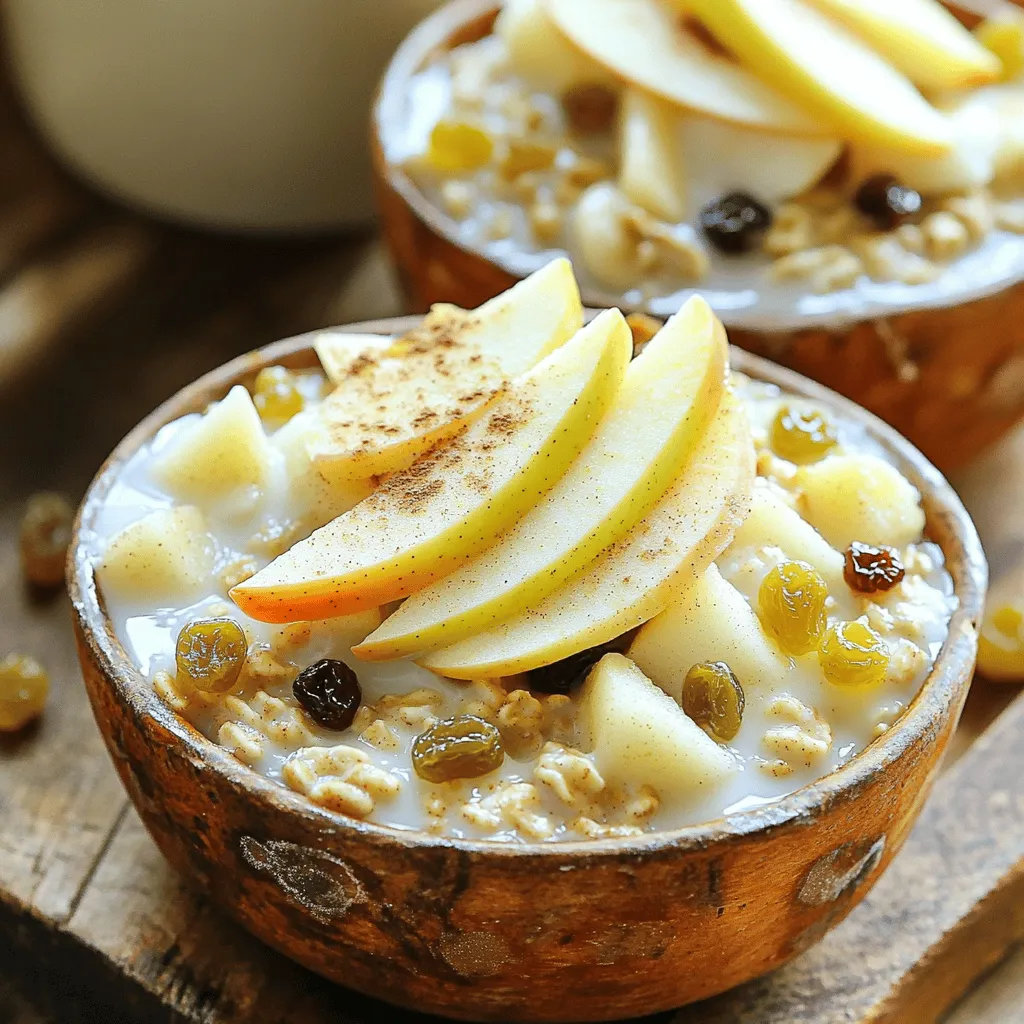
Warm, cozy, and reminiscent of fall, baked apple pie oatmeal is a delightful breakfast you’ll love. With simple ingredients like

- 2 large sweet potatoes - 2 tablespoons olive oil - 1 teaspoon sea salt - 1/2 teaspoon smoked paprika - 1/2 teaspoon garlic powder - 1/4 teaspoon cayenne pepper (optional) - Fresh herbs for garnish Sweet potatoes are the star here. They give a natural sweetness and vibrant color. Olive oil helps them crisp up and adds flavor. The sea salt enhances the taste, while smoked paprika adds a nice depth. Garlic powder gives a savory kick, and cayenne pepper is for those who like heat. Fresh herbs at the end make the dish pop with color and taste. - Caloric content: Around 150 calories per serving - Macronutrient breakdown: 30g carbs, 5g fat, 2g protein per serving - Vitamin and mineral content: High in vitamin A, C, potassium, and fiber These chips are a healthy snack choice. Sweet potatoes are rich in vitamins and fiber. They support good vision and boost your immune system. Each serving packs a satisfying crunch without the guilt. Whether you’re watching your weight or just want a tasty treat, these chips fit the bill. For the full recipe, check out the detailed cooking instructions. First, wash your sweet potatoes under cold water. Use a brush to scrub off any dirt. After washing, dry them well with a clean towel. This step helps the oil stick better. For slicing, I recommend using a mandoline. It gives you even slices. If you don’t have one, a sharp knife works too. Just aim for slices about 1/8 inch thick. This thickness helps them crisp up nicely in the oven. Next, you’ll want to coat the sweet potato slices with olive oil. Pour the oil into a large bowl. Add the slices and toss gently to coat them evenly. This helps the seasonings stick. Now, let’s add some flavor. Sprinkle sea salt, smoked paprika, garlic powder, and cayenne pepper over the slices. Mix them well. Make sure every slice gets some love from the spices. This step is key for tasty chips. Set your oven to 400°F (200°C). This temperature is perfect for baking. Line a baking sheet with parchment paper to prevent sticking. Spread the sweet potato slices in a single layer. Do not let them overlap. This helps them crisp up. Flip the slices halfway through baking. This ensures both sides get nice and crunchy. Bake for 20-25 minutes. Keep a close eye on them, especially near the end. They can burn quickly. Once they turn golden brown and crispy, pull them out. Let them cool on the baking sheet. This cooling time makes them even crunchier. You can find the full recipe above. Enjoy your crispy baked sweet potato chips! To get crispy baked sweet potato chips, the thickness of your slices matters. Aim for 1/8 inch thick slices. This thickness allows them to cook evenly and crisp up well. Use a mandoline for uniform slices. It makes the job easier and faster. Oven monitoring is key. Every oven is different, and chips can burn quickly. Start checking them at 15 minutes. Flip them halfway through baking for even crispness. Keep an eye on them during the last few minutes. For a great presentation, serve your chips in a rustic bowl or wooden platter. This makes them look inviting and fun. You can also arrange them neatly on a plate for a more formal touch. Pairing your chips with dips can enhance the snacking experience. Try tzatziki or salsa for a fresh kick. You can also serve them with guacamole or hummus for a creamy contrast. One common mistake is overcrowding the baking sheet. If the chips overlap, they won't crisp up. Spread them out in a single layer. This gives each chip room to breathe and bake properly. Baking times and temperatures can also lead to issues. Always preheat your oven to 400°F (200°C). This helps the chips start cooking right away. If you bake them too long or at too low a temperature, they can turn out soggy instead of crispy. {{image_2}} You can change the flavor of your sweet potato chips easily. Try different spice blends to add variety. For a sweet twist, sprinkle cinnamon and a bit of sugar. This makes a great treat! If you prefer savory, use curry powder or chili powder. These spices bring out the rich taste of sweet potatoes. You can mix and match flavors to suit your mood. Want crispy chips without the oven? Try an air fryer! It cooks chips quickly and evenly. Set it to 375°F (190°C) and cook for about 15 minutes. Shake the basket halfway through for even crispiness. Another option is a dehydrator. This method makes the chips extra crunchy. Set the dehydrator to 135°F (57°C) and dry for 6-8 hours until crispy. These chips fit many diets. They are naturally vegan and gluten-free! To make them lower in sodium, use less sea salt. You can also try salt-free seasonings. Fresh herbs add flavor without extra salt. This way, everyone can enjoy these tasty chips without worry. To keep your chips fresh, let them cool completely. Place them in an airtight container. You can also use a resealable bag. Make sure to remove as much air as possible. This helps prevent them from becoming soggy. Stored properly, your sweet potato chips can last about a week. Look for signs of spoilage like softness or an off smell. If they feel chewy or taste stale, it’s time to toss them. If your chips lose their crunch, don’t worry! You can recrisp them easily. - Oven Method: Preheat your oven to 350°F (175°C). Spread the chips on a baking sheet. Bake for about 5-10 minutes. Keep an eye on them to avoid burning. - Microwave Method: Place the chips in a single layer on a plate. Heat them in short bursts of 30 seconds. Check often to make sure they don’t overcook. These methods will help bring back that delicious crunch! For the full recipe, check out the steps I provided earlier. To make crispy baked sweet potato chips, follow these steps: 1. Preheat your oven to 400°F (200°C). 2. Line a baking sheet with parchment paper. 3. Wash and dry 2 large sweet potatoes. 4. Slice them thinly, about 1/8 inch thick. A sharp knife or a mandoline works best. 5. Toss the slices in a bowl with 2 tablespoons of olive oil. 6. Add 1 teaspoon of sea salt, 1/2 teaspoon of smoked paprika, and 1/2 teaspoon of garlic powder. Optionally, you can add 1/4 teaspoon of cayenne pepper for spice. 7. Mix well to coat each slice evenly. 8. Spread the slices on the baking sheet without overlapping. 9. Bake for 20-25 minutes, flipping halfway through. 10. Watch them closely to avoid burning. 11. Let the chips cool slightly for added crispiness. 12. Garnish with fresh herbs for a pop of flavor. For the best texture, make sure your slices are uniform in thickness. Thin slices crisp up nicely. Flipping the chips halfway through baking also helps them get that perfect crunch. Yes, you can use other types of potatoes, but sweet potatoes offer a unique flavor and sweetness. Regular potatoes, like russets or Yukon Gold, can work, but they will have a different taste. They are starchier and may not crisp up in the same way. If you decide to substitute, aim for similar thin slices. Some great dips for your sweet potato chips include: - Hummus: Packed with protein and fiber, it pairs well with the sweetness of the chips. - Guacamole: Avocado is healthy and adds creaminess. - Tzatziki: This yogurt-based dip is refreshing and light. - Salsa: Fresh salsa adds a zesty kick and is low in calories. Each dip provides unique nutrients. Hummus offers protein, while guacamole provides healthy fats. Choose dips that align with your taste and health goals. For more ideas, check out the Full Recipe. This guide shows how to make sweet potato chips. Start with fresh ingredients and follow the steps for prep, seasoning, and baking. You learned tips for the perfect crunch, how to store leftovers, and even ways to switch up flavors. With these ideas, you can enjoy a healthy snack that tastes great. Remember to share with friends and explore new variations. Happy cooking!

Crispy Baked Sweet Potato Chips Perfect for Snacking

Are you ready to enjoy a crunchy snack that’s both tasty and healthy? These crispy baked sweet potato chips are

Older posts
Newer posts
← Previous Page1 … Page52 Page53 Page54 … Page82 Next →

dsad

© 2026 Recipes Pursuit • Built with GeneratePress

Our Policies

  • Copyright Policy
  • Cookie Policy
  • GDPR Policy
  • Privacy Policy
  • Disclaimer
  • Terms Of Use

More Information

  • Home
  • About
  • Contact
  • Appetizers
  • Dessert
  • Dinner
  • Drinks
©2026, Recipes Pursuit About Back To Top