Skip to content
DisclaimerTerms Of UseGDPR PolicyCookie Policy

Recipes Pursuit

  • Home
  • Drinks
  • Appetizers
  • Dinner
  • Dessert
  • About
  • Contact
  • Privacy Policy
DisclaimerTerms Of UseGDPR PolicyCookie Policy

NO-ING-IMG

- 2 cups edamame in pods (fresh or frozen) - 4 cloves garlic, minced - 2 tablespoons olive oil - 1 tablespoon soy sauce - 1 teaspoon red pepper flakes (adjust for heat preference) - 1 teaspoon sesame oil - 1 tablespoon sesame seeds - Salt to taste - Fresh cilantro for garnish (optional) To make spicy garlic edamame, you need simple yet vibrant ingredients. Edamame is the star here. You can use fresh or frozen pods. They pack a healthy punch. You will also need garlic. Four cloves, minced finely, add great flavor. Olive oil is essential, too. It helps sauté the garlic and brings richness. Next, we have flavor enhancers. Soy sauce adds saltiness and depth. Red pepper flakes bring heat. Adjust the amount to fit your taste. A teaspoon works well for a nice kick. Lastly, sesame oil gives a nutty aroma and flavor. For garnishing, sesame seeds add crunch. Salt helps balance the dish. Fresh cilantro can elevate the look and taste. It’s optional, but I recommend trying it. Gather these ingredients, and you will create a tasty snack. To start, you need to boil your edamame. You can use fresh or frozen beans. If you choose frozen, boil a pot of salted water. This adds flavor. Once the water is boiling, add 2 cups of edamame. Cook them for 4 to 5 minutes until they are tender. After that, drain the beans and set them aside. Next, heat 2 tablespoons of olive oil in a large skillet over medium heat. This is where the magic begins. Add 4 cloves of minced garlic to the hot oil. Sauté the garlic for 1 to 2 minutes. You want it fragrant but not browned. Browned garlic can taste bitter, and we do not want that! Now, it’s time to spice things up. Stir in 1 teaspoon of red pepper flakes, 1 tablespoon of soy sauce, and 1 teaspoon of sesame oil. Mix these ingredients well. Cook this spicy mix for about 1 minute. The aroma will fill your kitchen and get your taste buds ready! Add the boiled edamame to the skillet. Toss the beans well to coat them with the spicy garlic mixture. Cook everything together for another 2 to 3 minutes until the edamame is heated through. Now, taste your dish and add salt if needed. Transfer the edamame to a serving bowl. Sprinkle 1 tablespoon of sesame seeds on top. If you like, add fresh cilantro for garnish. Enjoy your spicy garlic edamame! To tweak the heat in your spicy garlic edamame, start with less red pepper flakes. You can add more if you like it spicier. Just remember, a little goes a long way! If you want a milder snack, try using a pinch of black pepper instead. You can also skip the red pepper flakes completely for a gentle flavor. When picking edamame, choose beans that are bright green and firm. If you can find fresh edamame in pods, they are a great choice. However, frozen edamame works well too. It is often picked at peak freshness and frozen right away, which keeps the flavor strong. Just make sure to cook it properly for the best taste. Serving edamame can be fun. You can use a large bowl for sharing or individual cups for a more personal touch. To make it look nice, sprinkle sesame seeds on top right before serving. Adding fresh cilantro not only adds color but also gives a fresh taste. Arrange the pods in a circle for a lovely display that catches the eye. {{image_2}} You can add more spices to make your edamame more exciting. Try smoked paprika for a smoky taste. Cumin offers a warm, earthy flavor. You can also add citrus like lime or lemon juice. This makes the dish bright and fresh. Fresh herbs, such as basil or mint, can also enhance the taste. These additions will make your snack unique and tasty. This recipe is naturally vegan and gluten-free. Just check your soy sauce for gluten-free options. If you have nut allergies, you’re safe here too! The recipe contains no nuts. Always read labels to avoid hidden allergens. These small checks ensure everyone can enjoy this dish. Spicy garlic edamame works well with rice dishes. Serve it alongside stir-fries or grain bowls. You can also toss it in salads for extra crunch. This dish shines as a snack or appetizer too. It’s perfect for parties or movie nights. The bold flavors will impress your guests. Enjoy it warm or at room temperature. To keep your spicy garlic edamame fresh, store it in an airtight container. Place it in your fridge within two hours of cooking. This helps retain flavor and texture. Enjoy your leftovers within three days for the best taste. When you want to enjoy your edamame again, the best way to reheat it is in a skillet. Heat a small amount of olive oil over medium heat. Add the edamame and stir for a few minutes until warm. This method keeps the flavor intact. Avoid using the microwave, as it can make the edamame soggy. If you want to save some for later, freezing is a great option. Place the cooled edamame in a freezer-safe bag. Remove as much air as possible before sealing. They can last up to three months in the freezer. When you're ready to eat, thaw them in the fridge overnight. This helps keep their nice texture. You can use other beans, but edamame shines best here. Edamame has a unique flavor and texture. It is tender, slightly sweet, and nutty. Other beans may not give the same taste. For best results, stick with edamame for this recipe. To lower the spice level, reduce the red pepper flakes. You can start with just a pinch. Add more soy sauce or sesame oil for balance. Mixing in a bit of honey can also help. This adds sweetness that cools the heat. Edamame is packed with nutrients. It is high in protein, fiber, and healthy fats. One cup has about 17 grams of protein. This can help keep you full longer. Edamame is also rich in vitamins like K and folate. Eating it supports heart health and aids digestion. It’s a smart choice for a healthy snack. This blog post covered how to make a tasty edamame dish. We explored the main ingredients, flavor enhancers, and garnishing options. Cooking steps included preparing edamame, sautéing garlic, and combining flavors. I shared tips for adjusting heat, maximizing freshness, and presenting your dish. We also discussed variations, storage, and common questions. In the end, edamame is easy to customize and fun to eat. Experiment with new flavors and enjoy a healthy snack or side dish!

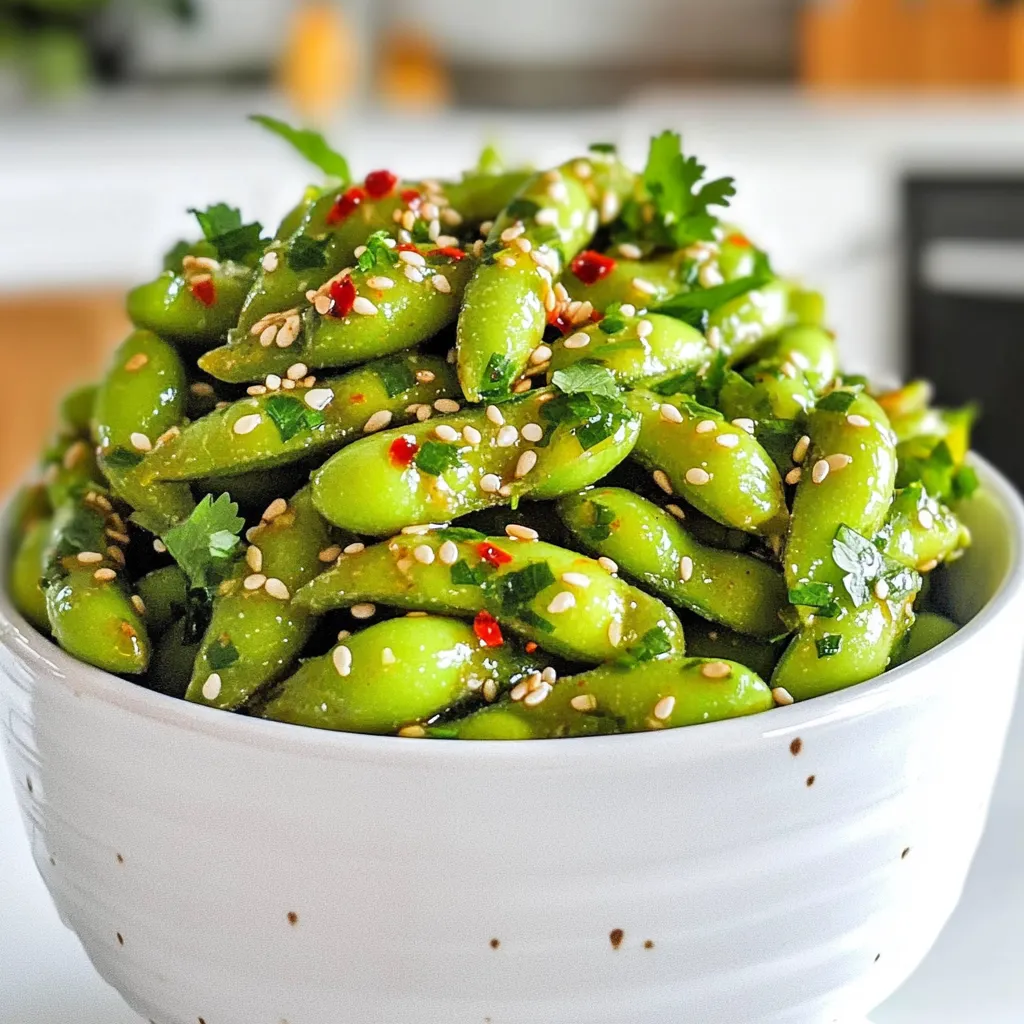
Spicy Garlic Edamame Flavorful and Easy Snack Recipe

If you’re craving a snack that’s quick, tasty, and packed with flavor, you’ll love this Spicy Garlic Edamame recipe. With

- Key components for the crust - 1 ½ cups graham cracker crumbs - ½ cup unsalted butter, melted - 2 tablespoons sugar - Cream cheese filling essentials - 16 oz cream cheese, softened - 1 cup sugar - 2 large eggs - 1 teaspoon vanilla extract - 2 tablespoons lemon juice - Zest of 1 lemon - Blueberry and lemon additions - 1 ½ cups fresh blueberries - 1 tablespoon cornstarch Each ingredient plays a key role in making these bars amazing. The graham cracker crumbs give a nice crunch. The melted butter helps hold the crust together, while sugar adds sweetness. For the filling, cream cheese is vital for that rich taste. Sugar sweetens, and eggs help bind everything. Vanilla adds depth, while lemon juice and zest bring bright flavor. Blueberries are the star of this dish. They add sweetness and color. The cornstarch helps keep them from sinking. Using fresh ingredients makes a big difference. Choose ripe blueberries for the best taste. Fresh lemon juice and zest will elevate your bars. Enjoy the magic of these flavors! First, let's make the crust. In a medium bowl, mix 1 ½ cups of graham cracker crumbs, ½ cup of melted unsalted butter, and 2 tablespoons of sugar. Stir until everything is well combined. Next, press this mixture firmly into the bottom of your lined 8x8 inch baking dish. Make sure it’s even and packed down well. Bake the crust at 325°F (160°C) for 10 minutes. After baking, let it cool slightly. Now, we’ll work on the cheesecake filling. In a large bowl, beat 16 oz of softened cream cheese with 1 cup of sugar. Mix until smooth and creamy, which takes about 2-3 minutes. Then, add 2 large eggs, one at a time, mixing well after each one. Next, stir in 1 teaspoon of vanilla extract, 2 tablespoons of lemon juice, and the zest of 1 lemon. This adds a bright flavor to our bars! To finish the filling, toss 1 ½ cups of fresh blueberries with 1 tablespoon of cornstarch in a separate bowl. This helps the blueberries stay in place. Gently fold the blueberries into the cream cheese mixture. Pour this mixture over your cooled crust, spreading it evenly. Bake the bars for 35-40 minutes, or until the center is set but still slightly jiggly. After baking, let them cool to room temperature. Once cool, refrigerate for at least 4 hours, or better yet, overnight. This helps the bars set fully. When ready, lift them out using the parchment. Cut into squares and enjoy! For a creamy cheesecake filling, start with softened cream cheese. This helps it blend smoothly. Beat the cream cheese with sugar for about 2-3 minutes until it is soft and fluffy. Add eggs one at a time, mixing well after each addition. This ensures a light texture. The lemon juice and zest also add freshness to the filling. To ensure the crust holds up, mix the graham cracker crumbs with melted butter and sugar. Press this mixture firmly into the baking dish. Bake it for 10 minutes before adding the filling. This helps the crust stay firm and not crumble. One common mistake is overmixing the batter. This can add too much air and make the cheesecake puff up. Mix just until combined. Another mistake is under-baking or over-baking the bars. Bake until the center is set but still slightly jiggly. This keeps the bars creamy and not dry. Check them at 35 minutes, but they may need a few more minutes. For a lovely look, dust the top of the cheesecake bars with powdered sugar. Add a few fresh blueberries on top. A slice of lemon adds a bright touch too. This makes the bars look inviting and fresh. When serving, cut the bars into neat squares. These bars are great for gatherings. Serve them chilled for the best taste. Enjoy! {{image_2}} You can switch blueberries for other fruits to change the taste. Raspberries, strawberries, or peaches work well. Each fruit brings a new flavor and color. You can also add flavors like almond or coconut. A few drops of almond extract can add a nice touch. Coconut can give it a tropical vibe. Just mix these in when you prepare the filling. If you want a lower-sugar version, use less sugar in the filling. You can also swap regular sugar for a sweetener like stevia or monk fruit. For a gluten-free crust, use almond flour or gluten-free graham crackers. They hold up well and taste great. These options make this dessert fit many diets while keeping it delicious. Serve these bars with a dollop of whipped cream or a scoop of ice cream. Both add creaminess and help balance the tartness of the lemon. To drink, pair it with iced tea or lemonade. These drinks enhance the fresh flavors. You can also serve with a light, fruity wine for a special occasion. To store leftovers, wrap the bars tightly in plastic wrap. You can also place them in an airtight container. This helps keep them fresh. The recommended storage duration is up to five days in the fridge. Always check for any signs of spoilage before serving. You can freeze these cheesecake bars both before and after baking. If you freeze them before baking, wrap them well and store them in the freezer for up to three months. When you are ready to bake, thaw them in the fridge overnight before baking. If you freeze them after baking, let them cool completely first. Wrap them tightly and freeze for up to three months. For thawing, place the bars in the fridge overnight. This keeps the texture nice and smooth. Avoid thawing at room temperature, as it can make them soggy. You can use leftover cheesecake bars in fun ways. Try crumbling them over yogurt or ice cream for a tasty treat. You can also mix them into smoothies for a creamy touch. Another idea is to use them in a trifle with layers of whipped cream and fresh fruit. Repurposing leftover cheesecake bars can turn them into new desserts. You can blend them into a cheesecake milkshake or use them to make parfaits. These ideas make your leftovers fun and exciting! Store your cheesecake bars in an airtight container. This keeps them fresh and moist. Place a piece of parchment paper between layers to avoid sticking. You can also wrap them tightly in plastic wrap for extra protection against air. Yes, you can use frozen blueberries. Just make sure to thaw them first. Drain any excess juice to prevent the bars from becoming too watery. Toss the thawed blueberries with cornstarch as in the recipe. This will help keep them suspended in the cheesecake filling. These cheesecake bars last up to one week in the fridge. Keep them in the airtight container to maintain flavor and texture. If you notice any changes in smell or appearance, it’s best to discard them. Absolutely! This recipe is perfect for making ahead. You can prepare these bars one to two days before serving. Just remember to chill them for at least four hours or overnight for the best results. If you need a substitute for cream cheese, try using Greek yogurt or ricotta cheese. For a vegan option, use cashew cream or tofu blended until smooth. Each option will change the flavor slightly, so choose what fits your needs best. In this blog post, we covered how to make delicious Blueberry Lemon Cheesecake Bars. You learned about essential ingredients like the crust, cream cheese filling, and berry additions. I shared step-by-step instructions for preparation, baking, and tips for perfect texture. Variations and storage methods helped you customize your bars. Remember, the key to a great cheesecake is to avoid overmixing and to store leftovers properly. Enjoy your tasty creation and impress friends at any gathering!

Blueberry Lemon Cheesecake Bars Simple and Delicious

If you’re craving a dessert that’s simple yet bursting with flavor, you’re in the right place! Blueberry Lemon Cheesecake Bars

- 2 ripe peaches, peeled and diced - 1 tablespoon lemon juice - 2 tablespoons brown sugar - 1 teaspoon ground cinnamon I love using ripe peaches for this recipe. Fresh peaches have a sweet and juicy taste. The lemon juice adds a bit of zing and keeps the peaches bright. Brown sugar gives it a rich, caramel flavor. Ground cinnamon brings warmth and spice to the mix. - 1 tablespoon cornstarch - 1 package refrigerated pie crusts (2 crusts) - 1 egg (for egg wash) - 1 tablespoon sugar (for sprinkling) Cornstarch helps thicken the peach filling. It keeps the hand pies from being too runny. Using refrigerated pie crusts makes this recipe easy and quick. The egg wash gives a nice golden color to the crust. Sprinkling sugar on top adds a sweet crunch. First, gather your ripe peaches. Peel and dice them into small pieces. In a medium bowl, add the diced peaches. Next, squeeze in one tablespoon of lemon juice. Then, add two tablespoons of brown sugar and one teaspoon of ground cinnamon. Finally, sprinkle in one tablespoon of cornstarch. Stir the mixture until it is well combined. Let it sit for a few minutes. This allows the flavors to mix and the juices to come out. Now, roll out your pie crust on a lightly floured surface. Cut the crust into 4 to 6 equal squares. The size depends on how big you want your hand pies. Take a tablespoon of the peach filling and place it in the center of each square. Fold the pie crust over to create a triangle or rectangle. Press the edges firmly to seal them. For a nice touch, use a fork to crimp the edges. This adds a fun design and ensures they stay closed. Preheat your air fryer to 350°F (175°C). Arrange the hand pies in the basket in a single layer. Make sure not to overcrowd them. Air fry the pies for about 12 to 15 minutes. Keep an eye on them until they turn golden brown and crispy. Depending on your air fryer size, you might need to fry them in batches. Once they are done, take them out and let them cool a bit before serving. Enjoy these warm, sweet treats! - Alternative fruits to use in hand pies You can swap peaches for ripe pears or juicy apples. Both bring sweet flavors that work well with cinnamon. Cherries or berries also add a nice twist. - Options for pie crust If you want a change, use puff pastry for a flaky texture. Gluten-free crusts can work too if you need a gluten-free option. Always choose a crust that you enjoy. - Techniques for better sealing Press the edges of the crust firmly to seal. A fork works great for crimping the edges and keeping the filling inside. This ensures no filling leaks during cooking. - Decorative crimping ideas Use the tines of a fork for a simple design. If you want to get fancy, try twisting the edges for a pretty look. This adds a personal touch to your hand pies. - Air frying tips for golden crust Preheat your air fryer. This step helps the pies cook evenly. Brush the tops with egg wash for a shiny finish. A sprinkle of sugar adds extra sweetness and crunch. - Adjusting time and temperature Cook at 350°F for about 12 to 15 minutes. Keep an eye on them as air fryers vary. If they look golden brown, they’re ready! Adjust the time as needed for your air fryer model. {{image_2}} You can mix up the flavors in these hand pies. Adding spices like nutmeg or ginger can enhance the taste. A pinch of nutmeg gives warmth, while ginger adds a kick. You can also try other fruits. Berries, apples, or even cherries work well. Just adjust the sugar based on the fruit's sweetness. Want to switch things up? You can make savory hand pies! Try adding cooked meats or veggies. Cheese pairs well with savory fillings, too. If you want more sweet options, think about chocolate or cream cheese. Mix in some fruit with these fillings for a fun twist. You can make these hand pies vegan or gluten-free. For a vegan version, swap the egg wash for almond milk. Use a gluten-free pie crust for those with gluten issues. If you're cutting back on sugar, reduce the brown sugar. You can use natural sweeteners like honey or maple syrup instead. To keep your hand pies fresh, store them in the fridge. Place them in an airtight container. This helps keep them crisp and tasty. They will last for about three days. If you want them for later, freezing is a great option. Wrap each pie in plastic wrap, then place them in a freezer bag. This way, they stay safe from freezer burn. Your hand pies can be frozen for up to three months. When it's time to enjoy your hand pies again, you have two great options: the microwave or the air fryer. The microwave heats them quickly, but it may make the crust a bit soft. If you prefer a crispy crust, the air fryer is the best choice. Preheat it to 350°F (175°C). Place the hand pies in the basket and heat for about 5-7 minutes. This keeps them crispy and warm. For both methods, be sure to check the pies often. You want to avoid overheating them. Enjoy your tasty hand pies just as much the second time around! Air fryer cinnamon sugar peach hand pies last about 3 days at room temperature. Store them in an airtight container to keep them fresh. If you want them to last longer, refrigerate them. They can stay good for up to a week in the fridge. Yes, you can use canned peaches. Drain the syrup and chop them into small pieces. Canned peaches can be sweeter, so adjust the brown sugar based on your taste. Fresh peaches add a nice texture, but canned peaches work well too. You can make many desserts in an air fryer! Some favorites include: - Air fryer brownies - Air fryer cookies - Air fryer apple chips - Air fryer donuts These desserts cook quickly and taste great with that crispy finish. Your hand pies are done when they turn golden brown and feel crispy. Check them at the 12-minute mark. If they need more time, air fry for another 2-3 minutes. The filling should be bubbly and hot when they are ready to eat. In this blog post, we explored how to make delicious cinnamon sugar peach hand pies. We covered fresh ingredients, step-by-step instructions, and tips for perfecting your pies. Remember, you can mix flavors and adjust recipes to suit your taste. Whether sweet or savory, hand pies are versatile treats. Enjoy experimenting with different ingredients and techniques. With proper storage, you can savor these delights later, too. Try making these tasty pies and share them with friends and family; they'll love them!

Air Fryer Cinnamon Sugar Peach Hand Pies Delight

Are you ready to bite into something amazing? Try my Air Fryer Cinnamon Sugar Peach Hand Pies! These sweet treats

- 1 pound large shrimp, peeled and deveined - 4 tablespoons unsalted butter, melted - 4 cloves garlic, minced - 1 tablespoon lemon juice - 1 teaspoon lemon zest - 1 teaspoon red pepper flakes - 1 teaspoon dried parsley - Salt and pepper to taste - 8 ounces linguine or spaghetti - Fresh parsley, chopped (for garnish) - Lemon wedges (for serving) To cook Slow Cooker Garlic Butter Shrimp Scampi, you need simple ingredients. Start with large shrimp. You want them peeled and deveined for easy eating. Next, grab some unsalted butter. This will add richness and flavor. Garlic is key too, so don’t skip the minced cloves. Lemon juice and zest give brightness. Red pepper flakes add a nice kick. Dried parsley provides a fresh touch, but you can use fresh if you have it. You will also need salt and pepper for seasoning. For the pasta, linguine or spaghetti works best. Lastly, fresh parsley and lemon wedges make your dish look great and add extra flavor. With these ingredients, you will create a tasty meal. Start by mixing the following in a medium bowl: - 4 tablespoons unsalted butter, melted - 4 cloves garlic, minced - 1 tablespoon lemon juice - 1 teaspoon lemon zest - 1 teaspoon red pepper flakes - 1 teaspoon dried parsley - Salt and pepper to taste Stir these ingredients well. This mixture adds a rich flavor to your shrimp. Next, transfer 1 pound of large, peeled, and deveined shrimp into the slow cooker. Pour the garlic butter mixture over the shrimp. Toss the shrimp well to coat them evenly. This step makes sure every shrimp gets a taste of that garlic goodness. Cover the slow cooker and set it to low. Cook the shrimp for about 2 hours, or until they turn pink. Stir once halfway through to ensure even cooking. While the shrimp cook, prepare 8 ounces of linguine or spaghetti according to the package instructions. Cook until al dente, then drain and set aside. Once the shrimp are ready, gently stir in the cooked pasta. Mix it well so the pasta is coated in the sauce. Check the flavor and adjust with more salt, pepper, or lemon juice if you like. Enjoy this flavorful dish hot, garnished with fresh parsley and lemon wedges on the side for an extra kick. How do you know when shrimp are done? Look for color and texture. Perfectly cooked shrimp turn pink and firm up. They should not be gray or rubbery. When you see them curl into a C shape, they are ready. Cooking shrimp for too long can make them tough. Keep an eye on them as they cook. How can you present this dish well? Serve it in a large shallow bowl. Top it with fresh parsley for color. Add lemon wedges on the side for a fresh taste. This adds a lovely touch and brightens up the meal. You can also serve it with crusty bread to soak up the garlic butter. What are some good swaps and add-ins? If you want less heat, skip the red pepper flakes. You can use other herbs like basil or oregano instead of parsley. For a twist, try adding cherry tomatoes or spinach. These add color and nutrition to your dish. If you don’t have linguine, spaghetti works just as well. {{image_2}} If you want to switch things up, you have many options. You can use scallops instead of shrimp. They add a sweet flavor. Another great choice is lobster. It gives a nice, rich taste. You can also use crab meat for a unique twist. Just ensure the seafood is fresh. This makes a big difference in taste. Want to add some heat? You can increase the red pepper flakes. Start with a half teaspoon more. This will give your dish a nice kick. You can also add a dash of hot sauce. Just be careful not to overpower the other flavors. If you prefer less heat, leave out the red pepper flakes. You can also serve with a side of hot sauce for those who like it spicy. Herbs can change the taste of your dish. If you want a different flavor, try using fresh basil. It pairs well with shrimp. You can also use fresh thyme for a earthier taste. Oregano is another great option. It gives a nice Mediterranean flair. Fresh herbs always taste best, but dried herbs work too. Just use a little less if you go that route. To store leftovers, place the shrimp scampi in an airtight container. Make sure to cool it down first. Seal it tightly and keep it in the fridge. It will last for 2-3 days. To keep the flavor fresh, try to eat it within this time. For reheating, the best method is to use a pan on the stove. Heat it over medium-low heat. Add a splash of water or broth to keep it moist. Stir gently until warm. You can also microwave it in short bursts. Use a microwave-safe dish and cover it loosely. This method prevents it from drying out. You can freeze shrimp scampi if you want to save some for later. First, let it cool completely. Then, place it in a freezer-safe container. Make sure to remove as much air as possible. It can stay in the freezer for up to 3 months. When ready to eat, thaw it overnight in the fridge. Reheat using the stovetop method for the best taste. Yes, you can use frozen shrimp. Just make sure to thaw them first. Place the shrimp in cold water for about 15-20 minutes. This step helps them cook evenly. Once thawed, peel and devein if needed. Then, follow the same steps in the recipe. Shrimp take about 2 hours to cook on low in a slow cooker. They will turn pink and firm when done. Stir halfway through to ensure even cooking. Keep an eye on the time, as overcooking can make them tough. Several sides go great with garlic butter shrimp scampi. Consider these options: - Garlic bread - Steamed broccoli - Mixed green salad - Roasted asparagus - Rice pilaf These sides add color and nutrition to your meal. Plus, they soak up the delicious garlic butter sauce! This blog post covered a simple and tasty shrimp scampi recipe. You learned about the ingredients, step-by-step cooking instructions, and tips for perfect results. I also shared ideas for variations, as well as how to store and reheat your dish. Remember, the key to great shrimp scampi lies in the garlic butter mix and cooking time. Try different seafood or herbs to personalize it. Enjoy creating this dish at home and impressing friends and family!

Slow Cooker Garlic Butter Shrimp Scampi Simple Recipe

Are you craving a delicious dinner without the fuss? Let’s make Slow Cooker Garlic Butter Shrimp Scampi! This simple recipe

- 2 cups plain Greek yogurt - 1 cup canned pumpkin puree - 3 tablespoons maple syrup - 1 teaspoon vanilla extract You need a few key items for this recipe. First, plain Greek yogurt gives a creamy base. Canned pumpkin puree adds rich flavor and color. Maple syrup provides sweetness, while vanilla extract enhances the taste. - 1 teaspoon pumpkin pie spice - 1/4 teaspoon ground cinnamon - 1 cup granola (your choice) - 1/2 cup chopped pecans or walnuts Next, we add some spices. Pumpkin pie spice gives that classic fall flavor. Ground cinnamon adds warmth. You can choose any granola for crunch. Chopped pecans or walnuts bring a nice nutty taste. - Fresh whipped cream - Additional pumpkin pie spice For a special touch, you can add fresh whipped cream on top. A sprinkle of extra pumpkin pie spice makes it look festive. These toppings make your parfaits even more delightful! Start by gathering all your ingredients. In a medium bowl, mix together: - 2 cups plain Greek yogurt - 1 cup canned pumpkin puree - 3 tablespoons maple syrup - 1 teaspoon vanilla extract - 1 teaspoon pumpkin pie spice - 1/4 teaspoon ground cinnamon Stir these ingredients until smooth. You want a creamy texture without lumps. Take your time to combine everything well. Smooth yogurt makes each bite tasty. Now it's time to layer your parfaits. Grab some clear serving glasses or bowls. Begin with a layer of the pumpkin yogurt mixture. Use a spoon to spread it evenly. Then, add a layer of granola. This gives a nice crunch. After that, sprinkle some chopped nuts on top. You can use pecans or walnuts. Repeat this layering process until your glass is full. Aim for neat layers. It looks more appealing when you can see the colors. To make your parfait even better, add a dollop of fresh whipped cream on top. It adds a light and airy texture. Finally, sprinkle some extra pumpkin pie spice for a festive look. This small detail makes a big difference in flavor. Serve your parfaits right away or chill them for up to two hours. Enjoy your delicious creation! Choosing the right yogurt is key. I love plain Greek yogurt for its thick texture. It adds creaminess and packs protein. You can also use non-dairy yogurt if you prefer. Look for options with simple ingredients. If you want a sweeter parfait, consider alternatives for maple syrup. Agave nectar works well. Honey is another great choice but may not be vegan. You can also use date syrup for a unique flavor. Pair your parfaits with fall beverages for a festive touch. A warm chai latte complements the pumpkin spice. Hot apple cider is another good match. Both drinks highlight the cozy fall vibes. These parfaits are perfect for many occasions. Serve them at brunches or family gatherings. They are also a fun treat for holiday parties. Kids and adults alike will enjoy them. Use creative glassware for serving. Clear glasses show off the beautiful layers. Small mason jars add a rustic touch. You can even use dessert cups for a fun twist. Layering techniques can enhance visual appeal. Start with a layer of the pumpkin yogurt. Then add granola and nuts for crunch. Alternate colors and textures to make your parfait pop. Finish with a dollop of whipped cream for a lovely touch. {{image_2}} You can change up your Pumpkin Spice Yogurt Parfaits with fun seasonal flavors. Try adding nutmeg or allspice for a twist. These spices blend well with pumpkin. You can also swap the yogurt flavor! Use vanilla or cinnamon yogurt for a new taste. If you want a vegan version, use dairy-free yogurt. Almond or coconut yogurt works great. For sweetening, try agave syrup instead of maple syrup. You can also find gluten-free granola at stores. This way, everyone can enjoy the parfaits. Making your parfaits more exciting is easy! Add fresh fruits like bananas or apples for sweetness. Mixing in chocolate chips or caramel sauce can also make them extra special. These add-ins will surprise your taste buds. Enjoy creating different flavors in your parfaits! To keep your Pumpkin Spice Yogurt Parfaits fresh, refrigerate them right away. Place them in an airtight container or cover them tightly with plastic wrap. This helps to keep out air and moisture. You can also use glass jars if you prefer. They look great and seal well. These parfaits can last in the fridge for up to two days. After that, the yogurt may start to separate. Watch for any changes in smell or texture. If you see any mold, throw it out. Freshness is key to enjoying this delicious treat! When serving leftovers, gently stir the parfaits before eating. This will mix the layers back together. If you stored them layered, you can serve them as they are. If they look a bit messy, it’s okay! They will still taste great. Just remember to add a fresh layer of granola or nuts for that crunch. Yes, you can make these parfaits in advance. I recommend storing them in the fridge. They stay fresh for up to 2 hours before serving. This time allows the flavors to blend well. If you plan to prepare them earlier, keep the granola separate. This way, it stays crunchy. You can layer it just before serving for the best texture. Absolutely! You can use fresh pumpkin instead of canned. To do this, cook and mash the pumpkin first. Aim for about 1 cup of cooked pumpkin. This option gives a fresh taste. Just remember to add some pumpkin pie spice for flavor. Fresh pumpkin may need a bit more maple syrup to sweeten. Taste as you go to get it just right! When it comes to granola, both store-bought and homemade work well. I suggest choosing a granola that has nuts and seeds for crunch. If you want to make your own, use oats, honey, and nuts. This way, you can control the sweetness and flavor. Look for granola that complements the pumpkin taste. A cinnamon or nutmeg flavor pairs nicely! In this blog post, we explored how to create delicious Pumpkin Spice Yogurt Parfaits. We covered essential ingredients like Greek yogurt and pumpkin puree. You learned step-by-step instructions for mixing the yogurt and assembling the layers. With tips on serving and storage, you can enjoy these parfaits fresh and flavorful. These parfaits are perfect for fall occasions and easy to customize. Experiment with different toppings and flavors. Enjoy creating a tasty treat that friends and family will love!

Pumpkin Spice Yogurt Parfaits Delightful Festive Treat

Get ready to indulge in the cozy flavors of fall with my Pumpkin Spice Yogurt Parfaits! This delightful treat combines

- 1 cup all-purpose flour - 1 tablespoon granulated sugar - 1 teaspoon baking powder - 1/2 teaspoon baking soda - 1/4 teaspoon salt - 1 cup buttermilk - 1 large egg - 2 tablespoons melted butter - 1 medium apple, peeled and diced - 1 teaspoon cinnamon - 1/4 cup brown sugar - 1/2 teaspoon vanilla extract To make Apple Cinnamon Roll Pancakes, gather all your ingredients first. This step makes cooking easier. You will need flour, sugar, baking powder, baking soda, and salt for the dry mix. These give the pancakes their structure. Next, you need buttermilk, an egg, and melted butter for the wet mix. Buttermilk adds flavor and keeps your pancakes soft. The egg binds everything together, while the butter adds richness. For the apple flavor, grab one medium apple. Peel it and dice it into small pieces. This will add a sweet crunch to your pancakes. Lastly, you need cinnamon and brown sugar to create that delicious swirl. Mix these two to get a sweet topping for your pancakes. Having everything ready helps you stay organized. It also makes cooking more fun and less stressful. Enjoy the process of making these tasty pancakes! Whisking Dry Ingredients Start by grabbing a large mixing bowl. Add 1 cup of all-purpose flour. Then, mix in 1 tablespoon of granulated sugar, 1 teaspoon of baking powder, 1/2 teaspoon of baking soda, and 1/4 teaspoon of salt. Whisk these dry ingredients together well. Mixing Wet Ingredients In another bowl, pour in 1 cup of buttermilk. Crack in 1 large egg and add 2 tablespoons of melted butter. Whisk until smooth and combined. Combining Wet and Dry Mixtures Next, slowly add the wet mixture to the dry mixture. Stir gently until just combined. It’s okay if there are a few lumps. Overmixing can make your pancakes tough, so keep it light. Folding in Apples Now, take 1 medium apple, peel and dice it. Gently fold the apple pieces and 1/2 teaspoon of vanilla extract into the batter. This will add flavor and texture to your pancakes. Creating the Cinnamon Filling In a small bowl, mix together 1/4 cup of brown sugar and 1 teaspoon of cinnamon. This will be your cinnamon swirl filling. Set it aside for later. Heating the Skillet Heat a non-stick skillet over medium heat. Lightly grease it with butter or cooking spray to prevent sticking. Pouring the Batter Pour about 1/4 cup of batter onto the skillet for each pancake. Before the batter sets, drizzle a small amount of your cinnamon-sugar mixture in a spiral on each pancake. Cooking and Flipping Tips Cook the pancakes for 2-3 minutes. Watch for bubbles to form on the surface. Carefully flip each pancake and cook for another 2-3 minutes, until golden brown. Repeat this with the remaining batter. Enjoy the warm, delicious smell filling your kitchen! - Avoiding Overmixing: Mix your batter gently. Overmixing makes pancakes tough. You want small lumps in your batter. This keeps the pancakes soft and fluffy. - Cooking on Medium Heat: Keep your skillet at medium heat. If it’s too hot, pancakes burn outside and stay raw inside. A steady temperature helps cook them evenly. - Topping Options: Maple syrup is a classic choice. It adds sweetness and flavor. Powdered sugar is also great for a light touch. You can even mix both for extra sweetness. - Presentation Ideas: Stack your pancakes high for a stunning look. Drizzle syrup on top and let it run down the sides. You can also sprinkle powdered sugar on top for a lovely finish. - Incorrect Batter Consistency: Your batter should be thick but pourable. If it's too runny, add a little flour. If it's too thick, add some buttermilk. The right texture makes for better pancakes. - Not Preheating the Skillet: Always preheat your skillet. A hot skillet helps pancakes cook well. If you skip this step, pancakes may stick and cook unevenly. {{image_2}} You can change the flavor of your pancakes by using other fruits. Pears work great as a substitute for apples. They offer a soft texture and sweet taste. Berries like blueberries or strawberries can add a fun twist. Just chop them up and fold them into the batter. Dried fruits, such as raisins or cranberries, can also add unique flavors. Soak them in warm water for a few minutes to soften them up. Then, mix them into the batter. This makes the pancakes chewy and sweet. If you need gluten-free options, you can swap all-purpose flour for a gluten-free blend. Look for brands that measure cup-for-cup. This keeps the same pancake texture you love. For vegan substitutes, use almond milk instead of buttermilk. Replace the egg with a flax egg or applesauce. This way, you can still enjoy tasty pancakes without animal products. To make your pancakes even better, consider adding nuts or chocolate chips. Chopped walnuts or pecans bring a nice crunch. Dark chocolate chips add a sweet flavor that pairs well with cinnamon. You can also try different spices to enhance your pancakes. Nutmeg or cardamom can add warmth. A hint of ginger can kick up the flavor too. Feel free to experiment and find what you love! To keep your pancakes fresh, store them properly. - Refrigeration Tips: Place leftover pancakes in an airtight container. They will last up to three days in the fridge. You can also separate layers with parchment paper to prevent sticking. - Freezing Instructions: For long-term storage, freeze pancakes. Stack them with parchment paper in between. Use a freezer bag or container. They can last up to two months. When you want to enjoy your pancakes again, reheating is key. - Microwave vs. Skillet: The microwave is fast but may make pancakes soggy. Heat them for about 30 seconds. A skillet gives you crispness. Warm over low heat for a few minutes, flipping once. Always check for signs of spoilage to ensure safety. - Signs of Spoilage: If pancakes smell off or have mold, throw them away. Also, if they feel dry or hard, they may not taste good anymore. Always trust your senses! Yes, you can make the batter the night before. Store the batter in the fridge. It will stay fresh overnight. Just give it a stir before you cook. If it thickens, add a splash of milk to thin it out. If your batter is too thick, add milk. Start with one tablespoon. Mix it in and check the consistency. You want it to flow easily but not be runny. A smooth batter makes for light, fluffy pancakes. You can make your own buttermilk easily. Mix one cup of milk with one tablespoon of vinegar or lemon juice. Let it sit for five minutes. This will give you a similar tangy flavor. Try maple syrup or whipped cream. A sprinkle of powdered sugar adds sweetness too. You can also use caramel sauce or chopped nuts for crunch. Mix and match to find your favorite combo! This blog post covers how to make delicious apple cinnamon roll pancakes. We discussed the key ingredients, step-by-step instructions, and tips for perfect texture. You learned about variations and how to store leftovers effectively. My final thought: these pancakes are easy to make and sure to please everyone. Enjoy experimenting with flavors and toppings. You'll love the warm, cozy taste of fresh pancakes any day!

Apple Cinnamon Roll Pancakes Delicious and Easy Recipe

Craving a sweet morning treat that’s easy to make? Try my Apple Cinnamon Roll Pancakes! This recipe combines soft pancakes

- 4 large bell peppers (any color) - 1 pound ground turkey or beef - 1 cup cooked rice (white or brown) - 1 (15 oz) can black beans, drained and rinsed - 1 cup corn (fresh, frozen, or canned) - 1 cup salsa (your choice of spiciness) - 1 cup shredded cheese (cheddar or a Mexican blend) - Optional toppings: chopped cilantro, diced avocado, sour cream - 1 packet taco seasoning - Salt and pepper to taste Each ingredient plays a key role in making your taco stuffed peppers great. The bell peppers are the perfect vessel for the filling. Ground turkey or beef gives you that classic taco taste. The cooked rice adds a nice texture. Black beans and corn bring extra flavor and nutrition. You can choose your salsa based on how spicy you like it. The cheese melts beautifully on top, adding creaminess. For toppings, cilantro and avocado add freshness. Salt and pepper bring out the flavors in all the ingredients. With these ingredients, you set the stage for a fun and tasty meal. Enjoy mixing and matching as you create your own version of taco stuffed peppers! Start by slicing the tops off the bell peppers. Remove the seeds and membranes inside. Lightly season the insides with salt and pepper. This step adds flavor to the peppers, enhancing the dish. Select the 'Sauté' function on your Instant Pot. Heat one tablespoon of olive oil. Add one pound of ground turkey or beef. Cook for about 5 to 6 minutes, breaking it up with a spatula until it's browned. This creates a rich base for your stuffed peppers. Next, stir in one packet of taco seasoning, one cup of cooked rice, one can of black beans (drained and rinsed), one cup of corn, and one cup of salsa. Mix well and let it cook for another 2 to 3 minutes. This helps the flavors blend together nicely. Carefully spoon the filling into each of the bell peppers. Pack it down gently to ensure they are full. Place the trivet inside the Instant Pot. Add one cup of water, then arrange the stuffed peppers upright on the trivet. This keeps them from sitting in the water. Close the lid and set the steam release to sealing. Select 'Manual' mode and cook on high pressure for 10 minutes. Once done, perform a quick release by turning the steam knob. Remove the lid carefully, and take out the stuffed peppers. Sprinkle one cup of shredded cheese over the top of each pepper. Allow it to melt from the heat. You can also place them back in the Instant Pot on 'Keep Warm' for a couple of minutes. Finally, garnish with chopped cilantro, diced avocado, or a dollop of sour cream before serving. Enjoy your delightful meal! To make your filling shine, adjust the spiciness of your salsa. Use mild salsa for kids or spicy for heat lovers. You can also add more spices. Consider cumin or paprika for depth and warmth. A little extra flavor can make a big difference. Pick bell peppers in different colors for a vibrant look. Green, red, yellow, or orange all work well. Choose large peppers for more filling. They should stand upright. This way, they hold the filling better and cook evenly. Sometimes, things can go wrong while cooking. If the peppers are too firm, they may need more time. You can add a splash of water and cook them longer. If you forget an ingredient, don’t worry. You can adjust by adding beans or more spices. Cooking is about being flexible and creative! {{image_2}} You can switch up the protein in your taco stuffed peppers. Ground chicken works well and stays moist. If you prefer a plant-based option, try lentils or a meat substitute. These choices add unique textures and flavors. Each option allows you to cater to different diets. If you're looking for a healthier twist, use quinoa or cauliflower rice instead of regular rice. Quinoa adds protein and a nutty flavor. Cauliflower rice keeps it low-carb and light. Both substitutes work great in the stuffed peppers and still taste amazing. Boost the taste of your filling by adding different spices or peppers. Consider adding cumin or smoked paprika for a smoky kick. You can also use jalapeños or poblano peppers for extra heat. Experimenting with flavors makes each batch unique and exciting! Store your leftover taco stuffed peppers in the fridge. Use an airtight container to keep them fresh. They will last for about 3 to 5 days. When you store them, avoid stacking to prevent squishing. Make sure to cool them to room temperature before sealing. To freeze leftover stuffed peppers, wrap each pepper tightly in plastic wrap. Place them in a freezer-safe bag or container. They can last for up to 3 months in the freezer. Remember to label your bags with the date. When you're ready to eat, let them thaw in the fridge overnight. You can reheat stuffed peppers in two ways: the microwave or the oven. For the microwave, place one pepper on a plate. Heat for 2 to 3 minutes, checking for warmth. For the oven, preheat to 350°F. Place the peppers on a baking dish. Bake for about 15 to 20 minutes until hot. The oven method keeps the peppers' texture better. Yes, you can use frozen bell peppers. Just thaw them before you start. This will help them cook evenly. Slice the tops off and remove any seeds. Even though they might be softer, they will still taste delicious. Cooking time is quick! It takes about 10 minutes on high pressure. You should also add time for the pressure to build up. This usually takes around 5 minutes. So, expect the total time to be about 15 minutes. These stuffed peppers go great with many sides. Some popular choices are: - Spanish rice - Refried beans - A fresh salad - Tortilla chips with salsa - Guacamole Feel free to mix and match these sides to make your meal complete! In this blog post, we explored how to make delicious taco stuffed peppers using ground turkey or beef, bell peppers, and cooked rice. We discussed optional ingredients, seasoning, and provided step-by-step instructions for cooking in an Instant Pot. Remember to adjust flavors and experiment with variations like different proteins or rice substitutes. Proper storage and reheating will keep your leftovers tasty. With these tips, you can master this fun meal that is perfect for any occasion. Enjoy creating your own savory stuffed peppers!

Instant Pot Taco Stuffed Peppers Delightful Recipe

Get ready to spice up your dinner with my Instant Pot Taco Stuffed Peppers! This easy recipe combines ground turkey

- 2 medium apples (Granny Smith or Honeycrisp) - 1 tablespoon lemon juice - 1/4 cup brown sugar - 1 teaspoon cinnamon - 1 tablespoon cornstarch - 1/2 cup walnuts, chopped - 1 pre-made pie crust (store-bought or homemade) - 1 egg (for egg wash) - 1 tablespoon milk (for egg wash) - 1 tablespoon unsalted butter, cut into small pieces This galette is easy to make, and the ingredients are simple. The apples bring a sweet and tart taste that mixes well with the walnuts. I like to use Granny Smith or Honeycrisp apples for their crispness. The lemon juice adds brightness and keeps the apples from browning. Brown sugar gives a deep sweetness, while cinnamon adds warmth to the filling. Cornstarch helps thicken the juices from the apples, making the filling perfect. Chopped walnuts add a nice crunch and nutty flavor. The pre-made pie crust saves time, but you can also make your own if you prefer. The egg wash gives the crust a lovely golden color. Milk helps make it shiny. Finally, small pieces of butter dot the filling for richness. All these ingredients come together to make a delicious Rustic Apple Walnut Galette. - Preheat your oven to 400°F (200°C). - Line a baking sheet with parchment paper. - Peel and slice the apples thinly. Use Granny Smith or Honeycrisp for a great taste. - In a mixing bowl, combine the sliced apples, chopped walnuts, brown sugar, lemon juice, cinnamon, and cornstarch. - Toss gently until all the apples are coated. Set this aside to let the flavors mix. - Roll out your pie crust on a floured surface. Aim for a rough circle about 12 inches wide. - Transfer the crust to your lined baking sheet. - Spoon the apple and walnut mixture into the center of the crust, leaving a 2 to 3-inch border around the edges. - Fold the edges of the crust over the filling. Pleat as you go to create a rustic look. - In a small bowl, whisk together the egg and milk for an egg wash. - Brush this mixture over the crust to give it a nice golden color while baking. - Dot the apple mixture with small pieces of butter for extra richness. - Bake the galette for 35-40 minutes. Check until the apples are soft and the crust is golden brown. - Remove it from the oven and let it cool for about 10 minutes before slicing. For a great galette, choose Granny Smith or Honeycrisp apples. These apples hold their shape well. Granny Smith apples are tart and make a nice contrast with sweet fillings. Honeycrisp apples are sweet and juicy, adding a lovely flavor. Mixing both gives a balance of sweet and tart flavors. Try other varieties, but these work best. Rolling out pie crust can be tricky. Start with a cool, floured surface. Use a rolling pin to make the crust about 12 inches wide. Make it uneven for that rustic look. When you fold the edges, don’t stress about perfection. A few pleats give it character. For a golden finish, brush the crust with an egg wash of egg and milk. This step makes your galette shine! To boost flavor, add spices like nutmeg or ginger. Just a pinch can elevate your dish. You can serve the galette warm with a scoop of vanilla ice cream. The cold ice cream pairs well with warm apples. Whipped cream is another fantastic choice. Both add a rich touch to your dessert. Enjoy! {{image_2}} You can switch walnuts for pecans or almonds. Both nuts add unique flavors. Pecans give a buttery taste, while almonds add a nice crunch. Just chop them up like the walnuts. Use the same amount. This keeps the recipe simple and fun! Mix in other fruits with your apples. Pears and berries work well. Pears add a soft and sweet touch. Berries bring a burst of color and tartness. You can use fresh or frozen options. Just make sure to adjust the sugar based on the fruit's sweetness. Have fun experimenting! You can use less sugar or try natural sweeteners. Honey or maple syrup can replace brown sugar. This makes the galette a bit healthier. If you want it less sweet, cut back on the sugar. Taste the filling before adding more. Adjust it to your liking! To keep your Rustic Apple Walnut Galette fresh, store leftovers in the fridge. Use an airtight container to prevent moisture loss. If you want to keep it longer, freeze slices. Wrap them tightly in plastic wrap and place in a freezer bag. This way, you can enjoy it later! To reheat your galette, use the oven for best results. Preheat the oven to 350°F (175°C). Place the galette on a baking sheet. Bake for about 10 to 15 minutes, or until warm. This method keeps the crust crispy while warming the filling. You can also use a microwave for a quick fix, but it may make the crust softer. The galette stays tasty for about 3 to 4 days in the fridge. If frozen, enjoy it within 2 to 3 months for the best flavor. Over time, the quality may drop, but it will still be safe to eat. Just check for any signs of freezer burn before serving. Yes, you can make the galette ahead of time. Here’s how: - Prepare the filling: Mix the apples, walnuts, brown sugar, lemon juice, cinnamon, and cornstarch. Store it in the fridge for up to a day. - Roll out the crust: You can roll out the pie crust and place it on a baking sheet. Cover it with plastic wrap and keep it in the fridge. - Assemble before baking: When ready to bake, simply fill the crust with the chilled filling. Fold the edges, brush with egg wash, and bake as directed. Look for these signs: - The crust should be golden brown. A nice color means it cooked well. - The apples should be tender. You can check by poking them with a fork. - The filling may bubble slightly, showing that it is hot and ready. To enhance the taste, try these accompaniments: - A scoop of vanilla ice cream adds creaminess. - Whipped cream gives a light touch. - Dusting powdered sugar adds a sweet finish. - A drizzle of caramel sauce can bring extra flavor. In this article, we explored how to make a delicious Rustic Apple Walnut Galette. We covered ingredients, preparation, baking, and tips for success. Choosing the right apples and perfecting the crust can elevate your dish. Remember, feel free to swap nuts or sweeteners to fit your taste. Storing leftovers and reheating them will keep your galette fresh and tasty. Enjoy serving it warm with ice cream or cream. Embrace creativity and enjoy this simple yet delightful dessert!

Rustic Apple Walnut Galette Delightful and Easy Recipe

If you love easy recipes that impress, you’ll adore this Rustic Apple Walnut Galette. With just a few fresh ingredients,

To make these delicious lava cakes, gather the following ingredients: - 1/2 cup dark chocolate chips (70% cocoa preferred) - 1/4 cup unsalted butter - 1/2 cup powdered sugar - 2 large eggs - 2 large egg yolks - 1 teaspoon vanilla extract - 1/4 cup all-purpose flour - A pinch of salt These cakes shine when served warm. You can add a scoop of ice cream or a dollop of whipped cream. Fresh berries or a sprinkle of cocoa powder can elevate the look, too. Select dark chocolate with at least 70% cocoa for rich flavor. Use fresh eggs to ensure a fluffy texture. Unsalted butter is best for controlling salt levels. Choose organic ingredients when possible for added quality. First, you need to preheat your air fryer. Set it to 350°F (175°C). This step is key for even cooking. A hot air fryer helps the cakes rise perfectly. It only takes a few minutes, so be patient. Next, grab a microwave-safe bowl. Add 1/2 cup of dark chocolate chips and 1/4 cup of unsalted butter. Microwave this mix in 30-second bursts. Stir after each burst until it is smooth. You want a nice, glossy mixture. This is the heart of your lava cake. Once your chocolate is melted, add 1/2 cup of powdered sugar. Stir it in well. Then, crack in 2 large eggs and 2 egg yolks. Don’t forget the 1 teaspoon of vanilla extract! Whisk everything together until it looks smooth. Now, gently fold in 1/4 cup of all-purpose flour and a pinch of salt. Be careful not to overmix. You want a light batter. Now you’re ready to pour the batter into ramekins! To get that gooey center, cook the cakes for 8 to 10 minutes. Check the edges; they should be firm. The center must look soft and slightly jiggly. This is where the magic happens! If you cook too long, the center will not flow. One mistake is overmixing the batter. This can lead to dense cakes instead of light ones. Another common error is not greasing the ramekins well. If the batter sticks, your cake won't come out right. Also, check your air fryer temperature. If it is too hot, your cakes will burn. You can add flavors to make your cakes special. Try adding a teaspoon of espresso for a coffee twist. Orange zest gives a fresh taste. You can also swap dark chocolate for milk chocolate for a sweeter flavor. Want something extra? Add a piece of caramel or peanut butter in the center before cooking. This gives you even more yummy surprises! {{image_2}} You can create many types of chocolate lava cakes. While the classic version is rich and chocolatey, try adding different chocolate types. Use milk chocolate for a sweeter taste or white chocolate for a creamy twist. You can also experiment with different shapes, like cupcakes or mini cakes. Just remember to adjust your cooking time. If you want a vegan lava cake, swap the eggs for flax eggs. Mix one tablespoon of flaxseed meal with two and a half tablespoons of water. Let it sit until it thickens. For gluten-free options, replace all-purpose flour with almond flour or a gluten-free mix. Both options work well in the air fryer, giving you a delicious treat. Adding flavor can make your lava cake even better. A teaspoon of espresso powder deepens the chocolate taste. You can mix in orange zest for a fresh, citrus burst. Other options include a dash of cinnamon or even a splash of mint extract. Get creative and try what you love! To keep your leftover lava cakes fresh, first let them cool. Once cool, cover each ramekin with plastic wrap. This helps to seal in moisture. You can also place them in an airtight container. Stored this way, they will stay good for 1-2 days in the fridge. When you're ready to enjoy your leftover cakes, take them out of the fridge. Remove the plastic wrap or lid. Place the ramekin in the air fryer again at 350°F (175°C) for about 4-5 minutes. This warms them through without drying them out. You want that gooey center back! If you want to save lava cakes for longer, freezing works great. Wrap each cooled cake tightly in plastic wrap. Then place them in a freezer-safe bag or container. They can last up to 3 months in the freezer. When you're ready to eat, thaw in the fridge overnight and reheat as mentioned. Yes, you can. Use muffin tins instead. Just make sure to grease them well. The cakes may come out a bit different but will still be delicious. You can also use silicone molds for easy removal. Check the edges first. They should look firm. The center should still look soft and jiggly. If the center is set, your cake is overcooked. Aim for 8 to 10 minutes in the air fryer for the best results. Serve these cakes warm for a great treat. Ice cream or whipped cream works well on top. Add fresh berries or a sprinkle of cocoa powder for a nice touch. You can also try a drizzle of chocolate sauce for extra flavor. In this post, we explored how to make delicious Air Fryer Chocolate Lava Cakes. We covered the key ingredients, step-by-step instructions, and tips to get the perfect molten center. You learned about variations, storage, and common questions. Making these cakes is easy and fun. With a few simple changes, you can impress anyone. Enjoy your tasty treat, and don't be afraid to get creative with flavors!

Irresistible Air Fryer Chocolate Lava Cakes Recipe

Who can resist a warm, gooey chocolate lava cake? With an air fryer, you can whip up these delicious treats

To make your Sheet-Pan Pesto Shrimp & Vegetables, gather these fresh and vibrant ingredients: - 1 lb large shrimp, peeled and deveined - 2 cups cherry tomatoes, halved - 1 medium zucchini, sliced into half moons - 1 bell pepper (any color), chopped - 1 cup asparagus, cut into 2-inch pieces - 1/4 cup pesto (store-bought or homemade) - 2 tablespoons olive oil - 2 cloves garlic, minced - Salt and pepper to taste - Fresh basil leaves, for garnish - Lemon wedges, for serving Each ingredient plays a key role. The large shrimp bring a sweet, tender bite. Cherry tomatoes add juicy bursts of flavor. Zucchini and bell pepper give a great crunch. Asparagus adds a nice touch and a pop of color. Pesto sauce is the star here. It coats everything in a rich, herby flavor. The olive oil helps everything roast nicely in the oven. Garlic adds a fragrant kick. Salt and pepper enhance all the tastes. Finally, fresh basil and lemon wedges add brightness to the dish. This mix of ingredients creates a colorful and tasty meal. You can feel good knowing you are using fresh, healthy foods. Plus, they all cook together on one sheet pan, making clean-up a breeze! Set your oven to 400°F (200°C). This high heat helps the shrimp cook quickly and evenly. Lining your baking sheet with parchment paper is key. It makes cleanup a breeze and keeps food from sticking. In a large mixing bowl, combine the shrimp, cherry tomatoes, zucchini, bell pepper, and asparagus. Drizzle olive oil and pesto over the mix. Add minced garlic, salt, and pepper to taste. Toss everything together until well coated. This step ensures each bite bursts with flavor. Spread the mixture evenly on your prepared baking sheet. Make sure everything is in a single layer. Bake in the oven for 12-15 minutes. The shrimp should turn pink and opaque, while the vegetables become tender. This is the perfect time to let your kitchen fill with delicious smells. To ensure your shrimp cook just right, use fresh shrimp. Look for shrimp that are firm and have a slight sheen. If you use frozen shrimp, thaw them completely. This helps them cook evenly. When choosing pesto, go for high-quality brands. You can also make your own. A great pesto has fresh basil, good olive oil, and nuts. This adds rich flavor to your dish. You can boost the flavor with some extra spices. Consider adding red pepper flakes for heat or smoked paprika for depth. Both spices work well with shrimp. For garnishes, fresh herbs like parsley or chives add a nice touch. You could also sprinkle some feta cheese on top for creaminess. Lemon zest is another option. It gives a fresh, bright flavor to the dish. {{image_2}} You can add more vegetables to this dish for extra flavor and nutrients. Some great options include: - Broccoli florets - Carrots, sliced thin - Snap peas - Cauliflower, cut into small pieces For harder vegetables, like carrots or cauliflower, cut them into smaller pieces. This helps them cook faster. You may need to add a few extra minutes to the baking time. Just make sure everything is tender before serving. If you want to switch up the protein, there are many great substitutes for shrimp. You can use: - Chicken breast, cut into bite-sized pieces - Tofu, diced into cubes - Scallops, for a seafood twist If you want a vegetarian or vegan dish, use tofu or chickpeas instead of shrimp. Both options soak up the pesto flavor well and add a nice texture. Adjust the cooking time as needed, especially if using chicken. Cook until it reaches a safe temperature of 165°F (74°C). Enjoy experimenting with these variations! To keep your leftover sheet-pan pesto shrimp and vegetables fresh, use airtight containers. Glass containers work well because they do not stain. You can also use plastic containers if they are BPA-free. Store your leftovers in the fridge for up to three days. This way, you can enjoy a quick meal later. When reheating, the best methods are the oven or microwave. For the oven, set it to 350°F (175°C). Place your leftovers on a baking sheet and cover with foil. Heat for about 10-15 minutes until warm. This keeps the shrimp and vegetables from getting too dry. If using a microwave, heat in short bursts of 30 seconds. Stir in between to avoid overcooking. Enjoy your delicious meal again! Yes, you can use frozen shrimp! Just make sure to thaw them first. Place the shrimp in a bowl of cold water for about 15 minutes. After thawing, pat them dry with a paper towel. This helps the shrimp absorb the flavors of the pesto better. You will know the shrimp are done when they turn pink and opaque. This usually takes around 12 to 15 minutes in the oven. Another tip is to check if they curl into a tight "C" shape. If they look firm and slightly shiny, they are ready to eat! Absolutely! Making your own pesto is easy and fun. Here are some tips for homemade pesto preparation: - Use fresh basil leaves for the best flavor. - Add 1/4 cup of nuts like pine nuts or walnuts for richness. - Blend in 1/2 cup of Parmesan cheese for a savory kick. - Drizzle in 1/2 cup of olive oil while blending to achieve a smooth texture. - Don't forget to season with salt and pepper to taste. Making pesto at home adds a personal touch to your dish! This recipe for pesto shrimp combines fresh ingredients and easy steps. You learned how to prepare shrimp and veggies, bake them, and add flavor. I shared tips on cooking and storing leftovers, plus alternatives for different diets. Pesto shrimp is versatile and makes a delicious meal. With simple changes, you can make it your own. Enjoy cooking this dish and experimenting with flavors!

Sheet-Pan Pesto Shrimp & Vegetables Easy Dinner Delight

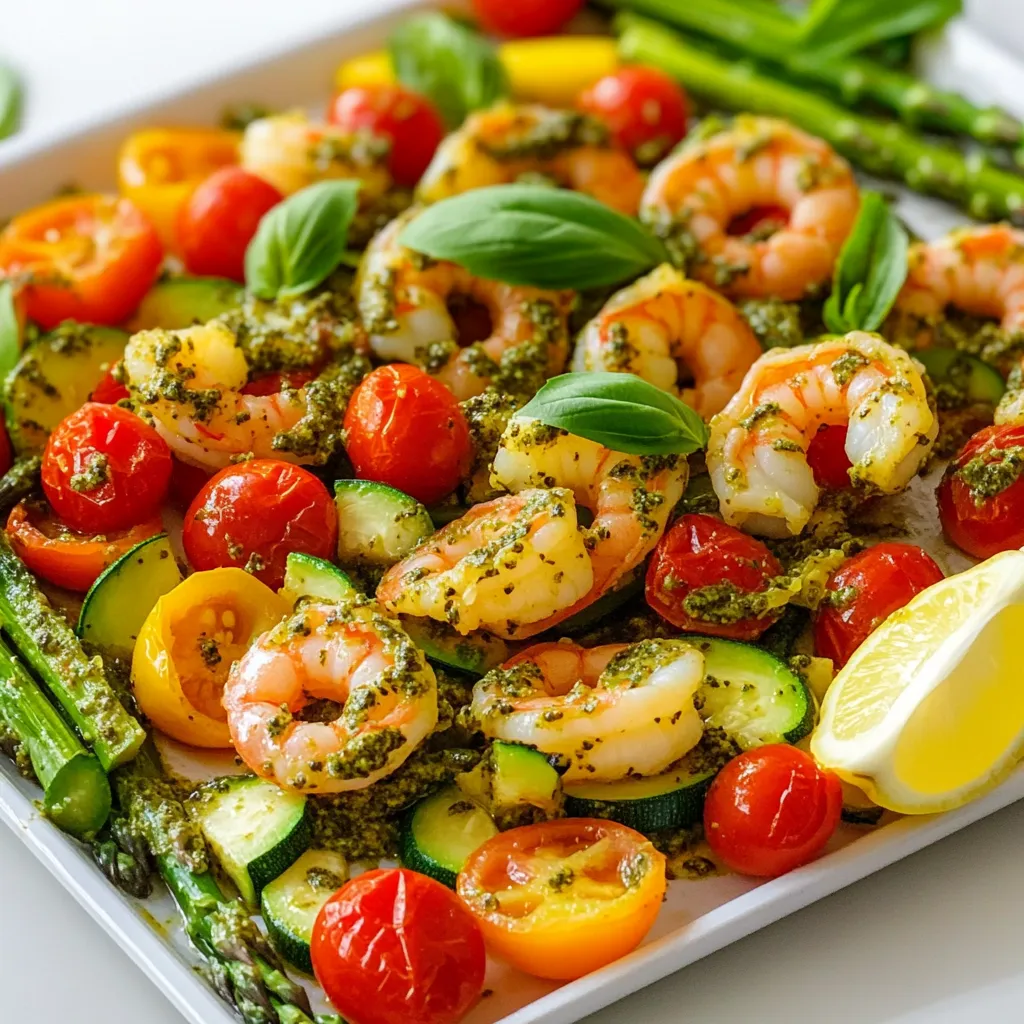
Looking for an easy weeknight meal? This Sheet-Pan Pesto Shrimp & Vegetables will be your new go-to! Packed with juicy

Older posts
Newer posts
← Previous Page1 … Page4 Page5 Page6 … Page82 Next →

dsad

© 2026 Recipes Pursuit • Built with GeneratePress

Our Policies

  • Copyright Policy
  • Cookie Policy
  • GDPR Policy
  • Privacy Policy
  • Disclaimer
  • Terms Of Use

More Information

  • Home
  • About
  • Contact
  • Appetizers
  • Dessert
  • Dinner
  • Drinks
©2026, Recipes Pursuit About Back To Top