Skip to content
DisclaimerTerms Of UseGDPR PolicyCookie Policy

Recipes Pursuit

  • Home
  • Drinks
  • Appetizers
  • Dinner
  • Dessert
  • About
  • Contact
  • Privacy Policy
DisclaimerTerms Of UseGDPR PolicyCookie Policy

NO-ING-IMG

- 2 cups rolled oats - 1 cup all-purpose flour - 1/2 cup brown sugar, packed - 1/2 cup unsalted butter, softened - 1 teaspoon cinnamon - 1/2 teaspoon salt - 3 large apples, peeled, cored, and sliced thinly (preferably Granny Smith or Honeycrisp) - 1 cup caramel sauce (store-bought or homemade) - 1/4 cup chopped walnuts or pecans (optional) To make my Caramel Apple Crisp Bars, I use simple, fresh ingredients. The rolled oats give a hearty texture. They mix well with flour, brown sugar, and butter to form a delicious crust. I always choose Granny Smith or Honeycrisp apples. They have the right balance of tartness and sweetness. Slicing them thin helps them cook evenly. Cinnamon adds warmth and depth to the flavor. The caramel sauce is the star of the show, adding sweetness and richness. If you love nuts, toss in some chopped walnuts or pecans for a nice crunch. These ingredients come together to create a cozy treat. You can find the full recipe below to see how these elements blend perfectly into a delightful dessert. Preheating the Oven Start by preheating your oven to 350°F (175°C). This step is key for even baking. Mixing Ingredients In a large bowl, mix together the rolled oats, all-purpose flour, brown sugar, softened butter, cinnamon, and salt. It should feel crumbly. Make sure the butter mixes well into the dry ingredients. Forming the Crust Take half of this mixture and press it firmly into the bottom of a greased 9x13-inch baking dish. This forms a solid base for your bars. Arranging Apple Slices Take three large apples. Peel, core, and slice them thinly. Spread these apple slices evenly over the crust. Aim for even coverage to ensure each bite is tasty. Drizzling Caramel Sauce Now, drizzle half of your caramel sauce over the apple layer. This adds a rich sweetness and flavor to your bars. Adding Topping and Nuts Sprinkle the rest of the oat mixture over the apple and caramel layers. If you like, add chopped walnuts or pecans on top. This gives a nice crunch. Baking Time Place your dish in the oven. Bake for 25-30 minutes. Keep an eye on it. The top should turn golden brown, and the apples should become tender. Cooling Instructions Once baked, take it out and let it cool for about 15 minutes. This helps the bars set and makes cutting easier. Drizzling Additional Caramel Before slicing, drizzle the remaining caramel sauce on top. This adds a final touch of sweetness and makes your dessert look amazing. For the full recipe, check out the detailed instructions. How to Achieve a Golden Brown Top To get that golden brown color, bake your bars at 350°F. Watch closely during the last few minutes. If the top is not golden yet, leave it in a few extra minutes. You want a nice warm color, not burnt. Avoiding Soggy Bottoms A soggy bottom can ruin your treat. To prevent this, press the oat mixture well when forming the crust. Make sure to bake it long enough before adding apples. This helps create a sturdy base. Ensuring Apples are Tender Choose firm apples like Granny Smith or Honeycrisp. Slice them thinly; this helps them cook evenly. Bake until the apples are soft but not mushy. This way, they add texture and flavor to your bars. Best Accompaniments Caramel apple crisp bars pair well with vanilla ice cream. A scoop on the side makes it extra special. You can also serve it with whipped cream for a light touch. Presentation Ideas Cut the bars into neat squares for a clean look. Drizzle extra caramel sauce on top before serving. You can sprinkle some chopped nuts for a nice crunch. Serving Temperature Recommendations These bars taste great warm or at room temperature. If you want a cozy treat, serve them warm. If you prefer them chilled, let them cool completely before serving. Overmixing the Oat Mixture Mix just until combined. Overmixing can lead to tough bars. You want a crumbly texture for a great bite. Not Using the Right Apple Variety Stick to tart apples like Granny Smith. Sweet apples may not balance the flavors well. The right apple keeps the bars from being too sweet. Skipping the Cooling Time Do not rush the cooling time. Letting them cool helps them set properly. If you cut them too soon, they may fall apart. Give them at least 15 minutes before slicing. For more detailed instructions and ingredients, check out the Full Recipe. {{image_2}} Alternative Sweeteners If you want less sugar, use honey or maple syrup. These natural sweeteners add flavor and moisture. You can also try coconut sugar for a richer taste. Vegan and Gluten-Free Options To make this recipe vegan, swap the butter for coconut oil or vegan butter. For a gluten-free version, use gluten-free flour. Make sure your oats are certified gluten-free to avoid cross-contamination. Different Nut Varieties Try using almonds or pecans instead of walnuts. Each nut brings its unique flavor and crunch. If you prefer no nuts, simply leave them out. Adding Spices and Extracts Mix in nutmeg or ginger for extra warmth. A splash of vanilla extract can also enhance the flavor. These small changes can make a big impact on taste. Incorporating Dried Fruits Add raisins or cranberries for chewy bites. They pair well with the apples and caramel. Just make sure to adjust the sweetness to balance everything. Swapping Caramel for Other Sauces Trade caramel for chocolate or butterscotch sauce. Each option gives a new twist to the bars. Experiment to find your favorite combination. Transforming Bars into Muffins Pour the mixture into muffin tins instead of a baking dish. This makes perfect, portable treats. Just adjust the baking time to about 15-20 minutes. Making Individually Wrapped Treats Cut the bars into small squares. Wrap them in parchment paper for easy sharing. This is great for parties or lunchboxes. Serving as a Pie Use a pie crust to make a delicious caramel apple pie. Layer the apple filling and oat topping as you would for the bars. Bake until golden and enjoy a different take on this classic dish. For the full recipe, please refer back to the detailed instructions above. To keep your caramel apple crisp bars fresh, store them in the fridge. Use an airtight container. This helps keep moisture out and flavor in. They stay tasty for about five days. If you want to enjoy them at their best, eat them within the first few days. If you want to keep them longer, freezing works well. Wrap each bar in plastic wrap and then place them in a freezer bag. This helps avoid freezer burn. They can last for up to three months in the freezer. To enjoy them, thaw in the fridge overnight. Reheat them in the oven at 350°F (175°C) for about 10 minutes. This will warm them and make them nice and soft again. These bars last about five days in the fridge. In the freezer, they last up to three months. Watch for signs of spoilage. If you see mold or the bars smell off, toss them. Freshness matters when it comes to taste. Enjoy your caramel apple crisp bars while they are at their best! For the full recipe, check back to the ingredients section. The best apples for these bars are Granny Smith and Honeycrisp. Granny Smith apples add a nice tartness. Honeycrisp apples bring a sweet crunch. You can mix both for a great flavor. A variety of apples gives depth to your dish. Yes, you can make these bars ahead of time. Prepare the bars and store them in the fridge. They will stay fresh for up to three days. Serve them warm or at room temperature. Just reheat them slightly in the oven for best results. Making homemade caramel sauce is simple. You will need sugar, butter, and cream. Melt sugar in a pan until it is golden brown. Add in butter and stir. Once melted, pour in the cream slowly. Stir until smooth. To perfect your caramel sauce, watch the color closely. A deep golden color means it is ready. If it burns, start over. Do not rush this process; patience makes perfect sauce. Yes, you can use store-bought caramel sauce. Look for high-quality brands without additives. This gives a rich flavor that complements your bars. Store-bought sauces may taste sweeter than homemade. Adjust the amount you use based on your preference. You will know the bars are done when the top is golden brown. The apples should be tender but not mushy. A toothpick inserted should come out clean. Keep a close eye on the bars during the last few minutes of baking. This ensures they do not overcook. This article covers everything you need to make tasty caramel apple crisp bars. We discussed ingredients, step-by-step instructions, tips for baking, and common mistakes to avoid. You can even try different variations and storage methods. These bars are sure to impress friends and family. Remember to choose the right apples and let them cool after baking for the best taste. Enjoy your delicious creation and share your results!

Caramel Apple Crisp Bars Irresistible and Tasty Treat

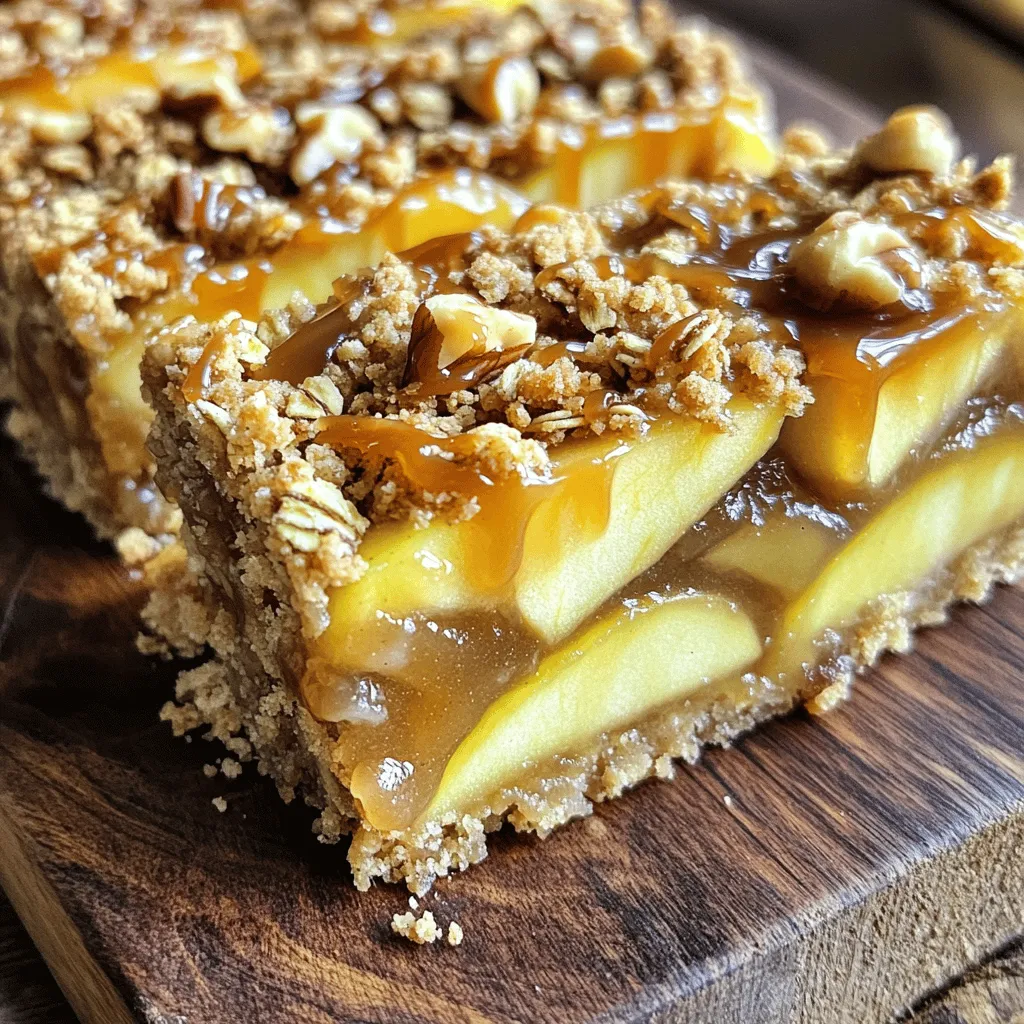
Get ready to satisfy your sweet tooth with my Caramel Apple Crisp Bars! These layers of tender apples, warm spices,

To make Pumpkin Spice French Madeleines, you need these key ingredients: - 1 cup all-purpose flour - 1 teaspoon baking powder - 1 teaspoon pumpkin pie spice - 1/4 teaspoon salt - 1/2 cup unsalted butter, melted - 3/4 cup granulated sugar - 2 large eggs - 1/2 teaspoon vanilla extract - 1/2 cup pumpkin puree - Powdered sugar for dusting These ingredients create a soft, fluffy treat that bursts with pumpkin flavor. If you have common allergens, here are some substitutions: - For gluten-free, use a 1:1 gluten-free flour blend. - If you are dairy-free, try using coconut oil instead of butter. - For egg-free, use flax eggs (1 tablespoon flaxseed meal + 2.5 tablespoons water = 1 egg). The key tool for this recipe is a madeleine pan. This pan has unique shell shapes that give madeleines their classic form. It is important because it helps create the perfect texture. Without it, your madeleines won’t have their lovely shape. You will also need: - Mixing bowls for combining ingredients. - A whisk for mixing dry and wet ingredients well. - A spatula for folding the batter gently. - An oven to bake the madeleines evenly. These tools make the process smooth and fun! Each one plays a role in crafting delicious madeleines that you can share with friends or enjoy solo. 1. Preheat the oven: Set your oven to 350°F (175°C). This helps the madeleines bake evenly. 2. Prepare the madeleine pan: Grease the pan with butter or use non-stick spray. A well-greased pan ensures easy removal. 3. Combine dry ingredients: In a bowl, whisk together: - 1 cup all-purpose flour - 1 teaspoon baking powder - 1 teaspoon pumpkin pie spice - 1/4 teaspoon salt Mixing these ingredients is crucial. It ensures that the baking powder and spices are evenly spread throughout the batter. 4. Beat the wet mixture: In a large bowl, mix: - 1/2 cup unsalted butter, melted - 3/4 cup granulated sugar Whisk until it becomes creamy. 5. Add eggs: Add 2 large eggs, one at a time. Beat well after each egg. This helps to incorporate air, making the madeleines light and fluffy. 6. Incorporate flavors: Stir in: - 1/2 teaspoon vanilla extract - 1/2 cup pumpkin puree Mix until everything is well combined. 7. Combine wet and dry: Gradually fold the dry mixture into the wet mixture. Be gentle—some lumps are okay. Overmixing can make the madeleines tough. 8. Fill the pan: Spoon the batter into the prepared madeleine pan. Fill each mold about three-quarters full for the best shape. 9. Bake: Place the pan in the oven and bake for 10-12 minutes. Look for golden edges. The tops should spring back when you gently press them. 10. Cool down: Remove from the oven. Let the madeleines cool in the pan for a few minutes. Then, transfer them to a wire rack. 11. Final touch: Once cooled, dust with powdered sugar. This adds a nice finish and sweetness. These steps ensure you achieve that perfect texture and flavor in your pumpkin spice French madeleines. For the complete recipe, check out the [Full Recipe]. To make great madeleines, start with the batter. Mix your ingredients gently. Overmixing can ruin the fluffy texture. Just fold until you see no dry flour. It’s okay if some lumps remain. After baking, let the madeleines cool in the pan for a few minutes. This helps them keep their shape. Then, transfer them to a wire rack. Cooling them completely on the rack is key. For the final touch, dust them with powdered sugar. This adds a sweet look and taste. One common mistake is overmixing the batter. Overmixing creates a dense texture. You want them light and airy, so mix carefully. Another issue is baking time. Different ovens can change how long you bake. Keep an eye on your madeleines. They should look golden on the edges. If your oven runs hot, check them a few minutes early. Trust your instincts for the best results. {{image_2}} You can change the flavor of your madeleines easily. Adding chocolate chips can bring a rich taste. Try folding in nuts, like walnuts or pecans, for a crunchy bite. You can also mix spices. Use cinnamon or nutmeg for a twist on the classic pumpkin spice. Each option adds a unique flavor, making these treats even more fun. If you need gluten-free madeleines, swap all-purpose flour for a gluten-free blend. These blends often work well in baked goods. For a vegan version, use flax eggs instead of real eggs. To replace butter, try using coconut oil or applesauce. These changes keep the taste great while fitting your diet. To keep your madeleines fresh, store them in an airtight container. This helps prevent them from drying out. Place parchment paper between layers to avoid sticking. They stay good for up to three days at room temperature. For longer storage, you can freeze them. Freezing madeleines is easy. Let them cool completely first. Then, wrap each one in plastic wrap. Place them in a freezer bag or container. They will last for up to three months in the freezer. When you want to enjoy them, just take out what you need. To reheat madeleines, use an oven for the best results. Preheat your oven to 350°F (175°C). Place the madeleines on a baking sheet for about five minutes. This keeps them warm and soft. You can also use a microwave. Heat them for about 10-15 seconds. Be careful not to overheat, as they can dry out quickly. Serve warm, dusted with powdered sugar for a nice touch. Enjoy them with coffee or tea for a cozy treat! You can tell when madeleines are done by looking for a few signs. First, check the edges. They should be golden brown. Next, gently press the tops. They should spring back easily. If they stay dented, they need more time. The baking time is usually 10 to 12 minutes. Ovens vary, so keep an eye on them. Yes, you can use fresh pumpkin. However, the texture may change. Fresh pumpkin often has more moisture than canned. This can make your batter wetter. You may need to adjust the flour to balance it out. Cook the fresh pumpkin first to reduce moisture. Then, mash it well before adding it to your batter. You have many options for spices! Cinnamon adds warmth and sweetness. Nutmeg gives a nice kick. Ginger can add a zesty flavor. Cloves bring in a deeper spice note. Feel free to mix and match. Experimenting with spices can lead to fun new flavors in your madeleines! Madeleines are delightful, but making them takes careful steps and attention. You learned about the key ingredients needed and the tools that help you bake perfectly. We discussed mixing, baking, and ways to avoid common mistakes. You can even try different flavors, like chocolate or spices. Storage tips will help you enjoy madeleines longer. Remember, with practice, you will master this classic treat. Enjoy your journey with madeleines!

Pumpkin Spice French Madeleines Fluffy Treat Recipe

Get ready to fall in love with a sweet treat! My Pumpkin Spice French Madeleines are not just fluffy and

- 8 oz fettuccine pasta - 1 lb large shrimp, peeled and deveined - 1 tablespoon Cajun seasoning - 2 tablespoons olive oil - 1 medium onion, diced - 3 cloves garlic, minced - 1 cup heavy cream - 1 cup chicken broth - 1 cup cherry tomatoes, halved - 1 cup fresh spinach - Salt and pepper to taste - 1/4 cup grated Parmesan cheese - Fresh parsley, chopped (for garnish) - Try different seasonings for unique flavors - Use other pasta types like penne or linguine - Add extra vegetables like bell peppers or zucchini The core of this recipe lies in its balance of flavors. You need fettuccine pasta for that perfect base. Large shrimp provide a great protein boost, while Cajun seasoning adds a spicy kick. Olive oil is essential for sautéing and brings everything together. The additional ingredients enhance the dish. Diced onion and minced garlic build a flavorful base. Heavy cream and chicken broth create the rich sauce. Halved cherry tomatoes add sweetness, and fresh spinach gives a nice pop of color and nutrition. Don't forget salt and pepper to taste, plus Parmesan for that creamy finish! Optional ingredients allow you to customize the dish. Experiment with seasonings to find your favorite mix. You can also swap out pasta types or add extra vegetables for more texture and taste. For the full recipe, check out the details above. Enjoy your cooking adventure! 1. Cook the pasta and set aside Boil salted water in a large pot. Add 8 oz of fettuccine pasta. Cook until al dente, then drain. Set the pasta aside for later. 2. Toss the shrimp with Cajun seasoning In a bowl, add 1 lb of large shrimp. Sprinkle with 1 tablespoon of Cajun seasoning. Mix well to coat all the shrimp evenly. 1. Sauté the onion and garlic Heat 2 tablespoons of olive oil in a large skillet over medium heat. Add 1 diced medium onion. Cook for 3-4 minutes until soft. Stir in 3 minced garlic cloves and cook for another 1-2 minutes until fragrant. 2. Cook the shrimp until pink and opaque Add the seasoned shrimp to the skillet. Cook for about 3-4 minutes. The shrimp should turn pink and opaque. Remove the shrimp from the skillet and set aside. 1. Make the creamy sauce In the same skillet, pour in 1 cup of chicken broth. Bring to a gentle simmer. Gradually stir in 1 cup of heavy cream and let it simmer for about 5 minutes. This thickens the sauce slightly. 2. Mix in tomatoes and spinach, then combine with shrimp and pasta Add 1 cup of halved cherry tomatoes and 1 cup of fresh spinach to the skillet. Cook until the spinach wilts. Return the cooked shrimp to the skillet. Toss in the fettuccine pasta, mixing all the ingredients well. Adjust the seasoning with salt and pepper to taste. For the full recipe, refer to the earlier section. - To cook shrimp well, heat oil until hot. Add shrimp in a single layer. Cook for 3-4 minutes. When they turn pink, they are ready. - For a creamy sauce, let it simmer slowly. Stir in the heavy cream gradually. This helps it thicken nicely without clumping. - Want more kick? Add a pinch of cayenne or paprika. This boosts the Cajun flavor. - Fresh herbs like parsley and basil add bright taste. Dried herbs work too but use less. - Serve pasta in wide bowls for a nice look. This shows off the sauce and shrimp. - Garnish with parsley and a sprinkle of Parmesan cheese. This adds color and flavor. For the full recipe, check out the complete instructions to create this dish! {{image_2}} You can easily switch up the pasta. Try gluten-free pasta for a lighter option. Rice noodles also work well if you want something different. If you prefer a different protein, use chicken or tofu instead of shrimp. Both options taste great with the creamy sauce. Adjusting the spice levels can change the whole dish. Add more Cajun seasoning if you like heat. If you want it milder, use less seasoning. You can also use different sauces. For instance, a pesto or Alfredo sauce can add unique flavors to this dish. Make this dish a one-pan meal by cooking the pasta in the same skillet. This saves time on cleanup and allows the pasta to soak up all the flavors. You can also serve it as a cold pasta salad. Just let it cool and mix in some fresh veggies for a light meal. For the full recipe, check out Creamy Cajun Shrimp Pasta. To keep your creamy Cajun shrimp pasta fresh, store it in an airtight container. Place it in the fridge within two hours of cooking. This pasta stays good for up to three days. Always let it cool down first to avoid steam build-up in the container. Can you freeze creamy pasta? Yes, you can! However, the sauce might change texture a bit. To freeze, place the pasta in a freezer-safe container. It lasts for about two months. When ready to eat, thaw it in the fridge overnight before reheating. You can reheat your pasta in two ways: the microwave or the stove. For the microwave, place the pasta in a bowl and cover it with a damp paper towel. Heat in 30-second bursts until warm. For the stove, add a splash of chicken broth to a pan and cook on low heat, stirring often. To rehydrate the sauce, keep adding a bit of liquid as you heat. This will help return some creaminess to your dish. If you want to learn more, check out the Full Recipe for creamy Cajun shrimp pasta. What goes well with creamy Cajun shrimp pasta? Creamy Cajun shrimp pasta pairs well with garlic bread and a fresh salad. You can add a simple green salad with a light vinaigrette. Sliced baguette with butter is also tasty. These sides balance the rich flavors and add freshness. Can I make this recipe vegetarian? Yes, you can make this dish vegetarian. Replace shrimp with mushrooms or zucchini. You can also add more vegetables like bell peppers or broccoli. Use vegetable broth instead of chicken broth to keep the flavor rich. Can I use other types of seafood? Absolutely! You can use scallops, crab, or even fish. Adjust cooking times as needed. For example, scallops cook faster than shrimp. Just make sure everything is cooked through. How to adjust for dietary restrictions To adjust for allergies, use gluten-free pasta if needed. For dairy-free, swap heavy cream with coconut milk or cashew cream. Always check ingredient labels to ensure they meet your dietary needs. What's the best way to ensure shrimp are cooked properly? Cook shrimp until they turn pink and opaque. This usually takes about 3-4 minutes. Avoid overcooking, as they can become rubbery. Use a timer to keep track. Tips for making the dish spicier or milder? For a spicier dish, add more Cajun seasoning or some red pepper flakes. If you prefer it milder, cut back on the seasoning and use less garlic. You can always taste and adjust as you go. In this post, we discussed how to make creamy Cajun shrimp pasta. You learned about essential ingredients like fettuccine, shrimp, and Cajun seasoning. I shared clear steps for cooking, making the sauce, and combining everything. We also covered tips for better flavor and presentation. Remember, you can adjust the recipe with different proteins or make it vegetarian. Enjoy your cooking and share your delicious results!

Creamy Cajun Shrimp Pasta Flavorful and Simple Recipe

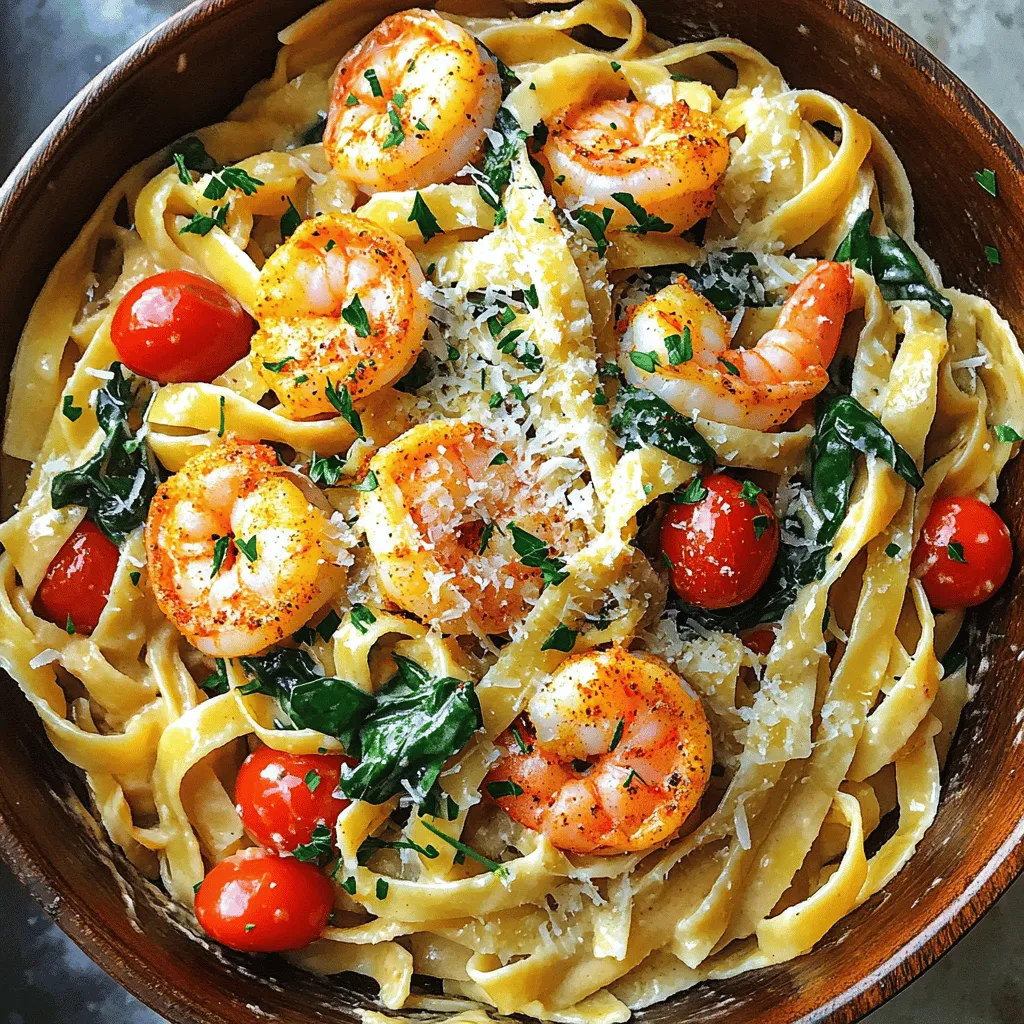
Craving a dish that’s both creamy and spicy? Look no further! My Creamy Cajun Shrimp Pasta is the perfect blend

For garlic herb chicken bites, the right ingredients make all the difference. Let's break them down. - Chicken and Marinade Components - 1 pound chicken breast, cut into bite-sized pieces - 3 tablespoons olive oil - 4 cloves garlic, minced - Herbs and Seasonings - 1 teaspoon dried oregano - 1 teaspoon dried thyme - 1 teaspoon paprika - Salt and pepper to taste - Additional Flavor Enhancers - 2 tablespoons fresh parsley, chopped - Zest of 1 lemon - Lemon wedges for serving Each ingredient plays a key role. The chicken is the star, while olive oil ensures moisture. Garlic adds boldness. Oregano and thyme bring warmth, while paprika gives a touch of color. Salt and pepper enhance all these flavors. Fresh parsley adds brightness, and lemon zest gives a zesty finish. I love how these ingredients work together. They create a dish that is not just tasty but also easy to make. For the full recipe, check out the details above. Enjoy cooking! Start by mixing the chicken with olive oil and spices. I like to use fresh garlic, dried oregano, and thyme. These herbs add great flavor. The key to tasty chicken bites is marinating them well. I suggest marinating for at least 30 minutes. If you have time, let them sit for up to 2 hours. This time allows the chicken to soak up all the flavors. Make sure every piece is coated. This step is crucial for a deep, rich taste. Next, you need to preheat your skillet. Heat it over medium-high heat. Add a splash of olive oil to get it ready. Once hot, it's time to add the chicken bites. Place them in a single layer in the pan. This helps them cook evenly. Cook for about 5 to 7 minutes. Turn them occasionally to brown all sides. You want them golden and cooked through. Use a meat thermometer to check. The chicken should reach 165°F for safety. In the last minute of cooking, add fresh parsley and lemon zest. This brightens up the dish and adds freshness. Give everything a good stir to mix well. Once done, remove the pan from heat and transfer the chicken to a plate. Serve it hot with lemon wedges on the side. The lemon adds a nice zing that pairs perfectly with the garlic and herbs. For the full recipe, check back to ensure you don't miss any details. Duration for Maximum Flavor To get the most flavor, marinate the chicken for at least 30 minutes. If you have time, let it sit for two hours. The longer it marinates, the more the flavors soak in. Alternative Marinade Ingredients Want to switch things up? You can add honey for sweetness or mustard for tang. A splash of soy sauce can also give it a nice umami kick. Feel free to experiment with your favorite flavors. Skillet vs. Oven Cooking I prefer skillet cooking for this recipe. It gives a nice sear and keeps the chicken juicy. If you want to use the oven, it works too. Just set it to 400°F and bake for about 20 minutes. Ensuring Chicken is Juicy To keep your chicken juicy, don’t overcrowd the pan. Cook in batches if needed. Always check that the internal temperature reaches 165°F. This ensures that your chicken is safe to eat and not dry. Pairing Ideas Serve these chicken bites with a fresh salad or rice. They also go well with roasted vegetables. For a fun twist, try them in a wrap with some sauce. Presentation Tips For a great look, sprinkle extra parsley on top before serving. Use lemon wedges around the plate for color and flavor. A nice presentation makes the meal even more enjoyable. For the full recipe, check out the complete details above. {{image_2}} You can switch up the herbs for your garlic herb chicken bites. Some great options include: - Fresh basil for a sweet touch. - Rosemary adds a strong flavor. - Cilantro gives a bright and fresh taste. Want it spicy? Try these ideas: - Add red pepper flakes to the marinade for heat. - Use jalapeños or any hot sauce you like. You can use different proteins if you want a change. Here are some ideas: - Turkey breast works well and is lean. - Pork tenderloin adds a different flavor. If you prefer vegetarian options, consider these swaps: - Use tofu for a plant-based choice. - Cauliflower bites give a nice texture and flavor. You have options for cooking your chicken bites. Baking Instructions: - Preheat your oven to 400°F. - Place the marinated chicken on a baking sheet. - Bake for 20 minutes or until cooked through. Air Fryer Recommendations: - Preheat the air fryer to 375°F. - Place the chicken in a single layer. - Cook for about 10-12 minutes, shaking halfway through. These methods keep your bites juicy and full of flavor! For the full recipe, check out the detailed steps provided. To keep your Garlic Herb Chicken Bites fresh, use airtight containers. These containers help lock in flavor and moisture. You can also wrap the chicken in plastic wrap or foil. Store them in the fridge for up to three days. After that, the chicken might lose its taste and texture. If you have extra chicken bites, freezing is a great option. First, let the chicken cool completely. Place the bites in a single layer on a baking sheet. This step prevents them from sticking together. Freeze for about one hour. Once frozen, transfer them to a freezer bag. Remove as much air as possible to avoid freezer burn. When you're ready to enjoy them again, thaw the chicken bites in the fridge overnight. To reheat, you can use an oven or a skillet. Heat them until warm and crispy. This method keeps them tasty and enjoyable. For the full recipe, check out the earlier section. You can serve Garlic Herb Chicken Bites with many sides. A fresh green salad pairs well. Roasted veggies also make a great match. You might enjoy them with rice or pasta too. Garlic bread adds a nice touch. Feel free to get creative based on your taste. You can marinate the chicken for at least 30 minutes. For deeper flavor, try marinating for up to 2 hours. If you have more time, overnight marination works too. Just remember to keep it in the fridge while it soaks up those tasty flavors. Yes, you can use store-bought marinade for these chicken bites. Look for a garlic or herb flavor to match the recipe. This option saves time and still adds great taste. Just ensure it blends well with your ingredients. The best way to check if chicken is cooked is to use a meat thermometer. The internal temperature should reach 165°F. If you don't have one, cut through a piece to check. The meat should be white, not pink. Cooking it evenly in a single layer helps too. You can find pre-made Garlic Herb Chicken Bites at many grocery stores. Look in the freezer or deli sections. Some local markets may offer freshly made options, too. Always check the label for fresh ingredients. If you're up for it, I recommend making the full recipe at home for the best flavor. You learned how to make flavorful garlic herb chicken bites. We explored the right ingredients, marinating techniques, and cooking steps. I shared tips on perfecting flavors and serving ideas. Don't forget about the variations and how to store leftovers. With these methods, you can enjoy tasty meals anytime. Keep experimenting and have fun with the flavors. Cooking is all about creativity and joy. Enjoy your delicious chicken bites!

Garlic Herb Chicken Bites Irresistible Flavor Packed

Are you ready to impress your taste buds with Garlic Herb Chicken Bites? These flavor-packed bites are easy to make

- 1 lb boneless, skinless chicken breasts - 1/4 cup honey - 1/4 cup soy sauce - 3 cloves garlic, minced - 1 tablespoon fresh ginger, grated - 1 tablespoon rice vinegar - 2 tablespoons sesame oil - Optional: 1/2 teaspoon red pepper flakes - 2 tablespoons green onions, chopped - Sesame seeds for garnish - Seasoning: Salt and pepper to taste When making honey garlic chicken bites, quality ingredients matter. Start with fresh chicken breasts. They should be boneless and skinless for the best texture. The honey brings sweetness, while soy sauce adds a savory touch. Fresh garlic gives a robust flavor that makes this dish pop. For a bit of spice, consider adding red pepper flakes. Ginger adds warmth and depth, and rice vinegar balances the sweetness with a tangy zip. The sesame oil gives a nutty flavor that rounds out the dish perfectly. Don't forget the garnishes! Green onions add color and freshness. Sesame seeds give a nice crunch. Always season with salt and pepper to enhance all the flavors. If you want a full recipe with step-by-step instructions, check out the Full Recipe. This dish is easy to prepare, and every bite bursts with flavor! - Whisk together marinade ingredients: honey, soy sauce, garlic, ginger, rice vinegar, and sesame oil. - Season chicken cubes with salt and pepper, ensuring even coverage. - Pour half of the marinade over the chicken. Mix well to coat all pieces. - Cover and refrigerate for marination. Let it sit for at least 30 minutes, or up to 2 hours for deeper flavor. - Heat a large skillet over medium-high heat. Add a splash of sesame oil. - Once the oil is hot, sear the chicken cubes in a single layer. Cook for about 6-8 minutes, turning occasionally, until golden brown. - Add the remaining marinade to the pan. Let it bubble and coat the chicken. Cook for another 2-3 minutes until the sauce thickens. Remember, for the complete recipe and more tips, check the Full Recipe. For the best flavor, marinate your chicken for at least 30 minutes. If you have time, let it sit for up to 2 hours. This helps the chicken absorb the honey and garlic flavors. To prevent dry chicken, do not skip the marination. The marinade keeps the meat juicy and tender. To check if your chicken is fully cooked, cut into a piece. The meat should be white, not pink. You can also use a meat thermometer; the internal temperature should reach 165°F. For a golden brown exterior, cook the chicken in batches. Avoid crowding the pan, as this can steam the meat instead of searing it. When plating your honey garlic chicken bites, use a clean white plate. This makes the dish pop. Garnish with fresh parsley or cilantro for color. Serve with steamed rice or a light salad. A cold drink, like iced tea or lemonade, pairs great with this meal. For a fun twist, use the chicken in wraps for a quick lunch! {{image_2}} For those who need gluten-free options, substitute the soy sauce with tamari. Tamari has a similar taste and works great in this recipe. If you want a vegetarian alternative, use tofu or tempeh. Both options soak up flavors well and provide a satisfying meal. You can prepare them just like the chicken for a tasty twist. You can add different herbs or spices to change the taste. Try adding fresh basil or cilantro for a fresh kick. If you like heat, increase the red pepper flakes or add sriracha. Adjust the sweetness by adding more honey or using less. Finding the right balance can make your dish feel unique each time. You can serve honey garlic chicken bites as a tasty appetizer or a filling main course. If you want a fun twist, use them as a filling for wraps or sandwiches. Pair them with fresh veggies and a drizzle of extra sauce for a complete meal. The options are endless, so get creative! For the Full Recipe, check out the detailed steps to make your honey garlic chicken bites today! To store honey garlic chicken bites, place them in an airtight container. This keeps them fresh. Let the chicken cool down before sealing. You can keep leftovers in the fridge for up to four days. After this, they may lose flavor and texture. For longer storage, freezing is a great option. First, make sure the chicken is completely cool. Then, place it in a freezer-safe bag. Remove as much air as possible to prevent freezer burn. You can freeze the chicken bites for up to three months. When you’re ready to eat, thaw them overnight in the fridge. This keeps the chicken juicy and safe. You can also use the microwave for quick thawing. To reheat honey garlic chicken bites without drying them out, use a skillet on medium heat. Add a splash of water or broth to keep moisture. Cover the pan to trap steam while reheating. This method helps maintain flavor and tenderness. Another idea is to use the oven. Preheat it to 350°F and place the chicken on a baking sheet. Heat for about 10 minutes or until warm. For serving, try adding leftover bites to salads or wraps. They make for an easy and tasty lunch! For the full recipe, check out the earlier section. To make honey garlic chicken bites, follow these simple steps: 1. Mix the marinade: Whisk honey, soy sauce, garlic, ginger, rice vinegar, sesame oil, and red pepper flakes in a bowl. 2. Prepare the chicken: Cut chicken breasts into bite-sized pieces. Season with salt and pepper. 3. Marinate: Pour half the marinade over chicken. Let it sit for at least 30 minutes in the fridge. 4. Cook the chicken: Heat sesame oil in a skillet. Add marinated chicken in a single layer. Cook for 6-8 minutes, turning until golden brown. 5. Add sauce: Pour remaining marinade into the pan. Cook for another 2-3 minutes until the sauce thickens. 6. Garnish and serve: Top with green onions and sesame seeds. Enjoy with rice or salad. You can find the full recipe above! Yes, you can use chicken thighs. They have a different texture and flavor. - Texture: Thighs are more tender and juicy. They stay moist during cooking. - Flavor: Thighs have a richer taste. This can make the dish even more flavorful. If you prefer a leaner option, stick to chicken breasts. For more flavor, thighs are great! If you don't have honey, there are good substitutes: - Maple syrup: It has a similar sweetness and flavor. - Agave nectar: This is a great vegan option with a mild taste. - Brown sugar: Mix brown sugar with a bit of water to mimic honey’s texture. Feel free to adjust the amount based on your taste. Each substitute gives a unique flavor twist! To make tasty honey garlic chicken bites, gather simple ingredients and follow the steps. You learned how to marinate, cook, and store this dish. Remember, you can adjust flavors to fit your taste. Whether you want to serve it as a main dish or appetizer, it’s easy to adapt. Keep these tips in mind to avoid dry chicken. Enjoy your cooking adventure, and don’t hesitate to share your results!

Honey Garlic Chicken Bites Flavorful Meal Idea

Are you ready to whip up a dish that will wow your taste buds? Honey Garlic Chicken Bites are a

- 8 oz rotini pasta - 1 cup cherry tomatoes, halved - 1 cup corn kernels (fresh or frozen) - 1 cup black beans, rinsed and drained - 1 cup cooked chicken, shredded (can use rotisserie) - 1/2 cup ranch dressing - 1/4 cup BBQ sauce - 1/2 cup green onion, chopped - 1/2 cup shredded cheddar cheese - Salt and pepper to taste - Fresh cilantro, for garnish When choosing your ingredients, fresh is often best. I like to use high-quality ranch dressing, such as Hidden Valley. For BBQ sauce, Sweet Baby Ray's offers a great blend of sweetness and tang. If you want to switch things up, try these ideas: - Use penne or fusilli pasta instead of rotini for a different shape. - For a vegetarian option, replace chicken with diced bell peppers or avocado. - You can swap black beans for kidney beans or chickpeas for a new flavor. When selecting vegetables, look for bright colors and firm textures. Fresh corn is sweet and crunchy, while canned beans are quick and easy. Choose ripe tomatoes that feel slightly soft for maximum flavor. 1. Cook the pasta: Boil water in a large pot. Add 8 oz of rotini pasta. Cook until it's al dente. This means it should be firm but not hard. Drain the pasta and rinse it with cold water. This stops the cooking process. It also keeps the pasta from sticking together. 2. Prepare the ingredients: While the pasta cooks, chop 1 cup of cherry tomatoes in half. If you use frozen corn, let it thaw before adding. Rinse and drain 1 cup of black beans. Shred 1 cup of cooked chicken. You can use rotisserie chicken for ease. 3. Mix the dressings: In a small bowl, combine 1/2 cup of ranch dressing and 1/4 cup of BBQ sauce. Stir until it is smooth. This mix gives your salad a creamy and tangy flavor. 1. Combine the ingredients: In a large mixing bowl, add the cooled pasta, cherry tomatoes, corn, black beans, and shredded chicken. Pour the ranch and BBQ dressing over the top. Toss gently to coat everything. Make sure all ingredients are well mixed. 2. Add the garnishes: Next, add 1/2 cup of chopped green onions and 1/2 cup of shredded cheddar cheese. Season with salt and pepper to taste. Fold these ingredients in gently. 3. Chill and serve: Cover the bowl and place it in the fridge for at least 30 minutes. This step helps the flavors blend well. Before you serve, garnish with fresh cilantro. This adds a nice color and taste. For the full recipe, check out the details above. Enjoy your BBQ Ranch Pasta Salad as a fresh and flavorful delight! You can prepare BBQ Ranch Pasta Salad a day ahead. This helps the flavors mix well. Start by cooking the rotini pasta and letting it cool. Mix all the ingredients, but save the dressing for later. Keep the salad in the fridge. When you're ready to serve, add the dressing and mix gently. This keeps everything fresh and tasty. For best flavor, let it sit for at least 30 minutes before serving. This allows the pasta to soak up the ranch and BBQ sauce. You can also add extra veggies or proteins to boost flavor. Taste your salad before serving. This lets you adjust flavors to your liking. You may want more ranch or BBQ sauce. Just add a little at a time. Watch out for common mistakes. Don’t add too much salt or pepper at first. You can always add more later, but it’s hard to fix if you overdo it. Always mix and taste as you go. This way, you’ll create a dish that everyone will love. For the full recipe, check out the BBQ Ranch Pasta Salad section! {{image_2}} You can easily make BBQ Ranch Pasta Salad fit your taste. If you want a vegetarian or vegan option, swap the chicken for extra beans or grilled veggies. You could use chickpeas for protein. This keeps the salad hearty and filling. For a creamier base, try using vegan ranch or a cashew dressing instead of traditional ranch. You can also switch up the sauces. If you prefer a tangy kick, use buffalo sauce instead of BBQ. For a more zesty flavor, mix in a cilantro-lime dressing. These swaps let you customize the salad to your liking and keep it fresh. Seasonal ingredients can elevate this dish. In summer, add diced cucumbers or bell peppers for a crisp texture. Fresh corn is a great choice as well, adding sweetness. In fall, consider roasted butternut squash or apples for a warm flavor. You could even add nuts like walnuts or pecans for a new crunch. When winter arrives, try adding shredded Brussels sprouts or kale. These greens give a hearty feel and add nutritional value. Each season brings new flavors, making this salad a year-round delight. For the complete recipe, check out the [Full Recipe]. To keep your BBQ Ranch Pasta Salad fresh, store it in an airtight container. This helps prevent it from drying out and keeps flavors strong. Properly stored in the fridge, it lasts for about 3 to 5 days. If you notice any changes in smell or color, it’s best to throw it out. When you're ready to enjoy leftovers, you can eat it cold or warm it up. If you prefer it warm, heat it on the stove over low heat. Stir gently to avoid losing flavor. Adding a splash of ranch dressing can help revive the taste. Can it be frozen? Yes, you can freeze BBQ Ranch Pasta Salad. However, the texture may change after thawing. I recommend not freezing it if you plan to use fresh ingredients like tomatoes or green onions. The best method is to freeze the pasta separately from the veggies and dressing. This way, you can maintain the best texture and flavor. For the full recipe, check the earlier sections. What is BBQ Ranch Pasta Salad? BBQ Ranch Pasta Salad is a fun mix of flavors. It combines rotini pasta, fresh veggies, and tender chicken with a tasty dressing. The ranch and BBQ sauce add a creamy, tangy touch. This dish is perfect for picnics or BBQs. Can I use different types of pasta? Yes, you can use different pasta types! Penne, fusilli, or even elbow macaroni work great. Just make sure to cook it until al dente. This keeps the pasta from getting mushy in the salad. Reasons your salad may not turn out as expected If your salad is bland, you may need more seasoning. Always taste as you go! If it’s too wet, you might have added too much dressing. Start with less and add more if needed. How to fix mushy pasta or overly dry salad For mushy pasta, try cooking it for a shorter time next time. If your salad is too dry, add a splash of ranch or BBQ sauce. Mix well to moisten without overpowering the dish. Health benefits of ingredients used This salad is packed with nutrients. Black beans offer protein and fiber. Cherry tomatoes are full of vitamins and antioxidants. Fresh veggies add crunch and color. Caloric breakdown per serving Each serving has about 350 calories. This includes healthy fats from cheese and dressing. It’s a filling dish that can fit into many meal plans. This blog post covered all you need to know about BBQ Ranch Pasta Salad. We discussed key ingredients, preparation steps, and tips for the best flavor. You now have ideas for variations and ways to store your salad. Remember, you can adjust seasonings to fit your taste and try different ingredients for fun twists. Keep these tips in mind for a tasty dish every time. Enjoy making and sharing this salad with friends and family!

BBQ Ranch Pasta Salad Fresh and Flavorful Delight

Are you ready for a delicious twist on a classic dish? BBQ Ranch Pasta Salad is the perfect blend of

- 1 cup cookie butter (Biscoff recommended) - 1/2 cup unsalted butter, melted - 1 cup brown sugar, packed To make these blondies, you need soft and sweet ingredients. The cookie butter gives the blondies their unique flavor. I always suggest Biscoff because it has a nice spice. The unsalted butter adds richness. Using melted butter makes mixing easy. Brown sugar is key; it adds moisture and that lovely brown color. - 1/2 cup chocolate chips or butterscotch chips - 1/4 cup crushed cookies for topping Want to make your blondies even more fun? Add chocolate chips or butterscotch chips. They melt and create gooey pockets of sweetness. If you like a bit of crunch, sprinkle crushed cookies on top. This adds texture and looks great. You can mix and match to fit your taste! For the full recipe, check the earlier section. First, preheat your oven to 350°F (175°C). This step warms the oven for even baking. Next, grab a 9x9 inch baking pan. Grease it with butter or line it with parchment paper. Lining helps with easy removal later. In a large mixing bowl, mix 1/2 cup of melted unsalted butter with 1 cup of cookie butter. Stir until they blend well. Now, add 1 cup of brown sugar and 1/4 cup of granulated sugar. Mix these until the blend is smooth and creamy. This step is key for great flavor. In another bowl, whisk together 1 1/2 cups of all-purpose flour, 1/2 teaspoon of baking powder, and 1/4 teaspoon of salt. Gradually add this dry mix to the wet ingredients. Stir until just combined. Avoid overmixing, as this keeps your blondies soft. If you want, fold in 1/2 cup of chocolate chips or butterscotch chips at this point. Pour the batter into the prepared pan and smooth the top with a spatula. Bake for 25 to 30 minutes. Check for doneness with a toothpick. It should come out with a few moist crumbs. Enjoy your delicious creation! For the full details, you can refer to the Full Recipe. To get the best texture, do not overmix the batter. Mixing too much can make blondies tough instead of soft. When you add the flour, mix just until it disappears. This keeps your blondies chewy and light. To check for doneness, look for golden edges. Insert a toothpick into the center. If it comes out with a few moist crumbs, your blondies are ready. If it’s wet, let them bake a bit longer. You can try different cookie butters for unique flavors. Brands like Speculoos or other flavored spreads work well. Each one brings its own twist to the blondie. For extra fun, add mix-ins like nuts or dried fruit. You can also top your blondies with a sprinkle of sea salt or crushed cookies. These little touches make your treats even more special. For the full recipe, be sure to follow the steps carefully to enjoy this delicious sweet delight! {{image_2}} You can change up the flavor of your cookie butter blondies in fun ways. Try using different types of chocolate or nuts. Dark chocolate adds a rich taste, while white chocolate gives a sweet twist. You could also use nuts like walnuts or pecans for crunch and flavor. Adding spices can really elevate your blondies. A dash of cinnamon gives them a warm kick. You could even try nutmeg or ginger for a unique twist. Experimenting with flavors makes each batch special. If you need gluten-free blondies, you can swap regular flour for gluten-free flour. Almond flour works well and adds a nice nutty flavor. Just make sure to check the brand for baking instructions. For a vegan option, replace the butter with coconut oil or a vegan butter substitute. You can also use flax eggs instead of chicken eggs. Mix one tablespoon of flaxseed meal with three tablespoons of water. Let it sit until it thickens. This will help bind your blondies without using eggs. These small changes can help everyone enjoy cookie butter blondies! Check out the Full Recipe for all the details. To keep your cookie butter blondies fresh, store them in an airtight container. Place them in the pantry away from heat and light. They stay good for about a week. If you want them to last longer, consider refrigerating them. Wrap each blondie in plastic wrap before placing them in the fridge. This helps keep them moist and tasty. Freezing your blondies is a great way to save them for later. Here’s how: 1. Cool Completely: Allow the blondies to cool fully before freezing. 2. Cut and Wrap: Cut them into squares. Wrap each piece tightly in plastic wrap. This keeps them from getting freezer burn. 3. Place in a Bag: Put the wrapped blondies in a freezer-safe bag. Squeeze out as much air as you can before sealing. 4. Label and Freeze: Label the bag with the date. Store in the freezer for up to three months. To thaw and enjoy again, simply take out a blondie and let it sit at room temperature for about 30 minutes. You can also warm it in the microwave for about 10-15 seconds. Enjoy the soft, gooey goodness! Cookie butter blondies stay fresh for about 3 to 5 days at room temperature. Keep them in an airtight container. If you refrigerate them, they can last up to a week. The cold helps keep them moist and tasty. Just make sure to let them return to room temperature before serving. Yes, you can make cookie butter blondies without eggs. Use alternatives like applesauce or mashed bananas. You can also use flaxseed meal. Mix one tablespoon of flaxseed with three tablespoons of water. Let it sit for a few minutes to thicken. This acts as a binder and keeps your blondies soft. Serve cookie butter blondies warm or at room temperature. Pair them with vanilla ice cream for a delicious treat. Drizzle some caramel or chocolate sauce on top for extra sweetness. You can also enjoy them with a glass of milk or a hot cup of coffee. They make a perfect snack any time of day. For the complete recipe, check out the [Full Recipe]. In this blog post, we explored how to make delicious cookie butter blondies. We covered essential ingredients, optional add-ins, and simple steps for baking. You learned tips for perfect texture and ways to enhance flavor. We also discussed variations, dietary modifications, and storage tips. Try these blondies for a sweet treat that everyone will love. They’re easy to make and full of flavor!

Cookie Butter Blondies Irresistible Sweet Delight

Are you ready to indulge in a sweet treat that’s hard to resist? These Cookie Butter Blondies offer a rich

To make your nachos pop with flavor, gather these main ingredients: - 1 large bag of tortilla chips - 2 cups shredded cheddar cheese - 1 cup shredded Monterey Jack cheese - 1 can (15 oz) black beans, rinsed and drained - 1 cup cherry tomatoes, halved - 1/2 cup sliced black olives - 1 jalapeño, sliced (optional for heat) - 1 avocado, diced - 1/4 cup fresh cilantro, chopped - 1/2 cup sour cream - 1/4 cup salsa - 1 tablespoon olive oil - 1 teaspoon taco seasoning - Salt and pepper to taste These ingredients create a colorful and tasty base for your nachos. The blend of cheeses adds creaminess, while the black beans provide protein. You can make your nachos even more fun with these optional toppings: - Pickled jalapeños for extra spice - Sliced green onions for crunch - Diced red onion for a tangy bite - Corn for sweetness - Lime juice for a zesty kick Feel free to mix and match! These toppings let you personalize each bite. To create the perfect Loaded Sheet Pan Nachos, have these tools ready: - A large sheet pan - Parchment paper for easy cleanup - Mixing bowls for combining ingredients - Measuring cups and spoons for precision - A sharp knife for chopping Using the right tools makes cooking easier and more enjoyable! For the full recipe, check out the detailed instructions. Start by preheating your oven to 400°F (200°C). This step is key to getting that perfect cheese melt. Next, grab a large sheet pan and line it with parchment paper. This makes cleaning up easy later. Once your pan is ready, spread a layer of tortilla chips evenly across the bottom. Make sure they cover the pan well. This creates a solid base for all the tasty toppings. Now it’s time to layer on the flavors! In a small bowl, mix the black beans with olive oil, taco seasoning, and a pinch of salt and pepper. Stir until everything is well combined. Scatter these seasoned black beans over the chips. Next, add the halved cherry tomatoes, sliced black olives, and jalapeños if you want some heat. Now for the cheese. Sprinkle the cheddar and Monterey Jack cheese evenly over the chips and toppings. Make sure every chip gets a good amount of cheese. This will help them stay crispy and delicious. Place the sheet pan in the oven and bake for 10 to 12 minutes. Keep an eye on it until the cheese is melted and bubbly. Once it looks perfect, carefully remove the pan from the oven and let it cool for a few minutes. Top your nachos with diced avocado, fresh cilantro, and dollops of sour cream and salsa. This adds color and flavor. You can serve the nachos right on the sheet pan for a fun, casual vibe. Or, if you prefer, transfer them to a large platter. Enjoy the tasty layers and textures of your loaded sheet pan nachos! For the complete recipe, check out the Full Recipe section. To get the best cheese melt, layer your cheese right. Use a mix of cheeses, like cheddar and Monterey Jack. This blend gives a great taste and texture. Sprinkle the cheese evenly over the toppings. Make sure to cover all chips. Bake your nachos at 400°F for about 10-12 minutes. Keep an eye on them. You want the cheese to be bubbly, not burnt. If you want extra melt, add a few minutes to your bake time. Just watch it closely! You can easily adapt this recipe for different diets. For vegans, swap cheese for a dairy-free option. Nutritional yeast adds a cheesy flavor without dairy. You can also replace sour cream with a vegan alternative or guacamole. For gluten-free needs, use certified gluten-free chips. If you want a low-carb option, try using sliced veggies instead of chips. Bell peppers or zucchini work great. This way, everyone can enjoy your nachos! Making nachos ahead of time is simple. Prep all your toppings earlier in the day. Store them in separate containers in the fridge. You can even assemble the nachos on the sheet pan without baking them. Just cover with plastic wrap and keep in the fridge. When you are ready to serve, bake them fresh at 400°F for about 12-15 minutes. This keeps them crispy and delicious. Remember, hot nachos are the best nachos! For the complete recipe, check out the Full Recipe. {{image_2}} For a fun twist, try vegetarian loaded nachos. Start with the same base of tortilla chips. Instead of black beans, use refried beans or lentils. Add lots of colorful veggies like bell peppers, corn, and chopped green onions. You can even add some sautéed mushrooms for extra flavor. Top it all off with cheese and bake. This version still gives you the crunch and taste you love, while being meat-free. If you crave heat, spicy loaded nachos are for you. Begin with the basic nacho recipe. Add extra jalapeños and diced hot peppers for heat. You can also sprinkle in some chili powder or cayenne pepper when you mix the black beans. For a kick, try using pepper jack cheese instead of cheddar. This variation will satisfy your spice cravings while keeping the nacho goodness intact. Cheese is key to a great nacho dish. While cheddar and Monterey Jack work well, you can mix it up. Try using gouda for a smoky flavor, or feta for a tangy twist. Mixing different cheeses gives your nachos a unique taste. A blend of mozzarella and provolone can also create a gooey texture. Experiment with cheese combinations to find your favorite mix that makes your nachos pop. For the full recipe, check out the detailed instructions above. Enjoy creating these tasty variations! To store leftover nachos, place them in an airtight container. Cover the nachos with plastic wrap or a lid. This keeps them fresh for up to two days in the fridge. Avoid stacking the nachos, as this can make them soggy. If you can, store toppings separately. This helps keep the chips crunchy. Reheating nachos can be tricky. The oven works best to keep them crispy. Preheat your oven to 350°F (175°C). Spread the nachos on a baking sheet. Heat them for about 5 to 10 minutes. Watch closely to avoid burning. You can also reheat them in the microwave. Just use a microwave-safe plate. Heat in short bursts of 30 seconds. This method may make them a bit soft. Freezing nachos is not the best option. The chips can get soggy when thawed. However, you can freeze the toppings. Cooked black beans and cheese freeze well. Place them in freezer bags. When you want nachos, just thaw the toppings and add to fresh chips. For quick meals, this method works great! For the full recipe, check out the details above. To make your nachos crispier, spread them out in a single layer. Avoid stacking chips on top of each other. Baking the nachos at a high temperature helps, too. I recommend using thin tortilla chips. They crisp up better than thick ones. If you want extra crunch, bake them for a few minutes before adding toppings. This quick step keeps them from getting soggy. Yes, you can use many types of chips! Tortilla chips are classic, but try pita chips for a twist. Potato chips work well, too, but they may break easier. Look for chips that hold up under toppings. Choose flavors that match your toppings. For example, spicy chips go great with mild cheese. The best cheese for nachos is a blend of cheddar and Monterey Jack. Cheddar adds sharp flavor, while Monterey Jack melts well. You can also experiment with other cheeses like pepper jack for a kick. Mozzarella gives a stretchy texture, while queso blanco adds creaminess. Use a mix for the best taste and texture. For more details, check the Full Recipe. Loaded sheet pan nachos are fun and tasty. You learned about key ingredients and how to layer them for great flavor. We discussed tips to get the cheese just right and ways to customize for different diets. Storing and reheating nachos was covered, so nothing goes to waste. Remember, nachos can be your canvas. Customize them to fit your taste! Enjoy making your perfect loaded nachos!

Loaded Sheet Pan Nachos Flavorful and Easy Recipe

Are you ready to take your nacho game to the next level? My Loaded Sheet Pan Nachos recipe is all

To make these tasty granola clusters, you need a few key ingredients. Here’s what you’ll need: - 2 cups rolled oats - 1 cup pumpkin puree - 1/2 cup honey or maple syrup - 1/2 cup almond butter (or any nut butter) - 1 teaspoon vanilla extract - 1 tablespoon pumpkin pie spice - 1/2 teaspoon salt - 1/2 cup chopped nuts (like pecans or walnuts) - 1/2 cup dried cranberries or raisins - 1/4 cup pepitas (pumpkin seeds) These ingredients blend to create a crunchy, flavorful snack. The oats form the base, while the pumpkin puree adds moisture and flavor. Honey or maple syrup gives sweetness, and nut butter helps bind it all together. You can change up the recipe with some optional ingredients. This adds your personal touch! Consider adding: - Coconut flakes for extra texture - Dark chocolate chips for sweetness - Sunflower seeds for crunch - Chia seeds for added nutrition These additions allow you to create a granola that suits your taste. This recipe offers a balance of nutrients. Each serving provides: - Calories: About 200 - Protein: 5 grams - Fiber: 4 grams - Healthy fats: 10 grams The granola clusters are packed with fiber and healthy fats, making them a great snack. They keep you full and energized! You can find the full recipe in the earlier section. Enjoy making your delicious pumpkin spice granola clusters! Start by preheating your oven to 350°F (175°C). This heat helps your granola bake evenly. While it heats, line a baking sheet with parchment paper. This step keeps the granola from sticking. You want to make cleanup easy! In a large mixing bowl, put the rolled oats, pumpkin pie spice, and salt. Stir these dry ingredients together. Mixing well ensures every bite has that lovely spice. It makes your granola flavorful and tasty. In another bowl, add the pumpkin puree, honey (or maple syrup), almond butter, and vanilla extract. Whisk these wet ingredients together until they are smooth. This mixture adds moisture and sweetness. It is the heart of your granola clusters. Pour the wet mixture into the dry bowl. Mix everything until the oats are coated well. It should look sticky and thick. This step is key for forming nice clusters. Transfer the mixture to the lined baking sheet. Press it down firmly into an even layer. Bake for 25-30 minutes. Look for a golden brown color. It should feel firm to the touch when done. Let the granola cool completely on the baking sheet. This cooling time helps it set and form clusters. Once cool, break it into pieces. Store your granola in an airtight container. It stays fresh for days. For the full recipe, check out my detailed instructions above! To get crunchy and flavorful granola clusters, you need to focus on the right texture. Use rolled oats as they provide a hearty base. When mixing, ensure every oat is coated in the wet mix. This helps bind the clusters together. Press the mixture down firmly on the baking sheet. This step keeps clusters from falling apart. Bake until golden brown. The longer they bake, the crunchier they get. Just watch them closely to avoid burning. Crumbling can happen if the granola is not pressed firmly enough. Make sure to pack the mixture tightly on the baking sheet. You can also try adding more nut butter for extra binding. This will help hold everything together. When cutting the clusters, use a sharp knife. Avoid breaking them into smaller pieces. Let them cool completely before breaking apart. This helps keep their shape. Pumpkin spice granola clusters shine when served in many ways. You can eat them as a quick snack or with yogurt for breakfast. Pair them with a drizzle of honey for added sweetness. A sprinkle of extra pumpkin pie spice can enhance the flavor. For a fun twist, add them to your favorite smoothie. The clusters add a nice crunch. For the full recipe, be sure to check out the entire article. {{image_2}} You can make this recipe even healthier. Instead of honey, try using agave syrup or coconut sugar. These options lower the glycemic index. You can also swap almond butter for sunflower seed butter. This makes it nut-free and safe for kids with allergies. Want to kick up the flavor? Add some dark chocolate chips or cacao nibs. They pair well with pumpkin spice. You can also toss in seeds like sunflower or chia. They add crunch and boost the nutrition. Change the spices for a fun twist. For a Christmas version, use cinnamon and nutmeg. You can also add a splash of maple extract instead of vanilla. This gives your granola a warm, cozy flavor perfect for the winter months. Explore these variations to make your pumpkin spice granola clusters uniquely yours. For the full recipe, check the section above! To keep your pumpkin spice granola clusters fresh, store them in an airtight container. This helps keep moisture out and keeps the clusters crunchy. You can use glass jars or plastic containers. If you want to keep them extra fresh, add a piece of parchment paper to absorb any moisture. Homemade granola clusters can last up to two weeks when stored properly. If you want them to last longer, you can freeze them. Just place the clusters in a freezer-safe bag. They can last up to three months in the freezer. If your granola clusters lose some crunch, you can refresh them easily. Preheat your oven to 300°F (150°C). Spread the clusters on a baking sheet and heat for about 5 to 10 minutes. This will revive their crunchiness. Let them cool before storing them again. For the full recipe, check out the details above. Enjoy your tasty snack! To make gluten-free pumpkin spice granola clusters, use gluten-free oats. They are key for this recipe. Substitute regular oats with certified gluten-free ones. The rest of the ingredients in the recipe are naturally gluten-free. This way, you can still enjoy the crunchy and flavorful snack without worry. Yes, you can use different nuts and fruits. Almonds, cashews, or hazelnuts work well in this recipe. For fruits, try dried apples, mango, or cherries. Feel free to mix and match based on your taste. This adds variety and keeps your granola exciting. You can find pre-made pumpkin spice granola clusters at many grocery stores. Look in the snack aisle or the health food section. Some brands sell them online as well. However, making them at home gives you control over the ingredients and flavor. You can substitute pumpkin puree with applesauce or mashed bananas. These options keep the granola moist. If you want a different flavor, try sweet potato puree. Each substitute will change the taste slightly but will still create tasty clusters. You’ve learned how to make delicious pumpkin spice granola clusters. We covered key ingredients, step-by-step instructions, and tips for the best texture. You now know how to customize flavors and store your granola properly. With these insights, you can create a tasty treat that’s perfect for any season. Enjoy making your own unique version and sharing it with friends and family. Happy baking!

Pumpkin Spice Granola Clusters Crunchy and Flavorful Snack

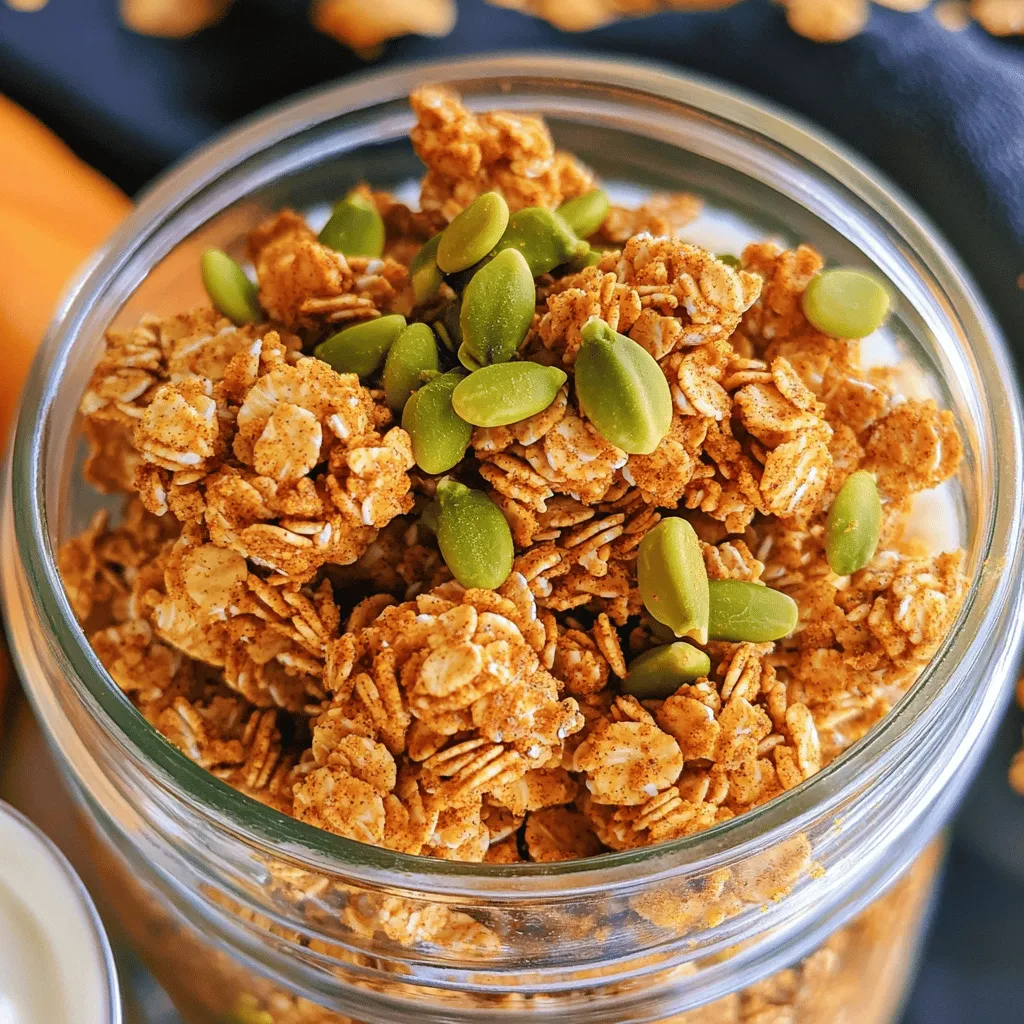
Are you ready to dive into fall flavors with a tasty twist? My Pumpkin Spice Granola Clusters are the perfect

To make Creamy Lemon Chicken Orzo Soup, gather these key ingredients: - 1 lb boneless, skinless chicken thighs, diced - 1 cup orzo pasta - 1 medium onion, chopped - 2 cloves garlic, minced - 4 cups chicken broth - 1 cup heavy cream - 1 lemon (zest and juice) - 2 cups fresh spinach, roughly chopped - 1 teaspoon dried thyme - 1 teaspoon dried oregano - Salt and pepper to taste - 2 tablespoons olive oil - Fresh parsley, for garnish These ingredients come together to create a warm, creamy soup that is packed with flavor. You can add more depth to the soup with these optional ingredients: - 1 cup carrots, diced - 1 cup peas - A pinch of red pepper flakes for heat These extras add sweetness and a touch of spice, making your soup even more delightful. If you have dietary needs, consider these substitutions: - Use chicken breast instead of thighs for a leaner option. - Swap orzo for quinoa or brown rice for a gluten-free meal. - Coconut milk can replace heavy cream for a dairy-free version. These options ensure that everyone can enjoy this delicious soup, no matter their diet. For the full recipe, check out the details in the cooking instructions. Start by heating olive oil in a large pot over medium heat. Add the chopped onion and sauté for 3-4 minutes. Cook until the onion turns soft and clear. Next, stir in the minced garlic. Sauté for about one minute. You want the garlic to smell good but not burn. Now, add the diced chicken thighs to the pot. Sprinkle salt, pepper, dried thyme, and oregano over the chicken. Cook for about 5-7 minutes, stirring often. The chicken should brown well and be fully cooked. This step is key for flavor! Pour in the chicken broth and bring it to a boil. Once boiling, add the orzo pasta. Cook according to the package instructions, usually around 9-10 minutes. Stir the pot occasionally to keep the orzo from sticking. When the orzo is al dente, reduce the heat to low. Stir in the heavy cream, lemon zest, and lemon juice. Mix well until the soup is creamy and smooth. The cream adds richness while the lemon gives a bright flavor. Fold in the chopped spinach and let it wilt for about 2 minutes. This adds color and nutrients. Taste the soup and adjust the seasoning if needed. You can add more salt, pepper, or lemon juice to suit your taste. Serve the soup hot in bowls. Garnish with fresh parsley for a nice touch. This dish pairs well with crusty bread or a light salad. Enjoy your creamy lemon chicken orzo soup! For more details, check the Full Recipe. - Achieving the Ideal Creaminess Start with heavy cream for a rich base. Add it slowly to the soup. Stir gently to mix it well. This gives a smooth texture. If it gets too thick, add more broth. The goal is a creamy embrace for each bite. - Balancing Flavors with Lemon Juice Use fresh lemon juice for the best taste. Squeeze it in at the end. This gives your soup a bright, zesty kick. Taste as you go. Adjust the lemon to suit your preference. A little can go a long way. Avoid adding all ingredients too soon. Chicken needs to cook before you add the broth. This helps build depth in flavor. Also, don’t skip the zest! It adds a nice layer of brightness. Lastly, remember to taste before serving. Adjust seasoning as needed. To make the soup even better, try adding herbs. Fresh dill or basil can work wonders. You can also toss in some peas or carrots. They add color and sweetness. For a kick, sprinkle in some red pepper flakes. These small changes can elevate your soup to new heights! {{image_2}} - Chicken Alternatives You can use turkey or rotisserie chicken. These options are tasty and save time. For a vegetarian version, use chickpeas or tofu. Both provide protein and texture. - Gluten-Free Options If you need gluten-free orzo, look for rice-based orzo. Quinoa or gluten-free pasta can also work well. These choices keep the dish creamy and satisfying. - Adding More Herbs Fresh herbs can brighten your soup. Try adding basil, dill, or cilantro. These herbs add depth and freshness. You can also mix in dried herbs like rosemary for a unique twist. - Spicing it Up For a kick, add red pepper flakes or a dash of cayenne. This spice brings heat without overpowering the lemon flavor. You can also add a splash of hot sauce for extra zing. Seasonal ingredients can enhance your soup. In spring, use fresh asparagus or peas for color and crunch. In fall, try adding diced butternut squash for sweetness. Each season brings new flavors to explore. Enjoy the changes and make the soup your own! You can keep Creamy Lemon Chicken Orzo Soup in the fridge for about three days. Make sure to store it in an airtight container. This helps keep the soup fresh and safe to eat. Before eating, check for any off smells or changes in color. If you want to save some for later, freezing is a great option. This soup freezes well for up to three months. To freeze, let the soup cool completely. Then, pour it into freezer-safe bags or containers. Leave some space at the top, as liquids expand when frozen. When you're ready to eat, just thaw it in the fridge overnight. Reheating the soup is easy. Pour it into a pot and heat over medium-low heat. Stir it often until it's hot. If the soup seems too thick after freezing, add a splash of chicken broth or water. This keeps the soup creamy and delicious. Enjoy it as if it were fresh from the pot! For the full recipe, check here: [Full Recipe]. Store your Creamy Lemon Chicken Orzo Soup in an airtight container. Place it in the fridge. It stays fresh for about 3 to 4 days. Make sure it cools before sealing. This helps keep the soup tasty and safe to eat. Yes, you can make this soup in advance. It tastes even better after a day. Just follow the Full Recipe and let it cool. Then, store it in the fridge. When you want to eat it, heat it up gently on the stove. Stir well to mix the flavors. Yes, there is a vegetarian version of this soup. You can swap out the chicken for chickpeas or tofu. Use vegetable broth instead of chicken broth. Add more veggies like carrots and zucchini. This keeps the soup hearty and satisfying without meat. This blog post covered making creamy lemon chicken orzo soup. You learned about essential ingredients and helpful tips. I shared steps for cooking and variations to make it your own. Remember to balance flavors and store leftovers correctly. Enjoy this soup as a warm meal or a tasty snack. It’s easy to prepare and perfect for any time. You can make it fit your taste and dietary needs. I hope you feel ready to create this dish!

Creamy Lemon Chicken Orzo Soup Delightful Meal

Looking for a warm and comforting dish to brighten your day? This Creamy Lemon Chicken Orzo Soup is your answer!

Older posts
Newer posts
← Previous Page1 … Page47 Page48 Page49 … Page82 Next →

dsad

© 2026 Recipes Pursuit • Built with GeneratePress

Our Policies

  • Copyright Policy
  • Cookie Policy
  • GDPR Policy
  • Privacy Policy
  • Disclaimer
  • Terms Of Use

More Information

  • Home
  • About
  • Contact
  • Appetizers
  • Dessert
  • Dinner
  • Drinks
©2026, Recipes Pursuit About Back To Top