Skip to content
DisclaimerTerms Of UseGDPR PolicyCookie Policy

Recipes Pursuit

  • Home
  • Drinks
  • Appetizers
  • Dinner
  • Dessert
  • About
  • Contact
  • Privacy Policy
DisclaimerTerms Of UseGDPR PolicyCookie Policy

NO-ING-IMG

To make No-Bake Salted Caramel Cheesecake Cups, you'll need: - 1 cup graham cracker crumbs - 4 tablespoons unsalted butter, melted - 16 oz cream cheese, softened - 1 cup powdered sugar - 1 teaspoon vanilla extract - 1 cup heavy whipping cream - 1/2 cup caramel sauce (plus more for drizzling) - 1 teaspoon sea salt (plus more for garnish) These ingredients provide a rich and creamy flavor. The graham cracker crumbs form a tasty crust. The cream cheese and whipped cream give the cheesecake its light and fluffy texture. You can swap some ingredients if needed. Use vegan butter instead of unsalted butter for a dairy-free option. For a lighter version, try using low-fat cream cheese. If you want a sweeter taste, consider using a flavored cream cheese. You can also use store-bought whipped topping instead of whipping cream. Always check the dates on cream cheese and heavy cream. Fresh ingredients make a big difference in flavor. For the best taste, use high-quality caramel sauce. When selecting sea salt, look for flaky varieties for a nice texture on top. For graham crackers, choose ones with minimal added sugar for a balanced flavor. Start by mixing the graham cracker crumbs and melted butter in a bowl. Use a fork to blend well until it looks like wet sand. This is your crust. Next, take your serving cups or small jars. Layer the graham cracker mix evenly at the bottom. Press down firmly to form a solid base. In a new bowl, beat the softened cream cheese with an electric mixer. You want it smooth and creamy. Add the powdered sugar slowly, mixing until it’s well blended. Then, pour in the vanilla extract. In another bowl, whip the heavy cream until you see stiff peaks. Gently fold the whipped cream into the cream cheese mix until combined. This step is key for a light texture. Now it’s time to put everything together. Spoon the cream cheese mixture over the graham cracker crust in each cup. Fill it nearly to the top. Next, drizzle in the caramel sauce. You want to create a marbled effect, so mix it lightly. Once assembled, refrigerate the cheesecake cups for at least four hours. This helps them set. Before serving, drizzle more caramel sauce on top. Sprinkle some sea salt for a nice contrast. Enjoy your delicious creation! To get the best whipped cream, use cold heavy cream. Cold cream whips faster and holds its shape better. Beat it with an electric mixer until you see stiff peaks. This means the cream stands tall when you lift the beaters. Be gentle when you fold it into the cream cheese mix. This keeps the light and fluffy texture. When adding caramel to your cheesecake mix, drizzle it in slowly. Use a spatula to fold it in gently. You want swirls of caramel, not a full blend. This gives your cheesecake cups a beautiful look. If you want more caramel flavor, add extra sauce on top before serving. Serve your cheesecake cups on a nice tray. Place a small spoon next to each cup for easy eating. To make them look fancy, sprinkle some chocolate shavings or crushed graham crackers on top. This adds a fun texture and makes them pop. Don’t forget to drizzle more caramel over the top for a sweet touch! {{image_2}} You can change the flavor of your cheesecake cups. Try adding chocolate, fruit, or nuts. For a chocolate twist, mix in cocoa powder. You can also add melted chocolate to the cream cheese mix. If you love fruit, try fresh berries or banana slices. Just fold them in gently. This makes a fun and tasty treat. Toppings can really change your dessert. Instead of caramel, use chocolate sauce or fruit puree. You can also top with whipped cream and crushed cookies. Nuts add a nice crunch too. Use pecans or almonds for a savory touch. Get creative and mix flavors you love! You can make this dessert gluten-free. Choose gluten-free graham crackers for the crust. For a vegan version, swap cream cheese with cashew cream. Use coconut cream for the whipped topping. Maple syrup can replace powdered sugar for sweetness. These swaps keep the flavor while meeting your diet needs. To keep your no-bake salted caramel cheesecake cups fresh, place them in an airtight container. This way, they stay moist and tasty. If you used small jars, simply cover each jar with a lid or plastic wrap. Make sure to store them in the fridge. They will stay good for several days this way. You can freeze these cheesecake cups for later enjoyment. First, let them chill in the fridge for at least four hours. Then, cover each cup with plastic wrap or foil. Place them in a freezer-safe container. When ready to eat, thaw them in the fridge overnight. This keeps the creaminess intact. These cheesecake cups can last up to five days in the fridge. After that, they may lose their creamy texture. If you freeze them, they can last for about two months. Always check for any off smells or changes in texture before eating. Keeping them well-covered helps maintain their freshness. Yes, you can make these cups a day in advance. They taste even better after chilling. Just keep them covered in the fridge until you serve them. If your mixture is too runny, try adding more cream cheese. You can also beat the heavy cream longer to make it stiffer. This helps the cheesecake set better. These cheesecake cups stay fresh for about 3 to 4 days in the fridge. Just make sure they are covered well to keep them from drying out. Yes, you can use low-fat cream cheese. However, it may change the texture slightly. The cheesecake might be a bit less creamy, but it will still taste great. To adjust sweetness, add more or less powdered sugar to your taste. You can also use less caramel sauce if you want it less sweet. Taste as you mix to find the perfect balance. This blog post covered key ingredients for cheesecake cups, including essential items and substitutions. I shared step-by-step instructions for the crust, filling, and assembly. You learned helpful tips for whipped cream and caramel. Variations offered fun ways to switch flavors and toppings. Proper storage methods ensure your treats stay fresh. Remember, exploring your creativity can lead to delicious results. Enjoy making these cheesecake cups!

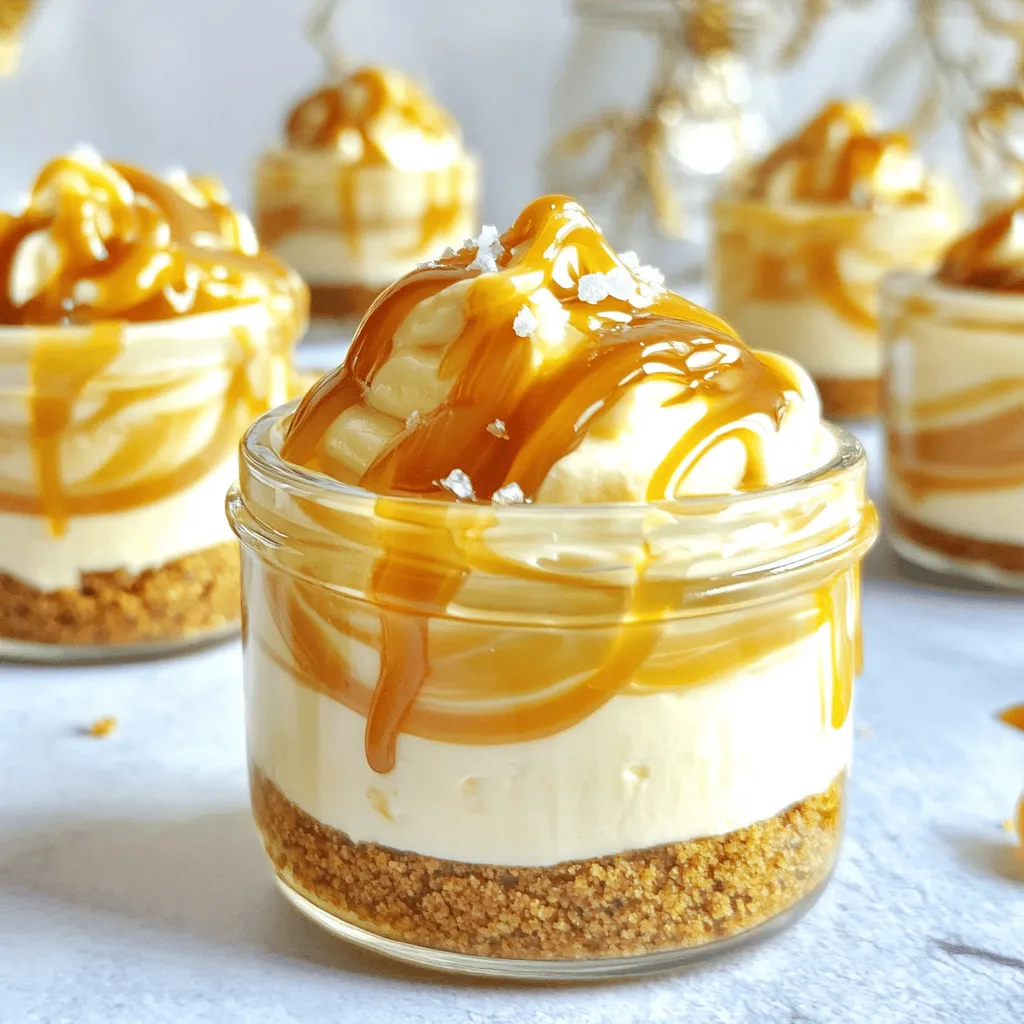
No-Bake Salted Caramel Cheesecake Cups Delight

Get ready to indulge in something truly delightful! My No-Bake Salted Caramel Cheesecake Cups offer creamy perfection without turning on

To make creamy lemon ricotta gnocchi, you need a few key ingredients: - 1 cup ricotta cheese - 1 cup all-purpose flour (plus extra for dusting) - 1/2 cup grated Parmesan cheese - Zest of 1 lemon - 1 tablespoon lemon juice - 1/2 teaspoon salt - 1/4 teaspoon black pepper - 1/4 teaspoon nutmeg - 2 tablespoons unsalted butter These ingredients create a soft and fluffy gnocchi that bursts with lemon flavor. The ricotta cheese gives it a creamy texture, while the lemon zest adds brightness. You can enhance your gnocchi with some simple garnishes: - Fresh basil, for garnish - Additional grated Parmesan cheese Using fresh basil adds a nice touch and a burst of flavor. You can also sprinkle more cheese on top for extra richness. To prepare this dish, you will need a few essential tools: - Large mixing bowl - Sharp knife - Clean surface for rolling - Skillet for cooking - Pot for boiling These tools help you mix, cut, and cook your gnocchi with ease. Each tool plays a part in making your cooking process smooth and enjoyable. Start by grabbing a large mixing bowl. Add 1 cup of ricotta cheese. Then, add the zest of one lemon and 1 tablespoon of lemon juice. Next, sprinkle in 1/2 teaspoon of salt, 1/4 teaspoon of black pepper, and 1/4 teaspoon of nutmeg. Mix everything together until it is smooth and well combined. This mixture is the heart of the dish, adding creaminess and flavor. Now, it’s time to make the dough. Gradually add 1 cup of all-purpose flour and 1/2 cup of grated Parmesan cheese. Mix gently until a soft dough forms. Be careful not to overwork it; the dough should be slightly sticky but easy to handle. Lightly flour a clean surface and transfer the dough there. Divide it into four equal pieces. Roll each piece into a long rope about 1/2 inch in diameter. Use a sharp knife to cut the ropes into 1-inch pieces. If you like, roll each piece over the tines of a fork. This helps the sauce stick better. Bring a pot of salted water to a boil. Carefully drop the gnocchi into the boiling water in batches. Watch closely! Once they float to the surface, let them cook for another 1-2 minutes. Then, remove them with a slotted spoon. In a skillet, melt 2 tablespoons of unsalted butter over low heat. Add the cooked gnocchi and gently toss them in the butter for about 2-3 minutes. This gives them a nice, slightly browned flavor. Serve hot, garnished with fresh basil and extra Parmesan cheese if you want! To get soft and fluffy gnocchi, use fresh ricotta. It should be smooth and creamy. Avoid over-mixing the dough. If you mix too much, your gnocchi can turn out tough. Aim for a slightly sticky dough. If it feels too wet, add a bit more flour. When rolling out the dough, keep the surface lightly floured. This prevents sticking and keeps the shape intact. One common mistake is using too much flour. If you add too much, your gnocchi will be dense. Also, don’t skip the resting time. Let the dough sit for a few minutes before shaping. Another mistake is cooking all the gnocchi at once. Cook them in batches to avoid crowding in the pot. This helps them cook evenly and float properly. For the best flavor, serve your gnocchi with fresh basil. It adds a nice touch of color and taste. You can also sprinkle extra Parmesan cheese on top. If you like a bit of heat, add crushed red pepper flakes. For a twist, try serving with a light lemon butter sauce. This will enhance the lemon flavor and make each bite delightful. {{image_2}} You can add fresh vegetables to your gnocchi for more flavor and color. Spinach, zucchini, or peas work well. Start by cooking these veggies lightly in a pan. Chop them finely and mix them into the ricotta blend before adding the flour. This adds nutrition and makes the dish even more tasty. If you want to change the cheese, you have options. Try using goat cheese instead of ricotta for a tangy twist. You can also mix in feta cheese for a salty kick. Just keep the same amount of cheese to maintain the texture. Each cheese brings a unique flavor to the gnocchi. To make a vegan version, swap out the cheese. Use silken tofu blended with lemon juice and nutritional yeast for a creamy base. Replace the butter with olive oil or vegan butter. You can still enjoy the same delicious taste while keeping it plant-based. This way, everyone can enjoy this delightful dish. To keep leftover gnocchi fresh, place it in an airtight container. You can store it in the fridge for up to three days. Be sure to let it cool before sealing. If you have sauce on it, eat it within one day for best flavor. Freezing gnocchi is easy and smart. First, lay the uncooked gnocchi in a single layer on a baking sheet. Make sure they do not touch each other. Freeze them for one to two hours until solid. Then, transfer them to a freezer bag. They can last up to three months in the freezer. To reheat gnocchi, use a skillet for best results. Add a little butter or oil to the pan. Heat it on low and add the gnocchi. Cook for about five minutes, stirring gently. This method keeps the flavor and texture nice. You can also boil it briefly if you prefer. Just be careful not to overcook it. The best type of flour for gnocchi is all-purpose flour. It gives the gnocchi a nice texture. You want a flour that can hold the ricotta well. Some people use "00" flour for a softer result. This flour is finer and great for pasta. However, all-purpose flour works just fine for this recipe. Yes, you can use store-bought ricotta for this recipe. Just make sure it’s fresh and creamy. I prefer whole milk ricotta for more flavor. You can also drain it slightly if it seems watery. This helps the dough stay firm and not too sticky. Cooking homemade gnocchi takes about 3 to 5 minutes. Once you drop them in boiling water, watch for them to float. When they float, they are nearly done. Let them cook for another 1-2 minutes for the best texture. They should be soft but not mushy. You learned how to make creamy lemon ricotta gnocchi with simple steps. We covered key ingredients, cooking tools, and tips for the best texture. Remember, you can add veggies or switch cheeses for fun twists. Proper storage helps you enjoy this dish later. Gnocchi is a versatile recipe that anyone can master. I hope you feel excited to try it. Cooking can be joyful, and this dish is a great start. Enjoy your tasty creation!

Creamy Lemon Ricotta Gnocchi Simple and Fresh Dish

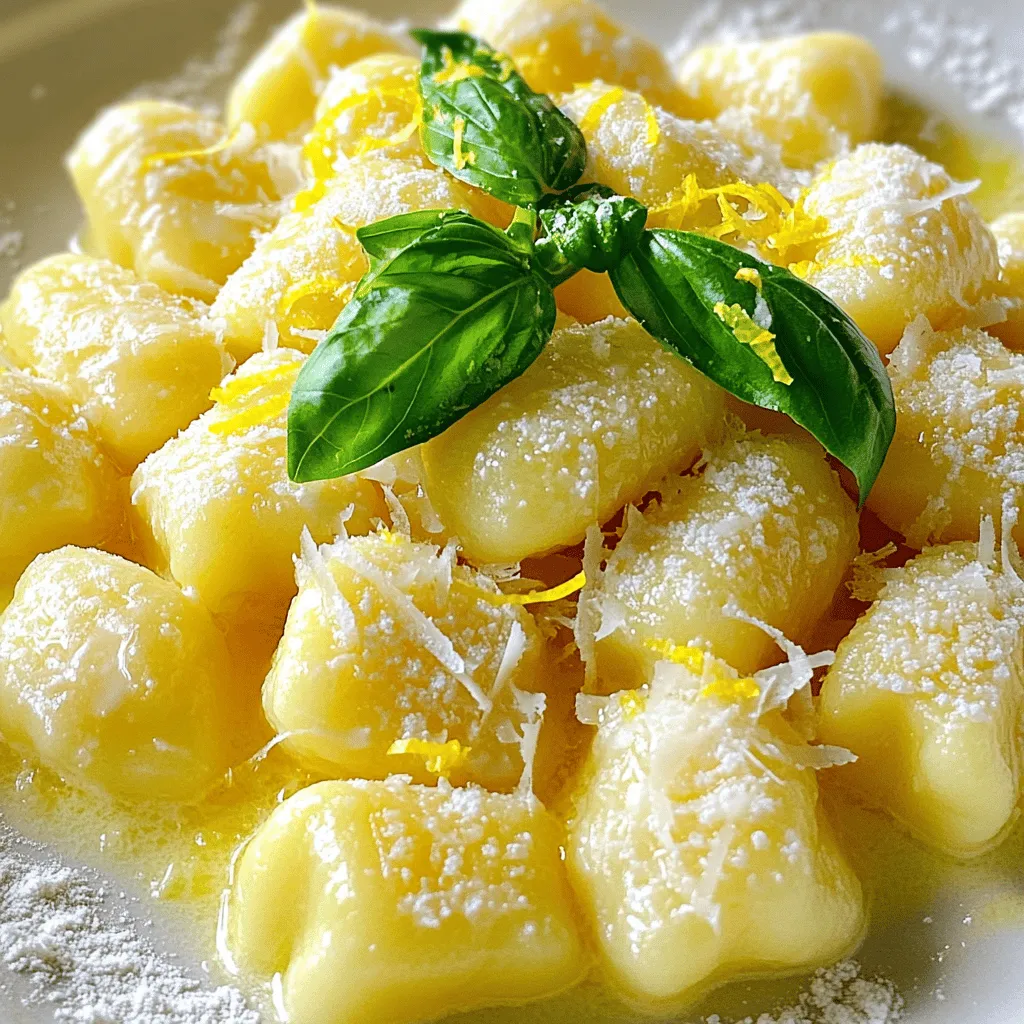
If you’re looking for a simple and fresh dish, Creamy Lemon Ricotta Gnocchi is it! This joyful comfort food bursts

- Yogurt, Sugar, Oil, and Eggs For this loaf, use 1 cup of plain yogurt. It adds moisture and a nice tang. Next, add ¾ cup of granulated sugar for sweetness. You will need ½ cup of vegetable oil to keep the loaf soft. Finally, include 3 large eggs to bind the mix. - Flavoring Elements: Lemon Zest, Juice, and Vanilla The zest of 1 large lemon gives a bright flavor. You will also need 1 tablespoon of lemon juice for a fresh kick. Add 1 teaspoon of vanilla extract for a warm note that balances the tartness. - Dry Ingredients: Flour, Baking Powder, Baking Soda, Salt Use 2 cups of all-purpose flour to create the loaf's structure. Add 1 ½ teaspoons of baking powder and ½ teaspoon of baking soda to help it rise. Lastly, include ½ teaspoon of salt to enhance the flavors. - Fresh Raspberries and Optional Powdered Sugar for Dusting Use 1 cup of fresh raspberries to add juicy bursts of flavor. If you want a sweet finish, you can dust the top with powdered sugar before serving. {{ingredient_image_1}} 1. Preheating the Oven and Preparing the Pan Start by preheating your oven to 350°F (175°C). This step is key for even baking. Next, grab a 9x5-inch loaf pan. You can grease it with butter and sprinkle a bit of flour inside. Alternatively, line it with parchment paper for easy removal. 2. Mixing Wet Ingredients: Yogurt and Other Components In a large mixing bowl, combine 1 cup of plain yogurt, ¾ cup of granulated sugar, and ½ cup of vegetable oil. Crack in 3 large eggs. Mix these ingredients until they are smooth and creamy. This mix is what gives the loaf its moist texture. 3. Combining Dry Ingredients and Folding Techniques In a separate bowl, whisk together 2 cups of all-purpose flour, 1 ½ teaspoons of baking powder, ½ teaspoon of baking soda, and ½ teaspoon of salt. This mix helps the loaf rise. Gradually fold the dry mixture into the wet mixture using a spatula. Be gentle; overmixing can make the loaf tough. The batter should be thick and smooth. 4. Final Batter Preparation and Pouring into the Pan Now, gently fold in 1 cup of fresh raspberries. If you want, save a few for the top. Pour the batter into your prepared loaf pan, using a spatula to smooth the top. If you reserved raspberries, sprinkle them on top for a lovely touch. 1. Setting the Temperature and Bake Duration Place the loaf in the preheated oven. Bake for about 50 to 60 minutes. This time will allow the loaf to rise and brown nicely. 2. Checking for Doneness with a Toothpick To check if the loaf is done, insert a toothpick into the center. If it comes out clean, your loaf is ready. If it has batter on it, give it a few more minutes. 3. Cooling Times and Steps for Transfer Once baked, let the loaf cool in the pan for 10 minutes. Then, carefully transfer it to a wire rack. Let it cool completely before slicing. This cooling step helps keep the loaf moist and flavorful. - Avoiding Overmixing the Batter: Mixing too much can make your loaf dense. Mix until the dry and wet ingredients just come together. A few lumps are okay. This keeps the bread light and fluffy. - Utilizing Fresh vs. Frozen Raspberries: Fresh raspberries give a burst of flavor. They also look great in the loaf. If you use frozen raspberries, thaw them first and drain excess water. This helps avoid a soggy loaf. - Safety Precautions with Baking: Always use oven mitts when handling hot pans. Let the loaf cool before slicing. This prevents burns and keeps the loaf intact. - Creative Ways to Serve: Slice the loaf and place it on a nice platter. Arrange slices in a fan shape for a fun look. This makes serving easy and inviting. - Garnishing Suggestions with Fruits: Top the loaf with fresh raspberries and lemon slices. This adds color and freshness. It also makes the loaf look more appealing for your guests. - Pairing Ideas with Whipped Cream or Yogurt: Serve slices with a dollop of whipped cream or a side of yogurt. This adds creaminess and a nice touch to each bite. It complements the lemon and raspberry flavors perfectly. Pro Tips Use Room Temperature Ingredients: Allow your eggs and yogurt to sit at room temperature for about 30 minutes before mixing. This helps create a smoother batter and results in a lighter loaf. Don’t Overmix the Batter: When combining the dry and wet ingredients, mix just until incorporated. Overmixing can lead to a dense loaf, so be gentle when folding in the raspberries as well. Check for Doneness: Every oven is different, so start checking for doneness at the 50-minute mark. Insert a toothpick into the center; it should come out clean or with a few moist crumbs. Store Properly: To keep your loaf fresh, store it in an airtight container at room temperature for up to 3 days or in the refrigerator for up to a week. You can also freeze slices for up to 3 months. {{image_2}} You can change up the flavors in your Lemon Raspberry Yogurt Loaf. Here are some fun ideas: - Introducing Other Fruits: Instead of raspberries, try blueberries or strawberries. Both fruits add a sweet and tart punch. They also keep the loaf moist and colorful. - Adding Nuts or Seeds for Crunch: Toss in some chopped nuts or seeds. Walnuts or sunflower seeds bring a nice crunch. They also add good fats and protein. - Substituting Yogurt Types or Sweeteners: You can switch yogurt types, too. Use Greek yogurt for a thicker loaf. For sweetness, consider honey or maple syrup. Both give a unique taste to your loaf. This recipe can fit many diets. Here are some easy swaps: - Gluten-Free Options Using Alternative Flours: If you need a gluten-free loaf, try almond flour or coconut flour. These flours work well and keep the loaf tasty. - Vegan Alternatives for Eggs and Dairy: To make the loaf vegan, replace eggs with flax eggs. Mix 1 tablespoon of flaxseed meal with 2.5 tablespoons of water. Let it sit until it thickens. Use plant-based yogurt instead of dairy yogurt for a great vegan version. These variations let you enjoy the Lemon Raspberry Yogurt Loaf in many ways. You can customize it to fit your taste or diet. To keep your Lemon Raspberry Yogurt Loaf fresh, use proper storage methods. You can store it in an airtight container. A plastic wrap is another good option. These help keep moisture in and air out. For best results, place the loaf at room temperature. It stays fresh for up to three days this way. If you want to store it longer, refrigeration works too. In the fridge, the loaf lasts about a week. If your loaf loses its fresh taste, you can revive it. The best method is to slice the loaf and warm it in the oven. Preheat your oven to 350°F (175°C). Heat for about 10 minutes or until warm. For long-term storage, freezing is a great option. Slice the loaf before freezing for easy access. Wrap each slice tightly in plastic wrap. Then, place them in a freezer-safe bag. It can stay in the freezer for up to three months. When you're ready to eat it, just thaw overnight in the fridge. Enjoy it fresh again! Can I Use Greek Yogurt Instead? Yes, you can use Greek yogurt instead of plain yogurt. Greek yogurt adds a nice creaminess. It may make the loaf a bit denser, but it will still taste great. Just ensure you measure it the same way. How to Tell When the Loaf is Done Baking? Check the loaf with a toothpick. Insert it into the center, and if it comes out clean, the loaf is done. You can also look for a golden top. The bread should spring back when you gently press it. What Can I Substitute for Granulated Sugar? You can use brown sugar or coconut sugar as substitutes. Both add a different flavor but work well. If you prefer a no-calorie option, try a sugar substitute like stevia. Adjust the amount based on the product instructions. Can This Recipe Be Doubled? Yes, you can double this recipe. Just use two loaf pans or bake it in a larger pan. Keep an eye on the baking time, as it may change with a larger batch. How Long Does the Loaf Last Once Baked? The loaf stays fresh for about three days at room temperature. If you want it to last longer, store it in the fridge for up to a week. Can I Make Mini Loaves Instead of One Large Loaf? Absolutely! You can use mini loaf pans. Bake them for about 25-30 minutes. Just check with a toothpick to ensure they are done. Mini loaves are perfect for sharing or gifting! This blog covered a delicious raspberry yogurt loaf, detailing the key ingredients and steps. You learned how to mix wet and dry components and bake to perfection. I also shared tips for avoiding common mistakes and enhancing flavor. You can even customize the recipe to suit your taste. For storage, I provided methods to keep your loaf fresh. Remember, baking is fun and flexible. Enjoy making this treat and feel free to experiment with flavors!

Lemon Raspberry Yogurt Loaf Delightful Flavor Treat

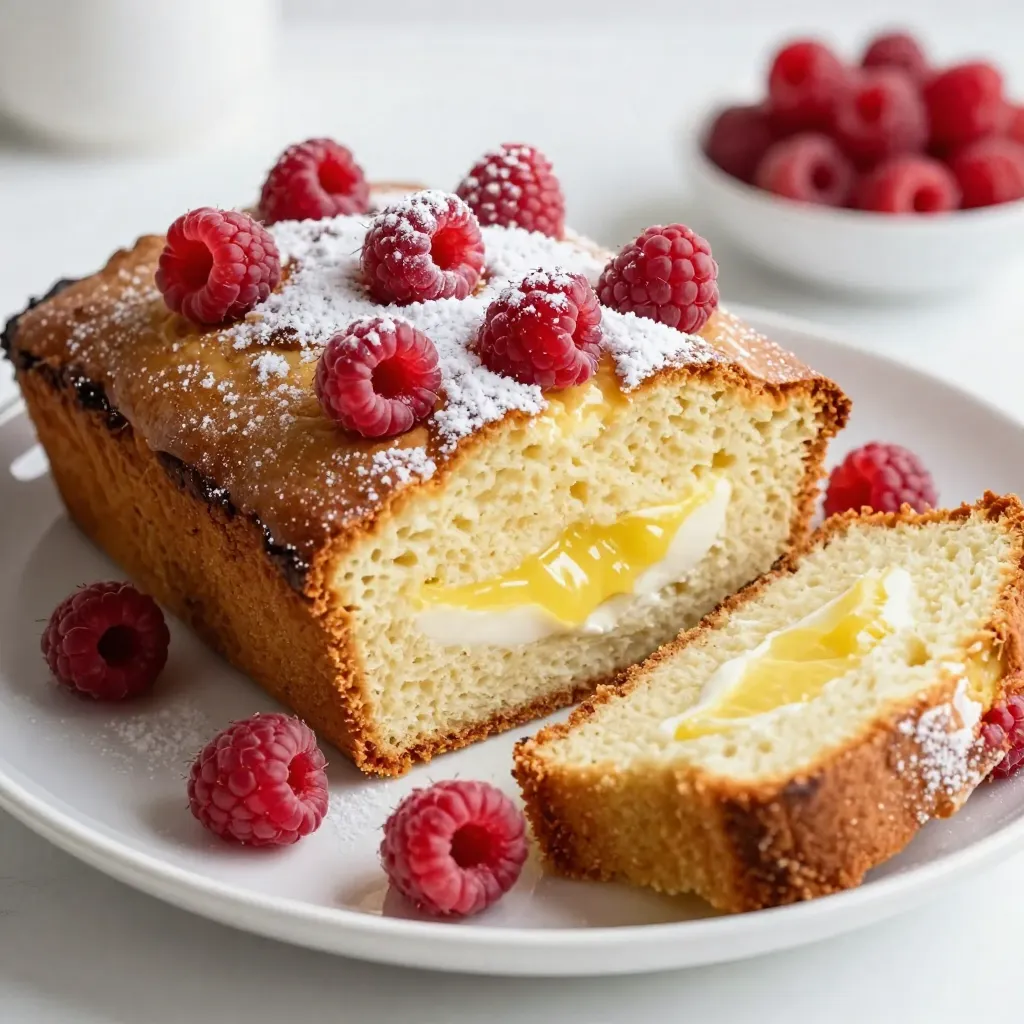
Are you ready to bake a delicious Lemon Raspberry Yogurt Loaf? This moist, zesty treat bursts with fresh flavors perfect

To make Air Fryer Honey Mustard Brussels Sprouts, you need these key ingredients: - 1 lb Brussels sprouts, trimmed and halved - 2 tablespoons honey - 2 tablespoons Dijon mustard - 1 tablespoon olive oil - 1 teaspoon garlic powder - ½ teaspoon salt - ¼ teaspoon black pepper - ¼ teaspoon smoked paprika These ingredients create a sweet and tangy flavor that pairs perfectly with the sprouts. The honey adds a lovely sweetness, while the Dijon mustard gives it a nice bite. Garlic powder adds depth, and smoked paprika brings warmth to the dish. To elevate your Brussels sprouts, consider adding: - 1 tablespoon apple cider vinegar (for extra tang) This ingredient is optional but adds a nice zing. If you want a brighter taste, the vinegar is a great choice. You can also sprinkle some sesame seeds or chopped parsley on top for added crunch and color when serving. For this recipe, you will need: - Air fryer - Large mixing bowl - Cutting board - Sharp knife - Measuring spoons Having these tools ready makes cooking easier. The air fryer is key for achieving crispy sprouts without much oil. A good knife helps you halve the Brussels sprouts evenly, ensuring they cook well. Start with 1 pound of Brussels sprouts. Trim off the ends and cut them in half. This helps them cook evenly. Rinse the sprouts under cold water to remove any dirt. Pat them dry with a clean towel. Dry sprouts get crispier in the air fryer. Grab a large mixing bowl. Add 2 tablespoons of honey and 2 tablespoons of Dijon mustard. Pour in 1 tablespoon of olive oil. Sprinkle in 1 teaspoon of garlic powder, ½ teaspoon of salt, ¼ teaspoon of black pepper, and ¼ teaspoon of smoked paprika. For a tangy twist, add 1 tablespoon of apple cider vinegar. Mix all the ingredients until smooth. Preheat your air fryer to 375°F (190°C) for about 5 minutes. Toss the halved Brussels sprouts in the honey mustard mix. Make sure they are covered well. Place them in the air fryer basket in a single layer. If needed, cook in batches. Cook for 12-15 minutes. Shake the basket halfway through for even cooking. The sprouts should turn golden brown and crispy. Once done, transfer them to a serving bowl. Drizzle any leftover sauce on top for more flavor. To get that perfect crispiness, always preheat your air fryer. Set it to 375°F (190°C) for about 5 minutes. This helps the Brussels sprouts cook evenly. When you place them in the basket, make sure they are in a single layer. If they are too crowded, they won’t crisp up well. Shake the basket halfway through cooking. This ensures that each sprout gets golden and crunchy. You can tweak the flavor to match your taste. If you like it sweeter, add more honey. For a tangy kick, increase the Dijon mustard. If you want a little heat, sprinkle in some red pepper flakes. The optional apple cider vinegar adds a nice tang, too. Mix and match these ingredients to create your ideal flavor burst. One common mistake is not trimming the Brussels sprouts properly. Always trim and halve them before cooking. This helps them cook faster and more evenly. Another mistake is skipping the shaking step. If you don’t shake the basket, some sprouts may burn while others remain soft. Finally, avoid cooking them for too long. Check them at 12 minutes, and then adjust as needed. {{image_2}} You can change the taste of your Brussels sprouts easily. Try using maple syrup instead of honey for a sweeter note. You could also swap Dijon mustard with whole grain mustard for extra texture. If you like spice, add a pinch of cayenne pepper or chili flakes. For a zesty kick, squeeze fresh lemon juice over the sprouts after cooking. This gives a bright and fresh flavor. Air fryers are great, but you can cook these Brussels sprouts in the oven too. Set your oven to 400°F (200°C). Spread the coated sprouts on a baking sheet. Bake for about 20-25 minutes, tossing halfway through. You can also roast them on a grill. Just make sure to use a grill basket to keep them from falling through the grates. Each method will give you a tasty result. Seasonal ingredients can elevate your dish. In fall, try adding roasted chestnuts or cranberries for sweetness. In spring, toss in fresh herbs like thyme or parsley for a burst of flavor. During winter, add a sprinkle of pomegranate seeds for a pop of color and taste. Using seasonal ingredients makes your meal fresher and more exciting. After enjoying your air fryer honey mustard Brussels sprouts, store any leftovers in an airtight container. Let them cool first to keep them fresh. They will stay good in the fridge for up to three days. If you want to keep them longer, consider freezing. To reheat, simply place the Brussels sprouts back in the air fryer. Set the temperature to 350°F (175°C) and heat for about 5-7 minutes. This method helps to restore their crispiness. You can also use the oven at 350°F (175°C) for about 10 minutes. If you want to freeze the Brussels sprouts, make sure they are completely cool first. Place them in a freezer-safe bag or container. They can last for up to three months in the freezer. When ready to eat, thaw them in the fridge overnight before reheating. Yes, you can use frozen Brussels sprouts. Just keep in mind they may not get as crispy as fresh ones. Thaw them first and pat them dry. This helps remove excess moisture, which can make them soggy. If you don't have an air fryer, you can roast the Brussels sprouts in your oven. Preheat the oven to 400°F (200°C). Use a baking sheet lined with parchment paper. Cook for about 20-25 minutes, tossing halfway through. Brussels sprouts are done when they are golden brown and crispy on the outside. You can also poke them with a fork. They should be tender inside. If they are still hard, cook for a few more minutes. Yes, making this recipe vegan is easy. Simply replace honey with maple syrup or agave nectar. This keeps the sweet flavor while making it plant-based. The rest of the ingredients are already vegan-friendly. In this post, we explored how to make honey mustard Brussels sprouts. We covered the main and optional ingredients, easy step-by-step instructions, and tips for perfecting your dish. I shared variations and storage tips, so you can enjoy leftovers or adapt the recipe to your tastes. Remember, cooking should be fun and flexible. With these ideas, you can create your own twist on this dish. Enjoy experimenting and savoring every bite of this tasty side!

Air Fryer Honey Mustard Brussels Sprouts Flavor Burst

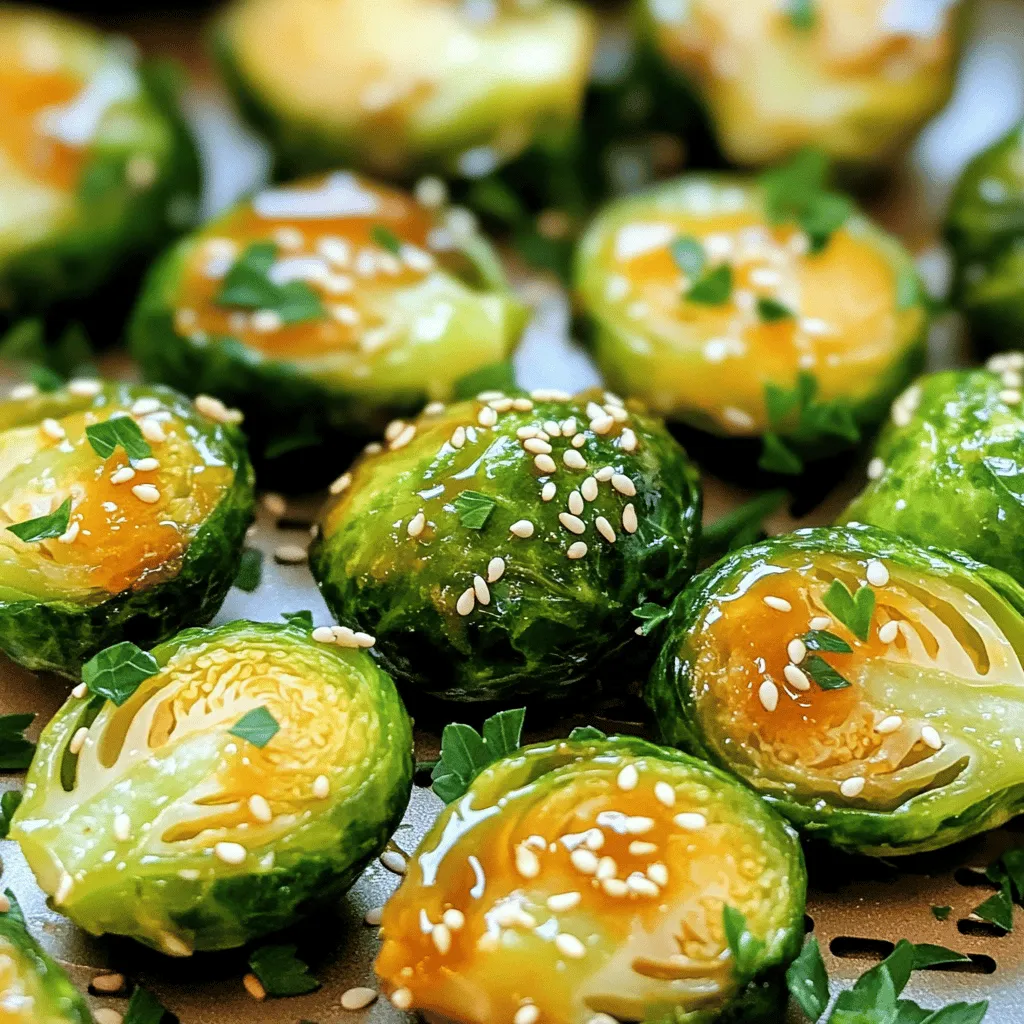
Are you ready to transform Brussels sprouts into a flavor-packed delight? In this blog, I’ll show you how to make

- 1 medium ripe banana - 2 tablespoons natural peanut butter - 1 scoop chocolate protein powder (plant-based or whey) - 1 cup unsweetened almond milk (or any milk of choice) - 2 tablespoons Greek yogurt - 1 tablespoon cocoa powder - 1 tablespoon honey or maple syrup (optional) - A handful of ice cubes - Sliced banana and crushed peanuts for garnish This smoothie packs a protein punch. Each serving contains about: - 25 grams of protein from yogurt and protein powder - Healthy fats from peanut butter - Fiber from the banana - Low calories with almond milk This balanced mix fuels your body and keeps you full. You can switch ingredients for your taste. Try these options: - Use almond butter instead of peanut butter for a different flavor. - Replace Greek yogurt with dairy-free yogurt for a vegan option. - Swap honey for agave syrup or leave it out if you prefer less sweetness. - Use any milk you like: oat milk, soy milk, or regular dairy milk works well. These swaps keep your smoothie tasty and healthy, no matter your diet! 1. Peel the ripe banana and break it into small pieces. Add these pieces to a blender. 2. Scoop in the natural peanut butter, chocolate protein powder, and almond milk. 3. Add the Greek yogurt for creaminess, followed by cocoa powder and honey if you like it sweet. 4. Toss in a handful of ice cubes to keep your drink cold and refreshing. Blend on high until the mixture is smooth and creamy. You want all the ingredients well mixed. If your smoothie is too thick, add a bit more almond milk and blend again. Always taste your smoothie. If it needs more sweetness, add extra honey or syrup, then blend again. Pour your smoothie into a chilled glass for a cool treat. Top it with sliced banana and a sprinkle of crushed peanuts for a crunchy finish. Enjoy right away for the best taste and texture. To get the best texture, follow these steps: - Use a ripe banana. It adds natural sweetness and creaminess. - Blend your smoothie on high. This ensures a smooth mix without lumps. - Add ice cubes before blending. They make the smoothie cold and refreshing. - If you want extra creaminess, add more Greek yogurt. It thickens the mix. Quality matters in this smoothie. Here are my tips: - Choose natural peanut butter. Avoid brands with added sugar or oils. - Opt for unsweetened almond milk. It keeps the taste clean and light. - Select high-quality protein powder. Look for plant-based or whey options. - Use fresh ingredients like ripe bananas and pure cocoa powder. I’ve seen some common errors. Don’t let them trip you up: - Skipping the ice cubes can lead to a warm smoothie. - Adding too much sweetener hides the rich flavors. - Not blending long enough can leave chunks of banana or peanut butter. - Forgetting to taste before serving means you might miss the perfect balance. {{image_2}} You can easily change the taste of your High-Protein Peanut Butter Cup Smoothie. Here are some fun ideas: - Mint Chocolate: Add a few drops of mint extract. This gives a fresh twist. - Vanilla Delight: Swap chocolate protein powder for vanilla. It makes the smoothie sweet and smooth. - Berry Bliss: Toss in a handful of berries like strawberries or blueberries. They add color and flavor. Making this smoothie dairy-free is simple. Just use plant-based yogurt instead of Greek yogurt. You can also choose almond milk or oat milk. This way, you keep the creaminess without dairy. All these options make the smoothie vegan-friendly. Want to boost the protein even more? Try these add-ons: - Chia Seeds: These tiny seeds pack a protein punch. Add a tablespoon for fiber and healthy fats. - Hemp Seeds: Sprinkle in some hemp seeds. They are also high in protein and have a nutty taste. - Nut Butter Variety: Swap peanut butter for almond or cashew butter. Each brings unique flavors and nutrients. These variations let you create a smoothie that suits your taste and needs! To store any leftover smoothie, pour it into an airtight container. Seal it tightly. Place it in the fridge. Smoothies taste best fresh but can last for one day. Give it a quick shake before drinking. If it separates, that’s normal! To freeze smoothie packs, prep your ingredients first. Place sliced banana, peanut butter, protein powder, and cocoa powder in a freezer-safe bag. You can add yogurt too, if you want. Seal the bag well and label it. Freeze for up to three months. When ready, blend it with milk and ice for a quick treat. Smoothies are best enjoyed cold, so reheating is not needed. If your smoothie thickens, add a splash of milk. Blend it again for a smooth texture. Enjoy your tasty drink fresh! This smoothie packs a protein punch! It contains about 30 grams of protein per serving. The protein comes from the chocolate protein powder, Greek yogurt, and peanut butter. This makes it a great choice for muscle recovery or a filling snack. Absolutely! You can use whey, plant-based, or any protein powder you like. Just make sure it mixes well with liquids. Each type may change the flavor and texture a bit, but it will still taste great. Yes, this smoothie is perfect for meal prep. You can make it ahead of time and store it in the fridge for up to 24 hours. Just give it a good shake or stir before drinking. If you want to keep it fresh longer, freeze it in individual portions. If you want a sweeter smoothie, add more honey or maple syrup. You can also try adding more banana. Just blend everything again after adding sweeteners to mix it well. Each ingredient brings its own health perks: - Banana: High in potassium and fiber. - Peanut butter: Provides healthy fats and protein. - Greek yogurt: Is packed with probiotics for gut health. - Cocoa powder: Contains antioxidants that help reduce inflammation. - Almond milk: Is low in calories and rich in vitamins. These ingredients make your smoothie tasty and nutritious, so enjoy every sip! This blog post shared key details about smoothie ingredients, preparation, and storage. You learned how to mix flavors, avoid common mistakes, and store your creations well. Remember, experimenting with ingredients can lead to new favorites. Use the tips for texture and ingredient quality for the best results. Smoothies can be healthy and tasty with the right choices. Enjoy your journey to making great smoothies!

High-Protein Peanut Butter Cup Smoothie Delight

Craving a delicious, guilt-free treat? Let me introduce you to the High-Protein Peanut Butter Cup Smoothie Delight! This tasty smoothie

- 2 cans of crescent roll dough - 3 medium apples (Granny Smith or Honeycrisp), peeled, cored, and diced - 1/2 cup brown sugar - 1 teaspoon cinnamon - 1/4 teaspoon nutmeg - 1 tablespoon lemon juice - 1/2 cup caramel sauce (plus extra for drizzling) - 1 egg, beaten (for egg wash) - 1 tablespoon sugar (for topping) - Whipped cream or vanilla ice cream (for serving, optional) Gather these simple ingredients before you start. The crescent roll dough forms the base of this treat. I love using Granny Smith or Honeycrisp apples. They add a nice mix of sweet and tart. Brown sugar gives a deep flavor, while cinnamon and nutmeg add warmth. Lemon juice brightens the apple mix and keeps it fresh. You’ll need caramel sauce for that gooey goodness. An egg wash helps the dough get a lovely golden color. Granulated sugar on top adds a sweet crunch. For serving, whipped cream or vanilla ice cream makes it extra special. Make sure to have everything ready, so you can enjoy making this delightful treat! - Preheat the oven to 375°F (190°C). Line a baking sheet with parchment paper. - In a bowl, mix the diced apples, brown sugar, cinnamon, nutmeg, and lemon juice. Toss until the apples are well coated. - Unroll the crescent roll dough and separate it into triangles. - Spoon a bit of the apple mixture onto each triangle. Drizzle caramel sauce over the apples. - Fold the pointed ends of the triangles over the apple mixture. Tuck them under the wide ends, making a ring shape. - Brush the dough with the beaten egg for a golden color. Sprinkle sugar on top for added sweetness. - Bake for 20-25 minutes until the dough is golden brown and cooked through. - Selecting the best apples: Choose Granny Smith or Honeycrisp apples. They add a nice tartness. Firm apples hold up well while baking. Avoid mushy apples to keep the texture crisp. - Achieving a golden crust: Use an egg wash for a shiny finish. Brush the dough before baking. Sprinkle sugar on top for extra crunch and sweetness. Bake until golden brown for the best look. - Alternative fillings: Add nuts like walnuts or pecans for crunch. Dried fruits like cranberries or raisins can add sweetness. Mix these with the apples for new flavors. - Adjusting sweetness level: If you prefer less sweetness, reduce the brown sugar. You can also skip the extra caramel drizzle for a lighter treat. - Plating suggestions: Serve slices on a round platter for a beautiful display. Place a scoop of vanilla ice cream beside each slice. - Enhancing with toppings: Drizzle extra caramel sauce over the top. Add a dollop of whipped cream for richness. A sprinkle of cinnamon can enhance the aroma and look. {{image_2}} You can change the flavors in your Caramel Apple Pie Crescent Ring. For fall, add cranberries for a tart bite. Chopped pecans bring a nice crunch. Both flavors match well with apples. For holiday fun, use spices like nutmeg and allspice. These spices add warmth and depth. They make your treat festive and cozy. If you need gluten-free options, look for gluten-free crescent roll dough. Many brands offer this now. You can still enjoy the same great taste. For a vegan twist, swap the egg for a plant-based milk wash. Use coconut or almond milk for brushing. For the filling, replace caramel sauce with a vegan version made from dates or coconut cream. These swaps keep the taste delicious and fun! To keep your Caramel Apple Pie Crescent Ring fresh, store it properly. Use an airtight container to prevent it from drying out. You can also wrap it in plastic wrap for extra protection. At room temperature, it lasts about two days. In the fridge, it stays good for up to five days. When reheating, I recommend using an oven. Preheat it to 350°F (175°C). Place the crescent ring on a baking sheet. Cover it with foil to keep it moist. Bake for about 10-15 minutes. This method helps avoid sogginess. You want it warm and crispy, just like when it was fresh. Enjoy it with extra caramel drizzled on top for a treat! How do I know when the crescent ring is done baking? Look for a golden brown color on the dough. The ring should also be firm. If a toothpick inserted into the dough comes out clean, it is done. Can I make this recipe ahead of time? Yes, you can prepare the apple filling in advance. Store it in the fridge. Just roll out the crescent dough when you are ready to bake. What other fruits can I use instead of apples? You can use pears or peaches. Cherries and berries work great too. Just make sure to adjust the sugar based on the fruit's sweetness. How do I store and reheat the Caramel Apple Pie Crescent Ring? Store leftovers in an airtight container at room temperature for one day. For longer storage, keep it in the fridge for up to three days. To reheat, place it in the oven at 350°F (175°C) for about 10 minutes. This helps keep it crisp. Can I use store-bought caramel sauce? Absolutely! Store-bought caramel sauce saves time and tastes great. Drizzle it over the top for a quick finish. This blog post shared a simple way to make a Caramel Apple Pie Crescent Ring. We discussed the ingredients, including apples and crescent roll dough, and provided clear step-by-step instructions. You learned helpful tips for perfecting the recipe and ideas for variations to suit your taste. Remember, this dessert is easy to store and reheat. With a bit of creativity, you can impress your family and friends with your baking skills. Enjoy making and serving this sweet treat!

Caramel Apple Pie Crescent Ring Delightful Treat Recipe

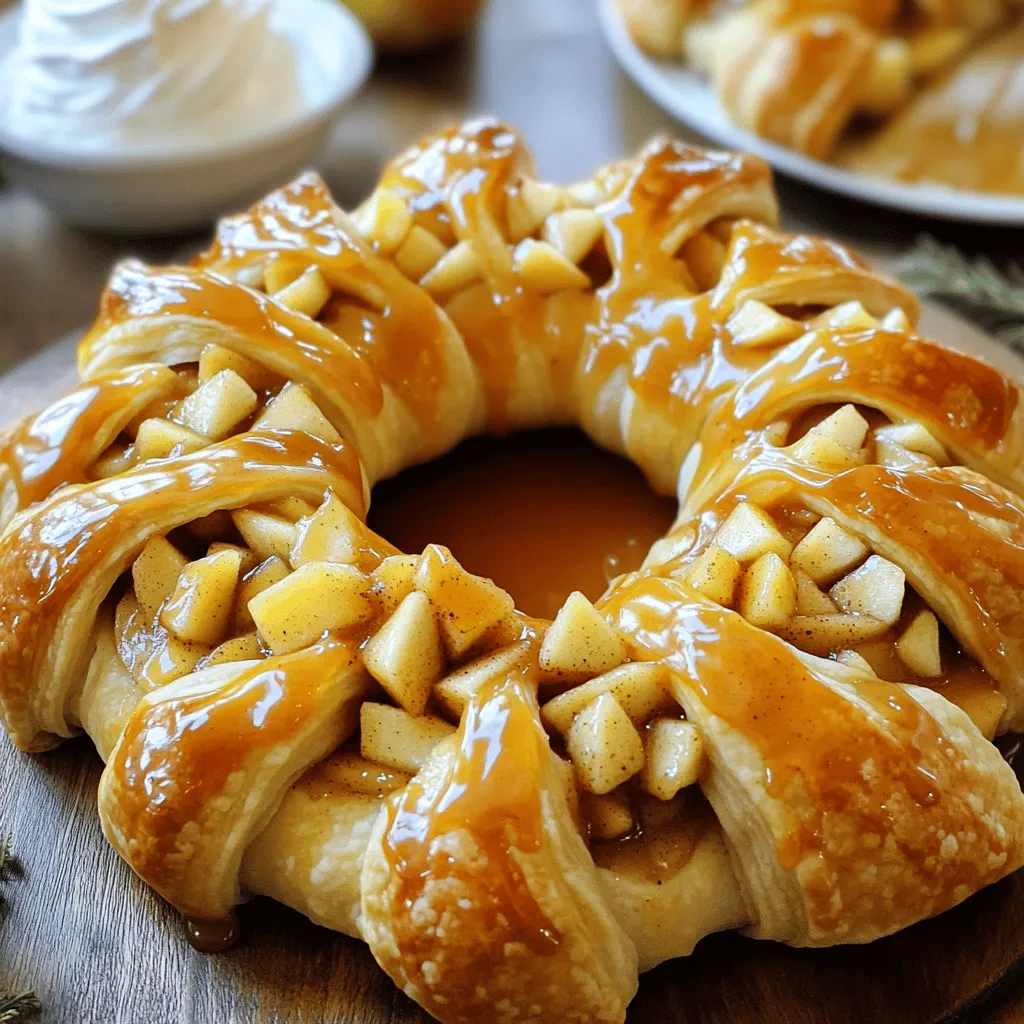
Are you ready to bake a show-stopping dessert that your family will love? This Caramel Apple Pie Crescent Ring combines

For these tasty tacos, you will need: - 1 lb large shrimp, peeled and deveined - 2 tablespoons olive oil - 4 cloves garlic, minced - 1 teaspoon chili powder - 1/2 teaspoon cayenne pepper (adjust for spice level) - Salt and pepper to taste - 1 teaspoon lime juice - 8 small corn tortillas - 1 cup shredded red cabbage - 1 avocado, sliced - Fresh cilantro, for garnish - Lime wedges, for serving These ingredients bring bold flavors. The shrimp is the star. The garlic adds depth, while the chili powder gives a kick. You can adjust the cayenne for your spice level. You can add these for a fun twist: - Sliced jalapeños for extra heat - Diced tomatoes for freshness - Crumbled feta for creaminess - Sour cream for a rich touch These toppings enhance the dish. Feel free to mix and match based on your taste. To make these tacos, gather: - A medium bowl for mixing - A large skillet for cooking shrimp - A spatula for flipping shrimp - A separate pan or grill for warming tortillas - A sharp knife for slicing toppings Using the right tools makes the process smooth. Each step will be easier with these handy items. To start, I recommend using large shrimp. They provide a nice bite. Rinse and dry the shrimp well. In a medium bowl, combine the shrimp with: - 2 tablespoons olive oil - 4 cloves garlic, minced - 1 teaspoon chili powder - 1/2 teaspoon cayenne pepper (adjust to your spice level) - Salt and pepper to taste - 1 teaspoon lime juice Toss everything together until the shrimp are well-coated. This mix gives the shrimp a bold flavor. Next, heat a large skillet over medium-high heat. Once the skillet is hot, add the shrimp in a single layer. Cook them for about 2 minutes until they turn pink and opaque. Then, flip the shrimp over and cook for another 1-2 minutes. They should be fully cooked and firm. Remove the skillet from heat. Perfectly cooked shrimp should be juicy and full of flavor. In another pan or on an open flame, warm the corn tortillas. Heat them for about 30-60 seconds on each side. You want them pliable and lightly charred. This makes the tortillas soft and adds a bit of smoky flavor. Now it's time to put everything together! On each warm tortilla, layer a handful of shredded red cabbage. This adds crunch and color. Next, place a generous amount of the cooked shrimp on top. Add avocado slices for creaminess. Finally, sprinkle fresh cilantro on each taco. This step brings brightness to the dish. Serve with lime wedges on the side. Squeeze some lime juice over the tacos for a zesty finish. Enjoy your bold flavor explosion! To make these tacos shine, you need a good mix of flavors. The garlic adds a nice kick. The chili powder gives warmth. The lime juice brightens up the dish. To balance it, taste as you go. If you find it too salty, add a bit more lime. Prefer it spicier? Just add more cayenne. Remember, cooking is all about finding what you love! When cooking shrimp, keep a close eye on them. They cook fast, usually in just a few minutes. Overcooking makes them tough. Cook until they turn pink and opaque. Always cook shrimp in a single layer. This ensures even cooking and nice browning. Use a non-stick skillet or add oil to prevent sticking. You can easily adjust the spice level. If you want more heat, add extra cayenne or chili powder. For a milder taco, reduce or skip the cayenne. You can also add toppings like sour cream or guacamole to cool it down. Experiment with fresh jalapeños for a fresh kick. Enjoy finding your perfect flavor! {{image_2}} If you want to switch things up, try different proteins. Chicken works great. Simply use the same spices. You can also use firm fish like tilapia or cod. Just make sure to cut it into small pieces. For a rich option, try beef or pork. Ground meat is quick to cook and adds a nice texture. Each protein will bring its own flavor to your tacos. For a meat-free version, consider using grilled veggies. Zucchini, bell peppers, and mushrooms taste amazing when grilled. You can also use black beans or chickpeas. They add protein and fiber. Toss them with the same chili and garlic flavors for a tasty bite. Another fun choice is roasted cauliflower. It adds a nice crunch and absorbs spices well. Toppings make tacos fun and unique. Try different salsas like mango or pineapple for sweetness. A classic tomato salsa is also a hit. For heat, use jalapeños or hot sauce. Fresh herbs like cilantro or parsley add brightness. Don’t forget about cheese! Crumbled feta or cotija are great options. Finally, squeeze fresh lime over your tacos for a zesty kick. To store leftover shrimp tacos, wrap each taco in plastic wrap. This keeps them fresh. Place them in an airtight container. Store the container in the fridge. Leftovers are best used within two days. Keep the shrimp and toppings separate if possible. This helps maintain the taco's crunch and flavor. To reheat your shrimp tacos, start by removing the toppings. This prevents sogginess. Heat a skillet over medium heat. Add the shrimp only until they are warm. This takes about 2-3 minutes. For the tortillas, warm them in the skillet for about 30 seconds on each side. This will bring back their softness. You can freeze the shrimp for later use. Place the cooked shrimp in a freezer bag. Remove as much air as possible before sealing. You can also freeze the tortillas separately. When ready to use, thaw shrimp overnight in the fridge. Reheat them as mentioned earlier. Enjoy your shrimp tacos again in no time! It takes about 20 minutes to make these tacos. You spend 10 minutes prepping and 10 minutes cooking. This quick time makes it easy to enjoy a tasty meal any day. Yes, you can use frozen shrimp. Just make sure to thaw them first. You can do this by placing them in cold water for about 15 minutes. This keeps the shrimp juicy and fresh. You can use flour tortillas if you prefer. Other good choices are lettuce wraps for a low-carb option. Just pick what you like best and enjoy! To adjust the spice, change the cayenne pepper amount. Use less for mild tacos or more for extra heat. You can also add hot sauce when serving for a kick. Minute Chili Garlic Shrimp Tacos are quick and tasty. We covered key ingredients, from shrimp to toppings. You learned how to prepare, cook, and assemble these tacos perfectly. Tips helped you balance flavor and adjust spice. Variations let you explore new proteins and vegetarian options. Lastly, proper storage keeps leftovers fresh. Enjoy these tacos, and don’t be afraid to make them your own!

Minute Chili Garlic Shrimp Tacos Bold Flavor Explosion

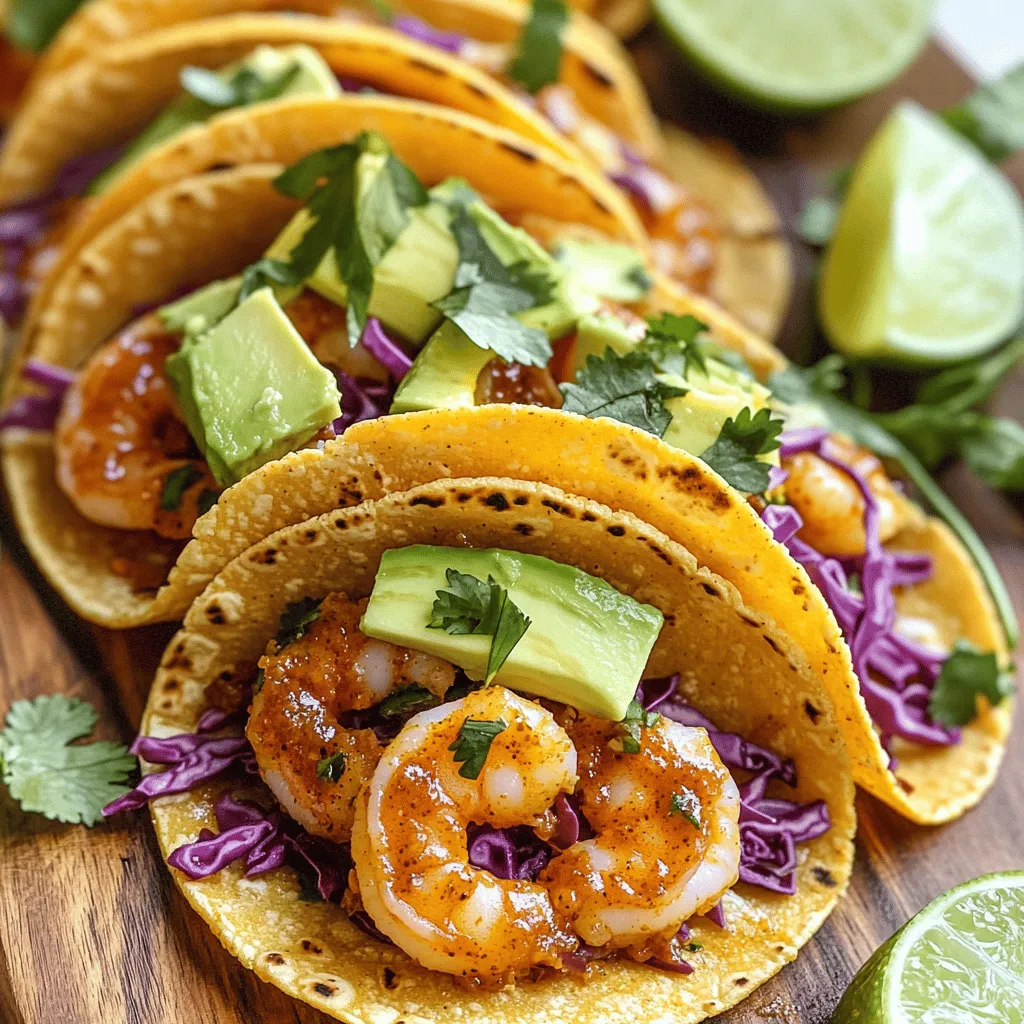
Are you ready for a burst of bold flavors? You can whip up Minute Chili Garlic Shrimp Tacos in no

- 4 cups diced tomatoes (canned or fresh) - 1 medium onion, finely chopped - 2 cloves garlic, minced - 3 cups vegetable broth - 1 cup heavy cream or coconut cream for a dairy-free option - 1 package (9 oz) cheese tortellini - 1 teaspoon dried basil - 1 teaspoon dried oregano - Salt and pepper to taste - 1 tablespoon olive oil - Fresh basil, for garnish - Optional: Grated parmesan cheese for serving When I make Slow Cooker Creamy Tomato Tortellini Bisque, I gather all my ingredients first. This method keeps me organized and ready to cook. I start with the diced tomatoes. You can use canned or fresh tomatoes. Both work well and add great flavor. Next, I chop one medium onion finely. The onion gives a nice base flavor. I also add two cloves of minced garlic. Garlic adds that perfect aromatic touch. I use three cups of vegetable broth. This broth makes the bisque rich and hearty. For creaminess, I add one cup of heavy cream. If you prefer a dairy-free option, coconut cream is a great choice. The star of this dish is the cheese tortellini. I use one package, which is about nine ounces. The tortellini makes the bisque filling. I love adding herbs for flavor. I use one teaspoon each of dried basil and dried oregano. Finally, I season with salt and pepper to taste. I also include one tablespoon of olive oil for sautéing the onion and garlic. For the final touch, I garnish with fresh basil and optional grated parmesan cheese. These add freshness and a nice finish to the dish. Start by making the base of your bisque. First, heat the olive oil in a skillet over medium heat. Add the finely chopped onion and sauté it until it turns translucent, which takes about five minutes. This step adds great flavor to your soup. Next, stir in the minced garlic and cook for one more minute. This brings out a lovely aroma. Now, transfer the onion and garlic mix to your slow cooker. Add the diced tomatoes, vegetable broth, dried basil, and oregano. Make sure to stir everything well. This mix will become the heart of your soup. Cover and choose your cooking time. For a low setting, let it cook for four to five hours. If you’re in a hurry, the high setting works in two to three hours. Once your soup base is ready, it’s time to blend. Use an immersion blender to blend the soup right in the slow cooker. This tool makes it easy. If you don’t have one, carefully transfer the soup to a stand blender in batches. Blend until smooth. This step gives your bisque that creamy texture we all love. Now for the final touches! Stir in the heavy cream or coconut cream, depending on your preference. This adds richness and creaminess to your bisque. Return the mixture to the slow cooker if needed. Next, add the cheese tortellini. Cover and cook for another 20 to 30 minutes on low. This lets the tortellini cook and become tender. Finally, season with salt and pepper to taste. When serving, ladle the bisque into bowls. Top each bowl with freshly chopped basil for a pop of color. If you want to make it extra special, sprinkle on some grated parmesan cheese. Enjoy your delicious creation! To boost flavor in your bisque, use spices like dried basil and oregano. They add depth and warmth. You can add a pinch of red pepper flakes for some heat. If you want protein, consider adding cooked chicken or sausage. This makes the dish heartier and more filling. For a smooth bisque, use an immersion blender. It’s easy and works well right in the slow cooker. If you prefer, you can use a stand blender in batches. For creaminess, stir in heavy cream or coconut cream. Adjust the amount based on your taste. If you want a thicker soup, blend longer. Serve your bisque hot for the best flavor. Pair it with crusty bread or a fresh salad. For garnishing, sprinkle fresh basil on top. You can also add grated parmesan cheese for a rich finish. These little touches enhance both looks and taste. {{image_2}} You can swap heavy cream for coconut cream. Coconut cream gives the bisque a rich texture. It also adds a subtle sweetness. This change works well for those who avoid dairy. Look for brands that have no added sugars. For the tortellini, choose plant-based options. Many stores offer tasty vegan tortellini. These options come filled with various flavors. If you want something different, try alternatives to tortellini. You can use small pasta shapes like shells or orzo. These options cook well and absorb the soup's flavor. You can also switch up the broth. While vegetable broth is great, chicken broth adds a deeper taste. Try different broth types to find your favorite. Incorporating seasonal vegetables can enhance your bisque. For spring, add fresh peas or asparagus. In fall, roasted butternut squash adds warmth. These veggies bring a fresh look and taste. You can also infuse flavors based on the seasons. In winter, add a pinch of nutmeg for warmth. In summer, fresh basil shines, boosting the bisque's aroma. Store leftover creamy tomato tortellini bisque in airtight containers. Glass or BPA-free plastic containers work best. Make sure to let the soup cool before sealing. This prevents condensation, which can spoil the bisque. You can keep it in the fridge for three to four days. If you want to freeze it, pour the bisque into freezer-safe containers. Leave some space at the top, as it will expand when frozen. This soup can last up to three months in the freezer. You can reheat the bisque in the microwave or on the stovetop. For the microwave, place the soup in a microwave-safe bowl. Heat in short bursts, stirring in between. This helps it heat evenly. For stovetop reheating, pour the bisque into a pot. Heat it over medium heat while stirring often. This keeps the texture smooth and creamy. To maintain the flavor, avoid overheating it. Heat until it's just warm. If the bisque thickens, add a splash of vegetable broth or cream. This will help restore its creamy texture. The bisque lasts about 3 to 4 days in the fridge. Store it in an airtight container. Make sure to let it cool first. If you see any signs of spoilage, like a sour smell or strange texture, toss it out. This keeps you safe and healthy. Yes, you can use fresh tomatoes! Choose ripe ones for the best taste. You will need about 4 cups of diced fresh tomatoes. Remove the skins for a smoother texture. Blanch them in hot water for easier peeling. Fresh tomatoes add a bright flavor to the bisque. Several sides pair well with tortellini bisque. Here are some ideas: - Garlic bread: Crunchy and buttery. - Side salad: A fresh green mix. - Grilled cheese: Classic comfort food. - Roasted vegetables: Adds more flavor and color. These sides enhance the meal and make it even more enjoyable. This bisque is rich, creamy, and perfect for any meal. You learned how to select fresh ingredients, sauté aromatics, and blend for a smooth finish. I covered tips to enhance flavor and variations to fit your needs. From storing leftovers to pairing sides, you can now enjoy this bisque anytime. Personalize it to your taste and make it your own. Now, gather your ingredients and start cooking. Enjoy every spoonful of your homemade tortellini bisque!

Slow Cooker Creamy Tomato Tortellini Bisque Wonder

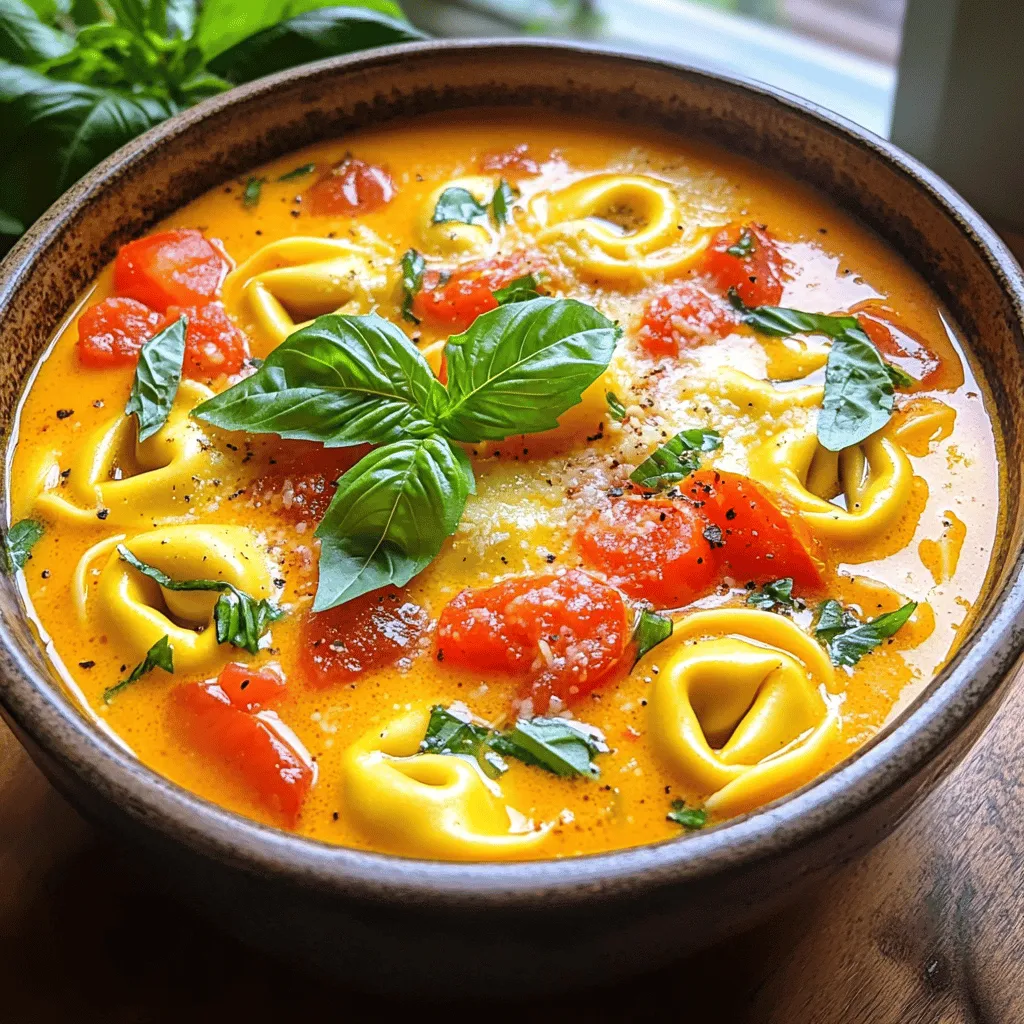
Ready to make a comforting meal that’s both creamy and satisfying? This Slow Cooker Creamy Tomato Tortellini Bisque is your

To make a delicious lemon blueberry yogurt cake, gather these key items: - 1 ½ cups all-purpose flour - 1 teaspoon baking powder - ½ teaspoon baking soda - ¼ teaspoon salt - ½ cup unsalted butter, softened - 1 cup granulated sugar - 2 large eggs - ½ cup plain yogurt - 2 tablespoons lemon juice - Zest of 1 lemon - 1 cup fresh blueberries (plus a few for topping) These ingredients mix well to create a moist, tangy cake with a sweet burst of blueberries. You can add a few optional ingredients to boost the cake's flavor: - Vanilla extract - Lemon extract - A pinch of cinnamon These extras can add depth to your cake, making it even more special. Sometimes, you may not have all the ingredients on hand. Here are some easy swaps: - Substitute Greek yogurt for plain yogurt for a thicker texture. - Use coconut oil instead of butter for a dairy-free option. - Swap out granulated sugar for honey or maple syrup for a different sweetness. These substitutions can help you create a cake that fits your needs while keeping it tasty. Start by preheating your oven to 350°F (175°C). Next, take a 9-inch round cake pan. Grease it well with butter or line it with parchment paper. This step helps the cake come out without sticking. Grab a medium bowl and add 1 ½ cups of all-purpose flour. Then, mix in 1 teaspoon of baking powder, ½ teaspoon of baking soda, and ¼ teaspoon of salt. Whisk these dry ingredients together until they blend well. Set the bowl aside for later. In a large bowl, place ½ cup of softened unsalted butter and 1 cup of granulated sugar. Use an electric mixer on medium speed to beat them together until the mix is light and fluffy, which takes about 3-4 minutes. Add 2 large eggs, one at a time, mixing well after each. Now, stir in ½ cup of plain yogurt, 2 tablespoons of lemon juice, and the zest of 1 lemon. Beat this mixture until smooth. Gradually add the dry mix to the wet mix. Stir gently until just combined. Avoid overmixing to keep the cake fluffy. Next, fold in 1 cup of fresh blueberries using a spatula. Make sure they are evenly spread throughout the batter. Pour the batter into your prepared cake pan and smooth the top. Decorate it with a few extra blueberries. Bake in the preheated oven for 30-35 minutes. Check if it's done by inserting a toothpick into the center. If it comes out clean, the cake is ready. Remove it from the oven and let it cool in the pan for 10 minutes. Then, transfer it to a wire rack to cool completely. Your cake will be soft and moist, perfect for any occasion! To get the best texture, follow a few simple steps. First, do not overmix the batter. When you add the dry mix to the wet mix, stir just until you see no dry flour. Overmixing can make the cake tough. Second, ensure your butter is softened but not melted. Softened butter helps create a light, fluffy cake. Lastly, let the cake cool completely before slicing. This will help keep the cake moist and prevent crumbling. Serve your cake with a light dusting of powdered sugar for a sweet touch. Fresh blueberries on top add a pop of color and flavor. Pair the cake with a dollop of whipped cream or a scoop of vanilla ice cream. A cup of tea or coffee also makes a great match. For brunch, serve slices with yogurt and honey for a tasty twist. You can also try it with a berry compote for a fruity kick. Yogurt is a key ingredient in this cake. It adds moisture and a slight tang that balances the sweetness. To enhance the flavor, use flavored yogurt like lemon or vanilla. You can also mix in a tablespoon of lemon zest to brighten up the taste. If you want a richer flavor, try Greek yogurt. It has a thicker texture and adds creaminess to the cake. The best part? Yogurt makes this cake a bit healthier, too! {{image_2}} You can switch up the fruit in this cake. Try raspberries or strawberries for a fun twist. These fruits add a lovely color and taste. If you use peaches, slice them thinly and mix them in. They bring a nice sweetness. Each fruit gives a unique flavor profile, so get creative! Want to make this cake gluten-free? Swap the all-purpose flour with a gluten-free blend. Look for one that works well in baking. You may not need to change anything else. Just check the baking powder for gluten. This way, everyone can enjoy the cake without worries. If you love muffins, this cake can become muffins! Simply pour the batter into muffin tins instead of a cake pan. Bake for about 20-25 minutes. Watch them closely, as they bake faster. You’ll have delightful lemon blueberry muffins, perfect for breakfast or a snack! To store leftover cake, let it cool completely first. Wrap it tightly in plastic wrap. You can also use an airtight container. This keeps the cake moist and fresh. Place it in the fridge if you plan to eat it within a week. You can freeze this cake too! First, let the cake cool fully. Wrap it in plastic wrap, then in foil. This protects it from freezer burn. It can last up to three months in the freezer. When you want to enjoy it, just thaw it in the fridge overnight. To reheat the cake, preheat your oven to 350°F (175°C). Place the cake on a baking sheet. Cover it loosely with foil. Heat for about 10-15 minutes. This keeps the cake moist and tasty. You can also microwave a slice for 15-20 seconds. Enjoy it warm with a dusting of powdered sugar! Yes, you can use frozen blueberries. They work well in this cake. Just be sure to add them straight from the freezer. This helps keep the batter from turning blue. Frozen blueberries may add a bit of moisture, but they will still taste great. To make this cake healthier, consider these swaps: - Use whole wheat flour instead of all-purpose flour. - Replace granulated sugar with a natural sweetener like honey or maple syrup. - Substitute low-fat yogurt for regular yogurt. These changes can make the cake lighter while still keeping it tasty. Here are fun ways to decorate your cake: - Dust the top with powdered sugar for a sweet touch. - Add fresh blueberries on top for color and flavor. - Drizzle a simple lemon glaze over the cake for extra zing. - Use lemon slices or zest for a bright finish. These ideas will make your cake look as good as it tastes. Yes, you can substitute yogurt with other ingredients. Here are some options: - Use sour cream for a similar texture and taste. - Buttermilk is another great option for moistness. - You can also try using applesauce for a healthier choice. Each of these substitutes will change the flavor slightly but will still keep the cake delicious. This blog post covered essential ingredients for your lemon blueberry yogurt cake and how to prepare it step by step. I shared tips to enhance flavor and variations, like gluten-free options and muffins. Finally, we discussed how to store your cake and answered common questions. Creating this cake is fun and rewarding. You can easily adjust the recipe to fit your taste. I hope you enjoy baking and sharing this delightful treat!

Lemon Blueberry Yogurt Cake Delightful and Simple Treat

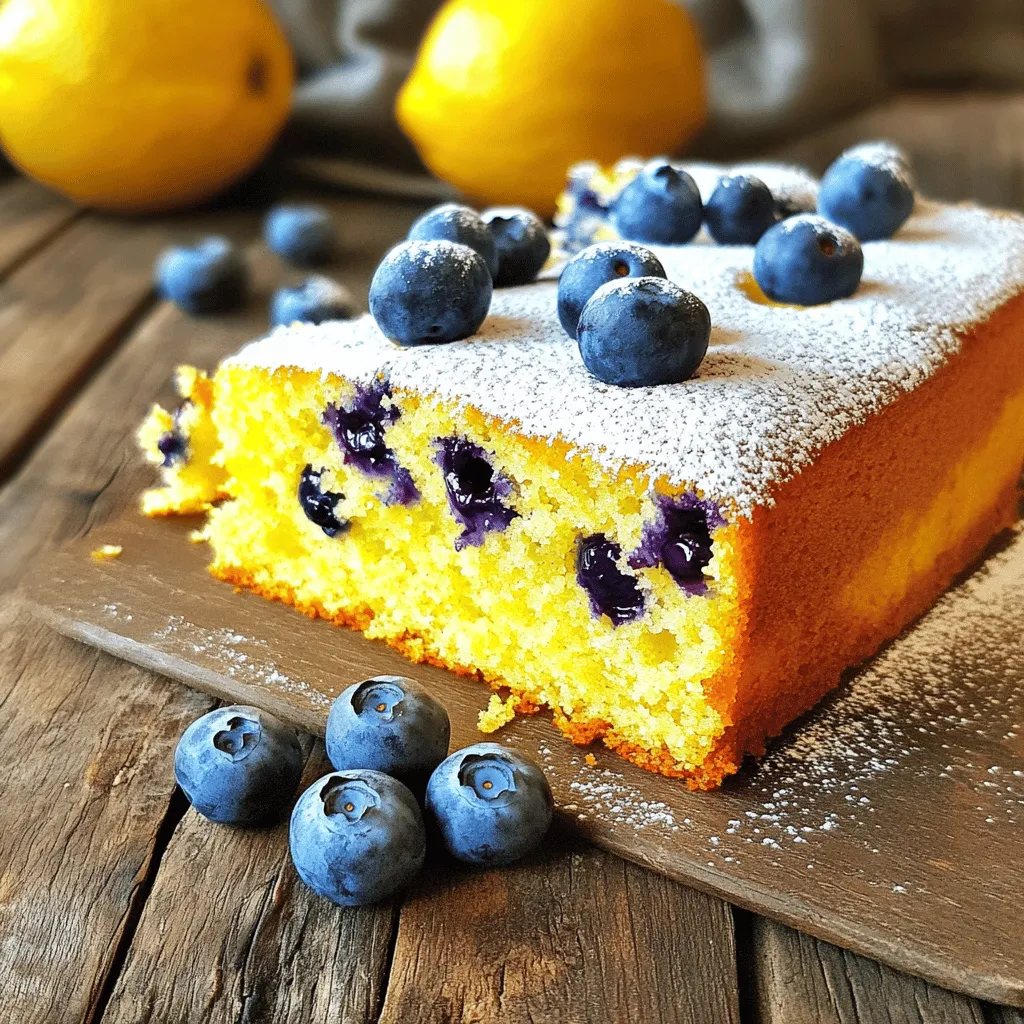
If you love desserts that are both tasty and easy to make, you’ll enjoy this Lemon Blueberry Yogurt Cake. This

- 1 head of garlic - 1 can (15 oz) white beans (like cannellini or great northern), drained and rinsed - 2 tablespoons tahini - 2 tablespoons lemon juice - 2 tablespoons olive oil (plus more for drizzling) - 1 teaspoon ground cumin - Salt and pepper to taste - Fresh parsley, chopped - Pita chips or vegetable sticks for serving - Use roasted garlic powder if fresh garlic is not available. - Swap tahini with Greek yogurt for a creamier dip. - Lemon juice can be replaced with vinegar for a tangy note. - Olive oil can be replaced with avocado oil for a different flavor. First, heat your oven to 400°F (200°C). Grab the head of garlic and slice off the top. This exposes the cloves inside. Next, wrap the garlic in aluminum foil. Drizzle a bit of olive oil on top. Bake it for 30 to 35 minutes. When done, the cloves will be soft and sweet. Let it cool for a few minutes. Squeeze the roasted cloves out of their skins. They should pop out easily, like little nuggets of flavor. While the garlic roasts, get your other ingredients ready. In a food processor, add the drained white beans. Include two tablespoons of tahini and lemon juice. Pour in two tablespoons of olive oil and add one teaspoon of ground cumin. Once the garlic is cool, add the roasted cloves to the mix. Blend everything together until it turns smooth. If it feels too thick, add a little water. Do this one tablespoon at a time until you reach the right consistency. Taste your dip and add salt and pepper as needed. Blend it one last time to mix in the seasoning, then transfer it to a serving bowl. Drizzle more olive oil on top for extra flavor. Finish off by sprinkling some chopped fresh parsley. For a fun touch, serve the dip with colorful pita chips and veggie sticks. This makes a great platter for sharing! To get the right dip texture, start with the beans. Use one can of white beans, like cannellini. Drain and rinse them well. After adding the roasted garlic, tahini, lemon juice, and olive oil, blend everything in a food processor. If the dip is thick, add water. Do this slowly, one tablespoon at a time, until it feels just right. You want it creamy but not runny. You can boost the flavor of your dip with a few extras. Try adding a pinch of smoked paprika for a warm kick. A dash of red pepper flakes can bring heat. If you like herbs, mix in some fresh basil or dill. These flavors can transform your dip into something special. Experimenting is part of the fun! For gatherings, presentation matters. Serve your dip in a nice bowl. Drizzle olive oil on top for shine. Sprinkle fresh parsley for color. Arrange pita chips and veggie sticks around the bowl. This creates a colorful platter. Guests will love to share and dive in. You can even offer crackers or sliced baguette as options. Enjoying food together makes every meal special. {{image_2}} You can tweak this dip to suit your taste buds. Here are some fun ideas: - Herbs and Spices: Add fresh herbs like thyme or rosemary for a fragrant twist. You can also try smoked paprika for a hint of smokiness. - Heat: If you like spice, mix in some crushed red pepper or a dash of hot sauce. This will give your dip a nice kick. - Cheesy Flavor: For a cheesy taste, sprinkle in some nutritional yeast or grated Parmesan cheese. This adds depth to the flavor. Feel free to mix and match these ideas. Each change brings a unique twist! This dip is already vegan and gluten-free! Here’s how to keep it that way: - Vegan: Just use plant-based ingredients. The tahini and beans work perfectly for this. - Gluten-Free: Serve it with gluten-free pita chips or veggie sticks to enjoy without worry. You can easily make this recipe fit any dietary need! Serving this dip can be just as fun as making it. Consider these creative ideas: - Platter Arrangement: Create a colorful platter with pita chips and fresh veggies. Carrots, cucumbers, and bell peppers make great choices. - Spread on Toast: Use the dip as a spread on toasted bread or crackers. It’s a great way to elevate a simple snack. - Party Appetizer: Serve it at your next gathering. Guests will love the taste and how pretty it looks. These ideas will make your dip the star of any table! To store your roasted garlic white bean dip, use an airtight container. Make sure the dip is cool before sealing it. This helps keep the flavors fresh. If you have extra, drizzle a bit of olive oil on top before sealing. This layer protects the dip from air. When stored properly, this dip lasts about 4 to 5 days in the fridge. Always check for any off smells or changes in color before eating. If you see any mold, it's best to toss it out. If you want to enjoy your dip warm, reheat it gently. You can use a microwave or a small pot on low heat. Add a splash of water if it seems too thick. Stir well to ensure even heating. Make sure it’s warm but not boiling. This keeps the flavors intact while serving. Yes, you can make this dip ahead of time. It tastes even better after sitting for a few hours or overnight. Just store it in the fridge. When you are ready to serve, let it sit out for a bit to warm up. You can add a drizzle of olive oil before serving for extra flavor. You can serve this dip with many tasty options. Here are some great ideas: - Pita chips - Vegetable sticks like carrots and celery - Crackers - Toasted baguette slices - Fresh veggies like bell peppers or cucumbers These pairings make it fun to enjoy the dip in many ways. Yes, this dip is quite healthy. It uses white beans, which are high in protein and fiber. Garlic adds flavor and has health benefits. Tahini provides healthy fats. When you use olive oil, you add even more good fats. Just watch the amount of salt you add to keep it healthy. Enjoy this dip knowing it’s a tasty and nutritious choice! This blog post covered how to make a tasty roasted garlic white bean dip. We discussed the needed ingredients and optional garnishes. I shared step-by-step instructions and tips for the perfect dip. You can even explore variations and storage techniques. In the end, this dip is easy and fun to make. It’s perfect for gatherings and healthy snacking. Try it out, enjoy, and get creative with flavors!

Roasted Garlic White Bean Dip Flavorful and Easy Recipe

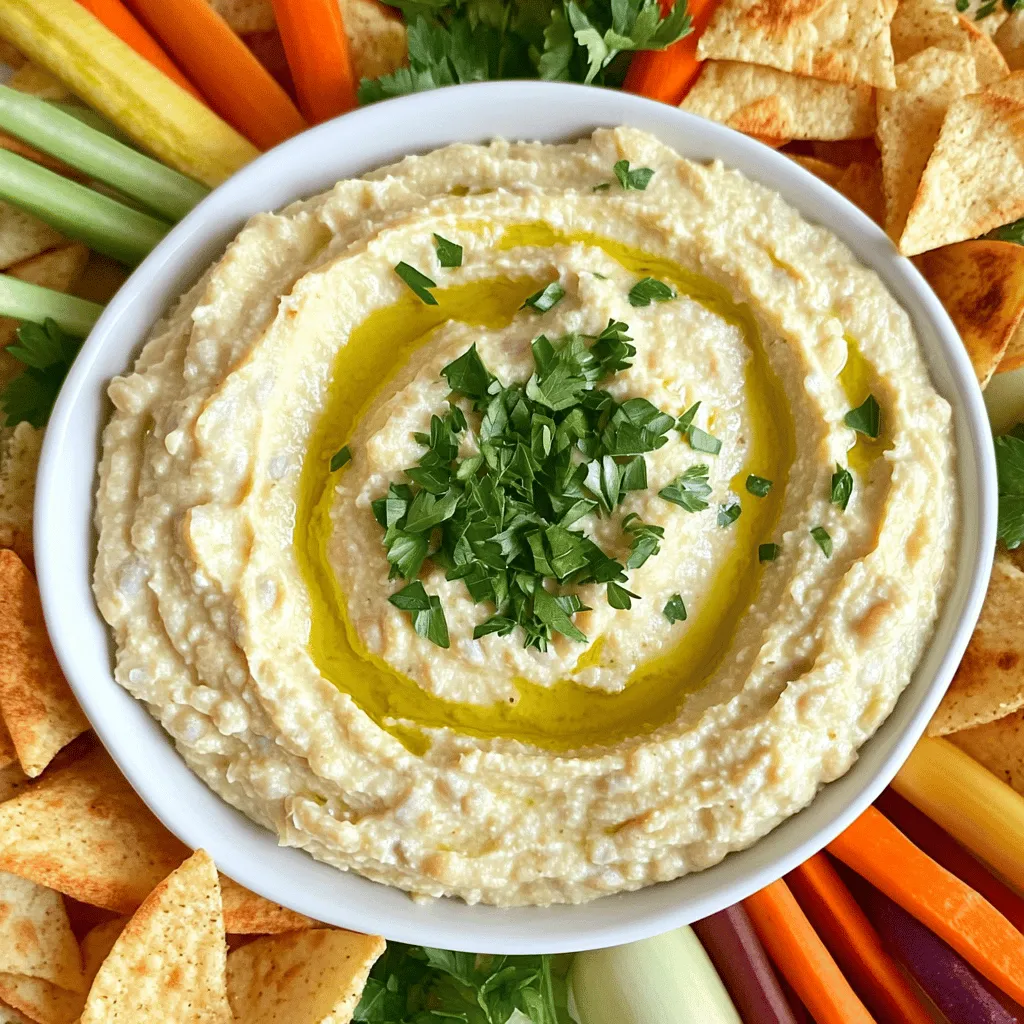
If you’re looking for a tasty and easy dip, you’ve come to the right place! This Roasted Garlic White Bean

Older posts
Newer posts
← Previous Page1 … Page28 Page29 Page30 … Page82 Next →

dsad

© 2026 Recipes Pursuit • Built with GeneratePress

Our Policies

  • Copyright Policy
  • Cookie Policy
  • GDPR Policy
  • Privacy Policy
  • Disclaimer
  • Terms Of Use

More Information

  • Home
  • About
  • Contact
  • Appetizers
  • Dessert
  • Dinner
  • Drinks
©2026, Recipes Pursuit About Back To Top