Skip to content
DisclaimerTerms Of UseGDPR PolicyCookie Policy

Recipes Pursuit

  • Home
  • Drinks
  • Appetizers
  • Dinner
  • Dessert
  • About
  • Contact
  • Privacy Policy
DisclaimerTerms Of UseGDPR PolicyCookie Policy

NO-ING-IMG

- 1 can (14 oz) coconut milk - 4 cups vegetable broth - 1 tablespoon red curry paste - 1 tablespoon ginger, minced - 3 cloves garlic, minced - 1 bell pepper, diced (red, yellow, or orange) - 1 cup carrots, sliced - 1 cup snap peas or green beans - 1 can (15 oz) chickpeas, drained and rinsed - 2 tablespoons soy sauce or tamari - 1 tablespoon lime juice - Fresh cilantro, for garnish - Sriracha, for serving (optional) When you make my Slow Cooker Thai Coconut Curry Soup, the ingredients create layers of flavor. Let’s break down each part. Coconut milk adds creaminess. It makes the soup rich and smooth. Vegetable broth serves as the base. It gives the soup depth and warmth. Red curry paste brings heat. It packs a punch that excites your taste buds. Fresh ginger and garlic bring brightness. They add zest and aroma that fill your kitchen. For vegetables, you have options. Bell peppers come in many colors. Each adds its own flavor and crunch. Carrots offer sweetness and texture. Snap peas or green beans add a nice snap. Chickpeas give protein and fill you up. They make this meal hearty. Seasonings bring everything together. Soy sauce or tamari adds umami. A touch of lime juice brightens the flavors. Fresh cilantro gives a fresh pop. If you like heat, Sriracha is perfect on top. It adds spice and makes each bite exciting. With these ingredients, your soup will be a hit. You can mix and match based on what you have. Enjoy cooking! Start by combining the coconut milk and the vegetable broth in your slow cooker. Mix well. Next, add the red curry paste. Stir in the minced ginger and garlic. This base brings rich flavor to the soup. Now, it’s time to incorporate the veggies and protein. Add the diced bell pepper and sliced carrots. Toss in the drained chickpeas and snap peas. Stir everything together so all the ingredients blend well. The colors will make the soup so inviting! Set your slow cooker. If you choose low, cook for 6 to 8 hours. For high, cook for 3 to 4 hours. Check for vegetable tenderness before serving. The veggies should be soft but not mushy. Enjoy your time in the kitchen! To make the soup taste amazing, balance the flavors. Use lime juice to add brightness. It cuts through the rich coconut milk. A pinch of salt can also bring out all the flavors. Adjust both to your liking. If you want more heat, add Sriracha. This spicy sauce gives a nice kick. Start with a little, then taste. You can always add more if you like it spicier. You can change the protein in this soup. Try using chicken instead of chickpeas. Just make sure to cook it through. For a vegetarian option, tofu works well too. It soaks up all the delicious flavors. Feel free to mix up the veggies too. If you don't have snap peas, use green beans instead. You can also add more carrots or any veggie you like. Just remember to cut them small for even cooking. Garnish your soup with fresh cilantro. It adds color and flavor. You can also add lime wedges on the side for extra zing. For sides, rice is a great option. It soaks up the soup and makes it filling. You can also serve it with crusty bread for dipping. Enjoy your warm, tasty meal! {{image_2}} If you follow a gluten-free diet, use tamari instead of soy sauce. Tamari is a great choice for flavor. It adds depth without gluten. You can also make this soup vegan-friendly. The recipe is already plant-based. Just ensure your red curry paste is vegan. For a dairy-free option, the coconut milk is perfect. It gives a rich and creamy texture. If you want to swap out some veggies, think about using seasonal picks. Zucchini or butternut squash can work well. They add great taste and nutrition. You can also use leafy greens like spinach for a boost. You can change the flavor by using green curry paste. This gives a fresh and vibrant taste. If you’re curious about red curry or yellow curry soup, try them out. Red curry tends to be spicier, while yellow has a milder flavor with turmeric. Each option brings its unique twist to your soup. To store leftovers, let the soup cool. Use an airtight container. This keeps it fresh and tasty. You can store it in the fridge for up to four days. Check for any signs of spoilage before eating. To freeze the soup, let it cool completely. Pour it into freezer-safe bags or containers. Make sure to leave some space for expansion. It can last up to three months in the freezer. When you’re ready to eat, thaw it overnight in the fridge. For reheating, heat it gently on the stove. Add a splash of broth if it seems thick. This helps bring back its creamy texture. When serving leftovers, reheat the soup until it’s hot throughout. Add a squeeze of fresh lime juice. This brightens the flavor and adds freshness. You might also want to sprinkle some cilantro on top. If you love spice, add a dash of Sriracha. This can really enhance the taste after refrigeration. To thicken your soup, you have a few options. One way is to add a cornstarch slurry. Mix one tablespoon of cornstarch with two tablespoons of cold water. Stir this into your soup about 30 minutes before serving. Another option is to blend some of the soup. Use an immersion blender or a regular blender. Blend just a part of it to create a creamier texture. This keeps the veggies intact while thickening the broth. You can also add more vegetables like potatoes or sweet potatoes. They break down during cooking and add body to the soup. Yes, you can make this soup in advance. It actually tastes better the next day! Cook the soup as directed, then let it cool. Store it in an airtight container in the fridge for up to three days. You can also freeze it for up to three months. Just make sure to leave out any fresh cilantro and Sriracha. Add those right before serving for the best flavor. If you want to swap out chickpeas, try using white beans or lentils. Both options add protein and fiber. You can also use shredded chicken or tofu for a different flavor. Just make sure to adjust the cooking time. Add cooked proteins in the last hour of cooking to keep them tender. Feel free to mix and match based on what you have or like! In this post, we explored a tasty slow cooker Thai coconut curry soup. We covered key ingredients like coconut milk, veggies, and proteins. We discussed ways to enhance flavors and offered tips for storing the soup. You can adapt the recipe to fit your diet and personal taste. Remember, cooking is about creativity. Use this recipe as a guide, but feel free to mix it up. With these tips, you will make a delicious meal. Enjoy the cooking adventure and share the soup with loved ones!

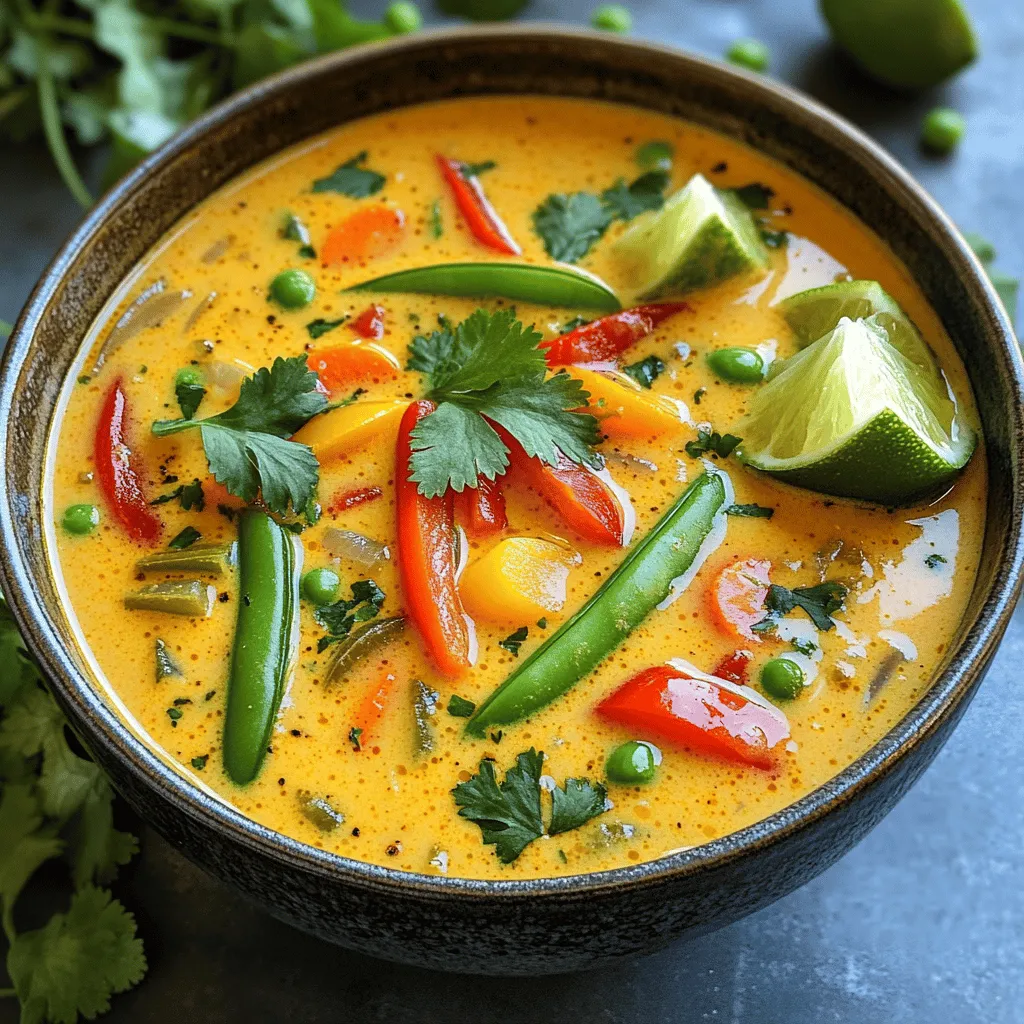
Slow Cooker Thai Coconut Curry Soup Flavor Boost

Are you ready to take your taste buds on a trip to Thailand? Slow Cooker Thai Coconut Curry Soup is

- 1 cup rolled oats - 1 scoop chocolate protein powder - 1 ripe banana, mashed - 1/2 cup Greek yogurt - 2 eggs - 1 teaspoon baking powder - 1 teaspoon vanilla extract - A pinch of salt - 1/4 cup mini chocolate chips - Cooking spray or coconut oil To make these high-protein chocolate chip pancake bites, you need simple ingredients. Start with rolled oats and chocolate protein powder for a healthy base. The ripe banana adds natural sweetness and moisture. Greek yogurt gives a creamy texture and boosts protein. Eggs bind everything together for a perfect bite. For baking, you will need baking powder, vanilla extract, and a pinch of salt to enhance flavors. Mini chocolate chips are optional but very tasty. You can use cooking spray or coconut oil to grease your muffin pan. Gather these ingredients, and you are ready to whip up a delicious batch of pancake bites that everyone will love! - Preheat oven to 350°F (175°C). - Grease mini muffin pan with cooking spray or coconut oil. - In a large bowl, combine: - 1 cup rolled oats - 1 scoop chocolate protein powder - 1 teaspoon baking powder - A pinch of salt - Stir until well mixed. - In another bowl, beat 2 eggs. - Add 1 ripe banana, mashed, and 1/2 cup Greek yogurt. - Add 1 teaspoon vanilla extract. - Mix until smooth. - Pour wet ingredients into dry ingredients. - Stir until just combined. - Gently fold in 1/4 cup mini chocolate chips. - Spoon batter into muffin pan, filling each cup about 2/3 full. - Bake for 12-15 minutes, until puffed. - Cool in the pan for a few minutes. - Transfer pancake bites to a wire rack to cool completely. - Use a mini muffin pan for perfect bite-sized pieces. - Ensure ingredients are at room temperature for better mixing. These tips help you create the best pancake bites. A mini muffin pan makes them just the right size. You get a nice crisp outside and a soft inside. Room temperature ingredients mix better. They blend more smoothly, which leads to great texture. - Drizzle with maple syrup or dust with powdered sugar. - Garnish with fresh fruits like strawberries or blueberries. Serving these pancake bites is fun! A drizzle of maple syrup adds sweetness. A light dusting of powdered sugar makes them look fancy. Fresh fruits like strawberries or blueberries add color and flavor. They also make your plate more exciting. - Add nuts or seeds for an extra protein boost. - Substitute Greek yogurt with plant-based yogurt for a vegan version. To make these bites even healthier, consider adding nuts or seeds. They give extra protein and a nice crunch. If you're vegan, use plant-based yogurt instead of Greek yogurt. This swap still keeps the bites creamy and delicious. {{image_2}} You can change the flavor of your pancake bites easily. Instead of chocolate protein powder, try using vanilla or peanut butter flavor. This switch brings a new taste to your bites. You can also add spices like cinnamon or nutmeg. These spices add warmth and depth to the flavor. A pinch of spice can really enhance your pancake bites. If you're following a gluten-free diet, use certified gluten-free oats. They keep the bites safe for you. For a dairy-free option, simply leave out the Greek yogurt. You can replace it with a plant-based yogurt. This keeps the recipe friendly for everyone. You might want your pancake bites a bit sweeter. Adding honey or maple syrup to the batter does the trick. This extra touch can make them even more delicious. If you prefer less sugar, choose dark chocolate chips instead. They give a rich flavor without adding too much sweetness. Store your High-Protein Chocolate Chip Pancake Bites in an airtight container. They will stay fresh at room temperature for up to three days. This means you can enjoy them for breakfast or a snack without hassle. For longer storage, refrigerate the pancake bites. They will last for up to one week in the fridge. If you want to keep them even longer, freeze them. They can stay in the freezer for up to three months. Just make sure to use a freezer-safe container or bag to keep them fresh. When you're ready to enjoy your pancake bites, you can reheat them easily. For a quick snack, pop them in the microwave for about 30 seconds. If you want them warm and a bit crispy, bake them in the oven at 350°F for 5-10 minutes. This will bring back their fluffy texture, making them taste fresh again. Yes, you can prepare these pancake bites and store them for later. They keep well in an airtight container. You can enjoy them for breakfast or a snack anytime. The pancake bites should be puffed up. You can test them by inserting a toothpick in the center. If it comes out clean, they are ready. Yes, you can use different protein powders based on your taste. Options include vanilla, peanut butter, or plant-based protein. Experiment with flavors to find your favorite. To make the pancake bites denser, add half a cup of rolled oats. You can also mix in a scoop of nut butter for a richer texture. Both options will give you a heartier bite. This blog post shared a simple recipe for tasty pancake bites. We covered the key ingredients, step-by-step cooking instructions, and great tips for serving and storing. You can customize them with different flavors or dietary options. These bites are quick to prep and perfect for any meal. Try making them ahead for busy mornings. Share them with friends and enjoy together. Now, you can whip up these delightful treats and impress everyone!

High-Protein Chocolate Chip Pancake Bites Recipe

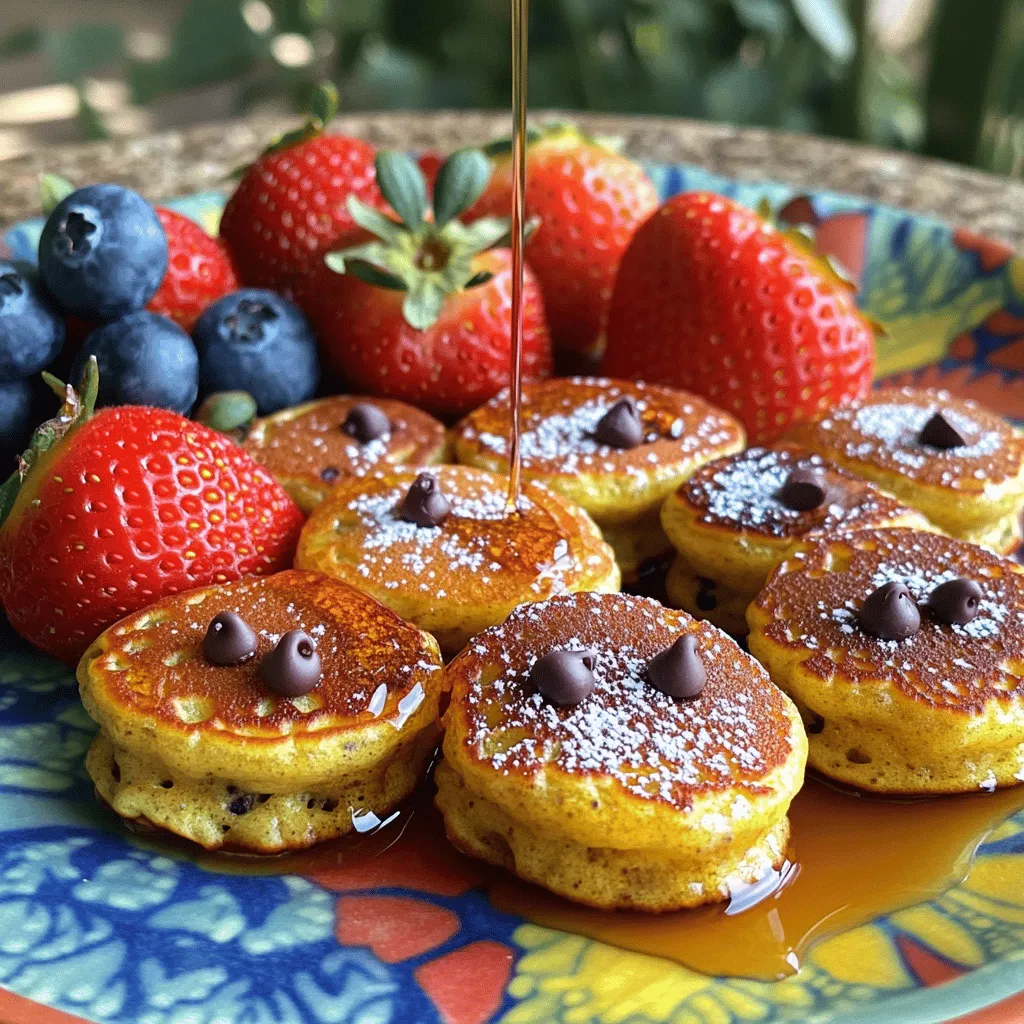
Looking for a tasty snack packed with protein? You’re in the right place! My High-Protein Chocolate Chip Pancake Bites are

For this warm apple cider caramel popcorn, you will need: - 1 cup popcorn kernels (about 12 cups popped popcorn) - 1 cup apple cider - 1 cup granulated sugar - 1/2 cup unsalted butter - 1/4 cup light corn syrup - 1/2 teaspoon baking soda - 1 teaspoon ground cinnamon - 1/2 teaspoon salt - 1/4 teaspoon nutmeg - 1/2 cup chopped pecans (optional) You can make this treat even more fun! Here are some ideas: - Dried Apples: Add small pieces for extra apple flavor. - Chocolate Drizzle: Melt dark or white chocolate and drizzle on top. - Spices: Try adding ginger or cloves for a warm kick. - Caramel Corn Mix: Combine with different nuts or candy for variety. To create this tasty snack, gather these tools: - Air popper or large pot for popping corn - Medium saucepan for reducing cider - Large saucepan for making caramel - Baking sheet lined with parchment paper - Spatula or wooden spoon for mixing - Oven to bake the popcorn mixture Start by popping the popcorn kernels. You can use an air popper or pop them on the stove. Follow the package instructions closely. Once you pop the corn, spread it out evenly on a large baking sheet. Make sure to use parchment paper to prevent sticking. Next, let’s prepare the apple cider. Pour 1 cup of apple cider into a medium saucepan. Bring it to a boil over medium-high heat. Once it boils, reduce the heat to medium-low. Let it simmer until it reduces to about 1/2 cup. This usually takes around 15 to 20 minutes. Keep an eye on it, and remove it from the heat when it’s done. Let it cool slightly before using. Now, it’s time to make the caramel. In a large saucepan, melt 1/2 cup of unsalted butter over medium heat. Stir in 1 cup of granulated sugar, 1/4 cup of light corn syrup, and a pinch of salt. Let the mixture boil while stirring continuously. Once it starts to boil, stop stirring. Let it boil for 4 to 5 minutes without stirring. Watch for it to turn a deep golden color. When it's ready, remove the saucepan from the heat. Carefully stir in the reduced apple cider, 1/2 teaspoon of baking soda, 1 teaspoon of cinnamon, and 1/4 teaspoon of nutmeg. The mix will bubble up a lot, so stir it gently until combined. Now, you’re ready to coat the popcorn! To coat the popcorn evenly, work fast. Pour the warm caramel over the popcorn right after you mix it. Use a spatula to gently fold the caramel into the popcorn. Make sure to lift from the bottom and turn the popcorn over. This helps every piece get a nice layer of caramel. If you take too long, the caramel will harden. Keep an eye on the caramel while it cooks. Stir until it boils, then stop stirring. Let it bubble for 4-5 minutes. Check the color; it should be deep golden brown, not dark brown. If it gets too dark, it will taste burnt. If you smell a strong scent, it’s likely burning. Remove it from the heat right away. For a fun presentation, use festive paper cones or clear jars. Tie them with ribbons for a sweet touch. You can sprinkle a bit of extra cinnamon on top for decoration. Serve them at parties or as gifts. This popcorn will be a crowd-pleaser! {{image_2}} If you need a nut-free treat, leave out the pecans. You can replace them with sunflower seeds or pumpkin seeds for a crunchy twist. Both options add a nice texture without the nut risk. To boost the flavor, try adding a splash of vanilla extract to the caramel mix. You can also sprinkle in a bit of ground ginger for a warm kick. For a sweeter twist, drizzle some honey or maple syrup over the popcorn before baking. For a non-dairy version, swap the butter with coconut oil or a dairy-free butter spread. Use a plant-based milk in place of the apple cider for a unique taste. Almond milk or oat milk can work well, keeping the treat creamy and delicious. To keep your Warm Apple Cider Caramel Popcorn fresh, store it in an airtight container. A glass jar or a plastic container works well. Make sure to seal it tightly. This helps keep the popcorn crunchy and flavorful. Avoid storing it in a warm or humid place. When stored properly, this popcorn lasts about one week. If you keep it in the fridge, it may last a bit longer, but it might lose some crunch. Check for any signs of softness. If it feels soft, it’s time to toss it. If your popcorn loses its crunch, you can reheat it. Spread it on a baking sheet and heat it in the oven at 250°F (120°C) for about 10 minutes. This brings back the crisp texture. Make sure to watch it closely to avoid burning. Enjoy your snack warm and fresh! Yes, you can use microwave popcorn. Just pop it as directed on the bag. Make sure it is plain, without butter or extra flavors. This will let the warm apple cider caramel shine through. If you want to swap out butter, try using coconut oil or vegan butter. Both will add a nice flavor. They will help to create that rich, gooey caramel texture. Absolutely! Feel free to use nuts like walnuts or almonds. You can even skip the nuts if you prefer a nut-free treat. Just make sure to adjust the amount if you add more or less. Yes, this recipe is gluten-free! All the ingredients used, like popcorn and sugar, are gluten-free. Just be sure to check your corn syrup brand to confirm it is also gluten-free. We explored how to create delicious caramel popcorn from start to finish. You learned about the key ingredients, optional add-ins, and the tools you need. I shared step-by-step instructions that help you pop the corn, reduce the cider, and make rich caramel. Our tips ensure an even coating and prevent burnt caramel. Consider the variations for nut-free, dairy-free, and flavorful treats. Finally, I covered the best storage practices and answered common questions. Now, you have all the tools to make great caramel popcorn, so enjoy every crunchy bite!

Warm Apple Cider Caramel Popcorn Irresistible Treat

Warm Apple Cider Caramel Popcorn is a treat you can’t resist! Imagine sweet caramel mixed with rich apple cider, all

- 1 lb (450g) boneless, skinless chicken breasts, cut into 1-inch cubes - 2 tablespoons chipotle in adobo sauce, minced - 3 tablespoons olive oil - 2 tablespoons fresh lime juice - 1 teaspoon lime zest - 2 cloves garlic, minced - 1 teaspoon cumin - 1 teaspoon smoked paprika - 1 teaspoon salt - 1/2 teaspoon black pepper - Wooden or metal skewers (if using wooden skewers, soak them in water for 30 minutes before using) Chicken breasts are the star of this dish. They are tender and soak up flavors well. The marinade includes chipotle in adobo sauce, which gives a spicy kick. Olive oil and lime juice help keep the chicken moist while adding flavor. Garlic, cumin, and smoked paprika round out the taste, making each bite delicious. - Fresh cilantro, for garnish - Lime wedges, for serving Adding fresh cilantro brightens the dish and adds a pop of color. Lime wedges are perfect for squeezing over the skewers. This adds extra tang and enhances the whole experience. You can adjust the garnishes to your taste, but these options elevate the flavors beautifully. {{ingredient_image_1}} First, gather your ingredients. You need: - 2 tablespoons chipotle in adobo sauce, minced - 3 tablespoons olive oil - 2 tablespoons fresh lime juice - 1 teaspoon lime zest - 2 cloves garlic, minced - 1 teaspoon cumin - 1 teaspoon smoked paprika - 1 teaspoon salt - 1/2 teaspoon black pepper In a large mixing bowl, combine all these ingredients. Stir until they mix well. This creates a flavorful marinade. Now, cut your chicken into 1-inch cubes. Use 1 pound of boneless, skinless chicken breasts. Add the chicken to the marinade. Ensure each piece gets coated. Cover the bowl with plastic wrap. For the best flavor, marinate the chicken for at least 30 minutes. If you have time, let it sit for up to 2 hours. This longer time helps the flavors soak in. Keep the chicken in the fridge while marinating. This keeps it safe and fresh. Start by preheating your grill or grill pan over medium-high heat. While the grill heats, thread the marinated chicken onto your skewers. Leave a little space between each piece. This helps the chicken cook evenly. Once the grill is ready, place the skewers on it. Cook for 10 to 12 minutes. Turn the skewers occasionally. You want them to get nice grill marks. The chicken should reach an internal temperature of 165°F (75°C). After cooking, remove the skewers from the grill. Let them rest for a few minutes. This helps keep them juicy. Garnish with fresh cilantro and serve with lime wedges. Enjoy every bite! To make your marinade pop, you can swap some ingredients or add more. Try using lime zest for a zestier kick or fresh herbs like cilantro or parsley. If you want a sweeter taste, add a touch of honey or agave syrup. Marinating time is key. Aim for at least 30 minutes to let the chicken soak up those flavors. However, for the best taste, let it marinate for up to two hours. This extra time makes a big difference. When threading chicken onto skewers, keep the pieces a bit apart. This helps them cook evenly. If you crowd them, some pieces may not get enough heat. If you use wooden skewers, soak them in water for 30 minutes. This prevents them from burning on the grill. Metal skewers don’t need soaking and can hold heat well. Control the grill temperature for the best marks. Heat your grill to medium-high. If it’s too hot, the outside cooks fast while the inside stays raw. When cooking, flip the skewers every few minutes. This helps get those beautiful grill marks and ensures even cooking. Aim for about 10-12 minutes total cooking time. Your chicken should reach 165°F (75°C) for safe eating. Pro Tips Marinate Longer for Flavor: For a more intense flavor, consider marinating the chicken for up to 2 hours, allowing the spices to penetrate the meat deeply. Use a Meat Thermometer: To ensure your chicken is perfectly cooked, use a meat thermometer to check that the internal temperature reaches 165°F (75°C). Experiment with Vegetables: Add colorful bell peppers, onions, or zucchini to the skewers for extra flavor and nutrition, making it a complete meal. Rest Before Serving: Allow the skewers to rest for a few minutes after grilling; this helps the juices redistribute, making the chicken more tender and juicy. {{image_2}} You can change the flavor of your Chipotle Lime Chicken Skewers easily. Try different spices like: - Chili powder - Oregano - Coriander You can also add other ingredients to the marinade. Consider using: - Honey for sweetness - Pineapple juice for a tropical twist - Fresh herbs like parsley or basil for a fresh taste If you don’t have a grill, you can still enjoy these skewers. Here’s how to cook them in the oven: 1. Preheat your oven to 400°F (200°C). 2. Place the skewers on a baking sheet lined with foil. 3. Bake for 15-20 minutes until chicken reaches 165°F (75°C). For air fryer fans, here’s a quick method: 1. Preheat your air fryer to 375°F (190°C). 2. Arrange the skewers in the basket, ensuring they don’t touch. 3. Cook for about 10-12 minutes, flipping halfway through. These skewers pair well with many side dishes. I suggest: - Cilantro lime rice - Grilled vegetables - A fresh green salad You can also enjoy them with tasty sauces. Try: - Sour cream mixed with lime - A zesty avocado sauce - A simple salsa for extra flavor Store your chicken skewers in an airtight container. This keeps them fresh for later. You can place them in the fridge for up to three days. When you want to eat them, heat them in the microwave. Use medium power to avoid drying them out. You can also reheat them in a skillet over low heat. This makes them nice and warm without losing taste. To freeze your skewers, first let them cool completely. Wrap each skewer in plastic wrap. Then, place them in a freezer bag. Make sure to squeeze out the air before sealing. They can stay in the freezer for up to three months. When you're ready to eat, thaw them in the fridge overnight. After thawing, you can grill them again to warm them up and get those grill marks back. Cooked chicken skewers stay fresh in the fridge for three days. If you see any strange colors or smells, it's time to toss them. Signs of spoilage include a sticky texture or a sour smell. Always check before you eat. Proper storage helps keep your food safe and tasty. To keep your chicken juicy, marinate it well. The marinade helps lock in moisture. Use olive oil, which adds fat and flavor. Aim to marinate the chicken for at least 30 minutes. You can go up to 2 hours for a stronger taste. When grilling, avoid high heat. Medium-high works best. Flip the skewers often. This helps cook the chicken evenly. Always check the internal temperature; it should reach 165°F (75°C). Yes, you can use other meats! Pork is a great substitute. Try tender cuts like pork loin. Beef also works well; use sirloin or tenderloin. For a lighter option, shrimp is tasty and cooks fast. You can even use firm tofu for a vegetarian choice. Just adjust cooking times based on the meat you choose. Each meat will add its unique flavor and texture. Pair your skewers with fresh sides. Some great options include: - Grilled corn on the cob - Cilantro lime rice - Fresh guacamole - A crisp green salad - Roasted vegetables These sides complement the smoky and spicy flavors of the chicken. You can also add lime wedges for extra zest. Enjoy the mix of tastes and textures! In this post, we explored how to make delicious chipotle lime chicken skewers. We discussed the key ingredients, from chicken breasts to the marinade. I shared tips on marinating, grilling, and achieving those perfect grill marks. You also learned about variations and how to store leftovers. For tasty skewers, focus on flavor and proper cooking. With these steps, you'll impress friends and family. Enjoy your grilling adventure!

Chipotle Lime Chicken Skewers Flavorful Grilling Delight

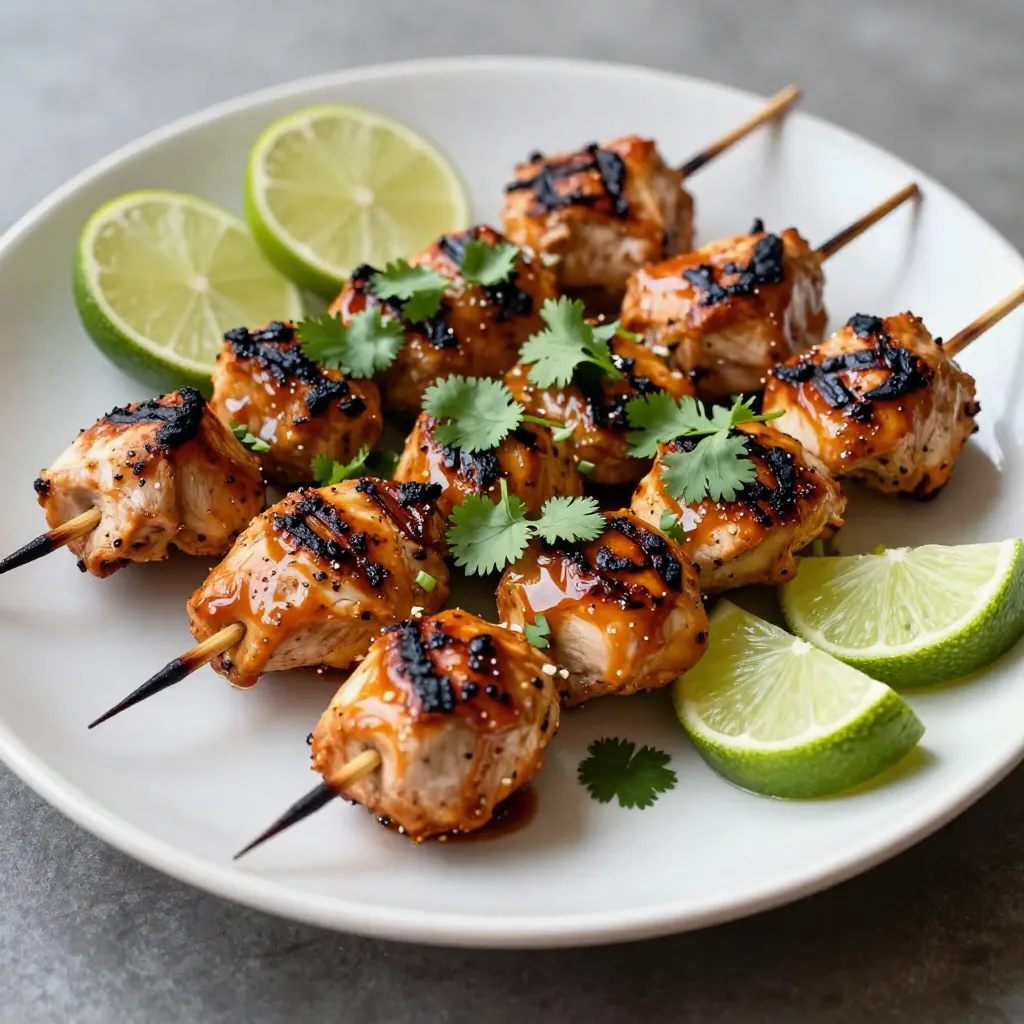
Looking to impress at your next barbecue? You’re in the right place! My Chipotle Lime Chicken Skewers are the perfect

- 8 oz. rotini pasta - 1 can (5 oz.) tuna in water, drained - 1 cup cherry tomatoes, halved - 1/2 cucumber, diced - 1/4 red onion, finely chopped - 1/4 cup Greek yogurt - 2 tablespoons mayonnaise - 2 tablespoons fresh dill, chopped - 1 tablespoon lemon juice - Salt and pepper to taste - 1 tablespoon olive oil (optional) For this Lemon Dill Tuna Pasta Salad, I love how simple yet fresh the ingredients are. The rotini pasta is fun to eat, and it holds the dressing well. Tuna adds protein and flavor. Cherry tomatoes give a sweet pop, while cucumber brings crunch. Red onion adds a mild bite that balances everything. In the dressing, Greek yogurt and mayonnaise create a creamy base. The fresh dill adds a lovely herb taste, and lemon juice brightens every bite. Salt and pepper let the flavors shine through. If you want a richer taste, olive oil is a great option. Gather these ingredients, and you’ll be ready to whip up this delightful salad in just 15 minutes! 1. Start by boiling water in a large pot. 2. Add a pinch of salt for flavor. 3. Cook the rotini pasta according to the package instructions until it is al dente. 4. Drain the pasta in a colander. 5. Rinse the pasta under cold water to cool it down. 1. In a large mixing bowl, combine the drained tuna, halved cherry tomatoes, diced cucumber, and finely chopped red onion. 2. In a small bowl, mix together the Greek yogurt, mayonnaise, fresh dill, lemon juice, and olive oil (if using) until smooth. 1. Add the cooled rotini pasta to the salad mixture in the large bowl. 2. Pour the dressing over the top of the pasta and salad. 3. Gently toss everything together to combine evenly. 4. Season the salad with salt and pepper to taste. 5. If you want, add more dill or lemon juice for extra flavor. 6. Chill the pasta salad in the refrigerator for about 10 minutes before serving. To make your Lemon Dill Tuna Pasta Salad really pop, you can adjust the salt, pepper, and lemon juice. Start with a little salt and pepper. Taste as you go to find your perfect level. If you want a zingy flavor, add more lemon juice. Fresh dill adds a bright touch, too. If you love dill, don’t hold back! You can add more than the recipe calls for. It gives the salad a fresh, herbaceous taste. When serving, presentation matters. Use individual bowls for each person. This makes it look special. Top each bowl with a sprig of dill and a lemon wedge. It adds color and freshness. Pair this salad with crusty bread for a nice crunch. Fresh greens like arugula or spinach make a great side, too. They add a crisp texture and balance the rich flavors of the salad. Enjoy your meal! {{image_2}} You can easily swap Greek yogurt for sour cream. This gives a creamy taste and adds a tang. If you want a lighter version, use plain yogurt. Instead of mayonnaise, try avocado for a creamy texture. You can also use mustard for a zesty kick. When it comes to pasta, rotini is great, but you can use penne or shells. Any short pasta works well here. Whole grain pasta is a healthy option too. Gluten-free pasta is also good if you need that. Just make sure to cook it according to the package instructions. If you want more protein, add chickpeas or diced chicken. These options boost the salad’s nutrition. You can also mix in cooked shrimp or crab for a seafood twist. For veggies, consider adding bell peppers or spinach. Both add color and crunch. You can also toss in chopped carrots or celery for more texture. Fresh herbs like parsley or basil can brighten the flavor. Just chop them finely and mix them in. To store your Lemon Dill Tuna Pasta Salad, place it in an airtight container. This keeps the salad fresh. You can enjoy it for up to three days in the fridge. When you want to eat it, check for any changes in smell or color. If it looks or smells off, it’s best to toss it. Freezing this pasta salad is simple. First, let it cool completely. Then, put it in a freezer-safe container. Make sure to leave some space at the top, as the salad may expand. It can last up to two months in the freezer. When you're ready to eat it, take it out and let it thaw in the fridge overnight. After thawing, stir it well. If it looks dry, you can add a bit of olive oil or yogurt to freshen it up. Enjoy your delicious meal! Making Lemon Dill Tuna Pasta Salad is quick and easy. The prep time is just 5 minutes. Cooking the pasta takes another 10 minutes. So, the total time to make this salad is 15 minutes. Yes, you can make this salad ahead of time. Prepare the salad and store it in the fridge. It will stay fresh for up to two days. Just keep it in a sealed container. If you want the best taste, add the dressing just before serving. This salad pairs well with many sides. You can serve it with crusty bread for a filling meal. Fresh greens, like a simple green salad, also complement it nicely. Consider adding some fruit, like sliced melons or berries, for a refreshing touch. This blog post shared a simple recipe for Lemon Dill Tuna Pasta Salad. We covered the key ingredients, how to make it, and tips to enhance flavor. You learned the best ways to store leftovers and some variations to try. This salad is fresh, tasty, and quick to whip up. Whether you eat it for lunch or dinner, it's a great option. Enjoy making it and don’t hesitate to get creative with your own twists!

Lemon Dill Tuna Pasta Salad 15-Minute Easy Dish

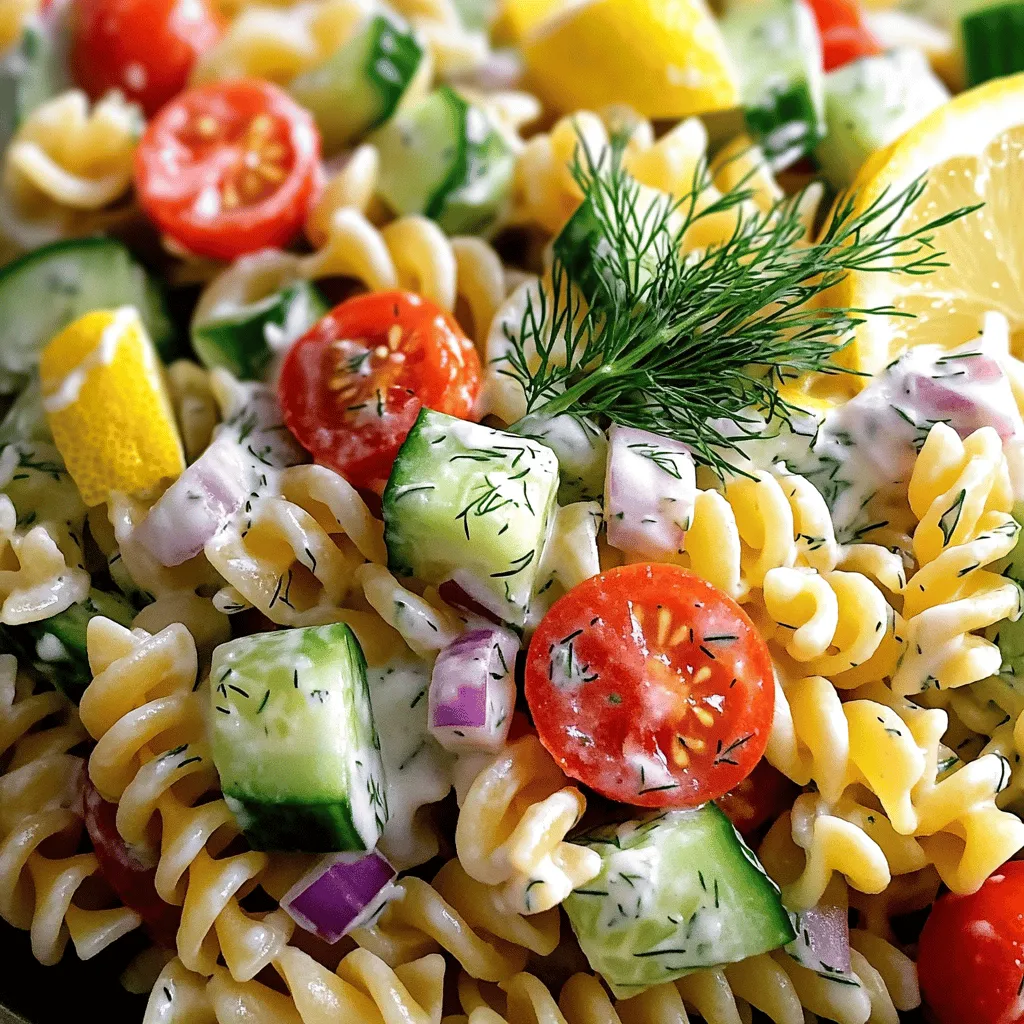
Looking for a quick, refreshing meal? Try my Lemon Dill Tuna Pasta Salad! In just 15 minutes, you can whip

- Main ingredients - 1 lb Brussels sprouts, halved - 3 tablespoons olive oil - 4 cloves garlic, minced - Seasoning and additional flavors - 1/2 cup grated Parmesan cheese - 1 teaspoon garlic powder - 1 teaspoon onion powder - 1/2 teaspoon red pepper flakes (optional for spice) - Salt and black pepper to taste - Optional garnish - Fresh parsley, chopped 1. Preheat your air fryer. Set it to 375°F (190°C) for 5 minutes. This helps the Brussels sprouts cook evenly. 2. Prepare your ingredients. Take 1 pound of Brussels sprouts and cut them in half. This makes them easier to cook and eat. 3. Combine and season the Brussels sprouts. In a large mixing bowl, mix the halved Brussels sprouts with: - 3 tablespoons olive oil - 4 cloves garlic, minced - 1 teaspoon garlic powder - 1 teaspoon onion powder - 1/2 teaspoon red pepper flakes (optional for spice) - Salt and black pepper to taste Toss everything well. Make sure every sprout is coated. This step is key for great flavor. 1. Air frying techniques. Once the air fryer is hot, place the seasoned Brussels sprouts in the basket. Lay them in a single layer. If your air fryer is small, cook in batches. 2. Check doneness and adjust time. Cook for 12-15 minutes. Shake the basket halfway through. This ensures they cook evenly. You want them crispy outside and tender inside. 3. Add the cheese. In the last 2 minutes of cooking, sprinkle 1/2 cup grated Parmesan cheese over the sprouts. This makes a tasty cheesy crust. 1. Plating ideas. Once done, carefully remove the Brussels sprouts and place them on a serving dish. 2. Garnish. Top with freshly chopped parsley. This adds color and freshness to your dish. Enjoy your Garlic Parmesan Brussels Sprouts Air Fryer Delight! To make great garlic Parmesan Brussels sprouts, even coating is key. This helps the sprouts cook well and ensures all flavors blend nicely. When you mix the olive oil and spices with the sprouts, toss them well. Make sure every piece gets a good touch of oil and seasoning. This will lead to a golden-brown finish. Keep in mind that air fryers can differ in how they cook. If your model cooks faster or slower, you may need to adjust the time. Always check the sprouts at the 10-minute mark. If they look too pale, give them more time. If they seem ready, shake the basket and check for crispiness. Want more flavor in your Brussels sprouts? Try adding lemon juice or zest for a fresh kick. You can also mix in some cooked bacon bits for a smoky touch. If you love heat, sprinkle in more red pepper flakes. For the crispiest results, do not overcrowd the air fryer basket. This allows air to flow freely around each sprout. If you have a lot, cook in batches. Another tip is to use a little more olive oil if needed. This helps the cheese melt into a tasty crust. These tips will guide you to make the best garlic Parmesan Brussels sprouts in your air fryer. Enjoy the process and happy cooking! {{image_2}} You can change the taste of your Garlic Parmesan Brussels sprouts by adding different cheeses. Try using feta or goat cheese for a tangy kick. For a creamy touch, sprinkle some mozzarella on top. Each cheese brings a new flavor that can wow your guests. You can also mix in other vegetables. Carrots, sweet potatoes, or bell peppers work well. Just cut them to similar sizes as the Brussels sprouts. This mix adds color and nutrition to your dish. If you need gluten-free options, this dish is perfect. All the ingredients are naturally gluten-free. Just be sure to check the cheese label to confirm. For vegan substitutions, swap the Parmesan cheese with a dairy-free version. Nutritional yeast is a great choice, giving a cheesy flavor without dairy. You can also use olive oil instead of butter for cooking. These changes make the dish plant-based, keeping it tasty and healthy. To keep your Garlic Parmesan Brussels sprouts fresh, follow these tips: - Refrigeration: Place leftovers in an airtight container. They stay good for about 3 to 4 days. Make sure to let them cool before sealing. - Freezing: If you want to save them longer, freeze the sprouts. Use a freezer-safe bag or container. They can last up to 2 months. Just remember to label the bag with the date. Reheating is key to keeping the taste and texture. Here are the best methods: - Air Fryer: Preheat your air fryer to 350°F (175°C). Cook the sprouts for about 5 to 7 minutes. This method keeps them crispy. - Oven: Place the sprouts on a baking sheet. Heat them at 350°F (175°C) for 10 to 15 minutes. This also helps maintain their crunch. These steps will help you enjoy your Garlic Parmesan Brussels sprouts again! How long do I cook Brussels sprouts in an air fryer? You should cook Brussels sprouts for 12-15 minutes in an air fryer. Make sure to shake the basket halfway through. This helps them cook evenly and get crispy. Can I use frozen Brussels sprouts? Yes, you can use frozen Brussels sprouts. Just keep in mind that they may take a bit longer to cook. You might need to add a few extra minutes to the cooking time. How do I know when my Brussels sprouts are done cooking? Brussels sprouts are done when they are crispy on the outside and tender on the inside. You can check them with a fork. If it goes in easily, they’re ready! What other air fryer recipes can I try? You can try air fryer sweet potato fries, crispy air fryer cauliflower, or air fryer asparagus. Each brings a unique flavor and texture. They are easy to make and pair well with many meals. How to pair this dish with other meals? These Garlic Parmesan Brussels sprouts go great with grilled chicken or salmon. You can also serve them alongside a hearty pasta dish. They add a nice crunch and flavor to any meal. In this guide, we explored how to make delicious air fryer Brussels sprouts. We covered the key ingredients, detailed preparation steps, and cooking techniques for perfect results. You learned about serving ideas, tips for enhancing flavor, and variations to suit your taste. We also discussed storage options and answered common questions. Now, you're ready to enjoy tasty Brussels sprouts that are crispy and packed with flavor. Get creative and make this dish your own! You can easily impress friends and family with your new cooking skills.

Garlic Parmesan Brussels Sprouts Air Fryer Delight

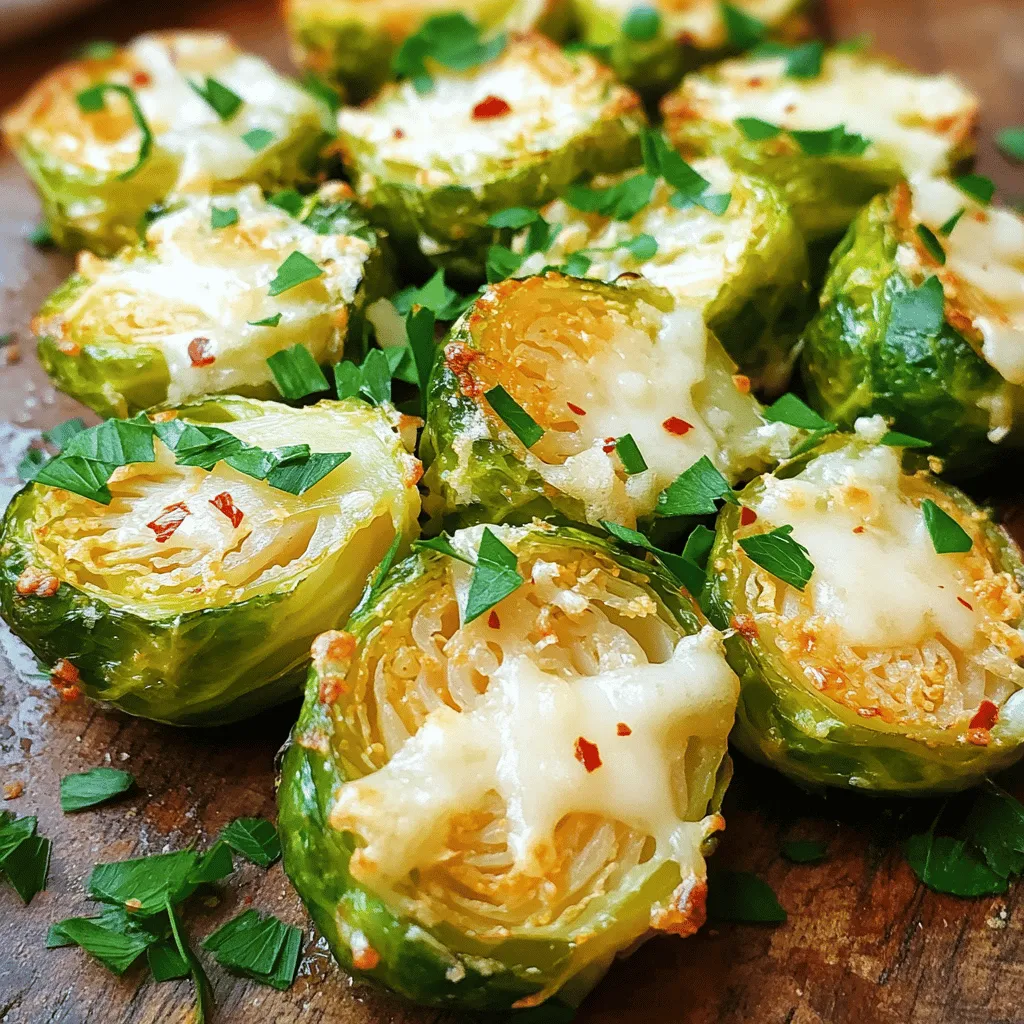
Looking to transform your side dish game? Garlic Parmesan Brussels Sprouts Air Fryer Delight is your answer! With just the

- 1 cup unsalted butter, melted - 1 cup brown sugar, packed - 1/2 cup granulated sugar - 2 large eggs - 2 teaspoons vanilla extract - 2 cups all-purpose flour - 1 teaspoon baking powder - 1/2 teaspoon baking soda - 1/4 teaspoon salt - 1/2 cup colorful sprinkles - 1/2 cup white chocolate chips (optional) Gathering the right ingredients is key for great Funfetti Birthday Cake Blondies. First, you need unsalted butter. It gives a rich taste. Melt it before mixing. Brown sugar adds a nice depth, while granulated sugar keeps them sweet. You’ll want two large eggs for that perfect blend. Don’t forget vanilla extract! It brings out all the flavors. For the base, you’ll need all-purpose flour. Baking powder and baking soda help the blondies rise. Salt balances the sweetness, so use it wisely. Colorful sprinkles make them fun and festive. You can also add white chocolate chips if you like a creamy touch. The sprinkles and chips make each bite a surprise. Now that you have your ingredients, you’re ready to bake! 1. Preheat your oven to 350°F (175°C). This step warms up your oven so the blondies bake evenly. 2. Grease a 9x13 inch baking pan. You can also line it with parchment paper. This makes removing the blondies easy. 3. In a large bowl, combine the melted butter with brown sugar and granulated sugar. Mix until this is smooth and creamy. 4. Add the eggs, one at a time. Stir well after each egg to blend. This helps the batter stay light. 5. Stir in the vanilla extract for that lovely flavor. In a separate bowl, whisk together the flour, baking powder, baking soda, and salt. 6. Gradually add the dry mix to the wet mix. Stir just until combined; don’t overmix. This keeps your blondies soft. 7. Gently fold in the colorful sprinkles and white chocolate chips if you want them. This adds fun and sweetness. 8. Pour the batter into the greased pan. Spread it evenly with a spatula. Top with extra sprinkles for a festive look. 9. Bake for 20-25 minutes. Check doneness by inserting a toothpick in the center. It should come out clean or with a few moist crumbs. 10. Let the blondies cool in the pan for about 10 minutes. Then, transfer them to a wire rack to cool completely. This step helps them set perfectly. To make the best blondies, avoid overmixing the batter. Overmixing makes them tough. Mix just until the flour disappears. This keeps the blondies soft and chewy. For optimal results, check your oven temperature with a thermometer. Ovens can vary. Bake the blondies until a toothpick comes out clean. This shows they are done. You can make your blondies unique by adding mix-ins. Try nuts, chocolate chips, or dried fruit. Each adds a new twist to the flavor. If you like sweeter treats, increase the sugar a bit. You can also reduce sugar if you prefer less sweetness. Taste as you go to find your perfect balance. When serving, presentation is key. Cut the blondies into squares and stack them on a colorful plate. Add a sprinkle of extra sprinkles on top for fun. Pair them with milk, coffee, or tea for the perfect treat. These drinks complement the sweet flavors well. Enjoy sharing these delightful treats with friends and family! {{image_2}} Chocolate Funfetti Blondies You can switch things up with chocolate funfetti blondies. Just replace half the flour with cocoa powder. This will give you a rich, chocolatey base. Add colorful sprinkles as usual. The mix of chocolate and sprinkles is a fun surprise! Peanut Butter Funfetti Blondies If you love peanut butter, this is for you! Replace half of the butter with creamy peanut butter. This adds a nutty taste and a lovely texture. Stick with the sprinkles to keep it festive. These blondies will have a soft, chewy bite. Gluten-free options You can make these blondies gluten-free! Use a 1:1 gluten-free flour blend instead of regular flour. This works well without changing the taste. Your blondies will still be soft and sweet. Vegan substitutions To make these blondies vegan, swap the eggs for flax eggs. Mix one tablespoon of ground flaxseed with three tablespoons of water. Let it sit for a few minutes until it thickens. Use a plant-based butter instead of regular butter. These swaps keep the blondies tasty and fun! Holiday-themed blondies For the holidays, add seasonal flavors. Mix in crushed peppermint candy for a minty twist. Or use pumpkin spice to make them cozy for fall. You can also use red and green sprinkles for a festive look. Festive decorations You can decorate these blondies for any celebration. Use themed sprinkles or edible glitter. Drizzle melted chocolate on top for a fancy touch. These small changes make them perfect for birthdays, holidays, or any fun event! - Room temperature storage: You can keep your Funfetti blondies at room temperature. Place them in an airtight container. They will stay fresh for up to 3 days. This keeps them soft and chewy. - Refrigeration instructions: If you want to keep them longer, place the blondies in the fridge. They can last for about a week. Just make sure to seal them well. This prevents them from drying out. - How to freeze for long-term storage: To freeze your blondies, cut them into squares. Wrap each piece in plastic wrap. Place the wrapped pieces in a freezer-safe bag. They can last for up to 3 months in the freezer. - Thawing and reheating tips: When you’re ready to eat, take them out of the freezer. Let them thaw in the fridge overnight. For a warm treat, you can microwave them for about 10-15 seconds. Enjoy your delicious blondies anytime! Can I use salted butter? Yes, you can use salted butter. It adds a nice flavor, but it can change the taste a bit. If you do use salted butter, skip the added salt in the recipe. How do I know when the blondies are done baking? Check the blondies at 20 minutes. Insert a toothpick in the center. If it comes out clean or with a few moist crumbs, they are done. They should be golden brown on top. Can I leave out the white chocolate chips? Absolutely! You can leave them out if you prefer. The blondies will still be great with just the sprinkles. Where to purchase Funfetti Birthday Cake Blondies You can find these blondies at local bakeries or order them online. Many bakeries offer this fun treat for special occasions. Check their websites for more details. Delivery options and specials Most bakeries provide delivery options. Some may even offer special deals for birthdays or large orders. Check their social media for current specials. Highlighting customer feedback Customers love the taste! Many say the blondies are soft and sweet. They enjoy the colorful sprinkles and the fun party vibe. Showcase popular experiences People often share how these blondies make parties special. They are a hit at birthdays and celebrations. Many customers return for more after their first bite! This blog post covered all you need to make perfect Funfetti Blondies. We looked at key ingredients, easy steps to bake, and tips for great results. I shared ideas for variations and ways to store your blondies. Remember, it’s all about having fun and personalizing your treat. Whether for a party or just a snack, these blondies will delight everyone. Enjoy your baking adventures!

Funfetti Birthday Cake Blondies Delightful Bakery Treat

Craving something sweet and fun? You’re in the right place! These Funfetti Birthday Cake Blondies are the perfect treat to

This creamy coconut lentil curry is a treasure of flavors. You need only a few simple items. Each ingredient plays a key role in the taste and texture. Let’s look closely at what you need. - 1 cup red lentils, rinsed - 1 can (14 oz) coconut milk - 2 cups vegetable broth - 1 can (14 oz) diced tomatoes - 2 tablespoons curry powder - 1 teaspoon ground cumin - 1 teaspoon turmeric - 1 teaspoon chili powder (adjust to taste) - Salt and pepper to taste - 1 tablespoon olive oil These pantry staples make the recipe easy. Red lentils are quick to cook and full of protein. Coconut milk adds a rich, creamy flavor. Each spice brings warmth and depth to the dish. - 1 medium onion, chopped - 3 garlic cloves, minced - 1-inch piece of ginger, grated - Fresh cilantro, chopped (for garnish) - Lime wedges (for serving) Fresh ingredients add brightness to the curry. Onions and garlic provide a great base flavor. Ginger offers a nice kick that blends well with the spices. Cilantro and lime give a fresh finish to each bowl. To start, gather all your ingredients. You will need: - 1 cup red lentils, rinsed - 1 can (14 oz) coconut milk - 2 cups vegetable broth - 1 medium onion, chopped - 3 garlic cloves, minced - 1-inch piece of ginger, grated - 1 can (14 oz) diced tomatoes - 2 tablespoons curry powder - 1 teaspoon ground cumin - 1 teaspoon turmeric - 1 teaspoon chili powder (adjust to taste) - Salt and pepper to taste - 1 tablespoon olive oil - Fresh cilantro, chopped (for garnish) - Lime wedges (for serving) Next, add the rinsed red lentils, coconut milk, and vegetable broth into your slow cooker. Then, toss in the chopped onion, minced garlic, grated ginger, and diced tomatoes. This mix forms a flavorful base for your curry. Now, sprinkle in the curry powder, ground cumin, turmeric, chili powder, salt, and pepper. Stir all the ingredients well to combine. This step is crucial for mixing the spices evenly throughout the dish. Drizzle the olive oil over the mixture to add extra richness. Cover the slow cooker with its lid. Set it to cook on low for about 6-8 hours or on high for 3-4 hours. The lentils should become tender, and the curry should take on a creamy texture. You can check the lentils for doneness as you approach the cooking end time. After cooking, taste your curry. Adjust the seasoning if needed. For a thicker consistency, use an immersion blender to blend a portion of the curry. This makes it creamier while keeping some lentils whole for texture. Serve the creamy coconut lentil curry hot. Garnish it with fresh cilantro and lime wedges. The lime adds a bright contrast that enhances the dish's flavors. Enjoy with fluffy basmati rice or warm naan for a complete meal. To make your creamy coconut lentil curry shine, use fresh spices. Fresh spices bring out the rich flavors of this dish. I like to toast the curry powder, cumin, and turmeric in a pan for a minute before adding them to the slow cooker. This simple step makes a big difference. Also, adjust the chili powder based on your taste. If you like heat, add more. If you prefer mild, use less. The key to a perfect curry is the right texture. After cooking, if your curry is too runny, blend a portion of it with an immersion blender. This will make it creamy while leaving some lentils whole. If it’s too thick, stir in a bit of vegetable broth or coconut milk until it reaches your desired thickness. Remember, the slow cooker can change the consistency over time, so check it before serving. Serve this curry hot in a deep bowl. A sprinkle of fresh cilantro on top adds a bright touch. Lime wedges on the side provide a zesty kick. This dish pairs well with fluffy basmati rice or warm naan. You can also serve it with a side salad for a fresh contrast. Enjoy the burst of flavors and textures in every bite! {{image_2}} You can make this creamy coconut lentil curry more colorful and nutritious by adding vegetables. Try adding diced carrots, bell peppers, or spinach. You can toss in chopped kale or sweet potatoes for added flavor. Just add them to the slow cooker at the start. They will cook down and blend well with the lentils and coconut milk. For an extra crunch, add peas in the last 30 minutes of cooking. If you want to add protein, you have choices. You can stir in cooked chicken, shrimp, or chickpeas. If you prefer a plant-based option, tofu works great too. Just cube the tofu and add it to the slow cooker. Make sure to adjust cooking times for any protein you add. Cooked chicken or shrimp can go in during the last hour. This way, they stay tender and juicy. To change the spice level, you can play with the chili powder. If you like it mild, use less. For a spicy kick, add more chili powder or even fresh chopped chilies. You might also consider using a pinch of cayenne pepper for added heat. Tasting during cooking helps you find the right balance. Adjust it to your liking as you go! You will love how easy it is to store leftovers. After you enjoy your creamy coconut lentil curry, let it cool down. Then, transfer it to an airtight container. It will stay fresh in the fridge for about 4 to 5 days. Just make sure to label the container, so you know when to eat it! If you want to save some for later, freezing works great! Use freezer-safe bags or containers. Portion the curry into smaller servings. This way, you can grab just what you need. It can last in the freezer for up to 3 months. When you are ready to eat, just thaw it in the fridge overnight. Reheating is simple and quick. You can use the microwave or the stove. For the microwave, place the curry in a bowl and cover it. Heat it in short bursts, stirring in between. On the stove, put it in a pan over low heat. Stir often until it is hot. If it seems thick, add a splash of vegetable broth or coconut milk. Enjoy your meal again! Yes, you can use other lentils. Green or brown lentils work well. They may take longer to cook. Red lentils cook faster and break down more. This gives a creamier texture. If you use green or brown lentils, check them often. They need about 30 minutes longer in the slow cooker. You can store the curry in the fridge for up to five days. Make sure to keep it in an airtight container. When you want to eat it, just reheat it on the stove or in the microwave. If it gets too thick, add a splash of broth or water. This curry pairs well with many foods. Fluffy basmati rice makes a great side. Warm naan is also a favorite choice. You can add a simple salad for extra crunch. Try serving with lime wedges for a fresh burst of flavor. Yes, this recipe is perfect for meal prep. It stores well and tastes better after a day. You can make a large batch on the weekend. Portion it out for lunches or dinners during the week. Just remember to store it properly for best taste. This article covered how to make creamy coconut lentil curry. We examined key ingredients, including pantry staples and fresh items. I shared easy steps to get your slow cooker ready and cook the dish to perfection. Tips for flavor, thickness, and serving ideas were also shared. You learned about variations using different vegetables and proteins. In the end, this recipe offers great options for any meal. Enjoy making and sharing it!

Creamy Coconut Lentil Curry Slow Cooker Delight

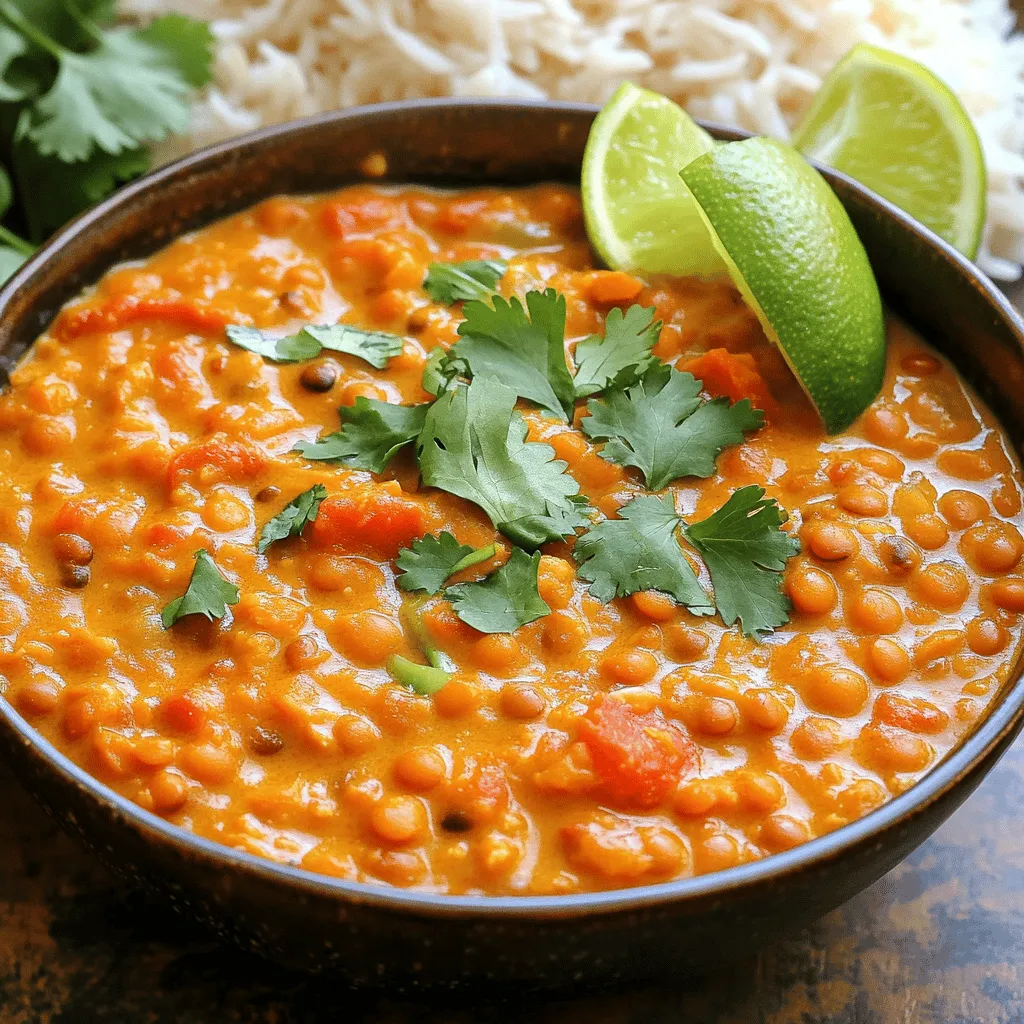
Welcome to Creamy Coconut Lentil Curry Slow Cooker Delight! If you love easy and tasty meals, this recipe is for

- 1 cup rolled oats - 1 ½ cups almond milk (or milk of choice) - 1 tablespoon cocoa powder - 2 tablespoons chia seeds - 2 tablespoons maple syrup (or honey) - 1 teaspoon instant coffee granules - ½ teaspoon vanilla extract - ½ cup Greek yogurt (for extra protein) - Dark chocolate shavings (for topping) - Sliced banana (for topping) The ingredients for mocha overnight oats are simple but powerful. Each one plays a vital role. - Rolled oats provide a hearty base. They fill you up and give you energy. - Almond milk adds creaminess. You can use any milk you like, though. - Cocoa powder gives you that rich chocolate flavor. It makes breakfast feel special. - Chia seeds are tiny but mighty. They help thicken the oats and add fiber. - Maple syrup or honey adds sweetness. Adjust to make it just right for you. - Instant coffee granules provide that mocha kick. Just a little gives a big boost. - Vanilla extract enhances all the flavors. It brings warmth to every bite. - Greek yogurt amps up the protein. This makes your breakfast more filling. - Dark chocolate shavings and sliced bananas make the dish beautiful. They add flavor and fun. - Calories: About 350 per serving. - Protein content: Roughly 15 grams, thanks to the Greek yogurt and oats. - Carbohydrates and sugars: Around 50 grams, with natural sugars from the syrup and fruit. - Fiber: High in fiber, thanks to oats and chia seeds. Protein is key in the morning. It fuels your body and brain. When you eat protein, you feel full longer. This can help you avoid snacking before lunch. Compared to typical breakfasts like sugary cereals, high-protein meals keep you steady. They help you focus and stay energized. Mocha overnight oats are a tasty way to start your day right. - Mixing the base ingredients Start by taking a medium bowl. Add 1 cup of rolled oats, 1 ½ cups of almond milk, 1 tablespoon of cocoa powder, and 2 tablespoons of chia seeds. Pour in 2 tablespoons of maple syrup and 1 teaspoon of instant coffee granules. Add ½ teaspoon of vanilla extract. Stir these well until everything mixes and blends nicely. - Incorporating Greek yogurt Now, it’s time to fold in ½ cup of Greek yogurt. This step adds creaminess and a protein boost. Make sure the yogurt spreads evenly in the mixture. - Dividing into containers Next, divide the oat mixture evenly into two airtight jars or containers. This makes it easy to grab one for breakfast later. - Recommended refrigeration time Seal the containers well and place them in the fridge. Let them chill overnight. If you can’t wait, allow at least 4 hours for them to soak. - How to check consistency in the morning In the morning, take out a jar and give the oats a good stir. If they seem thick, add a splash of almond milk. This helps you achieve the creaminess you like. - Ideal serving suggestions Top your oats with dark chocolate shavings and sliced banana. This adds flavor and makes your breakfast look great. - Layering in clear glasses To make your oats look even better, layer them in a clear glass. This way, you can see the rich colors from the cocoa and toppings. - Garnishing options for aesthetic appeal Use more dark chocolate shavings or banana slices on top for a lovely look. You can also sprinkle some chia seeds for a fun touch. - How to enhance flavor with toppings Feel free to add a drizzle of honey or a sprinkle of cinnamon. This can enhance the flavor and make your mocha overnight oats even tastier. - How to choose the best oats: I love using rolled oats for overnight oats. They soak well and keep a nice texture. Avoid instant oats, as they can get mushy. - Adjusting sweetness levels: You can tweak the sweetness by adding more or less maple syrup. Try honey for a different flavor. Taste before sealing your jars! - Variations with different milk types: I recommend almond milk for a nutty taste. You can use any milk, like oat or soy. Each type adds its own unique flavor. - Best containers for storage: Use airtight jars or containers to keep your oats fresh. Glass jars are great for seeing layers. - How long to store in the fridge: Store your mocha overnight oats for up to five days. They stay tasty and safe to eat. - Freezing options and tips: You can freeze these oats for up to three months. Just thaw them in the fridge overnight before eating. - Adding spices or extracts: Try adding a pinch of cinnamon or nutmeg for warmth. A splash of almond extract can boost flavor too. - Using flavored Greek yogurt: Flavored Greek yogurt adds creaminess and taste. My favorite is vanilla, but chocolate works too! - Substituting with alternative sweeteners: You can swap maple syrup for agave or stevia. These options can make the dish lower in sugar. {{image_2}} You can easily change this recipe to fit your needs. For a vegan version, swap Greek yogurt for plant-based yogurt. This keeps the creamy texture while making it dairy-free. If you need gluten-free options, use certified gluten-free oats. They work just as well. For a low-sugar variation, cut down on the maple syrup. You can also use a sugar substitute like stevia to keep it sweet. Want to mix it up? Add some fruits like berries or apples for a fresh taste. Nuts or seeds can give your oats a nice crunch, too. You can also swap out cocoa powder for other flavors. Try adding matcha or vanilla for a different twist. This way, you can keep things exciting every morning. When you serve your mocha overnight oats, try using different kinds of nut butter. Almond or peanut butter will add great flavor. Pair it with a smoothie or other breakfast items for a full meal. You can even create a parfait by layering the oats with fruits. This makes for a beautiful and tasty breakfast that is sure to impress. Store your mocha overnight oats in the fridge. The best temperature is around 34-40°F (1-4°C). Use airtight containers to keep them fresh and prevent odors. Regular jars work well but aren't always airtight. To increase shelf life, consume within 4-5 days. You can also freeze your oats for up to 3 months. Just thaw overnight in the fridge before eating. You can enjoy your mocha oats cold, but if you prefer them warm, here’s how. Place the oats in a microwave-safe bowl. Heat in short intervals, about 30 seconds at a time. Stir in between to ensure even warmth. If they seem dry, add a splash of almond milk for moisture. This helps keep their creamy texture. If you have extra rolled oats, try making oatmeal cookies or pancakes. You can also blend them into smoothies for added thickness. Use leftover Greek yogurt in dressings or dips. Mix it with herbs for a tasty spread. These options make great snacks or meals, cutting down on waste and adding variety. You can store mocha overnight oats in the fridge for up to 5 days. This makes it a great option for meal prep. Just make sure to keep them in an airtight container. After 5 days, the oats may lose flavor and texture. Yes, you can use steel-cut oats, but the texture will change. Steel-cut oats are chewier and take longer to soften. If you choose them, soak the oats overnight or cook them for a bit before mixing. This will help them absorb the liquid better. Absolutely! This recipe is perfect for meal prep. Just make a batch at the start of the week. Divide the mixture into jars, seal, and refrigerate. Grab a jar each morning for a quick, nutritious breakfast. Yes, you can easily make this recipe dairy-free. Use almond milk or any plant-based milk instead of dairy. For the Greek yogurt, try coconut or almond yogurt for a creamy texture. This keeps it tasty and plant-based. You can adjust the sweetness by changing the maple syrup or honey. For less sweetness, reduce the amount used. If you want it sweeter, add more syrup or honey. You can also use sweeteners like stevia or agave for different flavors. This blog post covers everything you need to know about mocha overnight oats. We explored key ingredients, nutritional benefits, and step-by-step instructions that make this breakfast simple and delicious. Remember, a high-protein breakfast keeps you full and energized. You can customize your oats with various toppings and flavors. Enjoy the ease of meal prep and make tasty variations to fit your diet. Embrace this nutritious choice, and feel great about starting your day right!

Mocha Overnight Oats High Protein Boost for Breakfast

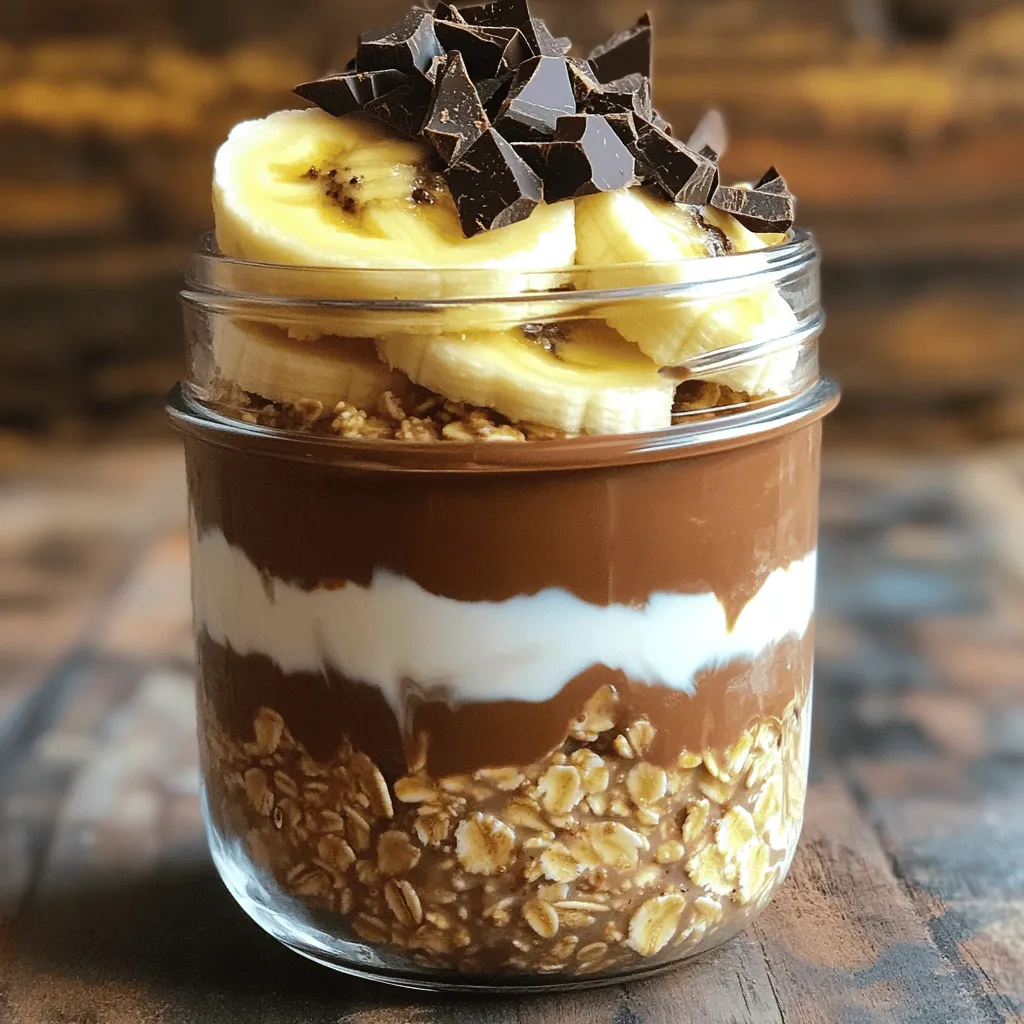
Start your day off right with my Mocha Overnight Oats High Protein Boost for Breakfast! This easy recipe packs in

- 1 pound large shrimp, peeled and deveined - 2 tablespoons olive oil - 1 tablespoon chipotle chili powder - 8 cups tortilla chips - 2 cups shredded Monterey Jack cheese - 1 avocado, diced - 1/2 cup fresh cilantro, chopped - Salsa - Sour cream - 1 teaspoon ground cumin - 1 teaspoon garlic powder - Zest and juice of 1 lime - Salt and pepper For these chipotle lime shrimp nachos, you need fresh, large shrimp. They give the dish a juicy and tender bite. Olive oil helps the shrimp cook well and adds flavor. The star of the show is chipotle chili powder. It gives a nice kick that pairs well with the lime. You can use any brand of tortilla chips you like. They should be sturdy enough to hold up against the toppings. Monterey Jack cheese melts beautifully and adds creaminess. For added flavor, think about optional toppings. Diced avocado adds creaminess and fresh cilantro gives a nice pop of color. Salsa and sour cream are great for dipping. The spice mix is simple but packs a punch. Ground cumin adds a warm note. Garlic powder gives depth. The lime zest and juice add brightness. Don’t forget salt and pepper to taste. Have fun with these ingredients. Feel free to adjust based on your taste. - Preheat the oven to 400°F (200°C). - In a medium bowl, mix olive oil, chipotle chili powder, cumin, garlic powder, lime zest, lime juice, salt, and pepper. Marinating the shrimp adds great flavor. When you mix these spices, let the shrimp soak for about 10-15 minutes. This step is key for a tasty dish. - On a large sheet pan, arrange tortilla chips in an even layer. - Sprinkle half of the shredded cheese over the chips. - Scatter the black beans and corn evenly over the chips. Layering is important for even cooking. Make sure the chips have space between them. This helps them stay crispy. - Arrange the marinated shrimp on top of the chips, beans, and corn. - Finish by adding the remaining cheese on top. Adding cheese on top helps it melt beautifully. It also creates a tasty crust over the nachos. - Place the sheet pan in the oven and bake for about 12-15 minutes. - Look for the shrimp to be pink and the cheese to be bubbly. After baking, remove the pan from the oven. This is when the nachos smell amazing! - Top with diced avocado and fresh cilantro. - Serve hot with salsa and sour cream on the side for dipping. The avocado and cilantro add freshness. They balance the heat from the chipotle. Enjoy your nachos warm and tasty! To make the shrimp shine, marinate them well. Use olive oil, chipotle chili powder, cumin, garlic powder, lime zest, lime juice, salt, and pepper for a tasty mix. Let the shrimp sit in this for at least 10-15 minutes. This helps the shrimp soak up all the flavors. For cooking, shrimp needs only 12-15 minutes in the oven. They should turn pink and opaque when done. Keep an eye on them to avoid overcooking. Even cooking is key for nachos. Spread the tortilla chips in a single layer on the sheet pan. This way, every chip gets its fair share of toppings. Layer half the cheese first, then add black beans and corn. Finally, place the marinated shrimp on top before adding the rest of the cheese. Position your sheet pan in the middle of the oven. This allows hot air to circulate and cook everything evenly. Nachos are great on their own, but pair them with fun toppings. Diced avocado adds creaminess. Fresh cilantro brings a burst of flavor. You can also serve salsa and sour cream on the side for dipping. Try different salsas, like mango or corn salsa, for extra taste. These additions make your nachos a crowd-pleaser! {{image_2}} You can change up the cheese for more flavor. Try sharp cheddar or pepper jack. If you want a creamy taste, use queso blanco. If shrimp isn't your thing, substitute it with chicken, beef, or even tofu. These swaps keep the dish fresh and exciting. Boost the taste by adding spices or herbs. You can mix in smoked paprika for a deeper flavor. Fresh herbs like oregano or thyme also work well. Want more crunch? Toss in bell peppers, jalapeños, or red onions. These veggies add color and nutrients to your nachos. To make the dish gluten-free, ensure your tortilla chips are labeled as such. There are many brands that offer gluten-free options. If you're looking for a vegetarian twist, skip the shrimp. Use black beans or lentils for protein. This way, everyone can enjoy the nachos! To store leftover nachos, first let them cool. Place them in an airtight container. Refrigerate them right away to keep them fresh. They will last for up to three days in the fridge. If you wait too long, the chips will get soggy. To reheat nachos, use an oven for the best results. Preheat your oven to 350°F (175°C). Place the nachos on a baking sheet. Heat for about 10 minutes or until warm. To avoid sogginess, cover them loosely with foil. This keeps some crunch while warming them. You can freeze shrimp nachos, but it's best to freeze the shrimp and toppings separately. Place the shrimp in a freezer bag. Remove as much air as possible and seal it. For other toppings, like cheese and beans, do the same. When you are ready to eat, thaw them in the fridge overnight. Once thawed, reheat them as described above. To keep nachos crispy, use these tips: - Layer wisely: Place cheese directly on the chips. This helps create a barrier. - Bake quickly: Keep baking time short, about 12-15 minutes. - Serve right away: Nachos taste best fresh from the oven. These steps help maintain crunch and avoid sogginess. Yes, you can use frozen shrimp. Here are the pros and cons: - Pros: Frozen shrimp is convenient and often cheaper. It lasts longer. - Cons: It may lose some texture when thawed. Fresh shrimp usually tastes better. When using frozen shrimp, thaw it completely before marinating. You can pair nachos with these tasty sides: - Fresh salad: A simple green salad adds crunch. - Guacamole: Creamy avocado complements the spice. - Coleslaw: A tangy slaw balances the flavors. These sides enhance the meal and offer variety. You now have a complete guide for making the best Chipotle Lime Shrimp Nachos. We covered all the key ingredients, from large shrimp to Monterey Jack cheese, and optional toppings like avocado and fresh cilantro. I shared steps to prepare, assemble, and cook your nachos perfectly. Remember, experimenting with flavors can enhance your dish. Try different toppings, or even switch up the proteins. With the right techniques, you can enjoy delicious nachos every time. Enjoy your cooking adventure!

Chipotle Lime Shrimp Nachos Sheet Pan Delight

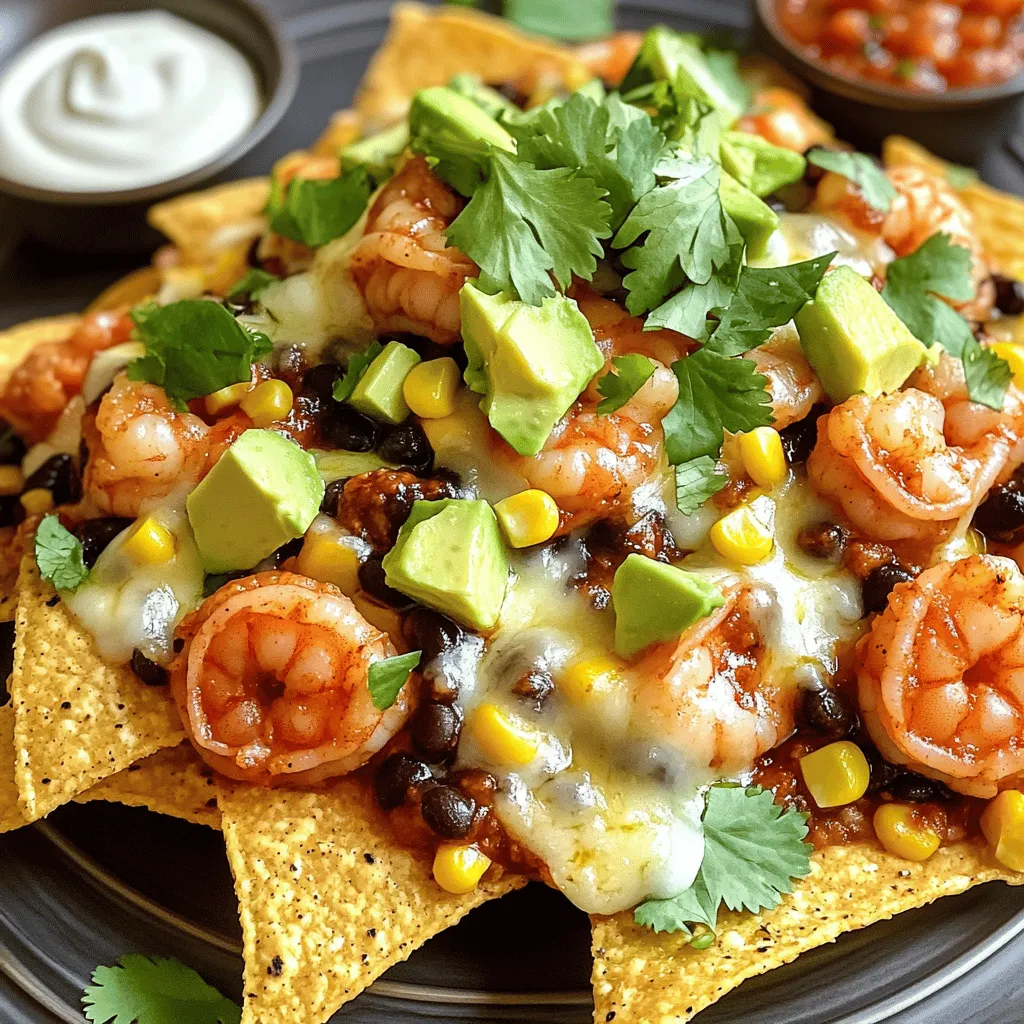
Craving a fun and flavorful snack? These Chipotle Lime Shrimp Nachos are the answer! With crisp tortilla chips, juicy shrimp,

Older posts
Newer posts
← Previous Page1 … Page24 Page25 Page26 … Page82 Next →

dsad

© 2026 Recipes Pursuit • Built with GeneratePress

Our Policies

  • Copyright Policy
  • Cookie Policy
  • GDPR Policy
  • Privacy Policy
  • Disclaimer
  • Terms Of Use

More Information

  • Home
  • About
  • Contact
  • Appetizers
  • Dessert
  • Dinner
  • Drinks
©2026, Recipes Pursuit About Back To Top