Skip to content
DisclaimerTerms Of UseGDPR PolicyCookie Policy

Recipes Pursuit

  • Home
  • Drinks
  • Appetizers
  • Dinner
  • Dessert
  • About
  • Contact
  • Privacy Policy
DisclaimerTerms Of UseGDPR PolicyCookie Policy

NO-ING-IMG

- 1 lb chicken breast, cubed - 1 tablespoon olive oil - 1 medium onion, chopped - 3 cloves garlic, minced - 1 inch ginger, grated - 1 red bell pepper, sliced - 1 can (13.5 oz) coconut milk - 4 cups chicken broth - 2 tablespoons lime juice (freshly squeezed) - 1 tablespoon fish sauce (optional) - 1 teaspoon brown sugar - Salt and pepper to taste - 1 cup baby spinach - Fresh cilantro for garnish - Lime wedges for serving Each ingredient in this soup plays a key role. The chicken gives protein and heartiness. Olive oil helps to sauté the onion, garlic, and ginger, making a strong base. The onion adds sweetness, while garlic and ginger bring warmth and depth. Coconut milk adds creaminess and a hint of sweetness. It balances the sharp lime juice's acidity. Chicken broth enhances the flavor, creating a rich and comforting soup. The red bell pepper adds a pop of color and crunch. Fish sauce is optional but adds a savory umami. Brown sugar rounds out the flavors. Salt and pepper enhance everything. Baby spinach gives a fresh, green touch. Finally, fresh cilantro and lime wedges brighten the dish when served. Gather all these ingredients before you start. It makes the cooking process smoother and more enjoyable. - Heat olive oil in a large pot over medium heat. - Sauté the chopped onion until it turns translucent, about 3-4 minutes. - Add minced garlic and grated ginger to the pot. Cook for one more minute until fragrant. - Add the cubed chicken breast and cook until it is browned on all sides, about 5-7 minutes. - Incorporate the sliced red bell pepper into the pot and cook for another 2 minutes. - Pour in the coconut milk and chicken broth. Stir well to combine all the ingredients. - Add the fresh lime juice, fish sauce (if using), brown sugar, salt, and pepper. - Let the soup simmer gently for about 15-20 minutes. This helps the flavors blend and the chicken to cook through. - In the last 5 minutes, stir in the baby spinach until it wilts. Taste and adjust seasoning as needed. You can add more lime juice for acidity or salt for flavor. Enjoy your creamy coconut lime chicken soup! - Make sure the chicken is cooked through. Use a meat thermometer to check that it reaches 165°F. This keeps the chicken safe and juicy. - Adjust the seasoning for your taste. If you like it spicy, add chili flakes. If you prefer it milder, cut back on the lime juice. This way, you make it just right for you. - Garnish your soup with fresh cilantro and lime wedges. This adds a nice pop of color and bright flavor. - Serve the soup with crusty bread or rice. The bread soaks up the soup, and rice makes it hearty. Both options are delicious! - You can experiment with additional spices. Try adding cumin, paprika, or turmeric for a new twist. Each spice brings a unique flavor that can elevate your meal. - If you have dietary restrictions, suggest alternatives. For a dairy-free option, use coconut yogurt instead of cream. If you're gluten-free, just double-check the broth. These small swaps help everyone enjoy the soup. {{image_2}} You can switch out the chicken in this soup. Use shrimp or tofu for a tasty twist. Both options bring a different texture to the dish. If you want a vegetarian version, substitute vegetable broth for chicken broth. This change keeps the soup rich and flavorful. For a zesty kick, add more citrus. Squeeze in some orange or lemon juice. This adds brightness that pairs well with coconut. You can also add extra veggies like zucchini or carrots. They not only boost nutrition but also add color and crunch. Want to spice things up? Infuse the soup with Thai flavors. Add lemongrass or chili to create a unique taste. Another option is to incorporate curry. This gives the soup a warm, rich flavor that feels comforting. Each of these variations makes the soup special and fun. To store leftover soup, let it cool first. Then, pour it into containers. I recommend using glass or BPA-free plastic containers. They seal well and keep the soup fresh. You can store it in the fridge for up to three days. If you want to freeze your soup, follow these steps. First, let it cool completely. Then, use freezer-safe bags or airtight containers. The soup can last up to three months in the freezer. When you want to eat it, thaw it overnight in the fridge. To heat it up, pour it into a pot. Warm it slowly over low heat. Stir often to ensure even heating. You can also use the microwave, but watch the time. Avoid freezing the soup with added spinach. The texture changes when thawed. Instead, add spinach when you reheat the soup. Always use airtight containers to keep your soup fresh. This helps prevent freezer burn and keeps the flavors strong. If you need a dairy-free option, use almond milk or cashew cream. Both add creaminess without coconut. Another option is using unsweetened soy milk mixed with a bit of oil. This can help mimic the rich texture of coconut milk. To create a similar texture, blend silken tofu with water or broth. This mix adds creaminess while keeping the flavor light. You can also try using heavy cream if dairy is not an issue. This soup can last up to four days in the fridge. Store it in an airtight container to keep it fresh. Make sure it cools before putting it in the fridge. This helps avoid bacterial growth. When you want to enjoy it again, reheat on the stove over low heat. Stir often to ensure even warming. Yes, you can make this soup ahead of time. Prepare it up to a day in advance. Follow the recipe but leave out the spinach until you reheat. When you are ready to serve, add the spinach and let it wilt. This keeps it fresh and bright. Plus, it gives you a quick meal on busy days. This blog post covered a tasty chicken soup with coconut milk. You learned about ingredients, preparation, and cooking steps. I shared useful tips for serving and storing your soup. Variations allow you to change flavors or make it vegetarian. In my view, this recipe is simple and fun. Try it with your favorite tweaks. Enjoy making this soup for yourself and your loved ones. You’ll savor every bite and impress your guests. Happy cooking!

Creamy Coconut Lime Chicken Soup Flavorful Delight

Looking for a soup that bursts with flavor and warmth? Try my Creamy Coconut Lime Chicken Soup! This delightful dish

- 1 cup plain Greek yogurt - 2 tablespoons almond butter (or peanut butter) - 2 tablespoons maple syrup (or honey) - 1/4 cup mini chocolate chips (plus extra for topping) - 2 tablespoons mini oats (optional for texture) - Pinch of sea salt - Additional sweeteners - Flavor variations For this delightful treat, I like to use plain Greek yogurt. It is thick and creamy, making it the perfect base. You can add almond butter or peanut butter for a rich taste. Maple syrup or honey brings a lovely sweetness. Next, I mix in mini chocolate chips. They give that classic cookie dough feel. If you want, you can toss in mini oats. They add a nice texture. A pinch of sea salt balances the sweet flavors well. If you want to make it sweeter, add more maple syrup. You can also play with flavors. Try adding vanilla or even a sprinkle of cinnamon for a twist. The best part? You can top it with extra chocolate chips or a drizzle of nut butter for a fun finish. Enjoy experimenting! 1. Start by grabbing a mixing bowl. 2. Combine 1 cup of Greek yogurt, 2 tablespoons of almond butter, 2 tablespoons of maple syrup, and 1/2 teaspoon of vanilla extract. 3. Whisk these ingredients until you get a smooth and creamy mix. 4. Next, gently fold in 1/4 cup of mini chocolate chips and, if you like, 2 tablespoons of mini oats for added texture. 1. Add a pinch of sea salt to enhance the flavors. 2. Taste your mixture. If it's not sweet enough, add a bit more maple syrup. 3. Spoon the cookie dough yogurt into serving bowls or cups. 1. Top your yogurt with extra mini chocolate chips for a fun look. 2. Sprinkle a few oats on top if you used them. 3. For a special touch, drizzle a bit more almond butter on top. 4. Serve in small glass jars for a pretty layered effect. 5. Pair with fresh fruit for a bright and tasty side. Each serving of Chocolate Chip Cookie Dough Greek Yogurt has about 250 calories. This makes it a tasty treat that won’t ruin your day. The macro breakdown is simple: you get around 15 grams of protein, 10 grams of fat, and 30 grams of carbs. This balance helps keep you full and satisfied. Greek yogurt brings many advantages to the table. It is rich in protein, which is great for muscle repair and growth. Plus, it has probiotics that help your gut stay healthy. Almond butter or peanut butter adds healthy fats and fiber too. It gives you energy without the sugar crash. For those with allergies, there are options. You can make this dish vegan by using a plant-based yogurt and coconut butter. If you need a nut-free version, try sunflower seed butter instead. For sweetener alternatives, consider using agave syrup or stevia. These options make the recipe friendly for sugar-conscious cooks. {{image_2}} To get the best flavor, choose a high-quality Greek yogurt. My favorite brands include Fage and Chobani. They have rich, creamy textures that work well. To enhance the cookie dough flavor, add a little extra almond butter. Mixing in a touch more vanilla extract also helps. Mini oats add great texture to your yogurt. They give a nice chewiness that makes each bite fun. If you prefer a thicker yogurt, use less yogurt or add more oats. For a creamier texture, try using full-fat yogurt or add an extra spoon of almond butter. Scaling this recipe is easy if you have a larger group. Just double or triple the ingredients. For portion control, use small jars or cups. This makes it fun and easy to serve. You can also prepare individual servings ahead of time for quick snacks or desserts. You can play with flavors in your chocolate chip cookie dough Greek yogurt. Adding mix-ins like chopped nuts or dried fruits can change the taste and texture. Try walnuts for crunch or dried cranberries for a touch of sweetness. You can switch up the base flavor too. Instead of vanilla, use cookie butter for a rich, spiced taste. You can also try almond extract or a hint of espresso for a fun twist. Each choice gives you a new way to enjoy this treat! If you need gluten-free options, choose oats that are certified gluten-free. They add a nice texture without gluten. For a dairy-free version, swap the Greek yogurt for a plant-based yogurt. Look for coconut or almond yogurt to keep the flavors smooth and creamy. You can also replace almond butter with sunflower seed butter for a nut-free option. These adjustments let everyone enjoy this special treat! Make your yogurt look even more fun! Swirl in fruit purees like strawberry or raspberry for a colorful effect. The fruit adds a fresh taste that pairs well with the yogurt. You can layer the yogurt with granola for extra crunch. This adds a new texture and makes it a great breakfast or snack. Try topping it with fresh berries or a drizzle of more almond butter for a fancy touch! You can find cookie dough flavored yogurt at many stores. Look for it in grocery chains like Walmart, Kroger, or Target. Health food stores often have it too. Online, check Amazon or specialty food websites. They may offer unique flavors or brands. To keep your yogurt fresh, store it in the fridge. Use an airtight container for best results. It will stay good for up to three days. If your yogurt has toppings, add them just before serving. This keeps everything nice and crisp. You can freeze this yogurt, but it may change a bit. When freezing, use a freezer-safe container, leaving space for expansion. To thaw, move it to the fridge overnight. The texture might become grainy, but it will still taste great. Mix it well after thawing to help restore its creaminess. This blog post explored how to create a delicious cookie dough-flavored yogurt. We covered key ingredients, simple steps, and tips for enhancements. Remember, using Greek yogurt boosts nutrition, while add-ins add fun. Adjust flavors and textures to suit your taste. Enjoy experimenting with different toppings or variations. By following these tips, you can make a tasty treat that everyone will love. Now, try it out and impress your friends and family!

Chocolate Chip Cookie Dough Greek Yogurt Delight

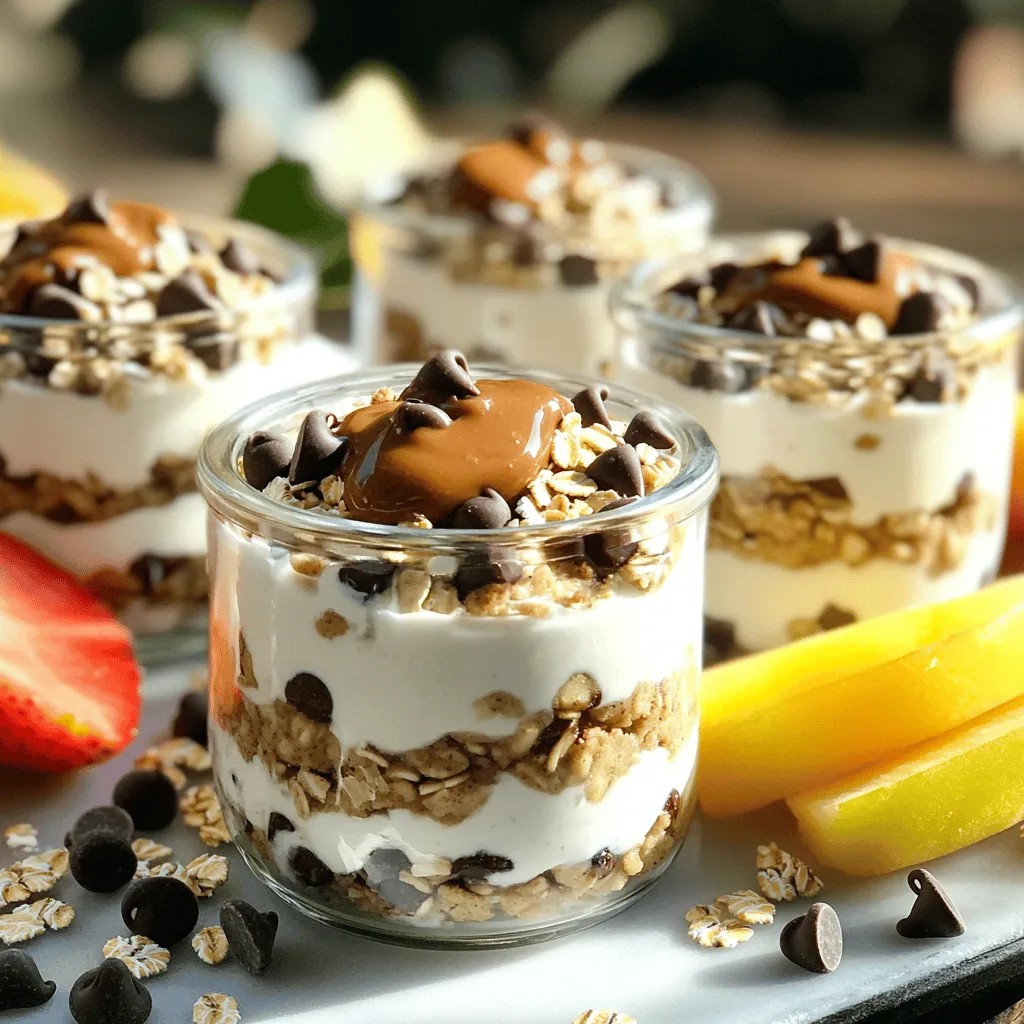
Indulge your sweet tooth with my Chocolate Chip Cookie Dough Greek Yogurt Delight! This simple, healthy treat blends creamy Greek

- 1 medium head of cauliflower, cut into florets - ½ cup buffalo sauce, adjust to taste - 8 small corn tortillas - 1 tablespoon olive oil - ½ teaspoon garlic powder - ½ teaspoon onion powder - ½ teaspoon smoked paprika - Salt and pepper to taste - ½ cup shredded purple cabbage - ½ avocado, sliced - Fresh cilantro leaves for garnish - ¼ cup crumbled feta cheese, optional Each ingredient plays a key role in making these tacos tasty. The cauliflower brings a nice texture while the buffalo sauce gives it that spicy kick. Spices like garlic and smoked paprika add depth to the flavor. The toppings of cabbage and avocado add freshness and creaminess. You can even sprinkle feta cheese for a tangy twist! First, grab a large bowl. Add the cauliflower florets, olive oil, garlic powder, onion powder, smoked paprika, salt, and pepper. Mix everything well. You want each piece of cauliflower to be coated in the spices. This step is key for flavor. Next, preheat your air fryer to 400°F (200°C). Place the seasoned cauliflower in the basket in a single layer. Make sure they are not crowded. Air fry for 12-15 minutes. Shake the basket halfway through cooking. This helps the cauliflower crisp evenly. You will know it's done when it looks golden and crispy. While the cauliflower cooks, warm the corn tortillas. Heat a skillet over medium heat. Warm each tortilla for about 30 seconds on both sides. This makes them flexible. When the cauliflower is ready, take it out and mix in the buffalo sauce. Now, take a warm tortilla. Add a portion of buffalo cauliflower in the center. Top with shredded cabbage, avocado slices, and crumbled feta cheese if you like. Enjoy your tasty tacos! To get that perfect crunch, shake the basket halfway through cooking. This helps the cauliflower cook evenly. Cooking times can vary. If you like it extra crispy, add a few more minutes. Just keep an eye on it to avoid burning. You can control the heat by changing the amount of buffalo sauce. If you find it too spicy, use less sauce, or try mixing it with some ranch dressing. For a different flavor, consider using BBQ sauce or a honey mustard mix instead. Pair these tacos with a fresh side salad or crispy sweet potato fries. They also go well with a light beer or a refreshing iced tea. These drinks balance the heat from the buffalo sauce nicely. Enjoy your meal with friends for a fun taco night! {{image_2}} You can easily change the fillings in these tacos. Try adding beans or lentils for extra protein and fiber. You can use black beans or chickpeas for a tasty twist. You can also add roasted veggies like bell peppers or zucchini. These add color and flavor, making your tacos even more fun. If you want more protein, consider adding some cheese or yogurt. Crumbled feta cheese gives a nice touch, or use cotija for a creamy flavor. These options keep your tacos satisfying while still being vegetarian. Corn tortillas are a great choice for gluten-free tacos. They have a nice texture and flavor. Just make sure your tortillas are labeled gluten-free. You can use them instead of flour tortillas without losing taste or quality. For other ingredients, use fresh veggies and sauces that are gluten-free. Most buffalo sauces are gluten-free, but check the label to be sure. This way, everyone can enjoy these tacos without worry. To boost the flavor, try adding more spices. You can mix in cumin or chili powder for a deeper taste. A sprinkle of cayenne can give your tacos a spicy kick. Adjust the amount based on your spice preference. Don't forget about toppings! You can use pickled red onions for a tangy crunch. Sliced jalapeños add heat, while a drizzle of lime juice brightens everything up. These simple additions can make your tacos even more exciting and fresh. To keep your tacos fresh, use airtight containers. Glass containers work best, as they do not absorb odors. Place the leftover tacos in the fridge. They stay good for up to three days. If you separate the cauliflower from the tortillas, it helps keep everything fresh longer. To keep the cauliflower crispy, use an air fryer or an oven. Preheat your air fryer to 350°F (175°C). Heat for about 5 minutes. This method keeps the crunch. For tacos, use a skillet over medium heat. Warm them for about 1-2 minutes on each side. This helps restore the texture and flavor. If you want to freeze the cauliflower, it works well. Place it in a freezer-safe bag or container. It can last up to three months. When you’re ready to eat, thaw it in the fridge overnight. For reheating, use the air fryer or oven again to regain that crispy texture. Yes, you can prepare the cauliflower ahead of time. Cut the cauliflower and toss it with the olive oil and spices. Store it in the fridge for up to 24 hours. When ready, air fry it right before serving. To store leftovers, place them in an airtight container in the fridge. Enjoy the tacos within three days for the best flavor and texture. If you want a different flavor, try these sauces: - Sriracha: This gives a spicy kick. - BBQ sauce: For a sweet and smoky taste. - Hot sauce: Use your favorite brand for a simpler option. Mix in a little lime juice for extra zest. Yes, these tacos can be made vegan. Just leave out the feta cheese. The rest of the ingredients are plant-based. Enjoy all the flavor without any animal products! You can make tasty buffalo cauliflower tacos with just a few simple steps. Start by prepping the cauliflower and tossing it with spices. Using an air fryer gives it perfect crispiness. Assemble your tacos with your favorite toppings, and don’t forget the tips for serving and storage. These tacos are not only easy to make, but you can also customize them to your taste. Experiment with different sauces and toppings to find your perfect blend. Enjoy making these delicious tacos at home!

Air Fryer Buffalo Cauliflower Tacos Savory and Easy

Craving a bold and tasty meal? You’re in the right place! These Air Fryer Buffalo Cauliflower Tacos are simple and

- 2 boneless, skinless chicken breasts - 1 cup fresh basil pesto - 2 cups cherry tomatoes - 8 oz fresh mozzarella balls - 2 cups mixed salad greens - 1/4 cup balsamic glaze - Salt and pepper - 2 tablespoons olive oil The main ingredients create a rich mix of flavors. The chicken adds protein and texture. Pesto gives a fresh, herb taste. Cherry tomatoes add a burst of sweetness. Mozzarella brings creaminess. Mixed greens add crunch and color. - Fresh basil for garnish - Avocado slices - Nuts or seeds for crunch Optional add-ins let you personalize your salad. Fresh basil enhances the aroma and taste. Avocado adds creaminess and healthy fats. Nuts or seeds give a delightful crunch. Feel free to mix and match these extras to make it your own! - Preheat your grill or grill pan over medium-high heat. - Season the chicken breasts with salt, pepper, and half a cup of basil pesto. Make sure the chicken gets a good coat of the pesto. - Grill the chicken for 6 to 7 minutes on each side. Use a meat thermometer to check if the internal temperature hits 165°F (75°C). - Once done, take the chicken off the grill and let it rest for a few minutes. This helps keep it juicy. - In a large bowl, mix the salad greens, halved cherry tomatoes, and mozzarella balls. - Slice the rested chicken into strips and add it to the bowl with the salad mixture. - Drizzle the remaining pesto and balsamic glaze over the salad. - Toss everything gently to combine and taste it. Add more salt and pepper if needed. To get the best grill marks, start with a clean grill. Preheat it well. Place the chicken on the hottest part of the grill. Leave it alone for a few minutes. This helps sear the meat. Turn the chicken only once. For chicken breasts, grill for 6-7 minutes per side. If your chicken is thicker, add a few more minutes. Always check that it reaches 165°F (75°C). Presentation makes your dish shine! Serve the salad in a large, shallow bowl. Arrange the chicken slices on top for a beautiful look. Drizzle extra balsamic glaze over everything. Sprinkle fresh basil leaves for color. You can also add cherry tomato halves around the edge. Prep ingredients ahead of time for easy meals. You can chop the salad greens and slice the tomatoes early. Store them in the fridge in airtight containers. For leftovers, keep the salad and chicken separate. This helps keep the salad fresh. Use glass containers for best results. Enjoy your Pesto Chicken Caprese Salad for lunch or dinner. {{image_2}} You can make this salad vegetarian by swapping chicken for grilled vegetables. Grilled zucchini, bell peppers, and eggplant work great. They add a nice smoky flavor and pair well with pesto. Just slice your veggies, brush with olive oil, and grill until tender. This change still keeps the dish vibrant and full of taste. To amp up the flavor, try adding different herbs or spices. Fresh mint or parsley can brighten the dish. You could also sprinkle in some red pepper flakes for a kick. For cheese lovers, incorporate unique cheese varieties like goat cheese or feta. These options create a new twist on the classic Caprese flavor. For a gluten-free salad, use a gluten-free balsamic glaze. Many brands offer this option, and it tastes just as good. You can also change the salad greens. Instead of mixed greens, try using kale or baby spinach. Both options add nutrients and flavor while keeping the salad gluten-free. To keep your Pesto Chicken Caprese Salad fresh, store it in an airtight container. This way, you prevent moisture loss and keep flavors intact. I recommend using glass containers for easy cleaning and visibility. You can also use BPA-free plastic containers if you prefer. Make sure to eat the salad within three days. The chicken and veggies taste best when fresh. If you notice the salad starting to wilt or the chicken drying out, it’s time to toss it. You can freeze the grilled chicken, but I do not recommend freezing the salad. Fresh greens and tomatoes do not freeze well. They become mushy when thawed. For freezing chicken, allow it to cool completely. Then, wrap the chicken tightly in plastic wrap or aluminum foil. Place it in a freezer-safe bag and remove as much air as possible. Label the bag with the date. The chicken can stay in the freezer for up to three months. When ready to eat, thaw the chicken in the fridge overnight. Reheat it on the grill or in a skillet before adding it back to your salad. This gives you a fresh taste without waste! Yes, you can use store-bought pesto. It saves time and still tastes great. Homemade pesto has a fresher flavor. You control the ingredients, like using more nuts or cheese. Store-bought is often thicker, while homemade is usually more vibrant. Both options work well in this salad. You can store Pesto Chicken Caprese Salad in the fridge for up to three days. Keep it in an airtight container. The salad may lose some texture over time. If you want the best taste, eat it fresh. If you add dressing, use it right away. You can use grilled shrimp, turkey, or tofu instead of chicken. Each option adds its unique taste and texture. Shrimp cooks quickly and pairs well with pesto. Turkey can give a lighter flavor. Tofu is great for a vegetarian option. This Pesto Chicken Caprese Salad combines fresh ingredients and grilling skills to create a tasty meal. You learned how to prepare and grill chicken, mix salad greens, and add delicious touches like pesto and balsamic glaze. Remember, you can experiment with options like grilled veggies or different cheeses for variety. Follow the tips for storing leftovers and meal prep to enjoy this dish later. With a few simple steps, you can create a flavorful, fresh salad everyone will love. Your kitchen will shine with these easy recipes!

Pesto Chicken Caprese Salad Fresh and Flavorful Delight

Are you ready to elevate your salad game? This Pesto Chicken Caprese Salad is a fresh and flavorful delight that

To make Raspberry Lemonade Crumb Bars, you will need: - 1 cup all-purpose flour - 1 cup rolled oats - ½ cup brown sugar - ½ cup granulated sugar - 1 teaspoon baking powder - ½ teaspoon salt - ½ cup unsalted butter, melted - 1 cup fresh raspberries (or frozen, thawed) - 2 tablespoons lemon juice - Zest of 1 lemon - 1 egg - 1 tablespoon cornstarch You can swap some ingredients if needed. Use whole wheat flour for a nuttier flavor. Coconut oil can replace unsalted butter for a dairy-free option. For a lower sugar option, try using honey or maple syrup. If you don't have fresh raspberries, frozen ones work well. Just thaw them before use. You can also use other fruits like blueberries or strawberries. Select raspberries that are plump and firm. Look for bright color, free from mold or squished spots. Smell the berries; they should have a sweet aroma. If you can, buy them from local farmers or markets. This way, you get the freshest and most flavorful berries. Always check the bottom of the container for hidden damage. Remember, fresh raspberries spoil quickly, so use them soon! Start by preheating your oven to 350°F (175°C). This step warms your oven for even baking. Next, grease a 9x9 inch baking pan. You can also line it with parchment paper. This makes it easy to lift the bars out later. In a large bowl, mix the dry ingredients. Combine 1 cup of all-purpose flour, 1 cup of rolled oats, ½ cup of brown sugar, ½ cup of granulated sugar, 1 teaspoon of baking powder, and ½ teaspoon of salt. Stir these well so they blend together. Pour in ½ cup of melted unsalted butter. Mix until it looks crumbly. Take about two-thirds of this mixture and press it into the bottom of the prepared pan. This will be the crust. In another bowl, gently mix 1 cup of fresh raspberries, 2 tablespoons of lemon juice, the zest of 1 lemon, 1 egg, and 1 tablespoon of cornstarch. Be careful not to mash the raspberries too much. You want them whole for texture. Once mixed, spread this raspberry mixture over the crust in the baking pan. Finally, crumble the remaining oat mixture on top of the raspberry layer. This creates a nice topping that will bake to a golden color. Now, place the pan in the preheated oven. Bake for 25 to 30 minutes. Keep an eye on it. The top should turn golden brown, and the raspberries will become bubbly. Once done, remove the pan from the oven. Let it cool in the pan for at least 20 minutes. This helps it set. For the best slicing results, let it cool fully before cutting into bars. To bake perfect Raspberry Lemonade Crumb Bars, follow these steps: - Always preheat the oven to 350°F (175°C). This step ensures even baking. - Grease your baking pan or use parchment paper. It makes removing the bars easy. - Mix dry ingredients well before adding wet ingredients. This helps with an even texture. - Press the crust mixture firmly into the pan. A sturdy base helps hold the filling. - Bake until the top is golden brown and the filling is bubbly. It usually takes 25-30 minutes. Let the bars cool for at least 20 minutes in the pan. This makes slicing easier. For best results, cool fully before cutting. Use a sharp knife for clean slices. - Serve on a nice platter. Dust the top with powdered sugar for a pretty touch. - Add fresh raspberries on top for a burst of color. A sprig of mint also adds flair. You can boost the flavor of your bars in several ways: - Add a teaspoon of vanilla extract to the filling for a warm note. - Mix in some chopped nuts, like almonds or walnuts, for added crunch. - Consider using different fruits. Blueberries or strawberries pair well with lemon. - A pinch of cinnamon in the crust can add a nice warmth. These tweaks can make your bars even more exciting! {{image_2}} You can switch up the raspberries with other fruits. Try blueberries or strawberries for a sweet twist. If you like tart flavors, use blackberries or sour cherries. Each fruit brings its own taste and color. Feel free to mix two or more fruits for added fun. Just keep the amount of fruit the same for the best results. If you need a gluten-free version, substitute regular flour with gluten-free flour. You can also use almond flour or oat flour. Make sure your oats are labeled gluten-free as well. This keeps the texture right while making it safe for those with gluten issues. The taste will still be bright and delicious. To make this recipe vegan, replace the egg with a flaxseed egg. Mix 1 tablespoon of ground flaxseed with 3 tablespoons of water. Let it sit for a few minutes to thicken. For the butter, use coconut oil or a vegan butter substitute. This way, you enjoy the same yummy bars without animal products. The flavor will still shine through! To keep your Raspberry Lemonade Crumb Bars fresh, store them in an airtight container. This method helps prevent them from drying out. If you use parchment paper, place a piece between layers to avoid sticking. You can store these bars at room temperature for up to three days. For longer freshness, refrigerate them for up to a week. If you want to save some for later, freezing works well. Wrap the bars tightly in plastic wrap. Then, place them in a freezer-safe bag or container. This way, they stay fresh for about three months. When you're ready to enjoy them, simply thaw in the fridge overnight. For a warm treat, reheat the bars in the oven. Preheat to 350°F (175°C) and bake for about 10 minutes. You can also microwave a bar for about 15-20 seconds. Serve them warm for a gooey texture. Dust with powdered sugar and add fresh raspberries for a nice touch. Enjoy with a glass of lemonade for a perfect pairing! Yes, you can use frozen raspberries. Just thaw them first. Frozen berries work well in this recipe. They will still taste great and keep the bars juicy. Just be careful when mixing them in. You don’t want to mash them too much. These bars last about 3 to 5 days at room temperature. Keep them in an airtight container. If you want them to last longer, you can store them in the fridge. They can stay fresh for up to a week in the fridge. Yes, you can double this recipe. Use a larger baking pan, like a 9x13 inch pan. Just keep an eye on the baking time. You may need to bake them a bit longer. Check for a golden top and bubbly raspberries to know they are done. Serve these bars on a nice platter. Dust them with powdered sugar for a pretty look. You can also add fresh raspberries or a mint sprig for color. These small touches make the bars stand out. Enjoy them chilled or at room temperature. In this post, we explored how to make Raspberry Lemonade Crumb Bars. You learned about key ingredients, how to use fresh raspberries, and tips for baking. We also discussed variations, storage tips, and your common questions. With the right fresh ingredients and these steps, you can create a tasty treat. Enjoy experimenting with different fruits and share your delicious bars with friends. Happy baking!

Raspberry Lemonade Crumb Bars Fresh and Flavorful Treat

Are you ready for a sweet burst of flavor? My Raspberry Lemonade Crumb Bars are the perfect treat for any

To make this mocktail pop with flavor, you need fresh blackberries. I use one cup of them. Their natural sweetness adds depth. Plus, they give a beautiful color to the drink. Make sure they are ripe for the best taste. Next, you will need two tablespoons of fresh thyme leaves. Thyme brings a lovely herbal note to the drink. It pairs well with the tart lemon and sweet blackberries. You can save extra leaves for garnish, adding a touch of green. Fresh lemon juice is key for this mocktail. You will need one cup, which comes from about four to five lemons. The bright acidity of lemon balances the sweetness from the blackberries and sweetener. Always use fresh juice for the best flavor! For sweetness, you have two great choices: honey or agave syrup. You will need half a cup. Honey gives a rich flavor, while agave is lighter. Both options enhance the drink without overpowering it. Choose what you like best! You will also need four cups of cold water. This helps to dilute the strong flavors, making the drink refreshing. Cold water is essential to serve the mocktail chilled and enjoyable on a hot day. Finally, don’t forget the garnishes! Ice cubes cool the drink down. Lemon slices add a nice touch and extra zest. You can also use extra thyme leaves for a beautiful finish. These small details make your drink look stunning! Start by grabbing a medium saucepan. Add 1 cup of fresh blackberries and 2 tablespoons of thyme leaves. Pour in 1 cup of water. Place the saucepan on medium heat and bring it to a gentle simmer. This helps release the tasty juices from the blackberries. Use a fork or muddler to mash the blackberries gently. Keep simmering for about 5 minutes. Once it simmers, remove it from heat. Let the mixture steep for 10 minutes. This step allows the thyme flavor to shine. Once the mixture has steeped, it’s time to strain it. Get a fine sieve and place it over a pitcher. Carefully pour the blackberry-thyme mixture into the sieve. Use the back of a spoon to press down on the solids. This helps extract as much liquid as possible. You want to keep the juice and leave the seeds and thyme bits behind. The result is a smooth, flavorful liquid. Now, add 1 cup of fresh lemon juice to the strained juice. This is about 4 to 5 lemons. Next, pour in 1/2 cup of honey or agave syrup. Stir it well until everything mixes. Taste your drink; you can add more honey if you like it sweeter. Then, pour in the remaining 3 cups of cold water. Stir again for a well-blended flavor. To serve, fill glasses with ice cubes. Pour the blackberry-thyme lemonade over the ice. Garnish each glass with fresh thyme and lemon slices. This adds a nice touch and makes it look pretty. Enjoy your refreshing drink! Choose blackberries that are deep purple or black. They should feel firm but not hard. Avoid berries that look dull or have white spots. Ripe blackberries taste sweet and juicy. You can find them at local markets or grocery stores. Select lemons that are bright yellow and feel heavy for their size. Roll the lemons on the counter to break down the membranes. This helps release more juice. Cut them in half and use a juicer or your hand to squeeze. Strain the juice to remove seeds and pulp for a smooth drink. Taste your lemonade before serving. If it’s too tart, add more honey or agave syrup. If it’s too sweet, mix in a bit more cold water. Remember, you can always add more sweetener but can’t take it out. Finding the right balance makes your drink perfect. Serve your mocktail in clear glasses to show off the color. Add ice cubes for a chill and freshness. Garnish with a few thyme sprigs and lemon slices on the rim. This not only looks pretty but adds extra flavor. A well-presented drink makes any occasion special! {{image_2}} You can change the sweetener in your blackberry thyme lemonade mocktail. Honey and agave syrup are great, but maple syrup works too. It adds a rich flavor. You may want to use less maple syrup since it is sweeter. Start with a smaller amount and taste as you mix. This will help you find the right balance. If you like bubbles, add sparkling water to your mocktail. After mixing your base drink, pour in the sparkling water. This will make your drink light and refreshing. You can adjust the amount based on how fizzy you want it. Just remember to add it right before serving to keep the bubbles. Herbs can change the flavor of your mocktail. Mint is a cool herb that pairs well with lemonade. Simply add a few mint leaves while you simmer the blackberries. Basil can add a sweet, peppery note. Try using fresh basil during the steeping step for a unique twist. These herbs can make your drink more interesting and fun! Store any leftover Blackberry Thyme Lemonade Mocktail in the fridge. Use a glass pitcher or a jar with a tight lid. The flavor stays fresh for up to three days. If you notice any separation, just give it a good stir before serving. For the best taste, keep fresh blackberries and thyme in the fridge. Place them in a container that allows airflow. Use them within a week for maximum freshness. You can also freeze blackberries for later use. Just wash them, dry them, and place them in a freezer bag. When meal prepping, you can make the base mix ahead of time. Just combine blackberries, thyme, lemon juice, and sweetener in a jar. Store this mix in the fridge for up to three days. When ready to serve, mix with cold water and ice. This saves time and keeps your mocktail fresh. Yes, you can make this mocktail ahead of time. It's best to prepare the blackberry-thyme mixture and store it in the fridge. This way, the flavors meld nicely. You can make it up to two days before serving. When you're ready to serve, just mix it with lemon juice and cold water. You can use many fruits in this mocktail. Raspberries, strawberries, or blueberries work well. Each fruit brings a unique flavor. You can even mix different fruits for a fun twist. Just remember to adjust the sweetness based on the fruit's natural sugar. Yes, you can add alcohol to this mocktail. Vodka or gin pairs well with blackberries and thyme. Start with a small amount, like one ounce per glass. Adjust based on your taste. This gives the drink a fun kick while keeping the refreshing flavor. To make this mocktail kid-friendly, keep it simple. Skip the thyme if kids don’t like herbs. Use lemonade instead of the blackberry-thyme mixture for a sweeter taste. You can also add more fruit slices for fun colors. Kids love bright drinks! This blog post covered how to create a refreshing blackberry-thyme mocktail. We started with key ingredients like blackberries, thyme, and lemon juice. Then, I guided you through easy steps to mix and serve the drink. I shared tips on selecting ripe fruit and adjusting sweetness. Lastly, I offered fun variations and storage tips. Now you can enjoy this delightful drink anytime. Experiment with flavors and enjoy the process! Your homemade mocktail will impress friends and family alike.

Blackberry Thyme Lemonade Mocktail Refreshing Drink

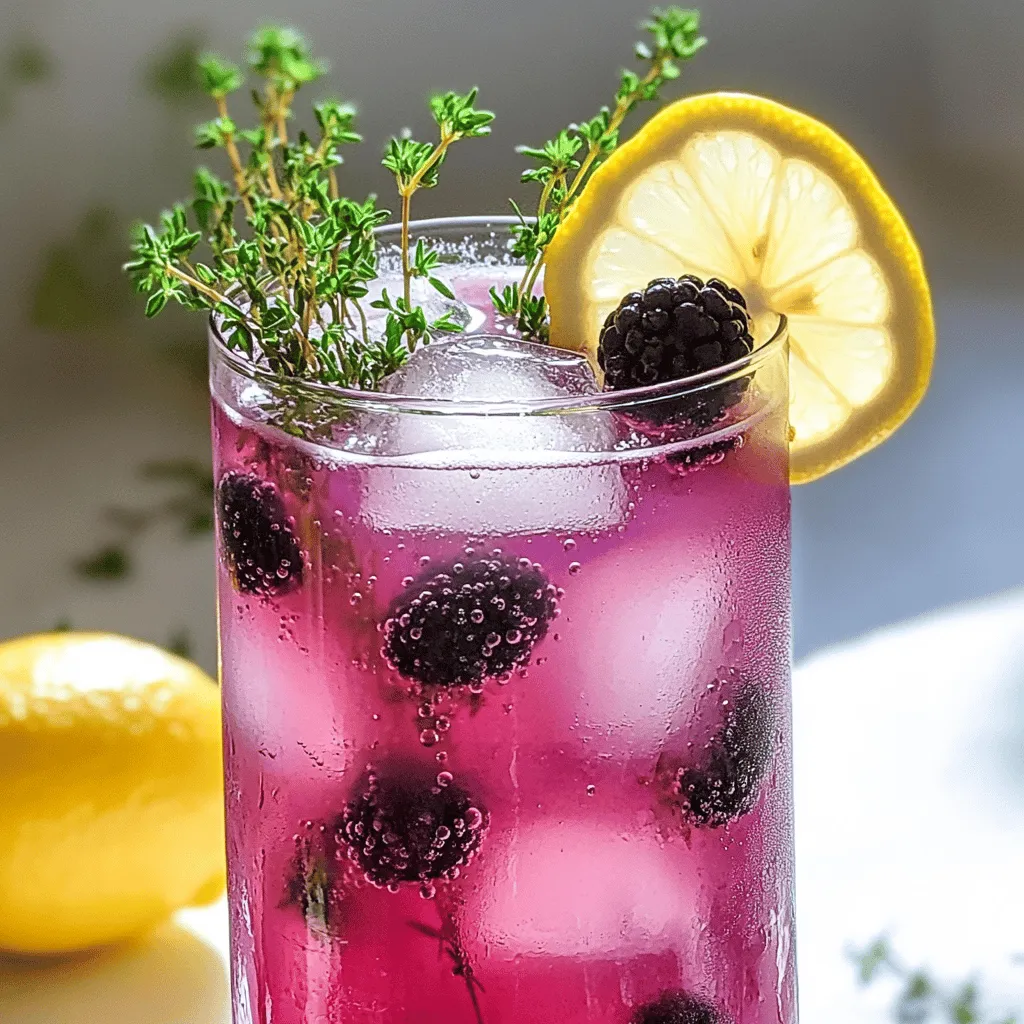
Are you looking for a refreshing drink that bursts with flavor? Try my Blackberry Thyme Lemonade Mocktail! It combines juicy

To make these tasty energy bites, gather these key ingredients: - 1 cup rolled oats - 1/2 cup natural peanut butter - 1/4 cup honey or maple syrup - 1/4 cup chocolate chips (dark or milk) - 1/4 cup ground flaxseed - 1/2 teaspoon vanilla extract - Pinch of sea salt These items work together to create a chewy, sweet snack that packs a punch. The rolled oats give a solid base. Peanut butter adds creaminess and flavor. Honey or maple syrup sweetens the mix, while chocolate chips offer a delightful treat. You can change things up with these optional ingredients: - Chopped nuts (like almonds or walnuts) - Dried fruit (like cranberries or raisins) - Protein powder for an extra boost - Coconut flakes for added texture These options let you tailor the bites to your taste. Get creative! Mix and match to find your favorite combo. If you lack an ingredient, here are some smart swaps: - Use almond butter instead of peanut butter. - Swap honey for agave syrup if you want. - Use quick oats if you have them on hand. These swaps keep the recipe easy and flexible. You can still enjoy the flavor and texture you love even when you don’t have everything. Start by gathering your ingredients. You will need rolled oats, ground flaxseed, and a pinch of sea salt. In a large mixing bowl, combine these three dry ingredients. Mix them well to ensure they are evenly spread. This step is key for good flavor in each bite. Next, take a separate bowl. Here, mix the natural peanut butter, honey or maple syrup, and vanilla extract. Stir until the mixture is smooth. You want it to blend well for even sweetness. Once both mixtures are ready, pour the wet mixture into the dry mix. Stir it together until everything combines fully. Make sure you don’t see any dry bits left. Then, gently fold in the chocolate chips. This will add a rich, sweet touch to your bites. Ensure they are spread throughout the mixture for the best taste. Now, it's time to shape the mixture into bites. Use your hands to grab small amounts of the mixture. Aim for about one inch in diameter for each ball. Roll them between your palms to form tight balls. Place each ball on a parchment-lined baking sheet. This will keep them from sticking. Make sure they have some space in between. After forming all the bites, it’s time for chilling. Place the baking sheet in the refrigerator. Let the bites chill for at least 30 minutes. This helps them firm up nicely. Once they are cold and set, store the energy bites in an airtight container. Keep them in the fridge, where they will stay fresh for up to a week. Enjoy these tasty snacks anytime you need a quick boost! Start by mixing the dry ingredients first. In a large bowl, combine rolled oats, ground flaxseed, and sea salt. Stir them well. This helps distribute the flavors evenly. For the wet mixture, blend natural peanut butter, honey, and vanilla in a separate bowl. Make sure it is smooth. Pour the wet mix into the dry mix. Stir until all ingredients combine. If the mix feels too dry, add a tiny bit of water. The right texture for these energy bites is crucial. You want them to hold together but not be too sticky. Use your hands to mix and form the bites. If they crumble, add a bit more peanut butter. If they are too sticky, sprinkle in some oats. After mixing, refrigerate the bites for at least 30 minutes. This helps them firm up and makes them easier to eat. You can serve these bites in many fun ways. Place them on a colorful plate for a pop of color. You can also add a drizzle of melted chocolate on top for a treat. Try using cupcake liners for a cute presentation. Pair them with fresh fruit or yogurt for a tasty snack. These bites are also great for a quick breakfast on the go. {{image_2}} If you want a nut-free option, try using sunflower seed butter. It gives a similar taste and texture. You can also use pumpkin seed butter. Both choices keep the bites creamy and rich. Just swap the peanut butter with these seeds. This way, kids and adults with nut allergies can enjoy them too. To spice up your energy bites, add different flavors. You can mix in shredded coconut for a tropical twist. Dried fruit like cranberries or apricots adds sweetness and chewiness. You can also try adding spices like cinnamon or cocoa powder. Each flavor change gives a new taste, so feel free to experiment. For a low-sugar version, reduce the honey or maple syrup. You can use ripe bananas or applesauce for natural sweetness. This change keeps the bites tasty but lowers the sugar content. If you need gluten-free bites, ensure you use certified gluten-free oats. This way, everyone can enjoy these tasty snacks without worry. To keep your Peanut Butter Cup Energy Bites fresh, store them in an airtight container. Place the container in the fridge. This way, they stay cool and tasty. Make sure to eat them within a week for the best flavor. If you want to save some bites for later, freezing is a great option. Form the bites as usual, but do not chill them first. Instead, place them on a baking sheet and freeze for about two hours. Once firm, transfer them to a freezer bag. They can last up to three months in the freezer. Just thaw them in the fridge when you’re ready to enjoy! Peanut Butter Cup Energy Bites taste best when fresh. If stored properly, they last up to a week in the fridge. To check for freshness, look for any change in color or smell. If they seem off, it’s best to toss them. Enjoy your snacks while they are still delicious! If you need a substitute for peanut butter, try almond butter or sunflower seed butter. These options keep the same creamy texture and taste great. You can also use cashew butter for a milder flavor. All these choices work well in the energy bites. Each Peanut Butter Cup Energy Bite has about 100 calories. This number may vary based on the ingredients used. If you measure carefully, you can keep track of the calories. These bites offer a nice balance of protein and healthy fats. Yes, you can easily make these energy bites vegan. Use maple syrup instead of honey. Choose dark chocolate chips that are dairy-free to keep it vegan. The rest of the ingredients are already plant-based, so you’re all set! Homemade energy bites can last up to one week in the fridge. Store them in an airtight container to keep them fresh. If you want to keep them longer, you can freeze them. Just remember to thaw them before you enjoy! In this post, we explored making Peanut Butter Cup Energy Bites. You learned about key ingredients and fun ways to customize them. I shared step-by-step instructions and tips for mixing and serving. We also covered different variations and storage tips for freshness. Now you can enjoy these tasty bites anytime. They are easy to make and great for snacks. Get creative with flavors, and have fun!

Peanut Butter Cup Energy Bites Simple and Tasty Snack

Looking for a quick and tasty snack? These Peanut Butter Cup Energy Bites are the answer! They are simple to

- 4 cups vegetable broth - 2 tablespoons miso paste (spicy or regular) - 1 tablespoon soy sauce - 1 teaspoon sesame oil - 1 block firm tofu, drained and cubed - 2 servings of ramen noodles - 1 cup shiitake mushrooms, sliced - 1 cup baby spinach - 1 carrot, julienned - 2 green onions, chopped - 1 teaspoon grated ginger - 2 cloves garlic, minced - Chili oil (optional, for extra heat) - Sesame seeds, for garnish - Extra chili flakes for more heat - Additional vegetables like bok choy or bell peppers - Soft-boiled eggs for added protein This spicy miso ramen with tofu is a hearty and nutritious meal. Each serving has about: - Calories: 400 - Protein: 20g - Carbohydrates: 50g - Fat: 15g - Fiber: 6g - Sodium: 800mg This recipe is rich in plant-based protein from tofu. It also offers vitamins from the vegetables. Enjoy this bowl as a tasty and healthy option for lunch or dinner! Start by pressing the tofu. Use paper towels to soak up extra moisture. This step is key. It helps the tofu absorb the flavors later. Cut the tofu into small cubes. Set the cubes aside for now. Grab a large pot and heat sesame oil over medium heat. Add grated ginger and minced garlic. Stir them for about 30 seconds. You will smell a lovely aroma! This step builds the base of your broth. Next, add sliced shiitake mushrooms and julienned carrots to the pot. Sauté for 3 to 4 minutes. You want them to soften a bit. Now pour in the vegetable broth and bring it to a simmer. Stir in the miso paste and soy sauce. Mix well until everything dissolves. Gently add the cubed tofu into the broth. Let it simmer for an extra 5 to 7 minutes. This allows the tofu to soak up all the good flavors. In a different pot, cook the ramen noodles according to the package. Once done, drain them and set them aside. Before serving, stir in the baby spinach. Let it wilt for a moment, keeping its bright color. In deep bowls, add the cooked ramen noodles. Ladle the hot broth and tofu over the noodles. Top with chopped green onions and sprinkle sesame seeds. For extra heat, drizzle some chili oil on top. Serve this bowl of spicy miso ramen with tofu hot and enjoy every bite! When making spicy miso ramen, pick firm or extra-firm tofu. This type holds its shape well during cooking. Look for tofu that is fresh and has a good texture. If you press it, it will soak up more flavor. Press it between paper towels for about 15 minutes. This step helps remove excess moisture. To enhance the taste, use high-quality miso paste. Spicy miso adds a nice kick, but regular miso works too. Combine the miso with soy sauce and sesame oil for depth. Don’t forget to sauté garlic and ginger first. These two ingredients bring out rich flavors. Adjust the heat by adding chili oil. It can make your ramen even spicier. Serve your ramen in deep, wide bowls. This allows for a beautiful display of colors. Start with the noodles as a base, then add the broth. Top with vibrant greens like spinach and green onions. A sprinkle of sesame seeds adds a nice touch. For extra flair, you can add chili flakes on top for a pop of color and heat. These simple steps make your dish look as good as it tastes! {{image_2}} To make this dish vegetarian or vegan, swap the broth. Use a vegetable broth instead of chicken broth. You can also choose a miso paste that is vegan. Miso paste is usually made from soybeans, salt, and koji. Check the label to ensure it has no fish products. You can also add plant-based protein like tempeh or seitan instead of tofu. If you like heat, use spicy miso paste. It adds a nice kick to your ramen. If you prefer a milder flavor, go for regular miso paste. You can also adjust the amount of chili oil you add. Start with a small drizzle and taste before adding more. This way, you control the spice level to suit your taste buds. Feel free to get creative with your veggies. Broccoli, bok choy, or snap peas all work well. Just make sure to add them at the right time. Cook firmer vegetables like broccoli longer to soften them. Add delicate vegetables like spinach or bok choy near the end to keep them fresh. This way, you get a colorful and nutritious bowl of ramen. After enjoying your spicy miso ramen with tofu, let the leftovers cool down. Store them in an airtight container. You can keep them in the fridge for up to three days. Make sure to separate the broth and noodles if possible. This keeps the noodles from getting soggy. When you’re ready to eat again, heat the ramen on the stove. Pour the broth and noodles into a pot. Warm them on medium heat until hot, about five to seven minutes. If you like, add a splash of water to keep it from drying out. Stir gently to mix the flavors back together. You can also use the microwave for quick reheating. Just cover the bowl and heat in short bursts. If you want to save your ramen for later, you can freeze it. Place the cooled ramen in a freezer-safe container. Make sure to leave some space for expansion. It can last for up to three months in the freezer. When you want to eat it, thaw it overnight in the fridge. Reheat as described above for a tasty meal. I like to use spicy miso for a bold flavor. You can also choose white or red miso. Each type brings its unique taste. If you want less heat, stick to white miso. Yes, you can use instant ramen noodles. They cook quick and save time. Just follow the package instructions for the best results. Make sure to drain them well before adding them to the soup. To make this ramen gluten-free, use gluten-free ramen noodles. Also, check your soy sauce for gluten. You can use tamari instead. It has a similar taste without gluten. If you don’t have shiitake mushrooms, use button or cremini mushrooms. They add a nice texture and flavor. You can also try other types like oyster mushrooms for a fun twist. Absolutely! You can add more tofu or even some cooked chicken. For a plant-based option, try chickpeas or edamame. They boost protein and make your ramen even more filling. In this post, we covered key ingredients for a tasty dish, including optional elements. I detailed step-by-step instructions, from preparing tofu to serving it hot. I shared tips on choosing tofu and perfecting flavors, plus different variations to try. Lastly, I explained how to store leftovers and answered common questions. Always feel free to experiment with flavors and ingredients. This dish is flexible and fun. With the right approach, you can make it your own. Enjoy your cooking journey!

Spicy Miso Ramen with Tofu Flavorful Comfort Bowl

Are you ready to dive into a comforting bowl of spicy miso ramen? This recipe features savory miso, silky tofu,

To make Roasted Garlic Parmesan Brussels Chips, you need: - 1 lb Brussels sprouts - 3 tablespoons olive oil - 4 cloves garlic, minced - 1/2 cup grated Parmesan cheese - 1 teaspoon smoked paprika - 1/2 teaspoon sea salt - 1/4 teaspoon black pepper - Zest of 1 lemon These ingredients work together to create a tasty treat that is both crunchy and flavorful. When selecting Brussels sprouts, choose firm, bright green ones. Look for sprouts that are tightly closed and have no yellow leaves. Smaller sprouts often taste sweeter and are more tender. They are perfect for making chips. Larger sprouts can be tougher and might not crisp up as well. Using fresh ingredients is key to getting the best flavor. Fresh Brussels sprouts offer a nice crunch and bright taste. Fresh garlic adds a strong aroma and rich flavor. When you use good quality Parmesan cheese, it melts nicely and gives a wonderful salty taste. Fresh ingredients not only taste better but also make your dish look great! Start by washing the Brussels sprouts under cold water. Trim the ends to remove any tough bits. Next, peel off any damaged leaves. This keeps your chips looking nice. Once cleaned, slice each Brussels sprout in half. Aim for uniform cuts so they cook evenly. Place the halved sprouts in a large bowl for mixing. In a small bowl, mix three tablespoons of olive oil with four minced garlic cloves. Add one teaspoon of smoked paprika for a smoky flavor. Then, sprinkle in half a teaspoon of sea salt and a quarter teaspoon of black pepper. Stir well to combine all the ingredients. This mixture will coat the Brussels sprouts and enhance their taste. Spread the Brussels sprouts on a baking sheet lined with parchment paper. Make sure the cut sides face down. This helps them get crispy. Preheat your oven to 400°F (200°C). Roast the sprouts for about 25 to 30 minutes. Flip them halfway through to ensure even cooking. Look for a golden brown color to know they're done. - Timing and Temperature Tips: Keep an eye on the sprouts as they roast. Ovens can differ, so check for crispiness after 25 minutes. If they need more time, roast them a few minutes longer. The goal is to achieve a crunchy texture without burning. To make your Brussels chips super crispy, start by slicing them thin. Thin slices help them cook faster and get crispier. Use high heat when roasting. The oven should be at 400°F (200°C). Also, flip the chips halfway through cooking. This step ensures they brown evenly. You can also use a wire rack on the baking sheet. This allows air to flow, making the chips even crunchier. If you want a different cheese, try Pecorino Romano or nutritional yeast for a vegan option. Both can add a nice flavor. For olive oil, you can use avocado oil. It has a high smoke point and works well for roasting. Sunflower oil is another good choice. Just make sure to keep the flavor simple, so it complements the garlic and cheese. To boost flavors, you can add herbs. Try rosemary, thyme, or oregano for a nice touch. A pinch of cayenne pepper adds heat if you like spice. You can also sprinkle lemon zest on top for a fresh twist. Feel free to experiment with your favorite spices. Just remember to keep it balanced, so the garlic and cheese shine through. {{image_2}} If you love heat, try adding red pepper flakes. This simple tweak gives your chips a nice kick. Just sprinkle about half a teaspoon of red pepper flakes into the olive oil mixture. Mix well and coat the Brussels sprouts. The spicy flavor pairs perfectly with the garlic and Parmesan. You can make a vegan version using plant-based cheese. Look for vegan Parmesan at your store. It melts well and adds a nice flavor. You can also try nutritional yeast. It has a cheesy taste without dairy. Just sprinkle it on the hot Brussels sprouts, same as you would with Parmesan. Don't stop at Brussels sprouts! You can use other veggies too. Kale, sweet potatoes, or zucchini all make great chips. Each vegetable has its own taste and texture. Just follow the same roasting steps. Slice them thin, season, and roast until crispy. Enjoy exploring new flavors! After you enjoy your Roasted Garlic Parmesan Brussels Chips, store the leftovers right. Place them in an airtight container. This keeps them fresh and helps avoid sogginess. Make sure to let them cool first. Leftover chips can last up to three days in the fridge. When you're ready to eat the chips again, use the oven. Preheat it to 350°F (175°C). Spread the chips on a baking sheet. Heat them for about 5-10 minutes. This makes them crispy again. Avoid using the microwave, as it makes them soft. If you want to freeze Brussels sprouts, start with fresh ones. Clean and slice them as you would for the chips. Blanch them in boiling water for about 3 minutes. Then, quickly cool them in ice water. Drain and pack them in freezer bags. They can last for up to 3 months in the freezer. When you're ready to cook, roast them straight from the freezer. Just add a few extra minutes to the cooking time. Yes, you can prepare these chips ahead but not fully cook them. You should coat the Brussels sprouts with the olive oil and seasoning mix. Then, store them in the fridge for up to a day. When you are ready to enjoy them, roast them fresh. This keeps their crispness and flavor intact. Brussels chips pair well with many dips. I love serving them with hummus or a creamy ranch dip. You can also try a tangy yogurt-based dip or spicy salsa. Choose a dip that complements the garlic and cheese flavors. Brussels sprout chips taste best the day they are made. If you have leftovers, store them in an airtight container. They can stay fresh for about 2 days. However, they may lose their crunch. To revive them, reheat in the oven for a few minutes. Roasted Garlic Parmesan Brussels chips are a tasty snack that's easy to make. We covered key ingredients, perfect prep steps, and how to get crispy results. You learned simple tips for substitutions and flavor boosts. Remember, fresh ingredients make all the difference. Try different variations and store leftovers for later. Enjoy these chips as a healthy snack anytime!

Roasted Garlic Parmesan Brussels Chips Crunchy Delight

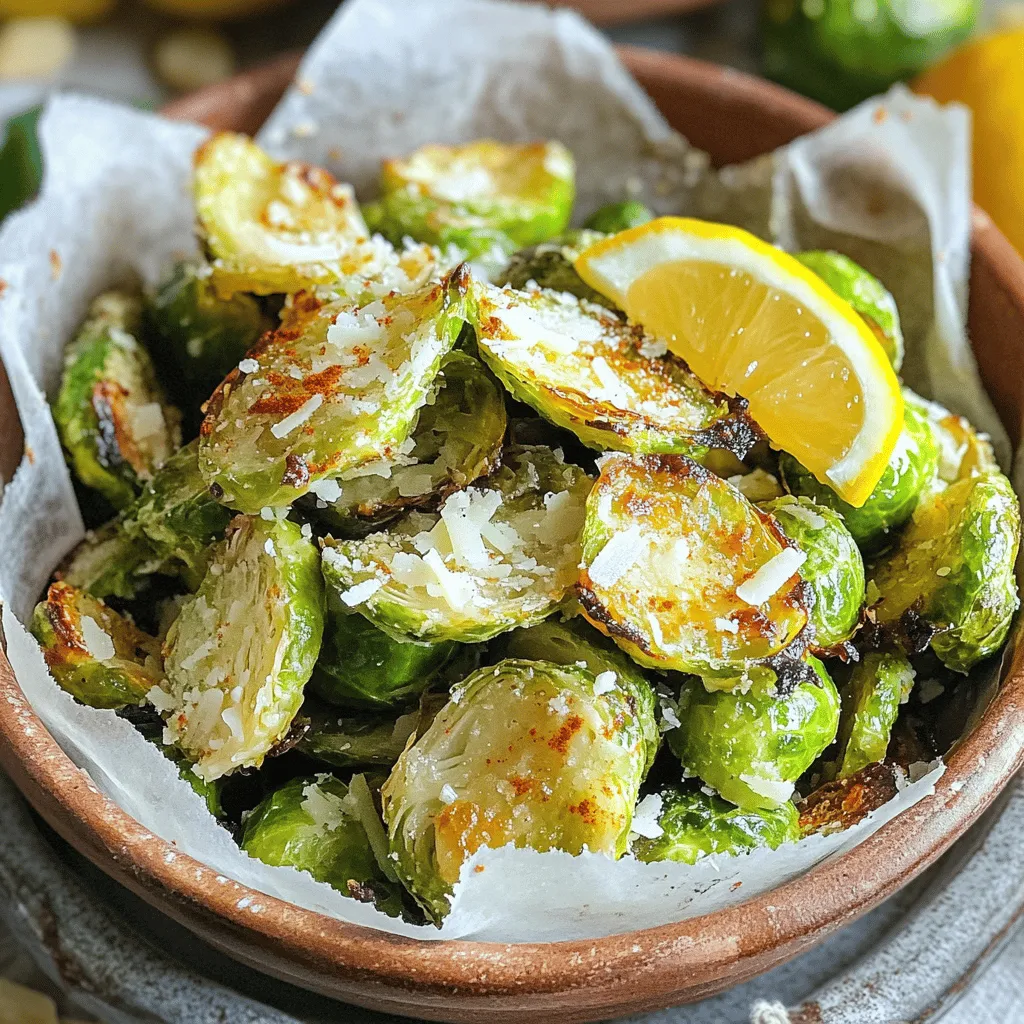
If you’re looking for a tasty snack, you’ve hit the jackpot! Roasted Garlic Parmesan Brussels Chips are crunchy, savory, and

- 2 cups fresh strawberries, hulled and sliced - 1 banana, frozen - ½ cup Greek yogurt (plain or vanilla) - ½ cup almond milk (or any milk of choice) - 2 tablespoons cream cheese, softened - 1 tablespoon honey or maple syrup (to taste) - 1 teaspoon vanilla extract - 1 tablespoon chia seeds To create a tasty Strawberry Cheesecake Smoothie Bowl, you need fresh strawberries. They bring a bright, sweet flavor. You also need a frozen banana. This adds creaminess and a nice chill. Greek yogurt gives it a rich texture, while almond milk helps blend everything smoothly. Cream cheese makes it taste like cheesecake. You can use honey or maple syrup for sweetness. A splash of vanilla extract adds depth to the flavor. Lastly, chia seeds give a nice crunch and boost nutrition. - Sliced strawberries - Granola - Shredded coconut - Nuts or seeds - Fresh mint leaves When serving your smoothie bowl, toppings make it fun! You can add sliced strawberries for freshness. Granola adds a nice crunch. Shredded coconut gives a tropical touch. Nuts or seeds can enhance the texture. Fresh mint leaves bring a pop of color and flavor. These toppings not only make your bowl pretty but also add different tastes and textures. Enjoy creating your own mix! First, you need to prepare the strawberries. Start by hulling them. This means removing the green tops. Then, slice the strawberries into smaller pieces. This makes them easier to blend. Next, grab a banana. Make sure it is frozen. A frozen banana will create a creamy texture for the smoothie. If you forget to freeze it, you can slice a fresh banana and freeze those slices for about an hour. Now, it’s time to blend! In your blender, combine the following main ingredients: - 2 cups fresh strawberries, hulled and sliced - 1 frozen banana - ½ cup Greek yogurt - ½ cup almond milk - 2 tablespoons softened cream cheese - 1 tablespoon honey or maple syrup - 1 teaspoon vanilla extract Blend these ingredients until they are smooth and creamy. If the mixture is too thick, add more almond milk. Just a little at a time until you reach your desired consistency. After blending, stir in 1 tablespoon of chia seeds. This adds a nice texture and nutrition to your bowl. Now, pour the smoothie mixture into a bowl. Use a spoon to smooth the top. Finally, it’s time to decorate! Add your favorite toppings. You can use: - Sliced strawberries - Granola - Shredded coconut - Nuts or seeds If you like, drizzle a little honey or maple syrup on top for extra sweetness. Enjoy your tasty Strawberry Cheesecake Smoothie Bowl! To get the right texture in your smoothie bowl, focus on the almond milk. Start with half a cup. If it's too thick, add more milk a little at a time. Frozen fruits also help make your smoothie creamy. Using a frozen banana gives a nice thickness. You can even freeze your strawberries for extra chill. Make your bowl look great for serving. Use a chilled bowl to keep the smoothie cold and fresh. For garnishing, add sliced strawberries, granola, or shredded coconut. Fresh mint leaves add a nice touch. All these toppings make the bowl colorful and fun to eat. When it comes to sweetness, always taste your mixture first. If you find it is not sweet enough, you can add more honey or maple syrup. If you want alternatives, try agave nectar or stevia. These options can change the flavor while keeping it sweet. Adjust based on your own taste. {{image_2}} You can change the fruit in this smoothie bowl. Try blueberries or raspberries instead of strawberries. These fruits add new tastes and colors. You can also use flavored Greek yogurt. The vanilla or strawberry yogurt will enhance the cheesecake flavor and add creaminess. If you need dairy-free options, swap the cream cheese for a nut-based cheese. Cashew cream or coconut cream works well. For a vegan version, use plant-based yogurt. These swaps keep the flavor rich and creamy without dairy. Add protein powder or nut butter to boost nutrition. Almond butter or peanut butter can bring extra protein and flavor. You can also sneak in superfoods like spinach or kale. These greens add nutrients without changing the taste much, making your smoothie bowl healthier. To keep your strawberry cheesecake smoothie bowl fresh, store it in an airtight container. Place the container in the refrigerator right after serving. This method helps maintain the taste and texture of the bowl. Aim to eat the leftovers within two days for the best flavor. To keep ingredients fresh, store them separately when possible. For example, keep sliced strawberries in a sealed bag. This way, they won’t get mushy. Also, avoid mixing in toppings until you are ready to serve. If you want to save portions for later, freezing is a great option. Pour the smoothie mixture into ice cube trays or freezer-safe containers. Make sure to leave some space for expansion. You can freeze it for up to one month. To thaw and serve later, take the frozen smoothie out of the freezer. Let it sit in the fridge overnight to defrost. If you want a quick option, use a microwave on low for a few seconds. Blend it again to restore the smooth texture before serving. The strawberry cheesecake smoothie bowl stays good in the fridge for about 2 days. After that, the freshness may fade, and it might not taste as great. Always check for any changes in smell or color before enjoying. If you see or smell anything off, it’s best to discard it. A Strawberry Cheesecake Smoothie Bowl combines sweet and creamy flavors. You taste fresh strawberries and creamy cheesecake notes. The texture is thick and smooth, perfect for a bowl. The Greek yogurt adds richness while the banana gives it sweetness. This bowl is like dessert for breakfast! You can enjoy it with a spoon, making it fun and satisfying. Yes, you can prepare this smoothie bowl ahead of time! Blend all the ingredients and pour it into a container. Seal it well and place it in the fridge. It stays fresh for about a day. For best taste, add toppings right before serving. This way, they stay crunchy and fresh! You can easily personalize your smoothie bowl. Here are some ideas: - Swap strawberries for other fruits like bananas or blueberries. - Try different yogurt flavors for a twist. - Add toppings like granola, nuts, or seeds for crunch. - Drizzle honey or maple syrup for extra sweetness. - Add chia seeds for nutrition and texture. Each choice makes it your own creation! You learned how to make a tasty strawberry cheesecake smoothie bowl. We covered the key ingredients, step-by-step instructions, and helpful tips. Variations allow you to mix flavors and meet dietary needs. You can store any extras for later use. Try it out and make it your own. Enjoy a cool, creamy treat that’s both healthy and fun!

Strawberry Cheesecake Smoothie Bowl Delightful Treat

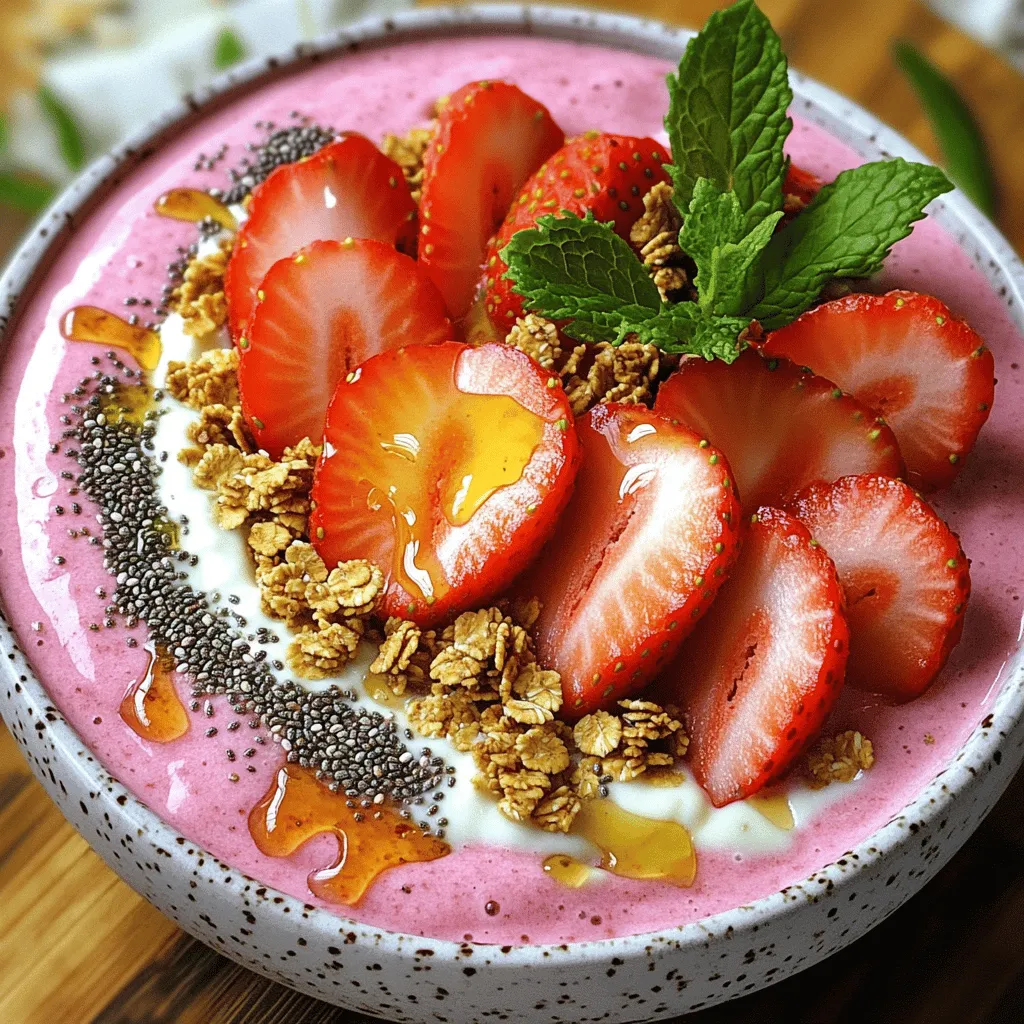
If you crave a cool, tasty treat that feels like dessert but is healthy, you must try this Strawberry Cheesecake

Older posts
Newer posts
← Previous Page1 … Page22 Page23 Page24 … Page82 Next →

dsad

© 2026 Recipes Pursuit • Built with GeneratePress

Our Policies

  • Copyright Policy
  • Cookie Policy
  • GDPR Policy
  • Privacy Policy
  • Disclaimer
  • Terms Of Use

More Information

  • Home
  • About
  • Contact
  • Appetizers
  • Dessert
  • Dinner
  • Drinks
©2026, Recipes Pursuit About Back To Top