Skip to content
DisclaimerTerms Of UseGDPR PolicyCookie Policy

Recipes Pursuit

  • Home
  • Drinks
  • Appetizers
  • Dinner
  • Dessert
  • About
  • Contact
  • Privacy Policy
DisclaimerTerms Of UseGDPR PolicyCookie Policy

NO-ING-IMG

To make Maple Pecan Sticky Granola Bars, gather these items: - 2 cups rolled oats - 1 cup pecans, roughly chopped - 1/2 cup unsweetened shredded coconut - 1/2 cup natural peanut butter (or almond butter) - 1/2 cup pure maple syrup - 1/4 cup honey (or agave syrup for a vegan option) - 1/2 teaspoon vanilla extract - 1/4 teaspoon salt - 1/2 cup dried cranberries or raisins (optional) - 1/4 cup mini chocolate chips (optional) These ingredients blend well for a tasty and chewy bar. If you have allergies or dietary needs, swaps can help. For nut allergies, use sunflower seed butter instead of peanut butter. This gives a similar texture without nuts. You can also replace honey with agave syrup for a vegan option. If you prefer gluten-free options, make sure your oats are labeled gluten-free. Want to make these bars even better? Here are some fun add-ins: - Dried fruit: Try adding apricots, figs, or apples for extra sweetness. - Seeds: Chia seeds or pumpkin seeds give a crunch and boost nutrition. - Spices: A pinch of cinnamon or nutmeg can add warmth to the flavor. These options allow you to customize your bars to match your taste. Start by preheating your oven to 350°F (175°C). While it warms up, take an 8x8 inch baking pan. Line it with parchment paper, leaving some paper hanging over the edges. This makes it easy to lift the bars out later. In a large bowl, add 2 cups of rolled oats, 1 cup of chopped pecans, and 1/2 cup of shredded coconut. Stir these dry ingredients together until they mix well. This will be the base of your granola bars. Grab a microwave-safe bowl and add 1/2 cup of peanut butter, 1/2 cup of maple syrup, 1/4 cup of honey, 1/2 teaspoon of vanilla extract, and 1/4 teaspoon of salt. Microwave this mixture for about 30 seconds. It should be warm and easy to stir. Mix until it is smooth and well combined. Pour the warm wet mixture over the dry ingredients in the large bowl. Stir everything together until the oats and nuts are well coated. If you want, fold in 1/2 cup of cranberries or mini chocolate chips. Next, transfer this mixture to your baking pan. Press it down firmly with a spatula or your hands. Make sure it is an even layer. Now, place the pan in the oven. Bake for 20 to 25 minutes until the edges turn golden brown. Keep an eye on it so it doesn't burn. Once baked, take the pan out of the oven. Let it cool in the pan for at least 15 minutes. After that, use the parchment paper to lift the bars out of the pan. Place them on a wire rack to cool completely. Once cool, cut them into squares or rectangles. Enjoy your tasty snack! To get the right texture, use fresh ingredients. Old oats can make your bars dry. Mix well to coat all the oats and nuts. A sticky mixture helps hold the bars together. Press the mixture firmly into the pan. This helps shape them better when baked. Even baking is key for great granola bars. Make sure your oven is preheated to the right temperature. Use an 8x8 inch pan for even heat. Check the bars at 20 minutes. Look for golden edges, which mean they are done. If the center is soft, bake a few more minutes. For serving, stack the bars on a nice platter. Drizzle extra maple syrup on top for shine. A sprinkle of chopped pecans adds color and crunch. You can also wrap them in parchment for a cute gift. These bars are perfect for snacks or breakfast on the go! {{image_2}} If you want to make a nut-free version, you can swap out the pecans. Use seeds like sunflower or pumpkin seeds instead. They add crunch and nutrition. You can also increase the amount of coconut in your mix. This keeps the texture fun and chewy. For a vegan twist, use agave syrup instead of honey. Choose almond or sunflower seed butter to replace peanut butter. This keeps your bars plant-based and just as tasty. Plus, use dairy-free chocolate chips if you want to add chocolate. You can change up the flavor to keep things exciting. Try adding mini chocolate chips for a sweet treat. Dried fruit like apricots or mango can add a fruity zing. You might even want to sprinkle in some cinnamon or nutmeg for warmth. Each new flavor makes your granola bars unique! Store your Maple Pecan Sticky Granola Bars in an airtight container. This keeps them fresh and tasty. You can stack the bars between sheets of parchment paper. This will prevent them from sticking together. Make sure to place the container in a cool, dry place. Avoid storing them near heat or moisture. These granola bars will stay fresh for up to one week. After that, they may lose some flavor and texture. If you want to keep them longer, consider freezing them. You can easily make a big batch and enjoy them over time. To freeze your granola bars, cut them into squares first. Wrap each bar in plastic wrap or foil. Then, place the wrapped bars in a freezer-safe bag. This way, they stay protected. You can freeze them for up to three months. When you want to eat one, just take it out and let it thaw at room temperature. Enjoy a quick and healthy snack anytime! Yes, you can use different nuts. Almonds, walnuts, or cashews work well. Just chop them roughly, like the pecans. Each nut adds its own flavor. So, feel free to experiment and find your favorite mix. To get a crunchier texture, bake them a bit longer. Keep an eye on them to avoid burning. Press the mixture down firmly in the pan before baking. This helps them hold together and get crisp. Let them cool completely before cutting. This step is key for crunch! If you don’t have maple syrup, honey is a great choice. Agave syrup works too, especially for a vegan option. Both options will keep the bars sticky and sweet. Just remember that each syrup has its own taste, which will change the flavor a bit. These granola bars are a healthy snack option. They contain oats, nuts, and natural sweeteners. Oats provide fiber, while nuts offer healthy fats. If you add dried fruit, you get more vitamins. Just watch the portion size, as they are still a treat! You learned how to make delicious granola bars today. We discussed ingredients, steps, and helpful tips. Knowing how to adjust flavors and textures lets you personalize your bars. Remember to store them properly for freshness. With these tips, you can create tasty snacks that fit your needs. Enjoy experimenting with variations and share your treats with others. Keep these ideas handy as you bake, and enjoy the process!

Maple Pecan Sticky Granola Bars Easy and Tasty Snack

If you’re looking for a quick, tasty snack, try my Maple Pecan Sticky Granola Bars! These bars are packed with

- 4 chicken thighs, bone-in and skin-on - 1/4 cup honey - 3 tablespoons Sriracha sauce - 2 tablespoons soy sauce (low sodium) - 2 cloves garlic, minced - 1 tablespoon fresh ginger, grated - 1 tablespoon apple cider vinegar - Salt and pepper to taste - 1 tablespoon sesame oil To create Sriracha honey glazed chicken thighs, you'll need key ingredients that pack a flavorful punch. The chicken thighs are the star, and their crispy skin adds texture. The honey and Sriracha sauce blend together for a sweet and spicy glaze. Soy sauce adds depth, while garlic and ginger give it a fresh kick. Apple cider vinegar balances the sweetness with a touch of tang. Use salt and pepper to enhance the flavors and sesame oil for a nutty finish. - Chopped green onions - Sesame seeds Garnishes like chopped green onions and sesame seeds give a nice pop of color and crunch. They add freshness and an extra layer of flavor to the dish. You can sprinkle them on before serving for a beautiful presentation. Enjoy the mix of tastes and textures in every bite! - Combining Ingredients In a medium bowl, whisk together these ingredients: - 1/4 cup honey - 3 tablespoons Sriracha sauce - 2 tablespoons low sodium soy sauce - 2 cloves minced garlic - 1 tablespoon grated fresh ginger - 1 tablespoon apple cider vinegar - 1 tablespoon sesame oil This mixture creates a sweet and spicy glaze. The honey adds sweetness, while the Sriracha brings heat. - Setting Aside Part of the Glaze Once mixed, set aside 2 tablespoons of this glaze for later. This extra glaze adds flavor when the chicken is baking. - Drying and Seasoning Chicken Pat the chicken thighs dry with a paper towel. This step helps the skin get crispy. Season both sides with salt and pepper to taste. This simple step enhances the chicken's natural flavors. - Preheating the Oven Preheat your oven to 400°F (200°C). A hot oven cooks the chicken evenly and helps caramelize the glaze. - Searing Chicken Thighs In an oven-safe skillet, heat a little oil over medium-high heat. Place the chicken thighs skin-side down. Sear them for about 5-7 minutes. The skin should turn golden brown and crispy. This step locks in juices and adds flavor. - Baking Instructions Flip the chicken thighs over in the skillet. Pour the Sriracha honey glaze over them. Make sure they are well coated. Transfer the skillet to the oven and bake for 25-30 minutes. Check that the chicken's internal temperature hits 165°F (75°C). Brush the chicken with the reserved glaze halfway through for extra flavor. Let the chicken rest for 5 minutes after cooking. This allows the juices to settle for a juicy bite. Enjoy the delicious Sriracha honey glazed chicken thighs with a vibrant presentation! How do I adjust spiciness? You can change how spicy the glaze is by adding more or less Sriracha sauce. If you want it milder, use less Sriracha. You can also add a bit of honey to balance the heat. This helps create a sweet and spicy mix that pleases everyone. What are the benefits of low sodium soy sauce? Low sodium soy sauce is great because it cuts down on salt. This keeps the dish from being too salty. It also lets the other flavors shine through. Using it helps you enjoy the sweet and spicy notes of the glaze more fully. How do I ensure the chicken is cooked through? To make sure the chicken is cooked well, use a meat thermometer. The chicken should reach 165°F (75°C) in the thickest part. This guarantees it is juicy and safe to eat. If you don’t have a thermometer, cut into the meat. It should be white and clear, not pink. Why is it important to let chicken rest? Letting chicken rest is key for juicy meat. After cooking, take the chicken out and let it rest for 5 minutes. This helps the juices stay inside the meat, making every bite more tasty. Plus, it makes the chicken easier to slice! {{image_2}} You can switch up the protein in this recipe for a new taste. - Sriracha Honey Glazed Chicken Breasts: Use chicken breasts instead of thighs. They cook faster, so check them early. Follow the same steps for the glaze. You’ll still get that sweet and spicy flavor. - Sriracha Glazed Tofu for a Vegetarian Option: For a plant-based dish, try firm tofu. Press it to remove water and cut it into cubes. Sear the tofu until golden, then coat it with the glaze. Bake it just like the chicken for a tasty meal. Adding new flavors can take this dish to the next level. - Adding Citrus Elements: Try adding lemon or lime juice to the glaze. The zest adds freshness and balances the heat. You can even toss in some zest for more flavor. - Experimenting with Different Heat Levels: Adjust the spiciness by changing the Sriracha amount. For less heat, use less Sriracha. For more kick, add a pinch of cayenne pepper or red pepper flakes. This keeps your meal fun and exciting. - Store the chicken thighs in an airtight container. - Use a glass or plastic container with a tight lid. - Keep the chicken in the fridge within two hours of cooking. - Enjoy it within three to four days for best taste. - The best way to reheat is in the oven. - Preheat your oven to 350°F (175°C). - Place the chicken on a baking tray. - Cover it with foil to keep moisture in. - Heat for about 15-20 minutes until warm. To keep the flavor and moisture, brush a little extra glaze on the chicken before reheating. You can also use a microwave, but it may dry out the chicken. If you choose the microwave, cover the chicken with a damp paper towel. This helps keep it juicy. Enjoy the tasty Sriracha honey glaze again! Sriracha is a hot sauce made from chili peppers, vinegar, garlic, sugar, and salt. It has a bright red color and a tangy flavor. This sauce adds heat and depth to many dishes. You can use it in marinades, dips, or dressings. It is popular in Thai food and now loved worldwide. Yes, you can use boneless chicken thighs. They cook faster and still stay juicy. Just adjust the cooking time. Check for doneness to ensure they reach 165°F (75°C). Boneless thighs absorb the glaze well, giving you great flavor. To check if chicken thighs are cooked, use a meat thermometer. The internal temperature should be 165°F (75°C). You can also cut into the thickest part of the thigh. The juices should run clear, not pink. Absolutely! You can prepare the glaze a day in advance. Just store it in an airtight container in the fridge. This allows the flavors to meld, making your chicken even tastier. Just remember to re-whisk before using. You can serve this dish with rice or noodles. Steamed veggies or a fresh salad pair nicely too. For a fun twist, try serving it with tortillas for chicken tacos. You can also add some pickled veggies for extra crunch and flavor. This blog post shared a tasty way to make Sriracha Honey Glazed Chicken Thighs. You learned about needed ingredients like chicken, honey, and garlic. I gave you clear steps to prepare, cook, and store the dish. Tips helped you adjust spice and ensure perfect cooking. You also saw variations for different proteins and flavors. Remember, cooking should be fun and creative. With these recipes and tips, you're set to impress at your next meal! Enjoy making this dish for your friends or family.

Sriracha Honey Glazed Chicken Thighs Flavorful Delight

Are you ready to take your chicken game to a whole new level? These Sriracha Honey Glazed Chicken Thighs will

- 1 cup pitted dates - 1 cup rolled oats - 1/2 cup unsweetened shredded coconut - 1/4 cup almond butter (or any nut butter of your choice) - Zest of 1 lemon - 2 tablespoons fresh lemon juice - 1 tablespoon honey (or maple syrup for a vegan option) - A pinch of salt - Extra shredded coconut for rolling These ingredients blend well for a tasty, healthy snack. The pitted dates add sweetness while rolled oats give a nice texture. Shredded coconut gives a tropical feel and almond butter adds creaminess. Fresh lemon juice and zest boost flavor and brightness. Each energy ball contains about: - Calories: 100 - Fat: 5g - Carbohydrates: 14g - Protein: 2g - Fiber: 2g This snack is high in healthy fats and fiber. It provides energy without refined sugar. Perfect for a quick boost during the day! You can swap almond butter for peanut butter or sunflower seed butter. Use agave syrup instead of honey for a vegan option. If you do not have pitted dates, try using dried figs. For a nut-free version, leave out the nut butter and add more oats. These swaps keep the recipe flexible and fun! {{ingredient_image_1}} To make Lemon Coconut Energy Balls, gather all your ingredients first. You need: - 1 cup pitted dates - 1 cup rolled oats - 1/2 cup unsweetened shredded coconut - 1/4 cup almond butter - Zest of 1 lemon - 2 tablespoons fresh lemon juice - 1 tablespoon honey (or maple syrup) - A pinch of salt - Extra shredded coconut for rolling Start by placing the pitted dates, rolled oats, shredded coconut, and almond butter in your food processor. Pulse this mix until it becomes sticky. It should break down nicely. Next, add the lemon zest, lemon juice, honey, and a pinch of salt. Blend again until everything mixes well. The blend should hold its shape when you press it. When using a food processor, make sure to not over-blend. You want a chunky texture, not a paste. If your mix is too dry, add a splash of water or more nut butter. If it's too wet, add a bit more oats. Always scrape down the sides of the bowl as you blend. This helps mix everything evenly. Don't forget to taste your mix! Adjust the sweetness if you like. Once your mix is ready, it’s time to form the balls. Scoop about a tablespoon of the mixture with your hands. Roll it into a ball shape. Repeat this until you’ve used all the mix. Now, take each ball and roll it in extra shredded coconut for a tasty coating. Place the balls on a baking sheet lined with parchment paper. Finally, refrigerate the energy balls for at least 30 minutes. This helps them firm up nicely. Enjoy your healthy snack! To keep your energy balls fresh, store them in an airtight container. Place them in the fridge. They stay good for about one week. You can also freeze them. Just put them in a freezer bag. They will last up to three months in the freezer. You can change the sweetness by adding or reducing honey. If you want a less sweet treat, use less honey. For a sweeter bite, add an extra teaspoon. If the mixture feels too dry, add a splash of water or lemon juice. This will help bind the ingredients better. Adding flavor makes these energy balls even better. Try mixing in vanilla extract or a pinch of cinnamon. You can also add nuts or seeds for crunch. Dried fruits like cranberries or apricots work well too. Get creative with your favorite flavors! Pro Tips Use Medjool Dates: Medjool dates are softer and sweeter, making them perfect for energy balls. They blend easily and provide a rich flavor. Experiment with Nut Butters: While almond butter is delicious, feel free to try cashew, peanut, or sunflower seed butter for different flavor profiles. Chill for Better Texture: Refrigerating the energy balls allows them to firm up, making them easier to handle and enhancing their chewy texture. Add Extras: For a fun twist, consider adding chocolate chips, chia seeds, or nuts to the mixture for added texture and flavor. {{image_2}} You can change the nut butter in this recipe. Almond butter works great, but you can also use peanut butter, cashew butter, or sunflower seed butter. Each nut butter adds its own unique flavor. If you want a creamier texture, use a smooth nut butter. For a bit more crunch, choose a chunky version. Adding flavors can make your energy balls even better. You can mix in a splash of vanilla extract for sweetness. A dash of cinnamon or nutmeg can add warmth. If you like spice, a bit of ginger or cardamom will do the trick. Experimenting with flavors keeps your energy balls fresh and fun. Superfoods can boost the nutrition of your energy balls. Chia seeds add fiber and healthy fats. You can also mix in some flaxseeds for extra omega-3s. Want more protein? Add a scoop of your favorite protein powder. These small changes make your snack more powerful and tasty. To keep your Lemon Coconut Energy Balls fresh, store them in an airtight container. This method prevents them from drying out. Place a sheet of parchment paper between layers if you stack them. Keep your container in the fridge for best results. The cool air helps maintain their texture and flavor. You can freeze these energy balls for later use. Place them in a single layer on a baking sheet. Once they are firm, transfer them to a freezer-safe bag or container. Label the bag with the date. You can store them in the freezer for up to three months. When you’re ready to eat, just thaw them in the fridge or at room temperature. Fresh Lemon Coconut Energy Balls last about one week in the fridge. If you notice any signs of spoilage, like an off smell or mold, toss them out. Always check before eating. Enjoy them as a quick snack or energy boost, knowing they are safe to eat. Lemon Coconut Energy Balls can last about one week in the fridge. Store them in an airtight container. If you want them to last longer, you can freeze them. They can keep well for up to three months in the freezer. Just make sure to label each container with the date. Yes, you can make these energy balls vegan. Simply replace honey with maple syrup. This keeps the recipe sweet and plant-based. Make sure to check the nut butter you use as well, to ensure it is vegan-friendly. Yes, there are a few allergens to consider. The main allergens are nuts and coconut. If you have nut allergies, use sunflower seed butter or tahini instead. Always check labels on ingredients to avoid cross-contamination. The blog post covered the essential parts of making energy balls. We reviewed ingredients, nutritional info, and substitutions. I shared a step-by-step guide for preparation and tips for using a food processor. I also discussed how to store your energy balls and add variations for better flavors. In summary, energy balls are easy snacks packed with nutrients. You can customize them to fit your taste and diet. Enjoy making and sharing these healthy bites!

Lemon Coconut Energy Balls Simple and Quick Recipe

Looking for a quick and healthy snack? You’ve found it! These Lemon Coconut Energy Balls are simple to make and

- 1 cup all-purpose flour - 1/2 cup ricotta cheese - 2 eggs - 1/2 cup milk - 1/4 cup granulated sugar - 1 teaspoon baking powder - 1/2 teaspoon baking soda - Zest of 1 orange - 1/2 cup fresh or dried cranberries - 1 teaspoon vanilla extract - Pinch of salt - Butter or oil for cooking - Flour: 1 cup gives a good base for the pancakes. - Ricotta cheese: 1/2 cup adds creaminess and richness. - Eggs: 2 eggs help bind the batter. - Milk: 1/2 cup keeps the batter moist. - Sugar: 1/4 cup brings sweetness to balance the tart cranberries. - Baking powder: 1 teaspoon helps the pancakes rise. - Baking soda: 1/2 teaspoon adds fluffiness. - Orange zest: From 1 orange, it gives a bright flavor. - Cranberries: 1/2 cup adds bursts of tartness. - Vanilla extract: 1 teaspoon enhances the overall flavor. - Salt: A pinch balances sweetness. - Butter or oil: For cooking, it prevents sticking. - All-purpose flour: Use whole wheat flour for more fiber. - Ricotta cheese: Cottage cheese can work in a pinch. - Milk: Almond or oat milk are great dairy-free options. - Granulated sugar: Substitute with honey or maple syrup for natural sweetness. - Fresh cranberries: Dried cranberries or blueberries can be used instead. - Butter: Use coconut oil for a dairy-free version. To make these orange cranberry ricotta pancakes, gather your ingredients first. You will need flour, ricotta cheese, eggs, milk, sugar, baking powder, baking soda, orange zest, cranberries, vanilla extract, and salt. Prepare your workspace by clearing a counter or table. This makes cooking smoother and more fun. 1. In a large bowl, whisk together: - 1 cup all-purpose flour - 1/4 cup granulated sugar - 1 teaspoon baking powder - 1/2 teaspoon baking soda - A pinch of salt Mix these dry ingredients well. 2. In a separate bowl, blend together: - 1/2 cup ricotta cheese - 2 eggs - 1/2 cup milk - 1 teaspoon vanilla extract - Zest of 1 orange Stir until smooth and creamy. 3. Pour the wet mixture into the dry mix. Gently fold them together. It’s fine if there are small lumps. 4. Add in 1/2 cup cranberries, folding them in carefully. This adds bursts of flavor. 5. Heat a non-stick skillet over medium heat. Add a little butter or oil to coat the surface. 6. For each pancake, pour about 1/4 cup of batter onto the skillet. Cook for 2-3 minutes. Look for bubbles on top and edges that look set. 7. Flip the pancakes. Cook for another 2-3 minutes until they turn golden brown. 8. Remove the pancakes and keep them warm. Repeat with the remaining batter. - Use room temperature ingredients for a fluffier texture. - Do not overmix the batter; lumps help keep pancakes tender. - Adjust the heat if pancakes cook too fast or slow. - Always grease the pan between batches to avoid sticking. To make fluffy pancakes, start with fresh ingredients. Use baking powder and baking soda that are not expired. Mix the dry and wet ingredients separately first. This helps keep the pancakes light. When combining them, fold gently. This keeps air in the batter. A few lumps are okay; overmixing can make them tough. One big mistake is using cold ingredients. Always use room temperature eggs and milk. Another mistake is cooking on too high heat. Medium heat works best for even cooking. Don't forget to grease your skillet. Butter or oil prevents sticking and helps with browning. Lastly, avoid pressing down on the pancakes while they cook. This can deflate them and ruin the fluffiness. These pancakes shine with toppings! Drizzle maple syrup for sweetness. Fresh or dried cranberries add a nice touch. You can also sprinkle powdered sugar for a festive look. For a fun twist, add orange slices on top. A dollop of whipped cream makes them extra special. You can even mix in nuts for crunch. Enjoy them warm for the best taste! {{image_2}} You can easily change some ingredients to fit your needs. For a gluten-free option, use almond flour or a gluten-free blend instead of all-purpose flour. If you want to avoid dairy, swap the ricotta cheese for silken tofu or a dairy-free cream cheese. You can also use almond or oat milk in place of regular milk. These swaps keep the flavor while making the pancakes suitable for different diets. You can add new flavors to make these pancakes even more fun. If you like lemon, replace the orange zest with lemon zest. This gives the pancakes a bright and fresh taste. You can also mix in chocolate chips for a sweet twist. Just fold them into the batter with the cranberries. Other options include adding cinnamon or nutmeg for a warm spice flavor. These changes let you customize the pancakes to your taste. If you need to change the serving size, it's easy to do. The recipe makes about four servings. If you want to serve more people, just double the ingredients. You can also cut the recipe in half for a smaller meal. Use a measuring cup to keep track of the amounts. This way, you always have the right balance of flavors in your pancakes. To keep your leftover pancakes fresh, stack them neatly. Place a sheet of parchment paper between each pancake. This prevents sticking and helps maintain their shape. Store them in an airtight container in the fridge. They will last for up to three days. If you want to keep them longer, freezing is a great option. To freeze pancakes, stack them with parchment paper between each one. Then, wrap the stack tightly in plastic wrap and place it in a freezer-safe bag. Your pancakes can last for up to three months in the freezer. When you’re ready to eat, you can reheat them in the toaster or microwave. For the toaster, 2-3 minutes at medium heat works well. In the microwave, heat for about 30 seconds to 1 minute until warm. Use airtight containers to store your pancakes. Glass containers work well since they don't absorb odors. Plastic containers with tight lids are also good. Make sure the pancakes cool completely before sealing them. This helps prevent moisture buildup, which can make them soggy. Yes, you can make these pancakes ahead of time. Cook the pancakes and let them cool on a wire rack. Once cool, stack them between sheets of parchment paper. Place the stack in an airtight container. They can stay in the fridge for up to three days. To reheat, just warm them in a toaster or microwave. You can make these pancakes dairy-free by swapping ricotta cheese with a dairy-free alternative. Try using almond or coconut yogurt. For milk, use almond, soy, or oat milk. These swaps keep the pancakes tasty and fluffy. These pancakes pair well with many delicious toppings. Maple syrup adds sweetness. Fresh fruit, like berries or banana, gives a fresh touch. You can also add a dollop of whipped cream for creaminess. A sprinkle of nuts adds crunch too. Enjoy experimenting with your favorites! This post covered all you need for perfect pancakes. We discussed the key ingredients, detailed cooking steps, and best tips for fluffiness. You learned about substitutes and variations to meet your needs. Storing leftovers and reheating can extend your pancake enjoyment. Remember, practice makes perfect. Enjoy your fluffy pancakes with your favorite toppings. Happy cooking!

Orange Cranberry Ricotta Pancakes Flavorful Breakfast Treat

Start your morning right with Orange Cranberry Ricotta Pancakes! These fluffy treats burst with fresh flavors, perfect for breakfast or

- 4 salmon fillets (about 6 oz each) - 1 bunch broccolini, trimmed - 1/4 cup sweet chili sauce - 2 tablespoons soy sauce (low-sodium) - 1 tablespoon honey - 2 cloves garlic, minced - 1 teaspoon fresh ginger, minced - Sesame seeds, for garnish - Lemon wedges, for serving Gather these items before you start cooking. The salmon fillets are the stars of this dish. They bring a rich flavor and nice texture. Broccolini adds a fresh, crisp bite. The sweet chili sauce ties it all together with its sweet and spicy notes. For the marinade, mix soy sauce, honey, garlic, and ginger. This blend adds depth and enhances the salmon's taste. Use fresh garlic and ginger for the best results. Don’t forget the sesame seeds! They add crunch and a nutty flavor. Lemon wedges are perfect for squeezing over the dish when served. This simple setup makes a great meal that impresses everyone! First, you need to preheat the oven. Set it to 400°F (200°C). This heat will help cook the salmon and broccolini just right. Next, take a large baking sheet and line it with parchment paper. This makes cleanup easy. Plus, it helps keep your food from sticking. Now, let’s make the marinade. In a small bowl, whisk together these ingredients: - 1/4 cup sweet chili sauce - 2 tablespoons low-sodium soy sauce - 1 tablespoon honey - 2 cloves garlic, minced - 1 teaspoon fresh ginger, minced Mix these well until they blend smoothly. The sweet and spicy notes of the sauce will bring great flavor to your dish. Time to put it all together! Place the salmon fillets on one side of the baking sheet. Season them with salt and pepper. Pour half of the marinade over the fillets, making sure they are fully coated. On the other side, arrange the broccolini. Drizzle it with olive oil and sprinkle some salt and pepper. Toss the broccolini to coat it evenly. Now it’s time to cook! Roast the salmon and broccolini in the oven for about 12 to 15 minutes. The salmon should be cooked through and flake easily with a fork. Meanwhile, the broccolini should be tender but still crisp. In the last 2 minutes, pour the remaining marinade over the salmon and broccolini. This will help caramelize the sauce and add a tasty glaze. Once everything is cooked, take it out of the oven. Sprinkle sesame seeds over the salmon and broccolini for extra crunch. Serve hot with lemon wedges on the side. Enjoy your delightful meal! How do you check salmon doneness? You should cook salmon until it flakes easily with a fork. Use a fork to gently poke the thickest part. If it breaks apart, it's ready. Typically, salmon needs about 12-15 minutes at 400°F (200°C). The internal temperature should reach 145°F (63°C). How do you ensure broccolini stays tender? To keep broccolini tender, avoid overcooking it. Roast it with the salmon for about 12-15 minutes. Check it near the end of cooking. It should be bright green and still crisp. What alternative sauces can you try? You can switch the sweet chili sauce for teriyaki or hoisin sauce. These sauces will add unique flavors. You might also enjoy a simple lemon-garlic blend for a fresh taste. What additional spices can you add for flavor? Try adding red pepper flakes for heat or smoked paprika for depth. A pinch of cumin can also give an earthy twist. Experiment with what you like best. What are some serving suggestions for visual appeal? Serve the salmon and broccolini on a large platter. Arrange lemon wedges around the edges. This adds color and makes it look inviting. What garnishing options with herbs can you use? Sprinkle fresh cilantro or parsley over the dish. You can also use chives for a mild onion flavor. This will add bright color and fresh taste. {{image_2}} You can switch up the broccolini for other veggies. Try using asparagus, green beans, or bell peppers. These vegetables also roast well and add great color. If you want to focus on seasonal options, consider zucchini in summer or Brussels sprouts in fall. Each choice gives a fresh taste to your meal. Want to spice things up? Add chili flakes or sriracha to the marinade. This gives the dish a nice kick. For a sweeter touch, swap the sweet chili sauce for teriyaki sauce or hoisin sauce. These sauces offer different flavors while keeping that sweet profile. If you need low-sodium options, use low-sodium soy sauce as the recipe suggests. This keeps your dish tasty without too much salt. For gluten-free needs, check the label on your soy sauce. There are gluten-free brands available that work just as well. You can still enjoy this meal while sticking to your diet. Store any leftover salmon and broccolini in an airtight container. This helps keep them fresh. Place the container in your fridge. The dish lasts about 3 days. After that, the quality may drop. To reheat salmon and broccolini, use the oven or the microwave. For the oven, set it to 350°F (175°C). Place the dish on a baking sheet and heat for about 10 minutes. If using the microwave, heat in short bursts of 30 seconds. This helps avoid overcooking. Salmon should stay moist and tender. You can freeze the dish, but it’s best to eat it fresh. If you freeze it, pack the salmon and broccolini in a freezer-safe bag. Remove as much air as possible. To thaw, place it in the fridge overnight. Reheat as mentioned above. This method keeps the flavors nice. For salmon, cooking time varies with thickness. A 6 oz fillet cooks in about 12-15 minutes at 400°F (200°C). Thicker fillets may need an extra 2-3 minutes. Always check that the salmon flakes easily with a fork. This ensures it is fully cooked and safe to eat. Sweet chili salmon pairs well with: - Steamed rice - Quinoa - Roasted sweet potatoes - Mixed green salad These sides balance the flavors and round out your meal nicely. Each option adds nutrition and texture. Yes, you can prep this dish ahead. Marinate the salmon and broccolini for 30 minutes to an hour before cooking. Store them in the fridge until you’re ready to bake. You can also roast everything and store leftovers in the fridge for up to three days. Just reheat gently to avoid overcooking. Broccolini is not the same as broccoli. It is a hybrid of broccoli and Chinese broccoli. Broccolini has smaller florets and longer stems. It is more tender and has a sweeter taste than broccoli. Nutritionally, both are healthy, but broccolini has more vitamin C and iron per serving. This recipe highlights the simple yet delicious process of making sweet chili salmon with broccolini. You learned about essential ingredients, step-by-step cooking, and helpful tips. Experimenting with variations can keep meals fresh and exciting. Don’t forget about storage tips to save leftovers for later. With this knowledge, you can impress your family and friends with your cooking. Embrace these ideas, enjoy your meals, and have fun in the kitchen!

Sheet Pan Sweet Chili Salmon & Broccolini Delight

If you crave a meal that’s fast, fun, and flavorful, you’ve found it! My Sheet Pan Sweet Chili Salmon &

To create No Bake Lemon Blueberry Cheesecake Bars, you need specific ingredients. Each item plays a key role in flavor and texture. - 1 cup graham cracker crumbs - 1/4 cup unsweetened shredded coconut - 1/2 cup unsalted butter, melted - 2 (8 oz) packages cream cheese, softened - 1 cup powdered sugar - 1/4 cup fresh lemon juice - Zest of 1 lemon - 1 teaspoon vanilla extract - 1 cup heavy whipping cream - 1 cup fresh blueberries (plus extra for topping) Graham cracker crumbs form a crunchy base. The shredded coconut adds a subtle sweetness. Melted butter binds the crust and gives it richness. Cream cheese creates a creamy filling with a smooth bite. Powdered sugar sweetens the mix without graininess. Fresh lemon juice and zest provide bright flavor and zestiness. Vanilla extract enhances the overall taste. Heavy cream adds lightness and fluffiness. Fresh blueberries give the bars their signature color and burst of flavor. You can adjust the amounts to suit your taste. If you want a sweeter bar, add more sugar. For a tangier flavor, increase the lemon juice or zest. Each ingredient contributes to a delicious treat you will love! - First, grab a mixing bowl. Combine 1 cup of graham cracker crumbs and 1/4 cup of shredded coconut. - Next, pour in 1/2 cup of melted unsalted butter. Mix it well until everything is combined. - Now, press this mixture firmly into the bottom of an 8x8-inch baking pan. Make sure it is even. - Chill the crust in the refrigerator while you prepare the filling. - In a large mixing bowl, take 2 packages of softened cream cheese. Beat it until it is smooth and creamy. - Gradually add 1 cup of powdered sugar. Keep mixing until it is fully blended. - Then, mix in 1/4 cup of fresh lemon juice, the zest of 1 lemon, and 1 teaspoon of vanilla extract. Make sure this is well combined. - In a separate bowl, whip 1 cup of heavy cream until stiff peaks form. - Gently fold the whipped cream into the cream cheese mixture. Be careful to keep it light and fluffy. - Next, fold in 1 cup of fresh blueberries. Make sure to distribute them evenly without crushing them. - Pour the cheesecake filling over the chilled crust. Smooth it out with a spatula. - Top with extra blueberries for decoration. - Cover the pan with plastic wrap and refrigerate for at least 4 hours, or until set. You can easily swap graham cracker crumbs for other options. Try using crushed cookies like Oreos or even nuts for a gluten-free crust. For a dairy-free or vegan option, use vegan cream cheese and coconut cream in place of heavy cream. This keeps the taste rich and creamy without dairy. To keep your cheesecake light and fluffy, beat the cream cheese well before adding other ingredients. When you whip the cream, make sure to get stiff peaks. This helps the filling stay airy. Chilling is key! Let the bars set for at least four hours. This helps them firm up and makes slicing easier. Serve the cheesecake bars on a pretty plate. Top them with extra blueberries and a sprinkle of powdered sugar for a sweet touch. You can also add lemon zest for color and flavor. For a fun twist, place mint leaves beside the bars. This adds freshness and a pop of green! {{image_2}} You can change the fruit in these cheesecake bars. Try strawberries for a sweet twist. Raspberries add a tart kick. You can even mix fruits for fun flavors. Adding herbs like mint or basil gives a fresh taste. A pinch of cinnamon can also boost the flavor. Experiment to find your favorite combo! If you want to cut sugar, use honey or maple syrup. Both options add a unique taste. Adjust the amount to fit your sweet tooth. Start with less and add more if needed. This way, you can make it just right for everyone. For a gluten-free option, use almond flour or gluten-free cookies. These still give a nice crunch. You can also switch up the cookies. Try chocolate wafers for a deeper flavor. Nuts like pecans or walnuts work well too. They add a nice texture to the crust. To keep your No Bake Lemon Blueberry Cheesecake Bars fresh, store them in the fridge. Use an airtight container or cover the pan tightly with plastic wrap. This helps prevent drying out or absorbing other smells from the fridge. These bars can last up to five days when stored properly. If you want to keep them longer, freezing is a great option. First, cut the cheesecake into squares. Place the squares in a single layer on a baking sheet. Freeze them for about two hours until firm. Then, transfer the squares into a freezer-safe bag or container. Be sure to label it with the date. They can stay in the freezer for up to three months. When you're ready to enjoy them, just take out the desired amount. Let them thaw in the fridge for a few hours or overnight. You can also serve them slightly frozen for a refreshing treat. Check your cheesecake bars before eating. If you see any mold, or if they smell sour, it’s best to discard them. If the texture feels slimy or off, don’t take the chance. Fresh is always best when it comes to desserts like these. Enjoy them while they are still tasty! Yes, you can. I suggest making these bars a day before you serve them. This gives the bars time to chill and set properly. The flavors also blend better when they sit overnight. Just cover them well in the fridge to keep them fresh. If you don’t have fresh blueberries, you can use other fruits. Strawberries, raspberries, or blackberries work well. You can even try diced mango or peaches for a twist. Just make sure the fruit is ripe and sweet to match the lemon flavor. Yes, you can use low-fat cream cheese. However, it may change the texture a bit. The bars may not be as rich and creamy. They might be slightly firmer too. If you prefer a lighter option, it is a good choice. Just remember, the taste will be a little different. This blog post gave you a simple recipe for No Bake Lemon Blueberry Cheesecake Bars. You learned about each ingredient and how to combine them correctly. You can choose different fruits and customize flavors for variety. Remember to chill your bars for the best taste and texture. Follow the tips for storage to keep your dessert fresh. Now, enjoy making this treat in your kitchen. You’ll impress everyone with your tasty creation!

No Bake Lemon Blueberry Cheesecake Bars Delightful Treat

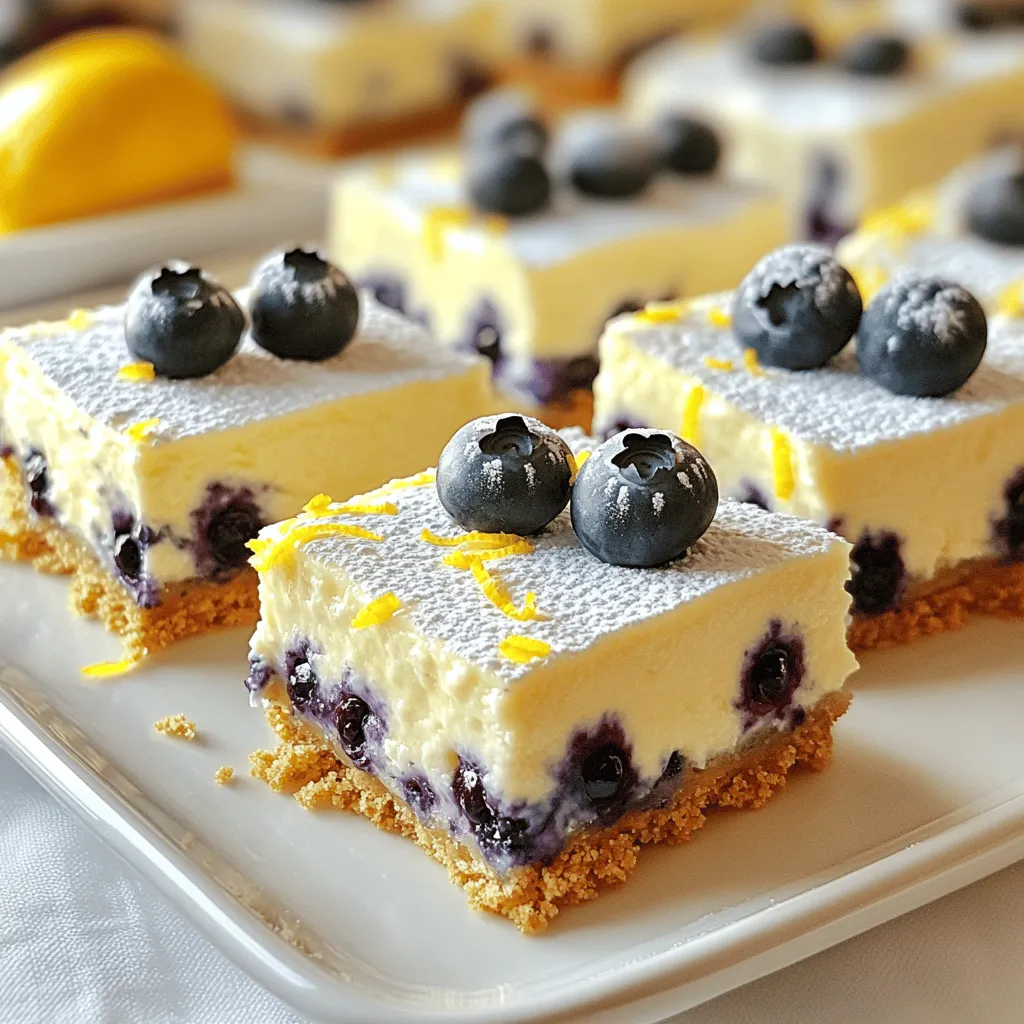
If you’re craving a sweet, tangy treat that’s both easy and delicious, you’re in the right place! These No Bake

- 1 cup unsweetened almond milk - 1/2 cup Greek yogurt - 1/3 cup unsweetened cocoa powder - 1/4 cup honey or maple syrup - 1 scoop chocolate protein powder - 1 teaspoon vanilla extract - A pinch of salt The main ingredients for these pudding cups are simple yet powerful. Unsweetened almond milk gives a creamy base. Greek yogurt adds protein and thickens the mix. Unsweetened cocoa powder brings rich chocolate flavor. Honey or maple syrup sweetens it and adds a lovely taste. A scoop of chocolate protein powder boosts the health factor. Vanilla extract adds depth, while a pinch of salt balances everything out. - Whipped coconut cream - Fresh berries - Chopped nuts Toppings can turn this treat into a showstopper. Whipped coconut cream adds a light, fluffy touch. Fresh berries not only look great but also bring a burst of flavor. Chopped nuts give a satisfying crunch. You can mix and match these toppings to suit your taste or mood. - In a medium bowl, combine 1 cup of unsweetened almond milk, 1/2 cup of Greek yogurt, and 1/4 cup of honey or maple syrup. - Whisk until smooth and well mixed. This base is creamy and rich. - Next, add 1/3 cup of unsweetened cocoa powder, 1 scoop of chocolate protein powder, 1 teaspoon of vanilla extract, and a pinch of salt. - Keep whisking until the mixture looks creamy and smooth. This step brings out the deep chocolate flavor. - Now, divide the pudding mixture into small cups. - Cover the cups with plastic wrap and refrigerate for 1-2 hours to help it set. Chilling gives it a nice texture. Whisking is key to getting a creamy pudding. Make sure to mix the almond milk, Greek yogurt, and sweetener until smooth. This helps break up any lumps. If you find the pudding too thick, add a splash more milk. Taste your mix before you chill it. If you want it sweeter, add a little more honey or maple syrup. Presentation makes a big difference. For a fun topping, try whipped coconut cream. Fresh berries add color and flavor. Chopped nuts give a nice crunch. When serving at gatherings, use clear cups. This way, everyone can see the lovely layers. It makes your dessert look fancy and inviting. One common mistake is using too much cocoa powder. This can make your pudding too bitter. Start with the amount in the recipe and adjust from there. Another mistake is not refrigerating long enough. The pudding needs 1-2 hours to set properly. If you skip this step, it won’t have the right texture. {{image_2}} You can easily make this dessert dairy-free. To do this, substitute Greek yogurt with plant-based yogurt. Look for options made from almond, coconut, or soy. These yogurts provide creaminess and flavor without dairy. Next, choose a milk that fits your needs. Unsweetened almond milk works great, but you can use any plant-based milk. Options like oat milk or cashew milk will add richness. The key is to pick what you like best. Want to spice things up? Add a pinch of cinnamon or a dash of chili powder. These spices can give your pudding a warm twist. They make each bite exciting and unique. You can also play with protein powder flavors. Try vanilla or even peanut butter. Each choice changes the taste and keeps things fresh. Don't be afraid to experiment! If you want to change the sweetener, there are great swaps. Honey and maple syrup work best, but you can try stevia or agave nectar. These options can help cut down on sugar if you prefer. Always taste as you go. This helps you find the balance you like. Adjusting sweetness makes your pudding perfect for your palate. To keep your protein dark chocolate pudding cups fresh, store them in the fridge. Place them in airtight containers to avoid moisture and odors. These cups will stay tasty for about 4 to 5 days. If you want the best flavor, eat them within the first 3 days. You can freeze the pudding for later. First, let the pudding cool completely. Then, pour it into freezer-safe containers. Leave some space at the top, as it will expand. To thaw, move the cups to the fridge overnight. This keeps the texture nice. Avoid microwaving to thaw, as it can change the pudding's consistency. Use glass or BPA-free plastic containers for storage. These types help keep the pudding fresh and safe. If you want to be eco-friendly, consider using reusable silicone containers. They are great for saving the planet and work well for your pudding. Each serving has about 150 calories. Here’s a quick breakdown of the nutrition per serving: - Calories: 150 - Protein: 10g - Carbohydrates: 19g - Fat: 4g - Fiber: 3g This pudding is not only tasty but also packs in good nutrients. Yes, you can prepare these pudding cups ahead of time. Just make them and store in the fridge. I recommend making them the night before. This way, they set nicely. Cover each cup tightly with plastic wrap. They will stay fresh for up to three days. The best protein powder depends on your taste and needs. I often use chocolate whey protein for a rich flavor. For vegan options, try plant-based protein powders. Look for ones that are low in sugar and have good reviews. This helps ensure you get a tasty pudding. Yes, these pudding cups are great for kids! They are fun to eat and loaded with protein. The Greek yogurt gives calcium, while cocoa adds antioxidants. You can even let your kids choose toppings. Fresh berries or nuts can make them even more appealing. Protein Dark Chocolate Pudding Cups are simple and flexible. You learned the key ingredients, step-by-step instructions, and helpful tips for the best results. You can also explore fun variations to suit your taste. These pudding cups are a tasty way to boost your protein intake. They are perfect for any occasion or snack time. Enjoy creating these delicious treats with friends and family!

Protein Dark Chocolate Pudding Cups Delightful Treat

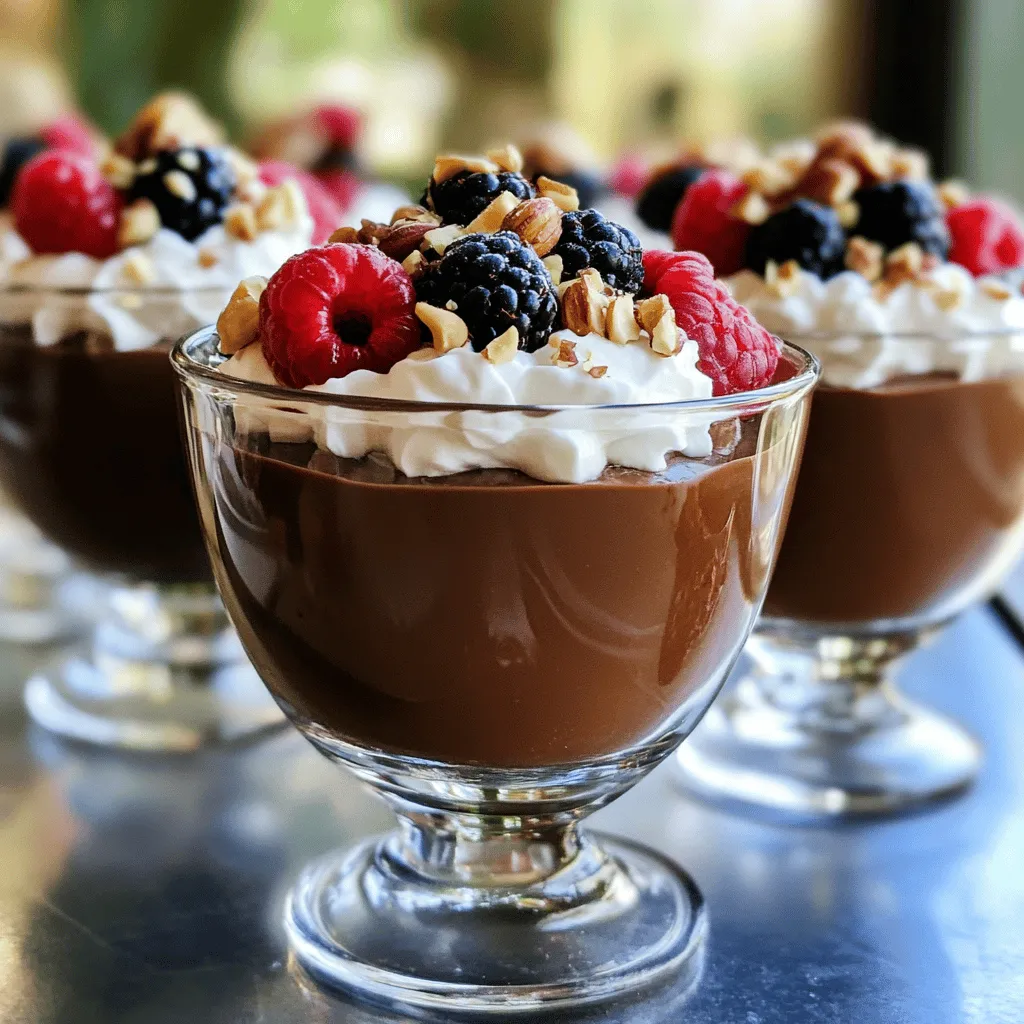
Craving a sweet treat that won’t ruin your diet? I’ve got just the thing! These Protein Dark Chocolate Pudding Cups

- 1 cup rolled oats - 1 ½ cups unsweetened almond milk (or milk of choice) - 1 medium apple, peeled, cored, and diced - 2 tablespoons caramel sauce (store-bought or homemade) - 1 tablespoon maple syrup (optional, for sweetness) - 1 teaspoon ground cinnamon - ½ teaspoon vanilla extract - ¼ cup Greek yogurt (optional, for creaminess) - Chopped nuts (walnuts or pecans) for topping - Additional caramel sauce for drizzling on top Gathering the right ingredients is key. I love using rolled oats because they soak up the flavors well. Almond milk works great, but any milk you prefer is fine too. For sweetness, I usually add caramel sauce and maple syrup. If you want more flavor, cinnamon and vanilla are must-haves. Don't forget the apple! A fresh, chopped apple gives the oats a nice crunch. Greek yogurt adds creaminess, but you can skip it if you want. Toppings like chopped nuts make each bite special, and a drizzle of caramel sauce on top is the perfect finish. This simple list of ingredients makes for a tasty breakfast treat. You can customize it to your liking, making it fun to experiment. Start with this base and let your creativity shine! - In a large bowl, combine 1 cup of rolled oats with 1 ½ cups of almond milk. - Stir well to ensure all oats are soaked. - Add 1 diced apple, 2 tablespoons of caramel sauce, 1 tablespoon of maple syrup, 1 teaspoon of ground cinnamon, ½ teaspoon of vanilla extract, and ¼ cup of Greek yogurt if you want extra creaminess. - Mix everything until it is well blended. - Divide the mixture into two jars or airtight containers. - Seal the jars and place them in the fridge overnight. This helps the oats soften and absorb flavors. - In the morning, take the jars out and stir the oats well. - If the mixture feels too thick, add a splash of almond milk to make it creamy. - Top your oats with chopped nuts and an extra drizzle of caramel sauce for a sweet finish. - Make sure your oats are fully submerged in the milk. This helps them soften well overnight. - You can adjust the sweetness with maple syrup. A little goes a long way, so add as needed. - Try using different types of apples. Granny Smith gives a tart bite, while Fuji adds sweetness. - Experiment with toppings like chopped nuts, seeds, or dried fruits. Each adds a new flavor and crunch. {{image_2}} You can switch things up with different types of milk. Try cow's milk or oat milk. Each will give a unique taste. You can also swap Greek yogurt for dairy-free options. Coconut yogurt works well for a creamy texture. For extra spice, add nutmeg or ginger. Just a pinch can change the flavor. If you love chocolate, toss in some chocolate chips. Dried cranberries can also add a nice chewiness. These small additions can make your oats even more delightful. You can keep leftover caramel apple pie overnight oats in the fridge for up to three days. Use airtight containers to keep them fresh. I recommend glass jars for storing. They help you see the oats and keep flavors intact. Plastic containers work too, but glass is best. You can prepare these oats ahead for busy mornings. Just make the oats the night before and let them soak. If you want to store them longer, you can freeze them. To freeze, divide the mixture into jars, seal them well, and place them in the freezer. When you're ready to eat, move a jar to the fridge the night before. Let it thaw overnight, and it will be ready in the morning. Overnight oats last up to three days in the fridge. Store them in airtight containers to keep them fresh. I suggest using glass jars. They help you see the oats and look nice, too. If you notice any changes in smell or texture, it’s best to throw them out. You can use quick oats, but they change the texture. Quick oats soak up liquid faster, making the dish mushy. Rolled oats give a nice chewy bite. For the best taste, stick to rolled oats when making caramel apple pie overnight oats. To make this recipe vegan, swap Greek yogurt for a plant-based option. Use almond milk or any non-dairy milk. You can also use maple syrup as your sweetener. This way, you keep all the flavor without any animal products. Enjoy your delicious vegan caramel apple pie overnight oats! This blog post covered delicious overnight oats. We looked at ingredients, step-by-step prep, and storage tips. You can customize flavors and adjust sweetness to fit your taste. Remember, these oats are easy to make ahead for busy mornings. They last for three days, making them a perfect choice for quick breakfasts. Enjoy experimenting with different fruits and toppings for variety. This simple dish is healthy and flexible, so get creative and make it your own!

Caramel Apple Pie Overnight Oats Easy Morning Treat

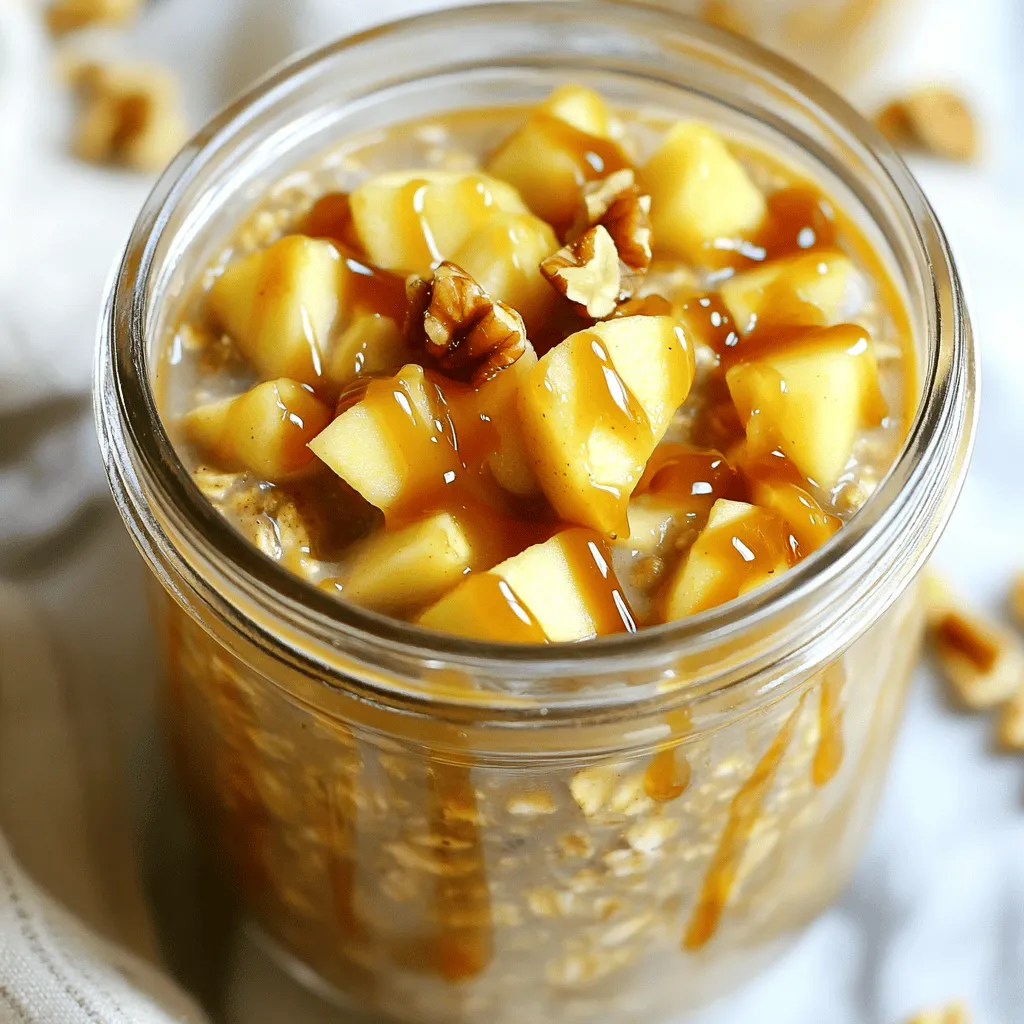
Start your day with a delicious twist on breakfast! Caramel Apple Pie Overnight Oats offer a sweet, tasty treat while

- 2 lbs boneless, skinless chicken breasts - 1 packet ranch seasoning mix - 1 cup chicken broth - 1 can diced tomatoes with green chilies (14.5 oz) - 1 can black beans, drained and rinsed - 1 cup corn kernels (fresh or frozen) - 1/2 cup diced red onion - 1 teaspoon garlic powder - Salt and pepper to taste - 8 small flour or corn tortillas The heart of these tacos is the chicken. I use two pounds of boneless, skinless chicken breasts. They stay moist and tender in the slow cooker. The ranch seasoning mix brings a creamy and zesty flavor. I always choose a good-quality packet for the best taste. The chicken broth helps to keep everything juicy as it cooks. Diced tomatoes with green chilies add a bit of heat and sweetness. The black beans offer protein and fiber, making the meal hearty. Corn kernels add sweetness and color. Diced red onion gives a nice crunch and flavor. I finish with garlic powder, salt, and pepper to round out the taste. - Shredded lettuce - Diced tomatoes - Shredded cheese - Avocado slices - Sour cream Toppings make these tacos fun and customizable. I love adding shredded lettuce for crunch. Diced tomatoes add freshness. Shredded cheese brings a creamy texture. Avocado slices add richness and healthy fats. Sour cream gives a tangy finish. Feel free to mix and match toppings to suit your taste! - Place the chicken in the slow cooker. - In a bowl, mix the ranch seasoning, chicken broth, diced tomatoes, black beans, corn, red onion, and garlic powder. Stir until well combined. - Pour the mixture over the chicken in the slow cooker. - Cover and cook on low for 6-8 hours or high for 4-5 hours. The chicken should be cooked through and tender. About 30 minutes before serving, shred the chicken using two forks right in the slow cooker. Mix it well with the sauce. - Warm the tortillas in a dry skillet or microwave. - Assemble the tacos by adding the chicken mixture and your favorite toppings. Options include shredded lettuce, diced tomatoes, cheese, avocado, and sour cream. Enjoy your flavorful tacos! To make your Slow Cooker Ranch Chicken Tacos even better, adjust the seasonings to your taste. Start by tasting the chicken mixture before serving. You can add more ranch seasoning, salt, or pepper as needed. This way, you ensure every bite is bursting with flavor. Also, consider adding a splash of lime juice. This small step brings a fresh and zesty kick to the dish. Lime juice brightens up the flavors and makes the tacos even more enjoyable. When shredding the chicken, use two forks. This method works best for breaking apart the meat directly in the slow cooker. Make sure to mix the chicken well with the sauce. This helps the chicken soak up all those tasty flavors. For cooking times, aim for 6-8 hours on low or 4-5 hours on high. This timing gives you tender chicken that falls apart easily. Always check that the chicken is cooked through for safety. Arranging your tacos well makes them look more appealing. Place the tacos on a large platter, with the fillings spilling out a bit. This draws in your guests and makes serving easier. Don’t forget garnishing! Fresh cilantro and lime wedges add color and freshness. A simple sprinkle of cilantro enhances the visual appeal. It also gives a nice herbal note that complements the tacos beautifully. {{image_2}} You can change the protein in these tacos. Try using ground beef or turkey. You could even use tofu for a tasty vegetarian option. Each choice gives the dish a unique twist. Next, think about the seasoning. While ranch seasoning is great, you can use taco seasoning too. This swap can add a fun kick to your meal. Experiment with different blends to find your favorite! If you need gluten-free options, use corn tortillas. They work just as well. You won’t miss the flour tortillas at all! For toppings, consider vegan choices. Use cashew cream instead of sour cream. You can also skip the cheese or use a plant-based cheese. These swaps keep the flavor high while meeting your dietary needs. Pair your tacos with sides like rice or a fresh salad. These sides balance the meal and add color to your plate. For gatherings, set up a taco bar! Lay out the tortillas, toppings, and fillings. This way, everyone can build their own tacos. It makes the meal fun and interactive! To keep your Slow Cooker Ranch Chicken Tacos fresh, store leftovers in an airtight container. Make sure to let them cool before sealing. You can keep the tacos in the fridge for up to three days. This keeps the flavors intact and safe to eat. If you want to save leftovers for later, freezing is a great option. Place the chicken mixture in a freezer-safe bag or container. Remove as much air as you can before sealing. You can freeze the leftovers for up to three months. When you're ready to eat, thaw the mixture overnight in the fridge. You have two main ways to reheat your tacos. You can use the microwave or stovetop. For the microwave, heat the chicken mixture in 30-second intervals until warm. Stir each time to keep it even. If you choose the stovetop, warm it in a skillet over medium heat. Stir often to prevent sticking. To help maintain the flavor and texture, add a splash of chicken broth if it seems dry. Enjoy your tasty tacos just as much the second time! Yes, you can make these tacos in advance. Meal prepping helps save time. - Cook the chicken: Prepare the chicken mixture and let it cool. - Store in the fridge: Place the cooled mixture in an airtight container. - Reheat before serving: When ready to eat, warm the mixture on the stove or microwave. This way, you have tasty tacos ready to go whenever you need a quick meal. If you don't have ranch seasoning, you can make your own. Here are some common spices to use: - Dried dill: This adds that classic ranch flavor. - Garlic powder: Use this for extra taste. - Onion powder: It gives a nice depth of flavor. - Parsley: Fresh or dried works well. Mix these ingredients to create your own ranch seasoning mix. To ensure chicken is safe to eat, check its temperature. The safe cooking temperature for chicken is: - 165°F (75°C): Use a meat thermometer to check the thickest part of the chicken. When the chicken reaches this temperature, it is fully cooked and safe to enjoy in your tacos. This blog post explored how to make Slow Cooker Ranch Chicken Tacos. We covered key ingredients, step-by-step cooking methods, and helpful tips to enhance flavor. You now have options for variations and storage tips, ensuring the tacos stay fresh. Making these tacos is fun and easy, perfect for gatherings or weeknight dinners. With simple swaps and topping ideas, you can customize to your taste. Enjoy every bite of these tasty tacos!

Slow Cooker Ranch Chicken Tacos Flavorful and Quick

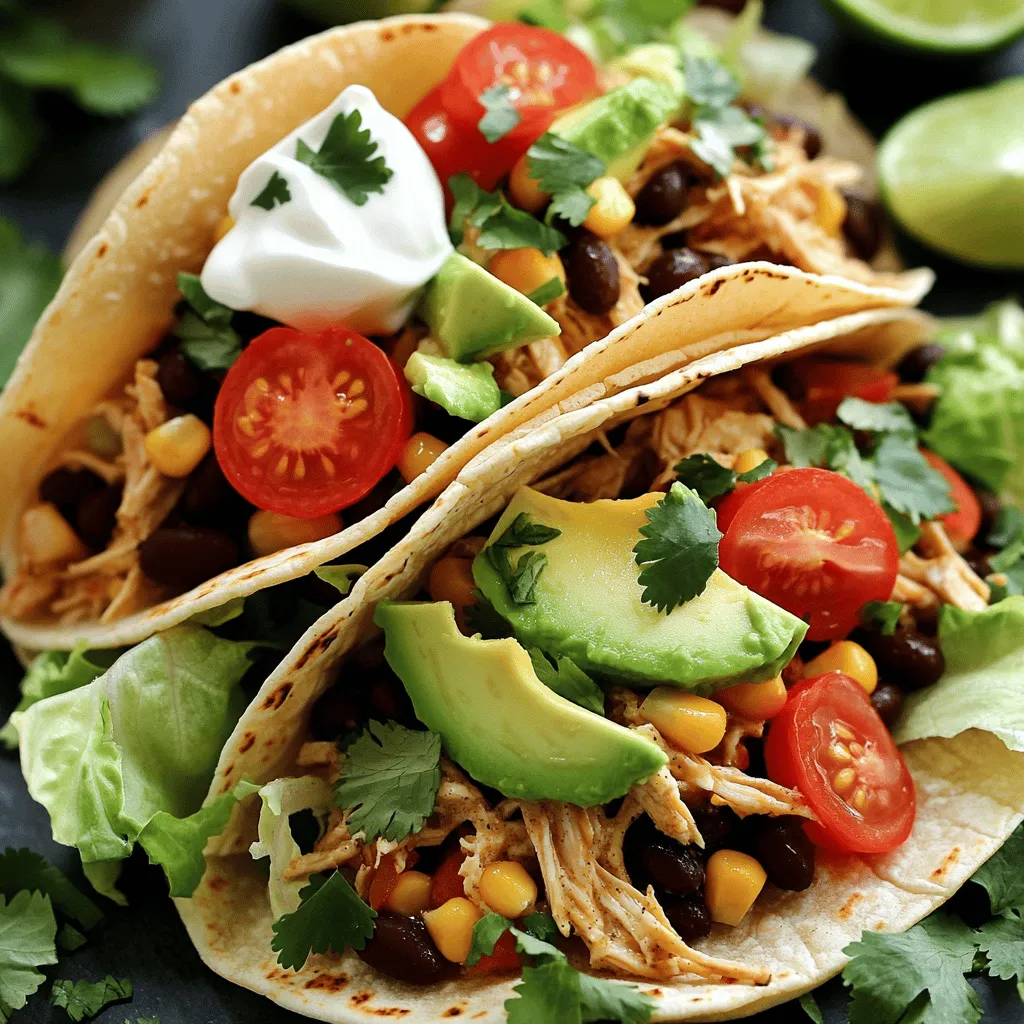
Are you ready for a quick and tasty dinner? Slow Cooker Ranch Chicken Tacos are your answer! This easy recipe

To make this tasty dish, gather the following ingredients: - 12 oz (340g) of pasta (penne or fettuccine works well) - 1 head of garlic - 2 tablespoons olive oil - 4 cups vegetable broth - 1 cup heavy cream - 1 cup grated Parmesan cheese - 1 teaspoon Italian seasoning - Salt and pepper to taste - Fresh parsley, chopped, for garnish You can mix it up with these swaps: - Use whole wheat pasta for a healthier option. - Swap heavy cream with coconut milk for a lighter choice. - Try nutritional yeast instead of Parmesan for a dairy-free flavor. - Choose chicken or beef broth if you want a richer taste. To make your dish even better, consider these garnishes: - Extra grated Parmesan cheese on top. - A sprinkle of red pepper flakes for heat. - A drizzle of olive oil for added richness. - Fresh basil or chives for a pop of color and flavor. First, you need to preheat your oven to 400°F (200°C). Grab a whole head of garlic. Slice off the top to show the cloves inside. Drizzle one tablespoon of olive oil over it. Wrap the garlic tightly in aluminum foil. Place it in the oven for about 30-35 minutes. The cloves will become soft and sweet as they roast. This step adds a rich flavor to our creamy pasta. While the garlic roasts, take a large pot and warm one tablespoon of olive oil over medium heat. Add your uncooked pasta, like penne or fettuccine, to the pot. Toast the pasta lightly for 2-3 minutes. Stir it often to avoid sticking. Now, pour in four cups of vegetable broth. Add one teaspoon of Italian seasoning along with salt and pepper to taste. Bring this mixture to a boil. Once boiling, lower the heat and let it simmer. Stir every now and then until the pasta is al dente, about 10-12 minutes. When the garlic is done roasting, let it cool for a few minutes. Squeeze the soft cloves from their skins into a bowl. Mash the cloves into a paste. Check the pasta; if it has absorbed most of the broth, it’s time to add the creamy goodness. Stir in one cup of heavy cream and one cup of grated Parmesan cheese. Add the mashed roasted garlic next. Mix everything together until the pasta is fully coated and creamy. If you need to, taste and adjust the seasoning. Let it simmer for another 2-3 minutes to thicken. Now, you’re ready to serve this delightful dish! To roast garlic, start by preheating your oven to 400°F (200°C). Slice off the top of the garlic head to show the cloves. Drizzle one tablespoon of olive oil over it. Wrap the garlic in aluminum foil to keep it moist. Roast it for 30 to 35 minutes. You want the cloves to be soft and golden brown. This makes the garlic sweet and creamy. For the best pasta, choose penne or fettuccine. Before adding any liquid, toast the uncooked pasta in a pot with a tablespoon of olive oil. Stir it for 2 to 3 minutes. This step adds flavor and helps the pasta stay firm. When you add vegetable broth, make sure it covers the pasta. Stir often to stop it from sticking. Cook until it is al dente, which takes about 10 to 12 minutes. If your sauce is too thick, add a splash of vegetable broth or cream. Stir well to combine. If it is too thin, let it simmer for a few more minutes. This helps the sauce thicken up. Remember, the sauce should coat the pasta nicely. Taste it after adding the cream and cheese to make sure the seasoning is just right. {{image_2}} You can boost your meal by adding protein. Chicken, shrimp, or tofu are great choices. For chicken, use bite-sized pieces. Cook it in the pot before adding pasta. For shrimp, toss them in during the last few minutes of cooking. This way, they cook perfectly without getting tough. If you prefer tofu, use firm tofu cut into cubes. Sauté it until golden before adding pasta. This adds flavor and texture. All these options make your dish heartier and more filling. Want a vegan version? Swap heavy cream for a dairy-free cream. Almond, coconut, or cashew cream works well. Use nutritional yeast instead of Parmesan for a cheesy flavor. It gives a nice depth without dairy. For the broth, make sure to use vegetable broth. Check labels for animal products. This keeps your meal plant-based and delicious. Adding vegetables is easy and fun! Spinach, peas, or bell peppers work well. You can stir them in during the last few minutes of cooking. This adds color and nutrients. Try sautéing mushrooms or zucchini with garlic before adding pasta. These add extra flavor and make your dish more filling. You can even toss in broccoli florets for a crunchy bite. Enjoy your one-pot pasta while boosting its health benefits! Store your leftover pasta in an airtight container. Let it cool down first. This will keep it fresh. It's best to eat within three days. To reheat, place the pasta in a pot. Add a splash of water or broth. Heat over low to medium heat. Stir often to avoid burning. You can also use the microwave. Heat in short bursts, stirring in between. You can freeze this dish for later. Use a freezer-safe container. Make sure to leave some space for expansion. It can last up to three months in the freezer. When ready to eat, thaw it in the fridge overnight. Reheat as directed above. I recommend using penne or fettuccine. Both types hold the sauce well. You can also try other pasta shapes like rotini or farfalle. The key is to pick a pasta that can soak up all that creamy goodness. While garlic powder is a quick option, it won't give the same flavor. Roasted garlic has a sweet, rich taste that adds depth to this dish. If you must use garlic powder, start with a small amount, about one teaspoon. Adjust to your taste, but know it won’t be the same. To make this dish gluten-free, swap regular pasta for gluten-free pasta. Many stores offer great options now. You can find gluten-free penne or fettuccine. Just follow the cooking time on the package, as it may differ. One-Pot Roasted Garlic Creamy Pasta is simple and delicious. You learned about key ingredients, easy steps, and handy tips. We explored tasty variations and how to store your meal. This dish is great for any occasion. You can customize it to fit your needs. By following these tips, you’ll always enjoy a creamy pasta treat. Now, go make this dish your own!

One-Pot Roasted Garlic Creamy Pasta Delightful Meal

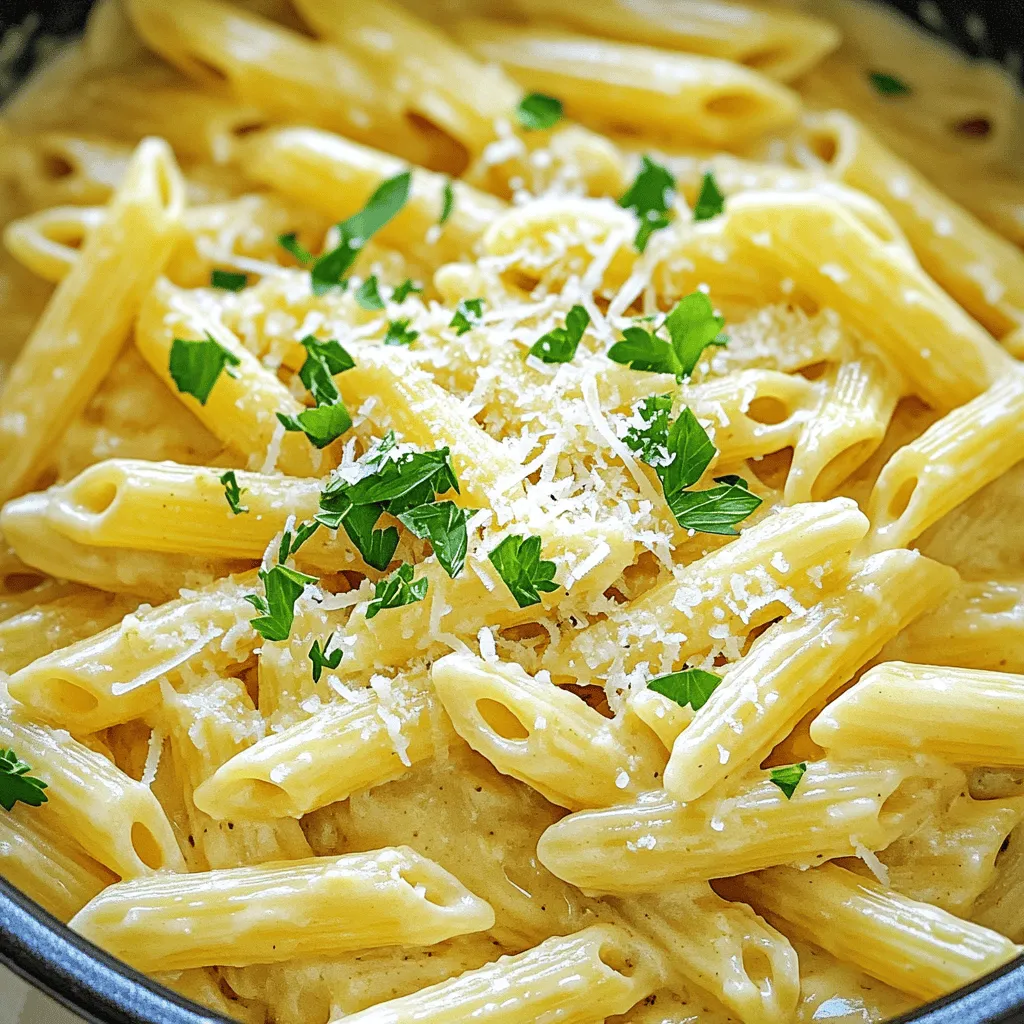
Craving a delicious meal without the messy cleanup? Let me introduce you to my One-Pot Roasted Garlic Creamy Pasta. This

Older posts
Newer posts
← Previous Page1 … Page20 Page21 Page22 … Page82 Next →

dsad

© 2026 Recipes Pursuit • Built with GeneratePress

Our Policies

  • Copyright Policy
  • Cookie Policy
  • GDPR Policy
  • Privacy Policy
  • Disclaimer
  • Terms Of Use

More Information

  • Home
  • About
  • Contact
  • Appetizers
  • Dessert
  • Dinner
  • Drinks
©2026, Recipes Pursuit About Back To Top