Skip to content
DisclaimerTerms Of UseGDPR PolicyCookie Policy

Recipes Pursuit

  • Home
  • Drinks
  • Appetizers
  • Dinner
  • Dessert
  • About
  • Contact
  • Privacy Policy
DisclaimerTerms Of UseGDPR PolicyCookie Policy

NO-ING-IMG

To make Honey Mustard Chicken Thighs, you will need these key ingredients: - 4 bone-in chicken thighs, skin-on - 1/4 cup honey - 1/4 cup Dijon mustard - 2 tablespoons apple cider vinegar - 1 tablespoon olive oil - 3 cloves garlic, minced - 1 teaspoon smoked paprika - Salt and pepper to taste - Fresh thyme or parsley for garnish Each ingredient plays a vital role in creating the dish. The bone-in thighs keep the meat juicy and tender. Honey adds sweetness, while Dijon mustard gives a nice tang. Apple cider vinegar adds a bit of acidity to balance the flavors. Olive oil keeps everything moist during cooking. Garlic adds depth, and smoked paprika gives a hint of warmth. Don't forget to season with salt and pepper for the best taste. Finally, fresh herbs make your dish look beautiful and add a burst of freshness at the end. Whisking the sauce Start by grabbing a mixing bowl. Add 1/4 cup honey, 1/4 cup Dijon mustard, 2 tablespoons apple cider vinegar, and 1 tablespoon olive oil. Toss in 3 minced garlic cloves, 1 teaspoon smoked paprika, and a pinch of salt and pepper. Whisk it all together until it blends smoothly. Marinating the chicken Next, take 4 bone-in chicken thighs and place them in a large resealable bag or a shallow dish. Pour your sauce over the chicken. Make sure each piece gets a nice coat. Seal the bag or cover the dish. Let it chill in the fridge for at least 1 hour. For best flavor, marinate overnight. Preheating the oven When you're ready, preheat your oven to 400°F (200°C). This step is key for even cooking. Line a baking dish with parchment paper. This makes clean-up a breeze. Placing the chicken in the baking dish Take the marinated chicken out of the fridge. Place the thighs skin-side up in your baking dish. Pour any leftover marinade over the chicken for extra flavor. Baking time and checking doneness Bake the chicken for 35 to 40 minutes. The skin should turn golden brown. To check if it’s done, insert a meat thermometer into the thickest part of the thigh. It should read 165°F (75°C) to be safe to eat. Broiling for crispy skin For a nice crunch, broil the chicken on high for 2 to 3 minutes. Watch it closely to avoid burning. Once done, take the chicken out and let it rest for 5 minutes. This helps keep it juicy. Garnish with fresh thyme or parsley before serving. Enjoy your flavorful dish! Marinating chicken is key to great flavor. It helps the meat soak up all the tasty juices. I recommend marinating your chicken for at least one hour. However, marinating overnight gives the best results. The longer you let it sit, the more flavor it gains. To enhance flavors, mix in fresh herbs or spices. You can try adding rosemary or thyme for a fragrant twist. For perfect doneness, always check the internal temperature. It should reach 165°F (75°C) for safety. If you prefer crispy skin, broil the chicken for a few minutes at the end. This adds a nice crunch. You can also grill the chicken for a smoky flavor. Just keep an eye on it to prevent burning. Pair your honey mustard chicken with side dishes that balance its sweetness. Roasted vegetables, like carrots and Brussels sprouts, work well. You can also serve it with fluffy rice or creamy mashed potatoes. For garnish, use fresh thyme or parsley. They add color and freshness to your plate. {{image_2}} You can change the taste of your honey mustard chicken thighs with simple tweaks. Adding spices like cayenne pepper brings heat. Fresh herbs like rosemary or oregano add depth. You can also swap honey for maple syrup for a unique touch. If you want more tang, use lemon juice instead of apple cider vinegar. This makes a bright flavor that pairs well with chicken. Try grilling instead of baking for a smoky flavor. Just marinate the chicken as usual. Preheat your grill to medium-high, then cook the thighs skin-side down. Grill for about 6-8 minutes per side. Make sure the internal temp hits 165°F (75°C). Another option is using a slow cooker. Place the marinated chicken in the slow cooker with the sauce. Cook on low for 6-8 hours or high for 3-4 hours. This method makes the chicken super tender and full of flavor. To store leftover honey mustard chicken thighs, let them cool. Place the chicken in an airtight container. This keeps it fresh for 3 to 4 days in the fridge. Make sure to cover the container tightly. You can also wrap the chicken in plastic wrap. This extra layer helps prevent drying. If you want to keep the chicken longer, freezing is a great choice. First, let the chicken cool completely. Then, wrap each piece in plastic wrap. Place the wrapped chicken in a freezer-safe bag. Remove as much air as possible. This helps avoid freezer burn. You can freeze the chicken for up to 3 months. When it's time to eat, reheating is simple. For best results, use the oven. Preheat it to 350°F (175°C). Place the chicken on a baking sheet, cover it with foil, and heat for 20-25 minutes. This keeps the chicken juicy. You can also use the microwave, but it may dry out the chicken. Heat it in short bursts, checking often. Enjoy your delicious honey mustard chicken! Yes, you can use boneless chicken thighs. They will cook faster without the bone. Just adjust the cooking time. Bake them for about 25-30 minutes. Check the internal temperature to ensure it reaches 165°F. If you don’t have Dijon mustard, use yellow mustard. You can also try whole grain mustard. These will change the flavor slightly but still taste great. Honey mustard will work too, but adjust the honey amount. Marinate the chicken for at least 1 hour. For the best flavor, marinate it overnight. The longer it sits, the more the flavors blend together. This gives a great taste to the chicken. Broiling is not necessary, but it helps achieve crispy skin. If you want that nice crunch, broil for 2-3 minutes at the end. Keep an eye on it to avoid burning. It adds a lovely finish to the dish. Yes, you can make this recipe in advance. Marinate the chicken and store it in the refrigerator. You can also bake it ahead of time. Just reheat it in the oven before serving. This makes meal prep easy. This blog post walked you through a tasty recipe for bone-in chicken thighs. We started with key ingredients like honey, Dijon mustard, and herbs. Then, I shared steps for marinating, baking, and adding finishing touches. You learned tips for perfect doneness and enjoyed variations for flavors and cooking methods. Remember, proper storage keeps leftovers fresh. Now you can impress anyone with this delicious dish!

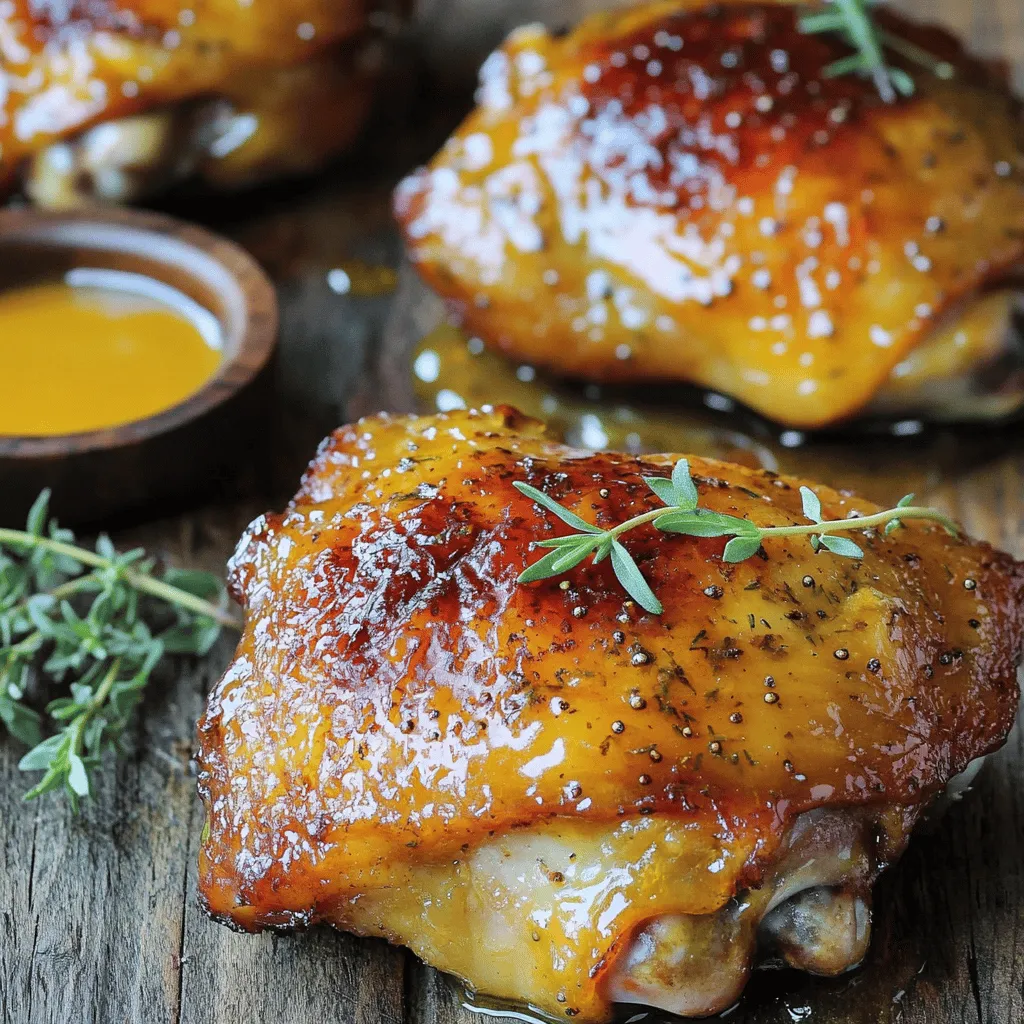
Honey Mustard Chicken Thighs Savory and Simple Recipe

Are you ready to elevate your dinner game with a dish that’s both savory and simple? Honey Mustard Chicken Thighs

To make Air Fryer Cinnamon Sugar Donut Holes, you need: - 1 cup all-purpose flour - 1/2 cup granulated sugar - 1 tablespoon baking powder - 1/2 teaspoon ground cinnamon (plus more for sprinkling) - 1/4 teaspoon salt - 1/2 cup milk - 1/4 cup unsalted butter, melted - 1 large egg - 1 teaspoon vanilla extract - 1/4 cup granulated sugar (for coating) - 2 tablespoons unsalted butter, melted (for coating) You can use different ingredients if needed. Here are some tips: - Flour: Whole wheat flour works too, but it may change the texture. - Sugar: You can swap granulated sugar for brown sugar for a richer taste. - Milk: Any milk, like almond or oat milk, is fine. Just adjust for taste. - Butter: Coconut oil is a good plant-based alternative to butter. - Egg: Use a flaxseed meal (1 tablespoon mixed with 2.5 tablespoons water) for a vegan option. Store your ingredients properly to keep them fresh: - Flour: Keep it in a cool, dry place. A sealed bag or container works best. - Sugar: Store in an airtight container to prevent clumping. - Butter: Refrigerate it, and use within a couple of weeks. - Milk: Keep it chilled in the fridge and check the expiration date. By following these tips, you'll be set for a fun baking adventure! To make Air Fryer Cinnamon Sugar Donut Holes, start by gathering all your ingredients. You need: - 1 cup all-purpose flour - 1/2 cup granulated sugar - 1 tablespoon baking powder - 1/2 teaspoon ground cinnamon (plus more for sprinkling) - 1/4 teaspoon salt - 1/2 cup milk - 1/4 cup unsalted butter, melted - 1 large egg - 1 teaspoon vanilla extract - 1/4 cup granulated sugar (for coating) - 2 tablespoons unsalted butter, melted (for coating) Next, preheat your air fryer to 350°F (175°C) for about 5 minutes. This helps the donut holes cook evenly and become nice and fluffy. 1. In a large bowl, mix the flour, 1/2 cup sugar, baking powder, 1/2 teaspoon cinnamon, and salt together. Whisk until everything is well combined. 2. In another bowl, combine the milk, melted butter, egg, and vanilla extract. Mix until smooth. 3. Pour the wet mixture into the dry mixture. Stir gently until combined. It’s alright if the batter is a bit lumpy; too much mixing can make the donut holes tough. 4. Use a small cookie scoop or your hands to form balls about 1 inch in size. Place them on a parchment-lined tray. 5. Lightly spray the air fryer basket with non-stick cooking spray. Place the donut holes in a single layer without touching each other. 6. Air fry for 5-6 minutes. They should be golden brown. Insert a toothpick in the center to check if they are done; it should come out clean. 7. While they cook, mix 1/4 cup sugar with 1 teaspoon cinnamon in a small bowl for the coating. 8. Once the donut holes are ready, brush them with melted butter. Roll them in the cinnamon-sugar mix until they are fully coated. 9. Repeat the air frying for any remaining dough. Make sure they have enough space in the basket to cook evenly. - Always preheat your air fryer. This step helps create a nice texture. - Do not overcrowd the basket. Give each donut hole room to expand. - Keep an eye on cooking time. Every air fryer is different. Adjust as needed. - Use a toothpick to check for doneness. It should come out clean. - If you like them extra crispy, air fry for another minute or two, but watch carefully to avoid burning. To make great donut holes, follow these simple tips. First, preheat your air fryer for five minutes. This helps the donut holes cook evenly. Second, use a light spray of non-stick cooking spray. This prevents sticking and keeps them golden. When forming the dough balls, aim for about one inch in size. This size cooks well without burning. Avoid overcrowding the basket. Give each donut hole space to breathe. This ensures they cook and crisp up nicely. If your donut holes are too dry, you may have overmixed the dough. Mix just until combined. A few lumps are okay. If they burn, lower the cooking time. Check them at five minutes. You want a light golden brown color. If they stick to the basket, try using parchment paper next time. Lightly spray it with non-stick spray for best results. If they come out too soggy, they may need more air circulation. Make sure to not overcrowd them in the basket. To amp up flavor, try adding a pinch of nutmeg to the dough. It pairs nicely with cinnamon. You can also use brown sugar instead of white sugar for a richer taste. For a fun twist, add mini chocolate chips to the dough. To add more texture, sprinkle some crushed nuts on top after coating them in the cinnamon-sugar mixture. You can also experiment with different spices. Cardamom or ginger can add a unique flair. Enjoy your delicious creations! {{image_2}} You can have fun with flavors in your donut holes. Here are some tasty ideas: - Chocolate: Add 1/4 cup of cocoa powder to the dry mix. This gives a rich taste. - Pumpkin Spice: Swap out some flour for pumpkin puree. Add 1 teaspoon of pumpkin spice too. - Lemon Zest: Mix in 1 tablespoon of lemon zest for a fresh twist. It brightens the flavor. These simple changes make your donut holes unique and fun to eat! If you need gluten-free options, try using gluten-free flour. Brands like almond flour or coconut flour work well. You may need to adjust the liquid a bit. Start with the same amount of milk, then add more if needed. Check the texture of the dough. It should be soft but not sticky. Want a healthier option? You can use applesauce instead of butter. Replace half the butter with 1/4 cup of unsweetened applesauce. This keeps the donut holes moist and cuts down on fat. You can also use less sugar. Try reducing the granulated sugar by half. This makes them less sweet but still tasty. These variations let you enjoy Air Fryer Cinnamon Sugar Donut Holes in many ways. To keep your donut holes fresh, place them in an airtight container. This helps them stay soft and tasty. You can store them at room temperature for up to two days. If you want to keep them longer, try freezing them. To freeze donut holes, first let them cool completely. Then, arrange them in a single layer on a baking sheet. Freeze for about one hour. Once they are firm, transfer them to a freezer-safe bag. Be sure to remove as much air as you can. They will stay good for up to three months. To reheat donut holes, you can use your air fryer or oven. Preheat the air fryer to 350°F (175°C). Place the donut holes inside for about 3-4 minutes. They will warm up nicely and regain their soft texture. If using the oven, place them on a baking sheet and heat for about 5-7 minutes at the same temperature. Enjoy them warm for the best taste! Yes, you can bake these donut holes. Preheat your oven to 350°F (175°C). Prepare the dough as described. Then, place the dough balls on a lined baking sheet. Bake for about 10-12 minutes. Check for a golden color, and use a toothpick to ensure they are done. Baking will create a slightly different texture, but they will still taste great. You can tell the donut holes are done when they are golden brown. Insert a toothpick into the center of one. If it comes out clean, they are ready. The outside should feel firm to the touch. Keep an eye on them as they cook for the best results. These donut holes pair well with many treats. You can serve them with coffee or tea for a lovely breakfast. Try adding a side of chocolate sauce or caramel for dipping. They also taste great with fresh fruit like berries. Get creative with your favorite toppings! In this post, we covered how to make air fryer donut holes. You learned the ingredients, cooking steps, and tips for perfect results. We also shared variations and storage tips to keep them fresh. These donut holes are a fun treat to enjoy. Try different flavors and make them your own. Practice makes perfect, so don’t be afraid to experiment. Enjoy your tasty creation!

Air Fryer Cinnamon Sugar Donut Holes Sweet Delight

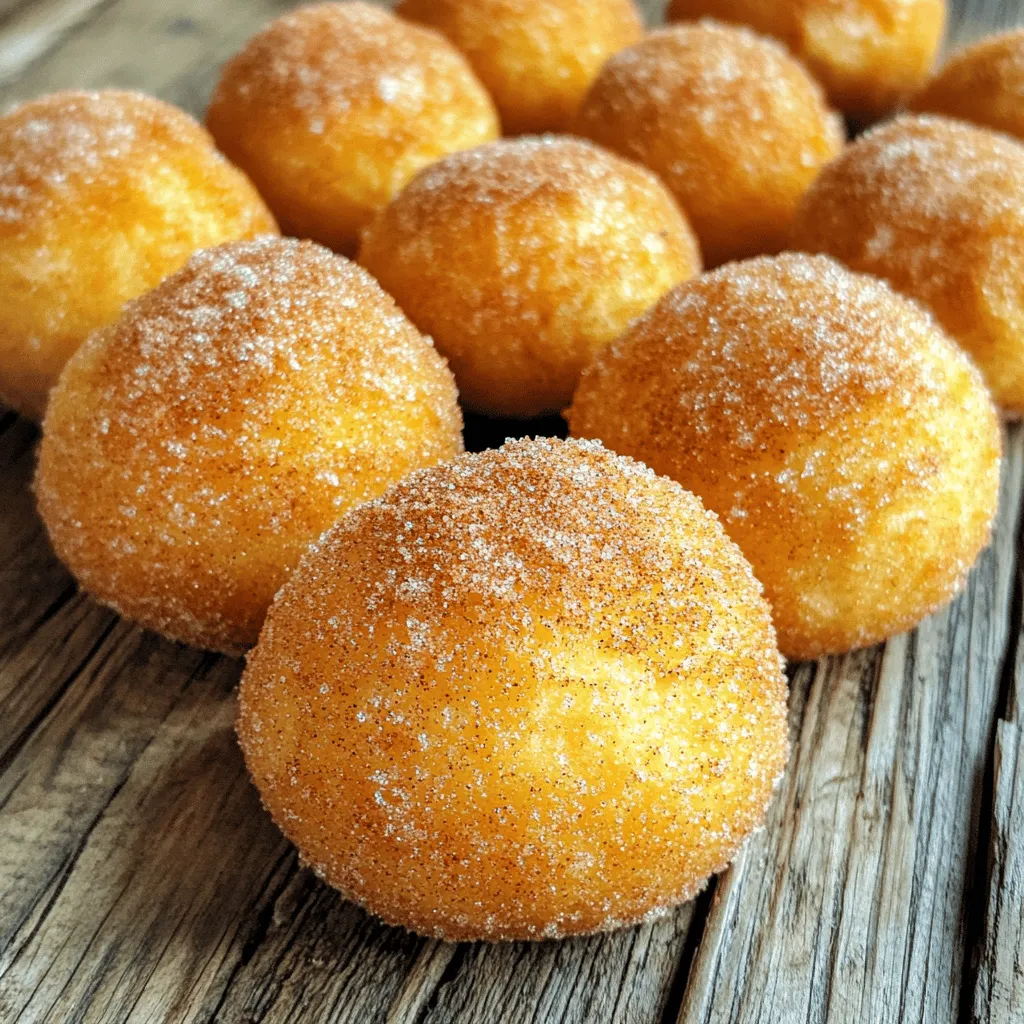
Indulge your sweet tooth with my easy recipe for Air Fryer Cinnamon Sugar Donut Holes. These bite-sized treats are fluffy,

- 1 lb Brussels sprouts, trimmed and halved - 4 cloves garlic, minced - 3 tablespoons olive oil - 1/2 cup grated Parmesan cheese Brussels sprouts are the star of this dish. Choose fresh, firm sprouts for the best taste. Garlic adds a strong, tasty kick. Use minced garlic for a bold flavor boost. Olive oil helps the sprouts roast perfectly. It adds a nice richness. Parmesan cheese brings a savory touch that melts beautifully. - 1/2 teaspoon red pepper flakes for heat - Fresh parsley, chopped for garnish Red pepper flakes give a nice sprinkle of heat. Add them if you like a little spice. Fresh parsley adds color and a fresh taste. It makes the dish look and taste great. Seasoning is key to making Brussels sprouts shine. Salt brings out their natural sweetness. Pepper adds a touch of warmth. Don't skip them! Adjust to your taste for the best result. First, trim the ends off the Brussels sprouts. Discard any yellow leaves. Next, cut each sprout in half. This helps them cook evenly. Now, let's mince the garlic. Take four cloves of fresh garlic and chop them finely. This will add a nice, strong flavor. In a large bowl, combine the halved Brussels sprouts and the minced garlic. Add three tablespoons of olive oil, one teaspoon of garlic powder, and half a teaspoon of red pepper flakes if you want some heat. Season with salt and pepper to taste. Toss everything together until the sprouts are well coated. Preheat your oven to 400°F (200°C). This ensures the Brussels sprouts roast properly. Spread the mixture on a large baking sheet, cut side down. This helps them get a nice brown color. Roast them for 20 to 25 minutes. Make sure to toss them halfway through for even cooking. Once they are golden brown and tender, take them out of the oven. Immediately sprinkle half a cup of grated Parmesan cheese over the hot sprouts. This cheese will melt beautifully. Return the sheet to the oven for five more minutes. This will crisp up the cheese. After that, garnish with fresh parsley before serving. Enjoy your delicious roasted garlic Parmesan Brussels sprouts! To get the best roast, place the Brussels sprouts cut side down. This helps them cook evenly. I like to use a high temperature of 400°F (200°C). This heat gives them a nice brown color and a great flavor. For the perfect Parmesan crust, add cheese right after roasting. Sprinkle it on while the sprouts are hot. Then, return them to the oven for five more minutes. This step makes the cheese melt and form a crispy layer. Want to elevate your dish? Add herbs like thyme or rosemary. A dash of lemon zest adds a nice twist too. If you like heat, try more red pepper flakes. These simple additions can make your Brussels sprouts even better! {{image_2}} You can change the taste of roasted garlic Parmesan Brussels sprouts in fun ways. Try adding different cheeses. Asiago brings a nutty flavor. Feta adds a creamy and tangy twist. Both cheeses make the dish special. Feel free to mix in other veggies too. Carrots add color and sweetness. Potatoes give a hearty feel. Just cut them to the same size as the Brussels sprouts for even cooking. If you want a vegan dish, swap out the Parmesan. Nutritional yeast is a great choice. It gives a cheesy flavor without dairy. You can also use vegan Parmesan. For those needing gluten-free options, this recipe is safe! All the main ingredients are gluten-free. Just check your cheese label to be sure. Roasted garlic Parmesan Brussels sprouts pair well with many main dishes. They go great with grilled meats like chicken or steak. The crispy sprouts balance the meal nicely. You can also serve them with pasta. Toss the sprouts with your favorite pasta dish for added flavor. Don’t forget to share your tasty meal with friends and family! To store your roasted garlic Parmesan Brussels sprouts, let them cool first. Place them in an airtight container. This keeps them fresh in the fridge. Enjoy them within 3-5 days for the best taste. To make your leftovers crispy again, use the oven. Preheat it to 375°F (190°C). Spread the Brussels sprouts on a baking sheet. Heat for about 10 minutes. You can also use an air fryer at 350°F (175°C) for 5-7 minutes. This keeps them crunchy and delicious. To freeze Brussels sprouts, ensure they are completely cool first. Place them in a freezer-safe bag. Remove any air to prevent freezer burn. They can last for up to 3 months in the freezer. To thaw, move them to the fridge overnight. You can roast them straight from frozen, just add a few extra minutes to the cooking time. I find that 400°F (200°C) works best for roasting Brussels sprouts. This heat gives them a nice crisp. It also helps them cook through without burning. The high temperature enhances their natural sweetness. To reduce bitterness, try these tips: - Trim the ends and remove any yellow leaves. - Add a sweet element like honey or balsamic glaze. - Roast them until golden brown, as this enhances their flavor. - Pair them with cheese, like Parmesan, to balance the taste. Yes, you can use frozen Brussels sprouts. However, they may not get as crispy. Thaw and pat them dry before roasting. This helps remove excess moisture. You might need to adjust the cooking time a bit, so check for tenderness. Brussels sprouts are done when they are golden brown and tender. You can test them by poking with a fork. If it goes in easily, they are ready. Toss them halfway through cooking for even browning. Absolutely! You can add: - Bacon for a smoky flavor. - Nuts like almonds or walnuts for crunch. - Other veggies, such as carrots or sweet potatoes, for variety. Store leftovers in an airtight container in the fridge. They stay fresh for about three days. Keep them separate from sauces or dressings to retain texture. To reheat, use the oven or a skillet. This helps them regain their crispiness. Heat them at 350°F (175°C) for about 10 minutes. Stir occasionally for even heating. Avoid microwaving, as it makes them soggy. This article covered key ingredients, steps, and tips for perfect Brussels sprouts. We discussed how to prepare, roast, and enhance flavors. You learned about flavor variations and storing leftovers properly. Remember, the right seasoning and cooking techniques can make a big difference. Enjoy experimenting with your dish and finding your favorite combinations. With practice, you'll master this tasty and healthy vegetable. Happy cooking!

Roasted Garlic Parmesan Brussels Sprouts Delight

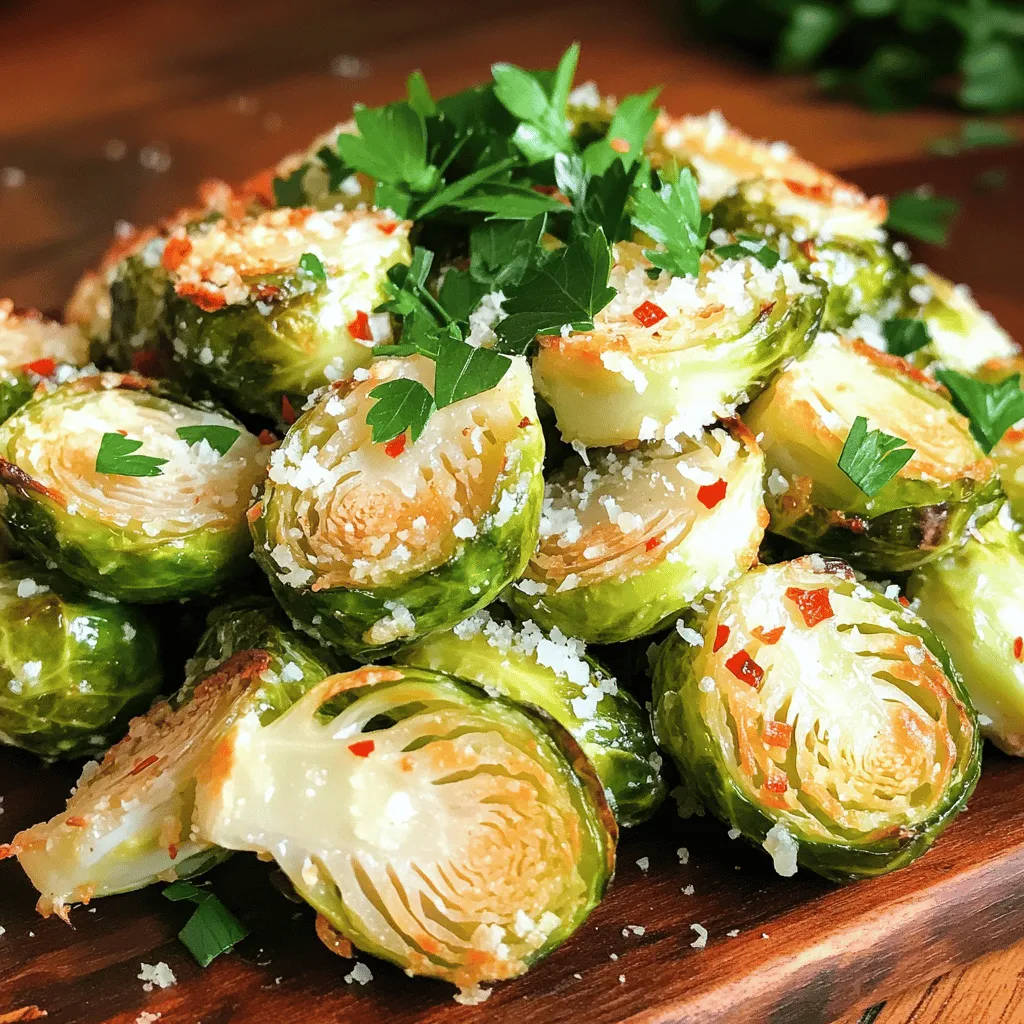
Welcome to Roasted Garlic Parmesan Brussels Sprouts Delight! If you think Brussels sprouts are boring, think again! I’ll show you

To make yummy white chocolate cranberry cookies, gather these simple items: - 1 cup unsalted butter, softened - 3/4 cup brown sugar, packed - 1/2 cup granulated sugar - 2 large eggs - 1 teaspoon vanilla extract - 2 1/4 cups all-purpose flour - 1 teaspoon baking soda - 1/2 teaspoon salt - 1 1/2 cups white chocolate chips - 1 cup dried cranberries - 1/2 cup chopped pecans (optional) Each ingredient plays a key role. The butter adds richness and helps the cookies stay soft. Brown sugar gives a deep flavor, while granulated sugar sweetens the mix. The eggs bind everything together, making a nice dough. Vanilla extract adds a warm aroma. Flour gives structure, while baking soda helps the cookies rise. Salt enhances the overall taste. The white chocolate chips add creaminess, and cranberries bring a fruity zing. If you love nuts, pecans can add crunch. Gathering these ingredients is the first step to baking delicious cookies. Enjoy the process and the tasty outcome! Start by preheating your oven to 350°F (175°C). This is key for even baking. While the oven heats, line two baking sheets with parchment paper. This helps the cookies not stick. Make sure to leave space on the sheets. You want room for the cookies to spread. In a large mixing bowl, add 1 cup of softened butter. Then mix in 3/4 cup of brown sugar and 1/2 cup of granulated sugar. Beat them together until the mix is light and fluffy. Next, crack in 2 large eggs, adding them one at a time. Mix well after each egg. Pour in 1 teaspoon of vanilla extract and combine it thoroughly. In another bowl, whisk together 2 1/4 cups of all-purpose flour, 1 teaspoon of baking soda, and 1/2 teaspoon of salt. Gradually add this dry mix to your wet ingredients. Stir gently until just combined. Be careful not to overmix! Now fold in 1 1/2 cups of white chocolate chips and 1 cup of dried cranberries. If you like, add 1/2 cup of chopped pecans for extra crunch. Use a cookie scoop or a tablespoon to drop rounded balls of dough onto your prepared baking sheets. Space them about 2 inches apart. Bake in your preheated oven for 10-12 minutes. Keep an eye on them! You want the edges to turn lightly golden, but the centers should still be soft. Once done, take the baking sheets out of the oven. Let the cookies cool on the sheets for about 5 minutes. Then, transfer them to wire racks to cool completely. Enjoy the sweet smell filling your kitchen! To get soft and chewy cookies, follow a few key steps. First, use softened butter. This helps mix the sugars well. Cream the butter with brown sugar and granulated sugar until fluffy. This adds air and keeps cookies soft. Next, do not overmix the dough. Mix the dry and wet ingredients until just combined. Overmixing can make cookies tough. Lastly, bake until the edges are lightly golden but the center remains soft. This ensures the perfect texture. To keep cookies fresh, store them in an airtight container. Place parchment paper between layers to prevent sticking. For added freshness, you can add a slice of bread in the container. The bread will absorb moisture and keep the cookies soft. If you live in a warm place, store cookies in the fridge. They will last longer and stay fresh for up to a week. Measuring ingredients correctly is crucial for great cookies. Always use a dry measuring cup for flour and sugar. Spoon flour into the cup, then level it off with a knife. Avoid packing it down, as this adds too much flour. For brown sugar, pack it firmly into the cup for accurate measurement. If you use liquid ingredients, use a clear measuring cup. Fill it to the correct line for precision. This small step can make a big difference in your cookie outcome. {{image_2}} You can change the nuts or fruits to make these cookies special. Try adding walnuts or almonds for a nice crunch. If you want a fruity twist, add dried cherries or blueberries. These swaps give your cookies new flavors and textures. Each option brings its own joy to the cookie. If you love dark chocolate, swap white chocolate chips for dark ones. Dark chocolate has a rich taste that pairs well with cranberries. This change makes the cookies feel more gourmet. Plus, the slight bitterness of dark chocolate balances the sweetness from the cranberries. You can make these cookies gluten-free easily. Replace all-purpose flour with a gluten-free blend. Look for a blend that has xanthan gum. This helps the cookies hold their shape. Check the labels for any added sugars or gluten. This way, everyone can enjoy a tasty treat! To keep your white chocolate cranberry cookies fresh, store them in an airtight container. This helps keep moisture in and prevents them from going stale. You can stack the cookies with parchment paper between layers. This way, they won’t stick together. Store the container at room temperature for up to one week. If you want to save some cookies for later, freezing works great. First, let the cookies cool completely. Then, place them in a single layer on a baking sheet. Freeze them for about an hour. Once frozen, transfer the cookies to a freezer-safe bag. Remove as much air as you can before sealing. These cookies can last for up to three months in the freezer. When ready to eat, thaw them at room temperature. For long-term storage, use sturdy containers like glass jars or plastic bins. Make sure they have tight lids to keep air out. You can also use vacuum-sealed bags. They are perfect for keeping cookies fresh longer. Label the containers with the date. This helps you know when to enjoy them for the best taste. You can tell the cookies are done when the edges turn lightly golden. The centers should remain soft and slightly underbaked. This keeps them chewy inside. When you bake them for 10-12 minutes, check at the 10-minute mark. If they look set and the edges are golden, it's time to take them out. Let them cool for 5 minutes on the baking sheet before moving them. You can use fresh cranberries, but they will change the taste and texture. Fresh cranberries are tart and have more moisture. To balance the tartness, you might need to add more sugar to the dough. If you choose fresh cranberries, chop them roughly. This keeps them from sinking to the bottom of the cookies. Also, the baking time may change slightly, so keep an eye on them! If you want to skip the eggs, try using unsweetened applesauce. Use 1/4 cup of applesauce for each egg. This keeps the cookies moist and adds a touch of sweetness. Another option is to use flaxseed meal. Mix 1 tablespoon of flaxseed meal with 2.5 tablespoons of water. Let it sit for a few minutes until it thickens, then use it in place of one egg. This works well and adds a nice nutty flavor! In this blog post, we explored the ingredients needed for tasty cookies and how to make them. I shared secrets for achieving that soft and chewy texture, plus smart storage tips. Don't forget to try the variations for exciting flavors. These cookies bring joy and warmth to any occasion. With the right steps, you can create a delicious treat everyone will love. Now, gather your ingredients and start baking. Your kitchen will soon smell amazing!

White Chocolate Cranberry Cookies Easy and Tasty Treat

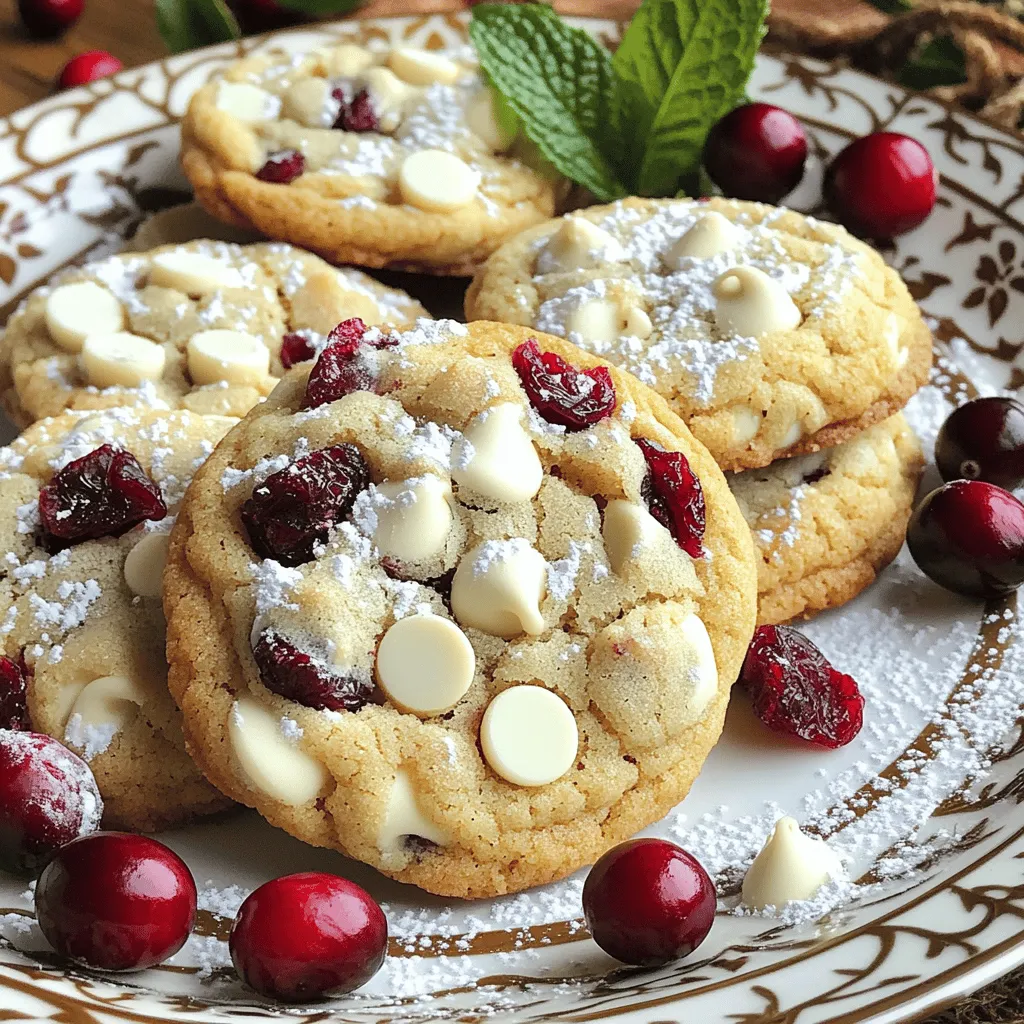
Looking for a quick treat that combines sweet and tart? These White Chocolate Cranberry Cookies are a perfect match! With

To make delicious garlic butter lobster tails, gather these main ingredients: - 2 lobster tails - 4 tablespoons unsalted butter, melted - 4 cloves garlic, minced - 1 tablespoon fresh parsley, chopped - 1 teaspoon lemon juice - Salt and pepper to taste - Lemon wedges for serving These ingredients come together to create a rich, tasty dish that shines at any meal. If you can't find some ingredients, here are some great substitutes: - Use olive oil instead of butter for a lighter option. - Try garlic powder if you don't have fresh garlic. - Dried parsley works if fresh parsley isn't available. - Lime juice can replace lemon juice for a different twist. These changes still keep the dish flavorful and enjoyable. Fresh lobster tails usually taste better but can be pricey. They offer a sweet and tender bite. Frozen lobster tails are a great alternative. They are often more affordable and easy to find. Just make sure to thaw them properly before cooking. This ensures even cooking and the best taste. Choose what fits your budget and enjoy this simple yet elegant meal. To start, preheat your air fryer to 380°F (193°C). This ensures even cooking. Next, take your lobster tails and use kitchen scissors to cut the top of the shells. Cut down the middle, but stop at the tail end. This keeps the meat attached. Gently pull the lobster meat out, letting it sit above the shell. This step is key for that perfect cook. In a small bowl, mix up your garlic butter. Start with 4 tablespoons of melted unsalted butter. Add 4 cloves of minced garlic for that rich flavor. Now toss in 1 tablespoon of chopped fresh parsley and 1 teaspoon of lemon juice. This adds brightness to the dish. Mix well until everything combines. Now it’s time to cook! Brush the garlic butter mixture generously over the exposed lobster meat. Season the meat with salt and pepper to taste. Place the lobster tails in the air fryer basket, meat side up. Cook for 8 to 10 minutes. The lobster is done when the meat is opaque and reaches 145°F (63°C). When it's finished, brush any remaining garlic butter on top. Serve warm with fresh lemon wedges for that extra zing. Enjoy your delicious garlic butter lobster tails! When picking lobster tails, look for ones that feel firm. Fresh tails should be slightly glossy and smell like the ocean. Avoid tails that are dry or have a strong fishy smell. Size matters too! Choose tails that weigh 4-6 ounces for the best texture. To cook lobster tails evenly, cut the shells carefully. Use kitchen scissors to slice the top of the shells. This helps the meat sit above the shell. It allows the heat to reach all parts of the meat. Make sure to brush the garlic butter mixture over the meat well. This adds flavor and helps with browning. If you don’t have an air fryer, don’t worry! You can broil or grill the tails. For broiling, place them in the oven on high heat. Cook for about 8-10 minutes and watch closely. For grilling, preheat your grill and cook for around 6-8 minutes. Always check the internal temperature. It should reach 145°F (63°C) for safety. {{image_2}} You can easily change the flavor of your lobster tails by using different herbs. Fresh basil offers a sweet note. Dill adds a nice, tangy taste. Oregano brings a warm, earthy flavor. You can mix a few herbs for a unique twist. Just chop them finely and mix them into your garlic butter. If you want some heat, try adding red pepper flakes to your garlic butter. Start with a pinch, then taste it. You can increase the amount based on your spice level. You can also mix in a bit of hot sauce for extra flavor. This spicy version is perfect for those who enjoy a kick. Lobster tails pair well with many sides. Try serving them with garlic bread for dipping. A fresh salad adds crunch and brightness. Rice or quinoa can soak up the garlic butter. For a special touch, add a glass of white wine. Each of these options enhances the meal and makes it more enjoyable. After enjoying your garlic butter lobster tails, let any leftovers cool first. Store them in an airtight container. Place a layer of plastic wrap between the lobster meat and the lid. This keeps the meat fresh and tasty. You can keep them in the fridge for up to two days. Avoid storing them with strong-smelling foods, as lobster can absorb those flavors. To reheat your lobster tails, use the air fryer for best results. Set the air fryer to 350°F (175°C). Place the lobster tails in for about 5 minutes. This method keeps the meat juicy and warm. You can also use a microwave, but be careful not to overheat. Heat in short bursts to prevent rubbery meat. If you have more than you can eat, freezing is a great option. Wrap each lobster tail tightly in plastic wrap. Then, place them in a freezer bag. Remove as much air as possible before sealing. You can freeze them for up to three months. To use, thaw in the fridge overnight before reheating. This way, you keep all that delicious flavor. Cook lobster tails in the air fryer for 8 to 10 minutes. The meat should be opaque and firm. Use a meat thermometer to check. Aim for 145°F (63°C) for safe eating. The time may vary based on the size of the tails. Larger tails may need a bit more time. Yes, you can use frozen lobster tails. Thaw them first in the fridge overnight. This helps the meat cook evenly. If you’re short on time, place them in cold water for about 30 minutes. Pat them dry before cooking to avoid excess moisture. Garlic butter lobster tails pair well with many sides. Here are a few ideas: - Garlic bread for that extra buttery taste - A fresh green salad for crunch - Steamed asparagus or green beans for a healthy boost - Rice or quinoa to soak up the garlic butter - Lemon wedges for a zesty finish These sides complement the rich flavors of the lobster tails perfectly. Enjoy your meal! Garlic butter lobster tails are simple yet delicious. We covered the key ingredients, cooking steps, and tips for perfect results. You can even choose fresh or frozen tails. Remember to explore variations to add your own twist. Store leftovers properly and reheat them for tasty meals later. Enjoy your cooking and impress your guests with this dish! It's easier than you think, and the flavor is worth it.

Garlic Butter Lobster Tails Air Fryer Delight Recipe

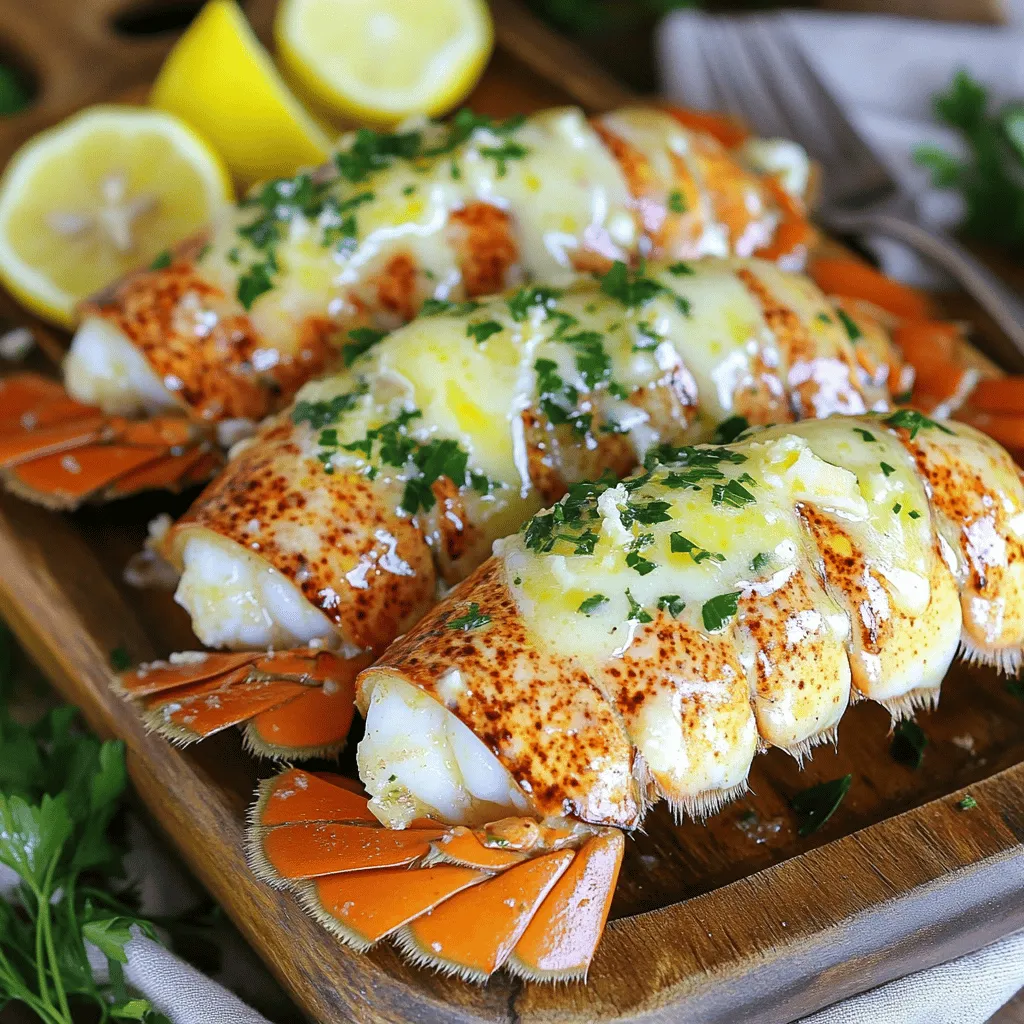
If you’re craving a seafood treat, you’re in the right place! This Garlic Butter Lobster Tails Air Fryer Delight Recipe

- 1 ½ cups graham cracker crumbs - ½ cup unsalted butter, melted - 2 tablespoons granulated sugar - 16 oz cream cheese, softened - 1 cup granulated sugar - 2 large eggs - 1 teaspoon vanilla extract - 1 cup sour cream - 1 can (21 oz) cherry pie filling - 1 tablespoon cornstarch To create Cherry Pie Cheesecake Bars, gather these ingredients first. The graham cracker crumbs form a crunchy base. Mixing them with melted butter and sugar makes a sweet crust. Next, the cream cheese blends with sugar, eggs, and sour cream for a rich filling. I choose cream cheese because it gives the bars that creamy texture. The cherry pie filling brings a burst of flavor. You’ll also need cornstarch to help the cherry filling set nicely. This mix will create a lovely swirl in your bars. Each ingredient plays a key role in making these bars a delight. - Mixing bowls - Hand mixer or stand mixer - 9x9 inch baking pan - Parchment paper - Spatula Be ready with the right tools. A hand mixer helps blend the cream cheese easily. The 9x9 inch pan keeps the bars at the perfect thickness. I like to line it with parchment paper. This way, the bars lift out easily once cool. A spatula ensures a smooth cheesecake layer. All these tools make the process simple and fun. - Preheat the oven to 325°F (163°C). - In a bowl, combine 1 ½ cups graham cracker crumbs, ½ cup melted butter, and 2 tablespoons sugar. Mix well until it looks like wet sand. - Press the crumb mixture firmly into a 9x9 inch baking pan. Bake for 10 minutes. Remove from the oven and let it cool. - In a large bowl, beat 16 oz softened cream cheese until smooth. - Gradually add 1 cup sugar. Mix well. Then, add 2 large eggs, one at a time. Mix until just combined. - Stir in 1 teaspoon vanilla extract and 1 cup sour cream until the mixture is creamy. - Pour the cheesecake batter over the cooled crust. Spread it evenly using a spatula. - In a small bowl, mix 1 can (21 oz) cherry pie filling with 1 tablespoon cornstarch. Spoon dollops of this mixture over the cheesecake layer. - Use a knife or skewer to swirl the cherry filling into the batter for a marbled look. Bake for 45-50 minutes, until the center is set. - Allow the cheesecake bars to cool in the pan for 1 hour. Then, refrigerate for at least 3 hours or overnight. - Once chilled, lift the bars from the pan using the parchment paper. Cut into squares and serve chilled. To get the best cheesecake texture, start with room temperature ingredients. This includes cream cheese and eggs. When they are warm, they mix better. This helps your cheesecake become smooth and creamy. Avoid overmixing your batter. Mix just until everything is combined. Overmixing adds too much air. This can cause the cheesecake to crack while baking. Garnish your cherry pie cheesecake bars with fresh cherries. You can also add a dollop of whipped cream on top. This makes the bars look more inviting. Serve the bars on a nice platter at gatherings. They will stand out, and guests will love the look. You can even add mint leaves for a pop of color. If your cheesecake cracks, don’t worry. You can cover it with whipped cream or more cherry filling. This hides the cracks and keeps it looking nice. To avoid a soggy crust, make sure to bake it first. Baking the crust for 10 minutes helps set it. Let it cool completely before adding the cheesecake layer. {{image_2}} You can change the cherry pie filling to other fruit fillings. Blueberry or apple work great too. They add their own sweet twist. You can also infuse flavors using different extracts. Almond and lemon extracts add a nice touch. These swaps keep the bars exciting and new. To make these bars healthier, use low-fat cream cheese. You can also mix in Greek yogurt for creaminess. This still gives you that rich taste. For a gluten-free option, swap graham crackers with almond flour. This change keeps the texture while catering to dietary needs. You can easily scale the recipe for bigger gatherings. Just double or triple the ingredients. If you want mini versions, use a muffin tin. This way, you can serve individual portions. They are perfect for parties or snacks. To keep your cherry pie cheesecake bars fresh, cool them completely. Let them sit in the pan for about an hour after baking. Then, lift them out using the parchment paper. Place the bars on a cutting board to slice them. Wrap each piece tightly in plastic wrap. This keeps them from drying out. You can also put them in an airtight container. For storage containers, use glass or plastic that seals well. Make sure the container is clean and dry before placing the bars inside. This helps prevent moisture from ruining the texture. In the fridge, these bars last for about five days. If you freeze them, they can stay good for up to three months. When frozen, wrap them well to avoid freezer burn. Watch for signs of spoilage. If you see any mold or an off smell, it’s best to toss them. The bars should still look bright and fresh. If the crust feels too soft or soggy, it might not taste good. To reheat your cheesecake bars, take them out of the fridge. Place them in the microwave for about 10-15 seconds. This warms them without changing the texture too much. If you want to serve them warm, try topping them with whipped cream or fresh cherries. This adds a nice touch and makes them feel special. Enjoy your delicious treat! Yes, you can prepare these cheesecake bars up to two days in advance. After baking, let them cool completely. Then, cover them tightly with plastic wrap or foil. Store them in the fridge until you are ready to serve. This way, the flavors have time to meld. To cut cheesecake bars cleanly, use a sharp knife. Dip it in hot water, then wipe it dry before each cut. This keeps the knife clean, resulting in nice, smooth edges. You can also run a spatula under the bars for easy lifting when serving. Yes, you can swap the graham cracker crust for other types. Try using crushed cookies, like Oreos or vanilla wafers. You can also use a shortbread crust for a buttery taste. Just make sure to adjust the sugar based on the sweetness of the crust. Check the edges of the cheesecake bars for a light golden color. The center should be set but still slightly jiggly. You can also insert a toothpick in the center. It should come out mostly clean, with a few crumbs sticking to it. This means it's done! In this article, I shared the secrets to making delicious cherry pie cheesecake bars. You learned about key ingredients, the necessary equipment, and step-by-step instructions to create them. I also covered helpful tips, variations, and best storage practices. Remember, using room temperature ingredients gives the best texture. With these tips in mind, you can impress friends and family with your baking skills. Enjoy every bite of your tasty creation!

Cherry Pie Cheesecake Bars Irresistible Treat Recipe

Are you ready for the perfect dessert that combines two favorites into one? These Cherry Pie Cheesecake Bars are a

- 12 oz fettuccine or spaghetti - 1 bunch of fresh asparagus, trimmed and cut into 2-inch pieces - 2 tablespoons olive oil - 3 cloves garlic, minced - 1 cup heavy cream - Zest and juice of 1 medium lemon - 1 cup grated Parmesan cheese - Salt and pepper - Fresh basil or parsley - Cooked chicken or shrimp - Red pepper flakes The main ingredients in Creamy Lemon Asparagus Pasta create a fresh and vibrant dish. Fettuccine or spaghetti serves as the base, providing a satisfying texture. Fresh asparagus adds a crisp bite and bright green color. Olive oil and minced garlic bring rich flavors that enhance the dish. Heavy cream creates the silky sauce, while lemon zest and juice add a bright, tangy kick. Grated Parmesan cheese adds depth and creaminess. For seasoning, salt and pepper are essential. Fresh basil or parsley can garnish the dish, adding color and flavor. If you want to boost protein, add cooked chicken or shrimp. Red pepper flakes can bring a touch of heat, making it even more exciting. This combination of ingredients makes the dish delightful and easy to make. You can feel confident in your cooking skills with these simple yet flavorful components. - Boil a large pot of salted water. - Add 12 oz of fettuccine or spaghetti. Cook until al dente. - Reserve 1 cup of pasta water before draining. - Heat 2 tablespoons of olive oil in a large skillet over medium heat. - Add 1 bunch of asparagus, cut into 2-inch pieces. Sauté for 3-4 minutes. - Stir in 3 cloves of minced garlic. Cook for 1 more minute until fragrant. - Lower the heat to medium-low. Add 1 cup of heavy cream to the skillet. - Stir well and let it simmer for 2-3 minutes. - Add the cooked pasta to the skillet with the creamy mixture. - Toss together until the pasta is well coated. - If the sauce is too thick, add reserved pasta water slowly. - Season with salt and pepper to taste. - Serve hot, garnished with fresh basil or parsley. To cook pasta just right, bring a large pot of salted water to a boil. Add your fettuccine or spaghetti. Cook until it's al dente, which means firm to the bite. This usually takes about 8 to 10 minutes, but check the package for exact times. After cooking, remember to reserve about 1 cup of the pasta water. This water helps to adjust the sauce later. To make your sauce thick or thin, you can add some reserved pasta water. Start with a little, about a tablespoon, and mix it in. If you want a smoother sauce, stir it well. You can also use a whisk to break up any clumps. If the sauce seems too thick, just keep adding that pasta water until you get the right texture. For extra flavor, consider adding herbs like fresh basil or parsley. They brighten the dish. You can also sprinkle in some red pepper flakes for a bit of heat. If you want to change the cheese, try using goat cheese or feta for a different taste. These options add a nice twist to your creamy lemon asparagus pasta. {{image_2}} You can add more veggies to this pasta. Cherry tomatoes bring a burst of sweetness. Spinach adds a nice green color and boosts nutrition. Just toss them in with the asparagus. They cook quickly and add great flavor. If you want protein, try adding chicken or shrimp. Cook the chicken in the skillet before adding the asparagus. For shrimp, add them after the asparagus is tender. This makes your meal more filling and balanced. Want a lighter sauce? Use low-fat cream or half-and-half instead of heavy cream. This cuts calories but keeps a creamy texture. For a vegan version, swap heavy cream with coconut milk or a cashew cream blend. You can still enjoy all the flavors without dairy. To store leftovers, place the pasta in an airtight container. Make sure it cools down to room temperature first. Store it in the fridge. It will last for about 3 to 4 days. If you want to keep it longer, consider freezing it. The best way to reheat pasta is on the stovetop. Use a skillet over low heat. Add a splash of water or extra cream to help it heat evenly. Stir often to avoid the sauce separating. You can also microwave it. Use a microwave-safe dish and cover it. Heat it in short bursts, stirring in between. Yes, you can freeze this pasta. Store it in an airtight container or freezer bag. It can last for up to 2 months in the freezer. To thaw, place it in the fridge overnight. For reheating, use the stovetop method or microwave, adding a bit of liquid if needed. Yes, you can make this dish ahead of time. Cook your pasta and sauce as usual. Once you combine them, let it cool. Store in an airtight container in the fridge. When ready to eat, reheat it on the stove. Add a splash of water to keep it creamy. You can use half-and-half or whole milk as a lighter option. Coconut cream works well for a dairy-free choice. You can also try cashew cream for a nut-based alternative. Each will give a different flavor, so choose what you like best. To make this dish gluten-free, use gluten-free pasta. Many brands offer great options that taste good. Make sure to check labels for any hidden gluten in sauces or cheese. This way, you can enjoy the dish without worry. Absolutely! You can increase the zest and juice of the lemon. Add a bit of lemon pepper for a unique twist. For a brighter taste, try adding fresh lemon slices on top when serving. This makes the dish even more zesty and refreshing. This blog post explored a tasty Creamy Lemon Asparagus Pasta recipe. We covered key ingredients like fettuccine, asparagus, and garlic. You learned step-by-step cooking instructions, tips for perfect pasta, and tasty variations. Feel free to adjust flavors or add protein for balance. Remember, enjoy this dish fresh, but leftovers can be stored or frozen easily. Try this recipe today for a delightful meal!

Creamy Lemon Asparagus Pasta Delightful and Easy Dish

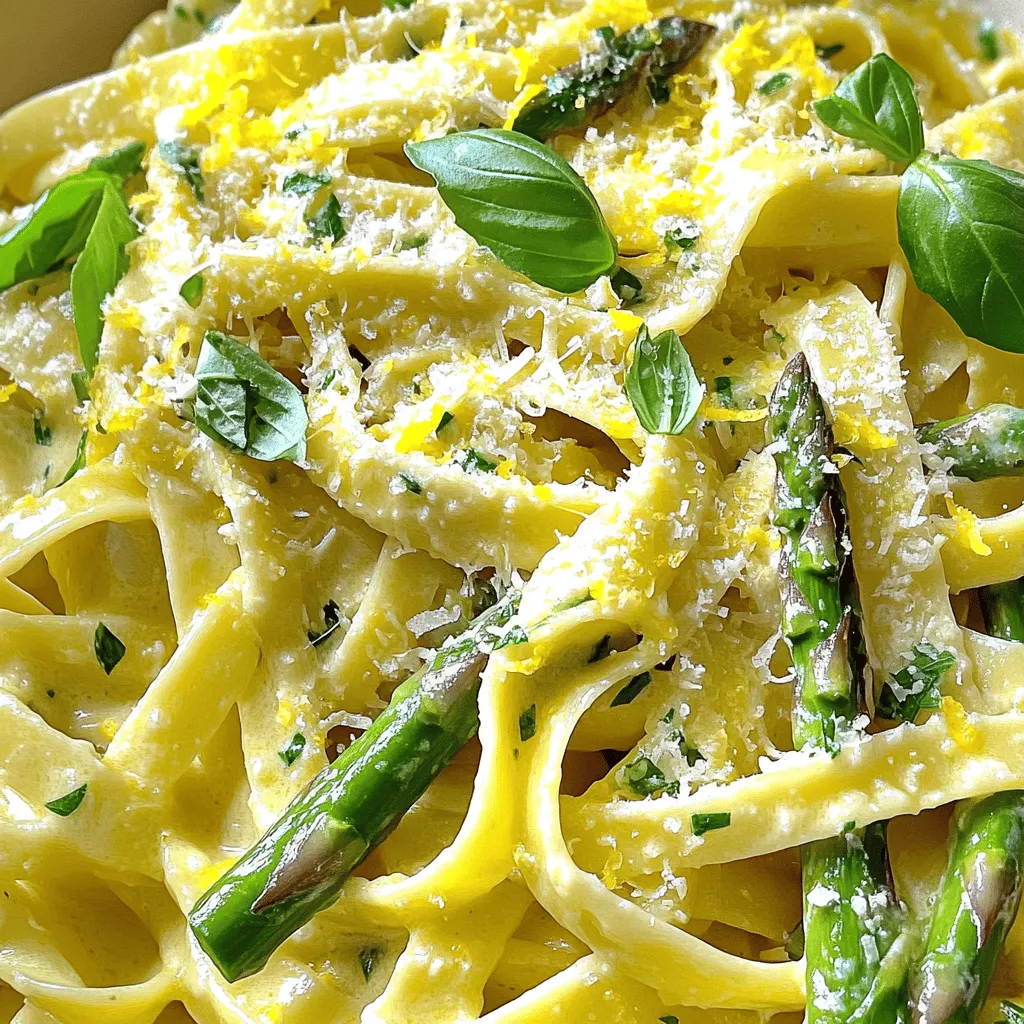
If you’re craving a dish that’s both creamy and zesty, you’re in for a treat! My Creamy Lemon Asparagus Pasta

- 1 medium head of cauliflower, cut into florets - 5 cloves of garlic, peeled - 3 tablespoons olive oil - 1/2 cup cream cheese, softened - 1/4 cup milk (or dairy-free alternative) - 1/4 teaspoon nutmeg - Fresh chives, finely chopped For a dairy-free option, use a nut-based cream cheese. You can also swap milk for almond or soy milk. If you want different flavors, try adding spices like paprika or garlic powder. For a twist, mix in a little cheese like Parmesan or cheddar. 1. First, preheat your oven to 400°F (200°C). This heat makes the cauliflower soft and sweet. 2. Next, take a medium head of cauliflower and cut it into florets. 3. In a baking dish, toss the cauliflower florets and 5 peeled garlic cloves with 2 tablespoons of olive oil. 4. Spread the mixture out into an even layer. This helps the cauliflower roast evenly. 1. Roast the cauliflower and garlic in the preheated oven for 25-30 minutes. The goal is for the cauliflower to become tender and the garlic to turn golden brown. 2. After roasting, allow the garlic to cool slightly. Squeeze the garlic cloves out of their skins into a mixing bowl. 3. Add the roasted cauliflower, 1/2 cup of softened cream cheese, and 1/4 cup of milk to the bowl. 4. Use a potato masher or hand mixer to mash everything together until it is creamy and smooth. 1. Season the mixture with salt, pepper, and 1/4 teaspoon of nutmeg if you want. 2. Mix well to combine all flavors. 3. For a little extra flavor, drizzle the remaining 1 tablespoon of olive oil on top before serving. 4. Transfer the creamy mix to a serving dish and garnish with fresh chives, finely chopped. This adds a nice touch of color and flavor. To get that creamy consistency, start with roasted cauliflower. Roasting brings out its sweet flavor. Use a potato masher for a slightly chunky texture or a hand mixer for super smooth results. I love using a hand mixer because it makes the cauliflower light and fluffy. Try adding different seasonings to boost the flavor. You can use garlic powder or smoked paprika for a twist. Fresh herbs like thyme or rosemary work great too. They add freshness and depth. I often sprinkle in fresh chives for a bright touch. For a beautiful presentation, serve the mashed cauliflower in a rustic bowl. Drizzle with olive oil and sprinkle fresh chives on top. It looks lovely! This dish pairs well with grilled chicken or roasted fish. You can also serve it with a hearty stew or as a side for your favorite meat. {{image_2}} You can easily change the taste of creamy roasted garlic mashed cauliflower. One great way is to add cheese. Try sharp cheddar for a strong flavor or cream cheese for richness. Mixing with other vegetables also adds fun. For example, include steamed broccoli or carrots for color and taste. If you want a low-carb or keto version, skip the cream cheese. Use pureed cauliflower and a bit of butter instead. For a vegan option, swap cream cheese with soaked cashews or vegan cream cheese. This keeps the dish creamy without dairy. You can easily scale this recipe. For more servings, just double or triple the ingredients. Adjust the garlic and cream cheese to fit your taste. Want it creamier? Add more milk or cream cheese. Enjoy making it your own! Once you have your creamy roasted garlic mashed cauliflower, store any leftovers in the fridge. Place them in an airtight container to keep them fresh. This dish stays good for about three days. If you want to avoid spills, use a container with a tight lid. To freeze your mashed cauliflower, let it cool first. Then, put it in a freezer-safe container. Leave some space at the top for expansion. It can last up to three months in the freezer. When you need it, thaw it overnight in your fridge. Reheat it in a pot on low heat or in the microwave. Add a splash of milk if it seems dry. For the best taste, eat your creamy mashed cauliflower within three days if refrigerated. If it starts to smell sour or has a change in color, it’s time to toss it. Always check for signs of spoilage. Eating fresh food keeps you healthy and happy! Creamy roasted garlic mashed cauliflower has a rich and smooth flavor. The roasted garlic adds a sweet, nutty taste that blends well with the creamy texture. You will enjoy a comforting dish that feels like a warm hug. The hint of nutmeg, if used, gives a gentle spice that makes it even better. Yes, you can easily make this recipe vegan. Use dairy-free cream cheese and a plant-based milk alternative. The flavor will stay rich and creamy, even without dairy. Just make sure to choose a vegan cream cheese that you like. This way, everyone can enjoy this delightful dish. To adjust the creaminess, you can add more cream cheese or milk. If you want it thicker, use less milk. If you like it creamier, add more cream cheese or milk gradually. Using a hand mixer will also help achieve the perfect smoothness. Play around with the amounts until you find your ideal texture. Yes, you can use frozen cauliflower instead of fresh. Just make sure to thaw and drain it well before mashing. Frozen cauliflower may be softer, so adjust your cooking time. It may also need less roasting time since it’s already cooked. This swap can save time and still give you a tasty dish. This blog post covered how to make creamy roasted garlic mashed cauliflower. You learned about the main and optional ingredients, along with useful substitutions. I walked you through preparation, cooking, and final touches for great flavor. You also got tips for texture, flavor boosts, and serving ideas. Variations let you mix in your favorites, while storage info helps you keep leftovers fresh. Now, it's your turn to create and enjoy this dish!

Creamy Roasted Garlic Mashed Cauliflower Delight

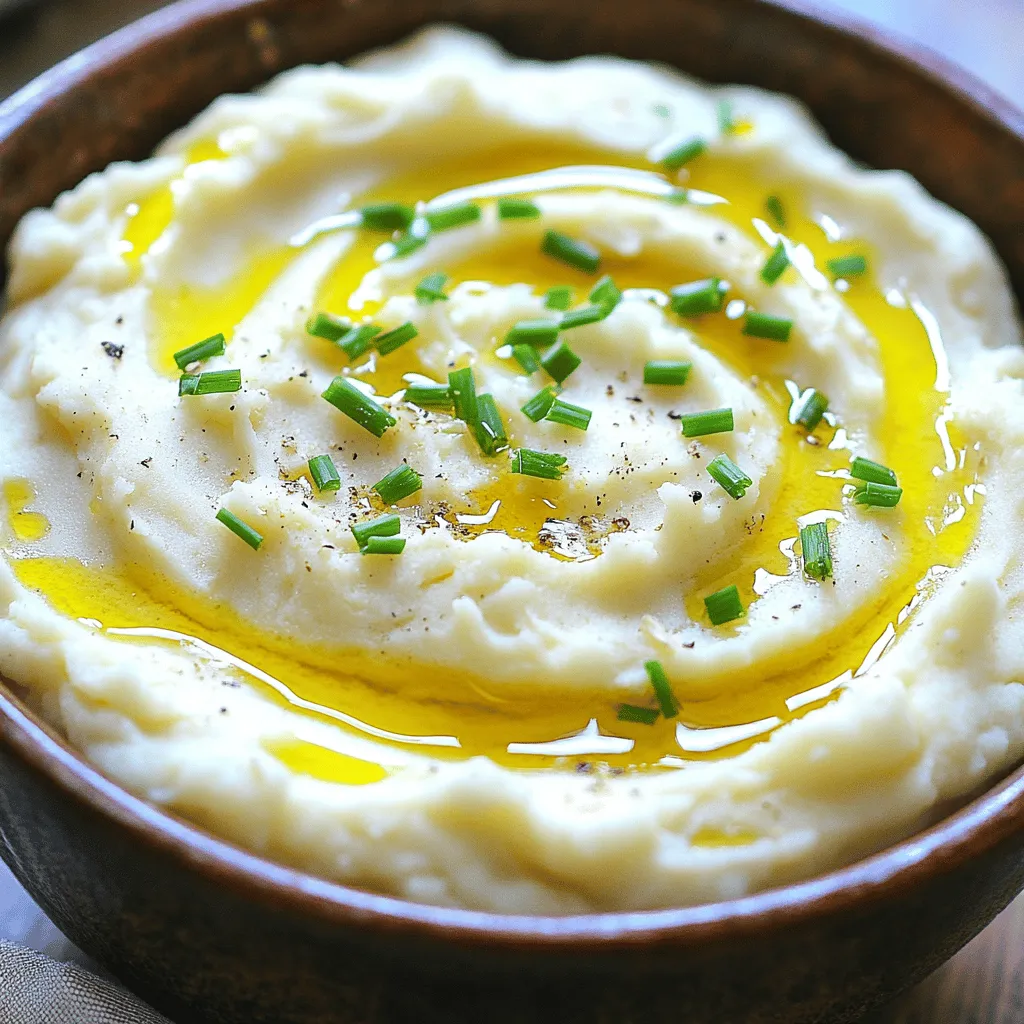
Are you ready to elevate your side dish game? My Creamy Roasted Garlic Mashed Cauliflower Delight is a game-changer. This

- 1 cup rolled oats - 1/2 cup chopped dried cranberries - 1/2 cup almond butter - 1/4 cup honey or maple syrup - Zest of 1 orange - 1 tablespoon fresh orange juice - 1/4 teaspoon cinnamon - 1/4 cup mini dark chocolate chips (optional) - Pinch of salt These ingredients blend together to create a tasty and healthy snack. The rolled oats give a great base, while the dried cranberries add a sweet and tangy flavor. Almond butter brings in healthy fats and protein. Honey or maple syrup acts as a natural sweetener. The zest and juice from the orange give a bright, fresh taste. Cinnamon adds warmth, and the optional chocolate chips can make these bites even more fun. You can mix and match these ingredients to suit your taste. Each serving has about 100 calories. The bites contain around: - 3 grams of protein - 5 grams of fat - 12 grams of carbs These energy bites provide a good balance of nutrients. The oats and cranberries deliver fiber, while the almond butter adds healthy fats. Enjoying these bites can keep you full and energized. They are great as a quick snack or post-workout treat. 1. Mixing dry ingredients: Start with a large bowl. Add 1 cup of rolled oats, 1/2 cup of chopped dried cranberries, and 1/4 teaspoon of cinnamon. Stir these together until they blend well. 2. Combining wet ingredients: In a separate bowl, mix 1/2 cup of almond butter with 1/4 cup of honey or maple syrup. Add the zest of 1 orange and 1 tablespoon of fresh orange juice. Don't forget a pinch of salt. Whisk until smooth. 3. Merging wet and dry mixtures: Pour the smooth wet blend into the bowl with the dry ingredients. Stir until everything is well combined. If you want a sweet twist, fold in 1/4 cup of mini dark chocolate chips. 1. Chilling the mixture: Once mixed, refrigerate the bowl for about 15-20 minutes. This makes the mixture easier to handle when forming bites. 2. Rolling into bites: After chilling, scoop about 1 tablespoon of the mixture. Roll it between your hands to form small balls. Repeat until all the mixture is used up. - Presentation tips for serving: Place the energy bites in a decorative bowl. Garnish with fresh cranberries and orange slices. This adds a nice touch for any snack table. - Possible pairings with beverages: These bites pair well with herbal tea or a glass of almond milk. They make a great snack anytime! To keep your Cranberry Orange Energy Bites fresh, store them in an airtight container. This helps maintain their taste and texture. You can keep them in the fridge for up to a week. If you want to store them for longer, freezing is a great option. Just place the bites in a freezer-safe bag. They can last up to three months in the freezer. Thaw them in the fridge when you’re ready to enjoy. Chilling the mixture is key. Refrigerate it for 15 to 20 minutes before rolling. This makes the mixture less sticky and easier to shape. For effective rolling, use your hands to form small balls. If you find it hard to roll, try wetting your hands slightly. This helps prevent the mixture from sticking. Want to spice things up? Try adding a pinch of nutmeg or ginger for extra warmth. You can also mix in nuts or seeds for a crunch. Consider topping the bites with coconut flakes or more chocolate chips for an extra treat. These simple enhancements can make your energy bites even more delicious! {{image_2}} You can easily swap the almond butter for other nut or seed butters. Try peanut butter for a classic taste, or sunflower seed butter for a nut-free option. Each choice brings its own flavor and nutrition. When it comes to dried fruits, cranberries are just the start. You can use chopped dates or raisins for sweetness. Apricots add a nice tartness, and cherries give a lovely twist. Mix and match your favorites! For a gluten-free version, ensure your oats are certified gluten-free. This keeps the bites safe for those with gluten sensitivities. It’s a simple change that keeps the snack delicious and safe. If you want a vegan version, replace honey with maple syrup. This keeps the flavor while making it plant-based. You still get that sweet goodness and a chewy texture. Add a chocolate orange twist by folding in mini dark chocolate chips. The chocolate pairs well with orange and makes each bite extra special. For a nutty cranberry medley, include chopped nuts like walnuts or pecans. This adds crunch and healthy fats. The mix of flavors will delight your taste buds and fuel your day. Cranberry Orange Energy Bites stay fresh for a week in the fridge. To store them, keep them in an airtight container. If you want them to last longer, freeze them. They can stay frozen for up to three months. Just make sure to thaw them in the fridge when you're ready to eat. You can use fresh cranberries, but they change the bites. Fresh cranberries are juicy and tart. They add moisture, which can make the bites softer. Dried cranberries provide sweetness and chewiness. If you decide to use fresh, consider adding a bit more oats to balance the texture. These energy bites are perfect for a quick snack. Try them with yogurt for breakfast or a post-workout treat. They also pair nicely with a hot cup of tea or coffee. You can serve them as a fun snack at parties. Arrange them in a bowl with fresh cranberries and orange slices for a colorful look. Cranberry Orange Energy Bites pack a lot of health benefits. Let's break down some key ingredients: - Rolled Oats: Oats offer great fiber. They help keep you full longer. They also support heart health. - Dried Cranberries: Cranberries boost your immune system. They are rich in antioxidants. Plus, they add a sweet-tart flavor. - Almond Butter: Almond butter is full of healthy fats and protein. It provides energy and helps with muscle repair. It also has vitamin E for skin health. These ingredients work together to give you a nutritious snack. They help power your day and keep cravings at bay. If you love energy bites, you might want to try these: - Peanut Butter Energy Bites: A classic with a nutty twist. - Chocolate Chip Energy Bites: For those who crave chocolate. - Coconut Energy Bites: A tropical treat that’s easy to make. For more snack ideas, check out these: - Nutty Trail Mix: Perfect for a quick energy boost. - Veggie Sticks with Hummus: A healthy crunch between meals. Watching someone make these bites can be helpful. Here are some great video tutorials: - How to Make Energy Bites: A step-by-step guide to different flavors. - Energy Bites for Kids: Fun recipes that kids will love. - Healthy Snacks 101: Learn about the best snacks for energy. These resources will help you explore more ways to enjoy your snacks! In this article, we covered how to make tasty Cranberry Orange Energy Bites. We discussed the simple ingredients, nutrition info, and easy prep steps. I shared tips for storing and making them easier to handle. Plus, we explored variations for everyone’s taste. These energy bites are a great snack for on-the-go. Enjoy the healthy benefits and tasty flavors anytime. Try new mix-ins or share them with friends!

Cranberry Orange Energy Bites Healthy Snack Boost

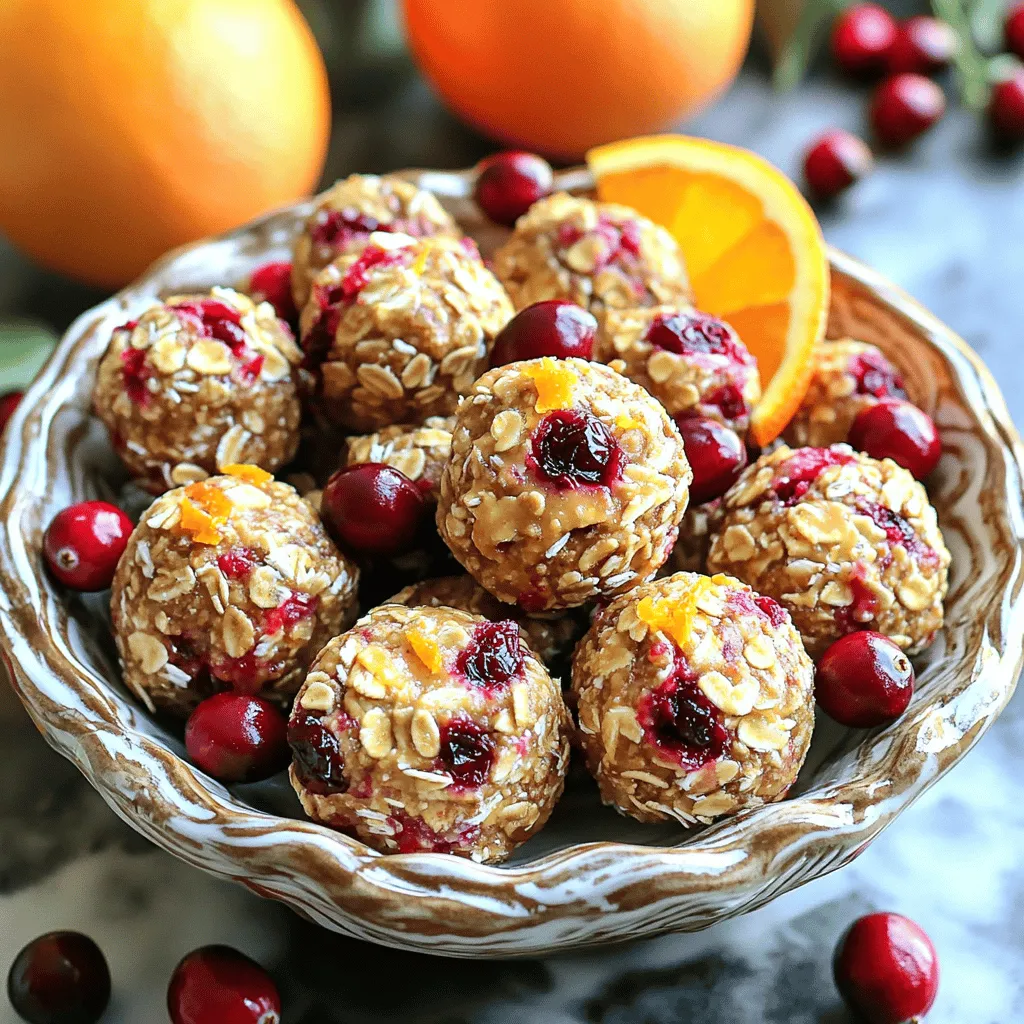
Looking for a quick and healthy snack? Let me introduce you to Cranberry Orange Energy Bites! Packed with oats, almond

To make your slow cooker maple glazed carrots, you need: - 2 pounds of baby carrots (or chopped regular carrots) - 1/2 cup pure maple syrup - 3 tablespoons unsalted butter, melted - 2 tablespoons brown sugar - 1/2 teaspoon cinnamon - 1/4 teaspoon nutmeg - Salt and pepper to taste - Fresh parsley, chopped (for garnish) Measuring ingredients well makes a big difference. Use a dry measuring cup for brown sugar. Pack it firmly to get the right amount. For the maple syrup, a liquid measuring cup works best. If you use regular carrots, peel them first. Cut them into even pieces. This helps them cook at the same rate. Baby carrots can be rinsed and used right away. You can swap some ingredients if you like. For a lighter version, use coconut oil instead of butter. If you want less sweetness, cut the brown sugar to one tablespoon. You can also try agave syrup in place of maple syrup. If you don’t like nutmeg, use allspice or omit it. Fresh herbs like thyme or dill can give a new flavor twist. Start with fresh carrots. If you choose baby carrots, just rinse them. If you use regular carrots, peel them first. Cut the carrots into pieces that are even in size. This helps them cook at the same rate. Aim for about two inches in length. Place the prepared carrots in your slow cooker. Grab a medium bowl to mix the glaze. Add 1/2 cup of pure maple syrup to the bowl. Pour in 3 tablespoons of melted unsalted butter. Next, add 2 tablespoons of brown sugar. Sprinkle in 1/2 teaspoon of cinnamon and 1/4 teaspoon of nutmeg. Finally, add salt and pepper to taste. Whisk these ingredients together until they blend well. The glaze should be smooth and shiny. Now, pour the maple glaze over the carrots in the slow cooker. Make sure all the carrots get coated. Cover the slow cooker with its lid and set it to low heat. Cook the carrots for 4 to 5 hours. If you want them a bit firmer, cook for 3 to 4 hours. When they are soft, gently stir the carrots in the glaze. Check the flavor and adjust the salt and pepper as needed. These steps will lead you to a sweet and tasty side dish that pairs well with many meals. Enjoy the process and the wonderful aroma that fills your kitchen! To make your carrots pop, focus on the glaze. Use high-quality maple syrup. This adds depth and richness. If you want extra flavor, add a pinch of garlic powder. A splash of orange juice also brightens the dish. It gives a fresh twist. For added texture, finish with a quick broil. This caramelizes the glaze and adds a nice crunch. One common mistake is overcooking the carrots. They should be tender but not mushy. Keep an eye on the cooking time. Another mistake is skipping the seasoning. Salt helps balance the sweetness. Test the flavor before serving. A little extra salt or pepper can make a big difference. These glazed carrots pair well with many dishes. Serve them with roasted chicken or pork for a hearty meal. They also make a great side for holiday dinners. For a fun touch, try serving them in small mason jars. This adds a rustic vibe and makes them easy to share. Don't forget to sprinkle fresh parsley on top for color and flavor! {{image_2}} You can easily change the flavor of your maple glazed carrots. Try adding different spices to the mix. For a warm taste, use ginger. Just a pinch can bring a fresh twist. You can also add cayenne pepper for heat. A small amount will spice things up nicely. If you like a savory note, try adding garlic powder. It pairs well with the sweetness of the maple syrup. Mix and match to find your favorite! Carrots are great, but you can add other veggies too. Sweet potatoes work well. They add a nice texture and flavor. You can also include parsnips for a unique taste. Just cut them into similar sizes as the carrots. This way, they cook evenly. You can even toss in some green beans. They add color and crunch. Use your creativity with whatever veggies you have on hand! These maple glazed carrots can fit many diets. If you're vegan, swap the butter for coconut oil. It adds a nice flavor while keeping it plant-based. For a low-sugar option, use less maple syrup. You can also try sugar-free maple syrup instead. This way, you still get the sweet taste. Gluten-free diets can enjoy this dish too, as all ingredients are gluten-free. Just remember to check your labels. Enjoy a tasty side without worry! After enjoying the slow cooker maple glazed carrots, you may have some left. To store them, let the carrots cool down to room temperature. Next, place them in an airtight container. Store the container in the fridge. These carrots will stay fresh for about 3 to 5 days. When you want to enjoy the leftovers, reheating is simple. You can use the microwave for quick results. Place the carrots in a microwave-safe bowl. Cover the bowl with a lid or a damp paper towel. Heat in short bursts, stirring in between, until warm. If you prefer the stove, heat them in a pan over low heat. Stir gently to avoid sticking. Freezing is a great option if you have lots of leftovers. Start by letting the glazed carrots cool completely. Then, place them in a freezer-safe bag or container. Make sure to remove as much air as possible to prevent freezer burn. You can freeze them for up to 3 months. When you want to eat them, thaw in the fridge overnight before reheating. To thicken the glaze, cook it longer. You can also add a cornstarch slurry. Mix one tablespoon of cornstarch with two tablespoons of cold water. Stir it into the glaze, then cook until thickened. This step helps give your carrots a nice coating. Yes, you can use honey instead of maple syrup. Honey will add a different flavor, but it works well. Both sweeteners create a lovely glaze. Adjust the amount based on your taste preference. Start with the same amount and taste as you go. If you don’t have a slow cooker, you can use a stovetop pot. Combine the carrots and glaze in the pot. Cook on low heat, stirring often. You can also bake them in the oven at 350°F for about 30-40 minutes. Just cover them to keep the moisture in. In this post, we explored how to make maple glazed carrots. We discussed the key ingredients and tips for preparation. You learned step-by-step instructions and helpful tricks to enhance flavor. We also shared variations, storage tips, and answered common questions. Making this dish is simple and fun. Enjoy your tasty carrots and feel proud of your cooking!

Slow Cooker Maple Glazed Carrots Delicious Side Dish

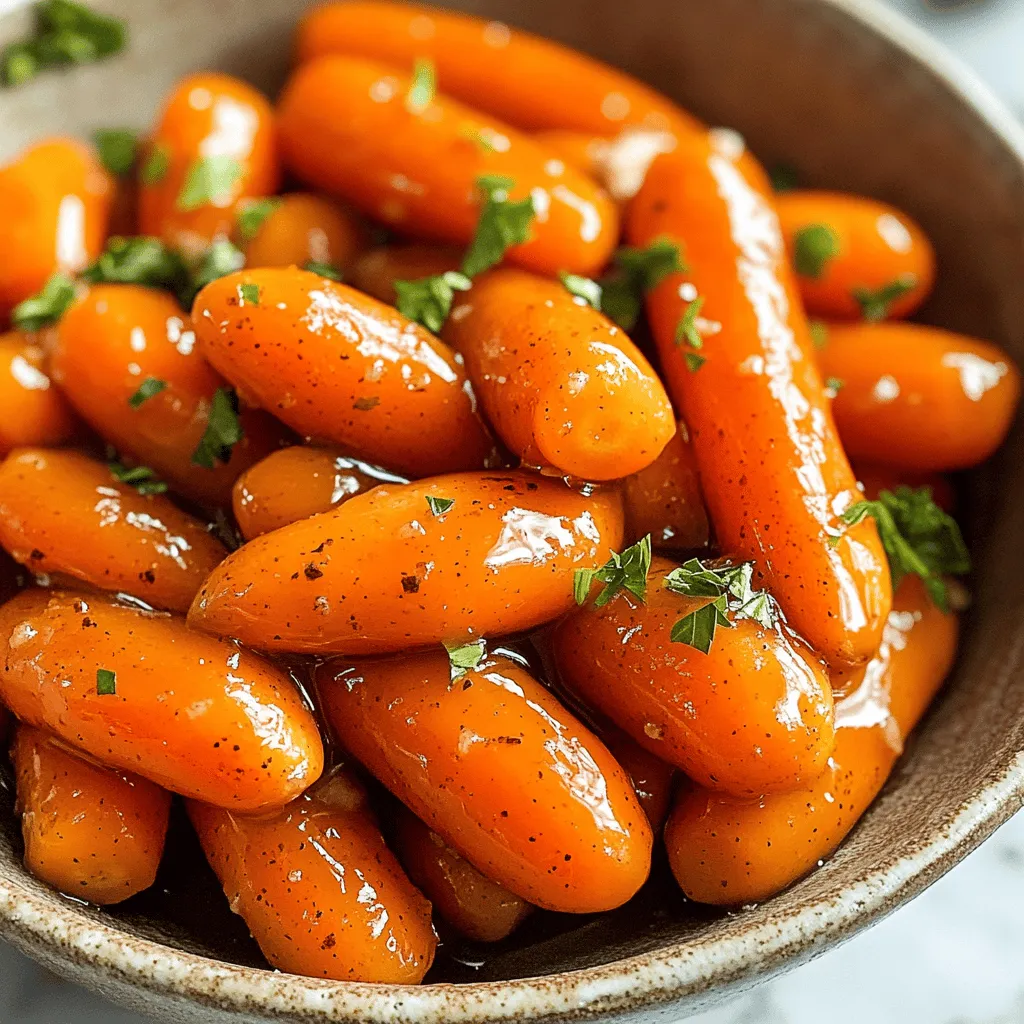
Looking for an easy and tasty side dish? I have just the recipe for you! Slow Cooker Maple Glazed Carrots

Older posts
Newer posts
← Previous Page1 … Page16 Page17 Page18 … Page82 Next →

dsad

© 2026 Recipes Pursuit • Built with GeneratePress

Our Policies

  • Copyright Policy
  • Cookie Policy
  • GDPR Policy
  • Privacy Policy
  • Disclaimer
  • Terms Of Use

More Information

  • Home
  • About
  • Contact
  • Appetizers
  • Dessert
  • Dinner
  • Drinks
©2026, Recipes Pursuit About Back To Top