Skip to content
DisclaimerTerms Of UseGDPR PolicyCookie Policy

Recipes Pursuit

  • Home
  • Drinks
  • Appetizers
  • Dinner
  • Dessert
  • About
  • Contact
  • Privacy Policy
DisclaimerTerms Of UseGDPR PolicyCookie Policy

NO-ING-IMG

- 1 pound baby carrots (or regular carrots cut into sticks) - 3 tablespoons honey - 2 tablespoons unsalted butter - 3 cloves garlic, minced - 1 tablespoon olive oil - 1 teaspoon fresh thyme leaves (or ½ teaspoon dried thyme) - Salt and pepper to taste - Optional: Chopped parsley for garnish You can swap baby carrots for regular carrots. Cut regular carrots into sticks for even cooking. Instead of honey, you can use maple syrup for a different flavor. If you want a vegan option, use coconut oil instead of butter. You can use dried thyme if fresh is not available. Carrots are rich in vitamin A. This vitamin helps keep our eyes healthy. Honey adds natural sweetness and has antioxidants. Garlic boosts the immune system and may lower blood pressure. Olive oil is a heart-healthy fat. It can help reduce bad cholesterol. Thyme has anti-inflammatory properties and adds flavor. {{ingredient_image_1}} Start by gathering your ingredients. You will need: - 1 pound baby carrots (or regular carrots cut into sticks) - 3 tablespoons honey - 2 tablespoons unsalted butter - 3 cloves garlic, minced - 1 tablespoon olive oil - 1 teaspoon fresh thyme leaves (or ½ teaspoon dried thyme) - Salt and pepper to taste - Optional: Chopped parsley for garnish Wash the carrots under cold water. If using regular carrots, cut them into even sticks. This way, they cook evenly. Heat a large skillet over medium heat. Add the olive oil and butter. Wait until the butter melts and bubbles. Next, add the minced garlic. Sauté it for about 1 minute. You want it fragrant, not burnt. Now, toss in the carrots. Coat them well with the garlic butter. Drizzle honey over the carrots, then add thyme, salt, and pepper. Cook the carrots for about 10 to 15 minutes. Stir occasionally. You want them tender and glazed. The sauce should thicken slightly. Once cooked, remove the skillet from heat. Transfer the glazed carrots to a serving dish. If you like, garnish with chopped parsley. It adds a fresh touch and bright color. Enjoy your honey garlic glazed carrots! To get that shiny glaze, focus on the heat. Start by melting the butter and olive oil together in a large skillet. This mix should be hot but not smoking. Add minced garlic and sauté it quickly. It needs only a minute to become fragrant. Then, toss in the carrots. Make sure they are coated well in the garlic butter. Drizzle honey over the carrots for sweetness. Cook them until they are tender and the glaze thickens. Stir occasionally so they cook evenly. One common mistake is burning the garlic. Keep an eye on it, as it can turn bitter fast. Another mistake is overcrowding the pan. If you add too many carrots, they won’t cook evenly. Also, don’t skip seasoning with salt and pepper. This step boosts the flavor of the dish. Lastly, avoid cooking on high heat. If the heat is too high, the glaze won’t form properly. Here are some tools that can help you make this dish easier: - Large skillet: A wide surface helps cook the carrots evenly. - Wooden spoon: Great for stirring without scratching your pan. - Measuring spoons: For precise amounts of honey and oil. - Sharp knife: If using regular carrots, a sharp knife makes cutting easier. - Cutting board: A stable surface for chopping and preparing ingredients. With these tips and tools, you’ll make the best honey garlic glazed carrots! Pro Tips Use Fresh Carrots: For the best flavor and texture, use fresh baby carrots or whole carrots that are crisp and vibrant. Adjust Sweetness: Feel free to adjust the amount of honey based on your sweetness preference; you can add more for a sweeter glaze or less for a savory dish. Cook to Your Preference: Depending on your texture preference, you can cook the carrots longer for a softer bite or shorter for a bit of crunch. Garnish for Color: Adding chopped parsley not only enhances the presentation but also adds a fresh flavor contrast to the sweet glaze. {{image_2}} You can change the flavor of honey garlic glazed carrots by adding herbs and spices. Try using rosemary for a piney taste. Dill adds a fresh, bright note. A pinch of cumin gives a warm, earthy flavor. Experiment with your favorites to find what you like best. If you want to switch up the veggies, go for it! Broccoli and green beans work great. Sweet potatoes or parsnips can add a nice sweetness. Just adjust the cooking time based on the veggie you choose. This keeps your meals fresh and exciting. Honey garlic glazed carrots are perfect next to many dishes. They pair well with roasted chicken or grilled steak. Serve them with rice or quinoa for a complete meal. A sprinkle of chopped parsley makes them look even better. These carrots can brighten up any plate! To keep your honey garlic glazed carrots fresh, let them cool first. Once they are cool, place them in an airtight container. Make sure to seal it well. Store the container in the fridge. Leftovers will stay good for up to three days. If you see any moisture, dry it before sealing. This will help keep the carrots crisp. When you’re ready to enjoy your leftovers, reheating is easy. You can use a skillet or a microwave. If using a skillet, add a splash of water. Heat over medium-low until warm. Stir occasionally to mix the flavors. If using a microwave, place the carrots in a microwave-safe dish. Cover with a damp paper towel. Heat in 30-second bursts, stirring in between. This will keep them moist and tasty. Freezing honey garlic glazed carrots is also possible. First, let them cool completely. Then, place them in a freezer-safe bag. Remove as much air as you can before sealing. Label the bag with the date. You can freeze them for up to three months. To use frozen carrots, thaw them in the fridge overnight. Reheat them on the stove or in the microwave as mentioned above. This way, you can enjoy them later without losing flavor. Yes, you can use regular carrots. Just cut them into sticks. Aim for a size similar to baby carrots. This helps them cook evenly. The taste will be just as sweet and savory! To make this recipe vegan, swap the butter for plant-based butter. Use maple syrup instead of honey for sweetness. The garlic and thyme still give great flavor. Your dish will still taste amazing! Honey garlic glazed carrots have many nutrients. One serving offers about: - Calories: 140 - Carbohydrates: 25g - Sugars: 12g - Fiber: 3g - Protein: 1g - Fat: 5g These carrots provide vitamins A and C. They are a healthy side you can enjoy! This blog post covered how to make tasty honey garlic glazed carrots. I shared key ingredients and their health perks. You learned step-by-step prep and cooking methods. Tips helped you avoid common mistakes and use the right tools. You also discovered variations to spice things up and storage tips to keep your carrots fresh. Now, you can enjoy this simple, healthy dish anytime. Happy cooking!

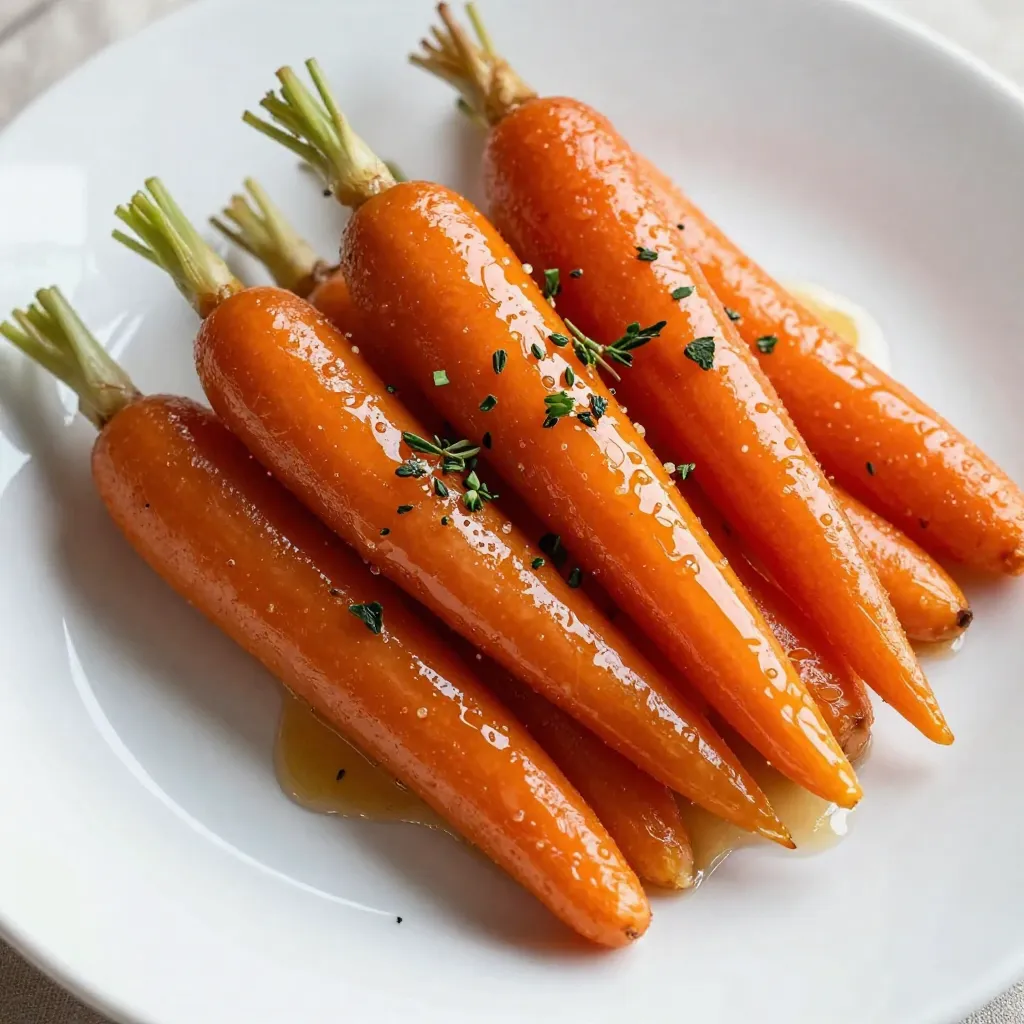
Honey Garlic Glazed Carrots Flavorful Vegetable Side

Looking to add a tasty side dish to your meal? Honey Garlic Glazed Carrots are the answer! These sweet and

To make caramel apple muffins, you will need: - 2 cups all-purpose flour - 1 cup granulated sugar - 1 tablespoon baking powder - 1/2 teaspoon baking soda - 1/2 teaspoon salt - 1 teaspoon ground cinnamon - 2 large eggs - 1/2 cup unsalted butter, melted - 1 cup buttermilk - 1 teaspoon vanilla extract - 2 cups apples, peeled and diced (about 2 medium apples) - 1 cup caramel sauce For added texture and flavor, consider these options: - 1/2 cup chopped nuts (like walnuts or pecans) You can swap some ingredients for different options: - Use whole wheat flour for more fiber. - Replace buttermilk with milk mixed with lemon juice or vinegar. - Use coconut oil instead of butter for a dairy-free option. - For a nut-free version, skip the nuts. These ingredients help create a muffin that is both tasty and moist. Enjoy crafting these delightful treats! First, I set my oven to 350°F (175°C). This makes sure the muffins bake evenly. I then take a 12-cup muffin tin and line it with paper liners. If I don’t have liners, I grease the tin well to prevent sticking. In a large bowl, I whisk together the dry ingredients. I combine 2 cups of flour, 1 cup of sugar, 1 tablespoon of baking powder, 1/2 teaspoon of baking soda, 1/2 teaspoon of salt, and 1 teaspoon of ground cinnamon. This mix adds flavor and helps the muffins rise. In another bowl, I crack 2 large eggs. I then add 1/2 cup of melted butter, 1 cup of buttermilk, and 1 teaspoon of vanilla extract. I whisk this mixture until it is smooth and well combined. This step adds moisture and richness to the muffins. I pour the wet ingredients into the bowl with the dry mix. I stir gently until just combined. It’s important not to over-mix. This keeps the muffins light and fluffy, which is what we want. Next, I fold in 2 cups of peeled and diced apples. If I want some crunch, I also add 1/2 cup of chopped nuts, like walnuts or pecans. I mix gently, ensuring the apples and nuts are evenly distributed in the batter. I spoon the batter into the prepared muffin tin, filling each cup about two-thirds full. Then, I drizzle about 1 tablespoon of caramel sauce on top of each muffin. I use a toothpick to swirl the caramel slightly into the batter. This creates a lovely marbled effect. I bake the muffins for 18 to 20 minutes. To check if they are done, I insert a toothpick into the center of a muffin. If it comes out clean, they are ready. After baking, I let the muffins cool in the tin for 5 minutes. Finally, I transfer them to a wire rack to cool completely. To make your muffins fluffy, do not over-mix the batter. Mix until just combined. This keeps the air bubbles intact. Another tip is to use room temperature eggs and buttermilk. They blend better and help create a lighter texture. Finally, make sure your baking powder is fresh. Old leavening agents can lead to dense muffins. Swirling caramel can be fun! After you fill the muffin cups, drizzle caramel on top. Use a toothpick to gently swirl it into the batter. Be careful not to mix it all in. You want swirls, not a solid caramel layer. This method gives a nice look and sweet bites in every muffin. Watch your muffins closely as they bake. Set a timer for 18 minutes. Check them with a toothpick. If it comes out clean, they are done. If not, bake for another minute or two. Over-baking can dry them out. Let them cool in the tin for 5 minutes before moving them. This helps them hold their shape. {{image_2}} You can boost the flavor of your caramel apple muffins with spices. Try adding nutmeg or ginger. A pinch of allspice can also add warmth. These spices mix well with cinnamon. They create a cozy taste perfect for fall. Think about changing the toppings or fillings. Instead of caramel, use cream cheese or chocolate chips. You could also sprinkle oats on top for a crunchy texture. For a fruity twist, mix in raisins or cranberries. These changes keep muffins exciting and fun. If you want vegan muffins, swap eggs for flaxseed meal. You can use almond milk instead of buttermilk. For gluten-free muffins, use a gluten-free flour blend. These adjustments keep the flavor while meeting special diets. Everyone can enjoy these tasty treats! To keep your caramel apple muffins fresh, store them in an airtight container. Place a piece of wax paper between layers to prevent sticking. Keep them at room temperature for up to three days. If you want them to last longer, consider refrigerating them. However, this may change their texture slightly. You can freeze these muffins for future treats. First, let them cool completely. Wrap each muffin tightly in plastic wrap. Then, place them in a freezer-safe bag or container. They can last up to three months in the freezer. When ready to eat, just thaw them overnight in the fridge. To reheat your muffins, preheat the oven to 350°F (175°C). Place the muffins on a baking sheet. Heat for about 10 minutes, or until warm. You can also use a microwave. Heat each muffin for 15 to 20 seconds. This warms them up and makes the caramel a little gooey again. Enjoy your delicious muffins! Yes, you can use other fruits. Pears or peaches work well. They add a nice flavor. Just make sure to chop them small like the apples. This keeps the muffins light and tasty. To make this recipe dairy-free, use plant-based milk. Almond or soy milk are great choices. Replace the butter with a dairy-free alternative, like coconut oil. These swaps keep the muffins soft and moist. If you over-mix the batter, the muffins can become tough. This happens because you develop the gluten too much. Mix just until the ingredients are combined. This ensures a light, fluffy texture. Caramel apple muffins can last about three days at room temperature. Store them in an airtight container to keep them fresh. For longer storage, you can freeze them for up to three months. Yes, you can use other toppings like chocolate sauce or fruit preserves. These options add different flavors. Just remember, the caramel gives a sweet, rich taste that is hard to match! This blog post covered everything you need to make delicious caramel apple muffins. We reviewed required and optional ingredients, along with smart substitutions. You learned step-by-step instructions, tips for fluffy muffins, and how to add your twist. Storage info helps keep your treats fresh for longer. In the end, making muffins can be fun and easy. With these tips and tricks, you can enjoy new flavors and share with friends. So, gather your ingredients and start baking! You’ll love your tasty creations.

Caramel Apple Muffins Tasty and Delightful Treat

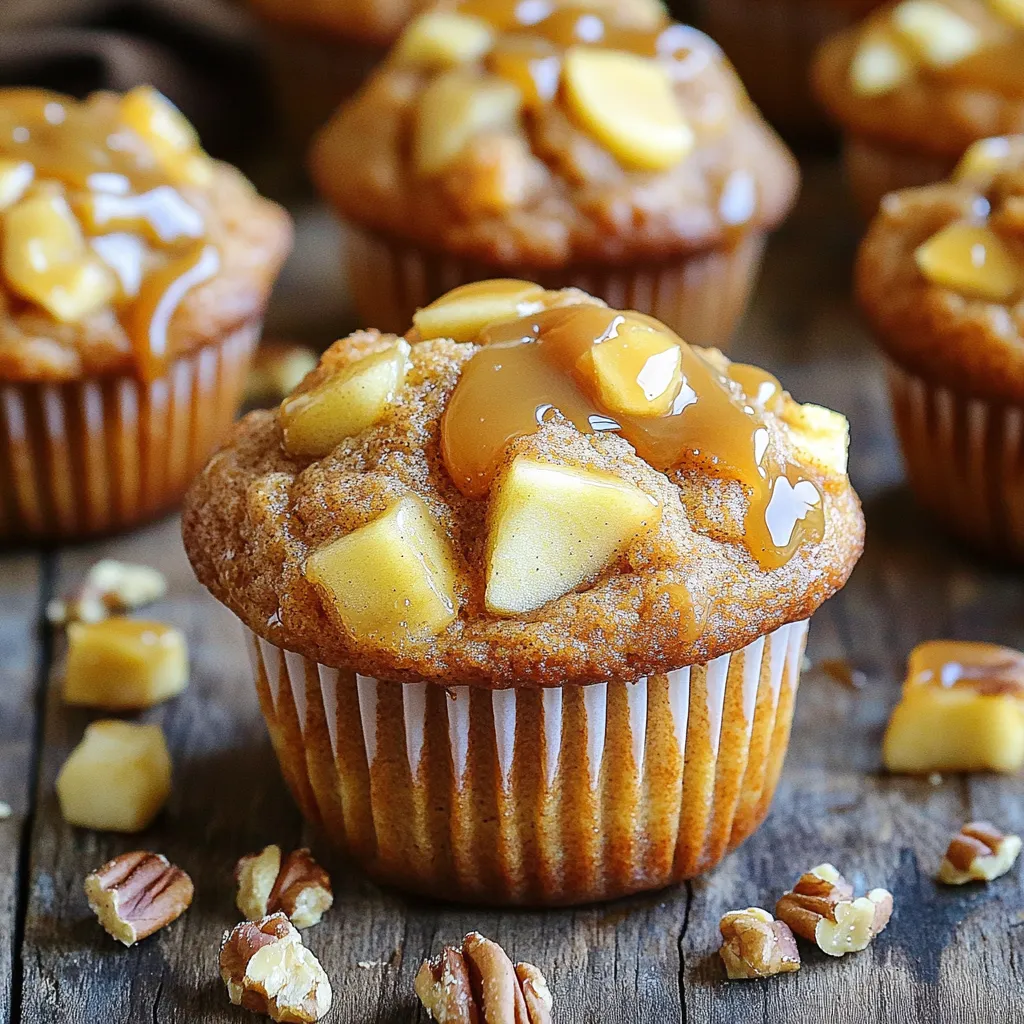
Caramel Apple Muffins are a tasty treat that can brighten your day! Bursting with sweet apple chunks and rich caramel

- 1 cup unsalted butter, softened - 1 cup brown sugar, packed - 1/2 cup granulated sugar - 2 large eggs - 1 teaspoon vanilla extract - 3 cups all-purpose flour - 1 teaspoon baking soda - 1 teaspoon baking powder - 1 tablespoon pumpkin spice blend - 1/2 teaspoon salt - 8 oz cream cheese, softened - 1/4 cup granulated sugar - 1/2 teaspoon vanilla extract - 1/2 cup pumpkin puree - 1/2 teaspoon pumpkin spice blend These ingredients create the perfect balance of flavors in your cookies. The unsalted butter gives them a rich base, while brown sugar adds depth. The granulated sugar helps the cookies spread just right. The eggs bind everything together, making the dough smooth. The pumpkin spice blend is key. It brings warmth and sweetness. You can buy it or mix cinnamon, nutmeg, and ginger for a homemade version. The cream cheese filling offers a creamy contrast to the cookie dough. Pumpkin puree makes it rich and adds moisture. Ensure you use softened cream cheese for easy mixing. This helps create a filling that is both smooth and fluffy. All these ingredients work together to create a delightful cookie that feels like a warm hug on a chilly day. - Beat cream cheese until smooth. Mix it well to get a creamy base. - Add remaining filling ingredients and mix. This includes sugar, vanilla, pumpkin puree, and pumpkin spice. - Freeze the filling for 30 minutes. This helps it firm up for easy use later. - Cream together butter and sugars. Use softened butter for the best texture. - Beat in eggs one at a time. This helps mix the eggs evenly into the dough. - Combine dry ingredients and mix with wet ingredients. Mix flour, baking soda, baking powder, pumpkin spice, and salt in a bowl. - Preheat oven to 350°F (175°C) and prepare baking sheets. Line the sheets with parchment paper for easy cleanup. - Prepare cookie dough and cheesecake filling. Get both ready before you start assembling. - Encase filling in dough and roll into balls. Flatten a piece of dough, add filling, and wrap it up. - Bake for 10-12 minutes. Look for lightly golden edges. - Cool on the baking sheet before transferring to a wire rack. Let them rest for about five minutes to firm up. To make the best cookies, avoid overmixing your dough. Overmixing can make cookies tough. Mix just until the dry and wet ingredients blend. This helps keep your cookies soft and chewy. It's also key to use room temperature ingredients. Room temperature butter and eggs blend better, giving you a smooth dough. You can make your cheesecake filling even better. Try adding different flavored extracts like almond or maple. This can change the taste and make it unique. You should also adjust the sugar based on how sweet you like it. Taste the filling before you freeze it. This way, you can find the right balance. Baking your cookies just right is important. Look for a golden edge and a soft center. This shows they are done but still moist. Keep an eye on baking times. Each oven may vary, so check your cookies a minute or two early. This will help you get that perfect texture. {{image_2}} You can switch ingredients for different diets. For a dairy-free option, replace butter with coconut oil. This change keeps the cookies moist and rich. If you need gluten-free cookies, use a gluten-free flour blend. This makes the cookies safe for those avoiding gluten while still tasting great. Want to mix it up? Add chocolate chips or nuts to the cookie dough. These additions give your cookies a nice crunch and extra flavor. You can also try different spice blends or extracts. Vanilla or almond extract can change the taste, making it unique each time. Make your cookies festive for the holidays! Incorporate cranberries or nuts for a Thanksgiving twist. These ingredients add a tart flavor that pairs well with pumpkin. You might also choose to top your cookies with caramel sauce. This adds a sweet and gooey touch that everyone will love. To keep your pumpkin spice cheesecake stuffed cookies fresh, store them in an airtight container at room temperature. This method maintains their soft texture and rich flavor. For the best taste, enjoy them within 5 days. If you want to save some cookies for later, freezing works great. Wrap each cookie tightly in plastic wrap or foil. Place the wrapped cookies in a freezer-safe bag. They can last up to 3 months in the freezer. When you’re ready to eat them, simply reheat the cookies in the oven at 350°F for about 5-10 minutes. This warms them up and softens them nicely. These cookies pair wonderfully with a hot cup of coffee or spiced tea. For gatherings, stack the cookies on a pretty plate and dust them with powdered sugar for a festive touch. You can also add a dollop of whipped cream on the side for extra indulgence. Enjoy sharing these delights with family and friends! You can check if the cookies are done by looking at their color and texture. The edges should be lightly golden. The centers should still look soft and slightly puffy. If you press them gently, they should spring back, but not feel hard. Keep an eye on the time, around 10 to 12 minutes works best. Yes, you can make the cheesecake filling ahead of time. Prepare it and store it in the fridge for up to three days. Make sure to cover it tightly to keep it fresh. You can also freeze the filling for up to a month. Just remember to thaw it in the fridge before using. If you don’t have pumpkin spice, you can make your own blend. Mix together 1 teaspoon of cinnamon, 1/2 teaspoon of ginger, 1/4 teaspoon of nutmeg, and a pinch of cloves. This will give you a similar warm flavor. Feel free to adjust the amounts to your taste. Yes, you can make these cookies vegan with some simple swaps. Use coconut oil instead of butter. Replace the eggs with flax eggs or applesauce. For the cheesecake filling, use vegan cream cheese and maple syrup instead of granulated sugar. These changes will keep the flavors rich and tasty. These cookies blend rich cheesecake and delightful pumpkin spice. You learned how to create both the creamy filling and the cookie dough. Plus, I shared tips for baking perfection and fun variations. Remember, you can customize ingredients, adjust flavors, and store these treats with ease. Try them for a cozy dessert at home or a treat to share. Enjoy the process and let your creativity shine while baking!

Pumpkin Spice Cheesecake Stuffed Cookies Delight

Get ready for a treat that blends the best of fall flavors! In this guide, I’ll show you how to

- 1 block (14 oz) firm tofu, pressed and cubed - 1 cup broccoli florets - 1 cup bell peppers (assorted colors), sliced - 1 cup carrots, thinly sliced - 3 tablespoons teriyaki sauce - 2 tablespoons soy sauce - 1 tablespoon olive oil - 2 cloves garlic, minced - 1 teaspoon fresh ginger, grated - 1 tablespoon sesame seeds - 3 green onions, sliced (for garnish) - Salt and pepper to taste Gather these fresh ingredients to make a tasty dish. The firm tofu gives the meal a nice texture. Broccoli adds crunch, while bell peppers offer sweetness. Carrots bring color and flavor. For the marinade, teriyaki sauce gives a rich taste. Soy sauce adds depth, and olive oil helps blend everything. Minced garlic and grated ginger boost the flavor even more. Finally, sesame seeds and green onions make great garnishes. They add a pop of flavor and make the dish look pretty. Salt and pepper enhance all the tastes, making every bite delightful. - Preheat the oven to 425°F (220°C). - Line a large baking sheet with parchment paper for easy cleanup. - Combine teriyaki sauce, soy sauce, olive oil, minced garlic, and grated ginger in a bowl. - Mix well to ensure every ingredient blends nicely. - Coat the cubed tofu with the marinade. - Allow it to marinate for at least 10 minutes for better flavor. - Toss broccoli, bell peppers, and carrots with olive oil, salt, and pepper. - Make sure they are evenly coated for great taste. - Spread tofu and veggies on the baking sheet. - Bake for 25-30 minutes, stirring halfway through. - Once baked, sprinkle sesame seeds over the top. - Serve with sliced green onions for a fresh finish. To get the best texture from your tofu, start by pressing it. Pressing removes excess water. This helps the tofu absorb flavors better. Wrap the tofu in a clean towel. Place a heavy object on top. Leave it for about 15 minutes. After pressing, cut the tofu into cubes. For marination, let the cubed tofu soak in the sauce for at least 10 minutes. This time allows the tofu to soak up the teriyaki and soy sauce. The longer it marinates, the tastier it gets. You can even marinate it overnight for more flavor. When choosing vegetables, think about color and texture. Broccoli, bell peppers, and carrots work well. They all roast nicely and add great flavor. You can also try zucchini, snap peas, or sweet potatoes. Cut the veggies into similar sizes. This helps them cook evenly. For example, slice the bell peppers into strips and cut the carrots thin. This way, they will roast at the same rate. Stir the tofu and veggies halfway through baking. This helps them cook evenly and get crispy. Check for doneness by looking for golden tofu and tender veggies. If the tofu is golden brown, it's ready. The veggies should be vibrant and soft, but not mushy. Adjust baking time as needed. {{image_2}} You can switch the tofu for other proteins. Chicken works great for meat lovers. Simply cut it into bite-sized pieces. Tempeh is a fantastic option too. It has a nutty flavor and adds protein. For a seafood twist, try shrimp. Shrimp cooks quickly, so adjust your bake time. Feel free to experiment with your favorite protein! While teriyaki sauce is tasty, you can try other sauces. Hoisin sauce adds a sweet kick. Soy sauce mixed with honey gives a nice glaze. For a spicy twist, use sriracha mixed with soy sauce. Each sauce brings its own flavor. Mix and match until you find your perfect blend. Using seasonal veggies can boost your meal's freshness. In spring, add asparagus or snap peas. Summer brings zucchini and corn, which brighten the dish. Fall is perfect for sweet potatoes or Brussels sprouts. Winter vegetables like cauliflower or kale add heartiness. Customize your mix based on what’s in season! Store your leftover Sheet-Pan Teriyaki Tofu and Veggies in an airtight container. Make sure to let it cool before sealing. This helps keep the flavors fresh. You can keep it in the fridge for about 3 to 4 days. After that, the tofu may lose its great taste and texture. To freeze this dish, first let it cool completely. Then, place it in a freezer-safe container. You can also use freezer bags for easy storage. Label the bags with the date to track freshness. This meal can last up to 2 months in the freezer. When ready to eat, thaw it overnight in the fridge. To reheat, the oven works best. Preheat it to 350°F (175°C). Spread the tofu and veggies on a baking sheet. Heat for about 15 to 20 minutes until warm. You can also use a microwave, but be careful. It may make the tofu a bit soft. If you prefer, use a skillet to heat it up on the stove. This keeps the texture crisp. It takes about 15 minutes to prep. The total cooking time is around 30 minutes. So, you can enjoy this dish in just 45 minutes. This quick time makes it perfect for busy weeknights. Yes, you can use frozen vegetables. Frozen veggies are easy and save time. However, fresh veggies taste better. If you choose frozen, add them straight from the bag. No need to thaw them first. Just adjust the cooking time, as frozen veggies may need a few extra minutes. This recipe is not gluten-free. Regular soy sauce contains gluten. To make it gluten-free, use tamari instead of soy sauce. Tamari tastes great and works well in this dish. Look for tamari in most grocery stores. Yes, this recipe is vegan. All the ingredients are plant-based. The tofu, veggies, and sauces are all vegan-friendly. You can enjoy this meal without any worry about animal products. You can serve this dish with steamed rice. White, brown, or jasmine rice all work well. You can also pair it with quinoa or a side salad. These options make the meal more filling and tasty. This blog post detailed a simple way to make Sheet-Pan Teriyaki Tofu and Veggies. We covered the ingredients, marinade, and baking steps. I shared tips on perfecting tofu and options for protein swaps. You have ideas for using seasonal vegetables and storage. Finally, we answered common questions about prep times and vegan choices. Get ready to enjoy a tasty, healthy meal that is quick and easy!

Sheet-Pan Teriyaki Tofu and Veggies Simple Delight

Looking for a quick and tasty meal? My Sheet-Pan Teriyaki Tofu and Veggies combines savory flavors and healthy ingredients in

- 1 tube (8 oz) refrigerated cinnamon rolls - 2 large eggs - 1/4 cup milk To start, you need some key ingredients. The star of this dish is the refrigerated cinnamon rolls. They bring sweet and gooey flavors that everyone loves. Eggs add richness, while milk helps make the batter smooth. These three ingredients form the base for your French toast sticks. - 1 teaspoon vanilla extract - 1 teaspoon ground cinnamon - 1 tablespoon sugar Next, let's enhance the flavor. Vanilla extract gives a warm, sweet taste. Ground cinnamon adds that classic spice we love in cinnamon rolls. Sugar brings out the sweetness in each bite. Together, these flavor enhancers make your dish taste even better. - Cooking spray (for air fryer) - Maple syrup (for serving) - Optional: powdered sugar for garnish When serving, use cooking spray to help the sticks crisp up nicely in the air fryer. Maple syrup is a must for dipping; it adds a sweet touch. If you want to impress, dust the sticks with powdered sugar. It looks great and tastes even better. Enjoy your delicious creation! 1. Preheating the air fryer: Start by preheating your air fryer to 350°F (175°C). This step is key for even cooking. 2. Preparing cinnamon rolls: Open the tube of refrigerated cinnamon rolls. Carefully separate them and cut each roll into four small pieces. This will help them cook faster and make them easier to dip. 1. Whisking ingredients together: In a medium bowl, combine 2 large eggs, 1/4 cup milk, 1 teaspoon vanilla extract, 1 teaspoon ground cinnamon, and 1 tablespoon sugar. Whisk these together until they blend well. 2. Dipping the cinnamon roll pieces: Take each cinnamon roll piece and dip it into the egg mixture. Make sure to coat each side fully. Let any extra mixture drip off before placing them in the air fryer. 1. Arranging cinnamon rolls in the basket: Place the coated cinnamon roll pieces in the air fryer basket. Arrange them in a single layer. Avoid overcrowding to ensure they cook evenly. If needed, work in batches. 2. Cooking duration and shaking guidelines: Lightly spray the tops with cooking spray. Air fry the sticks for about 6 to 8 minutes. Halfway through, shake the basket gently. This helps them brown and cook evenly. After they turn golden brown, they are ready to eat. For crispy Air Fryer Cinnamon Roll French Toast Sticks, set your air fryer to 350°F (175°C). This temperature works well, giving the rolls a golden brown finish. Coating the cinnamon rolls well is key. Each piece should soak up the egg mixture for great flavor. Avoid overcrowding the air fryer basket. This lets hot air flow around each stick, ensuring even cooking. If you have many sticks, cook in batches. You may need to adjust the cooking time slightly. For larger batches, check them after 8 minutes to stay on track. Get creative when serving your French toast sticks. You can drizzle them with maple syrup for sweetness. They also pair well with fresh fruit or whipped cream. For a fun twist, try a sprinkle of powdered sugar on top. This adds a nice touch to your breakfast spread! {{image_2}} You can easily change the flavor of your Air Fryer Cinnamon Roll French Toast Sticks. Here are two great ideas: - Adding chocolate chips: Mix in some chocolate chips with the egg mixture. This adds a rich, sweet touch that pairs well with cinnamon. - Using different flavored icing: Instead of the standard icing, try cream cheese, maple, or even hazelnut icing. Each brings a new twist to the dish. If you have dietary needs, don’t worry! You can still enjoy these tasty sticks. - Gluten-free options: Look for gluten-free cinnamon rolls at your local store. They work just as well in this recipe and taste great. - Vegan substitutions: Replace the eggs with a flaxseed mixture. Combine one tablespoon of ground flaxseed with three tablespoons of water. Let it sit for a few minutes to thicken. Use plant-based milk instead of dairy milk for a fully vegan treat. Get creative with how you serve your French toast sticks! - Making mini versions for bites: Cut the cinnamon rolls into smaller pieces for fun bite-sized snacks. They are great for kids or parties. - Using as a dessert option: Serve these sticks as dessert with a scoop of ice cream or whipped cream. Drizzle with extra icing or chocolate sauce for a sweet finish. To keep your Air Fryer Cinnamon Roll French Toast Sticks fresh, use an airtight container. Place the sticks in a single layer if possible. You can store them in the fridge for up to three days. After three days, they might lose their taste and texture. When you’re ready to enjoy your leftovers, use the air fryer for the best results. Preheat your air fryer to 350°F (175°C) and heat the sticks for about 3-5 minutes. This method keeps them crispy. Avoid using a microwave, as it can make them soggy. You can freeze these sticks either before or after cooking. If you freeze them before cooking, cut the cinnamon rolls and prepare the egg mixture. Dip them, then freeze in a single layer. Once frozen, transfer to a bag. If cooked, let them cool before freezing. Thaw them in the fridge overnight before reheating for best results. Yes, you can use homemade cinnamon rolls. They may give a fresher taste. If you make them, cut them into small pieces like the store-bought ones. This helps them cook evenly. Homemade rolls may have more moisture, so keep an eye on them as they cook. Set your air fryer to 350°F (175°C). This temperature works great for cooking the cinnamon roll sticks. Cook them for about 6-8 minutes. Make sure to shake the basket halfway through. This helps them crisp up nicely and cook evenly. To make this recipe healthier, consider these tips: - Use egg whites instead of whole eggs to cut fat. - Substitute almond milk or oat milk for regular milk. - Reduce the sugar to half a tablespoon or skip it altogether. These swaps can help lower calories while keeping the flavor yummy. You now have all the tips to make air fryer cinnamon rolls a tasty treat. Start with the main ingredients like cinnamon rolls, eggs, and milk. Enhance the flavor with vanilla, cinnamon, and sugar. Follow the steps to prepare and air fry them perfectly. Don’t forget to try fun variations and storage tips. With these ideas, you can enjoy these rolls as breakfast, bites, or dessert. Experiment and find your favorite way to enjoy this sweet delight!

Air Fryer Cinnamon Roll French Toast Sticks Delight

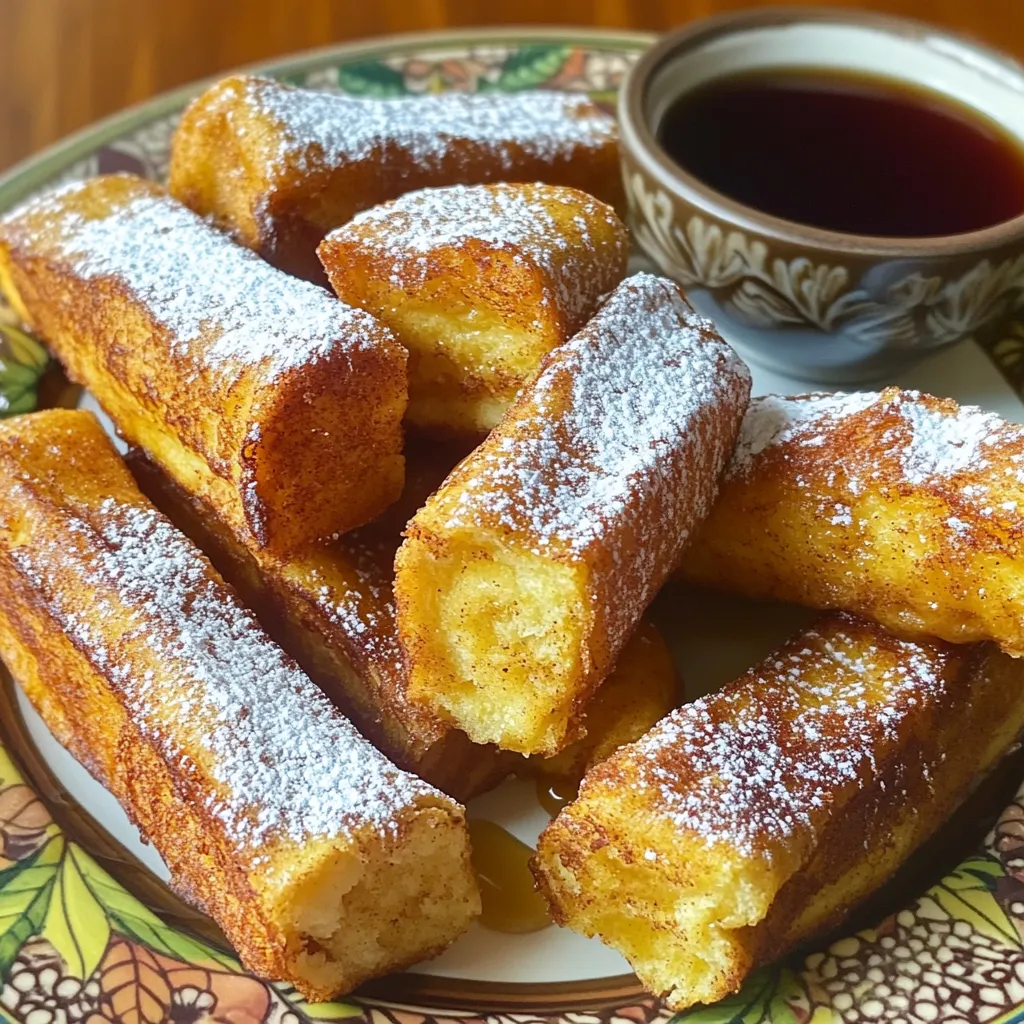
Craving a fun twist on breakfast? Try my Air Fryer Cinnamon Roll French Toast Sticks! This treat combines the warm

- 4 boneless, skinless chicken breasts - 1 cup Greek yogurt - 1/2 cup feta cheese, crumbled These main ingredients create the heart of the dish. The chicken breasts provide lean protein. Greek yogurt adds creaminess and tang. Feta cheese gives a salty kick that complements the yogurt. - 1/4 cup olive oil - 2 tablespoons lemon juice - 3 cloves garlic, minced The olive oil adds richness to the dish. Lemon juice brightens the flavors and balances the creaminess. Garlic brings depth and warmth, making every bite flavorful. - 1 cup cherry tomatoes, halved - 1 cucumber, diced - 1/4 red onion, finely chopped Fresh veggies add crunch and freshness. Cherry tomatoes offer sweetness. Cucumber cools down the dish, while red onion adds a nice bite. These fresh additions bring color and texture to your pitas, making them vibrant and eye-catching. First, place the four boneless, skinless chicken breasts in the slow cooker. This is your base for a tasty meal. Next, mix the creamy marinade. In a bowl, combine one cup of Greek yogurt, half a cup of crumbled feta cheese, a quarter cup of olive oil, and two tablespoons of lemon juice. Add three cloves of minced garlic and one tablespoon of dried oregano. Don’t forget to sprinkle in some salt and pepper. Mix it all until it’s smooth. Pour this creamy mixture over the chicken in the slow cooker. Make sure each piece is well coated. Now, it's time to cook. Cover the slow cooker and set it to low for six to seven hours. If you’re in a hurry, you can set it to high for three to four hours. The chicken will be tender and easy to shred when it's done. After cooking, take the chicken out of the slow cooker. Use two forks to shred it. Return the shredded chicken to the slow cooker and stir it well to coat with the sauce. While the chicken cooks, prepare your pita pockets. Cut them in half. You can lightly toast them if you like a bit of crunch. Now comes the fun part—stuffing the pitas! Take each pita pocket and fill it with a generous scoop of the creamy chicken mixture. Add some halved cherry tomatoes, diced cucumber, and finely chopped red onion. For the finishing touch, sprinkle freshly chopped parsley on top before serving. Enjoy your delicious Slow Cooker Creamy Greek Chicken Pitas! To ensure even cooking, place the chicken breasts in a single layer. Avoid stacking them. This helps the chicken cook uniformly. Use a meat thermometer to check the internal temperature. It should reach 165°F for safe eating. For perfect texture, cook on low heat for 6 to 7 hours. High heat cooks faster but may dry out the chicken. Consider adding spices like smoked paprika or cumin. These will give the dish a warm kick. You can also add a pinch of red pepper flakes for heat. To balance flavors, use the right amount of lemon juice. It brightens the dish and cuts through the creaminess. Taste as you go to find the right mix for you. Pair your creamy Greek chicken pitas with a fresh side salad. A simple mix of greens, olive oil, and vinegar works well. For garnishing, sprinkle extra feta cheese and parsley on top. You can also add sliced olives for a nice touch. These add both flavor and color to your meal. {{image_2}} You can make this recipe fit your diet. For gluten-free options, use gluten-free pita bread. Many stores stock great choices. They taste just as good as regular pita. For dairy-free needs, try using coconut yogurt instead of Greek yogurt. Nutritional yeast can replace feta to keep the flavor. This option keeps your meal creamy and tasty. Want to add some flair? A Mediterranean twist is easy. Consider adding olives or roasted red peppers. Both add great taste! You can also add fresh herbs. Dill or mint can bring a fresh burst of flavor. If you want more crunch, toss in bell peppers or spinach. They mix well with the creamy chicken. If you don’t have a slow cooker, try an Instant Pot. Cook the chicken on high pressure for about 10 minutes. Quick release the steam, shred the chicken, and mix it back in the sauce. You can also make this on the stovetop. Sauté the chicken in a pan and add the creamy sauce. Cook it on low heat until the chicken is tender. This method is fast and easy, perfect for busy days. To keep your Slow Cooker Creamy Greek Chicken fresh, store leftovers in the fridge. Place them in an airtight container. This helps prevent spoilage. The chicken stays good for up to three days. If you want to keep it longer, freezing is a great option. Transfer the chicken to a freezer-safe bag. It can last up to three months in the freezer. Reheating the chicken properly is key. You want to keep it tasty and moist. The best way is to use the microwave. Heat it on medium power for about two to three minutes. Check every minute to avoid overheating. If you prefer the oven, set it to 350°F. Bake for 10-15 minutes until hot. Adding a splash of water can help retain moisture. Meal prep can make your week easier. Start by preparing the chicken sauce ahead of time. Mix the Greek yogurt, feta, and spices. Store it in the fridge. You can also chop the veggies early. Cut the cherry tomatoes, cucumber, and red onion. Keep them in separate containers. This way, they stay fresh. On busy days, just cook the chicken and stuff the pitas. Pair it with a side salad for a complete meal. To add some heat, try using red pepper flakes. You can mix one teaspoon into the creamy marinade. Another option is to add diced jalapeños to the slow cooker with the chicken. For a different flavor, use smoked paprika or cayenne pepper. These will give your dish a nice kick without overpowering the Greek taste. Yes, you can use turkey or pork if you prefer. Turkey breasts work well and have a mild flavor. Thin pork loin slices also absorb the creamy marinade nicely. Just adjust the cooking time. Pork may need a bit longer to cook through, while turkey might be ready faster. The chicken is done when it is tender and easy to shred. Use a meat thermometer to check the temperature. It should reach at least 165°F. Look for juices that run clear and not pink. If the chicken falls apart with a fork, it's perfect for your pitas! This blog post outlined how to make flavorful chicken pitas. You learned about key ingredients like chicken, Greek yogurt, and feta cheese, plus the flavor enhancers and fresh additions. I walked you through step-by-step cooking instructions, tips for perfect texture, and variations for different diets. Finally, I shared storage tips and answered common questions. Enjoy your cooking adventure, and remember, you can always mix it up with new flavors!

Slow Cooker Creamy Greek Chicken Pitas Delight

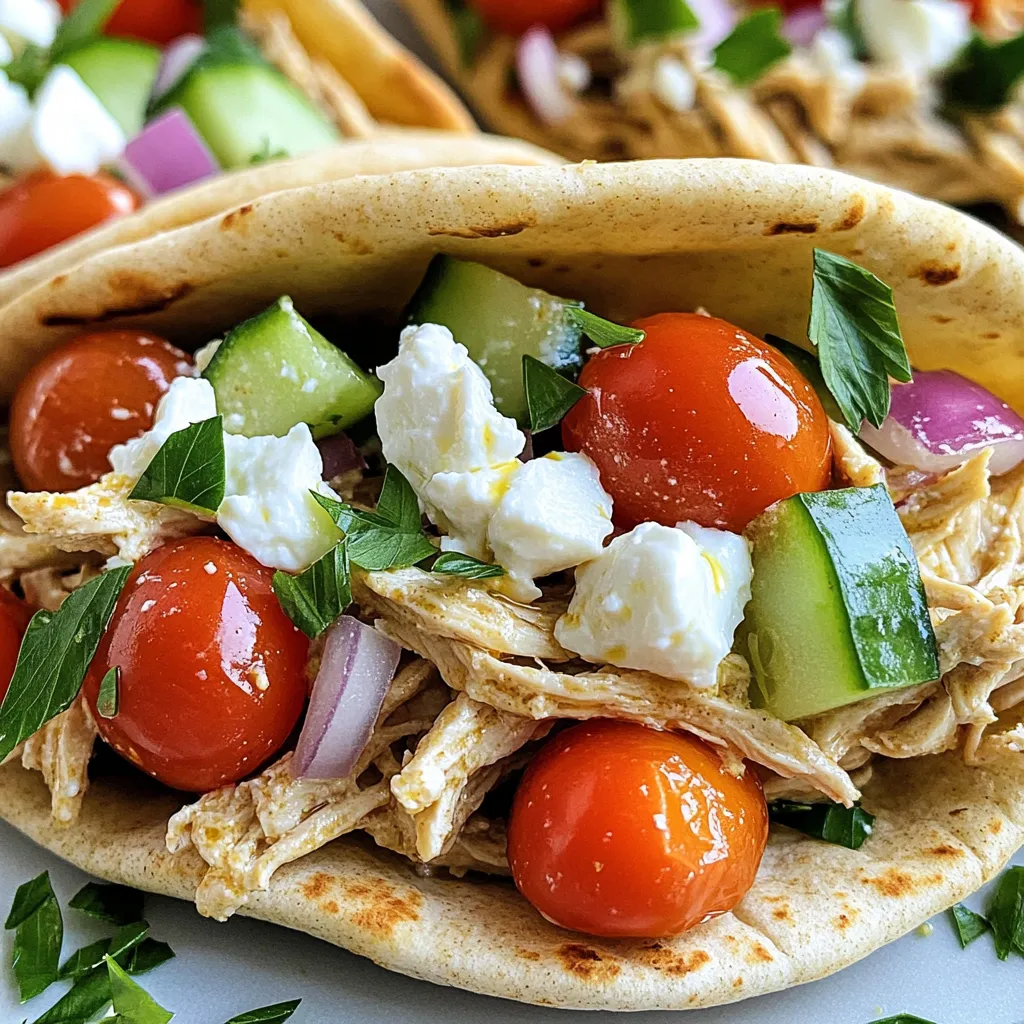
Craving a delicious and easy meal? Slow Cooker Creamy Greek Chicken Pitas are the answer! This dish is not just

- 4 salmon fillets (about 6 oz each) - 2 tablespoons sesame oil - 2 tablespoons fresh ginger, grated - 3 garlic cloves, minced - 1/4 cup soy sauce (low sodium preferred) - 2 tablespoons honey - 1 tablespoon rice vinegar - 1 tablespoon sesame seeds - 1 green onion, finely sliced - 1 cup sugar snap peas - Salt and pepper to taste - Cooked rice or quinoa, for serving You can swap salmon for any firm fish like trout or cod. If you want a vegetarian option, try tofu. Use olive oil instead of sesame oil for a different flavor. If you don’t have fresh ginger, ground ginger works too, but use less. For soy sauce, tamari is a great gluten-free choice. Honey can be replaced with maple syrup for a vegan option. When measuring sticky ingredients like honey, use a liquid measuring cup. Spray it lightly with oil first. For ginger, a microplane grater works best for fine grating. Use a scale for the salmon to ensure equal portions. When measuring soy sauce, pour it slowly to avoid spills. Always taste your sauce as you make it to get the flavor just right. To start, gather your salmon fillets. You need four fillets, each about six ounces. Rinse them under cold water and pat them dry with a paper towel. This step helps the skin crisp up nicely. Next, season each fillet with salt and pepper. Be generous, as this will enhance the flavor. Now, grab a large skillet and heat two tablespoons of sesame oil over medium-high heat. The oil should shimmer when it's ready. Place the salmon in the skillet skin-side down. Cook for three to four minutes until the skin is crispy. You will see the color change halfway up the side of the fillet. This shows it is cooking well. While the salmon cooks, make the sauce. In a small bowl, whisk together two tablespoons of fresh ginger, three minced garlic cloves, one-fourth cup of low-sodium soy sauce, two tablespoons of honey, and one tablespoon of rice vinegar. Mix until smooth. After four minutes, pour the sauce over the salmon. Add one cup of sugar snap peas to the skillet too. Cook for another three to four minutes. Spoon the sauce over the salmon as it cooks. The salmon will finish cooking, and the snap peas will stay crisp. Before serving, sprinkle one tablespoon of sesame seeds and sliced green onion on top. This adds flavor and a nice crunch. Serve the dish over cooked rice or quinoa, drizzling extra sauce from the skillet on top. Enjoy your meal! To get crispy skin on your salmon, start with dry fillets. Pat them with paper towels before cooking. Next, heat the sesame oil until it shimmers. This means it's hot enough. Place the salmon skin-side down in the skillet. Cook it for about 3 to 4 minutes. Don't move it too much. Let it sear nicely. The skin will turn golden and crispy. The secret to great flavor lies in your seasonings. Use fresh ginger and garlic. They add a nice punch. Whisk them with soy sauce, honey, and rice vinegar. This mix makes a tasty sauce. Pour it over the salmon while it cooks. The sauce will soak into the fish and snap peas. You can also sprinkle extra sesame seeds on top. They add a lovely crunch and nutty taste. Cooking salmon at medium-high heat works well. It cooks quickly and evenly. If your fillets are thicker, you may need more time. Keep an eye on them. If they start to brown too fast, lower the heat slightly. The salmon is done when it flakes easily with a fork. Aim for about 6 to 8 minutes of total cooking time. {{image_2}} You can swap salmon for other fish. Tuna and cod work well. Chicken breast is another great choice. Just adjust cooking time for thicker cuts. For a plant-based option, try firm tofu. It soaks up the sauce nicely and adds protein. Feel free to add more veggies to the skillet. Bell peppers, broccoli, or carrots brighten the dish. You can mix in leafy greens like spinach or kale. Just add them to the skillet a minute before the dish is done. This keeps them fresh and adds color. There are many ways to tweak the flavor. Add a splash of lime juice for zest. You can use sriracha for heat. Try swapping honey for maple syrup for a different sweetness. Each change brings a new spin to this dish. To store leftovers, let the salmon cool first. Use an airtight container. Place the salmon and peas in the container. Make sure to keep the sauce separate. This helps keep the salmon fresh. You can store leftovers in the fridge for up to 3 days. To reheat, place the salmon in a skillet. Add a splash of water or sauce. Heat on low over medium heat. This keeps the salmon moist and tasty. You can also use a microwave. Heat on medium power for 1-2 minutes. Check to avoid overcooking. You can freeze cooked salmon if you need to. Place it in a freezer-safe bag. Remove as much air as possible. Seal it tightly. You can freeze it for up to 3 months. When ready, thaw in the fridge overnight. Reheat as needed for a quick meal. Yes, you can use frozen salmon. Just make sure to thaw it first. Thaw the salmon overnight in the fridge or under cold water. After thawing, pat it dry to remove excess moisture. This helps the skin crisp up nicely when you cook it. You can serve this dish with a variety of sides. Here are some great options: - Cooked rice or quinoa - Steamed broccoli or asparagus - A fresh green salad - Roasted sweet potatoes These sides add color and flavor to your meal. They also balance the rich taste of the salmon. To make this recipe gluten-free, use gluten-free soy sauce. Many brands offer a good taste without gluten. You can also swap rice vinegar with apple cider vinegar, which is naturally gluten-free. Just check labels to be sure everything you use is gluten-free. This blog post covered the key steps to cook sesame ginger salmon. I shared ingredient lists, substitutions, and measurement tips to help you. You learned how to prep, cook, and serve the dish. I provided tips for crispy skin and enhancing flavors too. Plus, I offered variations on proteins and vegetables to mix things up. Storing leftovers and reheating methods were also discussed. Now, you're ready to try this delicious recipe, adjust it to your taste, and enjoy every bite. Happy cooking!

Minute Sesame Ginger Salmon Skillet Quick and Tasty

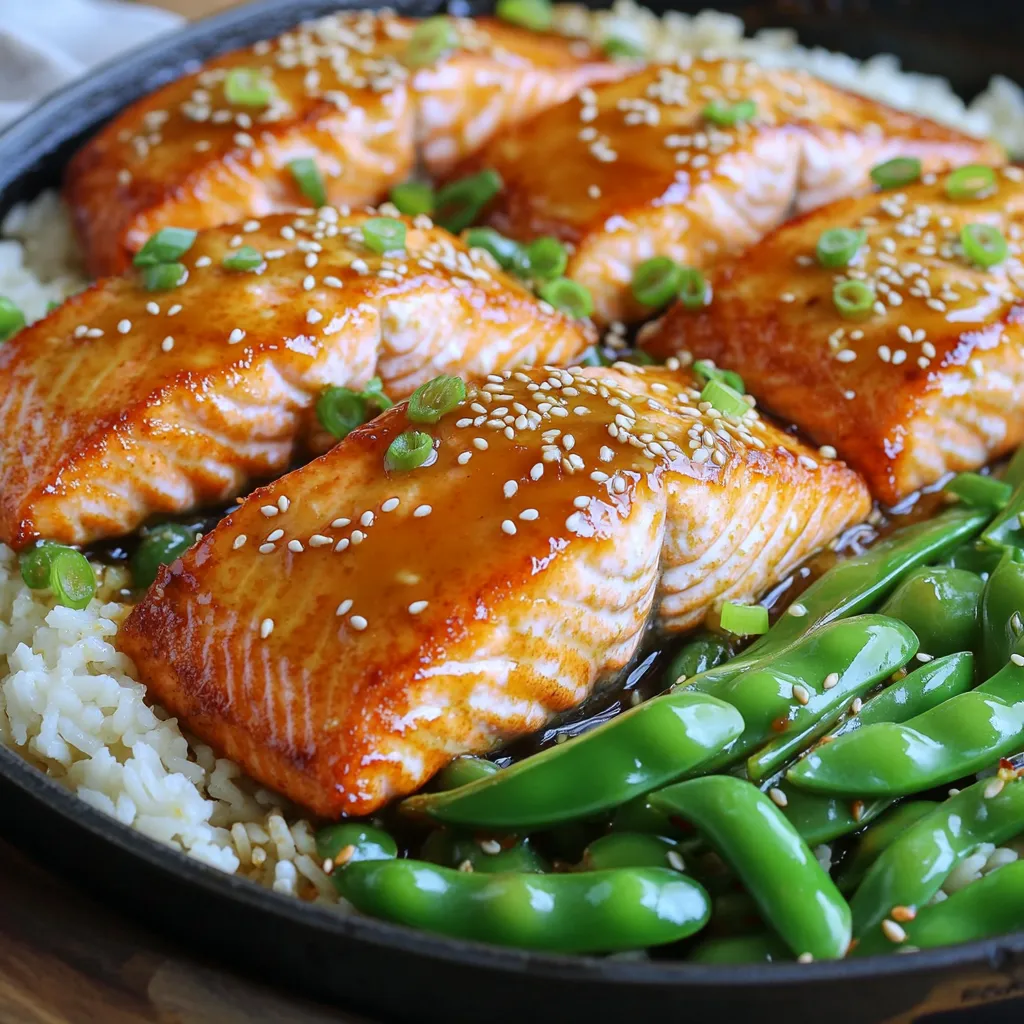
If you’re in a rush but crave something delicious, my Minute Sesame Ginger Salmon Skillet is for you. This quick

Here’s what you need to make these tasty no-bake chocolate chip cookie dough bars: - 1 cup almond flour - 1/2 cup rolled oats - 1/4 cup maple syrup - 1/4 cup peanut butter (or almond butter) - 1/2 teaspoon vanilla extract - 1/4 teaspoon salt - 1/2 cup mini chocolate chips - 1/4 cup chopped nuts (optional) Each ingredient plays a key role. Almond flour gives a rich base. Rolled oats add texture and heartiness. Maple syrup provides natural sweetness. Peanut butter adds creaminess and flavor. Vanilla extract enhances the overall taste. A pinch of salt balances the sweetness. Mini chocolate chips bring that classic cookie vibe. Chopped nuts can add crunch if you like. You can mix and match these ingredients to suit your taste. Substitute almond flour with another flour if needed. Just remember, it may change the taste and texture a bit. Enjoy experimenting! First, grab a mixing bowl. Combine 1 cup of almond flour and 1/2 cup of rolled oats. Stir well until mixed. This blend gives your bars a nice texture. Next, add your wet ingredients. Pour in 1/4 cup of maple syrup, 1/4 cup of peanut butter, 1/2 teaspoon of vanilla extract, and 1/4 teaspoon of salt. Mix these together until the mixture is smooth. This helps bind the dry ingredients. Now, mix until a sticky dough forms. You want it to hold together well. Then, fold in 1/2 cup of mini chocolate chips and 1/4 cup of chopped nuts if you like. Make sure they are evenly spread throughout the dough. Take an 8x8 inch baking dish and line it with parchment paper. Leave some paper hanging over the sides. This will help you lift the bars out later. Press the dough firmly into the dish using a spatula or your hands. Make sure it is even. Put the dish in the refrigerator for at least 30 minutes. This step is key. It helps the bars set and makes them easier to cut. Once chilled, lift the bars out using the parchment paper overhang. Cut them into squares or rectangles. Store your bars in an airtight container in the refrigerator. They will stay fresh for up to a week. Enjoy your tasty treats! To make your bars extra chewy, I suggest adding more peanut butter. Use 1/3 cup instead of 1/4 cup. This small change gives the bars a richer texture. You can also add an extra tablespoon of maple syrup. This keeps the bars moist and delicious. If you want to switch things up, try almond butter or cashew butter. Both options work great in this recipe. They add a unique flavor while keeping the texture smooth. If you need a nut-free option, go for sunflower seed butter. It gives a nice taste too! Mix your ingredients well to get the right consistency. It should be sticky but not too wet. If your dough feels dry, add a little more maple syrup. After mixing, press the dough firmly into your dish. Refrigerate it for at least 30 minutes. This helps the bars set properly and makes them easier to cut. {{image_2}} You can change the flavor of your bars easily. Try adding different extracts or spices. Here are some ideas: - Use almond extract for a nutty flavor. - Add a pinch of cinnamon for warmth. - Mix in cocoa powder for a chocolate twist. - Try a splash of coffee extract for depth. These small changes can make your bars unique and exciting. Experiment and find your favorite mix! Want to make these bars a bit lighter? You can swap some ingredients for healthier options. Here are a few ideas: - Use a sugar-free maple syrup for fewer calories. - Replace peanut butter with a low-fat nut butter. - Try using a sugar substitute like stevia or monk fruit. - Use unsweetened applesauce to cut down on sugar. These swaps can help you enjoy your treats without the guilt. Toppings add fun and flavor to your bars. Here are some tasty options: - Drizzle melted dark chocolate on top. - Sprinkle sea salt for a sweet-salty combo. - Add crushed nuts or seeds for crunch. - Top with shredded coconut for a tropical twist. These toppings can really enhance your no-bake cookie dough bars. Get creative and have fun! To keep your No-Bake Chocolate Chip Cookie Dough Bars fresh, use an airtight container. This helps prevent moisture from making them soggy. Place the bars in the fridge right after cutting them. If you stack the bars, put parchment paper between layers. This keeps them from sticking together. You can freeze these bars for later. First, cut them into squares. Wrap each square with plastic wrap. Then, place them in a freezer bag or container. They can stay in the freezer for up to three months. When you're ready to eat, take out a square and let it thaw at room temperature for about 30 minutes. You can also microwave it for 10-15 seconds if you want it warm. In the fridge, these bars last for about one week. After a week, they may lose some flavor and texture. If you notice any odd smells or changes in color, it's best to toss them out. Enjoy these sweet treats while they are fresh! Yes, you can use regular flour. However, the texture will change. Almond flour gives a nutty flavor and softer texture. Regular flour may make the bars denser. If you use all-purpose flour, you might need to adjust the liquid. The bars could end up too dry, so keep an eye on the mixture. To make these bars vegan, swap the peanut butter with a vegan option. Use almond butter if you like. For sweeteners, stick to maple syrup or agave syrup. Make sure the chocolate chips are dairy-free. These simple swaps keep the bars tasty and friendly for all diets. If you need a substitute for maple syrup, try agave syrup or honey. Both add sweetness and moisture. You can also use brown rice syrup, but it’s thicker. Adjust the amount slightly based on the sweetness you want. Each option brings a unique flavor, so choose what you prefer! This post covered how to make tasty snack bars using simple ingredients. We mixed dry and wet items, formed the dough, and chilled it. You saw tips for making your bars chewy and healthy. I shared fun variations and storage tips to keep them fresh. With this guide, you can easily create your own delicious bars. Enjoy experimenting in your kitchen!

No-Bake Chocolate Chip Cookie Dough Bars Delight

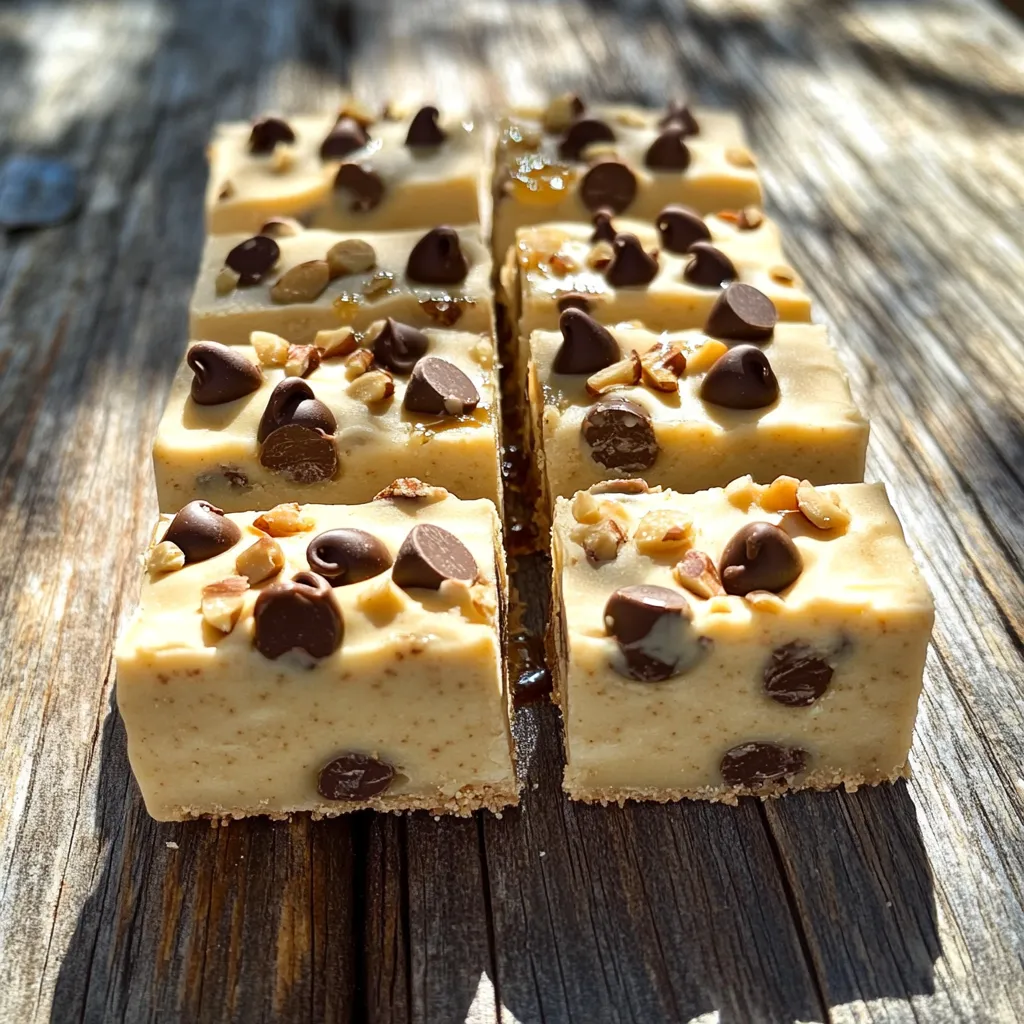
Are you craving a sweet treat that’s easy to make and requires no baking? Look no further! These No-Bake Chocolate

- 2 salmon fillets (about 6 oz each) - 8 oz fettuccine pasta - 2 tablespoons Cajun seasoning - 2 tablespoons olive oil - 1 cup heavy cream - 1 cup grated Parmesan cheese - 2 cloves garlic, minced - 1 cup spinach, chopped - Salt and pepper to taste - Fresh parsley, chopped (for garnish) To make Cajun Salmon Alfredo Pasta, gather your ingredients first. The salmon fillets should be fresh and firm. Fettuccine pasta gives a nice texture. Cajun seasoning adds a spicy kick. Next, for the additional ingredients, olive oil helps to cook the salmon perfectly. Heavy cream makes the sauce rich and creamy. Grated Parmesan cheese adds a savory flavor. Minced garlic gives depth to the sauce. Chopped spinach adds color and nutrition. Salt and pepper balance the taste. Lastly, fresh parsley brightens the dish when you garnish it. Using these ingredients, you can create a hearty meal that is both delicious and satisfying. Enjoy the process of cooking and share this delightful dish with family or friends! Start by rubbing the salmon fillets with Cajun seasoning. Make sure to coat both sides well. This adds a bold flavor to the fish. Boil a large pot of salted water. Once it boils, add the fettuccine. Cook it according to the package instructions until it's al dente. After cooking, reserve half a cup of the pasta water. Then, drain the pasta. Heat olive oil in a large skillet over medium heat. Place the seasoned salmon fillets in the skillet. Cook them for about 4-5 minutes on each side. They should be browned and fully cooked. Once done, remove them from the skillet and set them aside. In the same skillet, add minced garlic and sauté for about 1 minute. You want it to be fragrant but not burned. Then, pour in the heavy cream and bring it to a gentle simmer. Stir in the grated Parmesan cheese. Mix until it melts and combines well with the cream. Add the chopped spinach and cook until it wilts. Season with salt and pepper to taste. Now, add the drained fettuccine to the sauce. Toss everything together to coat the pasta evenly. If the sauce feels too thick, add some of the reserved pasta water until you reach your desired consistency. Finally, flake the cooked salmon and place it on top of the pasta. To get the best salmon, aim for even cooking. Cook each fillet for about 4-5 minutes on each side. The salmon should be opaque and flake easily with a fork. You want it to be moist but not raw in the center. If you prefer it a bit crispy, let it brown longer. Use a meat thermometer if you like. Aim for an internal temperature of 145°F (63°C). The sauce can sometimes be too thick. If this happens, don’t worry! Save some pasta water when you drain the fettuccine. Gradually add this reserved water to the sauce. Stir until you reach your desired smoothness. This will help the sauce cling to the pasta nicely. You can add more flavor with herbs and spices. Try adding fresh thyme or basil for a fragrant touch. A dash of lemon juice can brighten the dish, too. If you like heat, consider adding cayenne pepper or crushed red pepper flakes. These will give your dish that extra kick. {{image_2}} If you want to switch up the protein, try shrimp or chicken. Shrimp cooks fast and adds a nice touch. Just season it with Cajun seasoning like the salmon. Cook the shrimp for about 2-3 minutes on each side. For chicken, use boneless breast or thighs. Cook them until they reach 165°F. Both options keep the dish tasty and satisfying. You can also change the pasta type. Try gluten-free pasta if you need a gluten-free option. There are many good brands that taste great. Whole grain pasta is another healthy choice. It adds more fiber and nutrients, making your meal even better. Cook these options just like regular pasta. Adding vegetables is a great way to boost nutrition. You can include bell peppers, asparagus, or zucchini. Sauté them with the garlic for extra flavor. If you like greens, try kale or broccoli. They can add color and crunch to your plate. Just make sure to cook them until tender but not mushy. To store your Cajun Salmon Alfredo Pasta, place it in an airtight container. Make sure to let it cool to room temperature first. You can keep it in the fridge for up to three days. If you want to keep it longer, consider freezing it. When you reheat this dish, do it slowly. Use a skillet over low heat. Add a splash of water or cream to keep it moist. Stir gently to mix the flavors back together. This helps keep the pasta from sticking and the salmon from drying out. You can freeze Cajun Salmon Alfredo Pasta. However, the texture may change. To freeze, place it in a freezer-safe container. Make sure to label it with the date. It can stay in the freezer for up to three months. When you're ready to eat, let it thaw in the fridge overnight before reheating. Cajun seasoning is a mix of spices. It often includes paprika, cayenne pepper, garlic powder, onion powder, and black pepper. Some blends also add herbs like oregano and thyme. This mix gives dishes a warm, spicy flavor. You can buy it ready-made or make your own at home. Yes, you can use fresh salmon. Fresh salmon offers a nice taste and texture. Just ensure it is properly cooked. The cooking time may be shorter with fresh salmon, so be careful not to overcook it. To add spice, increase the Cajun seasoning. You can also add diced jalapeños or red pepper flakes. If you want a smoky flavor, consider using smoked paprika. Adjust the spice level to fit your taste. Absolutely! Cajun Salmon Alfredo Pasta keeps well in the fridge. Store it in an airtight container. It’s best eaten within three days. To reheat, use the microwave or a skillet on low heat. Yes, you can substitute heavy cream. Options include half-and-half or coconut milk for a dairy-free version. However, these may change the taste and texture of the sauce. Choose a substitute that fits your dietary needs. You learned how to make Cajun Salmon Alfredo Pasta, from key ingredients to cooking steps. Start with fresh salmon and fettuccine, then season and cook them well. Don’t forget the creamy garlic sauce mixed with spinach and cheese. You can change the recipe with different proteins or veggies. This dish stores well and reheats nicely too. Enjoy your flavorful meal and make it your own by trying different flavors. Happy cooking!

Cajun Salmon Alfredo Pasta Flavorful Dinner Recipe

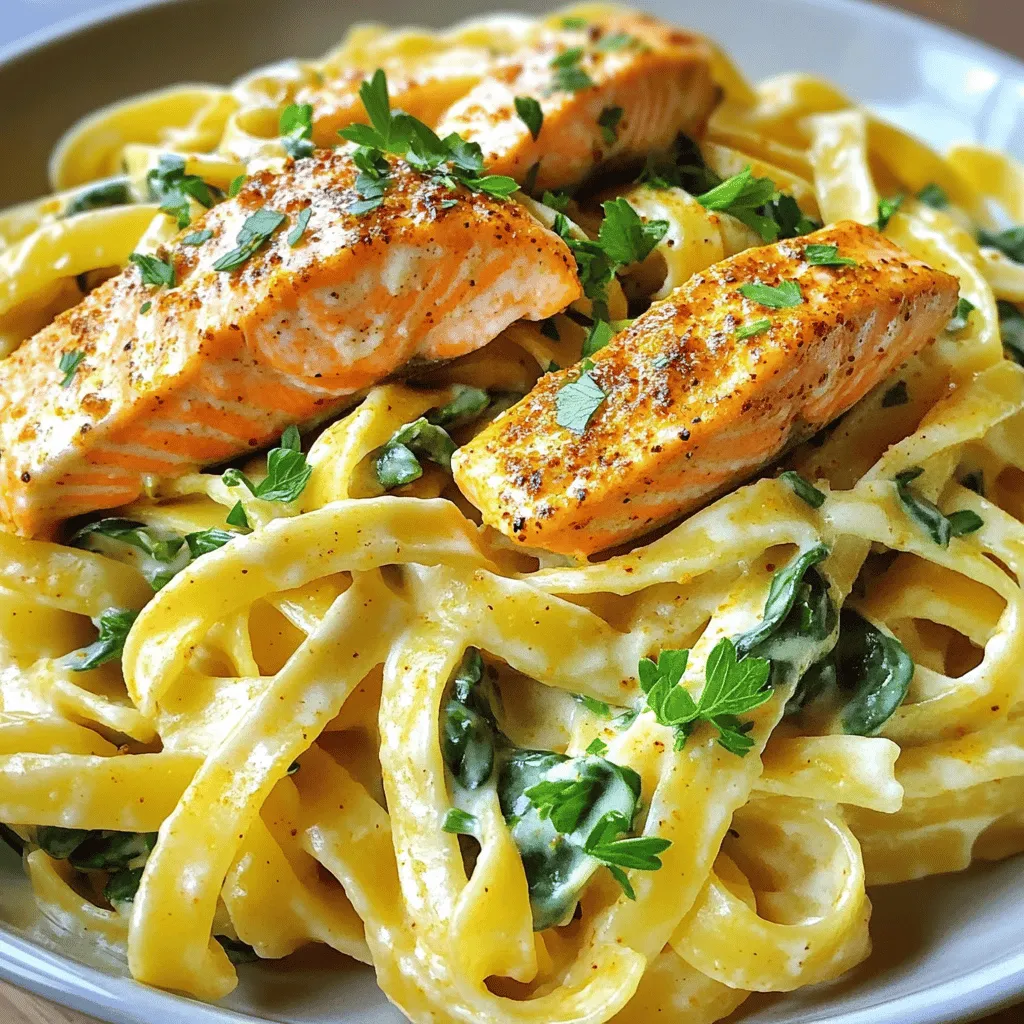
Looking for a dinner that packs bold flavor and creamy goodness? Look no further! This Cajun Salmon Alfredo Pasta recipe

To make a tasty chocolate covered strawberry smoothie, you need: - 1 cup fresh strawberries, hulled - 1 banana, sliced - 1 cup almond milk (or any milk of choice) - 1 tablespoon unsweetened cocoa powder These fresh ingredients give your smoothie a fruity and rich flavor. Strawberries add sweetness and color. Bananas make it thick and creamy. Almond milk provides a smooth base. If you want your smoothie even creamier, add: - 2 tablespoons Greek yogurt Greek yogurt makes the smoothie richer and adds protein. You can skip it if you prefer a lighter drink. For sweetness, you can use: - 1 tablespoon honey - 1 tablespoon maple syrup You can adjust the sweetener to your taste. Honey offers a floral note, while maple syrup gives a deeper flavor. Feel free to experiment with how much you use! Gather all your ingredients. You need: - 1 cup fresh strawberries, hulled - 1 banana, sliced - 1 cup almond milk (or any milk of choice) - 1 tablespoon unsweetened cocoa powder - 2 tablespoons Greek yogurt (optional for creaminess) - 1 tablespoon honey or maple syrup (adjust to taste) - Ice cubes (optional, for desired thickness) Make sure the strawberries are ripe and sweet. Slice your banana into small pieces. This will help the blender mix everything easily. If you choose to use Greek yogurt, it adds a nice creaminess. Measure all ingredients before blending. Put the prepared ingredients into a blender. Start with the almond milk. Add the strawberries, banana, cocoa powder, and Greek yogurt. Drizzle in the honey or maple syrup. Blend it all on high speed. It should take about 30 to 60 seconds. Watch for a smooth and creamy texture. If it seems too thin, add some ice cubes. Blend again until everything is well mixed. Pour the smoothie into a tall glass. Nice presentation matters! Top it with chocolate chips for a fun look. You can also add a whole strawberry on the rim. For an extra touch, drizzle some melted chocolate on top. This makes it look fancy and delicious. Enjoy your smoothie right away for the best taste! To make your smoothie just right, taste it after blending. If it feels too tart, add honey or maple syrup. Start with a small amount. You can always add more. Remember, ripe bananas also add natural sweetness. For a thick smoothie, add ice cubes before blending. Blend it well until smooth. If you want a thinner drink, use more almond milk. Adjust the milk amount based on how you like your smoothies. A nice look makes your drink more fun. Pour the smoothie into clear glasses for a great view. Top with chocolate chips and a whole strawberry for a pop of color. Drizzle some melted chocolate on top for extra flair. Enjoy your beautiful creation! {{image_2}} For a dairy-free version, use almond milk or oat milk. These options keep the smoothie creamy. Coconut milk is another great choice. It adds a nice tropical flavor. If you're looking for extra flavor, try cashew milk. Each milk gives a unique taste and texture. To boost protein, add Greek yogurt or a scoop of protein powder. Greek yogurt makes the smoothie thick and creamy. Plant-based protein powders work well too. You can use pea or hemp protein. These choices make the drink more filling and nutritious. Want to mix it up? Add more fruit! Blueberries make a great addition. They add sweetness and a fun color. You can also try mango or pineapple. These fruits give a nice tropical twist. Experiment with different combinations to find your favorite. You can store your Chocolate Covered Strawberry Smoothie in the fridge. Use an airtight container. This keeps the smoothie fresh for about one day. Make sure to stir it before drinking. If it separates, it’s still good! Freezing is a great choice if you want to save some for later. Pour the smoothie into ice cube trays. Once frozen, pop out the cubes and put them in a freezer bag. These cubes can blend into a new smoothie later. Just add milk or yogurt when blending. To keep your smoothie fresh, use ripe strawberries. They taste better and blend well. Also, store the ingredients separately until you are ready to blend. This way, you get the best flavor every time you make it. To make a vegan version, swap Greek yogurt with a plant-based yogurt. Use almond milk or another non-dairy milk. The rest of the ingredients stay the same. Blend fresh strawberries, banana, cocoa powder, and your chosen milk. This keeps all the rich flavors without dairy. Yes, you can use frozen strawberries! They make your smoothie cold and thick. Just use the same amount as fresh strawberries. If you use frozen, you may not need ice cubes. Blend until smooth, and enjoy the chill! This smoothie offers many benefits. Strawberries are full of vitamins and antioxidants. Bananas provide potassium and fiber. Almond milk is low in calories and dairy-free. Cocoa powder is rich in flavonoids, which can boost heart health. It's a tasty way to get nutrients! You can store leftover smoothie for up to 24 hours. Keep it in a sealed container in the fridge. Shake or stir before drinking, as it may separate. However, for the best taste and texture, drink it fresh! We covered how to make a vegan chocolate-covered strawberry smoothie using fresh ingredients. You learned about optional items for better creaminess and sweetener choices. I shared step-by-step instructions from prepping to blending and serving suggestions. With tips on adjusting sweetness and achieving the right thickness, you can customize your smoothie. Variations like dairy-free options and fruity add-ins allow for creativity. Finally, we explored storage methods to keep your smoothie fresh. Enjoy your tasty drink and experiment with different flavors!

Chocolate Covered Strawberry Smoothie Delightful Blend

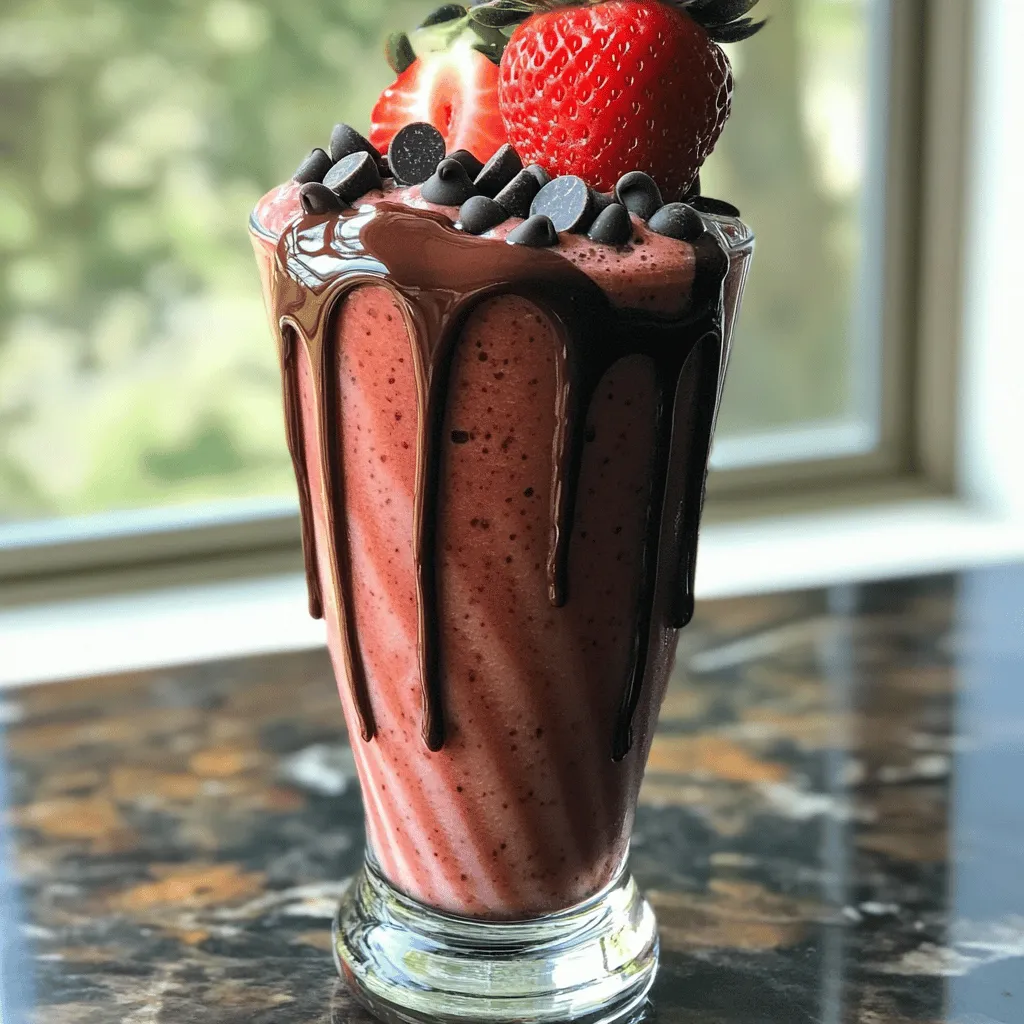
Are you ready to indulge in a treat that’s both tasty and healthy? My Chocolate Covered Strawberry Smoothie is a

Older posts
Newer posts
← Previous Page1 … Page14 Page15 Page16 … Page82 Next →

dsad

© 2026 Recipes Pursuit • Built with GeneratePress

Our Policies

  • Copyright Policy
  • Cookie Policy
  • GDPR Policy
  • Privacy Policy
  • Disclaimer
  • Terms Of Use

More Information

  • Home
  • About
  • Contact
  • Appetizers
  • Dessert
  • Dinner
  • Drinks
©2026, Recipes Pursuit About Back To Top