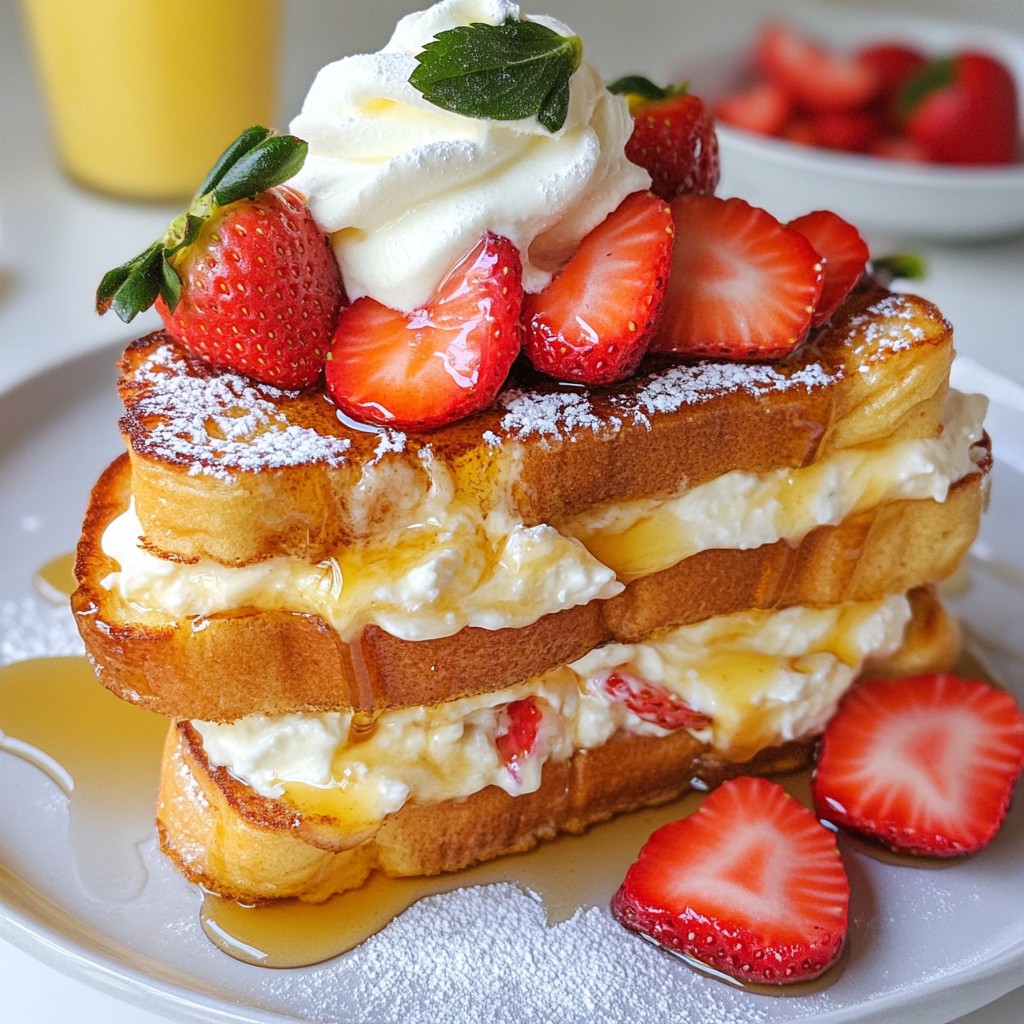
Are you ready to enjoy a breakfast that feels like dessert? Strawberry Cheesecake French Toast is a dreamy twist on your morning favorite. Imagine golden toast filled with creamy cheese and sweet strawberries. I’ll guide you step-by-step to create this delightful dish that will impress everyone at your table. Let’s dive into the ingredients, tips, and tricks that will make your brunch unforgettable!
Why I Love This Recipe
- Decadent Flavor: This French toast combines the rich taste of cheesecake with the freshness of strawberries, creating a delightful breakfast experience.
- Easy to Make:
- Customizable: Feel free to switch up the fruit or add toppings like nuts or chocolate chips to suit your taste preferences.
- Perfect for Sharing: This recipe makes two generous sandwiches, making it an ideal treat for sharing with a loved one or a friend.
Ingredients
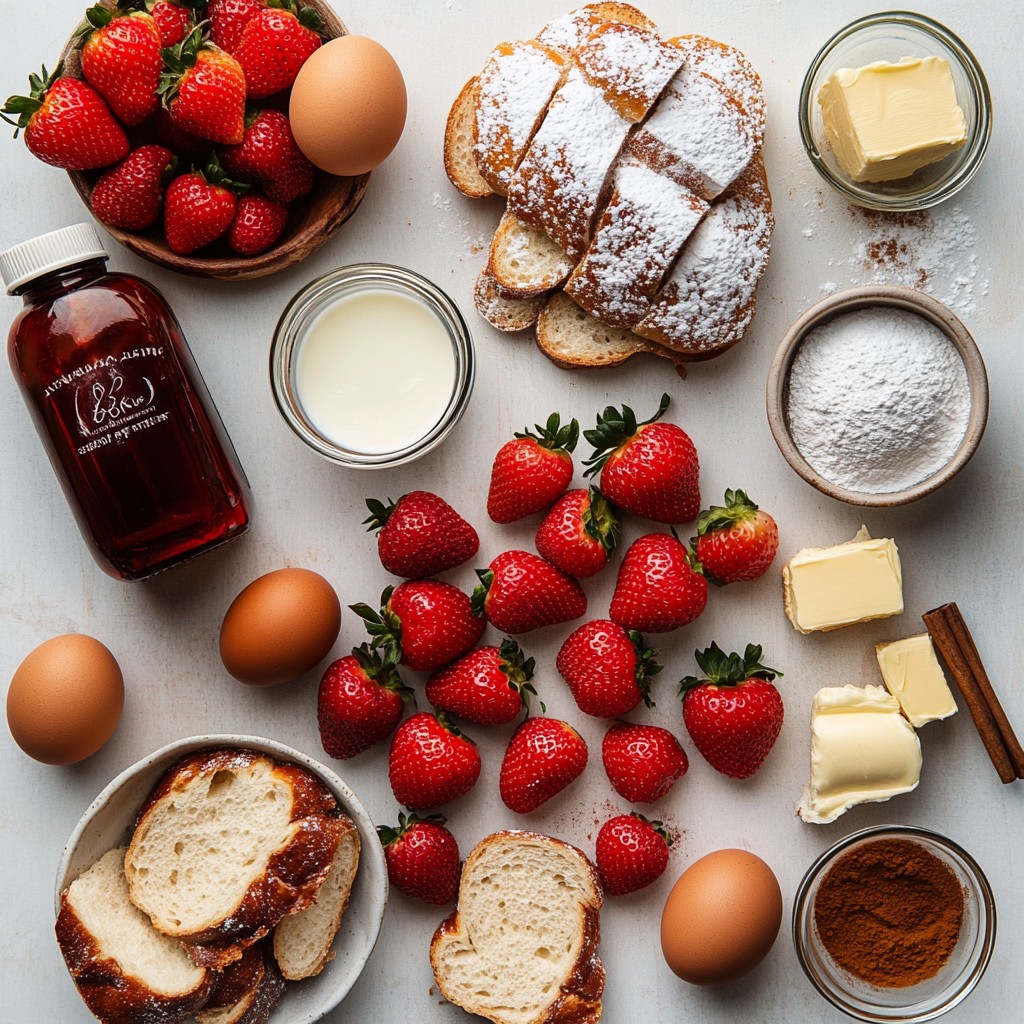
List of ingredients for Strawberry Cheesecake French Toast
To make this delightful dish, gather these ingredients:
- 4 slices of thick bread (challah or brioche work well)
- 4 oz cream cheese, softened
- 2 tablespoons powdered sugar
- 1 teaspoon vanilla extract
- 2 large eggs
- 1/2 cup milk
- 1 teaspoon ground cinnamon
- 1 cup fresh strawberries, hulled and sliced
- 2 tablespoons butter (for cooking)
- Maple syrup (for serving)
- Optional: Whipped cream for garnish
Recommended bread types
For the best results, use challah or brioche bread. Both types are soft and sweet. They soak up the egg mixture well, making each bite rich and tasty. The thickness of these breads adds a nice texture. You’ll enjoy how they become crispy on the outside while staying soft inside.
Optional ingredients for garnishing
To make your Strawberry Cheesecake French Toast even more special, consider these garnishes:
- Whipped cream adds a light, airy touch.
- Additional strawberries bring a fresh burst of flavor.
These toppings make your dish look beautiful and taste even better. Enjoy the sweet and creamy combo!
Step-by-Step Instructions
Preparing the cream cheese filling
To start, grab a mixing bowl. Add 4 oz of softened cream cheese, 2 tablespoons of powdered sugar, and 1 teaspoon of vanilla extract. Use a fork or mixer to blend these until the mixture is smooth and creamy. This filling is key for that cheesecake taste. Set it aside for later.
Assembling the French toast sandwiches
Next, take your thick slices of bread. I love using challah or brioche for this. Take one slice and spread a good layer of the cream cheese mix on one side. Place some sliced strawberries over the cream cheese. Then, top it with another slice of bread to form a sandwich. Repeat this for all slices of bread. You should have two tasty sandwiches ready to cook.
Cooking the sandwiches on the skillet
Now, heat a non-stick skillet or griddle over medium heat. Add 2 tablespoons of butter and let it melt. In a separate bowl, whisk together 2 large eggs, 1/2 cup of milk, and 1 teaspoon of ground cinnamon. Dip each sandwich into this egg mixture, making sure both sides are coated well. Once the butter is bubbling, place the sandwiches in the skillet. Cook them for about 3-4 minutes on each side, until they turn golden brown and crispy. After cooking, remove them from the skillet and let them cool for a minute. Cut each sandwich in half to show off the filling. Enjoy them warm with maple syrup and maybe a dollop of whipped cream!
Tips & Tricks
Best practices for achieving golden brown toast
To get that perfect golden brown toast, watch your heat. Use medium heat on your skillet. If it’s too hot, your bread will burn. If it’s too low, it won’t crisp up. Use thick slices of bread like challah or brioche. They hold the filling well and brown nicely. Always preheat your skillet before adding the butter. This helps the toast cook evenly.
How to prevent sticking on the skillet
To prevent sticking, use a good non-stick skillet. Add butter once the skillet is hot. Let the butter melt and bubble, but don’t let it brown too much. This can cause sticking. Dip your sandwiches in the egg mixture just before cooking. This keeps the filling intact and makes flipping easier.
Suggestions for making the filling extra creamy
For a creamier filling, make sure your cream cheese is very soft. Let it sit at room temperature for about 30 minutes. You can mix in a bit more powdered sugar for sweetness and creaminess. Adding a splash of milk can help make it even smoother. Blend the filling well until it’s light and fluffy. This will make every bite feel rich and indulgent.
Pro Tips
- Use Day-Old Bread: Stale bread absorbs the egg mixture better, resulting in a richer flavor and texture.
- Customize Your Filling: Feel free to add other fruits like blueberries or raspberries for a different twist!
- Control the Heat: Keep the skillet on medium heat to prevent burning while ensuring the inside cooks thoroughly.
- Experiment with Spices: Add a pinch of nutmeg or cardamom to the egg mixture for an extra depth of flavor.
Variations
Different fruit options (blueberries, raspberries)
You can switch up the fruit in this recipe. Blueberries add a sweet burst. Raspberries bring a tart twist. Both fruits pair well with cream cheese. Try using fresh or frozen berries. Just make sure to thaw the frozen ones first. You can layer them between the bread slices like strawberries. This change keeps the dish tasty and fun.
Healthier substitutions (whole grain bread, low-fat cream cheese)
If you want a healthier version, use whole grain bread. It adds fiber and nutrients. You can also swap regular cream cheese for low-fat cream cheese. This keeps the flavor but cuts calories. Another tip is to use less powdered sugar. You still get the sweet taste without all the sugar. These small changes can make the dish better for you.
Vegan variations (plant-based cream cheese and egg substitutes)
To make a vegan version, use plant-based cream cheese. There are many tasty options at the store. For the eggs, try flaxseed meal or chia seeds mixed with water. This works well as an egg substitute. Use a simple mix of 1 tablespoon of flaxseed meal with 2.5 tablespoons of water. Let it sit for a few minutes to thicken. You can enjoy a delicious Strawberry Cheesecake French Toast while keeping it plant-based!
Storage Info
Best way to store leftover French toast
After you enjoy your strawberry cheesecake French toast, store any leftovers in an airtight container. Place the container in the fridge. This keeps the toast fresh for up to three days. Make sure it cools completely before sealing. This step helps avoid sogginess.
How to reheat for optimal flavor and texture
To reheat, use a skillet over medium heat. Add a little butter to the pan. Place the French toast in the skillet and cook for about 2-3 minutes on each side. This method warms the toast and restores its crispy texture. You could also use a toaster oven for a similar result.
Freezing options for meal prep
If you want to freeze your French toast, let it cool first. Then, wrap each piece in plastic wrap. Place them in a freezer bag or airtight container. This method keeps them good for up to two months. When you're ready to eat, thaw in the fridge overnight before reheating.
FAQs
Can I use other types of cheese instead of cream cheese?
Yes, you can try other cheeses. Mascarpone works well for a rich taste. Ricotta is also a tasty choice. Both will give you a creamy filling. Just remember to adjust sugar to match the cheese's flavor.
How can I make this dish dairy-free?
To make this dish dairy-free, use plant-based cream cheese. Many brands offer good options. You can also use almond milk or oat milk in the egg mixture. This keeps the texture creamy and delicious without dairy.
What is the best syrup to serve with Strawberry Cheesecake French Toast?
Maple syrup is the classic choice. It adds a sweet touch that pairs well. You could also try strawberry syrup for extra fruit flavor. Honey is another option if you prefer something different. Each syrup brings out the taste of the dish.
In this post, I explored making Strawberry Cheesecake French Toast. I covered the key ingredients, from bread type to tasty garnishes. I shared step-by-step instructions to help you create these delicious sandwiches. The tips will guide you to the perfect texture and flavor. Plus, I offered variations for different tastes and dietary needs.
As you try this recipe, remember it’s all about having fun in the kitchen. Enjoy experimenting and savoring each bite.