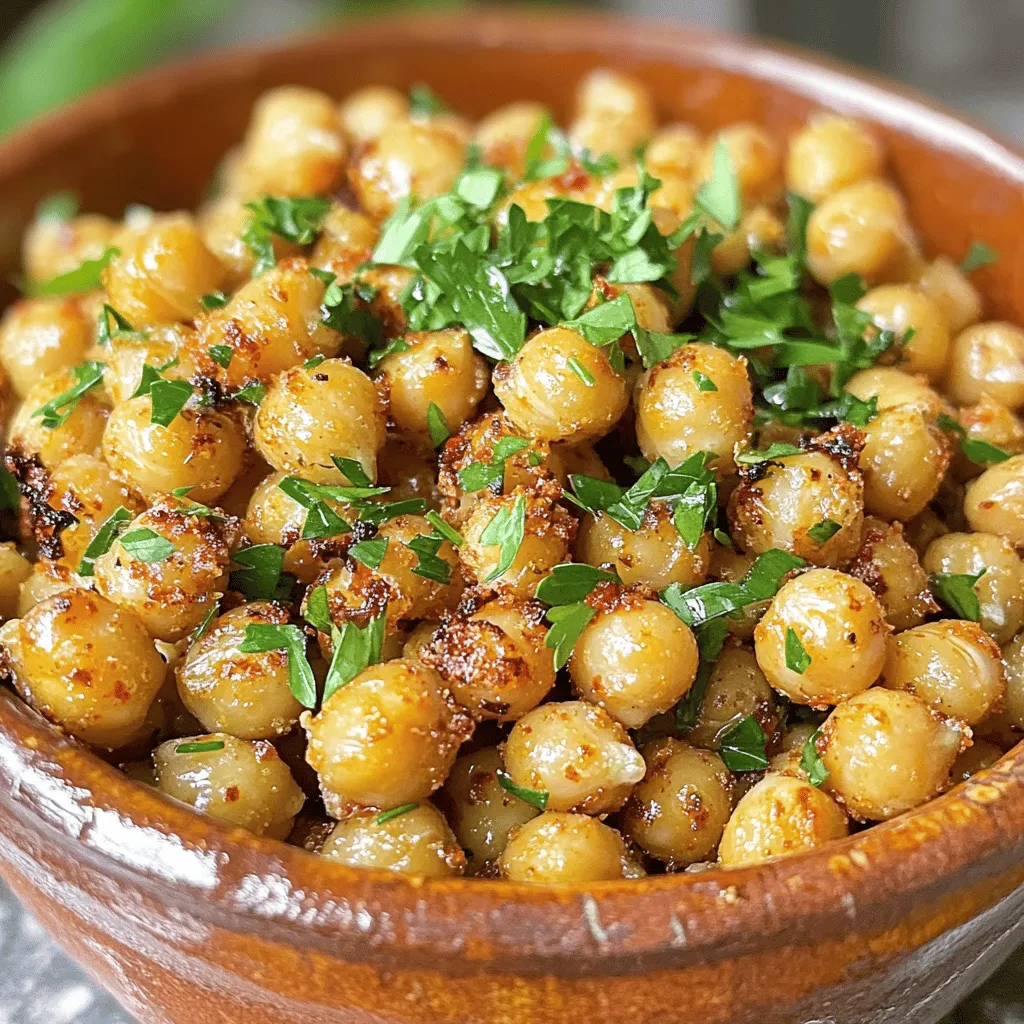
Are you ready to spice up your snack game? My Spicy Garlic Roasted Chickpeas are a game-changer! These crispy bites pack a flavor punch that’s perfect for any occasion. Whether you’re looking for a healthy munchie or a tasty addition to your meal, this recipe has you covered. Let’s dive into the simple ingredients and steps to create your new favorite snack!
Ingredients
Complete list of ingredients for Spicy Garlic Roasted Chickpeas
To make Spicy Garlic Roasted Chickpeas, you need these simple items:
– 1 can (15 oz) chickpeas, drained and rinsed
– 2 tablespoons olive oil
– 4 cloves garlic, minced
– 1 teaspoon smoked paprika
– 1/2 teaspoon cayenne pepper (adjust for heat preference)
– 1 teaspoon ground cumin
– 1 teaspoon sea salt
– 1 tablespoon fresh parsley, chopped (for garnish)
Ingredient substitutes and variations for dietary preferences
You can change some ingredients based on your needs. Here are a few ideas:
– Chickpeas: You can use dried chickpeas if you soak and cook them first.
– Olive oil: Use avocado oil or coconut oil for different flavors.
– Garlic: Garlic powder works if you don’t have fresh garlic.
– Spices: Try using chili powder or curry powder instead of smoked paprika.
– Salt: Low-sodium salt is a good choice for less sodium.
Tips for sourcing the freshest chickpeas
Freshness matters, especially for chickpeas. Here are tips to find the best:
– Canned chickpeas: Check the expiration date. Choose cans without dents.
– Dried chickpeas: Look for whole, unbroken beans. They should be firm and dry.
– Organic options: If you can, choose organic chickpeas. They often have better flavor.
– Local markets: Visit local farmers’ markets for fresh, high-quality options.
Step-by-Step Instructions
Detailed preparation steps for easy cooking
Start by preheating your oven to 400°F (200°C). This heat is key for crispy chickpeas. Next, take one can of chickpeas, drain, and rinse them well. Spread the chickpeas on a clean kitchen towel. Pat them dry to get rid of excess moisture. The drier they are, the crispier they will become. In a large bowl, mix the dry chickpeas with 2 tablespoons of olive oil, 4 minced garlic cloves, 1 teaspoon of smoked paprika, 1/2 teaspoon of cayenne pepper, 1 teaspoon of ground cumin, and 1 teaspoon of sea salt. Toss everything until the chickpeas are nicely coated.
Oven temperature and timing specifics
Once your chickpeas are seasoned, line a baking sheet with parchment paper. This step makes for easy cleanup. Spread the seasoned chickpeas in a single layer on the sheet. Roast them in the preheated oven for 25-30 minutes. Remember to stir halfway through. This ensures even cooking. The chickpeas should turn golden brown and crispy.
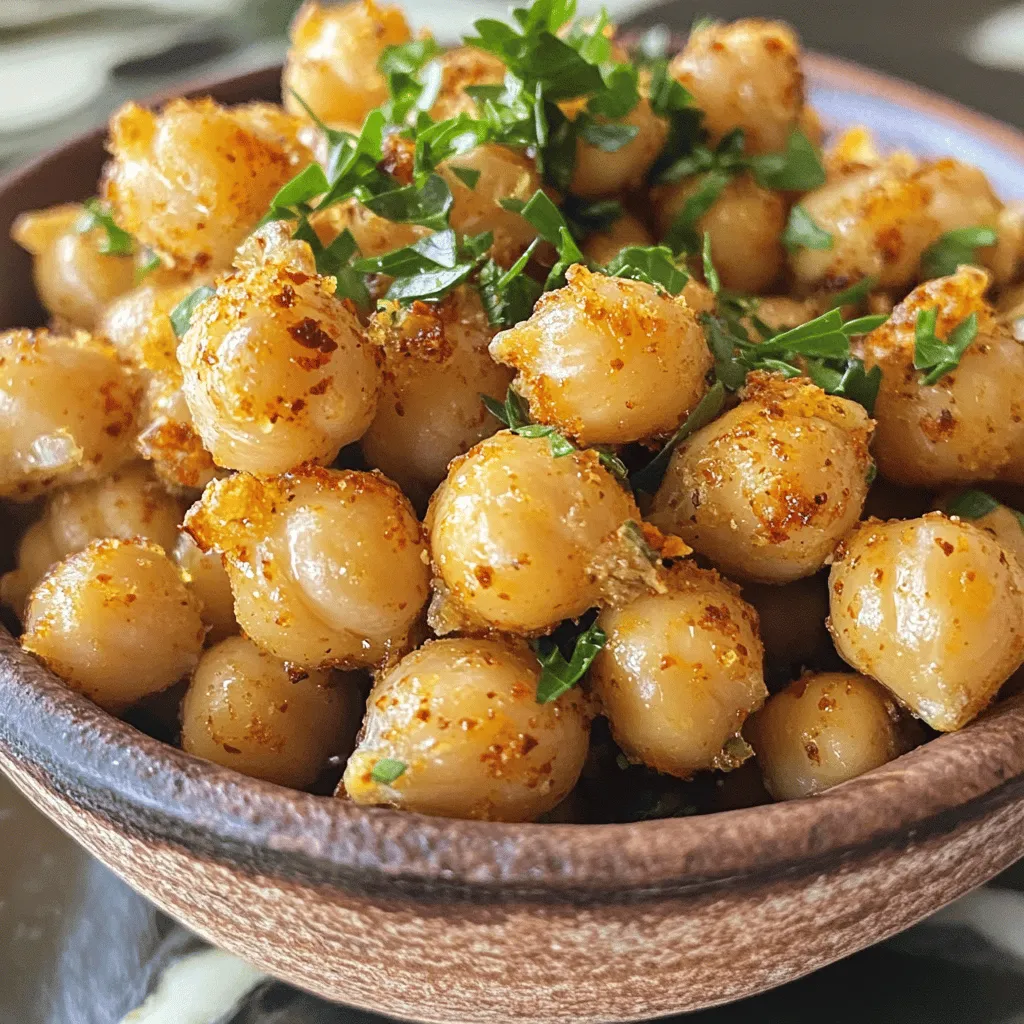
Best practices for achieving crispy chickpeas
After roasting, take the baking sheet out of the oven. Let the chickpeas cool for a few minutes. They will continue to crisp up as they cool. This step is important for getting that perfect crunch. For a pop of color and flavor, garnish with 1 tablespoon of fresh parsley before serving. Enjoy your spicy garlic roasted chickpeas as a tasty snack or topping!
Tips & Tricks
Common mistakes to avoid when roasting chickpeas
Roasting chickpeas is simple, but small mistakes can ruin them. Here are some pitfalls to watch out for:
– Not drying the chickpeas: Wet chickpeas will turn soft, not crispy. Always pat them dry after rinsing.
– Overcrowding the pan: If chickpeas are too close, they steam instead of roast. Spread them in a single layer.
– Skipping the stirring: Stir halfway through roasting. This helps them cook evenly and get crispy all over.
Enhancing flavor with additional spices and herbs
To make your spicy garlic roasted chickpeas even better, try these ideas:
– Add more heat: If you love spice, increase the cayenne pepper or add chili powder.
– Try new herbs: Fresh herbs like rosemary or thyme can add a unique taste.
– Mix in zest: A bit of lemon or lime zest can brighten the flavor of the chickpeas.
How to ensure even roasting for perfect texture
Getting that perfect crunch is key. Here’s how to ensure even roasting:
– Use a preheated oven: Starting with a hot oven helps the chickpeas crisp up quickly.
– Choose the right baking sheet: A rimmed sheet will keep the chickpeas from rolling around.
– Avoid using foil: Parchment paper works best. It allows for air circulation while keeping cleanup easy.Enjoy your cooking!
Variations
Creative flavor combinations for chickpeas
You can spice up your roasted chickpeas in many ways. Try adding lemon zest for a bright touch. For a sweet twist, mix in maple syrup or honey before roasting. You can also use different spices, like curry powder or chili lime seasoning, to change the taste. Each mix gives you a new flavor to enjoy.
Vegan and gluten-free adaptations
This recipe is already vegan and gluten-free, which is great! If you want to make it even healthier, use less oil. You can also add nutritional yeast for a cheesy flavor without dairy. Just sprinkle it on before serving. Feel free to get creative and swap spices to match your taste.
Ways to serve spicy garlic roasted chickpeas
Spicy garlic roasted chickpeas are great as a snack on their own. You can also toss them in salads for a tasty crunch. Use them as a topping for soups or grain bowls to add texture. They make a fun addition to party platters. Try serving them with a dip, like hummus or yogurt sauce, for extra flavor.
Storage Info
How to store leftover roasted chickpeas
After enjoying your spicy garlic roasted chickpeas, store leftovers in an airtight container. This keeps them fresh longer. Make sure the chickpeas are completely cool before sealing the container. If you have extra, you can also use zip-top bags for better space-saving.
Best practices for reheating for optimal crispiness
To reheat and maintain crispiness, use the oven. Preheat it to 350°F (175°C). Spread the chickpeas on a baking sheet in a single layer. Heat them for about 10 minutes, checking often. This helps restore their crunch while warming them up. Avoid the microwave, as it can make them soft.
Shelf-life and signs of spoilage
Properly stored, your chickpeas can last up to one week. Check for signs of spoilage before eating. Look for any off smells, unusual colors, or a soggy texture. If you notice any of these signs, it’s best to discard them. Freshness is key for enjoying this flavorful snack.
FAQs
Can I use dried chickpeas instead of canned for this recipe?
Yes, you can use dried chickpeas. First, soak them overnight in water. Then, cook them until tender. This process takes more time but gives you great flavor.Just remember to dry them well before roasting.
How to adjust spice levels based on personal preference?
To change the spice level, you can add or reduce cayenne pepper. If you like it milder, use less. For more heat, add more cayenne. You can also try different spices, like chili powder or black pepper, for a unique twist. Taste the mixture before roasting to find your perfect balance.
Are spicy garlic roasted chickpeas healthy?
Yes, spicy garlic roasted chickpeas are very healthy. They are high in protein and fiber, which keeps you full. Chickpeas also have good vitamins and minerals. Using olive oil adds healthy fats. Just watch the portion size, as they are easy to snack on!
In this blog post, we explored how to make spicy garlic roasted chickpeas. We covered all the ingredients, including substitutions for different diets. You learned step-by-step cooking instructions to achieve crispy texture. We also shared tips to avoid common mistakes and enhance flavors. Finally, we discussed storage methods and answered your burning questions.
These chickpeas make a healthy and tasty snack. With practice, you can create your perfect version. Enjoy experimenting with flavors and make this recipe your own. Happy cooking!