![To make this creamy dish, you will need: - 1 large head of cauliflower, cut into florets - 5 cloves of garlic, unpeeled - 2 tablespoons olive oil - 1/2 cup unsweetened almond milk (or any milk of choice) - 2 tablespoons butter (or vegan alternative) - Salt and pepper to taste These ingredients come together to create a rich and creamy mash. Cauliflower gives you a light and fluffy base while garlic adds a savory depth. The olive oil and butter bring richness to the mix, making each bite a delight. Feel free to get creative! You can enhance your mash with: - Fresh chives, finely chopped (for garnish) - Grated cheese (like Parmesan) - A sprinkle of paprika for heat - A drizzle of extra virgin olive oil Adding these can elevate your dish. Chives add color and freshness, while cheese and paprika provide extra flavor. Each serving of Roasted Garlic Cauliflower Mash is packed with nutrients. Here's what you'll find: - Calories: Approximately 120 - Protein: 3g - Carbohydrates: 8g - Fat: 8g - Fiber: 3g This mash is a great source of vitamins and minerals. It is lower in carbs than traditional mashed potatoes, making it a healthy choice. Enjoy this dish as a satisfying side that won't weigh you down. For the full recipe, check out the details above! Start with one large head of cauliflower. Cut it into small florets. This helps the cauliflower cook evenly. Next, take five cloves of garlic. Keep them unpeeled. This adds a rich flavor to the dish. Preheat your oven to 400°F (200°C). Take a baking sheet and toss the cauliflower florets and unpeeled garlic cloves in two tablespoons of olive oil. Add some salt and pepper. Spread them out in one layer on the sheet. Roast everything in the oven for about 25 to 30 minutes. You want the cauliflower to be tender and slightly brown. The garlic should feel soft when you touch it. After roasting, carefully squeeze the garlic out of its skin. Use the back of a knife or your fingers. In a food processor, add the roasted cauliflower, garlic, half a cup of almond milk, and two tablespoons of butter. Blend until everything is creamy and smooth. You might need to stop and scrape down the sides. Taste your mash and add more salt or pepper if you like. Serve warm, and top it with chopped chives for a fresh touch. For the full recipe, check out the details above. Roasting brings out the best in cauliflower. Start with a large head of fresh cauliflower. Cut it into florets for even cooking. Use a baking sheet and spread the florets out. Make sure they are in a single layer to roast evenly. Toss them with olive oil, salt, and pepper. I suggest roasting at 400°F (200°C) for 25 to 30 minutes. Watch them turn golden brown while softening. For a smooth mash, use a food processor. After roasting, take the garlic and cauliflower off the sheet. Squeeze the roasted garlic out of its skin. Add it to the food processor with the cauliflower. Pour in almond milk and butter for richness. Blend until creamy. You might need to stop and scrape the sides to mix well. If it’s too thick, add more almond milk until you reach the desired consistency. You can change the flavor easily. Add more garlic for a stronger taste. For a hint of sweetness, a touch of maple syrup works well. You can also mix in herbs like thyme or rosemary. Fresh chives on top add a nice crunch and color. Taste as you go to make sure the flavors are just right. These tweaks help make the dish your own. For the full recipe, check out the Roasted Garlic Cauliflower Mash. {{image_2}} You can make this mash vegan by swapping out the butter for a plant-based version. Use vegan butter or coconut oil for a rich taste. Almond milk works great, but you can try any plant milk you like. This keeps the dish creamy without any dairy. Mix in other veggies for extra flavor and nutrition. Try adding steamed carrots or roasted red peppers. These add color and taste. You can also stir in spinach or kale for more greens. This gives your mash a unique twist and makes it more filling. Herbs and spices can elevate your mash. Add fresh thyme or rosemary for a fragrant boost. A pinch of smoked paprika brings a warm, smoky flavor. If you like heat, sprinkle in some red pepper flakes. These simple changes make your mash exciting and delicious. For the full recipe, click here: [Full Recipe]. Storing leftovers is easy. First, let the mash cool to room temp. Then, scoop it into an airtight container. Make sure to seal it tight. This mash lasts up to three days in the fridge. Label your container with the date. This way, you know when to eat it. To reheat, scoop the mash into a bowl. You can use the microwave or stovetop. If using a microwave, heat on medium for two to three minutes. Stir halfway through to heat evenly. If using the stovetop, add a splash of almond milk. Heat on low, stirring until warm. This step helps keep it creamy. Freezing is a great option too! Portion the mash into small containers. Leave a little space at the top, as it will expand when frozen. Wrap each container tightly with plastic wrap. You can freeze it for up to three months. When you're ready to eat, thaw it in the fridge overnight. Reheat as mentioned above, and enjoy your creamy delight again! For the full recipe, check the details above. Cauliflower is low in calories but high in nutrients. It has vitamin C, which helps your immune system. It also has fiber, which is good for digestion. Eating cauliflower may help reduce the risk of certain diseases. It has antioxidants that protect your cells. This veggie is also a great choice for those on low-carb diets. Yes, you can make Roasted Garlic Cauliflower Mash ahead of time. Just follow the full recipe and let it cool. Once cooled, store it in an airtight container in the fridge. It will last for about three days. When you're ready to eat, reheat it in the microwave or on the stove. Add a splash of milk or broth to restore creaminess if needed. To keep it creamy without dairy, use almond milk or another plant-based milk. You can also add more olive oil or a vegan butter alternative. Blending the roasted cauliflower and garlic well helps achieve a smooth texture. If you want extra creaminess, try adding soaked cashews or nutritional yeast. These options boost flavor while keeping it dairy-free. Roasted garlic cauliflower mash is simple and tasty. We covered the key ingredients, like cauliflower and garlic, along with optional flavors. You learned the steps to prepare, roast, and blend everything smoothly. I shared helpful tips for great texture and flavor. Variations make it easy to add your favorite veggies or spices. Proper storage keeps leftovers fresh. Remember, this dish is healthy and versatile. You can enjoy it any day of the week!](https://recipespursuit.com/wp-content/uploads/2025/07/76d7df59-3612-40ec-860c-28303598ce19-768x768.webp)
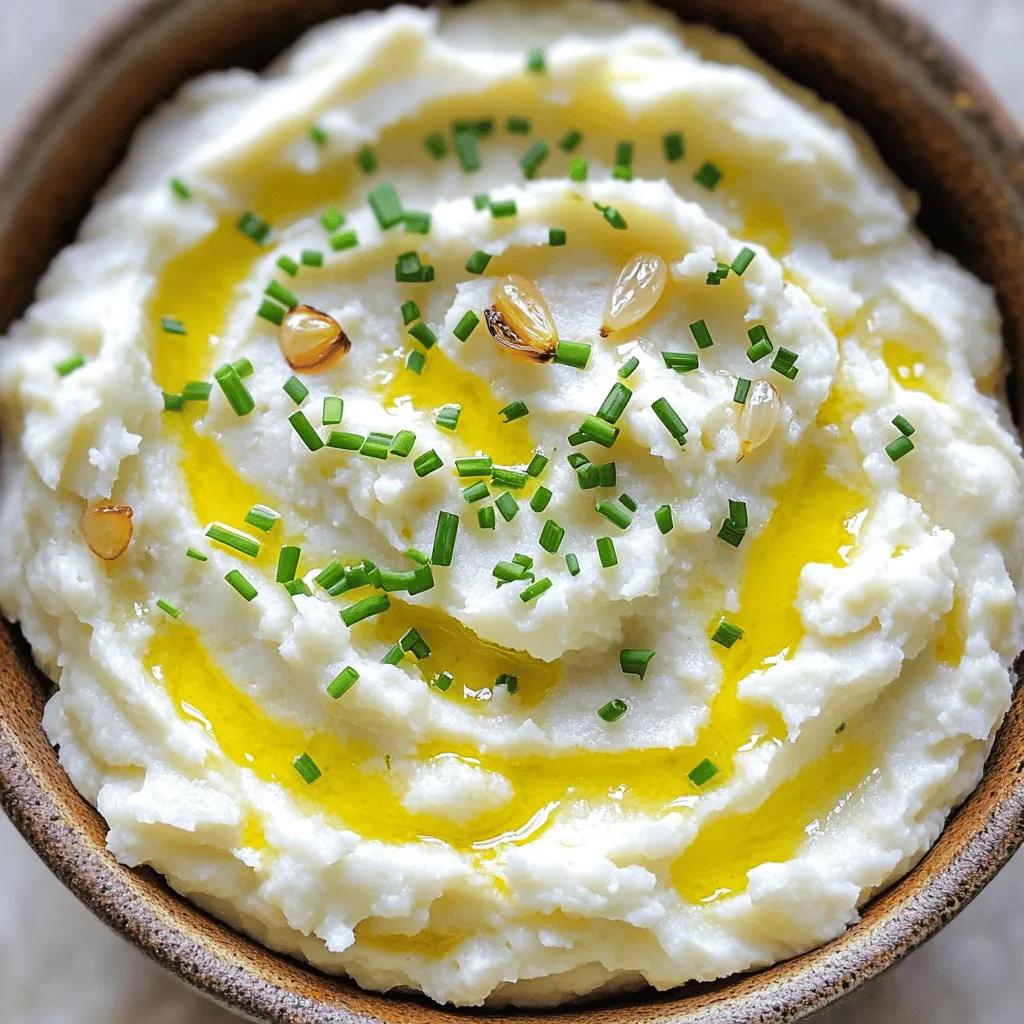
Looking for a tasty side dish that’s easy to make? This Roasted Garlic Cauliflower Mash packs a creamy flavor boost that’ll impress your family. It’s rich, healthy, and perfect for any meal. From prepping the garlic to blending it into a velvety mash, I’ll walk you through each simple step. Get ready to create a comforting dish that’s both delicious and nutritious—let’s dive in!
Ingredients
Main Ingredients for Roasted Garlic Cauliflower Mash
To make this creamy dish, you will need:
– 1 large head of cauliflower, cut into florets
– 5 cloves of garlic, unpeeled
– 2 tablespoons olive oil
– 1/2 cup unsweetened almond milk (or any milk of choice)
– 2 tablespoons butter (or vegan alternative)
– Salt and pepper to taste
These ingredients come together to create a rich and creamy mash. Cauliflower gives you a light and fluffy base while garlic adds a savory depth. The olive oil and butter bring richness to the mix, making each bite a delight.
Optional Garnishes and Seasonings
Feel free to get creative! You can enhance your mash with:
– Fresh chives, finely chopped (for garnish)
– Grated cheese (like Parmesan)
– A sprinkle of paprika for heat
– A drizzle of extra virgin olive oil
Adding these can elevate your dish. Chives add color and freshness, while cheese and paprika provide extra flavor.
Nutritional Information per Serving
Each serving of Roasted Garlic Cauliflower Mash is packed with nutrients. Here’s what you’ll find:
– Calories: Approximately 120
– Protein: 3g
– Carbohydrates: 8g
– Fat: 8g
– Fiber: 3g
This mash is a great source of vitamins and minerals. It is lower in carbs than traditional mashed potatoes, making it a healthy choice. Enjoy this dish as a satisfying side that won’t weigh you down.
Step-by-Step Instructions
Preparing the Cauliflower and Garlic
Start with one large head of cauliflower. Cut it into small florets. This helps the cauliflower cook evenly. Next, take five cloves of garlic. Keep them unpeeled. This adds a rich flavor to the dish.
Roasting Process
Preheat your oven to 400°F (200°C). Take a baking sheet and toss the cauliflower florets and unpeeled garlic cloves in two tablespoons of olive oil. Add some salt and pepper. Spread them out in one layer on the sheet. Roast everything in the oven for about 25 to 30 minutes. You want the cauliflower to be tender and slightly brown. The garlic should feel soft when you touch it.
Blending and Serving Steps
After roasting, carefully squeeze the garlic out of its skin. Use the back of a knife or your fingers. In a food processor, add the roasted cauliflower, garlic, half a cup of almond milk, and two tablespoons of butter. Blend until everything is creamy and smooth. You might need to stop and scrape down the sides. Taste your mash and add more salt or pepper if you like. Serve warm, and top it with chopped chives for a fresh touch.
Tips & Tricks
Best Methods for Roasting Cauliflower
Roasting brings out the best in cauliflower. Start with a large head of fresh cauliflower. Cut it into florets for even cooking. Use a baking sheet and spread the florets out. Make sure they are in a single layer to roast evenly. Toss them with olive oil, salt, and pepper. I suggest roasting at 400°F (200°C) for 25 to 30 minutes. Watch them turn golden brown while softening.
How to Achieve Creamy Texture
For a smooth mash, use a food processor. After roasting, take the garlic and cauliflower off the sheet. Squeeze the roasted garlic out of its skin. Add it to the food processor with the cauliflower. Pour in almond milk and butter for richness. Blend until creamy. You might need to stop and scrape the sides to mix well. If it’s too thick, add more almond milk until you reach the desired consistency.
Adjusting Flavor Profiles
You can change the flavor easily. Add more garlic for a stronger taste. For a hint of sweetness, a touch of maple syrup works well. You can also mix in herbs like thyme or rosemary. Fresh chives on top add a nice crunch and color. Taste as you go to make sure the flavors are just right. These tweaks help make the dish your own.
Variations
Vegan and Dairy-Free Options
You can make this mash vegan by swapping out the butter for a plant-based version. Use vegan butter or coconut oil for a rich taste. Almond milk works great, but you can try any plant milk you like. This keeps the dish creamy without any dairy.
Adding Other Vegetables
Mix in other veggies for extra flavor and nutrition. Try adding steamed carrots or roasted red peppers. These add color and taste. You can also stir in spinach or kale for more greens. This gives your mash a unique twist and makes it more filling.
Spicing It Up: Herb and Spice Suggestions
Herbs and spices can elevate your mash. Add fresh thyme or rosemary for a fragrant boost. A pinch of smoked paprika brings a warm, smoky flavor. If you like heat, sprinkle in some red pepper flakes. These simple changes make your mash exciting and delicious.
Storage Info
How to Store Leftovers Properly
Storing leftovers is easy. First, let the mash cool to room temp. Then, scoop it into an airtight container. Make sure to seal it tight. This mash lasts up to three days in the fridge. Label your container with the date. This way, you know when to eat it.
Reheating Instructions
To reheat, scoop the mash into a bowl. You can use the microwave or stovetop. If using a microwave, heat on medium for two to three minutes. Stir halfway through to heat evenly. If using the stovetop, add a splash of almond milk. Heat on low, stirring until warm. This step helps keep it creamy.
Freezer Tips for Meal Prep
Freezing is a great option too! Portion the mash into small containers. Leave a little space at the top, as it will expand when frozen. Wrap each container tightly with plastic wrap. You can freeze it for up to three months. When you’re ready to eat, thaw it in the fridge overnight. Reheat as mentioned above, and enjoy your creamy delight again!
FAQs
What are the Health Benefits of Cauliflower?
Cauliflower is low in calories but high in nutrients. It has vitamin C, which helps your immune system. It also has fiber, which is good for digestion. Eating cauliflower may help reduce the risk of certain diseases. It has antioxidants that protect your cells. This veggie is also a great choice for those on low-carb diets.
Can I make this dish ahead of time?
Yes, you can make Roasted Garlic Cauliflower Mash ahead of time.Once cooled, store it in an airtight container in the fridge. It will last for about three days. When you’re ready to eat, reheat it in the microwave or on the stove. Add a splash of milk or broth to restore creaminess if needed.
How do I make Roasted Garlic Cauliflower Mash creamy without dairy?
To keep it creamy without dairy, use almond milk or another plant-based milk. You can also add more olive oil or a vegan butter alternative. Blending the roasted cauliflower and garlic well helps achieve a smooth texture. If you want extra creaminess, try adding soaked cashews or nutritional yeast. These options boost flavor while keeping it dairy-free.
Roasted garlic cauliflower mash is simple and tasty. We covered the key ingredients, like cauliflower and garlic, along with optional flavors. You learned the steps to prepare, roast, and blend everything smoothly. I shared helpful tips for great texture and flavor. Variations make it easy to add your favorite veggies or spices. Proper storage keeps leftovers fresh. Remember, this dish is healthy and versatile. You can enjoy it any day of the week!
![To make this creamy dish, you will need: - 1 large head of cauliflower, cut into florets - 5 cloves of garlic, unpeeled - 2 tablespoons olive oil - 1/2 cup unsweetened almond milk (or any milk of choice) - 2 tablespoons butter (or vegan alternative) - Salt and pepper to taste These ingredients come together to create a rich and creamy mash. Cauliflower gives you a light and fluffy base while garlic adds a savory depth. The olive oil and butter bring richness to the mix, making each bite a delight. Feel free to get creative! You can enhance your mash with: - Fresh chives, finely chopped (for garnish) - Grated cheese (like Parmesan) - A sprinkle of paprika for heat - A drizzle of extra virgin olive oil Adding these can elevate your dish. Chives add color and freshness, while cheese and paprika provide extra flavor. Each serving of Roasted Garlic Cauliflower Mash is packed with nutrients. Here's what you'll find: - Calories: Approximately 120 - Protein: 3g - Carbohydrates: 8g - Fat: 8g - Fiber: 3g This mash is a great source of vitamins and minerals. It is lower in carbs than traditional mashed potatoes, making it a healthy choice. Enjoy this dish as a satisfying side that won't weigh you down. For the full recipe, check out the details above! Start with one large head of cauliflower. Cut it into small florets. This helps the cauliflower cook evenly. Next, take five cloves of garlic. Keep them unpeeled. This adds a rich flavor to the dish. Preheat your oven to 400°F (200°C). Take a baking sheet and toss the cauliflower florets and unpeeled garlic cloves in two tablespoons of olive oil. Add some salt and pepper. Spread them out in one layer on the sheet. Roast everything in the oven for about 25 to 30 minutes. You want the cauliflower to be tender and slightly brown. The garlic should feel soft when you touch it. After roasting, carefully squeeze the garlic out of its skin. Use the back of a knife or your fingers. In a food processor, add the roasted cauliflower, garlic, half a cup of almond milk, and two tablespoons of butter. Blend until everything is creamy and smooth. You might need to stop and scrape down the sides. Taste your mash and add more salt or pepper if you like. Serve warm, and top it with chopped chives for a fresh touch. For the full recipe, check out the details above. Roasting brings out the best in cauliflower. Start with a large head of fresh cauliflower. Cut it into florets for even cooking. Use a baking sheet and spread the florets out. Make sure they are in a single layer to roast evenly. Toss them with olive oil, salt, and pepper. I suggest roasting at 400°F (200°C) for 25 to 30 minutes. Watch them turn golden brown while softening. For a smooth mash, use a food processor. After roasting, take the garlic and cauliflower off the sheet. Squeeze the roasted garlic out of its skin. Add it to the food processor with the cauliflower. Pour in almond milk and butter for richness. Blend until creamy. You might need to stop and scrape the sides to mix well. If it’s too thick, add more almond milk until you reach the desired consistency. You can change the flavor easily. Add more garlic for a stronger taste. For a hint of sweetness, a touch of maple syrup works well. You can also mix in herbs like thyme or rosemary. Fresh chives on top add a nice crunch and color. Taste as you go to make sure the flavors are just right. These tweaks help make the dish your own. For the full recipe, check out the Roasted Garlic Cauliflower Mash. {{image_2}} You can make this mash vegan by swapping out the butter for a plant-based version. Use vegan butter or coconut oil for a rich taste. Almond milk works great, but you can try any plant milk you like. This keeps the dish creamy without any dairy. Mix in other veggies for extra flavor and nutrition. Try adding steamed carrots or roasted red peppers. These add color and taste. You can also stir in spinach or kale for more greens. This gives your mash a unique twist and makes it more filling. Herbs and spices can elevate your mash. Add fresh thyme or rosemary for a fragrant boost. A pinch of smoked paprika brings a warm, smoky flavor. If you like heat, sprinkle in some red pepper flakes. These simple changes make your mash exciting and delicious. For the full recipe, click here: [Full Recipe]. Storing leftovers is easy. First, let the mash cool to room temp. Then, scoop it into an airtight container. Make sure to seal it tight. This mash lasts up to three days in the fridge. Label your container with the date. This way, you know when to eat it. To reheat, scoop the mash into a bowl. You can use the microwave or stovetop. If using a microwave, heat on medium for two to three minutes. Stir halfway through to heat evenly. If using the stovetop, add a splash of almond milk. Heat on low, stirring until warm. This step helps keep it creamy. Freezing is a great option too! Portion the mash into small containers. Leave a little space at the top, as it will expand when frozen. Wrap each container tightly with plastic wrap. You can freeze it for up to three months. When you're ready to eat, thaw it in the fridge overnight. Reheat as mentioned above, and enjoy your creamy delight again! For the full recipe, check the details above. Cauliflower is low in calories but high in nutrients. It has vitamin C, which helps your immune system. It also has fiber, which is good for digestion. Eating cauliflower may help reduce the risk of certain diseases. It has antioxidants that protect your cells. This veggie is also a great choice for those on low-carb diets. Yes, you can make Roasted Garlic Cauliflower Mash ahead of time. Just follow the full recipe and let it cool. Once cooled, store it in an airtight container in the fridge. It will last for about three days. When you're ready to eat, reheat it in the microwave or on the stove. Add a splash of milk or broth to restore creaminess if needed. To keep it creamy without dairy, use almond milk or another plant-based milk. You can also add more olive oil or a vegan butter alternative. Blending the roasted cauliflower and garlic well helps achieve a smooth texture. If you want extra creaminess, try adding soaked cashews or nutritional yeast. These options boost flavor while keeping it dairy-free. Roasted garlic cauliflower mash is simple and tasty. We covered the key ingredients, like cauliflower and garlic, along with optional flavors. You learned the steps to prepare, roast, and blend everything smoothly. I shared helpful tips for great texture and flavor. Variations make it easy to add your favorite veggies or spices. Proper storage keeps leftovers fresh. Remember, this dish is healthy and versatile. You can enjoy it any day of the week!](https://recipespursuit.com/wp-content/uploads/2025/07/76d7df59-3612-40ec-860c-28303598ce19-250x250.webp)
