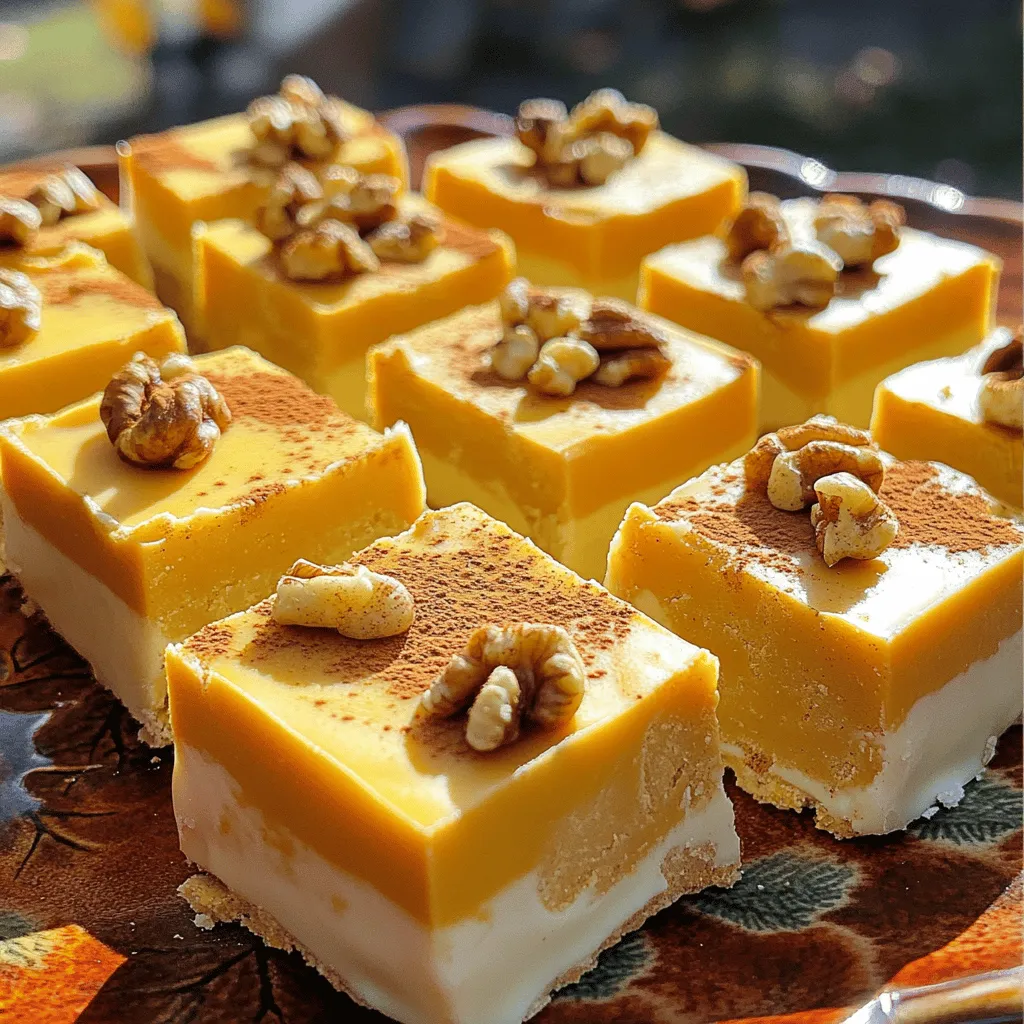
Get ready for a sweet fall treat! This Pumpkin Spice White Chocolate Fudge brings together the warm flavors of autumn with creamy white chocolate. In this post, I’ll guide you through simple steps to make this irresistible fudge at home. You’ll impress your friends and family with a dessert that tastes like a cozy pumpkin pie. Let’s dive in and whip up this delicious treat together!
Ingredients
List of Ingredients
– 2 cups white chocolate chips
– 1 can (15 oz) pumpkin puree
– 1 cup sweetened condensed milk
– 1 teaspoon vanilla extract
– 1 teaspoon pumpkin pie spice
– ½ teaspoon ground cinnamon
– ¼ teaspoon salt
– ½ cup chopped walnuts (optional)
Optional Ingredients
– Chopped pecans
– Mini marshmallows
– Drizzled caramel
Ingredient Notes
For the white chocolate chips, you can use high-quality brands found at most grocery stores. Look for chips that melt well. If you cannot find pumpkin puree, you can make your own by roasting and pureeing fresh pumpkin. Sweetened condensed milk is available in cans at any supermarket. You can skip the walnuts if you have nut allergies or prefer a smoother fudge. If you want to add more spice, try using nutmeg or ginger for a different flavor twist.
Step-by-Step Instructions
Preparation Steps
Start by lining an 8×8-inch baking pan with parchment paper. Leave some paper hanging over the sides. This helps you lift the fudge out later. Next, gather your ingredients. You will need white chocolate chips, pumpkin puree, sweetened condensed milk, and spices. Have everything ready before you begin.
Melting the Chocolate
In a medium saucepan, add the sweetened condensed milk and white chocolate chips. Set the heat to low. Stir the mix continuously. Keep stirring until the chocolate melts completely. The mixture should be smooth and creamy. Once melted, take the saucepan off the heat.
Cooling and Setting the Fudge
Now, stir in the pumpkin puree, vanilla extract, pumpkin pie spice, ground cinnamon, and salt. Mix well until everything is combined. If you like walnuts, fold them in now. Pour the fudge mixture into your prepared pan. Use a spatula to spread it evenly. Let it cool at room temperature for a bit. After that, put it in the fridge for at least two hours. This helps it set. Once firm, lift the fudge out using the parchment paper. Cut it into squares, and enjoy!
Tips & Tricks
Perfecting the Texture
To get the best texture, watch the heat closely when melting chocolate. Keep it on low. Stir the mix all the time. This step helps avoid any lumps. When you blend in the pumpkin, make sure it’s smooth. You want a creamy mix, not a chunky one. If you like, add chopped walnuts. They give a nice crunch.
Serving Suggestions
When it’s time to serve, cut the fudge into small squares. This makes it easy to share. Arrange them on a colorful platter. A sprinkle of pumpkin pie spice on top adds a nice touch. You can also serve it with whipped cream for dipping. This makes the treat even more fun.
Common Mistakes to Avoid
One common mistake is not stirring the chocolate enough. This can cause it to burn. Another mistake is using cold pumpkin puree. Always let it sit out to reach room temperature. This helps it mix better. Lastly, don’t rush the cooling time. Let it chill fully to set right.

Variations
Flavor Variations
You can change the flavor of this fudge with ease. Adding spices can give it a fun twist. For example, try mixing in nutmeg or ginger for a warm kick. You can also swap the vanilla extract for almond extract. This will add a lovely nutty flavor. Want a stronger pumpkin taste? Add an extra half cup of pumpkin puree. Each change makes the fudge more unique!
Dietary Modifications
If you follow a vegan diet, you can still enjoy this treat. Use dairy-free white chocolate chips and a vegan sweetened condensed milk. This simple swap keeps the fudge creamy and delicious. For gluten-free options, check labels on your ingredients. Most white chocolate chips are gluten-free, but it’s good to double-check.
Additional Toppings and Mix-ins
You can have fun with toppings and mix-ins! Chopped nuts, like walnuts, add a nice crunch. If you like a sweeter treat, sprinkle some mini chocolate chips on top. You can also try adding marshmallows or dried fruit for a chewy texture. Drizzling caramel or chocolate on top makes it extra special. The options are endless, so get creative!
Storage Info
How to Store Fudge
To keep your pumpkin spice white chocolate fudge fresh, store it in an airtight container. Place a sheet of wax paper between layers of fudge to prevent sticking. This method keeps your fudge soft and tasty for days. Keep it in a cool place, away from sunlight and heat.
Freezing Fudge
If you want to save some fudge for later, freezing works great! Wrap each piece tightly in plastic wrap. Then, place them in a freezer bag or container. You can freeze it for up to three months. When you are ready to enjoy it, let it thaw in the fridge overnight.
Shelf Life and Best Practices
Pumpkin spice white chocolate fudge can last about one week at room temperature. If you store it in the fridge, it can last two weeks. Always check for any signs of spoilage before eating. If it looks dry or hard, it may be time to toss it. For best taste, eat it fresh!
FAQs
Can I use dark chocolate instead of white chocolate?
Yes, you can swap dark chocolate for white chocolate. Dark chocolate gives a richer taste. It also changes the fudge’s color. Keep in mind that dark chocolate is less sweet. You may want to adjust the sugar or sweetened condensed milk to balance the flavors.
How do I know when the fudge is set?
You will know the fudge is set when it feels firm to the touch. After chilling for at least 2 hours, check the edges. They should pull away slightly from the pan. If the fudge is still soft in the center, give it more time in the fridge.
What is the best way to cut the fudge?
Use a sharp knife for clean cuts. First, lift the fudge out of the pan using the parchment paper. Place it on a cutting board. Wipe the knife between cuts to keep the edges neat. For smaller squares, cut in half, then cut each half into equal pieces.
In this blog post, we explored how to make fudge, from ingredients to storage. We covered the main ingredients, optional choices, and substitutions. You learned step-by-step how to prepare, melt, and set your fudge. We also shared tips to perfect the texture and avoid common mistakes. Lastly, we discussed variations for different flavors and dietary needs. Enjoy your fudge-making adventure, and don’t forget to share your delicious results!