Latest & Greatest

Spicy Garlic Roasted Chickpeas Crispy Flavor Boost
Are you ready to spice up your snack game? My Spicy Garlic Roasted Chickpeas are a game-changer! These crispy bites
Read more…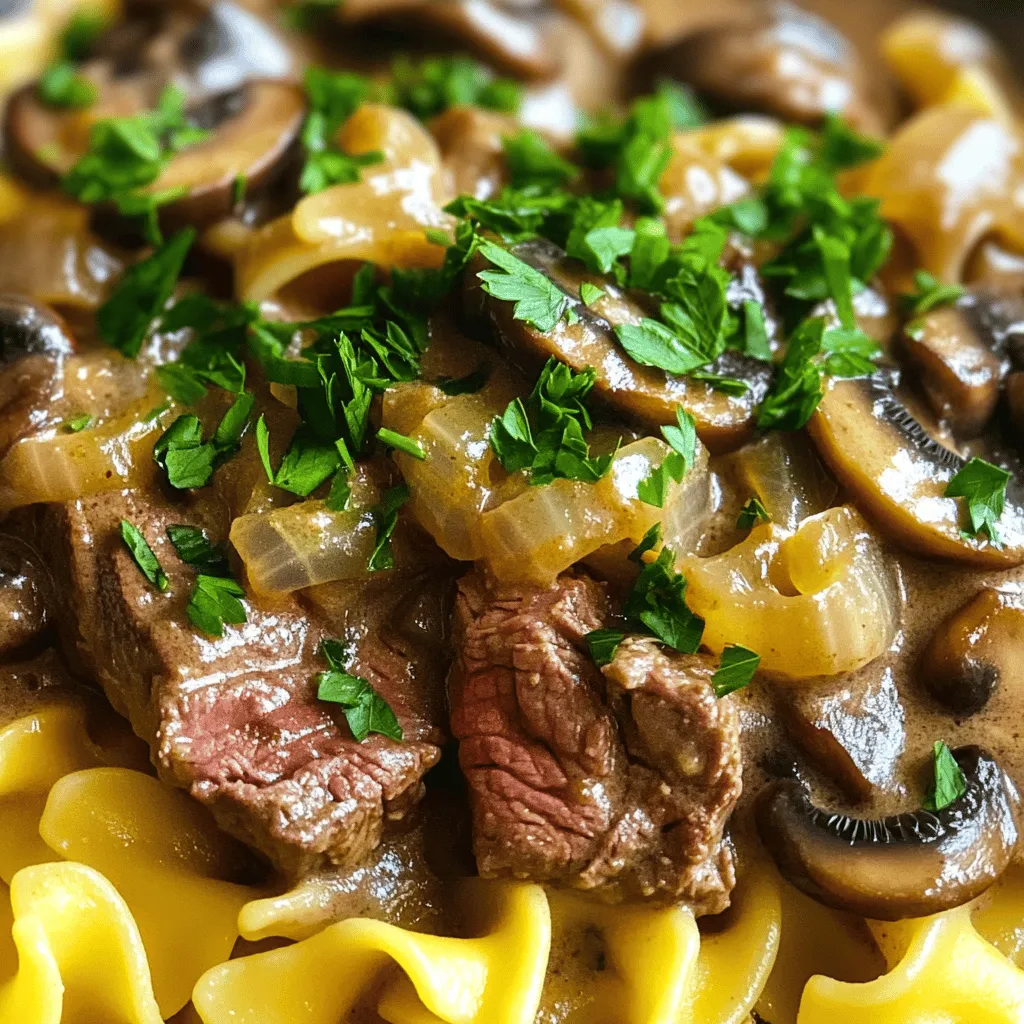
Instant Pot Beef Stroganoff Quick and Tasty Meal
Looking for a quick and tasty meal? My Instant Pot Beef Stroganoff is just the ticket! In about 35 minutes,
Read more…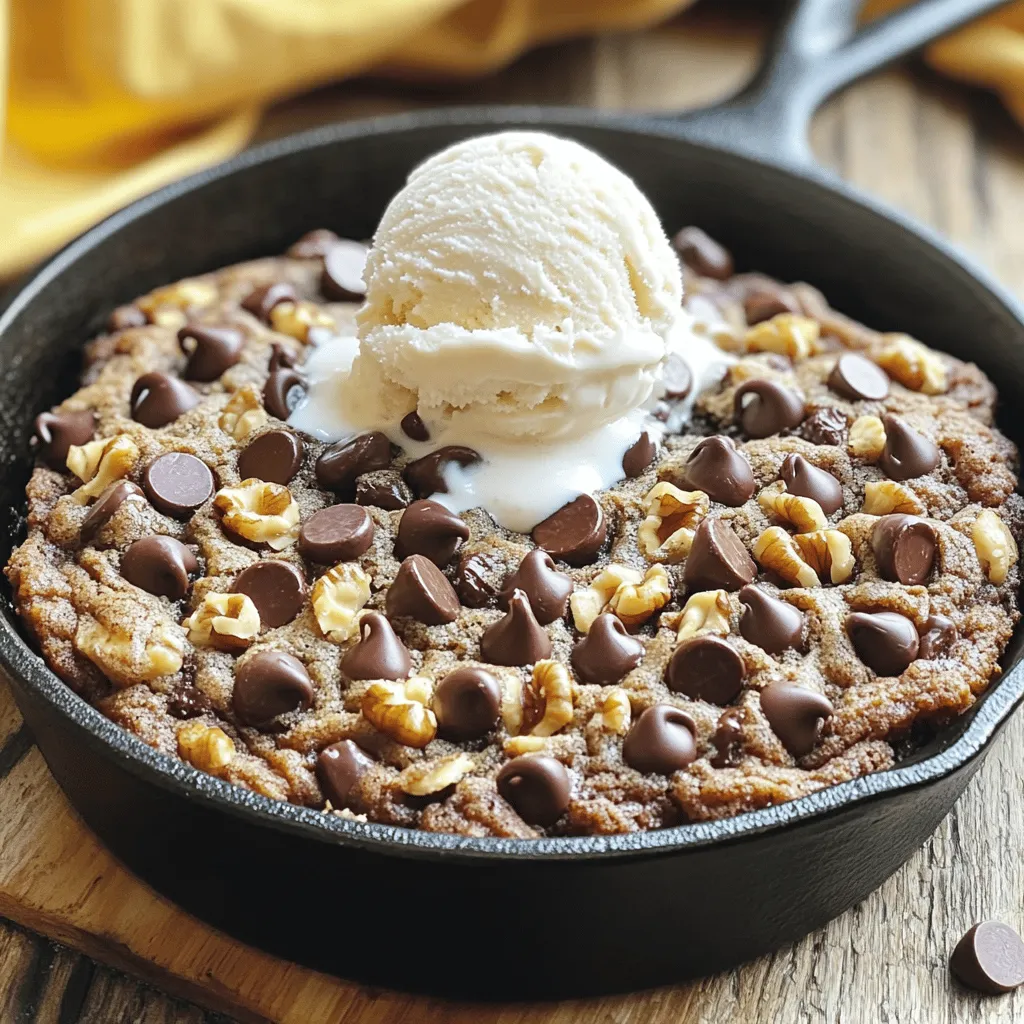
Chocolate Chip Cookie Skillet Simple and Tasty Delight
Are you ready to indulge in a warm, gooey treat? A Chocolate Chip Cookie Skillet is the ultimate delight for
Read more…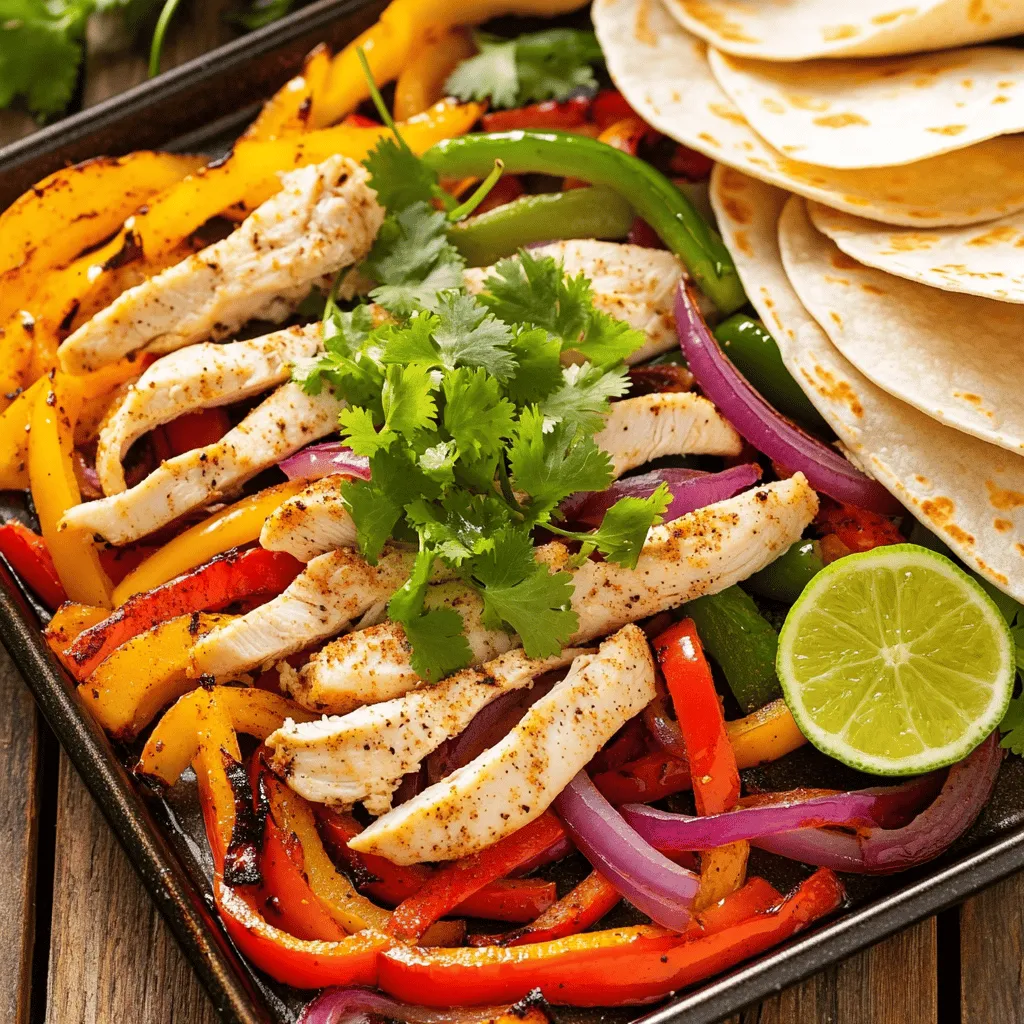
Sheet Pan Fajitas Bold and Flavorful Dinner Idea
Looking for a quick and tasty dinner? Sheet Pan Fajitas are your answer! This bold, flavorful dish combines chicken, vibrant
Read more…
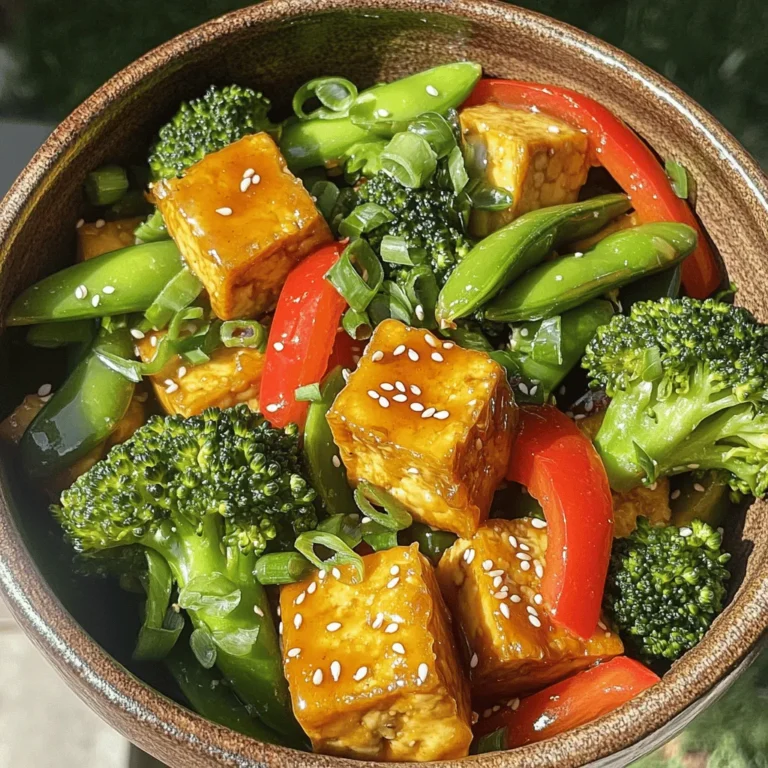
Quick Veggie Stir-Fry Easy and Healthy Dinner Idea
Looking for a quick and healthy dinner idea? A veggie stir-fry can be your go-to dish! It’s colorful, packed with
Read more…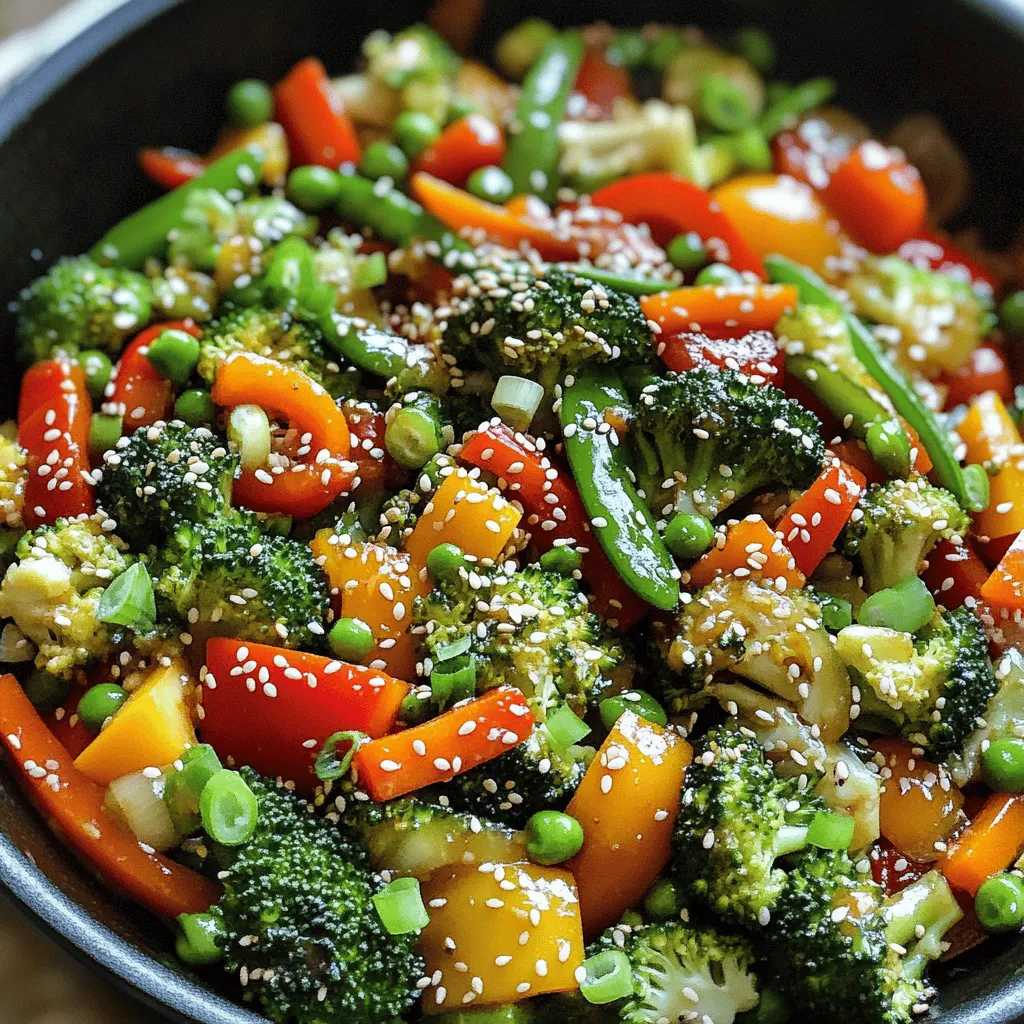
Quick Veggie Stir-Fry Easy and Healthy Dinner Idea
Looking for a quick and healthy dinner idea? A veggie stir-fry can be your go-to dish! It’s colorful, packed with
Read more…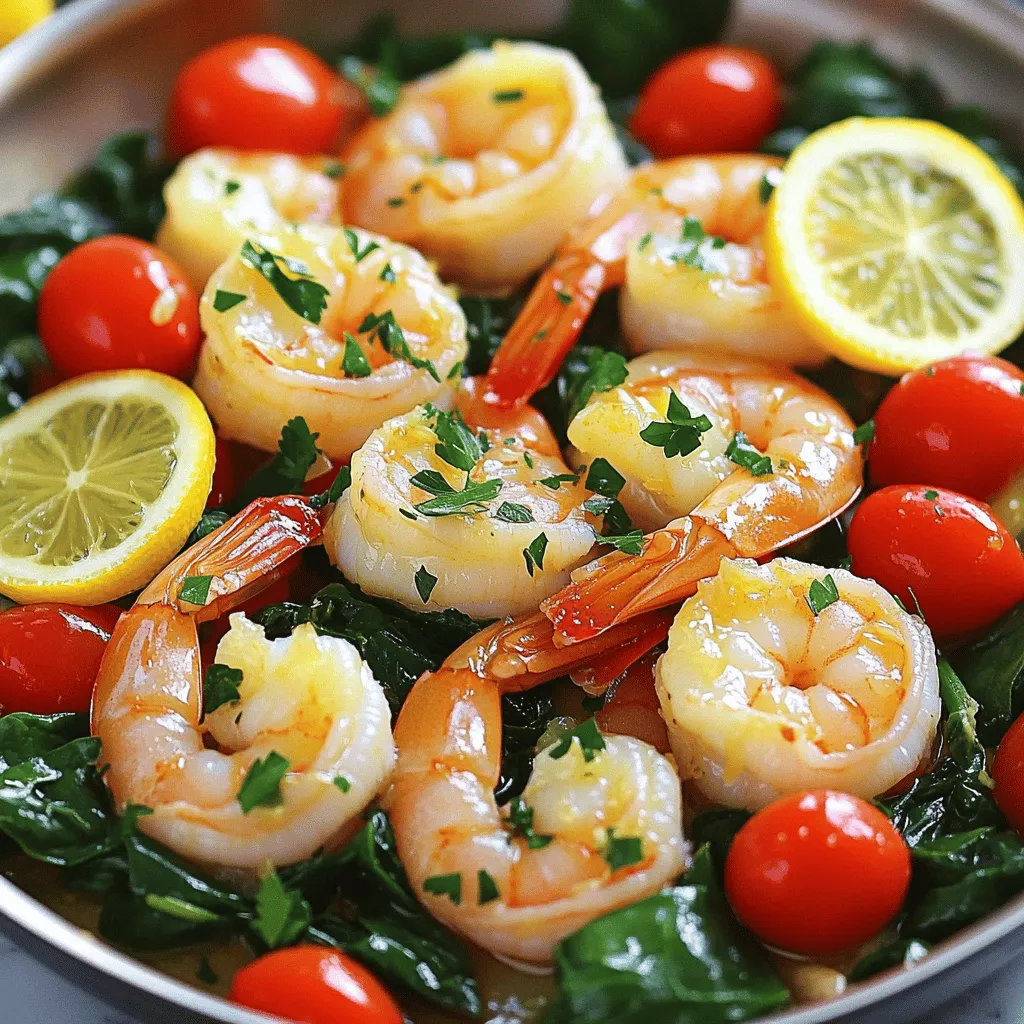
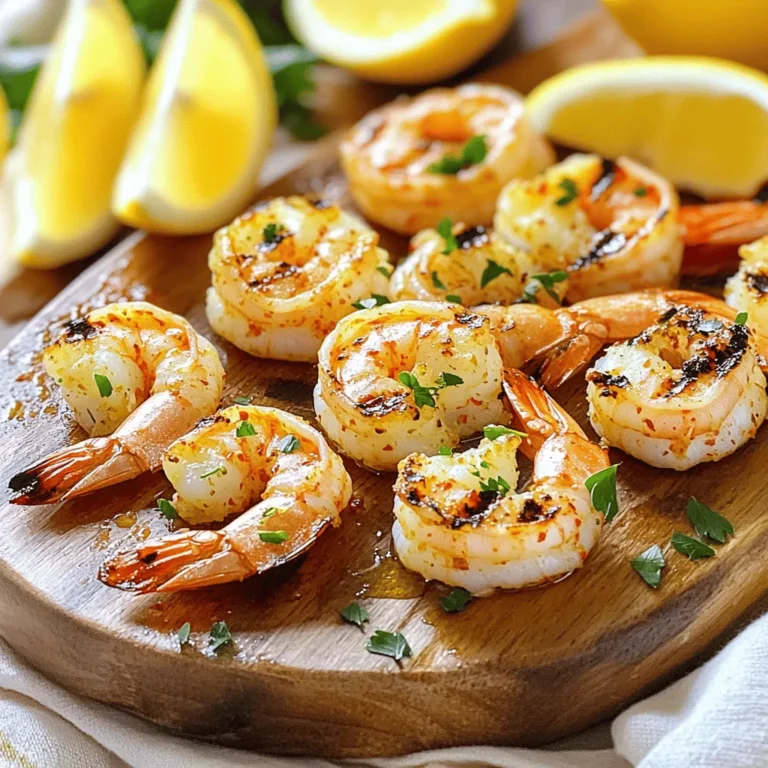
One-Pan Lemon Garlic Shrimp Quick and Flavorful Meal
Looking for a quick and tasty dinner option? This One-Pan Lemon Garlic Shrimp is packed with flavor yet simple to
Read more…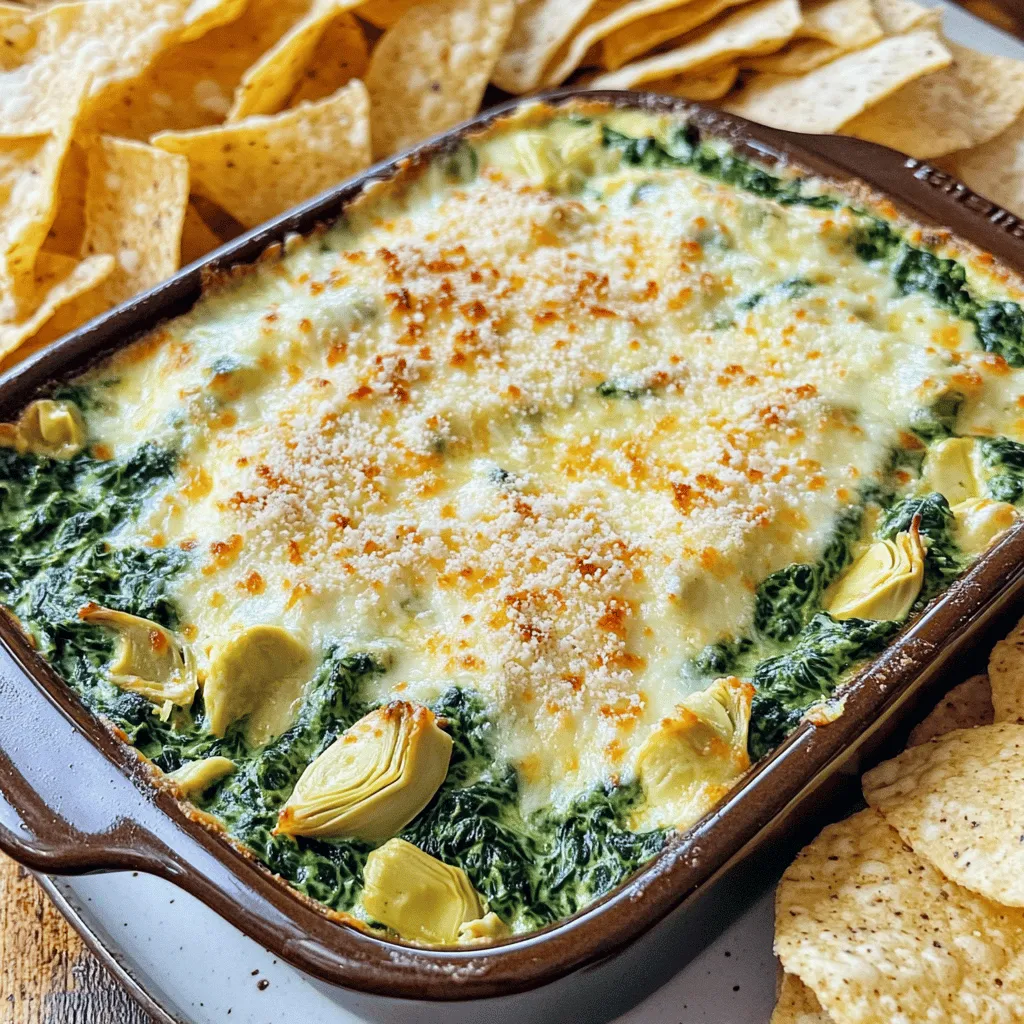
Creamy Spinach and Artichoke Dip Irresistible Delight
Are you ready to dive into a world of flavor with creamy, rich goodness? My Creamy Spinach and Artichoke Dip
Read more…browse recipes


Crispy Coconut Chicken Tenders Perfect for Dinner
If you’re searching for a dinner recipe that’s both easy and delicious, look no further! Crispy Coconut Chicken Tenders are a fun twist on…
My Latest Desserts
My Latest Recipes

hey,
i’m !
I’m so happy you’re here!
Cooking is my love language, and I’m excited to share my best dishes with you. Hope they become your favorites too! Let’s enjoy every bite of this journey together.


![To make Easter Chicks Cupcakes, you need simple ingredients. Each one plays a key role in flavor and texture. Gather everything before you start. It makes baking easier and more fun! - 1 ½ cups all-purpose flour - 1 cup granulated sugar - ½ cup unsalted butter, softened - 2 large eggs - ½ cup milk - 1 tablespoon baking powder - 1 teaspoon vanilla extract - ½ teaspoon salt - Yellow food coloring (gel preferred) These ingredients create a soft and sweet cupcake. The yellow food coloring gives the cupcakes their fun chick look. - 2 cups buttercream frosting (store-bought or homemade) - Shredded coconut (sweetened, for nest) - Candy eyes (edible) - Mini chocolate chips (for beaks) - Green candy grass (optional, for decoration) These decorations make your cupcakes look adorable and festive. The coconut mimics a nest, while the candy eyes and chocolate chips bring the chicks to life. You can add green candy grass for extra fun! For the complete recipe, check the Full Recipe link. Start by preheating your oven to 350°F (175°C). This step helps to bake the cupcakes evenly. Next, line your muffin tin with cupcake liners. I love using bright colors to match the Easter theme. This small touch makes each cupcake pop. In a large mixing bowl, cream together the softened butter and granulated sugar. Use a mixer on medium speed until it becomes light and fluffy. Add the eggs, one at a time, mixing well after each. Then, stir in the vanilla extract for extra flavor. In a separate bowl, whisk together the flour, baking powder, and salt. Gradually add this dry mix to the butter mixture. Alternate with the milk to keep the batter smooth. It’s crucial to mix until just combined; overmixing can make the cupcakes tough. Now, it’s time for the fun part! Add yellow food coloring to the batter, a few drops at a time. Mix until you reach a bright chick yellow. This color will make your cupcakes cheerful and inviting! Pour the batter into the lined muffin tin, filling each liner about two-thirds full. This gives them room to rise without spilling over. Place the muffin tin in the preheated oven. Bake for 18-20 minutes. To check if they are done, insert a toothpick into the center. If it comes out clean, they are ready! Let the cupcakes cool in the pan for 5 minutes. Then, carefully transfer them to a wire rack to cool completely. This step is key for perfect frosting later. For the full recipe, you can refer back to the ingredients section. To get a soft, fluffy cupcake, start with room-temperature butter and eggs. This helps the batter mix well. Cream the butter and sugar until it feels light and fluffy. This step adds air to the mix. When adding the dry ingredients, mix just until combined. Over-mixing can make the cupcakes tough. For the perfect chick look, use a piping bag for the frosting. Swirl it high to create a cute chick shape. After frosting, sprinkle shredded coconut on top to mimic a nest. Use candy eyes for fun, and place a mini chocolate chip for the beak. You can add green candy grass around the nest for extra color and charm. One mistake is overfilling the cupcake liners. Fill them only two-thirds full to allow for rising. Another error is not checking oven temperature. Use an oven thermometer to ensure it’s accurate. Lastly, don't rush the cooling process. Let the cupcakes cool completely before frosting; warm cupcakes can melt the frosting. Following these tips will help you create delightful Easter chicks cupcakes every time! {{image_2}} You can have fun by changing the flavor of your Easter chicks cupcakes. Instead of vanilla, try lemon or almond extract for a twist. Chocolate cupcakes are also a crowd-pleaser. Just swap out some flour for cocoa powder. Each flavor gives a unique taste. You can even mix flavors! How about a lemon-chocolate combo? It’s a tasty surprise. Decorating your cupcakes can be just as fun as baking them! Instead of coconut, use crushed graham crackers for a sandy look. You can also add edible glitter for sparkle. If you want more color, use different food dyes. Orange for beaks or pink for cheeks makes them pop! Get creative and let your kids help. They will love making their own designs. Mini cupcakes are a cute option for Easter. They are bite-sized and perfect for little hands. Use the same batter and bake them for about 12-15 minutes. Decorate them just like the regular cupcakes. Mini chicks are fun for parties or gifts. You can even put them in small boxes for an extra special treat. Enjoy making these little delights! To keep your decorated Easter chicks cupcakes fresh, place them in an airtight container. This protects them from air and moisture. If you have room, store them in the fridge for added freshness. When you want to enjoy them, just take them out and let them sit for a few minutes. This will bring back their soft texture. Freezing cupcakes is a great way to save some for later. First, cool the cupcakes completely. Then, wrap each one in plastic wrap. After that, place them in a freezer-safe bag. Be sure to label the bag with the date. You can freeze them for up to three months. When you’re ready to eat them, thaw the cupcakes in the fridge overnight. Frost them before serving for the best taste. Here are some tips to keep your cupcakes fresh: - Do not stack the cupcakes. This can ruin their shape and frosting. - Keep cupcakes away from strong odors in the fridge. - Use a cake dome for display and protection if leaving them out. - Only frost what you plan to eat right away. Frosting can soften over time. These tips help ensure your Easter chicks cupcakes stay delicious and fun! For the full recipe, check out the earlier section. Yes, you can make these cupcakes ahead of time. Bake and cool the cupcakes, then store them in an airtight container. Keep them at room temperature for up to two days. For longer storage, place them in the fridge for up to a week. Frost them close to serving time. This keeps the frosting fresh and fluffy. If you need a butter substitute, you can use coconut oil or vegetable oil. Both options work well in this recipe. Use the same amount as the butter listed. You can also try applesauce for a lower-fat option. However, it may change the flavor and texture slightly. To make homemade buttercream frosting, start with softened butter. Use 1 cup of butter and beat it until smooth. Gradually add 4 cups of powdered sugar, mixing well. Add 2-4 tablespoons of milk for creaminess. Mix until fluffy. You can also add vanilla or lemon extract for flavor. For colorful frosting, add food coloring to match your Easter theme. Check the [Full Recipe] for more details. You’ve learned about key ingredients and steps to make delicious cupcakes. We covered important tips for texture and decoration. You can try fun flavor variations and mini cupcake options too. Storing your treats properly will keep them fresh longer. Remember, practice makes perfect! Making cupcakes can be fun and creative. Enjoy baking and sharing your tasty results with friends and family. Happy cupcake making!](https://recipespursuit.com/wp-content/uploads/2025/05/5802436f-88fa-42b4-92d4-a61dc0900d5c-300x300.webp)
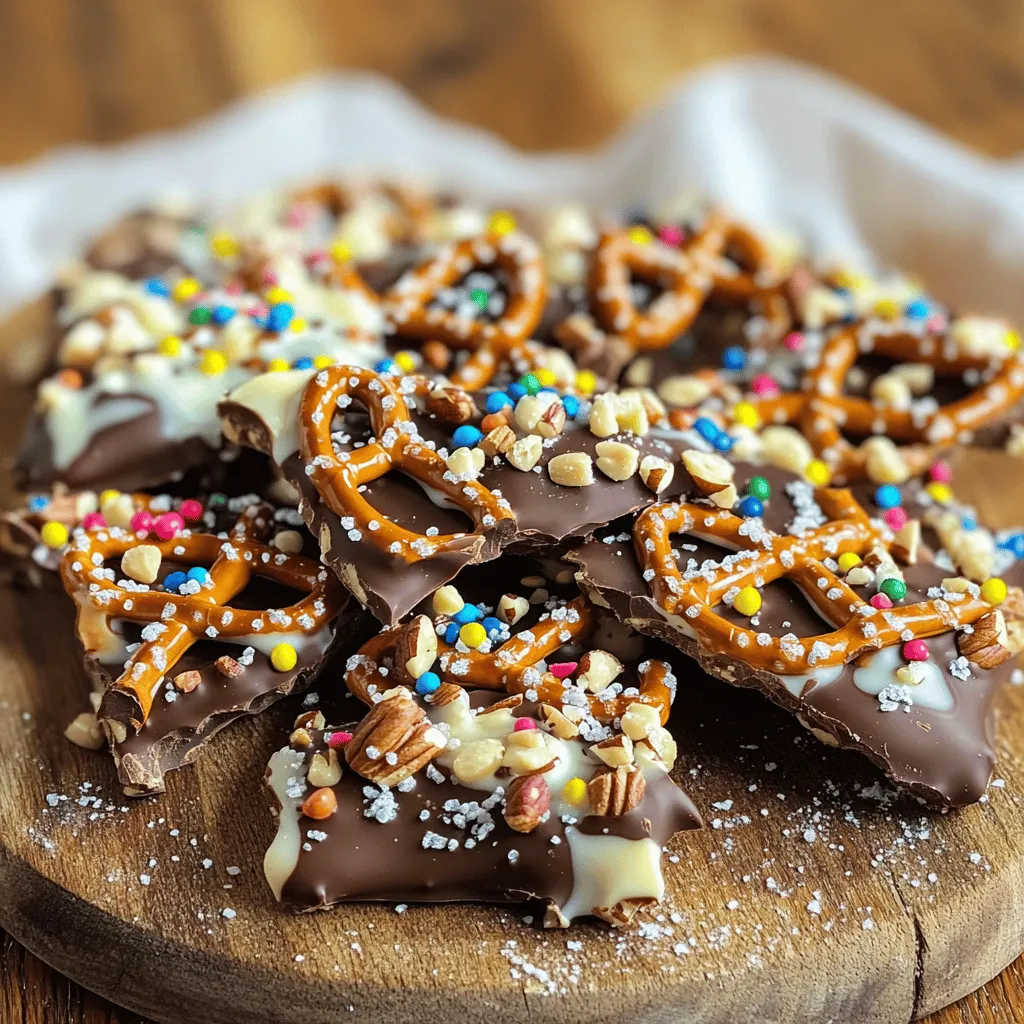
Chocolate Covered Pretzel Bark Irresistible Treat Recipe
Are you ready to dive into a sweet and salty delight? This Chocolate Covered Pretzel Bark is an easy treat that combines crunchy pretzels,…