Latest & Greatest

browse recipes

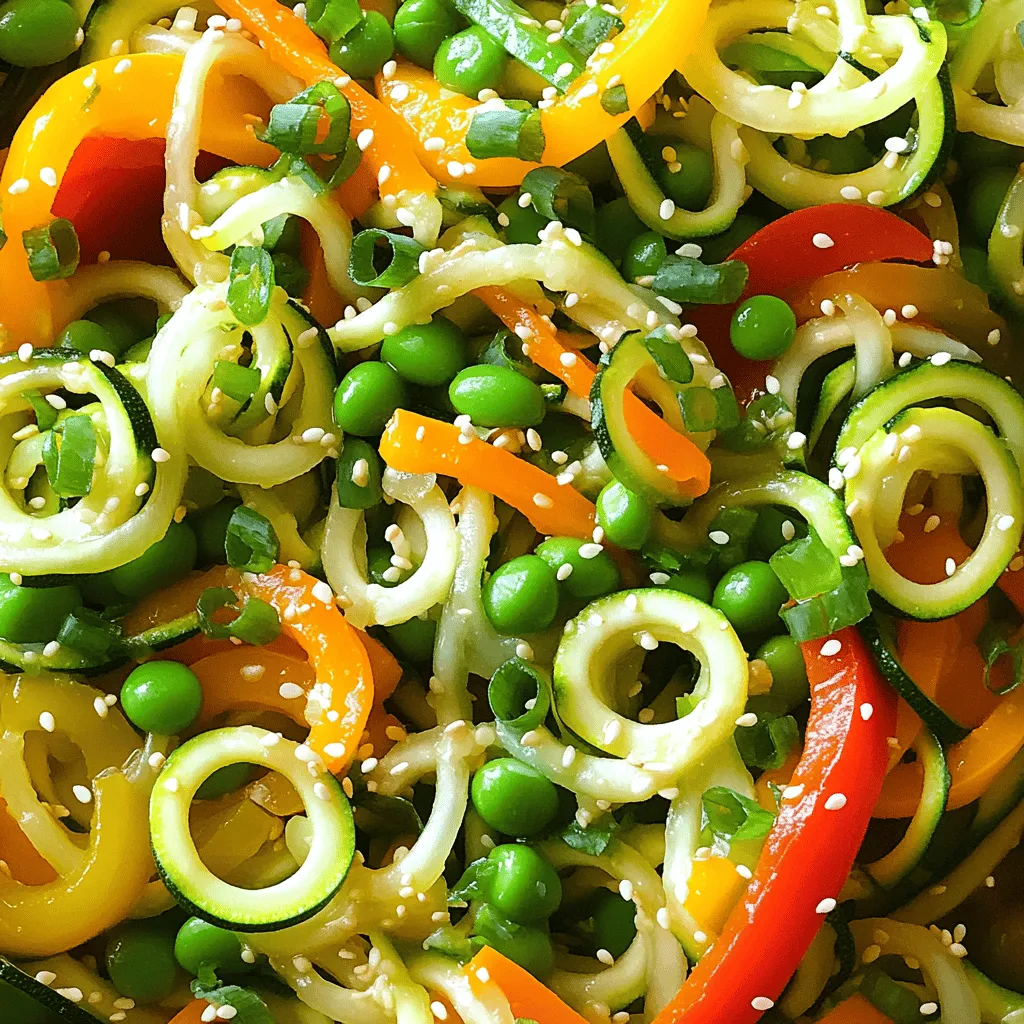
To make a tasty zucchini noodle stir fry, gather these key ingredients: - 3 medium zucchinis, spiralized - 1 cup bell peppers (red, yellow, green), sliced - 1 cup snap peas, trimmed - 1 carrot, julienned - 1 small red onion, thinly sliced - 3 cloves garlic, minced - 1 tablespoon ginger, minced - 3 tablespoons soy sauce (or tamari for gluten-free) - 1 tablespoon sesame oil - 1 tablespoon olive oil - 1 teaspoon chili flakes (optional, for heat) - 2 green onions, chopped - Toasted sesame seeds for garnish Fresh produce makes a big difference. Look for bright, crisp vegetables. I recommend using: - Organic zucchinis for best flavor - Colorful bell peppers for sweetness - Crunchy snap peas for texture - A fresh carrot for color and crunch Using fresh ingredients boosts taste and nutrition. Plus, it adds vibrant colors to your dish. Feel free to get creative! Here are some optional ingredients to enhance flavor: - Extra vegetables like mushrooms or bok choy - Proteins like chicken, shrimp, or tofu - Fresh herbs like cilantro or basil for brightness - A splash of lime juice for zest These additions let you play with flavors and textures. You can make this dish your own. For the full recipe, check out the details above. Start with fresh zucchinis. You will need three medium-sized zucchinis for this dish. Use a spiralizer or a vegetable peeler to create long, noodle-like strands. Place the spiralized noodles in a large bowl. Set them aside for now. This step helps to keep the noodles from getting too watery later. Heat a large skillet or wok over medium-high heat. Add one tablespoon of olive oil and let it warm up. Once hot, toss in the sliced red onion. Stir-fry for about two minutes until they soften. Next, add three cloves of minced garlic and one tablespoon of minced ginger. Stir this mixture for about thirty seconds until it smells amazing. Now, add the sliced bell peppers, trimmed snap peas, and julienned carrot. Cook them for about three to four minutes. You want them to stay crisp but tender. Pour in three tablespoons of soy sauce and one tablespoon of sesame oil. If you like heat, add one teaspoon of chili flakes. Mix everything well. Quickly add the zucchini noodles to the skillet. Toss all the ingredients gently. Cook for an additional two to three minutes. You want the noodles warm but not mushy. Remove the skillet from the heat. Stir in two chopped green onions for a fresh kick. Adjust the seasoning if needed. To serve, scoop the stir fry into bowls. Garnish with toasted sesame seeds for a nice crunch. Enjoy your fresh and flavorful Zucchini Noodle Stir Fry! For the full recipe, check the earlier section. To keep your zucchini noodles firm, start by salt them. After spiralizing, sprinkle salt on the noodles. Let them sit for 10 minutes. This step draws out extra water. Pat them dry with a clean towel before cooking. When you cook, avoid high heat for too long. Zucchini noodles need just a few minutes to heat through. If you cook them too long, they become mushy. Choosing the right oils makes a big difference in flavor. I suggest using olive oil for a mild taste. Sesame oil adds a nice nutty touch. A mix of both works well. For a more intense flavor, try avocado oil. It has a high smoke point, making it great for stir-frying. Avoid oils with strong flavors like coconut oil. They can overpower the dish. Seasoning is key to a tasty zucchini noodle stir fry. Start with soy sauce for saltiness. Add ginger and garlic for warmth and depth. If you want some heat, include chili flakes. Fresh herbs like basil or cilantro can brighten the dish. I like to finish with a sprinkle of toasted sesame seeds for crunch. This adds texture and a bit of flair. For the full recipe, check out the Zesty Zucchini Noodle Stir Fry section. {{image_2}} You can easily make a vegan version of this dish. Just skip the protein add-ins. Use the same fresh veggies from the recipe. They add great taste and color. For added protein, consider using edamame or chickpeas. They fit well and boost nutrition without meat. This dish stays fresh, vibrant, and full of flavor. To make this dish gluten-free, replace soy sauce with tamari. Tamari gives a similar taste without gluten. Always check labels when buying sauces. Many brands offer gluten-free versions. You can enjoy this dish without worrying about gluten. The other ingredients in the recipe are naturally gluten-free, so you’re good to go! Adding protein can turn this dish into a filling meal. For chicken, cut it into bite-sized pieces. Cook it first until golden brown. For tofu, opt for firm tofu, cut into cubes, and sauté until crispy. Shrimp cooks quickly, so add it after the veggies. Cook until pink and opaque. Each option adds a unique taste and texture, making your stir fry even better. For the full recipe, check out the Zesty Zucchini Noodle Stir Fry. Store your zucchini noodle stir fry in an airtight container. Make sure the stir fry cools down before sealing it. This keeps moisture in check. Use glass or plastic containers for easy stacking. Keep the container in the refrigerator for best results. To reheat, use a skillet over medium heat. Add a splash of water or oil to keep it moist. Stir often to heat evenly. You can also use a microwave. Place the stir fry in a microwave-safe bowl. Heat in short bursts of 30 seconds, stirring in between. Your zucchini noodle stir fry lasts about 3 to 4 days in the fridge. After that, the noodles may get soggy. Always check for any off smells or changes in texture before eating. Enjoy this fresh and vibrant dish with the best quality! For the complete recipe, refer to the Full Recipe section. Zucchini noodles are low in calories. They are a great source of vitamins A and C. They also provide fiber, which helps digestion. Eating zucchini noodles can help you feel full without many carbs. This makes them a smart choice for anyone watching their weight. Yes, you can prep the veggies and noodles ahead. Cut the veggies and spiralize the zucchini. Store them in the fridge for up to two days. But, cook the stir fry fresh for the best taste. If you store it cooked, the noodles may get soggy. If you don’t have a spiralizer, use a vegetable peeler. Simply peel long strips off the zucchini. Then, stack the strips and cut them into thin noodles. You can also use a box grater to shred the zucchini into noodle-like pieces. You can use tamari for a gluten-free option. Coconut aminos also work well for a soy-free choice. If you want less sodium, try low-sodium soy sauce. You can even use homemade broth or a mix of vinegar and water for a different flavor. For the full recipe, check out Zesty Zucchini Noodle Stir Fry. Zucchini noodle stir fry is a fun dish. We covered key ingredients, how to prepare zucchini noodles, and cooking tips. I shared variations for vegan and gluten-free recipes, too. Remember to store leftovers properly for the best taste. In conclusion, zucchini noodles are healthy, tasty, and easy to make. Enjoy this dish with your favorite protein or vegetables. Get creative in the kitchen and have fun!

Zucchini Noodle Stir Fry Fresh and Flavorful Dish

Looking for a quick, fresh meal that’s full of flavor? Try my Zucchini Noodle Stir Fry! It’s a fun way to enjoy veggies without…

My Latest Desserts

My Latest Recipes

hey,

i’m !

I’m so happy you’re here!

Cooking is my love language, and I’m excited to share my best dishes with you. Hope they become your favorites too! Let’s enjoy every bite of this journey together.

Chocolate Marshmallow Whoopie Pies Delightful Treat

If you love sweet treats, chocolate marshmallow whoopie pies are for you! Imagine soft chocolate cookies filled with fluffy marshmallow cream. They are simple…
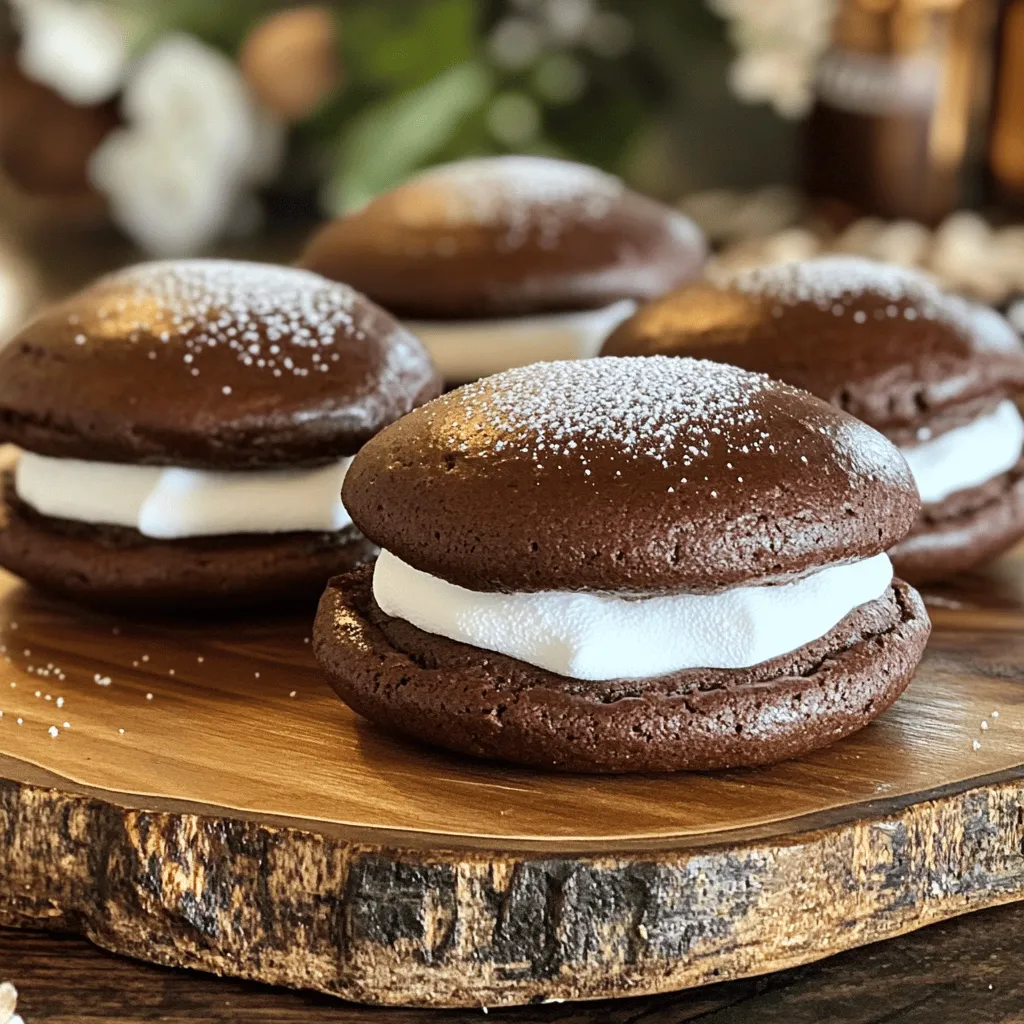
- 1 cup all-purpose flour - 1/2 cup unsweetened cocoa powder - 1 teaspoon baking soda - 1/2 teaspoon salt - 1/4 cup unsalted butter, softened - 1 cup granulated sugar - 1 large egg - 1 teaspoon vanilla extract - 1/2 cup buttermilk - 1 cup marshmallow fluff - 1/2 cup confectioners' sugar - 1/4 teaspoon vanilla extract (for frosting) When I bake whoopie pies, I love using fresh ingredients. They make a big difference in taste. The flour gives the pies structure. Cocoa powder adds rich chocolate flavor. Baking soda helps the pies rise. Salt enhances all the sweet flavors, making them pop. Softened butter blends well with sugar. This creates a creamy mix that adds moisture. Eggs provide binding and some lift. Vanilla extract adds warmth and depth to the batter. Buttermilk makes the pies tender. Marshmallow fluff is key for the filling. It brings a sweet and gooey texture. Confectioners' sugar sweetens the fluff. The extra vanilla in the filling adds a nice touch. - Chocolate shavings or sprinkles for decoration - Additional flavors (e.g., peppermint extract) I enjoy adding chocolate shavings or sprinkles on top. They make the pies look fancy. You can also try different flavors. A drop of peppermint extract can make a fun twist. - Gluten-free flour alternatives - Dairy-free options for butter and buttermilk If you need gluten-free pies, use gluten-free flour. It works just as well. For dairy-free options, swap the butter with coconut oil and the buttermilk with almond milk. These small changes can keep your whoopie pies delicious for everyone. For the full recipe, refer to the instructions. - Preheat your oven to 350°F (175°C). - Prepare baking sheets with parchment paper. Getting your oven hot first is key. It helps the cookies rise well. Lining the sheets makes cleanup easy. You want to make sure each pie bakes evenly. - Whisk flour, cocoa, baking soda, and salt. - Cream butter and sugar until fluffy. - Incorporate egg and vanilla. Start by mixing the dry stuff in a bowl. This way, the cocoa combines well. Next, cream the butter and sugar until it looks light and fluffy. This step adds air, making your pies soft. When you add the egg and vanilla, mix until it's smooth. - Combine dry and wet mixtures. - Portion and bake cookies. - Cool on wire rack. Now, mix the dry and wet ingredients together. Do this gently so you don’t overmix. Use a tablespoon to drop mounds of batter on the sheets. Bake for about 10-12 minutes. The tops should spring back when pressed. Let them cool on a wire rack after baking. This helps keep them soft and chewy. Measuring your ingredients correctly is key. Use dry measuring cups for flour and cocoa. Spoon flour into the cup and level it off. Avoid packing it down. This small step helps keep your whoopie pies light. For fluffiness, cream the butter and sugar well. Mix them for about 2-3 minutes until they look pale and fluffy. This adds air to your mix. Incorporate the egg and vanilla, then alternate adding the dry and wet ingredients. This keeps the batter smooth and airy. Dust your whoopie pies with confectioners' sugar for a lovely touch. Place them on a cooling rack. Use a fine mesh sieve to sprinkle the sugar evenly. This makes for a beautiful finish. When serving, think about adding a drizzle of melted chocolate. It gives an extra layer of flavor and impresses guests. Arrange them on a colorful plate for even more eye appeal at gatherings. One big mistake is overmixing the batter. This can make your whoopie pies dense and tough. Mix just until combined to keep them soft. Also, watch your baking time. If you bake them too long, they will dry out. Check them at the 10-minute mark. They should spring back lightly when pressed. Perfect timing leads to a soft, chewy treat. {{image_2}} You can switch up the flavor of your whoopie pies with fun twists. A popular choice is adding pumpkin spice. This gives a warm, cozy taste, perfect for fall. Just mix in a teaspoon of pumpkin spice into your batter. This simple change makes a big difference. Another tasty option is mint chocolate whoopie pies. Use mint extract to flavor the batter. This gives the pies a refreshing taste. You can also add chocolate chips for extra chocolatey goodness! If you want to make vegan whoopie pies, you can easily adapt the recipe. Replace the egg with a flaxseed meal. Mix one tablespoon of flaxseed with three tablespoons of water. Let it sit for a few minutes to thicken. This works just like an egg in the recipe. For the butter, use coconut oil or a vegan butter substitute. If you're on a keto diet, you can make changes too. Swap the all-purpose flour with almond flour. This keeps the pies low in carbs. You can also use a sugar substitute like erythritol or stevia. The filling can change up your whoopie pies in great ways. Instead of marshmallow fluff, try a rich chocolate ganache. To make this, heat heavy cream and pour it over chocolate chips. Stir until smooth and cool. This makes a decadent filling. You can also use fruit-flavored fillings for a fruity twist. Mix cream cheese with fruit puree, like raspberry or strawberry. This gives a fresh taste that pairs well with the chocolate. For the full recipe, check out the directions above and get baking! To keep your whoopie pies fresh, store them in an airtight container. This helps prevent drying out. You can keep them at room temperature for up to two days. If you want them to last longer, place them in the fridge. They stay good for about five days when refrigerated. You can freeze whoopie pies for later enjoyment. To freeze them, wrap each pie in plastic wrap. Then, place them in a freezer-safe bag. This keeps them fresh for up to three months. When you're ready to eat, take them out and let them thaw at room temperature. This way, they stay soft and tasty. Whoopie pies are best when fresh, but they have a decent shelf life. At room temperature, they can last for two days. In the fridge, they stay fresh for about five days. Watch for signs of spoilage, like a dry texture or off smell. If that happens, it's time to toss them out. Chocolate marshmallow whoopie pies are soft, cake-like cookies filled with sweet marshmallow cream. They are a fun dessert that pairs rich chocolate with fluffy filling. The whoopie pie's origin is debated, but many believe it started in New England. These tasty treats have roots in Pennsylvania Dutch culture. They were often made with leftover cake batter, creating a delightful hand-held dessert. You can make whoopie pies ahead by baking the cookies and filling them later. Once baked, let the cookies cool completely. Store them in an airtight container at room temperature. You can make the filling and keep it in the fridge for up to a week. When you're ready to serve, simply assemble the whoopie pies. This way, they stay fresh and tasty. Yes, you can use cake mix for whoopie pies. It makes the process quicker and easier. Just follow the instructions on the cake mix box, but use less liquid than suggested. This will help keep the mixture thick for better shaping. You may need to experiment with the baking time, as it might differ from the original recipe. Whoopie pies can last for about 3 to 5 days when stored properly. Keep them in an airtight container to maintain freshness. If you want them to last longer, consider refrigerating them. They can stay fresh in the fridge for about a week. Always check for any signs of spoilage, like a change in texture or smell. Yes, you can make mini whoopie pies! Just scoop smaller amounts of batter onto the baking sheets. Space them accordingly to allow for spreading. Bake them for a shorter time, around 8 to 10 minutes. Mini whoopie pies make great bite-sized treats that are perfect for parties or gatherings. Now you have all the tools to make delicious chocolate marshmallow whoopie pies. We covered key ingredients, easy steps, and useful tips to ensure success. Remember to mix well, avoid common mistakes, and have fun trying different flavors. Whether you stick to the classics or explore new variations, these treats are sure to impress. With proper storage, they will stay fresh and tasty. Enjoy your baking adventure and share your creations with friends and family!