Latest & Greatest
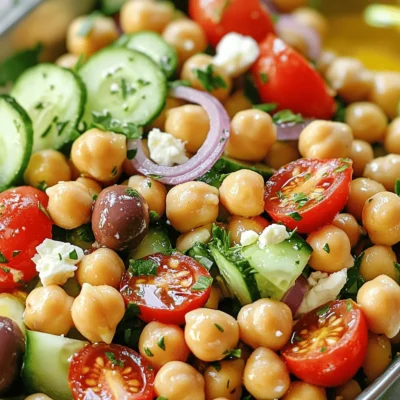
Mediterranean Chickpea Salad Fresh and Simple Delight
Are you ready to create a burst of flavor with a Mediterranean Chickpea Salad? This fresh and simple delight combines
Read more…
Savory Shrimp and Grits Casserole Recipe Delight
If you love the rich flavors of Southern cuisine, you’ll adore this savory shrimp and grits casserole. It’s a cozy
Read more…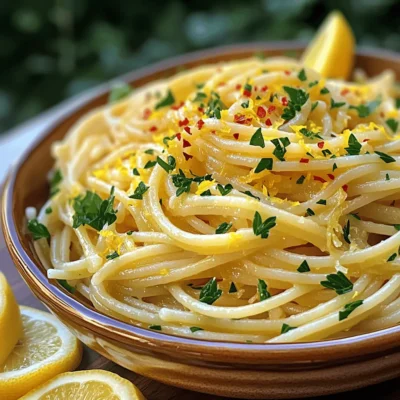
Spaghetti Aglio e Olio Simple and Flavorful Dish
Looking for a simple yet flavorful dish? Spaghetti Aglio e Olio is the answer! With just a few ingredients and
Read more…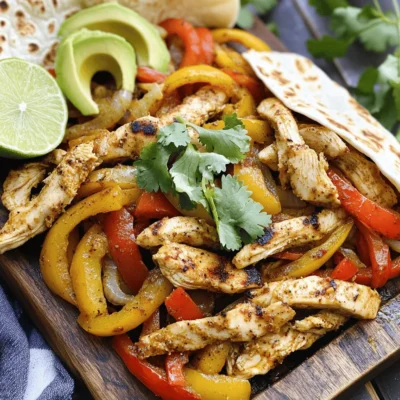
Oven-Baked Chicken Fajitas Flavorful and Simple Meal
Are you ready to create a tasty and simple meal? Oven-Baked Chicken Fajitas are your answer! This dish is full
Read more…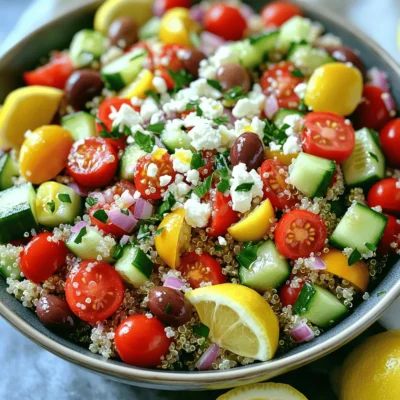
Mediterranean Quinoa Salad Tasty and Healthy Delight
Mediterranean Quinoa Salad is a tasty, healthy delight that you can enjoy any time. This colorful dish combines fresh veggies,
Read more…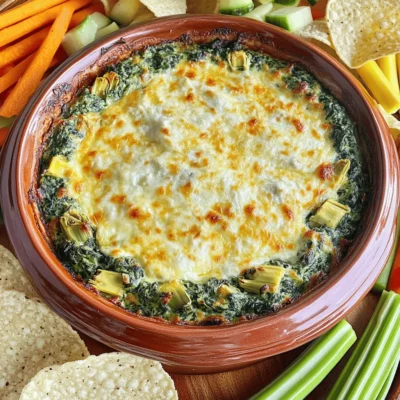
Spinach Artichoke Dip Wholesome and Flavorful Recipe
Are you ready to whip up a creamy, delicious Spinach Artichoke Dip? This wholesome recipe brings together fresh flavors and
Read more…
Sweet Potato Hash with Eggs Energizing Breakfast Recipe
Looking for a breakfast that fuels your day? Try my Sweet Potato Hash with Eggs! This tasty dish combines creamy
Read more…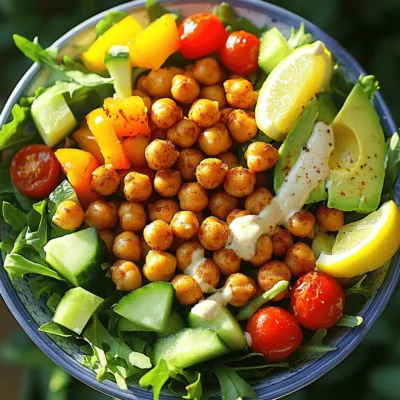
Crispy Chickpea Salad Fresh and Flavorful Delight
Looking for a fresh and tasty salad that’s simple to make? You’ve come to the right place! In this article,
Read more…browse recipes
![For a delicious serving of zucchini noodles with pesto, you'll need these items: - 3 medium zucchinis - 1 ripe avocado - 1 cup fresh basil leaves - 1/4 cup walnuts - 2 tablespoons lemon juice - 2 tablespoons olive oil - 1 clove garlic, minced - Salt and pepper to taste To enhance your dish, consider these toppings: - Cherry tomatoes, halved - Grated Parmesan cheese (optional) These garnishes add color and flavor that brighten up your meal. If you don't have certain items, here are some swaps: - Use pine nuts instead of walnuts for a different taste. - If you lack fresh basil, try spinach or arugula as alternatives. - For a nut-free option, use sunflower seeds in the pesto. - Instead of lemon juice, lime juice works well too. Feel free to mix and match based on what you have! The full recipe can guide you through this simple yet tasty dish. To start, grab three medium zucchinis. Using a spiralizer or a julienne peeler, turn those zucchinis into noodles. Place the noodles in a colander. Sprinkle them lightly with salt. This helps to draw out excess moisture. Let them sit for about 15 to 20 minutes. The salt will work its magic. After 20 minutes, rinse the noodles under cold water. Pat them dry with a paper towel. This step keeps your dish from being too watery. While the zucchini noodles drain, it's time to make the avocado pesto. Take one ripe avocado and scoop it into a food processor. Add one cup of fresh basil leaves, one-fourth cup of walnuts, and two tablespoons of lemon juice. Pour in two tablespoons of olive oil and add one clove of minced garlic. Blend everything until it's smooth. Taste the mixture and add salt and pepper as needed. If the pesto is too thick, add a bit more olive oil until you like the texture. This creamy pesto makes the dish sing. Once the zucchini noodles are dry, it's time to combine everything. In a large bowl, add the zucchini noodles and the avocado pesto. Toss gently until all the noodles are coated well. Now for the fun part—plating! Serve the noodles on a nice plate. Garnish with halved cherry tomatoes on top. If you like, sprinkle some grated Parmesan cheese for extra flavor. Serve immediately, and enjoy the fresh taste of this delightful dish. You can follow the [Full Recipe] for more details. To make perfect zucchini noodles, start with fresh, firm zucchinis. Use a spiralizer or julienne peeler. Spiralize the zucchinis directly into the bowl. Aim for long, thin strands. After spiralizing, place the noodles in a colander. Sprinkle them with salt to draw out the moisture. Let them sit for about 15 to 20 minutes. Rinse the noodles under cold water and pat them dry. This process helps keep your dish from becoming soggy. For the best pesto, use a food processor. Combine ripe avocado, fresh basil, walnuts, lemon juice, olive oil, and minced garlic. Blend until smooth, but don’t over-blend. You want a bit of texture in your pesto. If it’s too thick, add a little more olive oil. Taste and adjust with salt and pepper as needed. This balancing act is key to a bright, flavorful pesto that brings your dish to life. To make your zucchini noodles pop, add fresh ingredients. Halved cherry tomatoes add a nice touch. They bring sweetness and color to the dish. A sprinkle of grated Parmesan cheese can enhance the taste, too. For extra crunch, consider adding pine nuts or sunflower seeds. You could also serve the dish with a side of grilled chicken or shrimp for protein. These simple additions can elevate your meal without much effort. {{image_2}} Zucchini noodles fit well into both Paleo and Whole30 diets. These diets focus on whole foods. For a tasty twist, use nuts like pecans in your pesto. You can also swap olive oil for avocado oil for a different flavor. Make sure to skip any cheese to keep it compliant. For a vegan version, the avocado is your best friend. It adds creaminess without dairy. You can replace walnuts with sunflower seeds in the pesto. Sunflower seeds offer a nice crunch and a different taste. Consider adding nutritional yeast for a cheesy flavor without the dairy. If you want to make your dish heartier, add proteins. Grilled chicken or shrimp pairs well with this dish. You can toss cooked quinoa or chickpeas into the noodles for extra protein. For a vegetarian option, try adding tofu or tempeh. These options will keep your meal filling and satisfying. For the complete cooking experience, check the Full Recipe. To keep leftover zucchini noodles fresh, place them in an airtight container. You can store them in the fridge for up to two days. Avoid adding sauce until you're ready to eat. This keeps the noodles from getting too soggy. If you notice excess moisture, gently pat them dry with a paper towel before storing. Store your leftover pesto in a small jar or container. Make sure to cover the surface with a thin layer of olive oil. This helps prevent browning. You can keep it in the fridge for about a week. For longer storage, freeze it in ice cube trays. Once frozen, transfer the cubes to a freezer bag. This way, you can enjoy fresh pesto anytime. When reheating zucchini noodles, use a skillet over medium heat. Add a splash of olive oil to prevent sticking. Heat them for just a few minutes until warm. Avoid overcooking, as they can become mushy. For pesto, gently warm it in a small pan. Stir constantly to keep the texture smooth. Enjoy the fresh taste every time! Yes, you can use regular pasta in this dish. Zucchini noodles are a great low-carb option. They provide a fresh taste and unique texture. If you prefer pasta, choose your favorite type. Cook it according to the package instructions. Serve the pesto over the cooked pasta instead of zucchini noodles. Enjoy the same flavorful sauce with a different twist. Zucchini noodles last about 2 to 3 days in the fridge. Store them in an airtight container. Keep in mind, they may lose some crunch over time. To extend their life, avoid adding the pesto until you're ready to eat. If they get too soft, you can still use them in soups or stews. You can substitute walnuts with pine nuts or sunflower seeds. Both give a nice flavor and texture. If you want a nut-free option, try using hemp seeds. These options work well in the avocado pesto. Just blend them like you would with walnuts. This way, you keep the creamy texture and rich taste. For the full recipe, you can refer to the Zesty Zucchini Noodles with Avocado Pesto. This blog post covered everything you need for a delicious zucchini noodle dish. We explored the key ingredients, prepared the avocado pesto, and combined them to create a fresh meal. I shared tips for perfect noodles and clever serving ideas. You can even adapt the dish to fit your diet. Lastly, I explained how to store leftovers for another day. Use this knowledge to enjoy healthy eating with ease and creativity. Don’t hesitate to experiment and make this dish your own!](https://recipespursuit.com/wp-content/uploads/2025/04/d809c1f9-b3f3-42d5-acc8-9eea95e43f70.webp)
Zucchini Noodles with Pesto Flavorful and Healthy Dish
Looking for a healthy twist on pasta? Zucchini noodles with pesto are your answer! This dish is not only colorful and full of flavor,…
My Latest Desserts
My Latest Recipes
hey,
i’m !
I’m so happy you’re here!
Cooking is my love language, and I’m excited to share my best dishes with you. Hope they become your favorites too! Let’s enjoy every bite of this journey together.
Cherry Almond Granola Muffins Tasty Healthy Treat
Are you looking for a delicious, healthy treat to kickstart your day? My Cherry Almond Granola Muffins bring together bright cherries, crunchy almonds, and…





![To make a great cheesy cauliflower bake, you need these simple ingredients: - 1 large head of cauliflower, cut into florets - 1 cup shredded cheddar cheese - 1 cup mozzarella cheese, shredded - 1 cup cream cheese, softened - 1 cup milk - 2 cloves garlic, minced - 1 teaspoon onion powder - 1 teaspoon garlic powder - Salt and pepper to taste - 1/2 cup grated Parmesan cheese - 1/4 cup chopped fresh parsley (for garnish) You will need a few tools to make this dish: - A large pot for boiling - A large mixing bowl - A whisk for blending - A 9x13 inch baking dish - A knife and cutting board for chopping Choosing the right ingredients is key. Here’s how to pick the best: - Cauliflower: Look for a fresh head with tight, white florets. Avoid brown spots. - Cheese: Buy blocks of cheese and shred them yourself for better flavor. - Cream Cheese: Ensure it is softened to mix well with other ingredients. - Milk: Use whole milk for a creamier texture, but low-fat works too. - Garlic: Fresh garlic gives the best taste, but minced garlic from a jar works in a pinch. - Parsley: Fresh parsley adds color and a nice flavor. Dried parsley is not as good. Follow these tips and your cheesy cauliflower bake will shine. For the full recipe, check the details above. Start by boiling water in a large pot. Add a pinch of salt to the water. Once the water is bubbling, add the cauliflower florets. Blanch the cauliflower for about five minutes. You want it to be slightly tender but still firm. After five minutes, drain the cauliflower in a colander. Set it aside to cool for a moment. In a large bowl, mix the softened cream cheese and milk. Add the minced garlic, onion powder, garlic powder, salt, and pepper. Whisk until the mix is smooth and creamy. Next, fold in the shredded cheddar and mozzarella cheese. Save some cheese for the top. Stir gently to coat all the cheese in the creamy mix. Now, take a greased 9x13 inch baking dish. Pour the cheesy cauliflower mix into the dish and spread it out evenly. Sprinkle the reserved cheddar and mozzarella on top. Finish with grated Parmesan cheese for extra flavor. Place the dish in your preheated oven at 375°F (190°C). Bake for 25-30 minutes until the top is golden brown and bubbly. After baking, let it cool for a few minutes. Garnish with fresh chopped parsley before serving. Enjoy your delicious Cheesy Cauliflower Bake! For more details, check the Full Recipe. To get a great texture in your Cheesy Cauliflower Bake, focus on blanching. Blanch the cauliflower florets for about five minutes. This step softens them but keeps a nice crunch. After blanching, drain the florets well. If they hold too much water, the bake may become soggy. Then, mix the cauliflower with the cheese sauce gently. This will help each piece stay intact and coated. One common mistake is not salting the water when blanching. Salt adds flavor, and it helps the cauliflower taste better. Another mistake is overbaking. If you bake for too long, the dish can dry out. Watch for that golden, bubbly top. Finally, don't skip the fresh parsley. It adds a bright touch and a pop of color. To boost the flavor, try adding smoked paprika or cayenne pepper. Both will add a nice kick without being too spicy. You can also mix in cooked bacon for a smoky depth. Fresh herbs like thyme or rosemary can bring a new twist. Always taste the cheese sauce before mixing in the cauliflower. Adjust salt and pepper to your liking for the best flavor. For full instructions and a list of ingredients, refer to the Full Recipe. {{image_2}} To make a low-carb version, you can swap the cauliflower with broccoli. Broccoli has less sugar and keeps the dish healthy. You can also skip the cream and use almond milk instead. This option still tastes great and fits your diet. You can boost the dish by adding proteins or other veggies. Try cooked chicken, bacon, or even shrimp. For veggies, consider spinach or bell peppers. Mix them in with the cauliflower for extra flavor and nutrients. This makes your cheesy bake even more satisfying. Experimenting with cheese can change your dish's flavor. Swap cheddar or mozzarella with gouda or fontina. Each cheese brings a unique taste and texture. You can also mix in some blue cheese for a bold kick. The right cheese makes every bite delightful. For the complete recipe, check out the [Full Recipe]. After making the Cheesy Cauliflower Bake, let it cool. Once cooled, cover it tightly with plastic wrap or foil. It stays fresh in the fridge for up to three days. If you have leftovers, try to keep them in an airtight container. This helps to keep the flavors and moisture locked in. You can freeze Cheesy Cauliflower Bake for later. First, let it cool completely. Then, cut it into portions. Wrap each portion tightly in plastic wrap. Place them in a freezer-safe bag or container. This dish can last up to three months in the freezer. When you're ready to eat, just thaw it in the fridge overnight. Reheating is simple. For the best results, use the oven. Preheat your oven to 350°F (175°C). Place the dish in a baking pan and cover it with foil. Heat for about 20 minutes or until warmed through. You can also use the microwave. Just place a portion in a microwave-safe bowl and heat for 1-2 minutes. Stir halfway for even heating. Enjoy your cheesy comfort food! The cooking time for Cheesy Cauliflower Bake is about 25 to 30 minutes. You want the top to be golden and bubbly. Preheat your oven to 375°F (190°C) first. After baking, let it cool a bit before serving. This will help the dish set and make it easier to serve. Yes, you can make Cheesy Cauliflower Bake ahead of time. Prepare the dish and store it in the fridge. Just cover it well with plastic wrap or aluminum foil. When ready to bake, remove it from the fridge and let it sit for about 30 minutes. Then bake as directed. This makes it great for meal prep! Yes, Cheesy Cauliflower Bake is suitable for a gluten-free diet. All the ingredients used are gluten-free. Just ensure you check any processed items, like cheese, for gluten. This dish packs in flavor and comfort without any gluten worries. Enjoy it with confidence! In this blog post, we explored the key ingredients and step-by-step instructions for making a delicious Cheesy Cauliflower Bake. I shared tips for achieving the perfect texture and avoiding common mistakes. You can enhance the dish with various seasonings or opt for tasty variations. Remember to follow the storage tips for fresh leftovers. This dish is easy to make, full of flavor, and suits many dietary needs. Enjoy making your Cheesy Cauliflower Bake and share it with others! Your cooking skills will shine.](https://recipespursuit.com/wp-content/uploads/2025/05/014bfaee-945f-4e16-9e95-b1db45d44a24-300x300.webp)

![To make Instant Pot creamy mushroom risotto, you need simple, fresh ingredients. Here’s what you will gather: - 1 cup Arborio rice - 4 cups vegetable broth (low sodium) - 8 ounces cremini mushrooms, sliced - 1 small onion, finely chopped - 2 cloves garlic, minced - 1 cup Parmesan cheese, grated - 2 tablespoons unsalted butter - 1 tablespoon olive oil - 1 teaspoon thyme (fresh or dried) - 1 teaspoon salt - ½ teaspoon black pepper - Chopped parsley for garnish These ingredients work together to create a rich and creamy dish. Arborio rice is key for its starchiness, which helps thicken the risotto. The vegetable broth adds depth, while the cremini mushrooms provide an earthy flavor. Using fresh onion and garlic enhances the taste, making the dish even better. Parmesan cheese gives that creamy texture, while butter and olive oil add richness. Thyme, salt, and pepper are essential for seasoning. Lastly, chopped parsley adds a pop of color and freshness to each bowl. Gather these items before you start cooking for the best results. You can find the full recipe in the next section. - Sauté aromatics in the Instant Pot: Set your Instant Pot to the Sauté function. Add olive oil and butter. Once melted, toss in the chopped onion. Cook for 3 to 4 minutes. The onion should be soft and clear. - Add garlic and mushrooms: Stir in the minced garlic and sliced cremini mushrooms. Cook for about 5 minutes. Stir often until the mushrooms are soft and brown. - Toast the rice: Add the Arborio rice to the pot. Stir for around 2 minutes. You want the rice to look a bit clear. - Add broth and seasoning: Pour in the vegetable broth. Add thyme, salt, and black pepper. Stir well to mix everything. - Pressure cook the risotto: Close the lid and seal the vent. Set your Instant Pot to Manual, high pressure, for 6 minutes. - Quick release the pressure: When the timer goes off, carefully move the vent to venting. This will release the steam quickly. - Stir in Parmesan cheese: Open the lid and add the grated Parmesan cheese. Stir until it melts and makes the risotto creamy. Taste and adjust the seasoning if needed. - Garnish and serve: Spoon the risotto into bowls. Top with chopped parsley for a fresh look. Enjoy your meal! For the full recipe, check out the [Full Recipe]. Choosing the right rice For risotto, use Arborio rice. This rice has a high starch content. It gives risotto its creamy texture. Other types of rice may not yield the same results. Stick to Arborio for the best dish. Importance of low sodium broth Using low sodium broth is key. It allows you to control the salt level in your dish. This broth enhances the flavor without overpowering it. Always taste and adjust your seasoning as needed. Achieving the desired creaminess The creaminess of your risotto comes from two main factors: starch and technique. Stirring the rice releases starch. This gives your risotto that velvety mouthfeel. Be patient and stir often while cooking. Adjusting cooking times Cooking times for risotto in an Instant Pot are shorter. Set your pot to high pressure for just six minutes. This quick cooking keeps the rice tender. Follow up with a quick release for the best texture. Maintaining the right pressure Ensure your lid is sealed tight during cooking. This keeps the pressure steady. If your Instant Pot loses pressure, the risotto may not cook fully. Always check the vent before starting. Pairing with side dishes Risotto pairs well with simple side dishes. A light salad or steamed vegetables works great. These sides add freshness and balance to your meal. Consider using seasonal greens for added flavor. Best wines to complement risotto A crisp white wine like Sauvignon Blanc is ideal. It complements the earthy mushrooms well. If you prefer red, a light Pinot Noir is a good choice. Enjoy the meal with your favorite drink to enhance the experience. For the detailed recipe, check out the Full Recipe. {{image_2}} You can make this creamy mushroom risotto even better. Try adding proteins like chicken or shrimp. Simply sauté them after the onions. This gives you a heartier dish. If you want more color, toss in some peas or asparagus. These veggies add a nice crunch and vibrant look. Want a vegan version? Swap the cheese for a plant-based alternative. You can also use olive oil instead of butter. This keeps the flavor rich, without dairy. If you need gluten-free options, use gluten-free broth. Just make sure your rice is certified gluten-free. Using seasonal mushrooms can make a big difference. Try chanterelles in the spring or shiitakes in the fall. Each type brings its own unique taste. Fresh herbs also change with the seasons. Use basil in summer or rosemary in winter for a fresh flavor boost. You can find tasty herbs at local markets. Using seasonal ingredients makes your dish not just good, but great. For the full recipe, check out the full recipe section. To keep your risotto fresh, store it in an airtight container. Place it in the fridge. Make sure it cools to room temperature first. Use the leftover risotto within three days for best taste. Always check for any signs of spoilage before eating. You can reheat risotto in different ways. A microwave is quick and easy. Place the risotto in a bowl and add a splash of broth or water. Heat for one minute, stir, and heat again if needed. You can also use a skillet. Heat over low heat, adding broth slowly. Stir until warm and creamy. To freeze risotto, let it cool completely. Spoon it into freezer bags or containers. Press out as much air as you can before sealing. Label and date the bags. Risotto can last for up to three months in the freezer. When you're ready to eat, thaw it overnight in the fridge. Then, reheat it on the stovetop or microwave. Add a little broth or water to restore its creamy texture. How to make Instant Pot risotto? To make risotto in an Instant Pot, I start by sautéing onion in butter and olive oil. After it becomes soft, I add garlic and mushrooms. Then, I toast Arborio rice before adding vegetable broth and seasoning. I seal the pot and cook on high pressure for six minutes. Finally, I release the pressure quickly and stir in Parmesan cheese. Can I use other types of rice? You can use other rice, but Arborio rice works best. It gives risotto its creamy texture. If you prefer, you can try Carnaroli or Vialone Nano. These types also help achieve that perfect creaminess. What to do if the risotto is too dry? If your risotto is too dry, add a bit more broth or water. Stir it in slowly. This helps to bring back the creamy texture. Always taste it to check the flavor after adding more liquid. What can I use instead of Arborio rice? If you need a substitute for Arborio rice, try using Carnaroli or Vialone Nano. You can also use farro or quinoa, but they will change the dish's texture. They are good options if you want something different. Alternatives for Parmesan cheese? For Parmesan cheese, you can use Pecorino Romano for a sharper taste. Nutritional yeast is great for a vegan option. It gives a cheesy flavor without dairy, making it a good choice for many diets. What if my risotto is undercooked? If your risotto is undercooked, add a small amount of broth and seal the pot again. Cook for another minute or two. This should help finish cooking the rice without overcooking it. Why did the Instant Pot give a burn warning? The burn warning usually means that food is stuck to the bottom. It can happen if there is not enough liquid. To prevent this, always scrape the bottom of the pot after sautéing. If you get the warning, add a bit more broth and restart the cooking. In this article, I broke down how to make delicious Instant Pot risotto. We covered the ingredients, step-by-step cooking instructions, and tips to perfect your dish. Remember, using the right rice and broth makes a huge difference. Explore flavor variations and seasonal ingredients to keep it fresh. Lastly, proper storage and reheating will ensure you enjoy leftovers safely. Make this risotto your own and delight friends and family with each creamy bite!](https://recipespursuit.com/wp-content/uploads/2025/05/25759e51-0b85-416c-827d-0a45ff8d172d-300x300.webp)

