


Latest & Greatest
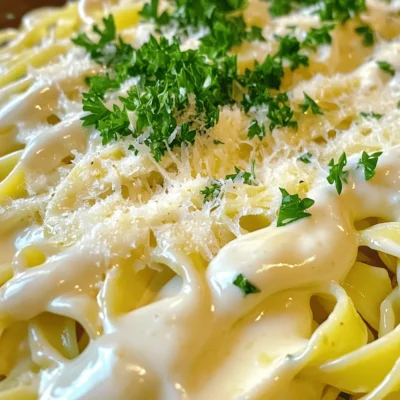
Creamy Garlic Alfredo Sauce Delicious and Simple Recipe
If you’re craving a rich, creamy dish, my Creamy Garlic Alfredo Sauce is just what you need! This easy recipe
Read more…
Buffalo Cauliflower Tacos Flavorful and Crisp Delight
If you’re craving a fun twist on taco night, try Buffalo Cauliflower Tacos! These tacos pack a punch with spicy,
Read more…
Honey Garlic Chicken Meatballs Easy and Tasty Recipe
Craving something sweet and savory? You’ll love these Honey Garlic Chicken Meatballs! This easy recipe combines juicy ground chicken with
Read more…
Pulled Chicken Tacos with Slaw Quick and Tasty Meal
Craving a simple yet delicious meal? You will love these Pulled Chicken Tacos with Slaw! They are quick to make
Read more…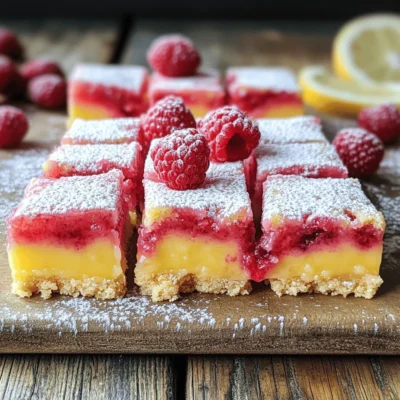
Raspberry Lemonade Bars Flavorful and Fresh Dessert
If you’re craving a sweet and tart treat, look no further than Raspberry Lemonade Bars. These delightful bars burst with
Read more…
Thai Basil Chicken Stir-Fry Flavorful Dinner Delight
If you’re craving a quick and tasty meal, look no further! Thai Basil Chicken Stir-Fry is a vibrant dish that
Read more…
Almond Joy Energy Bites Nutritious and Tasty Snack
Looking for a snack that’s both tasty and good for you? You’re in the right place! My Almond Joy Energy
Read more…
Tropical Fruit Salad with Honey Lime Dressing Delight
If you’re looking for a vibrant burst of flavor, my Tropical Fruit Salad with Honey Lime Dressing is a must-try!
Read more…browse recipes


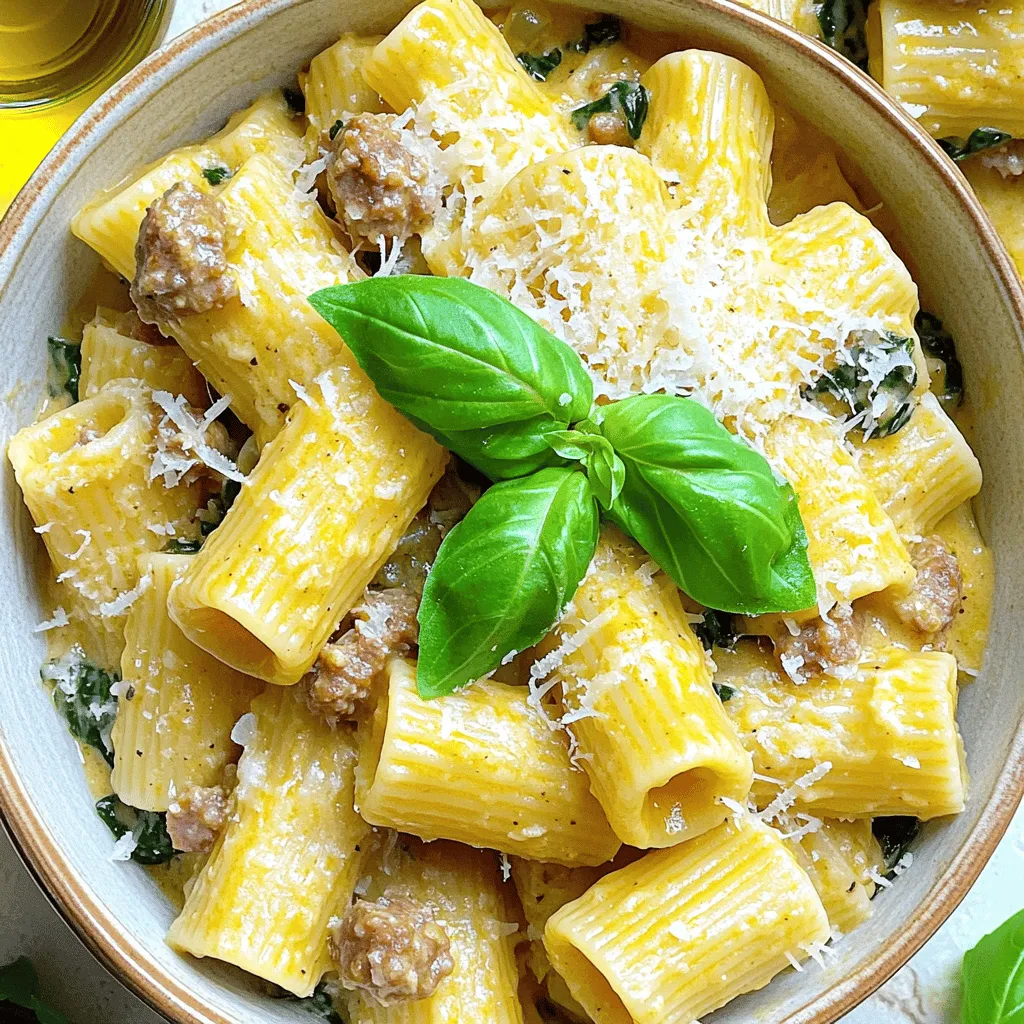
Creamy Sausage Rigatoni Flavors That Delight Every Bite
Get ready to delight your taste buds with Creamy Sausage Rigatoni! This dish combines rich flavors and hearty ingredients for a satisfying meal. I’ll…
My Latest Desserts
My Latest Recipes

hey,
i’m !
I’m so happy you’re here!
Cooking is my love language, and I’m excited to share my best dishes with you. Hope they become your favorites too! Let’s enjoy every bite of this journey together.
. To get a soft and moist texture, use fresh zucchini. Grate it and let it drain. This helps remove excess moisture. You want just enough to keep the bread moist but not soggy. Also, don’t overmix the batter. A few lumps are fine. This keeps the bread light and fluffy. If your bread is too dense, you may have added too much flour. Make sure to measure flour correctly. Use the spoon and level method. If your bread is too dry, try adding a little more oil or zucchini. If the top browns too fast, cover it with foil during baking. This prevents burning while the inside cooks. You can make this bread even tastier with extra ingredients. Try adding: - 1/2 cup dried cranberries or raisins - 1/2 cup shredded coconut - 1/2 teaspoon almond extract for a nutty flavor - Citrus zest for a fresh twist These additions can make your zucchini pumpkin bread unique and enjoyable. For the full recipe, check out the recipe section above. {{image_2}} You can easily make this zucchini pumpkin bread gluten-free. Use a 1-to-1 gluten-free flour blend instead of all-purpose flour. This swap keeps the texture light and fluffy. Make sure the blend contains xanthan gum. This helps mimic the stretch of wheat flour. Check the labels to avoid any gluten cross-contamination. Boost the flavor by adding spices. You can try a teaspoon of allspice or cloves. These spices add warmth and depth. If you love a kick of heat, consider adding a pinch of cayenne pepper. It adds a nice contrast to the sweet flavors of pumpkin and zucchini. Feel free to adjust the amounts to suit your taste. Dietary needs vary, and that's okay! If you're looking for a lower-sugar option, use a sugar substitute. You can also swap the vegetable oil for applesauce. This change reduces fat and adds moisture. For nut allergies, simply leave out the nuts or use seeds instead. You can also replace eggs with flaxseed meal mixed with water for a vegan option. For more details, refer to the Full Recipe. To keep your zucchini pumpkin bread fresh, wrap it tightly in plastic wrap. This will help keep moisture in. You can also place it in an airtight container. Store it at room temperature if you plan to eat it within a few days. If you want to keep it longer, consider freezing it. To freeze your zucchini pumpkin bread, first let it cool completely. Then, wrap it in plastic wrap, followed by aluminum foil. This double layer helps prevent freezer burn. You can freeze it for up to three months. When ready to eat, simply thaw it overnight in the fridge or at room temperature. For the best taste, reheat the bread before serving. Preheat your oven to 350°F (175°C). Place the bread on a baking sheet and warm it for about 10-15 minutes. This will bring back its soft texture and rich flavor. You can also use a microwave for a quick fix. Heat it in short bursts of 10-15 seconds to avoid drying it out. Enjoy your delicious zucchini pumpkin bread warm! Yes, you can use fresh pumpkin. To do this, cook the pumpkin first. Peel, seed, and chop it into pieces. Then, boil or steam it until soft. After that, mash it well. This will give you a fresh taste, but make sure it is smooth like puree. Zucchini pumpkin bread can last for about a week. Keep it in an airtight container at room temperature. If you want it to last longer, you can store it in the fridge. It can stay fresh for about two weeks when chilled. You can use several options for eggs. Some good choices are: - 1/4 cup unsweetened applesauce - 1/4 cup mashed banana - 1/4 cup yogurt - 1 tablespoon ground flaxseed mixed with 3 tablespoons water These options will help keep the bread moist and tasty. Yes, you can make mini loaves! Just divide the batter evenly into mini loaf pans. Bake them for about 25-30 minutes. Check them with a toothpick to ensure they are done. They will be cute and perfect for sharing. To check if the bread is done, insert a toothpick into the center. If it comes out clean or with a few crumbs, the bread is ready. If it has wet batter on it, bake for a few more minutes. This ensures your Zucchini Pumpkin Bread is perfectly baked. This blog post covered how to make delicious Zucchini Pumpkin Bread. We went through the ingredients, steps, tips, and variations. You learned how to mix wet and dry items, and bake the bread perfectly. Remember to check for doneness with a toothpick. Try different spices and options to make it your own. With proper storage, your bread will stay fresh and tasty. Enjoy this baking journey and savor every bite!](https://recipespursuit.com/wp-content/uploads/2025/06/032c1b52-4ffe-4851-bcd9-f6d6b794d161-300x300.webp)


Pulled Chicken Tacos with Slaw Quick and Tasty Meal
Craving a simple yet delicious meal? You will love these Pulled Chicken Tacos with Slaw! They are quick to make and packed with flavor.…