Latest & Greatest
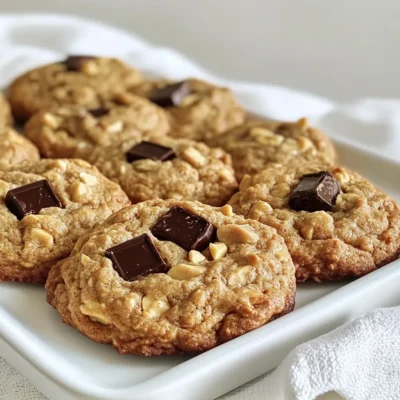
Peanut Butter Banana Breakfast Cookies Quick and Easy
Looking for a quick and easy breakfast that’s both tasty and healthy? These Peanut Butter Banana Breakfast Cookies are the
Read more…
Lemon Garlic Roasted Cauliflower Steaks Delightfully Simple
Discover a simple way to elevate your meals with Lemon Garlic Roasted Cauliflower Steaks. This easy recipe combines the fresh
Read more…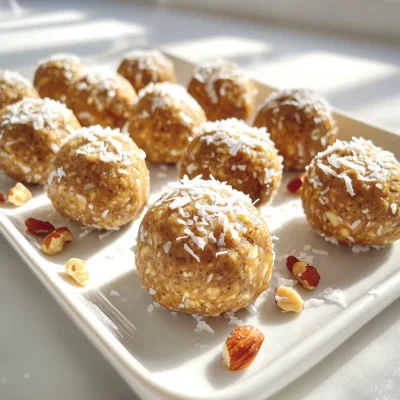
Vanilla Chai Energy Bites Easy and Delicious Snack
Looking for an easy and delicious snack? Try my Vanilla Chai Energy Bites! These tasty treats pack a flavorful punch
Read more…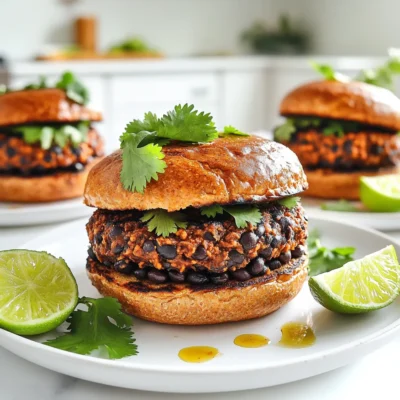
Spicy Chipotle Black Bean Burgers Flavorful Delight
Are you ready to spice up your burger routine? These Spicy Chipotle Black Bean Burgers are packed with flavor, making
Read more…
Everything Bagel Cucumber Bites Fresh and Tasty Snack
Looking for a fresh and tasty snack? Try my Everything Bagel Cucumber Bites! These little delights pack a punch of
Read more…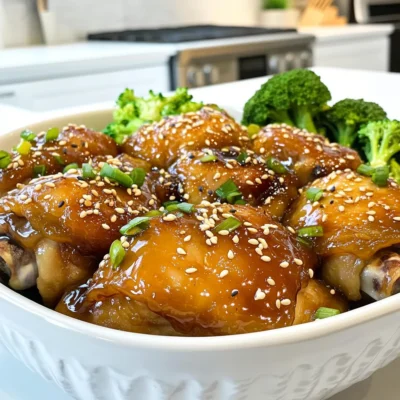
Instant Pot Honey Sesame Chicken Flavorful Dinner Delight
Imagine digging into a bowl of sweet and savory Instant Pot Honey Sesame Chicken. With juicy chicken thighs, simple sauces,
Read more…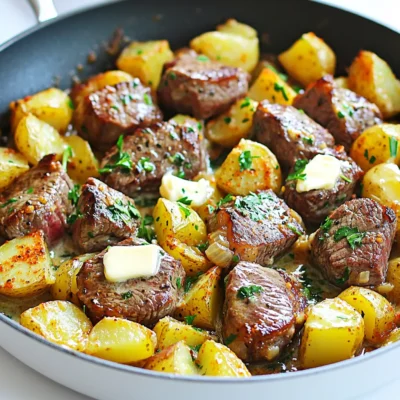
Garlic Butter Steak Potatoes Skillet Savory Delight
Are you ready for a mouthwatering meal that’s easy to make? Our Garlic Butter Steak Potatoes Skillet Savory Delight is
Read more…
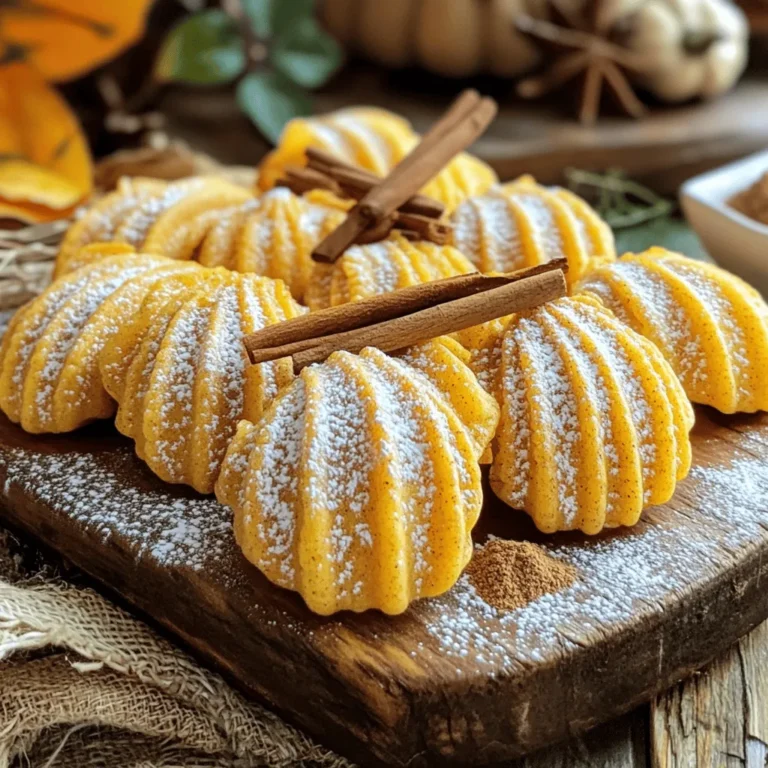
Chocolate Dipped Pumpkin Cookies Tasty Fall Treat
Get ready to dive into a delightful fall treat with my Chocolate Dipped Pumpkin Cookies! These cookies blend the warm
Read more…browse recipes


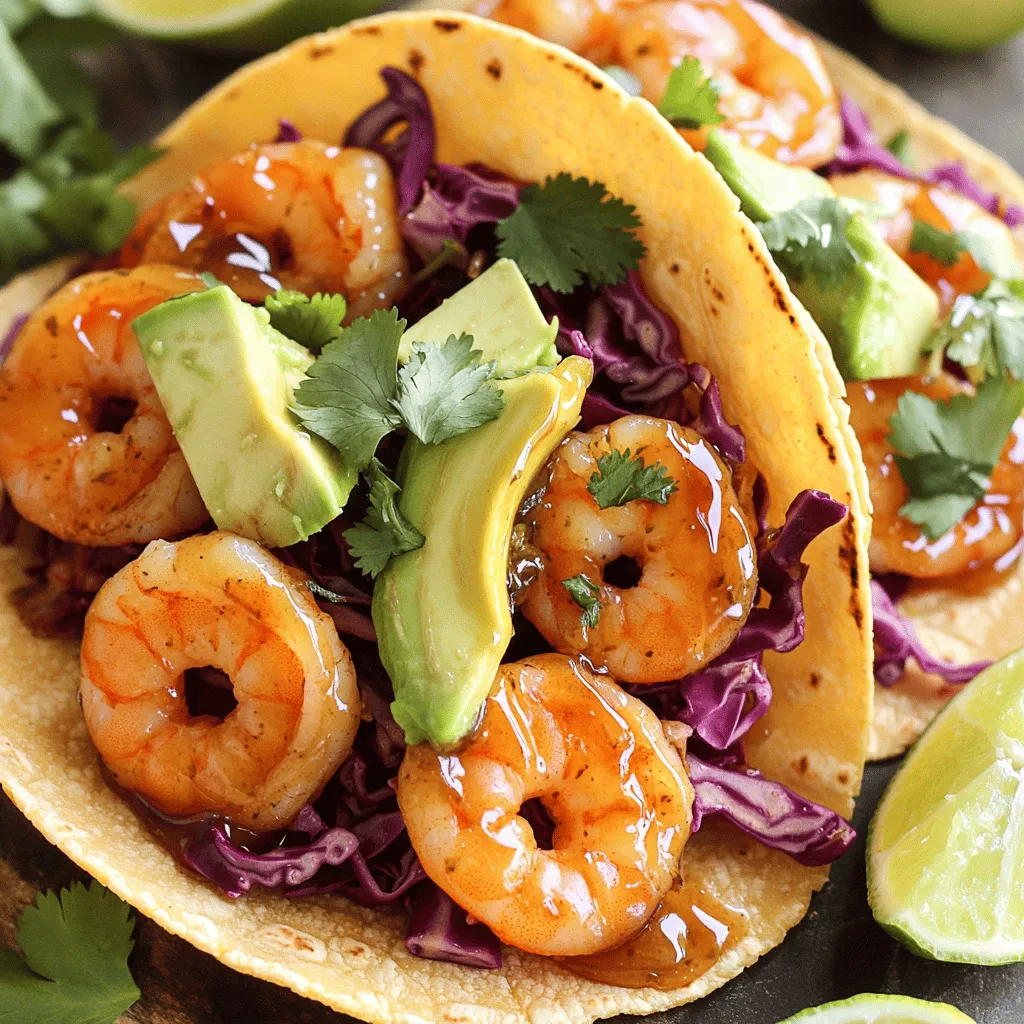
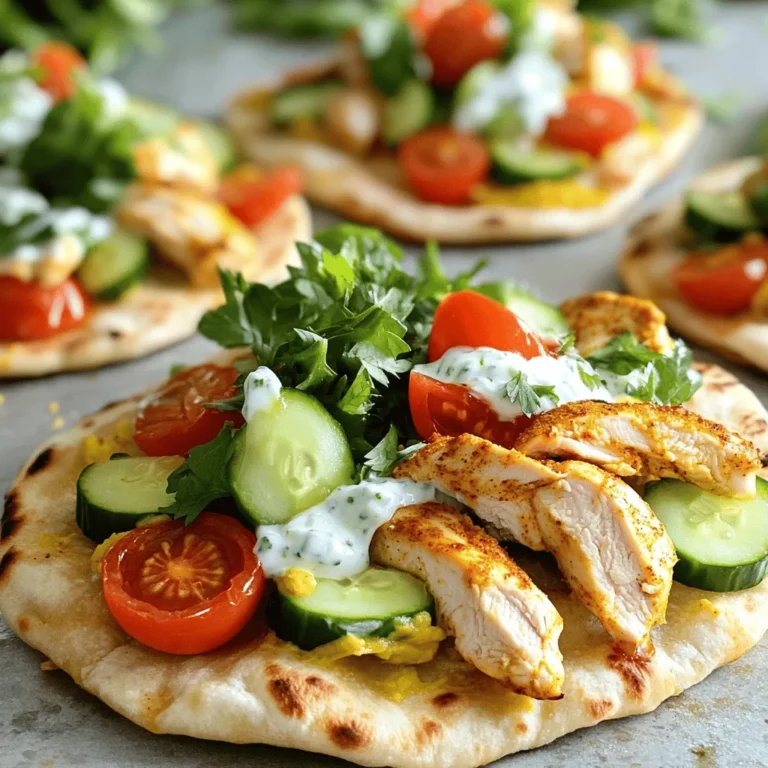
Honey Garlic Shrimp Tacos Flavorful and Easy Recipe
Craving a quick and tasty meal? Look no further than Honey Garlic Shrimp Tacos! This easy recipe combines sweet honey, savory garlic, and plump…
My Latest Desserts
My Latest Recipes

hey,
i’m !
I’m so happy you’re here!
Cooking is my love language, and I’m excited to share my best dishes with you. Hope they become your favorites too! Let’s enjoy every bite of this journey together.

Cheesy Cauliflower Bake Savory and Comforting Dish
Are you ready to enjoy a tasty twist on a classic dish? My Cheesy Cauliflower Bake is a savory and comforting treat you won’t…
![To make a great cheesy cauliflower bake, you need these simple ingredients: - 1 large head of cauliflower, cut into florets - 1 cup shredded cheddar cheese - 1 cup mozzarella cheese, shredded - 1 cup cream cheese, softened - 1 cup milk - 2 cloves garlic, minced - 1 teaspoon onion powder - 1 teaspoon garlic powder - Salt and pepper to taste - 1/2 cup grated Parmesan cheese - 1/4 cup chopped fresh parsley (for garnish) You will need a few tools to make this dish: - A large pot for boiling - A large mixing bowl - A whisk for blending - A 9x13 inch baking dish - A knife and cutting board for chopping Choosing the right ingredients is key. Here’s how to pick the best: - Cauliflower: Look for a fresh head with tight, white florets. Avoid brown spots. - Cheese: Buy blocks of cheese and shred them yourself for better flavor. - Cream Cheese: Ensure it is softened to mix well with other ingredients. - Milk: Use whole milk for a creamier texture, but low-fat works too. - Garlic: Fresh garlic gives the best taste, but minced garlic from a jar works in a pinch. - Parsley: Fresh parsley adds color and a nice flavor. Dried parsley is not as good. Follow these tips and your cheesy cauliflower bake will shine. For the full recipe, check the details above. Start by boiling water in a large pot. Add a pinch of salt to the water. Once the water is bubbling, add the cauliflower florets. Blanch the cauliflower for about five minutes. You want it to be slightly tender but still firm. After five minutes, drain the cauliflower in a colander. Set it aside to cool for a moment. In a large bowl, mix the softened cream cheese and milk. Add the minced garlic, onion powder, garlic powder, salt, and pepper. Whisk until the mix is smooth and creamy. Next, fold in the shredded cheddar and mozzarella cheese. Save some cheese for the top. Stir gently to coat all the cheese in the creamy mix. Now, take a greased 9x13 inch baking dish. Pour the cheesy cauliflower mix into the dish and spread it out evenly. Sprinkle the reserved cheddar and mozzarella on top. Finish with grated Parmesan cheese for extra flavor. Place the dish in your preheated oven at 375°F (190°C). Bake for 25-30 minutes until the top is golden brown and bubbly. After baking, let it cool for a few minutes. Garnish with fresh chopped parsley before serving. Enjoy your delicious Cheesy Cauliflower Bake! For more details, check the Full Recipe. To get a great texture in your Cheesy Cauliflower Bake, focus on blanching. Blanch the cauliflower florets for about five minutes. This step softens them but keeps a nice crunch. After blanching, drain the florets well. If they hold too much water, the bake may become soggy. Then, mix the cauliflower with the cheese sauce gently. This will help each piece stay intact and coated. One common mistake is not salting the water when blanching. Salt adds flavor, and it helps the cauliflower taste better. Another mistake is overbaking. If you bake for too long, the dish can dry out. Watch for that golden, bubbly top. Finally, don't skip the fresh parsley. It adds a bright touch and a pop of color. To boost the flavor, try adding smoked paprika or cayenne pepper. Both will add a nice kick without being too spicy. You can also mix in cooked bacon for a smoky depth. Fresh herbs like thyme or rosemary can bring a new twist. Always taste the cheese sauce before mixing in the cauliflower. Adjust salt and pepper to your liking for the best flavor. For full instructions and a list of ingredients, refer to the Full Recipe. {{image_2}} To make a low-carb version, you can swap the cauliflower with broccoli. Broccoli has less sugar and keeps the dish healthy. You can also skip the cream and use almond milk instead. This option still tastes great and fits your diet. You can boost the dish by adding proteins or other veggies. Try cooked chicken, bacon, or even shrimp. For veggies, consider spinach or bell peppers. Mix them in with the cauliflower for extra flavor and nutrients. This makes your cheesy bake even more satisfying. Experimenting with cheese can change your dish's flavor. Swap cheddar or mozzarella with gouda or fontina. Each cheese brings a unique taste and texture. You can also mix in some blue cheese for a bold kick. The right cheese makes every bite delightful. For the complete recipe, check out the [Full Recipe]. After making the Cheesy Cauliflower Bake, let it cool. Once cooled, cover it tightly with plastic wrap or foil. It stays fresh in the fridge for up to three days. If you have leftovers, try to keep them in an airtight container. This helps to keep the flavors and moisture locked in. You can freeze Cheesy Cauliflower Bake for later. First, let it cool completely. Then, cut it into portions. Wrap each portion tightly in plastic wrap. Place them in a freezer-safe bag or container. This dish can last up to three months in the freezer. When you're ready to eat, just thaw it in the fridge overnight. Reheating is simple. For the best results, use the oven. Preheat your oven to 350°F (175°C). Place the dish in a baking pan and cover it with foil. Heat for about 20 minutes or until warmed through. You can also use the microwave. Just place a portion in a microwave-safe bowl and heat for 1-2 minutes. Stir halfway for even heating. Enjoy your cheesy comfort food! The cooking time for Cheesy Cauliflower Bake is about 25 to 30 minutes. You want the top to be golden and bubbly. Preheat your oven to 375°F (190°C) first. After baking, let it cool a bit before serving. This will help the dish set and make it easier to serve. Yes, you can make Cheesy Cauliflower Bake ahead of time. Prepare the dish and store it in the fridge. Just cover it well with plastic wrap or aluminum foil. When ready to bake, remove it from the fridge and let it sit for about 30 minutes. Then bake as directed. This makes it great for meal prep! Yes, Cheesy Cauliflower Bake is suitable for a gluten-free diet. All the ingredients used are gluten-free. Just ensure you check any processed items, like cheese, for gluten. This dish packs in flavor and comfort without any gluten worries. Enjoy it with confidence! In this blog post, we explored the key ingredients and step-by-step instructions for making a delicious Cheesy Cauliflower Bake. I shared tips for achieving the perfect texture and avoiding common mistakes. You can enhance the dish with various seasonings or opt for tasty variations. Remember to follow the storage tips for fresh leftovers. This dish is easy to make, full of flavor, and suits many dietary needs. Enjoy making your Cheesy Cauliflower Bake and share it with others! Your cooking skills will shine.](https://recipespursuit.com/wp-content/uploads/2025/05/014bfaee-945f-4e16-9e95-b1db45d44a24.webp)
