
Latest & Greatest

No Bake Cheesecake Bites Easy and Tasty Treat
If you’re craving something sweet and easy, these No Bake Cheesecake Bites are for you! They’re quick to make and
Read more…
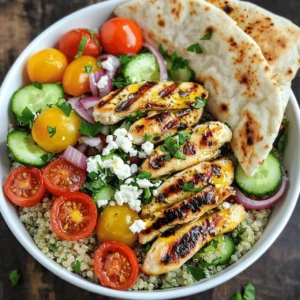
Classic Chicken Caesar Salad Tasty and Fresh Meal
Ready to indulge in a classic Chicken Caesar Salad that’s both tasty and fresh? This dish combines juicy chicken, crisp
Read more…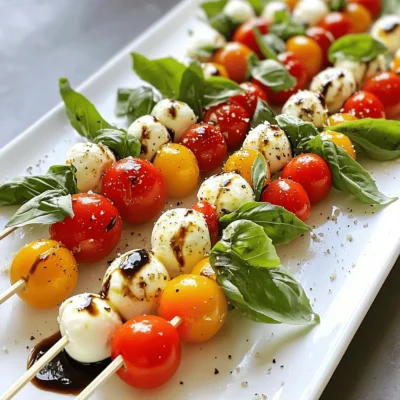
Easy Caprese Skewers Perfect for Quick Appetizers
If you’re looking for a simple yet delicious appetizer, Easy Caprese Skewers are a quick fix! With just a few
Read more…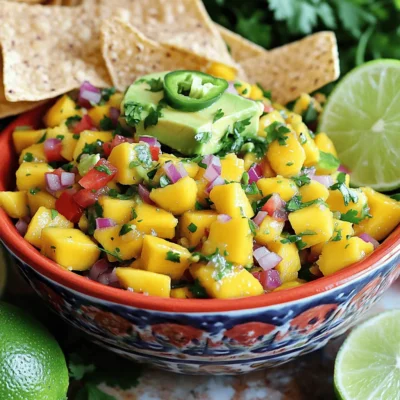
Spicy Mango Salsa Fresh and Flavorful Recipe Guide
Are you ready to elevate your next meal with a burst of flavor? In this guide, I’ll show you how
Read more…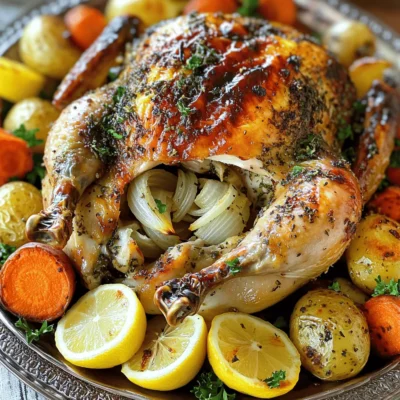
Garlic Herb Roasted Chicken Tasty Dinner Recipe
Looking for a delicious dinner idea? Let’s make Garlic Herb Roasted Chicken! This dish is simple to prepare and packed
Read more…
Sweet Potato Casserole Delightful and Easy Recipe
Are you ready to impress your friends and family with a delicious sweet potato casserole? This delightful and easy recipe
Read more…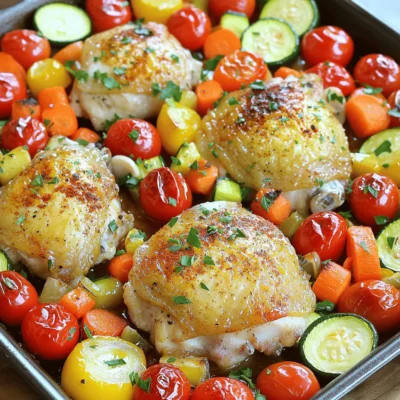
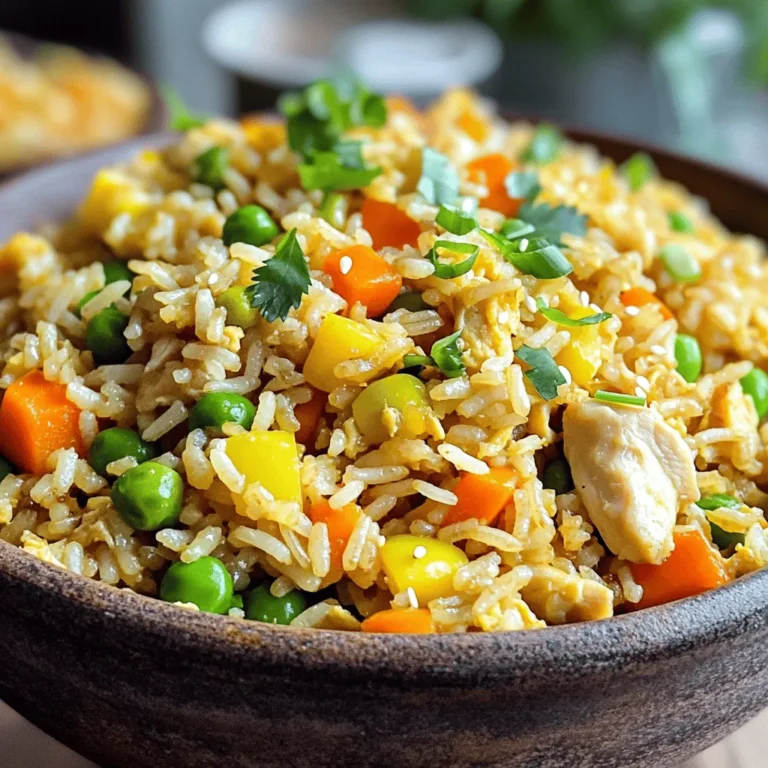
One Pan Chicken and Veggies Easy Roasted Meal
Looking for an easy and satisfying meal? You’ve come to the right place! This One Pan Chicken and Veggies recipe
Read more…
Classic Ambrosia Salad Tasty and Easy Recipe Guide
Are you ready to whip up a nostalgic treat that’s both tasty and easy? Classic ambrosia salad is the perfect
Read more…browse recipes


Mango Sorbet Delicious and Refreshing Summer Treat
Looking for a cool treat to beat the summer heat? You’ve come to the right place! This Mango Sorbet recipe is simple, fresh, and…
My Latest Desserts
My Latest Recipes

hey,
i’m !
I’m so happy you’re here!
Cooking is my love language, and I’m excited to share my best dishes with you. Hope they become your favorites too! Let’s enjoy every bite of this journey together.
![Chicken and Rice - 1 pound boneless, skinless chicken thighs - 1 cup long-grain white rice, rinsed Vegetables and Aromatics - 1 medium onion, finely chopped - 3 cloves garlic, minced - 1 cup frozen peas and carrots Seasonings and Broth - 4 cups chicken broth - 1 cup heavy cream - 1 teaspoon dried thyme - 1 teaspoon paprika - Salt and pepper to taste - 2 tablespoons olive oil - Fresh parsley, chopped (for garnish) Gathering these ingredients is key. Chicken thighs bring rich flavor and stay juicy. Rinsing the rice helps remove excess starch. This keeps the dish from being too sticky. The onion and garlic add depth. They create an inviting aroma as they cook. Frozen peas and carrots make this dish colorful and healthy. For seasonings, chicken broth is essential. It adds moisture and flavor. Heavy cream gives the dish its creamy texture. Thyme and paprika add complexity without overpowering the meal. Don't forget salt and pepper to enhance all the flavors. This combination of ingredients makes a hearty dish. It’s perfect for family dinners or meal prep. For the full recipe, follow the steps closely to ensure a tasty result. Sautéing Chicken Thighs Start by turning your Instant Pot to the Sauté setting. Pour in the olive oil and let it heat up. Once hot, season the chicken thighs with salt and pepper. Add the thighs to the pot. Sauté each side for about 4-5 minutes or until they turn golden brown. After that, remove the chicken and set it aside. Seasoning Tips Use a generous amount of salt and pepper. You can also add your favorite spices. This step builds a great flavor base for your dish. Sautéing Onions and Garlic In the same pot, add the finely chopped onion. Sauté it for 3 minutes until it becomes translucent. Now, stir in the minced garlic and cook for an additional minute. The aroma will fill your kitchen. Adding Rice and Spices Next, pour in the rinsed rice along with the dried thyme and paprika. Stir everything well for about a minute. This helps the rice absorb the flavors from the onion and garlic. Deglazing the Instant Pot Pour in the chicken broth. Use a spatula to scrape any brown bits from the bottom of the pot. This step is vital to avoid burning. Setting Up for Pressure Cooking Now, place the chicken thighs back into the pot on top of the rice mixture. Close the lid and ensure the valve is set to “Sealing.” Natural Pressure Release Select the “Manual” or “Pressure Cook” setting. Cook on high pressure for 10 minutes. After that, let the pressure naturally release for 10 minutes. Then, quick release any remaining pressure. For the full recipe, check the link provided in the article. To make your creamy chicken and rice perfect, avoid burn messages. Always deglaze your pot. After sautéing, add the broth and scrape the bottom. This step stops the food from sticking. Use a spatula to get every bit. If you see a burn notice, it can ruin your dish. For shredding chicken, I find two forks work best. First, let the chicken cool for a few minutes after cooking. Then, use the forks to pull the chicken apart. This method gives you nice, even pieces. You can also shred it in the pot for less mess. Prep your ingredients ahead of time. Chop your onions and garlic the night before. Measure your rice and spices, too. This way, you can cook faster and enjoy your meal sooner. Multi-tasking helps during cooking. While the chicken cooks, wash your rice and chop veggies. Keep an eye on the pot but do other tasks as well. This keeps you busy and makes cooking fun. {{image_2}} You can easily change the proteins in this recipe. If you want, use chicken breasts instead of thighs. For a plant-based option, try tofu. Just make sure to adjust cooking times. Tofu will need less time than chicken. You can also switch up the vegetables. Broccoli and bell peppers work well in the mix. You can add them in the last few minutes of cooking. This keeps them crisp and colorful. Adding cheese can make this dish even tastier. A handful of shredded cheese melts into the creamy sauce. It gives a rich flavor that everyone loves. Try cheddar or parmesan for different tastes. Incorporating herbs and spices can make a big difference too. Fresh herbs like basil or parsley add brightness. You can also try spices like cumin or cayenne for a kick. Each change makes the dish feel new and exciting. For the full recipe, check out the Instant Pot Creamy Chicken and Rice. To keep your creamy chicken and rice fresh, store it in an airtight container. This helps keep flavors intact. Make sure to let it cool to room temperature before sealing. You can place it in the fridge for up to four days. If stored properly, the dish will stay safe to eat for about 4 days. After that, the taste and texture may change. If you want to keep it longer, consider freezing it. You can reheat your chicken and rice in a microwave or on the stovetop. If you use the microwave, place it in a bowl and cover it to avoid drying out. Heat it in short bursts, stirring in between. Using the stovetop helps maintain the creaminess better. Heat over low to medium heat. Stir often to keep it from sticking. Add a splash of chicken broth or cream if it seems dry. To keep that rich texture, add a bit of cream or broth while reheating. This will help bring back the creamy goodness. Stir well to mix it in. Enjoy your meal as if it was fresh! If you want to make this dish, check out the Full Recipe for all the steps and tips! Yes, you can use brown rice, but you must adjust the cooking time. Brown rice takes longer to cook than white rice. For brown rice, you should increase the pressure cooking time to 22-25 minutes. Make sure to use the same amount of liquid. This will help the rice cook perfectly. To keep the rice from becoming mushy, follow these tips: - Rinse the rice well before cooking. This removes excess starch. - Use the correct rice-to-liquid ratio. Too much liquid can lead to mushiness. - Let the rice rest after cooking. This helps it firm up a bit. Yes, this recipe is great for meal prep. You can store leftovers easily. - Refrigerate in airtight containers for up to 4 days. - For longer storage, freeze in portions. It can last up to 3 months. Just thaw in the fridge overnight before reheating. For the complete recipe, check out the Instant Pot Creamy Chicken and Rice [Full Recipe]. In this article, we explored how to make delicious creamy chicken and rice. We covered key ingredients, step-by-step cooking methods, and tips for success. You learned about ingredient swaps and flavor boosts too. Plus, we discussed safe storage and reheating strategies. Remember, this dish is simple and can be tailored to your taste. Enjoy cooking, and feel free to experiment with flavors and ingredients! Your meals can be warm, tasty, and unique.](https://recipespursuit.com/wp-content/uploads/2025/05/43a7b454-201a-46ac-a3de-0e94ef25a07f-300x300.webp)


Air Fryer Lasagna Fritta Crispy and Flavorful Delight
Are you ready to take your taste buds on a crispy adventure? In this blog post, I’ll share my tried-and-true recipe for Air Fryer…