
Latest & Greatest
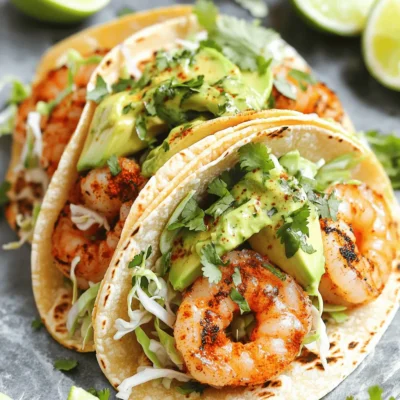
Quick Shrimp Tacos Flavorful and Easy Weeknight Meal
Looking for a quick and tasty dinner? You’re in the right place! These Quick Shrimp Tacos come together in just
Read more…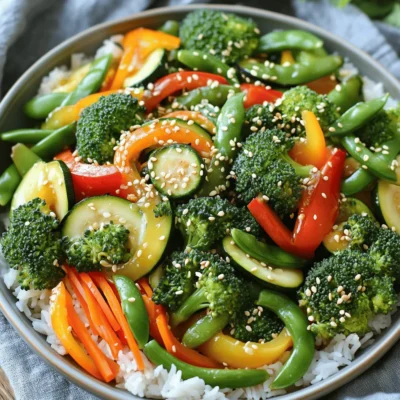
Easy Vegetable Stir Fry Quick and Healthy Meal Idea
Looking for a quick and healthy meal? This Easy Vegetable Stir Fry is your answer! Packed with colorful veggies and
Read more…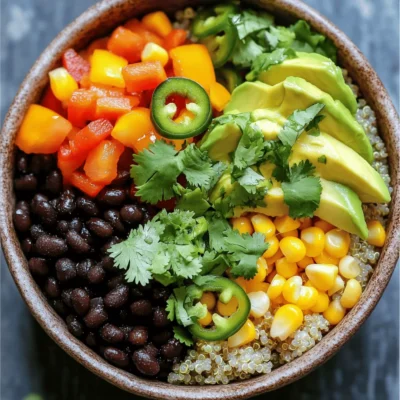
Vegan Burrito Bowls Flavorful and Nutritious Meal
Are you ready to explore a meal that’s both flavorful and good for you? Vegan burrito bowls are not just
Read more…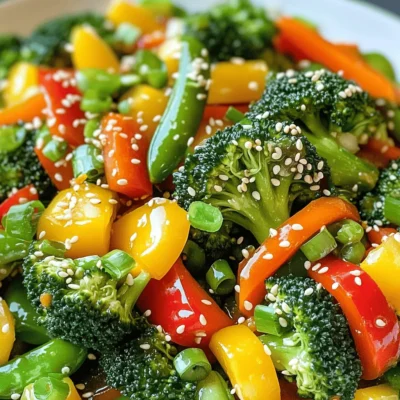
Simple Vegetable Stir Fry Flavorful and Quick Recipe
Are you looking for a quick and tasty meal? My Simple Vegetable Stir Fry is just what you need! Packed
Read more…
Easy Peach Scones Flaky Delight for Every Occasion
Let’s make some delicious peach scones that everyone will love! This easy recipe gives you soft, flaky scones bursting with
Read more…
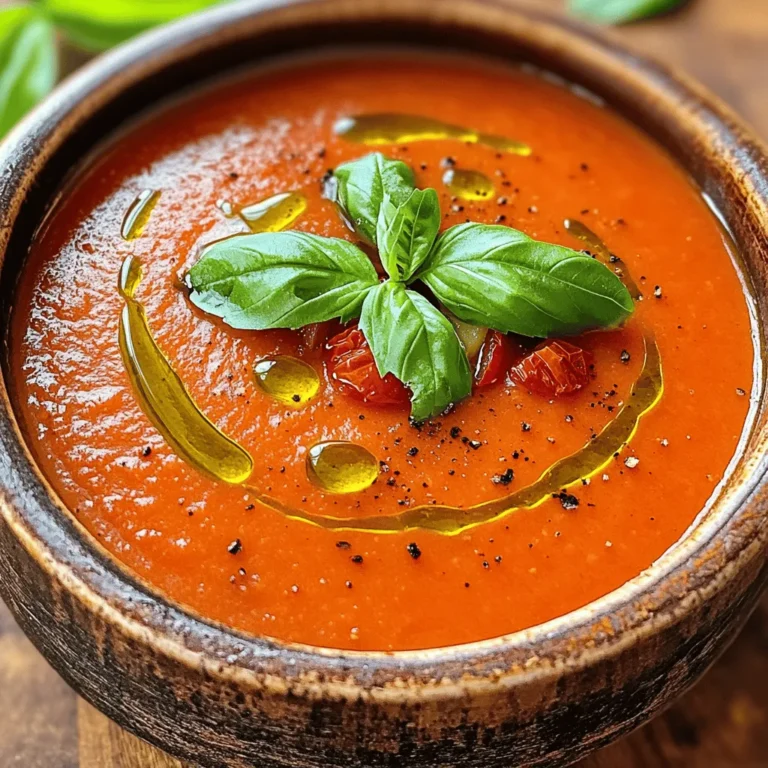
Homemade Tomato Soup Comforting and Simple Recipe
Tomato soup is a classic comfort food that warms your heart and soul. In this article, I will share my
Read more…
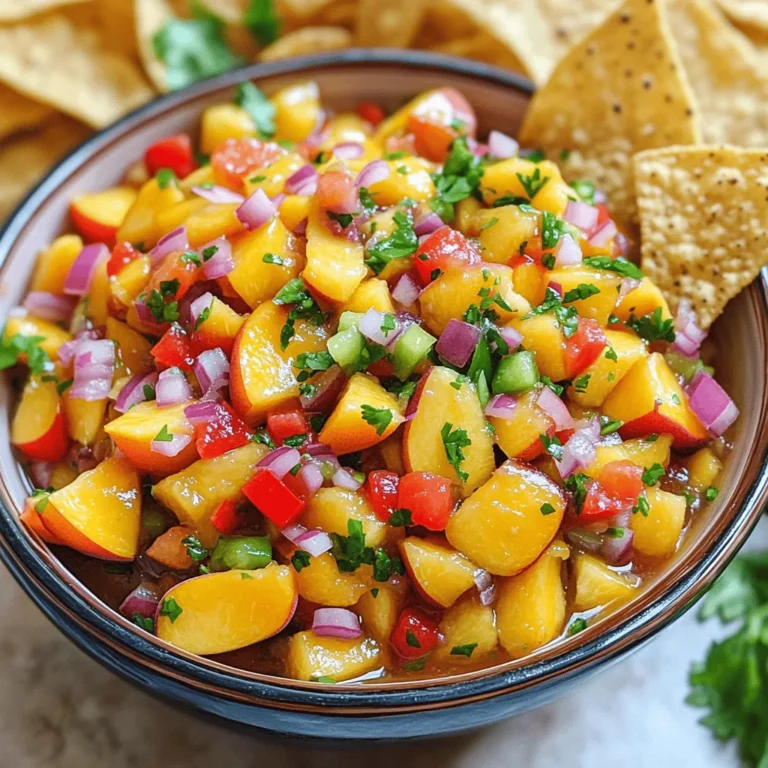
Fresh Peach Salsa Flavorful and Easy Recipe
Get ready to add a burst of flavor to your meals with this Fresh Peach Salsa recipe! You don’t have
Read more…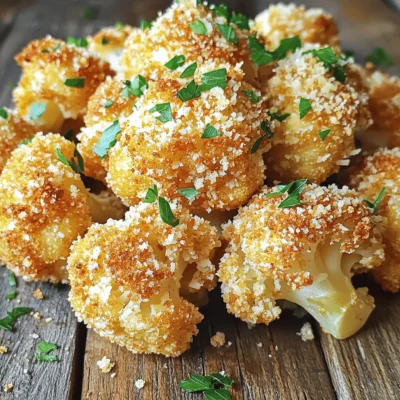
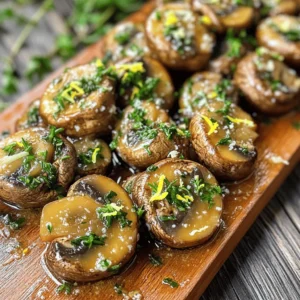
Crispy Garlic Parmesan Cauliflower Flavorful Delight
Are you ready to transform your snack game? My Crispy Garlic Parmesan Cauliflower will blow you away! This tasty treat
Read more…browse recipes


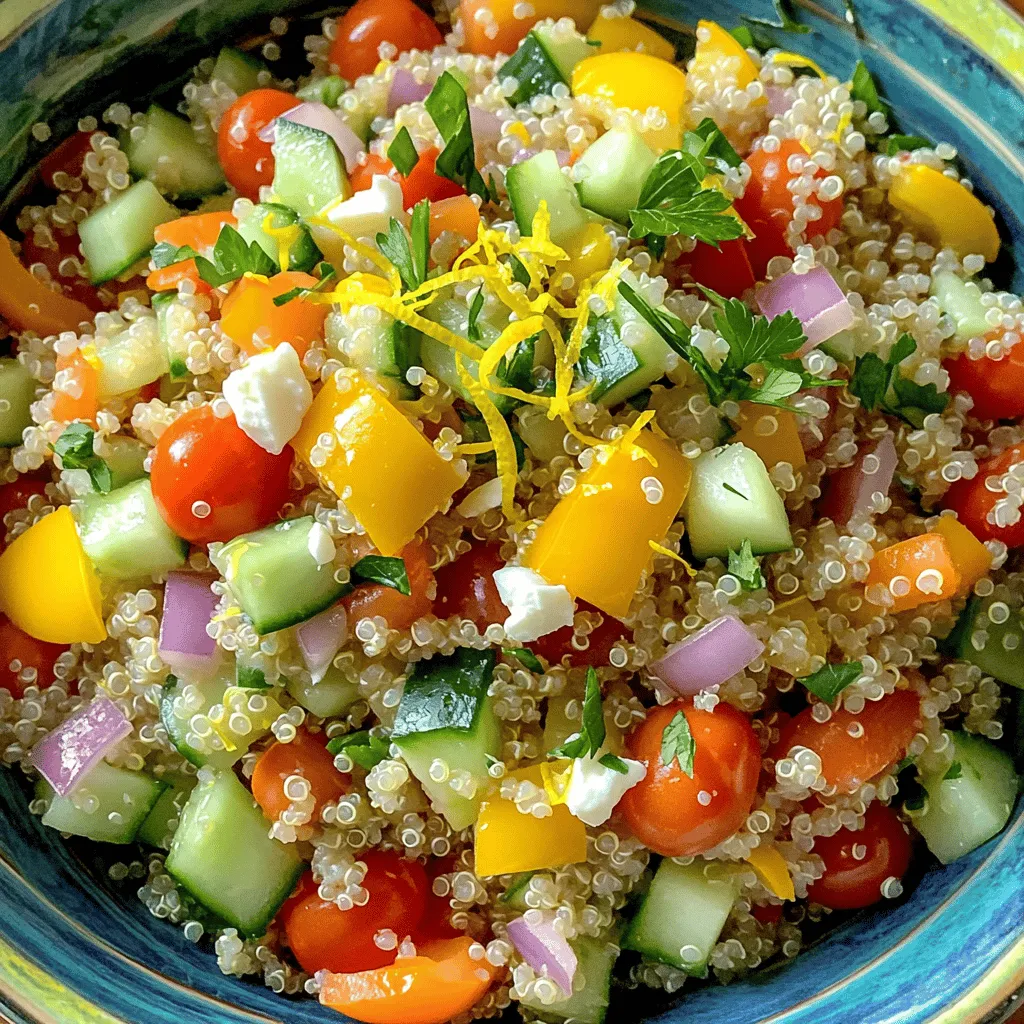
Zesty Lemon Herb Quinoa Flavorful and Healthy Dish
Looking for a healthy, tasty meal that’s easy to make? Zesty Lemon Herb Quinoa is the perfect dish! Packed with fresh veggies and vibrant…
My Latest Desserts
My Latest Recipes

hey,
i’m !
I’m so happy you’re here!
Cooking is my love language, and I’m excited to share my best dishes with you. Hope they become your favorites too! Let’s enjoy every bite of this journey together.


Sheet Pan Chicken Fajitas Flavorful and Easy Meal
If you’re craving a tasty and easy meal, my Sheet Pan Chicken Fajitas recipe is just for you! This dish combines juicy chicken, colorful…
![- 1 pound boneless, skinless chicken breasts, sliced into strips - 1 red bell pepper, sliced - 1 green bell pepper, sliced - 1 yellow onion, sliced - 3 tablespoons olive oil - 2 tablespoons fajita seasoning (store-bought or homemade) - 1 lime, juiced - Salt and pepper to taste The main ingredients in this dish are quite simple. The chicken gives you protein and makes the meal filling. The bell peppers and onion add flavor and color. Olive oil keeps everything moist and helps the spices stick. Fajita seasoning packs a punch, adding a mix of spices. Lime juice brightens the dish, making it fresh. - Flour or corn tortillas, for serving - Fresh cilantro, chopped (for garnish) Tortillas are an easy way to serve fajitas. They hold the juicy chicken and veggies well. You can choose flour or corn based on your taste. Fresh cilantro gives a nice touch and adds a pop of color. - Caloric value: About 350 calories per serving - Protein content: Roughly 30 grams per serving - Dietary restrictions: Gluten-free option available with corn tortillas This recipe is not only tasty but also nutritious. Each serving offers about 350 calories, making it a balanced meal. It has a good amount of protein, which is important for muscle health. If you need a gluten-free meal, just use corn tortillas instead of flour. For the full recipe, check out the detailed steps and tips. To start, slice the chicken and vegetables. Take one pound of boneless, skinless chicken breasts. Cut them into strips. Then, grab one red bell pepper, one green bell pepper, and one yellow onion. Slice these into thin strips too. Next, mix everything in a large bowl. Add the sliced chicken, red bell pepper, green bell pepper, and onion. Drizzle three tablespoons of olive oil over the mixture. Squeeze the juice of one lime over it too. This adds a nice zing! Now, sprinkle two tablespoons of fajita seasoning, along with some salt and pepper, over the mixture. Toss the ingredients together. Make sure everything is coated well. This step is key for flavor. Before you bake, preheat your oven to 400°F (200°C). This is essential for even cooking. While the oven heats, line a large baking sheet with parchment paper. This makes cleanup easy later. Once the oven is ready, spread the chicken and vegetables evenly across the prepared sheet pan. Lay them out in a single layer. This helps them cook properly without steaming. Bake in the preheated oven for 20 to 25 minutes. Check that the chicken is cooked through and the veggies are tender. You want them to be slightly charred for extra flavor. When done, remove the sheet pan from the oven. Let it cool for a couple of minutes before serving. This helps the juices settle. Serve the fajitas hot with warm tortillas. Don’t forget to top them with fresh cilantro! For the full recipe, check the earlier section. - Checking doneness: The best way to check if your chicken is done is to use a meat thermometer. Insert it into the thickest part of the chicken. It should read at least 165°F (74°C). If you don’t have a thermometer, cut into a piece of chicken. It should be white without any pink inside. - Avoiding dryness: To keep your chicken juicy, avoid overcooking. Bake just until it reaches the right temperature. Remember, the chicken will keep cooking a little after you take it out of the oven. - Marinating suggestions: Marinating your chicken can boost flavor. Use lime juice, olive oil, and fajita seasoning. Let it sit for at least 30 minutes. For more flavor, try adding garlic or chipotle peppers. - Additional spices to consider: You can mix in other spices like smoked paprika or cumin. These spices add depth and warmth to your dish. Try to experiment with different blends for unique tastes. - Best practices for serving on the table: Serve the fajitas straight from the sheet pan. This keeps them warm and sizzling. Let everyone build their own tortillas with the chicken and veggies. - Creative platter ideas: Use a large platter to display your fajitas. Add bowls with toppings like sour cream, guacamole, and salsa. This makes your meal look inviting and fun for guests. {{image_2}} You can easily switch up the protein in this recipe. If you want to use beef, try flank steak. Slice it thin and marinate it just like chicken. The flavors will still shine through. For a vegetarian twist, use chickpeas or tofu. Both options soak up flavors well. You can toss them in the same seasoning mix. This makes a tasty meal for everyone. Using seasonal veggies can elevate your fajitas. In summer, add zucchini and corn for a fresh taste. In autumn, try sweet potatoes or butternut squash. These veggies add sweetness and texture. Always adjust based on freshness. Check your local market for the best produce. This not only makes your dish better but also supports local farmers. You can change up the spice blend for more variety. Use smoked paprika for a deeper flavor. Add chili powder for a kick. Each spice mix can give a unique taste. You can also add sweetness with fruits. Pineapple chunks or mango slices can brighten your dish. They melt into the mix and offer a delightful contrast to savory flavors. For the full recipe, click [Full Recipe]. After enjoying your Sheet Pan Chicken Fajitas, store any leftovers in the fridge. Use airtight containers to keep them fresh. This way, the flavors stay locked in. Make sure to cool the fajitas before sealing the containers. They can last for about three to four days in the fridge. When you're ready to eat leftovers, reheating them properly is key. The best way is to use the oven. Preheat the oven to 350°F (175°C). Spread the fajitas on a baking sheet and heat for about 10-15 minutes. This keeps them crispy. If you're in a hurry, the microwave works too. Place the fajitas in a microwave-safe dish and cover it with a damp paper towel. Heat for about one to two minutes. Make sure to check if it's hot all the way through. Freezing fajitas is a great option for meal prep. To freeze, let the fajitas cool completely. Then, place them in freezer-safe bags or containers. Remove as much air as possible to prevent freezer burn. They can last up to three months in the freezer. When you're ready to enjoy them, thaw the fajitas overnight in the fridge. For a quick option, you can use the microwave to defrost. Make sure to heat them thoroughly before serving. Enjoy your flavorful meal anytime! Sheet pan chicken fajitas can last in the fridge for 3 to 4 days. Make sure to store them in an airtight container. If you want to keep them longer, freeze them. They can last up to 3 months in the freezer. Just make sure to thaw them in the fridge before reheating. Yes, you can prepare the chicken and veggies ahead of time. Slice the chicken and vegetables a day before. Mix them with oil and spices and store them in the fridge. This makes cooking quick and easy when you are ready to eat. Leftover fajitas are great for many meals. You can make fajita bowls with rice or quinoa. They also work well in tacos or wraps. Add them to omelets for breakfast or mix them into a salad for a tasty lunch. Absolutely! Sheet pan chicken fajitas are perfect for meal prep. You can portion them into containers for the week. Just reheat them when you are ready to eat. This makes it easy to have a healthy meal ready in no time. This blog post covered key ingredients for chicken fajitas, cooking steps, and tips for perfect dishes. I shared ideas for variations and how to store leftovers. You can adapt these fajitas to fit any taste or diet. The recipe is simple and great for meal prep. With proper cooking and storage, you can enjoy delicious meals all week. Dive into this tasty dish and make it your own!](https://recipespursuit.com/wp-content/uploads/2025/06/42f1f157-11fc-45e7-8397-0bcc90c45de7.webp)
