Latest & Greatest

browse recipes

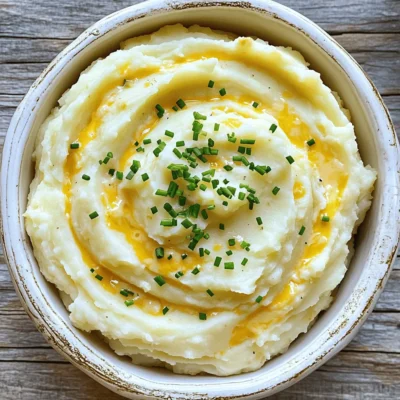
- 1.5 lbs baby potatoes, halved - 4 tablespoons unsalted butter - 4 cloves garlic, minced - 2 tablespoons fresh parsley, chopped - 2 teaspoons fresh rosemary, chopped - 1 teaspoon fresh thyme, chopped - Salt and pepper to taste - Zest of 1 lemon - 1 tablespoon lemon juice To make Garlic Butter Herb Potatoes, you need simple, fresh ingredients. Start with baby potatoes. They are small and tender. Halving them helps them cook evenly. Next, you will need unsalted butter. This adds richness to the dish. Garlic brings a bold flavor. Minced garlic releases a strong aroma when cooked. Fresh herbs are key to brightening the dish. Parsley, rosemary, and thyme add depth. A bit of salt and pepper enhances all these flavors. Lemon zest and juice brighten the potatoes. The zest adds a fragrant note. The juice gives a nice tang. Together, they make the dish pop. - Additional fresh herbs - Lemon wedges For garnishes, consider adding more fresh herbs. They bring color and flavor. Lemon wedges can also be a nice touch. They let you add more lemon juice to taste. This makes your Garlic Butter Herb Potatoes even brighter. Using fresh ingredients ensures the best taste. You will enjoy the fresh, herb-filled flavor in each bite. For the full recipe, check out the details above. - Preheat your oven to 400°F (200°C). Line a baking sheet with parchment paper for easy cleanup. - In a large pot, bring salted water to a boil. Add 1.5 lbs of halved baby potatoes. Cook them for about 10-12 minutes until they are fork-tender. Drain the potatoes and let them cool for a bit. - In a small saucepan, melt 4 tablespoons of unsalted butter over low heat. - Add 4 minced cloves of garlic. Sauté this for about 1-2 minutes until it smells great. Be careful not to burn the garlic. - Off the heat, stir in 2 tablespoons of chopped parsley, 2 teaspoons of chopped rosemary, 1 teaspoon of chopped thyme, the zest of 1 lemon, 1 tablespoon of lemon juice, salt, and pepper. - Transfer the drained potatoes to a large mixing bowl. Pour the garlic herb butter over them. - Toss gently until all the potatoes are coated in the flavorful butter. - Arrange the coated potatoes cut-side down on the prepared baking sheet. - Roast them in the preheated oven for 20-25 minutes until they are golden brown and crispy. Halfway through, flip the potatoes for even browning. - Once cooked, remove them from the oven. You can sprinkle more fresh herbs or lemon zest on top if you like. Now you're ready to enjoy these Garlic Butter Herb Potatoes! For the full recipe, check out the details. To make great garlic butter herb potatoes, start by picking the right potatoes. I love using baby potatoes. They are small and tender. Look for ones that are firm and smooth. Avoid potatoes with blemishes or soft spots. This will help your dish taste better. For crispy texture, parboil the potatoes first. Boil them in salted water for 10-12 minutes. This makes them soft inside. Then, drain and let them cool. When you roast them, cut-side down helps them get crispy. Don’t forget to flip them halfway through cooking for even browning. Adding more flavor is easy! You can try different seasonings to make the dish your own. If you want some heat, add cayenne pepper or paprika. For a smoky taste, try smoked paprika. You can also mix in grated cheese for a cheesy touch. Using fresh herbs is key. I recommend parsley, rosemary, and thyme. But feel free to experiment! Basil or dill can add a nice twist. You can even use a mix of dried herbs if fresh ones aren’t available. Choosing the right baking sheet matters. A heavy-duty, rimmed baking sheet works best. It keeps the heat even and helps the potatoes roast nicely. Using parchment paper makes cleanup easy and helps prevent sticking. For boiling, a large pot is ideal. It should hold enough water for the potatoes. Make sure it has a lid to boil faster. A colander helps drain the potatoes well. This way, they cool off quickly and get ready for roasting. For the full recipe, check out the detailed steps for making garlic butter herb potatoes! {{image_2}} You can switch up the type of potatoes you use. Red potatoes work great. They have a smooth skin and tender flesh. Yukon gold potatoes are another good choice. Their buttery flavor adds depth to the dish. Both types make for a tasty and crispy result. If you're looking for vegan options, try using plant-based butter. It gives a similar richness without dairy. For gluten-free needs, you can enjoy these potatoes without worry. All of the ingredients are naturally gluten-free, so dig in! Want to make them even more special? Add cheese for a creamy touch. Cheddar or Parmesan can melt beautifully over the potatoes. For those who like heat, try adding red pepper flakes or cayenne. These spices can bring a fun kick to the flavor. The key is to find what you love. Explore the Full Recipe for more ideas! To keep your Garlic Butter Herb Potatoes fresh, place them in an airtight container. Store them in the fridge right away. They stay good for about 3 to 5 days. If you want to keep them longer, consider freezing. You can reheat leftover potatoes in the oven. Preheat your oven to 350°F (175°C). Spread the potatoes on a baking sheet. Heat for about 10 to 15 minutes, or until warm. This method keeps them crispy. If you're short on time, use the microwave. Place the potatoes in a microwave-safe dish and cover with a lid or plastic wrap. Heat them for 1 to 2 minutes. Check if they are warm enough, and add more time if needed. Freezing cooked potatoes is simple. First, let them cool completely. Spread them out on a baking sheet in a single layer. Freeze for about 1 hour until solid. Then, transfer them to a freezer bag. They can last up to 3 months in the freezer. When you're ready to eat, thaw the potatoes in the fridge overnight. For quicker thawing, you can use the microwave on the defrost setting. This way, you can enjoy your Garlic Butter Herb Potatoes anytime! Don't forget to check the Full Recipe for further details on making these tasty bites. To make Garlic Butter Herb Potatoes crispy, start with the right potatoes. Baby potatoes work best. First, boil them for a short time. This helps them cook evenly. After boiling, let the potatoes cool a bit. This step allows moisture to escape. Next, coat them well with the garlic butter mix. Place them cut-side down on the baking sheet. This position helps create a nice crispy edge. Roast them in a hot oven. Flip them halfway through cooking for even crispiness. Yes, you can prep Garlic Butter Herb Potatoes ahead of time. Cook the potatoes and cool them completely. Store them in the fridge in a sealed container. When you are ready to eat, just toss them in the butter mixture. Then roast them as you normally would. This saves time and keeps the flavor fresh. Garlic Butter Herb Potatoes go well with many dishes. They pair great with grilled chicken or steak. Fish like salmon also complements this dish. Serve them alongside a fresh salad for balance. Roasted vegetables can add more color and taste. These potatoes make a great side for any meal. For the complete Garlic Butter Herb Potatoes recipe, check out the Full Recipe. 🧄🥔 These Garlic Butter Herb Potatoes are simple and tasty. We covered the main ingredients, preparation steps, and roasting methods. Tips ensure you get that perfect crisp. You can adjust flavors and even substitute ingredients to fit your needs. Don't forget how to store leftovers or reheat them for the best taste. Try these potatoes with your favorite dishes for a fantastic meal. Enjoy making this easy recipe in your kitchen!

Garlic Butter Herb Potatoes Crispy and Flavorful Delight

Are you ready to elevate your potato game? These Garlic Butter Herb Potatoes are golden, crispy, and packed with flavor. With just a few…

My Latest Desserts

My Latest Recipes

hey,

i’m !

I’m so happy you’re here!

Cooking is my love language, and I’m excited to share my best dishes with you. Hope they become your favorites too! Let’s enjoy every bite of this journey together.

Roasted Beet and Goat Cheese Salad Flavorful Delight

Are you looking for a fresh, tasty dish that shines at any meal? This Roasted Beet and Goat Cheese Salad offers a mix of…
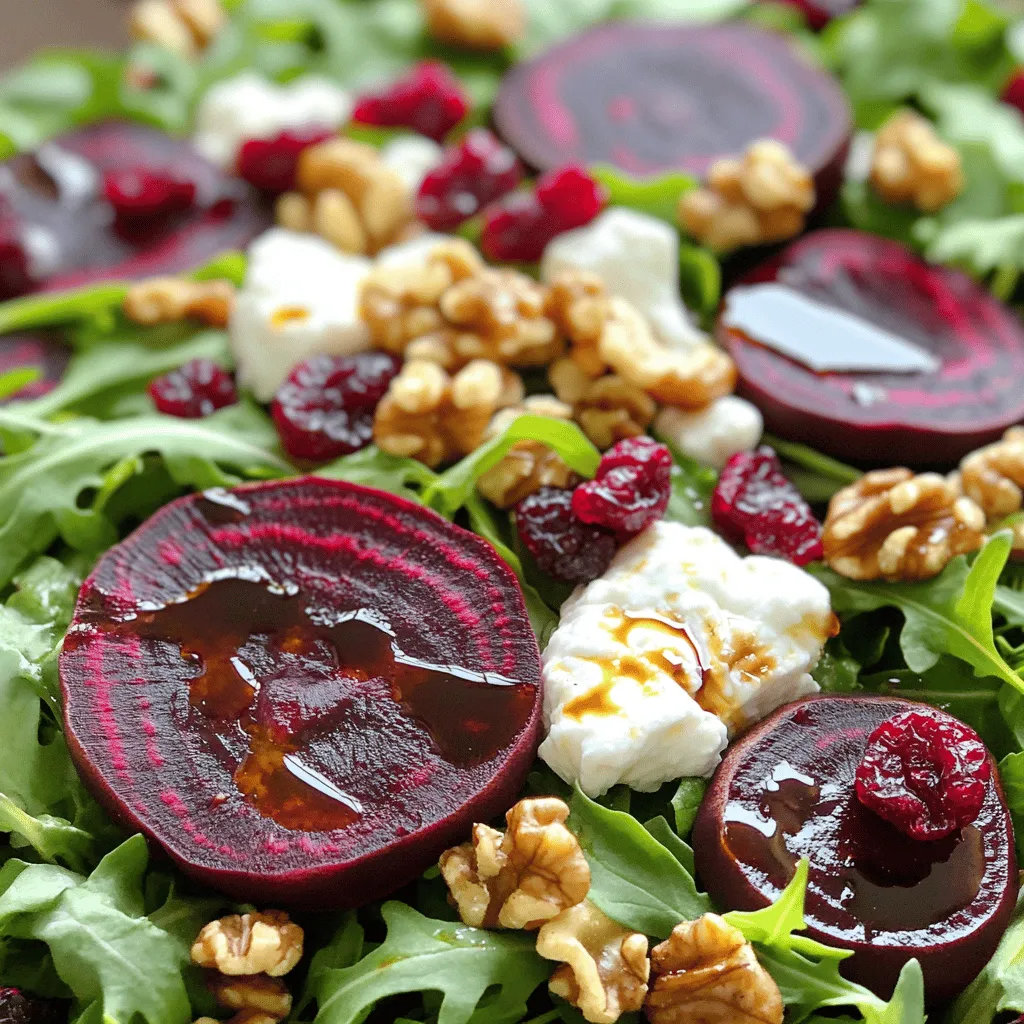

To make a delicious roasted beet and goat cheese salad, you will need: - 4 medium beets, trimmed and washed - 2 tablespoons olive oil - Salt and pepper to taste - 4 cups mixed salad greens (arugula, spinach, and frisée) - 1/2 cup goat cheese, crumbled - 1/2 cup walnuts, roughly chopped - 1/4 cup dried cranberries - 2 tablespoons balsamic vinegar - 1 tablespoon honey - 1 tablespoon Dijon mustard - Fresh herbs (optional: parsley or chives) for garnish You can easily adjust this salad to fit your taste. Here are some great swaps: - Beets: Use golden beets for a milder flavor. - Goat Cheese: Feta cheese works well if you prefer a stronger taste. - Nuts: Try pecans or almonds instead of walnuts. - Greens: Kale or romaine can replace mixed greens for added crunch. - Dried Fruit: Use raisins or chopped apples in place of cranberries. These changes can make the salad your own while still keeping it tasty. Choosing fresh ingredients is key to a great salad. Here are a few tips: - Beets: Look for firm, smooth beets with no soft spots or blemishes. - Greens: Choose vibrant greens that are crisp and free of wilting. - Goat Cheese: Opt for cheese that is creamy and fresh, not dried out. - Nuts: Select raw or lightly roasted nuts for the best flavor. - Dried Fruit: Pick dried cranberries that are plump and not hard. Fresh ingredients boost the flavor and health of your salad. Enjoy the process of picking the best for your dish! To start, preheat your oven to 400°F (200°C). This heat helps to bring out the beet's natural sweetness. Next, trim and wash your beets. Wrap each beet in aluminum foil. Place them on a baking sheet to catch any drips. Roast the beets for 45-60 minutes. You know they are done when a fork goes through easily. Once roasted, take them out and let them cool. After cooling, peel off the skins. They should come off easily. While the beets roast, you can make the dressing. In a small bowl, combine 2 tablespoons of balsamic vinegar, 1 tablespoon of honey, and 1 tablespoon of Dijon mustard. Whisk these together until smooth. Slowly add 2 tablespoons of olive oil while whisking. This creates a creamy texture. Don't forget to add salt and pepper to taste. Set the dressing aside for later. Once your beets are peeled and cooled, slice them into wedges. In a large bowl, combine 4 cups of mixed salad greens, the beet wedges, 1/2 cup of crumbled goat cheese, 1/2 cup of toasted walnuts, and 1/4 cup of dried cranberries. Drizzle your dressing over the salad and toss gently. This helps to mix the flavors without breaking the beets. If you like, add some fresh herbs for garnish. Now you have a colorful salad ready to enjoy. For the complete recipe, check the full recipe link. Roasting beets is simple and rewarding. Start by preheating your oven to 400°F (200°C). Wrap each beet in aluminum foil. This keeps them moist. Place the wrapped beets on a baking sheet. Roast for 45 to 60 minutes. The beets are done when a fork goes in easily. After roasting, let them cool before peeling. The skins come off easily. You’ll enjoy the sweet, earthy flavor of roasted beets. To boost flavor, consider adding fresh herbs. Chives or parsley brighten the salad. You can also swap walnuts with pecans for a different crunch. For a tangy kick, try adding feta cheese instead of goat cheese. A sprinkle of fresh lemon juice brightens the dish too. You may even mix in some sliced apples or pears for sweetness. These changes keep your salad exciting and fresh. Presentation matters when serving salad. Arrange the mixed greens in a large bowl first. Then layer the roasted beet wedges on top. Crumble the goat cheese evenly over the beets. Scatter the toasted walnuts and cranberries next. This creates a beautiful mix of colors. For a finishing touch, drizzle the dressing just before serving. You can garnish with fresh herbs to impress your guests. They will love the look and taste of this delightful salad. For the complete recipe, check out the Full Recipe. {{image_2}} You can add fruits or veggies to this salad to change flavors. In spring, try adding strawberries or radishes. They add a sweet and crunchy touch. In fall, sliced apples or pears work well. They bring a nice contrast to the earthiness of the beets. You can also add roasted sweet potatoes for a cozy, warm twist. If you want to switch the cheese, you have options! Feta is a great choice. It offers a salty flavor that pairs well with beets. Blue cheese is another option if you like bold tastes. For a creamier option, try ricotta. Its soft texture balances the salad without overpowering it. Nuts add crunch and flavor to your salad. Walnuts are great, but you can also use pecans. They add a sweet, buttery taste. Almonds bring a nice crunch, too. Try slicing them for a different texture. If you prefer seeds, sunflower or pumpkin seeds work nicely as well. They add crunch and nutrition without the nutty flavor. Feel free to explore these variations as you create your own roasted beet and goat cheese salad. Each twist makes this dish even more enjoyable! For the complete recipe, check out the Full Recipe. After enjoying your roasted beet and goat cheese salad, store leftovers in an airtight container. This keeps the flavors fresh. Refrigerate the salad for up to three days. Keep the dressing separate to avoid sogginess. For long-lasting ingredients, follow these tips: - Beets: Store in a cool, dark place. They last for weeks if unpeeled. - Greens: Keep mixed greens in a salad spinner or container lined with paper towels. This prevents moisture and wilting. - Goat cheese: Wrap tightly in plastic wrap or store in a sealed container. This keeps it fresh and tasty. If you want warm beets, here’s how to reheat them: - Oven: Preheat to 350°F (175°C). Wrap the beets in foil and heat for 10-15 minutes. - Microwave: Cut the beets into smaller pieces. Place them in a bowl with a splash of water. Cover and heat for 1-2 minutes. This method helps keep the beets moist while warming them up. Enjoy the full recipe to make this delightful salad! Yes, you can prepare the salad ahead. Roast the beets and make the dressing. Store the beets and dressing separately in the fridge. Combine them with greens just before serving. This keeps the salad fresh and crisp. If you don’t have goat cheese, try feta or ricotta. Both options add creaminess. You can also use a dairy-free cheese if needed. This keeps the flavor interesting while catering to dietary needs. To avoid sogginess, keep the components separate until serving. Store the dressing and salad greens in different containers. Mix them just before eating. This ensures each bite stays crunchy and fresh. In this article, we explored the roasted beet and goat cheese salad from start to finish. We discussed key ingredients, prepping tips, and variations to spice up your dish. Remember, choosing fresh ingredients helps make your salad shine. When roasting beets, keep an eye on timing for perfect results. You can also customize it with different cheeses or nuts. With these tips, your salad will impress anyone. Enjoy making this dish and share it with others for a healthy treat!