Latest & Greatest

Savory Southwest Chicken Salad Easy and Flavorful Dish
Looking for a tasty meal that’s quick and easy to make? You’ve found it! This Savory Southwest Chicken Salad is
Read more…
Lemon Blueberry Pancakes Delicious and Easy Recipe
If you’re craving a sweet and zesty breakfast, you need to try my Lemon Blueberry Pancakes! They’re light, fluffy, and
Read more…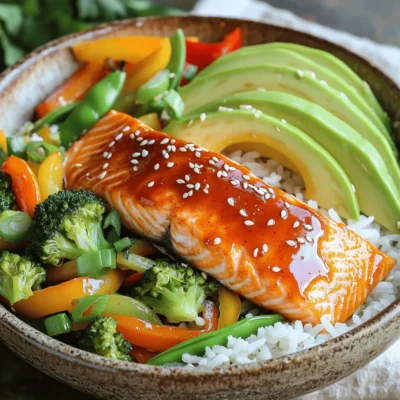
Sweet Chili Salmon Bowls Flavorful and Easy Recipe
Are you ready for a flavorful adventure? My Sweet Chili Salmon Bowls are not only easy to make but also
Read more…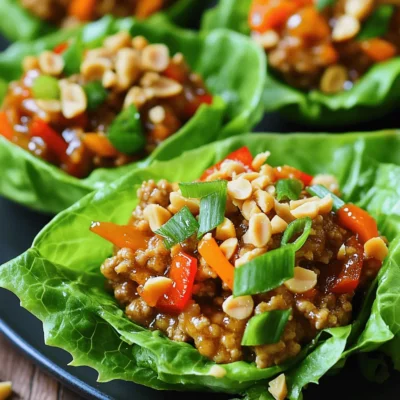
Spicy Thai Chicken Lettuce Cups Flavorful and Fresh
If you crave bold flavors and fresh ingredients, let’s dive into Spicy Thai Chicken Lettuce Cups! This dish bursts with
Read more…
Chicken Shawarma Flatbreads Flavorful and Simple Meal
Looking for a quick and tasty meal? I’ve got you covered with Chicken Shawarma Flatbreads! This dish brings bold flavors
Read more…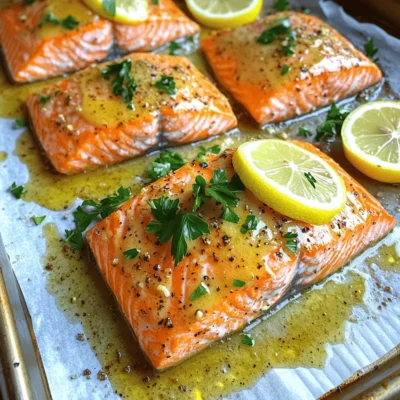
Garlic Butter Roasted Salmon Flavorful Dinner Delight
Are you ready to impress at dinner? Garlic Butter Roasted Salmon is the dish you need. This recipe is simple,
Read more…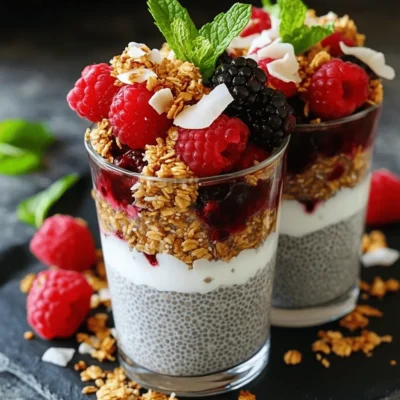
Berry Coconut Chia Parfait Fresh and Simple Recipe
Get ready for a tasty treat that’s fresh and simple! This Berry Coconut Chia Parfait is not just delicious; it’s
Read more…
Vegan Sweet Potato Brownies Simple and Tasty Delight
If you love sweet treats but want a healthy twist, these Vegan Sweet Potato Brownies are for you! Not only
Read more…browse recipes
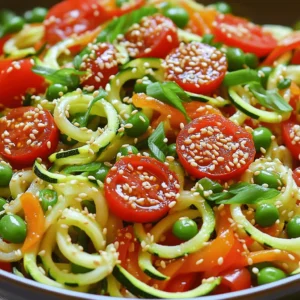
![For a delicious serving of zucchini noodles with pesto, you'll need these items: - 3 medium zucchinis - 1 ripe avocado - 1 cup fresh basil leaves - 1/4 cup walnuts - 2 tablespoons lemon juice - 2 tablespoons olive oil - 1 clove garlic, minced - Salt and pepper to taste To enhance your dish, consider these toppings: - Cherry tomatoes, halved - Grated Parmesan cheese (optional) These garnishes add color and flavor that brighten up your meal. If you don't have certain items, here are some swaps: - Use pine nuts instead of walnuts for a different taste. - If you lack fresh basil, try spinach or arugula as alternatives. - For a nut-free option, use sunflower seeds in the pesto. - Instead of lemon juice, lime juice works well too. Feel free to mix and match based on what you have! The full recipe can guide you through this simple yet tasty dish. To start, grab three medium zucchinis. Using a spiralizer or a julienne peeler, turn those zucchinis into noodles. Place the noodles in a colander. Sprinkle them lightly with salt. This helps to draw out excess moisture. Let them sit for about 15 to 20 minutes. The salt will work its magic. After 20 minutes, rinse the noodles under cold water. Pat them dry with a paper towel. This step keeps your dish from being too watery. While the zucchini noodles drain, it's time to make the avocado pesto. Take one ripe avocado and scoop it into a food processor. Add one cup of fresh basil leaves, one-fourth cup of walnuts, and two tablespoons of lemon juice. Pour in two tablespoons of olive oil and add one clove of minced garlic. Blend everything until it's smooth. Taste the mixture and add salt and pepper as needed. If the pesto is too thick, add a bit more olive oil until you like the texture. This creamy pesto makes the dish sing. Once the zucchini noodles are dry, it's time to combine everything. In a large bowl, add the zucchini noodles and the avocado pesto. Toss gently until all the noodles are coated well. Now for the fun part—plating! Serve the noodles on a nice plate. Garnish with halved cherry tomatoes on top. If you like, sprinkle some grated Parmesan cheese for extra flavor. Serve immediately, and enjoy the fresh taste of this delightful dish. You can follow the [Full Recipe] for more details. To make perfect zucchini noodles, start with fresh, firm zucchinis. Use a spiralizer or julienne peeler. Spiralize the zucchinis directly into the bowl. Aim for long, thin strands. After spiralizing, place the noodles in a colander. Sprinkle them with salt to draw out the moisture. Let them sit for about 15 to 20 minutes. Rinse the noodles under cold water and pat them dry. This process helps keep your dish from becoming soggy. For the best pesto, use a food processor. Combine ripe avocado, fresh basil, walnuts, lemon juice, olive oil, and minced garlic. Blend until smooth, but don’t over-blend. You want a bit of texture in your pesto. If it’s too thick, add a little more olive oil. Taste and adjust with salt and pepper as needed. This balancing act is key to a bright, flavorful pesto that brings your dish to life. To make your zucchini noodles pop, add fresh ingredients. Halved cherry tomatoes add a nice touch. They bring sweetness and color to the dish. A sprinkle of grated Parmesan cheese can enhance the taste, too. For extra crunch, consider adding pine nuts or sunflower seeds. You could also serve the dish with a side of grilled chicken or shrimp for protein. These simple additions can elevate your meal without much effort. {{image_2}} Zucchini noodles fit well into both Paleo and Whole30 diets. These diets focus on whole foods. For a tasty twist, use nuts like pecans in your pesto. You can also swap olive oil for avocado oil for a different flavor. Make sure to skip any cheese to keep it compliant. For a vegan version, the avocado is your best friend. It adds creaminess without dairy. You can replace walnuts with sunflower seeds in the pesto. Sunflower seeds offer a nice crunch and a different taste. Consider adding nutritional yeast for a cheesy flavor without the dairy. If you want to make your dish heartier, add proteins. Grilled chicken or shrimp pairs well with this dish. You can toss cooked quinoa or chickpeas into the noodles for extra protein. For a vegetarian option, try adding tofu or tempeh. These options will keep your meal filling and satisfying. For the complete cooking experience, check the Full Recipe. To keep leftover zucchini noodles fresh, place them in an airtight container. You can store them in the fridge for up to two days. Avoid adding sauce until you're ready to eat. This keeps the noodles from getting too soggy. If you notice excess moisture, gently pat them dry with a paper towel before storing. Store your leftover pesto in a small jar or container. Make sure to cover the surface with a thin layer of olive oil. This helps prevent browning. You can keep it in the fridge for about a week. For longer storage, freeze it in ice cube trays. Once frozen, transfer the cubes to a freezer bag. This way, you can enjoy fresh pesto anytime. When reheating zucchini noodles, use a skillet over medium heat. Add a splash of olive oil to prevent sticking. Heat them for just a few minutes until warm. Avoid overcooking, as they can become mushy. For pesto, gently warm it in a small pan. Stir constantly to keep the texture smooth. Enjoy the fresh taste every time! Yes, you can use regular pasta in this dish. Zucchini noodles are a great low-carb option. They provide a fresh taste and unique texture. If you prefer pasta, choose your favorite type. Cook it according to the package instructions. Serve the pesto over the cooked pasta instead of zucchini noodles. Enjoy the same flavorful sauce with a different twist. Zucchini noodles last about 2 to 3 days in the fridge. Store them in an airtight container. Keep in mind, they may lose some crunch over time. To extend their life, avoid adding the pesto until you're ready to eat. If they get too soft, you can still use them in soups or stews. You can substitute walnuts with pine nuts or sunflower seeds. Both give a nice flavor and texture. If you want a nut-free option, try using hemp seeds. These options work well in the avocado pesto. Just blend them like you would with walnuts. This way, you keep the creamy texture and rich taste. For the full recipe, you can refer to the Zesty Zucchini Noodles with Avocado Pesto. This blog post covered everything you need for a delicious zucchini noodle dish. We explored the key ingredients, prepared the avocado pesto, and combined them to create a fresh meal. I shared tips for perfect noodles and clever serving ideas. You can even adapt the dish to fit your diet. Lastly, I explained how to store leftovers for another day. Use this knowledge to enjoy healthy eating with ease and creativity. Don’t hesitate to experiment and make this dish your own!](https://recipespursuit.com/wp-content/uploads/2025/04/d809c1f9-b3f3-42d5-acc8-9eea95e43f70.webp)
Zucchini Noodles with Pesto Flavorful and Healthy Dish
Looking for a healthy twist on pasta? Zucchini noodles with pesto are your answer! This dish is not only colorful and full of flavor,…
My Latest Desserts
My Latest Recipes
hey,
i’m !
I’m so happy you’re here!
Cooking is my love language, and I’m excited to share my best dishes with you. Hope they become your favorites too! Let’s enjoy every bite of this journey together.
Mouthwatering Teriyaki Chicken Tasty Quick Recipe
Are you craving a dish that’s quick, tasty, and packed with flavor? Look no further than this Mouthwatering Teriyaki Chicken recipe! With juicy chicken…
. Enjoy cooking! - Combine soy sauce, honey, rice vinegar, sesame oil, minced garlic, and ginger. - Whisk until well blended. Creating a great teriyaki marinade is key. The blend of soy sauce and honey gives that sweet and salty taste. Rice vinegar adds a nice tang. Sesame oil brings in a nutty flavor. Garlic and ginger add depth and warmth. - Place chicken thighs in a resealable bag or dish. - Pour marinade over the chicken and refrigerate for 30 minutes. Marinating is vital. It lets the chicken soak up those tasty flavors. Using a resealable bag makes it easy to coat every piece. If you can, flip the bag halfway through for even flavor. - Preheat grill or grill pan and discard leftover marinade. - Grill chicken thighs until internal temperature reaches 165°F (75°C). Grilling gives a nice char and smoky taste. Make sure your grill is hot before adding the chicken. This helps get those beautiful grill marks. I usually cook for about 6-7 minutes on each side. - Let chicken rest, slice into strips, and serve over rice. - Add garnishes of sesame seeds and green onions. Resting the chicken is important. It keeps the juices inside, making each bite juicy. Slicing it into strips makes it easy to serve. Lay it over fluffy white rice, then sprinkle sesame seeds and green onions for a fresh look. For the full recipe, check the section above. - To achieve perfect grill marks, ensure the grill is preheated properly. - Let chicken rest after cooking to retain juices. - Consider adding mushrooms or bell peppers to the marinade for extra flavor. - Use low-sodium soy sauce for a healthier option. - Arrange the rice on a platter with sliced chicken on top. - Use a colorful side of steamed vegetables for an attractive presentation. {{image_2}} You can switch up the main protein in teriyaki chicken. - Use chicken breast instead of thighs for a leaner option. - Substitute with tofu for a vegetarian version. Tofu absorbs the marinade well, giving it great flavor. You can cook teriyaki chicken in various ways. - Bake in the oven at 375°F (190°C) for 25-30 minutes. This method keeps the chicken juicy. - Stir-fry chicken pieces in a skillet for a quick, easy meal. Just cook until they are golden brown and cooked through. Feel free to get creative with flavors. - Experiment with pineapple juice for a tropical twist. This adds sweetness and acidity. - Add sriracha for a spicy version of teriyaki chicken. It gives a nice kick that balances the sweetness. These variations ensure that everyone can enjoy teriyaki chicken in their own favorite way. You can find the full recipe to get started on this delicious dish. Keep any leftover chicken and rice in an airtight container. This helps keep the food fresh. Store in the refrigerator for up to 3 days. If you wait too long, it may spoil. You can freeze marinated chicken before cooking. This makes for quick meal prep later. Cooked chicken can also be frozen for up to 2 months. Just make sure to seal it well. To reheat, use a microwave or the stovetop. Add a splash of water to keep it moist. This way, your teriyaki chicken stays delicious and tender. Enjoy your meal! To make teriyaki chicken less salty, you should use low-sodium soy sauce. You can also reduce the amount of soy sauce in the recipe. This way, you keep the flavor but cut down on the saltiness. Yes, you can cook teriyaki chicken in an air fryer. Set it to 375°F (190°C) and cook for about 15-20 minutes. Flip the chicken halfway through for even cooking. Serve teriyaki chicken over rice. Add steamed vegetables on the side. For an extra touch, garnish with sesame seeds and chopped green onions. This adds color and flavor to your meal. To check if the teriyaki chicken is cooked, use a meat thermometer. The internal temperature should reach 165°F (75°C). This ensures it is safe to eat and juicy. This blog post covered how to make teriyaki chicken that is both tasty and easy. We discussed the main ingredients, cooking steps, and helpful tips to enhance flavor. You can customize your dish with different proteins or cooking methods. Remember to store any leftovers properly for future meals. Teriyaki chicken can be simple, versatile, and enjoyable for any occasion. Now you’re ready to cook and impress your friends and family with this delicious dish!](https://recipespursuit.com/wp-content/uploads/2025/05/fab40ec2-7461-42af-860b-045b61ea2976.webp)


