

Latest & Greatest
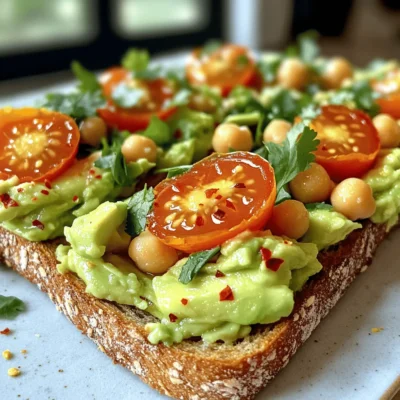
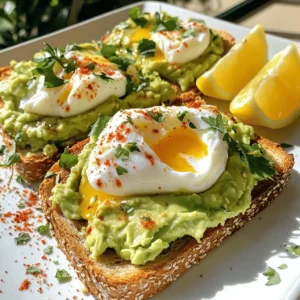
Easy Chickpea Avocado Toast Simple and Tasty Meal
If you’re looking for a quick and satisfying meal, Easy Chickpea Avocado Toast is for you. This tasty dish combines
Read more…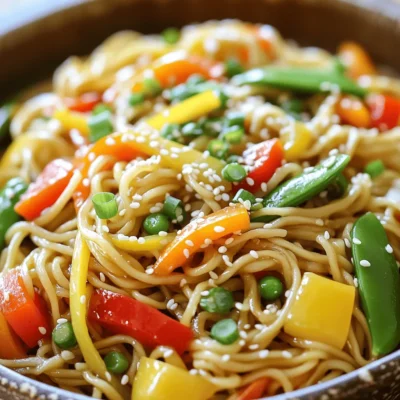
Ginger Garlic Stir Fry Noodles Quick and Flavorful Meal
Are you looking for a quick and tasty meal? Ginger Garlic Stir Fry Noodles are the answer! With just a
Read more…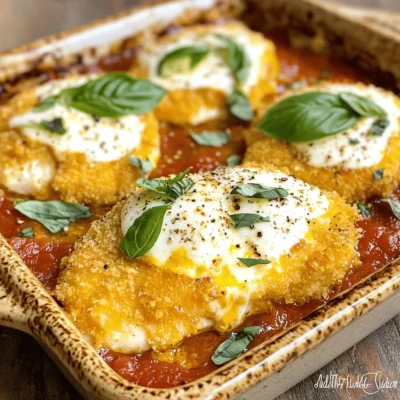
Baked Chicken Parmesan Tasty and Easy Recipe Guide
Are you ready to dive into a dish that’s both tasty and easy to make? Baked Chicken Parmesan is a
Read more…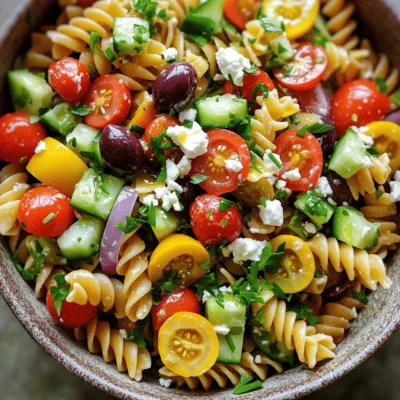
Classic Greek Pasta Salad Fresh and Flavorful Dish
Looking for a fresh and tasty dish that shines at any gathering? Look no further than Classic Greek Pasta Salad!
Read more…
Lemon Rosemary Chicken Thighs Tangy and Juicy Recipe
Craving a dish that bursts with flavor? You’ll love my Lemon Rosemary Chicken Thighs! This recipe delivers juicy, tangy chicken
Read more…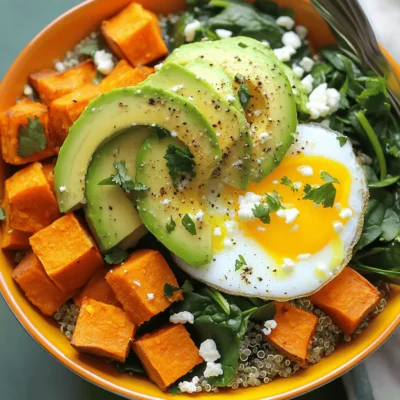
Sweet Potato Breakfast Bowl Flavorful Morning Meal
Start your day with a delicious Sweet Potato Breakfast Bowl that’s as nutritious as it is tasty! This bowl is
Read more…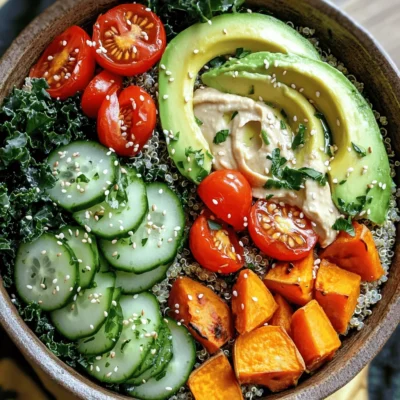
Easy Veggie Buddha Bowl Healthy and Tasty Recipe
Looking for a healthy meal that’s both delicious and easy to make? You’ve found it! This Easy Veggie Buddha Bowl
Read more…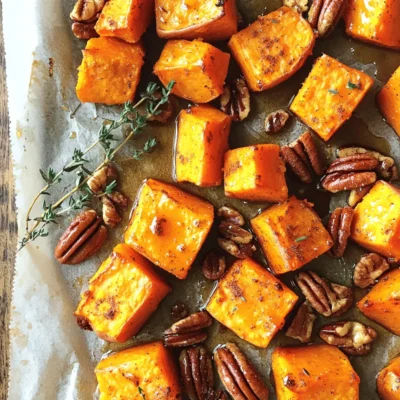
Maple Roasted Sweet Potatoes Flavorful Autumn Side
Fall is here, and it’s time to enjoy the rich flavors of the season! Maple roasted sweet potatoes make a
Read more…browse recipes


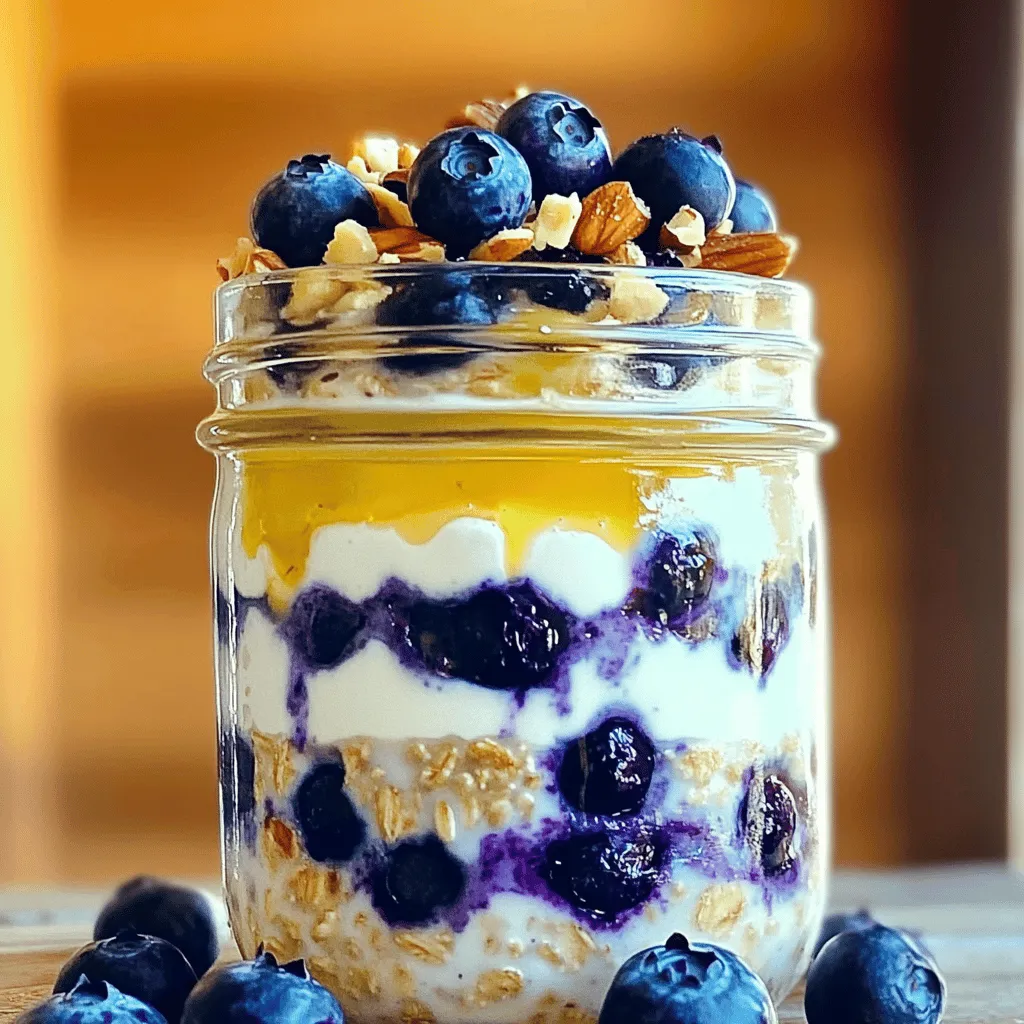
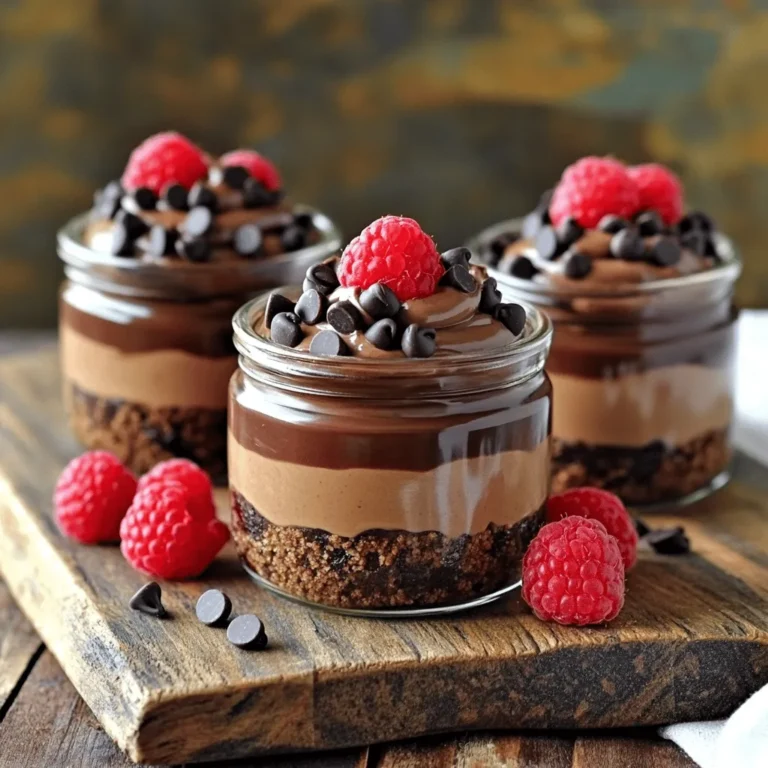
Blueberry Cheesecake Overnight Oats Delightful Recipe
Looking for a simple and delicious breakfast? You’ll love this Blueberry Cheesecake Overnight Oats recipe! It’s creamy, fruity, and packed with flavor. In just…
My Latest Desserts
My Latest Recipes

hey,
i’m !
I’m so happy you’re here!
Cooking is my love language, and I’m excited to share my best dishes with you. Hope they become your favorites too! Let’s enjoy every bite of this journey together.

![To make these tasty zucchini feta muffins, you need the following ingredients: - 2 medium zucchinis, grated - 1 cup all-purpose flour - 1/2 cup whole wheat flour - 1 teaspoon baking powder - 1/2 teaspoon baking soda - 1/2 teaspoon salt - 1 teaspoon dried oregano - 1/2 teaspoon black pepper - 1/2 cup crumbled feta cheese - 2 large eggs - 1/3 cup olive oil - 1/2 cup Greek yogurt - 1 tablespoon fresh lemon juice - 1/4 cup fresh parsley, chopped (optional) These ingredients create a delicious blend of flavors and textures. You can enhance your muffins with some fun add-ins: - Chopped sun-dried tomatoes for a burst of flavor. - Sliced black olives to add a salty kick. - Chopped spinach for extra color and nutrients. - Cheddar cheese for a different cheesy taste. Feel free to mix and match based on what you enjoy. Here’s a quick look at the nutrition of key ingredients: - Zucchini: Low in calories, high in vitamins A and C. It adds moisture. - Feta Cheese: Provides calcium and protein. It adds a salty, tangy flavor. - Whole Wheat Flour: Offers more fiber than all-purpose flour, helping digestion. - Greek Yogurt: Adds creaminess and protein while keeping muffins moist. These ingredients not only taste good but also offer health benefits. For the full recipe, check [Full Recipe]. Before you start, gather all your ingredients. This makes cooking easy and fun. You need: - 2 medium zucchinis, grated - 1 cup all-purpose flour - 1/2 cup whole wheat flour - 1 teaspoon baking powder - 1/2 teaspoon baking soda - 1/2 teaspoon salt - 1 teaspoon dried oregano - 1/2 teaspoon black pepper - 1/2 cup crumbled feta cheese - 2 large eggs - 1/3 cup olive oil - 1/2 cup Greek yogurt - 1 tablespoon fresh lemon juice - 1/4 cup fresh parsley, chopped (optional) Make sure to wash the zucchinis. Grate them using a box grater. Set them aside in a bowl. This will add moisture and flavor to your muffins. Take a large bowl. Add the all-purpose flour, whole wheat flour, baking powder, baking soda, salt, oregano, and black pepper. Mix these dry ingredients well. This step is very important. It helps ensure that your muffins rise and taste great. If you skip this, your muffins may not turn out right. In another bowl, whisk together the eggs, olive oil, Greek yogurt, and lemon juice. Mix until it is smooth. Then, add the grated zucchini and parsley if you want. Stir to combine. Now, here comes the fun part! Gradually fold the wet mixture into the dry mixture. Use a spatula and be gentle. You want to mix it just enough. Do not overmix! This keeps the muffins fluffy. Finally, fold in the crumbled feta cheese. Make sure it is well spread in the batter. Now, you are ready for the next steps in the Full Recipe. Enjoy the process! To keep your muffins from being soggy, start by squeezing out excess moisture from the grated zucchini. Use a clean kitchen towel or cheesecloth to press down on the zucchini. This step is simple but very important. Also, do not overmix your batter. Just combine the ingredients until they are mixed. Overmixing can create a dense texture. To grate zucchini well, use a box grater or a food processor. A box grater gives you better control. Grate the zucchini on the larger holes. This size helps the zucchini cook well in the muffins. If you are using a food processor, choose the grating attachment for even results. Remember to wash the zucchini before grating to remove any dirt. Store your muffins in an airtight container at room temperature. They stay fresh for up to three days. If you need to keep them longer, you can freeze them. Wrap each muffin in plastic wrap and place them in a freezer bag. To reheat, thaw them in the fridge overnight. Then, warm them in the oven at 350°F for about 5-10 minutes. This method keeps them soft and tasty. For more details, check the Full Recipe. {{image_2}} You can make these muffins dairy-free or vegan. To replace the feta, try using nutritional yeast. It adds a cheesy flavor without dairy. For Greek yogurt, use a plant-based yogurt. Choose a brand with a creamy texture. Instead of eggs, use flax eggs. Mix 1 tablespoon of flaxseed meal with 2.5 tablespoons of water. Let it sit until it thickens. This swap works well in baking. Fresh herbs can change the taste of your muffins. Instead of parsley, try basil or dill. These herbs pair well with zucchini and feta. You can add thyme for a savory touch. If you want a bit of spice, add red pepper flakes. They give the muffins a kick without overwhelming the flavor. Boost the nutrition by adding more veggies. Finely grated carrots can add sweetness and color. Chopped spinach adds a healthy green touch. You could also add bell peppers for crunch. Just remember to keep the total moisture in check. Too much moisture can make your muffins soggy. Test your batter for the right consistency. Adjust by adding a little more flour if needed. For the full recipe, check out the details above. To keep your zucchini feta muffins fresh, store them in an airtight container. You can place parchment paper between layers to avoid sticking. If you need to stack them, this keeps the tops nice and clean. Keep the container at room temperature for short-term storage. When stored properly, zucchini feta muffins last for about three days at room temperature. If you want to keep them longer, consider refrigeration. In the fridge, they can last for up to a week. Just remember to let them cool completely before sealing them up. Freezing zucchini feta muffins is easy and a great way to save leftovers. First, let the muffins cool completely. Then, wrap each muffin in plastic wrap. Place them in a freezer-safe bag or container. They can last in the freezer for about three months. When you're ready to enjoy them, take them out and thaw them in the fridge overnight. You can also microwave them for about 30 seconds to a minute. This makes for a quick snack or breakfast option. For more details on making these delightful muffins, refer to the Full Recipe. Yes, you can use other cheeses. Try goat cheese for a tangy kick. Cheddar adds a rich flavor, while mozzarella gives a gooey texture. Each cheese will change the muffin's taste. Experiment to find your favorite! Zucchini feta muffins are great warm or at room temp. Serve them with a dollop of Greek yogurt for creaminess. You can add a sprinkle of herbs on top for color. Pair them with a fresh salad for a light meal. They also work well as a snack at any time! Yes, zucchini feta muffins are quite healthy. They have fiber from zucchini and whole wheat flour. The feta cheese adds protein, and olive oil provides healthy fats. Using Greek yogurt lowers the fat content while keeping them moist. Enjoy them as a tasty, nutritious treat! You can find the full recipe [here](#). Zucchini feta muffins blend tasty ingredients for a healthy snack. We discussed the key ingredients, step-by-step instructions, and tips to avoid sogginess. You learned about cool variations and how to store your muffins well. Overall, these muffins offer both flavor and nutrition. Enjoy these delicious treats, and don’t hesitate to get creative with your add-ins. Happy baking!](https://recipespursuit.com/wp-content/uploads/2025/06/3656566b-ffc5-45b1-ae24-1b15eaf29365-300x300.webp)
. Enjoy cooking this easy and tasty dish! Roasting vegetables is simple and tasty. We covered the best veggies like broccoli, carrots, and zucchini. We explored how to make a flavorful dressing with olive oil, lemon, and herbs. You learned tips for perfect roasting and how to store leftovers. The options for variations let you get creative. Remember, fresh ingredients make a big difference. Enjoy your delicious roasted veggies any time!](https://recipespursuit.com/wp-content/uploads/2025/07/a2b87498-289f-492f-b0b3-effd4a17394b-300x300.webp)

Air Fryer Cauliflower Buffalo Bites Crispy Snack Recipe
Looking for a delicious snack that’s both crispy and spicy? You’ll love these Air Fryer Cauliflower Buffalo Bites! With just a few simple ingredients,…