Latest & Greatest
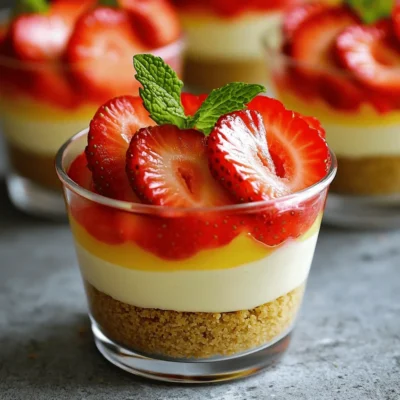
No-Bake Strawberry Cheesecake Cups Easy Dessert Treat
Are you craving a sweet treat that’s easy to whip up? No-Bake Strawberry Cheesecake Cups are your perfect answer. This
Read more…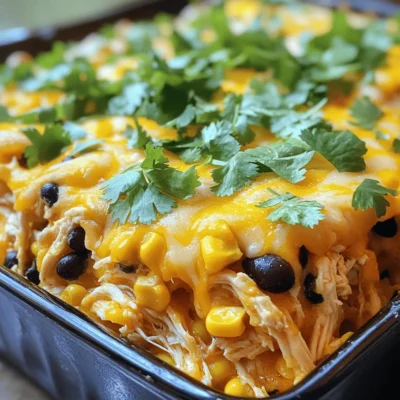
Tex Mex Chicken Casserole Simple and Tasty Meal
Looking for a quick and tasty meal? You’ll love this Tex Mex Chicken Casserole! It’s a simple dish packed with
Read more…
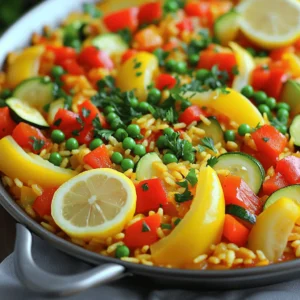
Avocado Cilantro Lime Rice Flavorful and Fresh Side
If you’re looking for a fresh and tasty side dish, Avocado Cilantro Lime Rice is your answer. This flavor-packed dish
Read more…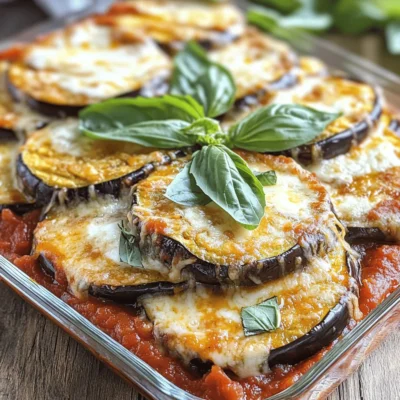
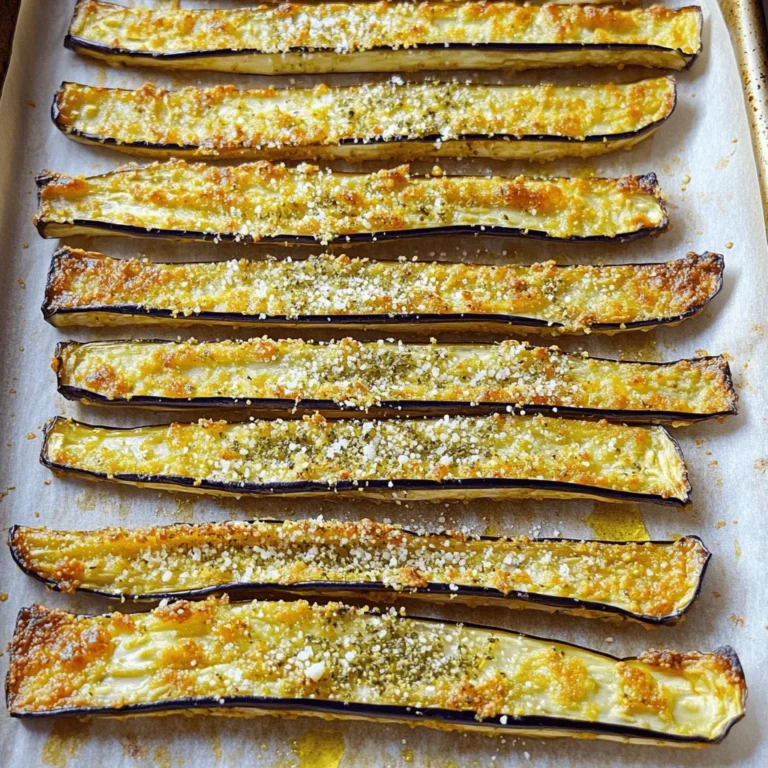
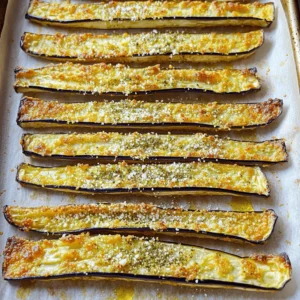
Crispy Baked Eggplant Parmesan Delicious and Simple Dish
If you’re craving a tasty dish that’s easy to make, you’ll love my Crispy Baked Eggplant Parmesan. With layers of
Read more…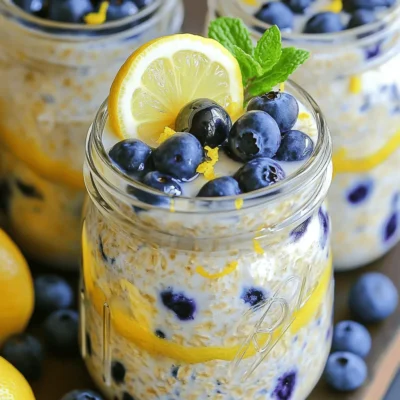
Lemon Blueberry Overnight Oats Energizing Breakfast Idea
Looking for a quick and tasty breakfast? My Lemon Blueberry Overnight Oats are the perfect solution! This energizing meal combines
Read more…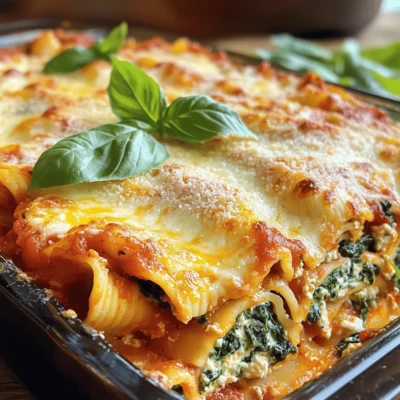
Baked Ziti with Spinach and Ricotta Simple Dinner Delight
If you’re looking for a cozy dinner that warms the heart, you’ve found it! My Baked Ziti with Spinach and
Read more…
Crispy Buffalo Tofu Wraps Healthy and Flavorful Bite
Looking for a tasty and healthy meal? Crispy Buffalo Tofu Wraps deliver bold flavor in every bite! Made with simple
Read more…
Grilled Pineapple Chicken Skewers Flavorful Delight
If you’re looking for a tasty dinner idea, you’ve found it! Grilled Pineapple Chicken Skewers combine juicy chicken, sweet pineapple,
Read more…browse recipes


![The key ingredients for these cookies create a rich, warm flavor. You will need: - 1 cup canned pumpkin puree - 1 cup brown sugar, packed - 1/2 cup granulated sugar - 1/2 cup unsalted butter, softened - 1 large egg - 1 teaspoon vanilla extract - 2 cups all-purpose flour - 1 teaspoon baking soda - 1 teaspoon baking powder - 1 teaspoon ground cinnamon - 1/2 teaspoon ground nutmeg - 1/2 teaspoon ground ginger - 1/2 teaspoon salt - 1 cup semi-sweet chocolate chips Using canned pumpkin puree is key. It is smooth and consistent. This gives your cookies a perfect texture. Fresh pumpkin can work, but it may not blend as well. Canned puree also adds moisture and flavor without being too watery. I use both brown and granulated sugar in this recipe. Brown sugar keeps the cookies soft and chewy. Granulated sugar adds a bit of crispness to the edges. The mix of these sugars makes each bite delightful. You can customize your cookies with some fun extras: - Additional spices like cloves or allspice - Different types of chocolate chips, like dark or white - Chopped nuts, like walnuts or pecans - Dried fruits, like cranberries or raisins Adding spices like cloves can enhance the flavor. You can also try different chocolate chips for variety. Dark chocolate adds a richer taste, while white chocolate can make it sweeter. If you like crunch, nuts are a great choice. Dried fruits can add a lovely chewiness and sweetness. Get creative! These options let you make the cookies your own. Just remember, the base recipe is perfect on its own, too. For the full recipe, check out the details in the article. To start, you need to preheat your oven to 350°F (175°C). This step is key. A hot oven helps the cookies rise and bake evenly. While the oven warms up, grab a baking sheet. I always line mine with parchment paper. This keeps the cookies from sticking. It also makes for an easy cleanup. Next, we will mix the wet and dry ingredients. In a large bowl, cream together the softened butter, brown sugar, and granulated sugar until it's light and fluffy. This process adds air to the mixture, making your cookies soft. Once that’s done, add the canned pumpkin puree, a large egg, and vanilla extract. Mix it all well until combined. Now, take another bowl for the dry ingredients. Whisk together the all-purpose flour, baking soda, baking powder, cinnamon, nutmeg, ginger, and salt. This step helps distribute the leavening agents and spices evenly. Gradually add this dry mix to your wet ingredients. Mix until just combined; be sure not to overmix. Overmixing can lead to tough cookies. Now it’s time to bake the cookies. Use a cookie scoop or a spoon to drop rounded tablespoons of dough onto the lined baking sheet. Make sure to space them about 2 inches apart. This allows them room to spread. Pop the baking sheet in the preheated oven. Bake for 10-12 minutes. You want the edges to turn lightly golden. The centers can look a bit underbaked, but that’s okay. They will harden as they cool. Once done, let the cookies sit on the baking sheet for 5 minutes. Then, transfer them to a wire rack to cool completely. For the full recipe, check out the details above! To get the best texture for your cookies, avoid overmixing the dough. When you add the dry ingredients to the wet ones, mix just until you see no flour. Overmixing makes the cookies tough. Your baking conditions also matter. Bake at 350°F (175°C) for chewy cookies. Watch for the edges turning golden. The centers may look soft, but they will firm up as they cool. You can swap out butter and milk for dairy-free options. Use coconut oil instead of butter. For milk, try almond or oat milk. These swaps keep the flavor rich and delicious. If you need a gluten-free option, use a gluten-free flour blend. It works well in this recipe. Just make sure it has xanthan gum to help with the texture. If your cookies spread too much, chill the dough for 30 minutes before baking. This helps keep their shape. You can also add a bit more flour to the dough. For dry or crumbly cookies, check your butter's temperature. It should be soft but not melted. If the dough feels too dry, add a splash of milk or extra pumpkin puree. This will help keep your cookies moist and tasty. For the full recipe, visit the [Full Recipe]. {{image_2}} You can change the flavors of your cookies with fun add-ins. Adding cranberries gives a tart burst. White chocolate chips add a sweet twist. Both options pair well with pumpkin. For a crunch, try adding nuts or seeds. Pecans or walnuts add texture. Sunflower seeds offer a nut-free choice. Get creative with spices! You can add a pinch of allspice or cloves. Each spice adds its own warmth. Want to try something different? Make Pumpkin Spice Chocolate Chip Cookies. Just mix in more pumpkin spice for an extra kick. The result is a cookie packed with fall flavor. You can make your cookies healthier too! First, cut back on sugar. You can also swap in honey or maple syrup. These options bring natural sweetness. If you want a vegan treat, replace the egg with a flax egg. This easy swap keeps your cookies soft. To keep your pumpkin chocolate chip cookies fresh, store them in an airtight container. Place parchment paper between layers to avoid sticking. Keep the container at room temperature, away from sunlight. This helps them stay soft and tasty for longer. If you want them even fresher, add a slice of bread to the container. The bread helps keep the cookies moist. You can freeze cookie dough or baked cookies for later use. To freeze raw dough, scoop cookie portions onto a baking sheet. Freeze them until solid, then transfer them to a freezer bag. This keeps them from sticking together. For baked cookies, let them cool completely first. Then, place them in an airtight container or freezer bag. When you want to enjoy them, just thaw the cookies at room temperature. When stored correctly, these cookies last about one week at room temperature. If you store them in the fridge, they can stay fresh for about two weeks. Always check for signs of spoilage. Look for mold or an off smell. If the cookies feel dry or crumbly, it’s time to toss them out. Enjoying them fresh is best! For the full recipe, check out the Pumpkin Spice Chocolate Chip Cookies. Yes, you can use fresh pumpkin. Fresh pumpkin gives a bright taste. However, it takes more time to prepare. You must cook and puree it first. Canned pumpkin is easy and ready to use. It also has a consistent texture. If you're short on time, go for canned. Check the edges of the cookies. They should look light golden brown. The centers may still look soft. This is fine; they will firm up as they cool. You can also gently touch the top. If it springs back, they are done. Trust your eyes and your touch! Yes, you can make the dough ahead of time! Store it in an airtight container. Keep it in the fridge for up to three days. You can also freeze it for longer. Just scoop the dough onto a baking sheet and freeze. Once firm, store the balls in a bag. When you're ready, bake them straight from the freezer. It’s that easy! You now have a complete guide for making delicious pumpkin chocolate chip cookies. You learned about the best ingredients, step-by-step instructions, and helpful tips. Customizing cookies and exploring variations adds fun to baking. Proper storage ensures your cookies stay fresh and tasty. Remember, experimenting is key. Whether you share them or enjoy them solo, these cookies bring joy. Dive into your baking adventure, and enjoy every bite!](https://recipespursuit.com/wp-content/uploads/2025/05/46206f22-e093-4a96-9a14-6e70abd9591a.webp)
Pumpkin Chocolate Chip Cookies Delightful and Easy Recipe
Craving a festive treat that’s easy to whip up? Look no further! This Pumpkin Chocolate Chip Cookie recipe blends warm spices and sweet chocolate…
My Latest Desserts
My Latest Recipes

hey,
i’m !
I’m so happy you’re here!
Cooking is my love language, and I’m excited to share my best dishes with you. Hope they become your favorites too! Let’s enjoy every bite of this journey together.


![For a delicious serving of zucchini noodles with pesto, you'll need these items: - 3 medium zucchinis - 1 ripe avocado - 1 cup fresh basil leaves - 1/4 cup walnuts - 2 tablespoons lemon juice - 2 tablespoons olive oil - 1 clove garlic, minced - Salt and pepper to taste To enhance your dish, consider these toppings: - Cherry tomatoes, halved - Grated Parmesan cheese (optional) These garnishes add color and flavor that brighten up your meal. If you don't have certain items, here are some swaps: - Use pine nuts instead of walnuts for a different taste. - If you lack fresh basil, try spinach or arugula as alternatives. - For a nut-free option, use sunflower seeds in the pesto. - Instead of lemon juice, lime juice works well too. Feel free to mix and match based on what you have! The full recipe can guide you through this simple yet tasty dish. To start, grab three medium zucchinis. Using a spiralizer or a julienne peeler, turn those zucchinis into noodles. Place the noodles in a colander. Sprinkle them lightly with salt. This helps to draw out excess moisture. Let them sit for about 15 to 20 minutes. The salt will work its magic. After 20 minutes, rinse the noodles under cold water. Pat them dry with a paper towel. This step keeps your dish from being too watery. While the zucchini noodles drain, it's time to make the avocado pesto. Take one ripe avocado and scoop it into a food processor. Add one cup of fresh basil leaves, one-fourth cup of walnuts, and two tablespoons of lemon juice. Pour in two tablespoons of olive oil and add one clove of minced garlic. Blend everything until it's smooth. Taste the mixture and add salt and pepper as needed. If the pesto is too thick, add a bit more olive oil until you like the texture. This creamy pesto makes the dish sing. Once the zucchini noodles are dry, it's time to combine everything. In a large bowl, add the zucchini noodles and the avocado pesto. Toss gently until all the noodles are coated well. Now for the fun part—plating! Serve the noodles on a nice plate. Garnish with halved cherry tomatoes on top. If you like, sprinkle some grated Parmesan cheese for extra flavor. Serve immediately, and enjoy the fresh taste of this delightful dish. You can follow the [Full Recipe] for more details. To make perfect zucchini noodles, start with fresh, firm zucchinis. Use a spiralizer or julienne peeler. Spiralize the zucchinis directly into the bowl. Aim for long, thin strands. After spiralizing, place the noodles in a colander. Sprinkle them with salt to draw out the moisture. Let them sit for about 15 to 20 minutes. Rinse the noodles under cold water and pat them dry. This process helps keep your dish from becoming soggy. For the best pesto, use a food processor. Combine ripe avocado, fresh basil, walnuts, lemon juice, olive oil, and minced garlic. Blend until smooth, but don’t over-blend. You want a bit of texture in your pesto. If it’s too thick, add a little more olive oil. Taste and adjust with salt and pepper as needed. This balancing act is key to a bright, flavorful pesto that brings your dish to life. To make your zucchini noodles pop, add fresh ingredients. Halved cherry tomatoes add a nice touch. They bring sweetness and color to the dish. A sprinkle of grated Parmesan cheese can enhance the taste, too. For extra crunch, consider adding pine nuts or sunflower seeds. You could also serve the dish with a side of grilled chicken or shrimp for protein. These simple additions can elevate your meal without much effort. {{image_2}} Zucchini noodles fit well into both Paleo and Whole30 diets. These diets focus on whole foods. For a tasty twist, use nuts like pecans in your pesto. You can also swap olive oil for avocado oil for a different flavor. Make sure to skip any cheese to keep it compliant. For a vegan version, the avocado is your best friend. It adds creaminess without dairy. You can replace walnuts with sunflower seeds in the pesto. Sunflower seeds offer a nice crunch and a different taste. Consider adding nutritional yeast for a cheesy flavor without the dairy. If you want to make your dish heartier, add proteins. Grilled chicken or shrimp pairs well with this dish. You can toss cooked quinoa or chickpeas into the noodles for extra protein. For a vegetarian option, try adding tofu or tempeh. These options will keep your meal filling and satisfying. For the complete cooking experience, check the Full Recipe. To keep leftover zucchini noodles fresh, place them in an airtight container. You can store them in the fridge for up to two days. Avoid adding sauce until you're ready to eat. This keeps the noodles from getting too soggy. If you notice excess moisture, gently pat them dry with a paper towel before storing. Store your leftover pesto in a small jar or container. Make sure to cover the surface with a thin layer of olive oil. This helps prevent browning. You can keep it in the fridge for about a week. For longer storage, freeze it in ice cube trays. Once frozen, transfer the cubes to a freezer bag. This way, you can enjoy fresh pesto anytime. When reheating zucchini noodles, use a skillet over medium heat. Add a splash of olive oil to prevent sticking. Heat them for just a few minutes until warm. Avoid overcooking, as they can become mushy. For pesto, gently warm it in a small pan. Stir constantly to keep the texture smooth. Enjoy the fresh taste every time! Yes, you can use regular pasta in this dish. Zucchini noodles are a great low-carb option. They provide a fresh taste and unique texture. If you prefer pasta, choose your favorite type. Cook it according to the package instructions. Serve the pesto over the cooked pasta instead of zucchini noodles. Enjoy the same flavorful sauce with a different twist. Zucchini noodles last about 2 to 3 days in the fridge. Store them in an airtight container. Keep in mind, they may lose some crunch over time. To extend their life, avoid adding the pesto until you're ready to eat. If they get too soft, you can still use them in soups or stews. You can substitute walnuts with pine nuts or sunflower seeds. Both give a nice flavor and texture. If you want a nut-free option, try using hemp seeds. These options work well in the avocado pesto. Just blend them like you would with walnuts. This way, you keep the creamy texture and rich taste. For the full recipe, you can refer to the Zesty Zucchini Noodles with Avocado Pesto. This blog post covered everything you need for a delicious zucchini noodle dish. We explored the key ingredients, prepared the avocado pesto, and combined them to create a fresh meal. I shared tips for perfect noodles and clever serving ideas. You can even adapt the dish to fit your diet. Lastly, I explained how to store leftovers for another day. Use this knowledge to enjoy healthy eating with ease and creativity. Don’t hesitate to experiment and make this dish your own!](https://recipespursuit.com/wp-content/uploads/2025/04/d809c1f9-b3f3-42d5-acc8-9eea95e43f70-300x300.webp)
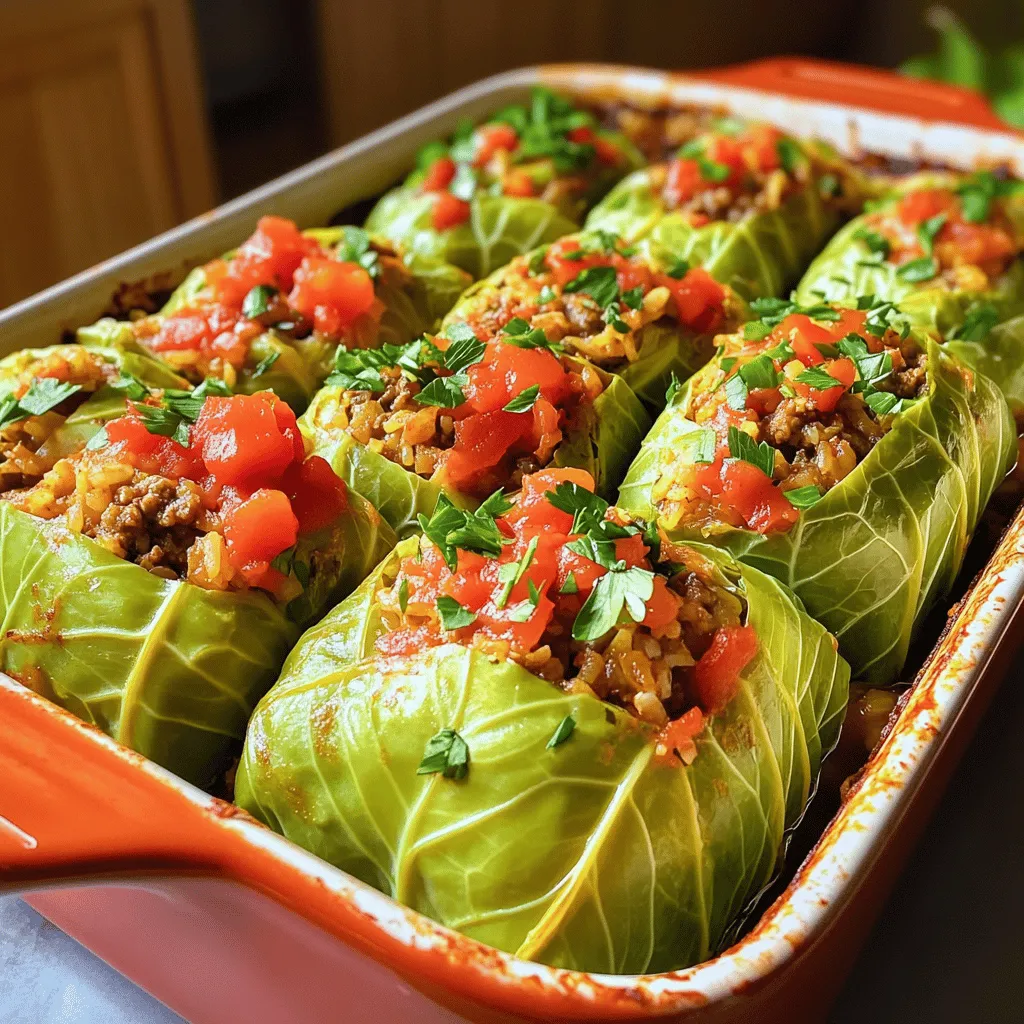
Classic Stuffed Cabbage Rolls Flavorful Family Meal
Are you ready to create a meal that warms hearts and brings families together? Classic stuffed cabbage rolls are a delightful dish that offers…