
Latest & Greatest

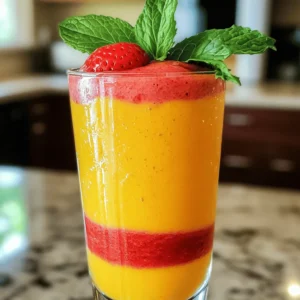
Coconut Lime Energy Balls Energize Your Snack Time
Are you looking for a quick, tasty snack that boosts your energy? Coconut Lime Energy Balls are your perfect answer!
Read more…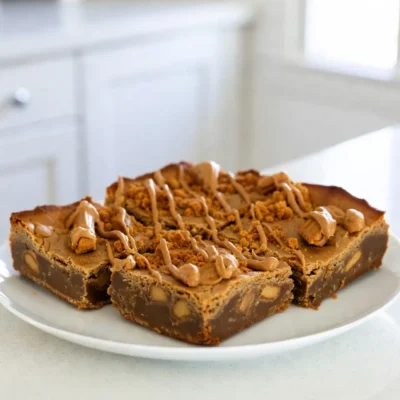
Biscoff Cookie Butter Blondies Easy and Delicious Treat
Get ready to satisfy your sweet tooth with Biscoff Cookie Butter Blondies! These treats blend rich flavors and soft textures
Read more…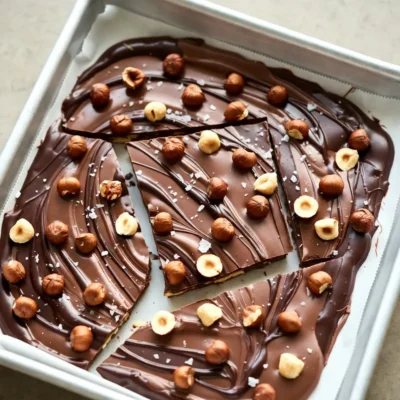
Chocolate Hazelnut Bark Simple and Tasty Treat
Are you ready to indulge in a quick, simple treat that bursts with flavor? My Chocolate Hazelnut Bark combines rich
Read more…
Creamy Tomato Tortellini Skillet Simple and Quick Meal
If you need a quick dinner that’s both tasty and satisfying, this Creamy Tomato Tortellini Skillet is your answer! Made
Read more…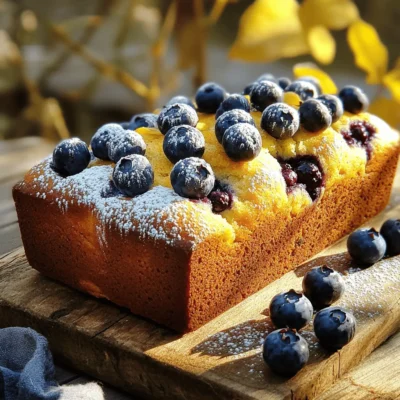
Blueberry Lemon Yogurt Bread Simple and Tasty Recipe
Looking for a tasty treat that’s easy to make? I’ve got you covered with my Blueberry Lemon Yogurt Bread recipe!
Read more…
Honey Garlic Salmon Bites Air Fryer Delightful Treat
If you’re looking for a quick and tasty dish, try my Honey Garlic Salmon Bites in the air fryer. These
Read more…
Creamy Cauliflower Alfredo Fettuccine Simple Dish
Craving a warm, creamy dish that’s easy to make? Look no further than Creamy Cauliflower Alfredo Fettuccine! This recipe takes
Read more…
Sweet Chili Lime Grilled Chicken Kebabs Recipe Delight
Fire up your grill! These Sweet Chili Lime Grilled Chicken Kebabs are a game-changer for your summer cookouts. With a
Read more…browse recipes


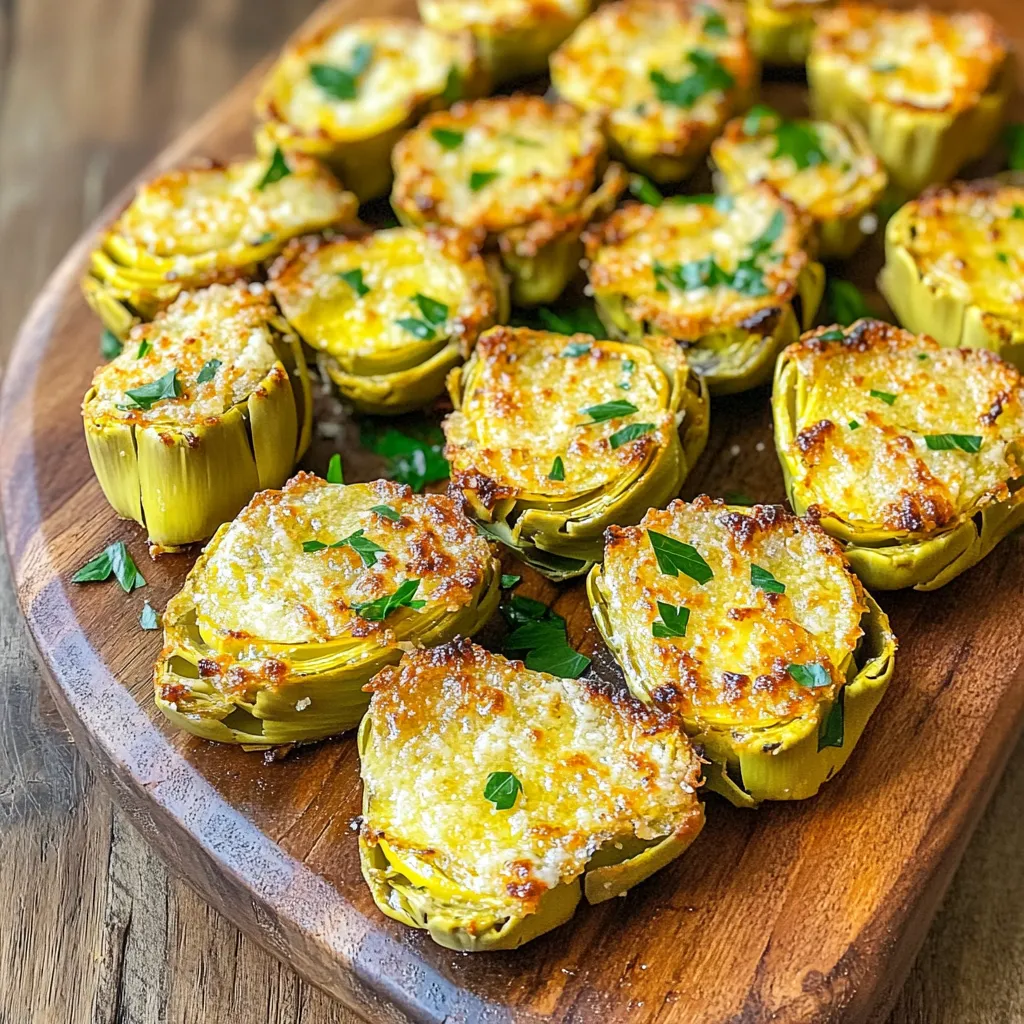
Air Fryer Garlic Parmesan Artichoke Hearts Delight
Looking for a tasty and easy snack? You’ll love these Air Fryer Garlic Parmesan Artichoke Hearts! They’re crispy, full of flavor, and perfect for…
My Latest Desserts
My Latest Recipes

hey,
i’m !
I’m so happy you’re here!
Cooking is my love language, and I’m excited to share my best dishes with you. Hope they become your favorites too! Let’s enjoy every bite of this journey together.


![To make these vegan sweet potato brownies, you will need: - 1 cup sweet potato puree - 1/2 cup almond butter - 1/3 cup maple syrup - 1 teaspoon vanilla extract - 1/2 cup cocoa powder - 1/4 teaspoon baking soda - 1/4 teaspoon salt - 1/2 cup oat flour - 1/4 cup dark chocolate chips Sweet potato puree adds moistness and a hint of sweetness. Almond butter gives a creamy texture and rich flavor. Maple syrup acts as a natural sweetener, while vanilla extract enhances the overall taste. Cocoa powder brings that rich chocolate flavor we all love. Baking soda helps the brownies rise, and salt balances the sweetness. Oat flour adds structure, and dark chocolate chips provide delightful bursts of chocolate. If you don’t have some ingredients, you can swap them out. Here are some ideas: - Instead of almond butter, use peanut butter or sunflower seed butter. - You can replace maple syrup with agave syrup or another liquid sweetener. - If you lack cocoa powder, try carob powder for a different flavor. - For oat flour, simply blend rolled oats into a fine powder. These substitutes keep the brownies tasty and vegan-friendly. Each ingredient in these brownies brings health benefits: - Sweet potato: High in vitamins A and C, great for your skin and vision. - Almond butter: Packed with protein, healthy fats, and vitamin E. - Maple syrup: Contains antioxidants and helps with energy. - Vanilla extract: May have calming effects and boosts flavor. - Cocoa powder: Rich in antioxidants and can improve heart health. - Baking soda: Helps with digestion and balances pH levels. - Salt: Needed in small amounts for hydration and nerve function. - Oat flour: High in fiber, supports digestion, and lowers cholesterol. - Dark chocolate chips: Good source of antioxidants and may improve mood. These ingredients make your brownies not just delicious but also nutritious. Check the Full Recipe for more details on how to create these sweet treats! To start, you need sweet potato puree. Just cook one medium sweet potato. You can bake, steam, or boil it until soft. After cooling, mash it until smooth. This puree gives the brownies a sweet taste and a rich texture. You can make extra puree and use it in other dishes, like soups or smoothies. In a big bowl, mix the sweet potato puree with almond butter. Then add maple syrup and vanilla extract. Stir until it looks smooth. Next, sift in cocoa powder, baking soda, and salt. Mix everything together. Now, slowly add oat flour. Stir until it blends well. Finally, fold in vegan chocolate chips. This step makes the brownies extra yummy. Preheat your oven to 350°F (175°C). Grease an 8x8 inch baking dish or use parchment paper. Pour the brownie batter into the dish and spread it evenly. Bake for 25-30 minutes. Check if they are done by inserting a toothpick. If it comes out clean or with a few crumbs, they are ready. Let them cool in the pan for about 10 minutes. After that, move them to a wire rack to cool fully. This helps keep them soft and chewy. For the full recipe, refer back to the ingredients section for details. To get that perfect brownie texture, use the right sweet potato puree. I recommend using fresh sweet potatoes. Steam or bake them until soft, then mash until smooth. This gives a rich, moist brownie. Avoid overmixing the batter. Stir just until the flour blends in. This helps keep your brownies fudgy and not cake-like. Once your brownies cool, you can store them easily. Place them in an airtight container. Keep them at room temperature for up to three days. If you want to store them longer, pop them in the fridge. They can last up to a week this way. For longer storage, wrap them tightly in foil and freeze. They can stay fresh for up to three months. Just thaw them in the fridge when you're ready to enjoy again. You don’t need fancy tools to make these brownies. Here are some essentials: - Mixing bowls - Measuring cups and spoons - A spatula for mixing - An 8x8 inch baking dish - Parchment paper for easy removal - A whisk to blend the ingredients Using these tools makes baking fun and easy. Enjoy your time in the kitchen! For the full recipe, check out the earlier section. {{image_2}} You can make these vegan sweet potato brownies gluten-free. Just use oat flour made from certified gluten-free oats. This swap keeps the brownies soft and flavorful. You can also use almond flour for a nutty taste. Both options work great for a gluten-free treat. If you want a sugar-free version, try using mashed bananas or unsweetened applesauce instead of maple syrup. These fruits add natural sweetness and moisture. You can also use a sugar substitute like stevia or erythritol. Make sure to adjust the amount based on the product instructions. Feel free to get creative with add-ins. You can mix in nuts like walnuts or pecans for crunch. Dried fruits, like cranberries or raisins, add a nice chew. Want something special? Add a pinch of cinnamon or a dash of espresso powder. Both enhance the chocolate flavor beautifully. For a richer taste, try adding peanut butter swirls right before baking. Each variation brings a new twist to your brownies. For the full recipe, check back for the complete details! To keep your vegan sweet potato brownies fresh, store them in an airtight container. Place parchment paper between layers to prevent sticking. This helps maintain their soft texture. You can keep them at room temperature for up to three days. If you prefer, you can also store them in the fridge for a cooler treat. If you want to save some brownies for later, freezing is a great option. First, let the brownies cool completely. Then, cut them into squares. Wrap each piece in plastic wrap and place them in a freezer-safe bag. They can last up to three months in the freezer. When you're ready to enjoy, simply thaw them at room temperature or heat them in the microwave for a few seconds. When stored correctly, vegan sweet potato brownies can last about a week in the fridge. They may get a bit firmer due to the cold, but a quick trip to the microwave can bring back their gooey goodness. Enjoy them as a snack or dessert anytime! Don't forget to check out the Full Recipe for more tips. Yes, you can substitute sweet potato in this recipe. You can use pumpkin puree or even ripe bananas. Each option changes the flavor but keeps the brownies moist. Sweet potatoes add a unique taste and texture. If you choose pumpkin, the brownies will be softer. Bananas will add natural sweetness. Just make sure to use the same amount as the sweet potato puree. To make these brownies more cake-like, you can add a bit of baking powder instead of baking soda. Start with 1/2 teaspoon of baking powder. This change helps the brownies rise more. You can also mix in an extra 1/4 cup of oat flour. This will make the texture lighter and fluffier. If you want, adding a bit of almond milk can help with moisture. Yes, vegan sweet potato brownies are generally healthier than regular brownies. They have less sugar and more nutrients from the sweet potatoes. Sweet potatoes are rich in vitamins and fiber. Using nut butter instead of butter adds healthy fats. The cocoa powder gives antioxidants, too. Overall, these brownies provide better nutrition while still being a tasty treat. For the full recipe, check out the [Full Recipe]. Vegan sweet potato brownies are a tasty, healthy treat. We explored their key ingredients, substitutes, and nutrition. You learned step-by-step how to make them, tips for perfecting the texture, and storing them properly. I also covered variations like gluten-free and sugar-free options. Remember, these brownies can fit many diets and still be delicious. Enjoy experimenting with flavors and have fun baking!](https://recipespursuit.com/wp-content/uploads/2025/07/e2a289de-6c15-4df2-831a-78564a17a28c-300x300.webp)
Lemon Blueberry Pancakes Delicious and Easy Recipe
If you’re craving a sweet and zesty breakfast, you need to try my Lemon Blueberry Pancakes! They’re light, fluffy, and packed with fruity flavor.…

