Latest & Greatest
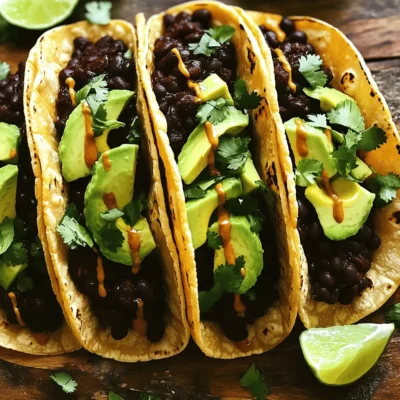
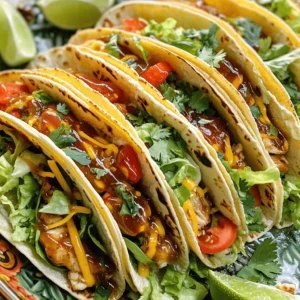
Spicy Chipotle Black Bean Tacos Healthy Flavor Burst
If you’re craving a simple yet exciting meal, you’ve come to the right place! Spicy Chipotle Black Bean Tacos pack
Read more…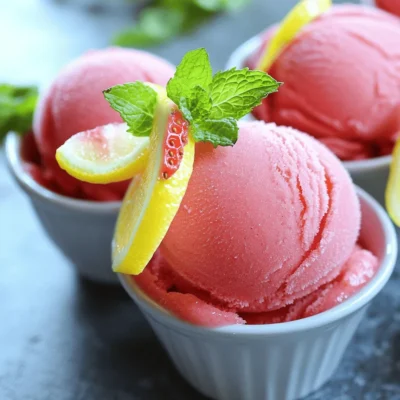
Strawberry Lemonade Sorbet Refreshing Summer Treat
Looking for a cool dessert to beat the summer heat? You’ve found it! Strawberry Lemonade Sorbet is simple to make
Read more…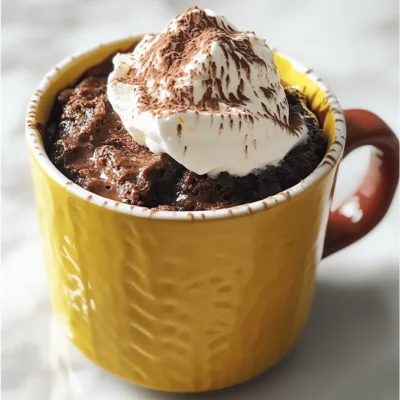
Peanut Butter Chocolate Mug Cake Easy and Quick Delight
Craving a sweet, warm treat in just minutes? I present to you the Peanut Butter Chocolate Mug Cake! This easy
Read more…
Honey Mustard Chicken Thighs Savory and Simple Recipe
Are you ready to elevate your dinner game with a dish that’s both savory and simple? Honey Mustard Chicken Thighs
Read more…
Air Fryer Cinnamon Sugar Donut Holes Sweet Delight
Indulge your sweet tooth with my easy recipe for Air Fryer Cinnamon Sugar Donut Holes. These bite-sized treats are fluffy,
Read more…
Roasted Garlic Parmesan Brussels Sprouts Delight
Welcome to Roasted Garlic Parmesan Brussels Sprouts Delight! If you think Brussels sprouts are boring, think again! I’ll show you
Read more…
White Chocolate Cranberry Cookies Easy and Tasty Treat
Looking for a quick treat that combines sweet and tart? These White Chocolate Cranberry Cookies are a perfect match! With
Read more…
Garlic Butter Lobster Tails Air Fryer Delight Recipe
If you’re craving a seafood treat, you’re in the right place! This Garlic Butter Lobster Tails Air Fryer Delight Recipe
Read more…browse recipes

Loaded Sheet Pan Nachos Flavorful and Easy Recipe
Are you ready to take your nacho game to the next level? My Loaded Sheet Pan Nachos recipe is all about big flavor and…
My Latest Desserts
My Latest Recipes
hey,
i’m !
I’m so happy you’re here!
Cooking is my love language, and I’m excited to share my best dishes with you. Hope they become your favorites too! Let’s enjoy every bite of this journey together.
Spicy Chicken Lettuce Wraps Tasty and Simple Recipe
Ready to spice up your meals? My Spicy Chicken Lettuce Wraps are not just tasty; they’re simple to make! In this recipe, you’ll find…
![To make the best spicy chicken lettuce wraps, you need fresh and tasty ingredients. Here’s what you will need: - 1 pound ground chicken - 2 tablespoons soy sauce - 2 teaspoons sesame oil - 1 tablespoon sriracha (adjust to taste) - 1 tablespoon fresh ginger, grated - 2 cloves garlic, minced - 1 red bell pepper, diced - 1 cup carrots, grated - 1 green onion, chopped - 1 tablespoon honey - 1 tablespoon rice vinegar - Salt and pepper to taste - 1 head of butter or romaine lettuce, leaves separated These ingredients provide a perfect mix of flavor and texture. The ground chicken gives protein, while the veggies add crunch and color. You can make your wraps even better with these fun additions: - Chopped cilantro - Lime wedges These garnishes add freshness and a zesty kick to your wraps. You can also try adding sliced jalapeños for more heat or crushed peanuts for crunch. To cook your spicy chicken lettuce wraps, you will need some basic tools. Here’s a quick list: - A large frying pan - A spatula for stirring - Measuring spoons - A cutting board and knife Having these tools ready will help you cook easily and quickly. For the full recipe, check out the [Full Recipe]. To make spicy chicken lettuce wraps, start by heating 2 tablespoons of sesame oil in a pan over medium heat. Once the oil is hot, add 1 pound of ground chicken. Cook it for about 5 to 7 minutes, stirring often. You want the chicken to turn white and no longer be pink. Next, add 2 cloves of minced garlic, 1 tablespoon of grated fresh ginger, and 1 diced red bell pepper. Cook for another 2 to 3 minutes. The peppers should soften but not lose their color. Now, mix the sauce. In a small bowl, whisk together 2 tablespoons of soy sauce, 1 tablespoon of sriracha, 1 tablespoon of honey, and 1 tablespoon of rice vinegar. Pour this sauce over the chicken mixture in the pan. Stir well and let it cook for another 1 to 2 minutes. Season with salt and pepper. Finally, stir in 1 cup of grated carrots and 1 chopped green onion. Heat them for about a minute. Once done, take the pan off the heat. Prepare your lettuce wraps by placing a spoonful of the chicken mix onto each lettuce leaf. Garnish with chopped cilantro and serve with lime wedges. For the full recipe, you can check the details above. To cook quickly, prepare all your ingredients first. Chop the veggies and measure out the sauces. This way, you won't waste time searching for items while cooking. Use a non-stick pan to reduce sticking and make cleanup easier. Keep your heat at medium; this helps cook the chicken evenly without burning anything. You can make these wraps in different ways. A stovetop pan works well, but you can also use a skillet for more surface area. If you prefer, try grilling the chicken in a grill pan for a smoky flavor. You can even bake the chicken mixture in the oven if you want a hands-off approach. Just mix the ingredients in a baking dish and let it cook until done. To make the best spicy chicken lettuce wraps, use fresh ingredients. Fresh herbs and veggies add great flavor. Always cook the chicken until it's no longer pink. This helps avoid any health risks. Stir often to keep everything from sticking. This ensures even cooking and great taste. Make sure to taste as you go. This lets you adjust flavors. If you want more sauce, feel free to add more soy sauce or sriracha. A balance of flavors makes the dish shine. For a lovely crunch, add the carrots last. This keeps them crisp and fresh. Spice levels can change based on your taste. If you love heat, add more sriracha. If you prefer it milder, reduce the sriracha amount. You can also try other sauces, like sweet chili. This can bring a different flavor without too much heat. To really customize your wraps, consider adding sliced jalapeños. They add a nice kick. Another option is to use crushed red pepper flakes. Start small and add more until it suits your taste. One common mistake is overcooking the chicken. If you cook it too long, it can get dry. Always check for doneness but remove it from the heat as soon as it’s done. Don’t forget the seasoning. If you skip salt and pepper, the dish may taste bland. Also, be careful with how you handle the lettuce. If you tear the leaves, they won't hold the filling well. Finally, don't pack the wraps too tightly. This can make them messy to eat. Instead, fill them lightly, allowing room for the flavors to shine. Follow these tips, and you’ll have a delicious meal that is fun to eat! For the complete cooking method, check the Full Recipe. {{image_2}} You can switch the ground chicken for other meats. Ground turkey or beef works well. If you want a different taste, try diced shrimp or pork. Each protein gives a unique flavor to your lettuce wraps. Just adjust the cooking time to make sure it's cooked through. For a vegetarian or vegan option, use mushrooms or tofu instead of chicken. Mushrooms add a nice texture and umami flavor. Tofu absorbs the sauces well and takes on great taste. Press the tofu to remove excess water. Then, crumble or cube it before cooking. This makes it easy to mix into the wrap. Adding different sauces can change the whole dish. Try hoisin sauce for a sweet, savory touch. Peanut sauce can bring a nutty flavor that many enjoy. For a spicy kick, add extra sriracha or chili paste. You can even mix in some lime juice for a zesty twist. Each sauce enhances the dish and makes it fun to try new tastes. For more details, check the Full Recipe to explore all the ingredients and steps. After you enjoy your spicy chicken lettuce wraps, store the leftovers right away. Place them in an airtight container. This keeps the chicken fresh and tasty. You can refrigerate them for up to three days. Make sure to separate the chicken from the lettuce leaves. This helps the lettuce stay crisp. If you want to keep your wraps longer, freezing is a great option. First, let the chicken cool completely. Then, pack it in freezer-safe bags or containers. Try to remove as much air as possible. You can freeze the chicken for up to three months. Just remember, do not freeze the lettuce leaves. They won't taste good after thawing. When you're ready to eat the leftovers, reheating is key. You can use a microwave or stovetop. If using a microwave, place the chicken in a bowl. Heat it for about one to two minutes, stirring halfway. If you use the stovetop, heat a pan over medium heat. Add the chicken and stir until it’s warm, about five minutes. Serve the reheated chicken in fresh lettuce leaves for the best flavor. For extra zest, add lime juice or more sriracha. Enjoy! The best types of lettuce for wraps are butter lettuce and romaine. Butter lettuce has soft, flexible leaves that hold the filling well. Romaine lettuce has a nice crunch and sturdy structure. Both types keep the filling secure and add a fresh taste. Yes, you can prepare spicy chicken lettuce wraps ahead of time. Cook the chicken mixture and store it in the fridge. Just keep the lettuce leaves separate. When you're ready to eat, assemble them fresh. This makes for a quick meal when you're busy. Sides that pair well include rice, steamed veggies, or a simple salad. You could also serve some fresh fruit for a sweet touch. These sides complement the spicy chicken and add variety to your meal. Enjoy your wraps with a cool drink to balance the spice. For the full recipe, check out the ingredients and steps outlined above. Spicy chicken lettuce wraps are easy and fun to make. We explored key ingredients, essential tools, and step-by-step cooking methods. I shared tips to adjust spice levels and avoid common mistakes. You learned about tasty variations and how to store leftovers. These wraps are great for any meal. Try them out, and enjoy your cooking journey!](https://recipespursuit.com/wp-content/uploads/2025/07/0edd09b5-ef80-4a39-a30f-4a324956605d.webp)
