
Latest & Greatest
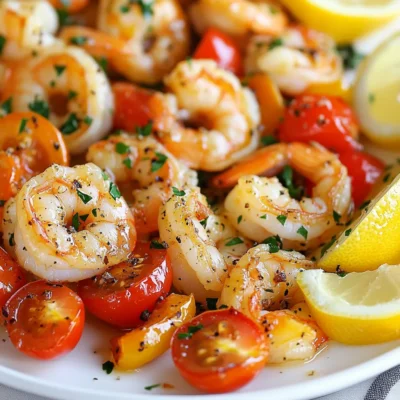
Sheet Pan Lemon Garlic Shrimp Fresh and Easy Meal
Ready to whip up a meal that’s fresh, easy, and bursting with flavor? This Sheet Pan Lemon Garlic Shrimp recipe
Read more…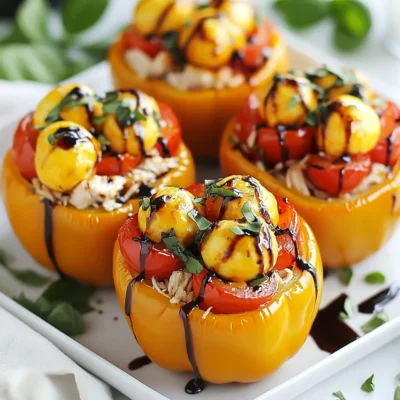
Caprese Chicken Stuffed Peppers Flavorful Delight
Are you ready to spice up your dinner routine? These Caprese Chicken Stuffed Peppers are not only colorful but packed
Read more…
Cajun Shrimp Tacos Simple and Tasty Delight
Looking for a quick, flavorful meal? Cajun shrimp tacos are your answer! These simple delights burst with spice and freshness,
Read more…
Greek Yogurt Lemon Pound Cake Fresh and Flavorful Slice
Ready to bake something fresh and delicious? This Greek Yogurt Lemon Pound Cake is your new go-to treat! With its
Read more…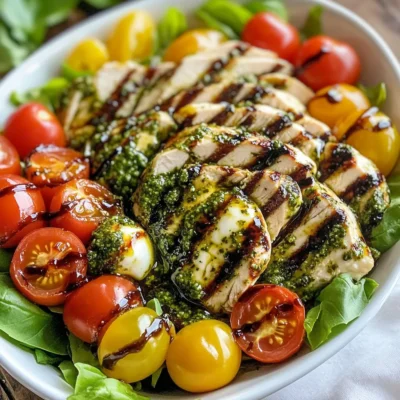
Pesto Chicken Caprese Salad Fresh and Flavorful Dish
Looking for a fresh and tasty meal? This Pesto Chicken Caprese Salad is the answer! Packed with vibrant flavors and
Read more…
Spicy Cajun Shrimp Tacos Flavorful and Easy Meal
Looking to spice up your weeknight dinner? Join me in crafting Spicy Cajun Shrimp Tacos — a dish that packs
Read more…browse recipes

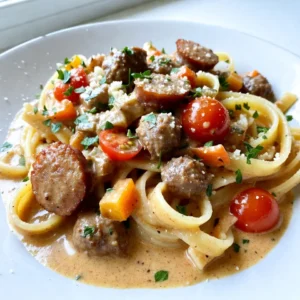
![- 1 cup cookie butter (Biscoff recommended) - 1/2 cup unsalted butter, melted - 1 cup brown sugar, packed To make these blondies, you need soft and sweet ingredients. The cookie butter gives the blondies their unique flavor. I always suggest Biscoff because it has a nice spice. The unsalted butter adds richness. Using melted butter makes mixing easy. Brown sugar is key; it adds moisture and that lovely brown color. - 1/2 cup chocolate chips or butterscotch chips - 1/4 cup crushed cookies for topping Want to make your blondies even more fun? Add chocolate chips or butterscotch chips. They melt and create gooey pockets of sweetness. If you like a bit of crunch, sprinkle crushed cookies on top. This adds texture and looks great. You can mix and match to fit your taste! For the full recipe, check the earlier section. First, preheat your oven to 350°F (175°C). This step warms the oven for even baking. Next, grab a 9x9 inch baking pan. Grease it with butter or line it with parchment paper. Lining helps with easy removal later. In a large mixing bowl, mix 1/2 cup of melted unsalted butter with 1 cup of cookie butter. Stir until they blend well. Now, add 1 cup of brown sugar and 1/4 cup of granulated sugar. Mix these until the blend is smooth and creamy. This step is key for great flavor. In another bowl, whisk together 1 1/2 cups of all-purpose flour, 1/2 teaspoon of baking powder, and 1/4 teaspoon of salt. Gradually add this dry mix to the wet ingredients. Stir until just combined. Avoid overmixing, as this keeps your blondies soft. If you want, fold in 1/2 cup of chocolate chips or butterscotch chips at this point. Pour the batter into the prepared pan and smooth the top with a spatula. Bake for 25 to 30 minutes. Check for doneness with a toothpick. It should come out with a few moist crumbs. Enjoy your delicious creation! For the full details, you can refer to the Full Recipe. To get the best texture, do not overmix the batter. Mixing too much can make blondies tough instead of soft. When you add the flour, mix just until it disappears. This keeps your blondies chewy and light. To check for doneness, look for golden edges. Insert a toothpick into the center. If it comes out with a few moist crumbs, your blondies are ready. If it’s wet, let them bake a bit longer. You can try different cookie butters for unique flavors. Brands like Speculoos or other flavored spreads work well. Each one brings its own twist to the blondie. For extra fun, add mix-ins like nuts or dried fruit. You can also top your blondies with a sprinkle of sea salt or crushed cookies. These little touches make your treats even more special. For the full recipe, be sure to follow the steps carefully to enjoy this delicious sweet delight! {{image_2}} You can change up the flavor of your cookie butter blondies in fun ways. Try using different types of chocolate or nuts. Dark chocolate adds a rich taste, while white chocolate gives a sweet twist. You could also use nuts like walnuts or pecans for crunch and flavor. Adding spices can really elevate your blondies. A dash of cinnamon gives them a warm kick. You could even try nutmeg or ginger for a unique twist. Experimenting with flavors makes each batch special. If you need gluten-free blondies, you can swap regular flour for gluten-free flour. Almond flour works well and adds a nice nutty flavor. Just make sure to check the brand for baking instructions. For a vegan option, replace the butter with coconut oil or a vegan butter substitute. You can also use flax eggs instead of chicken eggs. Mix one tablespoon of flaxseed meal with three tablespoons of water. Let it sit until it thickens. This will help bind your blondies without using eggs. These small changes can help everyone enjoy cookie butter blondies! Check out the Full Recipe for all the details. To keep your cookie butter blondies fresh, store them in an airtight container. Place them in the pantry away from heat and light. They stay good for about a week. If you want them to last longer, consider refrigerating them. Wrap each blondie in plastic wrap before placing them in the fridge. This helps keep them moist and tasty. Freezing your blondies is a great way to save them for later. Here’s how: 1. Cool Completely: Allow the blondies to cool fully before freezing. 2. Cut and Wrap: Cut them into squares. Wrap each piece tightly in plastic wrap. This keeps them from getting freezer burn. 3. Place in a Bag: Put the wrapped blondies in a freezer-safe bag. Squeeze out as much air as you can before sealing. 4. Label and Freeze: Label the bag with the date. Store in the freezer for up to three months. To thaw and enjoy again, simply take out a blondie and let it sit at room temperature for about 30 minutes. You can also warm it in the microwave for about 10-15 seconds. Enjoy the soft, gooey goodness! Cookie butter blondies stay fresh for about 3 to 5 days at room temperature. Keep them in an airtight container. If you refrigerate them, they can last up to a week. The cold helps keep them moist and tasty. Just make sure to let them return to room temperature before serving. Yes, you can make cookie butter blondies without eggs. Use alternatives like applesauce or mashed bananas. You can also use flaxseed meal. Mix one tablespoon of flaxseed with three tablespoons of water. Let it sit for a few minutes to thicken. This acts as a binder and keeps your blondies soft. Serve cookie butter blondies warm or at room temperature. Pair them with vanilla ice cream for a delicious treat. Drizzle some caramel or chocolate sauce on top for extra sweetness. You can also enjoy them with a glass of milk or a hot cup of coffee. They make a perfect snack any time of day. For the complete recipe, check out the [Full Recipe]. In this blog post, we explored how to make delicious cookie butter blondies. We covered essential ingredients, optional add-ins, and simple steps for baking. You learned tips for perfect texture and ways to enhance flavor. We also discussed variations, dietary modifications, and storage tips. Try these blondies for a sweet treat that everyone will love. They’re easy to make and full of flavor!](https://recipespursuit.com/wp-content/uploads/2025/07/94314d33-46f3-4376-a0cc-c29f6027e68e.webp)
Cookie Butter Blondies Irresistible Sweet Delight
Are you ready to indulge in a sweet treat that’s hard to resist? These Cookie Butter Blondies offer a rich and creamy flavor that…
My Latest Desserts
My Latest Recipes

hey,
i’m !
I’m so happy you’re here!
Cooking is my love language, and I’m excited to share my best dishes with you. Hope they become your favorites too! Let’s enjoy every bite of this journey together.

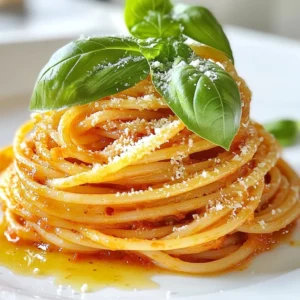
![To make this roasted red pepper pasta, gather these ingredients: - 3 large red bell peppers - 3 cups cooked pasta (penne or fusilli recommended) - 1/4 cup olive oil - 2 cloves garlic, minced - 1 teaspoon red pepper flakes (adjust for spice preference) - 1/2 cup heavy cream or coconut cream for a vegan option - 1/2 cup grated Parmesan cheese or nutritional yeast for a vegan option - Salt and black pepper to taste - Fresh basil leaves, chopped (for garnish) - Toasted pine nuts (optional, for garnish) You can easily change some ingredients to fit your needs: - For gluten-free: Use gluten-free pasta. - For dairy-free: Swap heavy cream with coconut cream and Parmesan with nutritional yeast. - For vegan: Follow the dairy-free options above. - For low-carb: Try zucchini noodles or spaghetti squash instead of pasta. To make this recipe, I recommend these tools: - A sharp knife for cutting peppers - A baking sheet for roasting - A blender or food processor for the sauce - A large pot for cooking pasta - A mixing spoon for combining everything With these ingredients and tools, you're all set to create a delicious roasted red pepper pasta. Check out the [Full Recipe] for detailed steps! Roasting red peppers is easy and quick. Start by preheating your oven to 425°F (220°C). Take three large red bell peppers and cut them in half. Remove the seeds and membranes. Place the peppers cut-side down on a baking sheet. Roast them for about 25 to 30 minutes. Watch for the skins to blister and blacken. Once done, take them out and let them cool for a bit. After cooling, peel off the skins. This step gives your dish a sweet, smoky flavor. While your peppers roast, cook the pasta. Use penne or fusilli for best results. Boil water in a large pot and add salt. Once boiling, add three cups of pasta. Cook according to the package instructions until it's al dente. This usually takes about 8 to 10 minutes. Drain the pasta and set it aside. The pasta should be firm, as it will cook a bit more when you mix it with the sauce. Now it's time to bring it all together. In a blender or food processor, add the peeled roasted peppers. Include two minced garlic cloves, a quarter cup of olive oil, and one teaspoon of red pepper flakes. Pour in half a cup of heavy cream or coconut cream. Blend until it's smooth and creamy. In a large pot, combine the cooked pasta with the roasted red pepper sauce. Stir well to coat every piece. Add half a cup of grated Parmesan cheese or nutritional yeast for a vegan choice. Mix until melted. Adjust seasoning with salt and black pepper. Serve warm, garnished with fresh basil and toasted pine nuts if you like. Enjoy your meal! For the full recipe, check out the details above. To get the best sauce, blend the roasted peppers until smooth. If the sauce is too thick, add a splash of pasta water. This method makes the sauce creamy and helps it stick to the pasta. For a richer taste, use heavy cream or coconut cream, depending on your choice. I love adding red pepper flakes for heat. Start with a teaspoon and taste the sauce. If you want more spice, add a bit more. If you prefer it milder, cut back on the flakes. You can also use black pepper for a different flavor. Serve the pasta in a large bowl for family-style dining. Sprinkle fresh basil on top for color. For a fancy touch, add toasted pine nuts. They give a nice crunch and a nutty taste. A drizzle of olive oil can also make the dish shine. Enjoy this Roasted Red Pepper Pasta with a side salad for a complete meal! Check out the Full Recipe to make this dish even easier. {{image_2}} You can easily make this dish vegan. Just swap heavy cream with coconut cream. For cheese, use nutritional yeast instead of Parmesan. This keeps the creamy taste without dairy. You'll still enjoy a rich flavor, and it stays plant-based. Want to add more to your pasta? You can include proteins like chicken, shrimp, or tofu. These options boost the meal's nutrition. You can also add veggies like spinach, mushrooms, or zucchini. They add color and crunch to your dish. While penne and fusilli are great choices, feel free to use any pasta. Spaghetti, rigatoni, or gluten-free options work well too. Just remember to adjust the cooking time based on the pasta you choose. This way, you can enjoy Roasted Red Pepper Pasta your way. For the complete recipe, check out the Full Recipe. After you enjoy your Roasted Red Pepper Pasta, store the leftovers in an airtight container. Make sure to let the pasta cool first. This helps keep the pasta fresh and prevents moisture build-up. You can keep it in the fridge for up to three days. If you want to enjoy it later, consider freezing it. To reheat your Roasted Red Pepper Pasta, you can use a stovetop or microwave. For the stovetop, add a splash of water or olive oil to a pan. Heat on low, stirring often, until warm. If you use the microwave, place it in a bowl. Cover it with a damp paper towel and heat in short bursts, stirring in between. This helps keep the pasta moist. Freezing Roasted Red Pepper Pasta is easy! First, let it cool completely. Then, portion the pasta into freezer-safe bags or containers. Squeeze out any air to avoid freezer burn. Label with the date and freeze for up to three months. When you’re ready to eat, thaw it overnight in the fridge before reheating. This way, you can enjoy a quick meal anytime! For the complete recipe, check the Full Recipe. Leftover roasted red peppers are a treasure! You can add them to salads for extra flavor. They work great in sandwiches too. Chop them up and mix them into dips or spreads. You can even toss them in an omelet for a tasty breakfast. Try blending them into soups for a rich taste. The options are endless! Yes, you can! Make the sauce a day before serving. Store it in the fridge in an airtight container. Just cook the pasta fresh when you're ready to eat. You can also mix everything and keep it in the fridge. Just remember to reheat gently, so the pasta doesn't get mushy. To serve more people, simply double or triple the ingredients. Use six or nine red peppers for larger amounts. Increase the pasta, sauce, and cheese accordingly. Keep the cooking time the same, but check that everything is heated through. This way, you can enjoy your dish with family and friends! For the full recipe, check out the complete guide. We explored the ingredients needed for roasted red pepper pasta and dietary substitutions. I shared tools that make cooking easier and gave step-by-step instructions for roasting peppers and cooking pasta. You learned tips for the perfect sauce and presentation, plus variations to suit your taste. We also covered storage and reheating, ensuring you can enjoy your dish later. This pasta is simple to make, tasty, and fun to customize. Enjoy making it your own!](https://recipespursuit.com/wp-content/uploads/2025/07/be0b9083-b73e-4b21-adc9-52ed4323e9b8-300x300.webp)
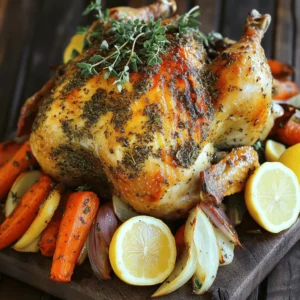
Sheet Pan Honey Garlic Chicken Simple and Tasty Meal
Looking for a quick and tasty meal? Let me introduce you to Sheet Pan Honey Garlic Chicken! This dish combines juicy chicken thighs with…
![For this tasty dish, you need a few key items. The main star is chicken thighs. They bring juicy flavor and crisp skin. You also need honey and garlic. These two work together to create a sweet and savory sauce. Lastly, you'll want some vegetables. I like using: - 4 chicken thighs, bone-in and skin-on - 3 tablespoons honey - 4 cloves garlic, minced - 1 medium red bell pepper, sliced - 1 medium zucchini, sliced - 1 cup broccoli florets The right seasonings make this dish shine. Soy sauce adds saltiness. Apple cider vinegar brings a little tang. Fresh ginger gives a nice zing, while sesame oil adds depth. Don’t forget the basics: salt and pepper. You will need: - 1 tablespoon soy sauce (low sodium) - 1 tablespoon apple cider vinegar - 1 teaspoon fresh ginger, grated - 1 teaspoon sesame oil - 1 teaspoon ground black pepper - 1 teaspoon salt - 2 tablespoons olive oil Garnishes can make your dish look pretty and taste better. I suggest using sesame seeds and fresh cilantro. They add a nice touch on top. Here’s what you can use: - Sesame seeds for garnish - Fresh cilantro for garnish For the full recipe, check out Sheet Pan Honey Garlic Chicken. It’s a simple way to make a delicious meal! First, preheat your oven to 400°F (200°C). While it heats, line a large sheet pan with parchment paper. This makes cleanup easier later on. Next, in a small bowl, whisk together the honey, minced garlic, soy sauce, apple cider vinegar, grated ginger, sesame oil, black pepper, and salt. Mix until all the ingredients blend well. This honey garlic sauce adds a sweet and savory flavor to your dish. Now, place the chicken thighs on one side of the prepared sheet pan. Pour half of the honey garlic sauce over the chicken. Make sure each piece is coated well. On the other side of the sheet pan, add the sliced red bell pepper, zucchini, and broccoli florets. Drizzle the vegetables with olive oil and sprinkle with salt and pepper. Toss them to combine. Then, pour the remaining honey garlic sauce over the vegetables and toss gently. This step ensures that every bite is full of flavor. Bake the dish in your preheated oven for 25-30 minutes. Check that the chicken reaches an internal temperature of 165°F (74°C). This ensures that it is safe to eat. The skin should be crispy, giving the chicken a nice texture. About halfway through cooking, stir the vegetables. This helps them cook evenly and become tender. Once the chicken and veggies are done, remove the pan from the oven and let it rest for 5 minutes. To get crispy chicken, use bone-in, skin-on thighs. They cook evenly and stay juicy. Place the chicken skin-side up on the pan. This helps the skin get crisp while cooking. Fresh ingredients make a big difference. Use fresh garlic and ginger for the best taste. Marinate the chicken for at least 30 minutes to let the flavors soak in. You can use the honey garlic sauce as a marinade too. Use parchment paper to line your sheet pan. This makes cleanup quick and easy. You can prep your ingredients the night before. This way, you can enjoy a tasty meal without much fuss. For the full recipe, check out the details above. {{image_2}} You can switch out chicken thighs for chicken breasts if you prefer. Chicken breasts cook faster, so check them earlier. If you want a meatless option, try tofu. Use firm tofu, and press it to remove extra water. Cut the tofu into cubes and toss it in the honey garlic sauce. This gives a nice flavor and a healthy twist. Feeling creative? Use seasonal veggies that you love. Carrots, snap peas, or asparagus work well. They add color and taste. Pair these veggies with the honey garlic sauce for a sweet and savory mix. You can even try adding sweet potatoes for a hearty feel. Want some heat? Add sriracha or red pepper flakes to the sauce. This makes the dish spicy and exciting. If you like it sweeter, try different honeys. Clover honey is mild, while orange blossom honey adds a citrus note. Adjust the sauce to fit your taste perfectly. For the complete details, check the Full Recipe for Sheet Pan Honey Garlic Chicken! To store leftovers, let the food cool first. Place the chicken and veggies in an airtight container. This keeps them fresh for later meals. I suggest using glass or plastic containers with tight lids. They help prevent spills and odors. If you want to freeze the chicken, make sure it is fully cooled. Wrap the chicken tightly in plastic wrap or foil. Then, place it in a freezer-safe bag. Remove as much air as possible to prevent freezer burn. For reheating, thaw in the fridge overnight. Heat it in the oven or microwave until hot. In the fridge, the leftovers last about 3 to 4 days. For the best taste, eat them within this time. When frozen, chicken can last up to 3 months. Make sure to label your bags with the date to keep track. To ensure safety, check the internal temperature of the chicken. It should reach 165°F (74°C). Use a meat thermometer for accuracy. Insert it into the thickest part of the thigh, avoiding bones. When the chicken hits this temperature, it is safe to eat. Juices should run clear, not pink. Yes, you can prep this dish ahead of time. Marinate the chicken in the honey garlic sauce for up to 24 hours. This adds more flavor and makes cooking easier. You can also chop the vegetables in advance and store them in the fridge. This saves time on busy nights. This dish works well with many sides. Here are some great options: - Steamed rice or quinoa - Roasted potatoes or sweet potatoes - A simple green salad - Garlic bread for extra flavor - Stir-fried vegetables for a colorful plate These sides balance the sweet and savory notes of the chicken. Enjoy your meal with a mix of textures and flavors. For the full recipe, visit [Full Recipe]. In this article, we explored making Sheet Pan Honey Garlic Chicken. We covered essential ingredients, step-by-step instructions, and tips for crispy chicken. We also discussed flavorful variations, storage methods, and answered common questions. Remember, cooking should be fun! Use fresh ingredients and experiment with flavors. This dish is easy to tweak for your taste. Now, it's time for you to enjoy a tasty meal that’s simple and satisfying!](https://recipespursuit.com/wp-content/uploads/2025/07/ec82280b-c7e8-4b67-9e74-8ee6fb8758bc.webp)
