
Latest & Greatest

Creamy Pesto Orzo with Chicken Delightful Recipe
Welcome to a creamy culinary adventure! This “Creamy Pesto Orzo with Chicken” recipe blends rich flavors and easy steps for
Read more…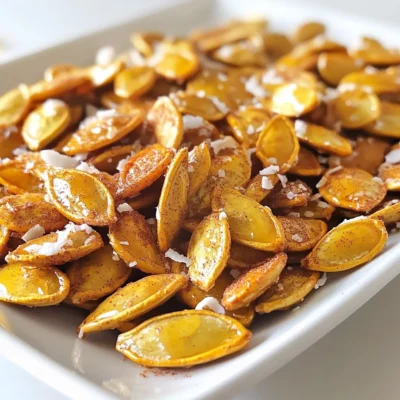
Maple Cinnamon Roasted Pumpkin Seeds Tasty Snack Recipe
If you’re looking for a delicious snack that’s easy to make, you’ve hit the jackpot! This Maple Cinnamon Roasted Pumpkin
Read more…
Creamy Tomato Basil Tortellini Soup Simple Delight
Looking for a warm, tasty meal that you can whip up quickly? Welcome to the world of Creamy Tomato Basil
Read more…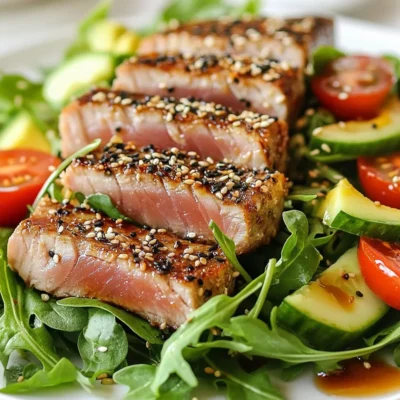
Sesame Crusted Tuna Salad Flavorful and Fresh Meal
If you’re seeking a vibrant and healthy meal, look no further. This Sesame Crusted Tuna Salad combines fresh tuna steaks
Read more…
Creamy Pumpkin Alfredo Gnocchi Delightful Dinner Option
If you’re craving a cozy, delicious meal, then you’re in luck! This Creamy Pumpkin Alfredo Gnocchi is a perfect dish
Read more…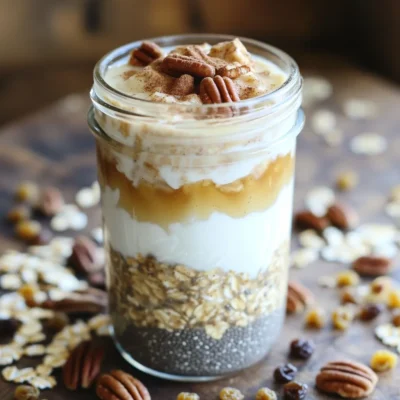
Cinnamon Roll Overnight Oats Easy Breakfast Delight
Looking for a quick and tasty breakfast? Cinnamon Roll Overnight Oats are the answer! With creamy oats and a delightful
Read more…
Slow Cooker Coconut Curry Chickpeas Flavorful Delight
If you want a warm, tasty dinner that’s easy to make, try this Slow Cooker Coconut Curry Chickpeas recipe. It’s
Read more…
Air Fryer Buffalo Turkey Meatballs Flavorful and Easy
Get ready for a tasty treat with Air Fryer Buffalo Turkey Meatballs! These meatballs pack a flavorful punch and are
Read more…browse recipes


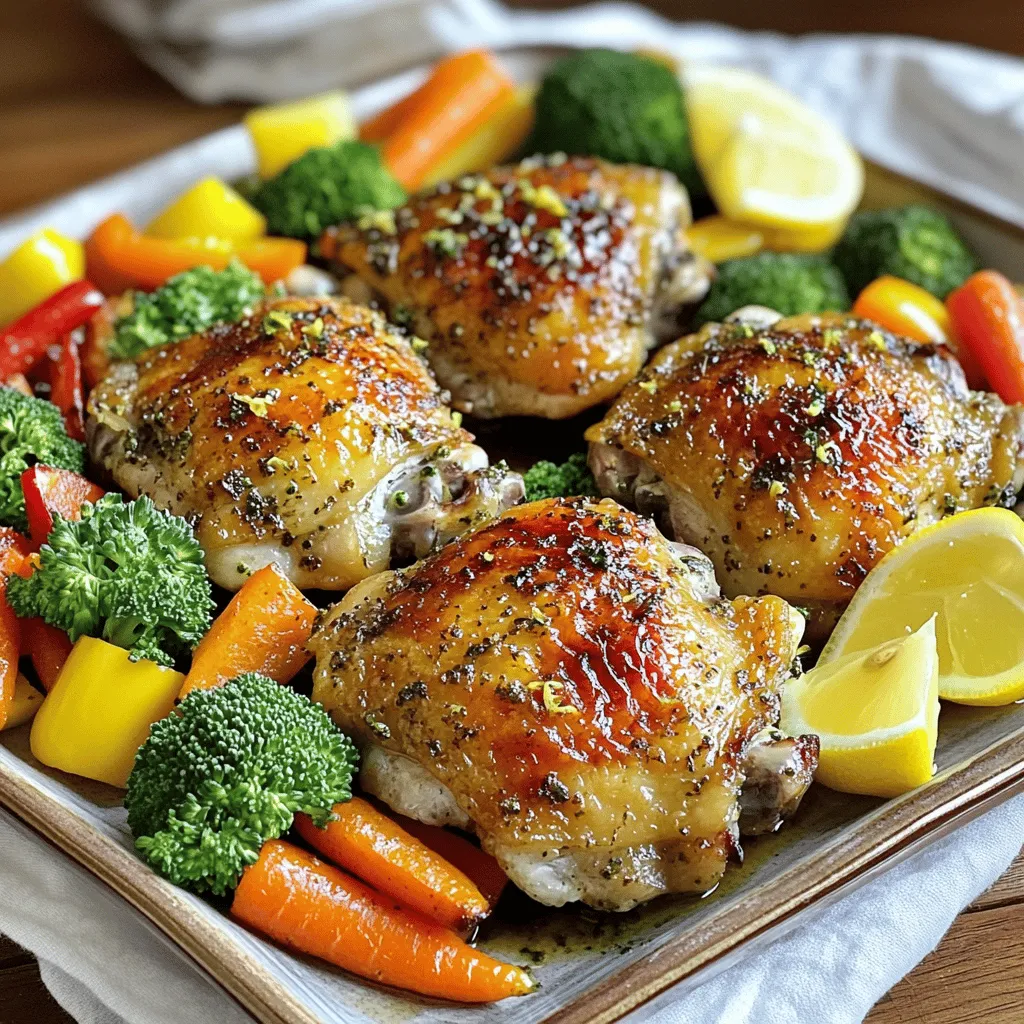
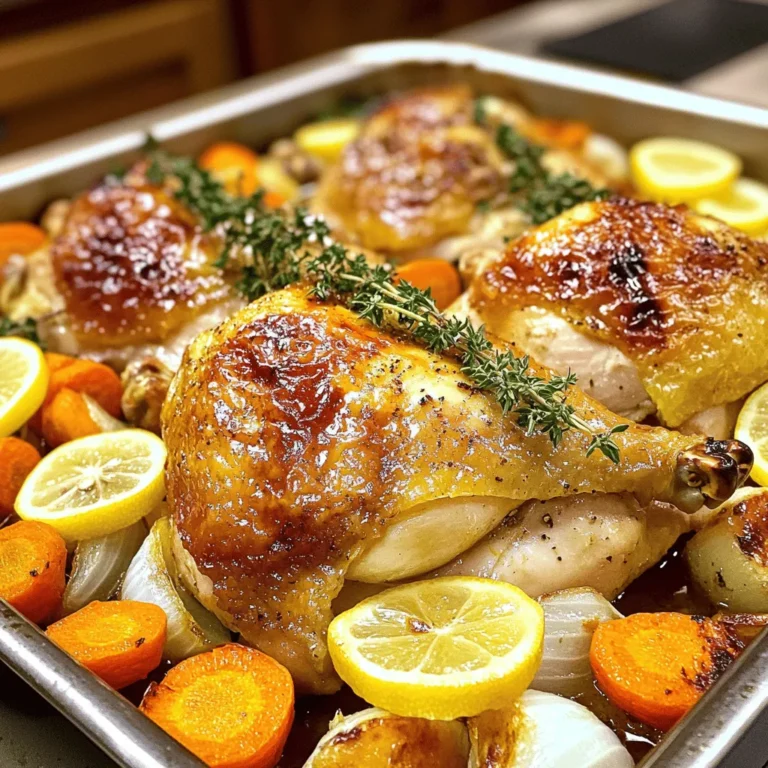
Sheet Pan Lemon Herb Chicken and Veggies Delight
Welcome to a fresh, easy dinner idea that will brighten your week! My Sheet Pan Lemon Herb Chicken and Veggies Delight brings you juicy…
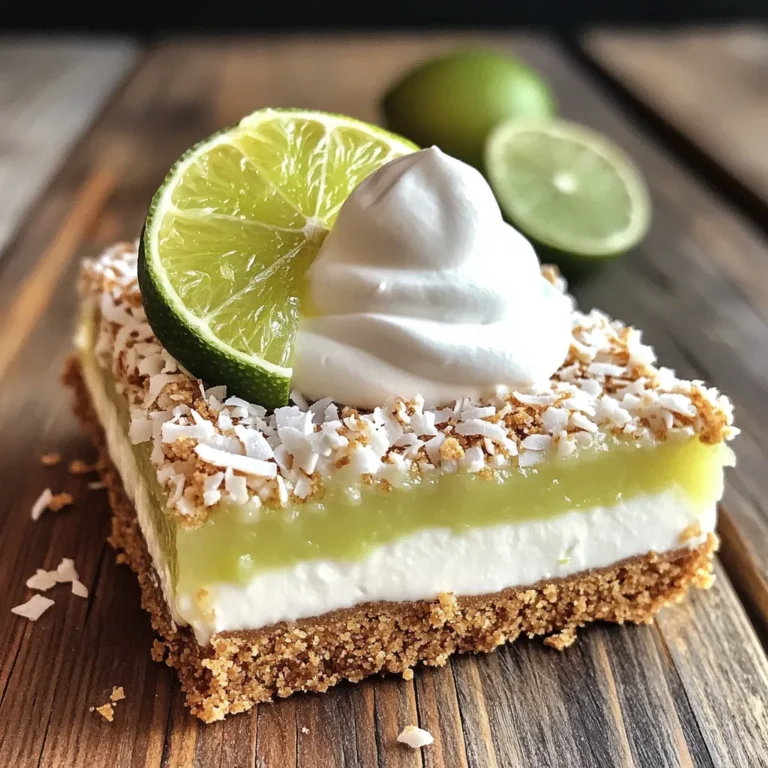
My Latest Desserts
My Latest Recipes

hey,
i’m !
I’m so happy you’re here!
Cooking is my love language, and I’m excited to share my best dishes with you. Hope they become your favorites too! Let’s enjoy every bite of this journey together.
![- 1 lb Brussels sprouts, trimmed and halved - 4 tablespoons unsalted butter - 4 cloves garlic, minced - 1 teaspoon red chili flakes (optional) - 2 tablespoons lemon juice - Salt and pepper to taste - 2 tablespoons grated Parmesan cheese (optional) - Fresh parsley, chopped for garnish - Additional spices (e.g., garlic powder, onion powder) - Balsamic glaze for drizzling - Alternative cheeses (e.g., feta, blue cheese) When you cook Garlic Butter Brussels Sprouts, fresh ingredients make a huge difference. Start with firm, bright Brussels sprouts. Look for ones that are all green with no browning. The butter adds richness, while garlic gives a nice kick. If you like heat, red chili flakes work well. Lemon juice helps balance the flavors. It adds a bright, fresh taste. Salt and pepper are key to enhancing your dish. If you want extra flavor, sprinkle some Parmesan cheese on top. Fresh parsley not only adds color but also a fresh taste. You can choose optional ingredients to customize your dish. Garlic powder or onion powder can boost the flavor. A drizzle of balsamic glaze adds sweetness and depth. If you want a twist, try different cheeses like feta or blue cheese. Using these ingredients, you can create a flavorful side dish that stands out. Check out the Full Recipe for more details on how to prepare this delicious dish! - Preheat your oven to 400°F (200°C). - Trim and halve the Brussels sprouts. This helps them cook evenly. - Toss the Brussels sprouts with melted butter. Make sure they are well coated. - Add minced garlic, red chili flakes, lemon juice, salt, and pepper. Mix well to combine all the flavors. - Spread the Brussels sprouts on a baking sheet in a single layer. This ensures they roast properly. - Roast them in the oven for 20-25 minutes. Stir halfway through for even cooking. - In the last 5 minutes, sprinkle grated Parmesan cheese over the sprouts if you want. It adds a nice touch. For more detailed instructions, check the Full Recipe. To get the best out of your Brussels sprouts, always roast them in a single layer. This helps them cook evenly. If you stack them, some may steam instead of roast, and you won’t get that nice crisp. Stir the sprouts halfway through cooking. This ensures all sides brown nicely and gives you a great texture. You can adjust the seasoning to fit your taste. If you like it spicy, add more red chili flakes. For the best flavor, use fresh garlic. It really makes a difference compared to dried garlic. Fresh ingredients always shine in simple dishes like this one. When serving, garnish your Brussels sprouts with fresh parsley and a touch of lemon zest. This adds a bright flavor and makes the dish look more appealing. Pair them with proteins like chicken or fish for a complete meal. They also work well as a side dish at any dinner party. For the full recipe, check out the details above. {{image_2}} You can make Garlic Butter Brussels Sprouts in different ways. For a crispy texture, try the air fryer. It cooks them quickly while making them crunchy. Just toss the halved sprouts with the garlic butter, and air fry at 375°F for about 15 minutes. Shake the basket halfway through for even cooking. If you prefer a stovetop option, sautéing is quick and easy. Start by melting the butter in a pan. Add the sprouts and cook over medium heat for about 10-12 minutes. Stir often until they are golden and tender. To change up the flavor, adding bacon is a great idea. The smoky taste pairs well with the garlic and butter. Cook the bacon until crispy, then toss it in with the Brussels sprouts. You can also add nuts like walnuts or pecans for crunch. Just chop them and mix in during the last few minutes of cooking. This adds a lovely texture and extra flavor. Using seasonal veggies can enhance your dish. Try adding carrots or squash for a colorful touch. They cook well with the Brussels sprouts and add sweetness. For a zestier dish, experiment with citrus. A splash of orange or lime juice can brighten the flavors. Just mix it in with the lemon juice before cooking. For the full recipe, check out the [Full Recipe]. Keep your leftover Garlic Butter Brussels Sprouts in an airtight container. This helps them stay fresh. They taste best when you eat them within 3 days. To keep them crispy, use your oven to reheat. Set it to 350°F (175°C) and heat for about 10 minutes. If you need a quick option, you can use the microwave. Heat for 30 seconds to 1 minute until warm. You can freeze cooked Brussels sprouts for up to 2 months. Make sure they are cool before freezing. To thaw, place them in the fridge overnight. Then, reheat them using the oven or microwave for best results. For the full recipe, check the earlier section! Look for firm, bright green sprouts with no yellow leaves. Fresh sprouts should feel heavy and have tightly closed leaves. If you find any that are soft or shriveled, avoid those. Yes, you can prep and store them before roasting. Just trim and halve the sprouts, then toss them with the garlic and butter. Keep them in the fridge for up to a day. When you’re ready, roast them for that fresh taste. They pair well with meats, fish, or as part of a vegetarian meal. Try serving them with roasted chicken, grilled salmon, or a hearty grain dish. Their rich flavor makes them a great side for many main courses. Substitute butter with olive oil and omit cheese. You can still enjoy great flavor. Add nutritional yeast for a cheesy taste without dairy. This keeps the dish light and healthy while still being delicious. In this blog post, we've explored how to make delicious Garlic Butter Brussels Sprouts. We covered the key ingredients, step-by-step preparation, and creative variations to enhance flavor. Remember to store leftovers properly and reheat them for the best taste. These versatile sprouts can accompany many dishes or shine on their own. Whether you're a novice or experienced cook, these tips will help you create a tasty side. Enjoy experimenting with your own twists and savor the crispy, buttery goodness!](https://recipespursuit.com/wp-content/uploads/2025/06/333dd36f-c2f0-4e46-9c09-9689796527f6-300x300.webp)
![- 2 cups cooked chicken, shredded - 2 cups broccoli florets (fresh or frozen) - 1 cup cooked rice (white or brown) - 1 cup cheddar cheese, shredded - 1/2 cup cream of chicken soup - 1/2 cup milk - 1 teaspoon garlic powder - 1/2 teaspoon onion powder - 1/2 teaspoon paprika - Salt and pepper to taste - 1/2 cup breadcrumbs (optional for topping) - 2 tablespoons olive oil When making Cheesy Broccoli Chicken Casserole, it’s key to gather fresh and quality ingredients. Start with cooked chicken, which adds protein and flavor. You can use leftover chicken or rotisserie chicken for ease. Broccoli gives a nice crunch and pairs perfectly with cheese. Rice rounds out the dish, making it filling. The cream of chicken soup and milk create a creamy base. Garlic powder, onion powder, and paprika add depth to the flavor. Don't forget to season with salt and pepper to enhance taste. If you want a crispy topping, use breadcrumbs mixed with olive oil. - Alternative cheeses - Different vegetables (e.g., carrots, bell peppers) - Seasoning variations Feel free to customize your casserole! Swap cheddar for mozzarella or pepper jack for a kick. You can also mix in other veggies like carrots or bell peppers for added color and nutrition. Adjust the spices based on your taste for a fun twist. For the full recipe, check out the [Full Recipe]. - Preheat the oven to 375°F (190°C). - Prepare a greased 9x13 inch baking dish. - In a large bowl, combine cooked chicken, broccoli, and rice. - In another bowl, mix cream of chicken soup, milk, garlic powder, onion powder, paprika, salt, and pepper. - Pour the soup mixture over the chicken and rice mix. Stir until everything is well coated. - Fold in 3/4 cup of the shredded cheddar cheese. - Transfer the mixture into the greased baking dish and spread evenly. - If you want a crunchy topping, mix breadcrumbs with olive oil and sprinkle on top. - Finish by topping the dish with the remaining 1/4 cup of cheddar cheese. - Bake in the preheated oven for 25-30 minutes until bubbly. - Let it cool for a few minutes before serving. This recipe is simple and full of flavor. You can find the Full Recipe to follow along easily. Enjoy the cooking! To get the best creaminess in your casserole, use a mix of cream of chicken soup and milk. This blend gives a rich and smooth base. Make sure to mix it well to avoid lumps. You want every bite to be creamy and delicious. For a crispy breadcrumb topping, mix breadcrumbs with olive oil. This will help them brown nicely in the oven. Sprinkle them evenly over the top before baking. Adding herbs or spices can boost the flavor. Try adding thyme or basil for a fresh taste. A dash of cayenne pepper can add heat if you like spice. For side dishes, a light salad pairs well. You can also serve it with some crusty bread. These sides will balance your meal and add more texture. For the best results, choose a glass or ceramic baking dish. These materials hold heat well and cook evenly. Make sure it is at least 9x13 inches for the perfect fit. Key kitchen tools include a mixing bowl, measuring cups, and a whisk. These items help you combine all your ingredients easily and quickly. {{image_2}} You can easily make this casserole gluten-free. Use gluten-free breadcrumbs for the topping. Swap the cream of chicken soup with a gluten-free version. This keeps the dish tasty without the gluten. For a low-fat option, use low-fat cheese and milk. You can also use Greek yogurt instead of cream of chicken soup. This keeps it creamy while cutting some fat. Choose lean chicken breast for a healthier protein source. Want to spice things up? Try adding some diced jalapeños for a kick. You could mix in some hot sauce for a bold flavor. Adding a bit of cayenne pepper can also bring the heat. To give your casserole a global twist, add spices like cumin or curry powder. These spices add warmth and depth. You can even mix in some soy sauce for an Asian flair. Each addition gives a new taste to this classic dish. Feel free to use seasonal veggies for a fresh twist. In spring, add peas or asparagus. In fall, consider using butternut squash or pumpkin. Seasonal veggies not only taste great but also add color. During the holidays, think about adding cranberries for a festive touch. You can also top it with roasted nuts for crunch. These small changes can make your dish feel special for any occasion. For the full recipe, check the earlier notes. To keep your cheesy broccoli chicken casserole fresh, use airtight containers. Glass or plastic containers work well. Make sure to let the casserole cool first. Place it in the fridge within two hours after cooking. Store it for up to four days. When reheating, aim to keep your casserole moist. Cover it with foil to prevent drying out. You can reheat it in the oven at 350°F (175°C) for about 20 minutes. For a quick option, use the microwave. Heat in short bursts of one minute, stirring in between, until hot. If you want to save it for later, freezing works great. Allow the casserole to cool completely before freezing. Use freezer-safe containers or wrap it tightly in plastic wrap. It can last up to three months in the freezer. To thaw, place it in the fridge overnight before reheating. Can I use rotisserie chicken? Yes, you can use rotisserie chicken. It saves time and adds great flavor. Just shred it before mixing. How long can the casserole be stored in the fridge? You can store the casserole in the fridge for up to three days. Make sure to cover it well. Can I make this dish ahead of time? Yes, you can prepare the casserole ahead. Assemble it and keep it in the fridge. Bake it when ready to eat. What to do if the casserole is too dry? If the casserole is too dry, add more milk or soup. Stir it in before baking. Fixing over-seasoned dishes If the dish is too salty, add more rice or broccoli. This helps balance the flavors. Best sides to complement the casserole Serve this casserole with a fresh salad or garlic bread. These sides add freshness and taste. Presentation ideas for guests For a nice look, serve in individual bowls. Sprinkle fresh herbs on top for color. This blog gave you a full guide to make a delicious chicken casserole. You learned about the essential and optional ingredients, along with easy steps to bake it. I shared tips to enhance flavor and texture while offering variations to fit different diets. Proper storage and reheating tips were covered too. Now you're ready to make this dish your own. Enjoy customizing it and sharing it with friends and family!](https://recipespursuit.com/wp-content/uploads/2025/04/301552f3-379d-4580-a682-73ca66ee12b9-300x300.webp)

Crunchy Roasted Chickpeas Tasty Snack Ideas
Looking for a healthy snack that’s crunchy and full of flavor? You’ve come to the right place! In this post, I’ll share my favorite…