

Latest & Greatest
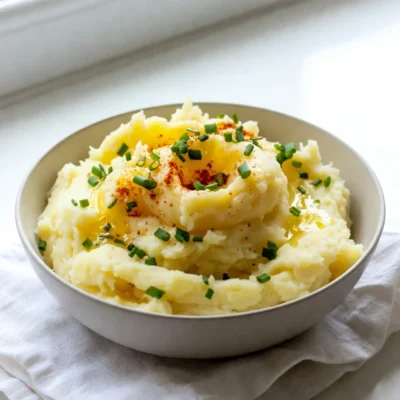
Creamy Garlic Mashed Potatoes Flavorful Side Dish
If you’re searching for the perfect side dish, look no further! Creamy garlic mashed potatoes are a must-try. They are
Read more…
One-Pot Creamy Broccoli Alfredo Orzo Delight
Welcome to One-Pot Creamy Broccoli Alfredo Orzo Delight! If you love quick, tasty meals, this dish is perfect for you.
Read more…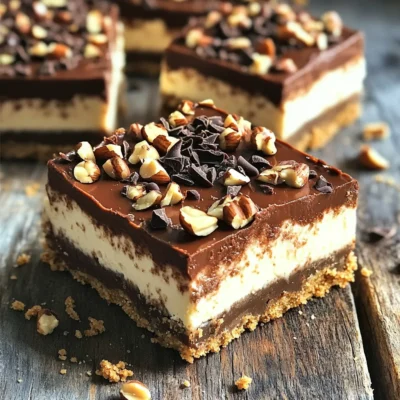
No-Bake Chocolate Hazelnut Cheesecake Bars Delight
Are you ready for a dessert that’s easy and oh-so-delicious? No-Bake Chocolate Hazelnut Cheesecake Bars blend rich chocolate and creamy
Read more…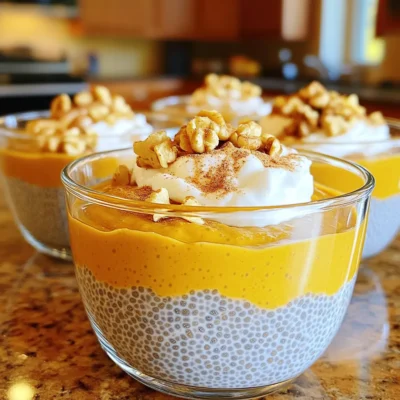
High-Protein Pumpkin Pie Chia Pudding Delight
Love pumpkin pie but want a healthier twist? You’ll enjoy my High-Protein Pumpkin Pie Chia Pudding Delight! This creamy, delicious
Read more…
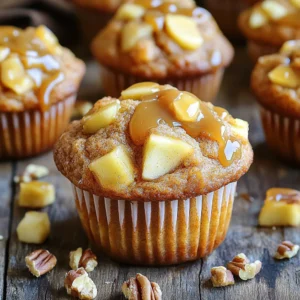
Caramel Apple Cheesecake Milkshake Creamy Delight
Craving something sweet and creamy? Let me introduce you to the Caramel Apple Cheesecake Milkshake! This tasty treat brings together
Read more…
Ingredient Cinnamon Roll Bites Scrumptious and Simple
Craving something sweet and easy? These Ingredient Cinnamon Roll Bites are just what you need! With just a few simple
Read more…
Creamy Pesto Orzo with Chicken Delightful Recipe
Welcome to a creamy culinary adventure! This “Creamy Pesto Orzo with Chicken” recipe blends rich flavors and easy steps for
Read more…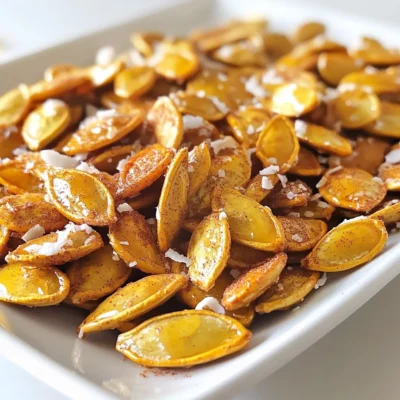
Maple Cinnamon Roasted Pumpkin Seeds Tasty Snack Recipe
If you’re looking for a delicious snack that’s easy to make, you’ve hit the jackpot! This Maple Cinnamon Roasted Pumpkin
Read more…browse recipes

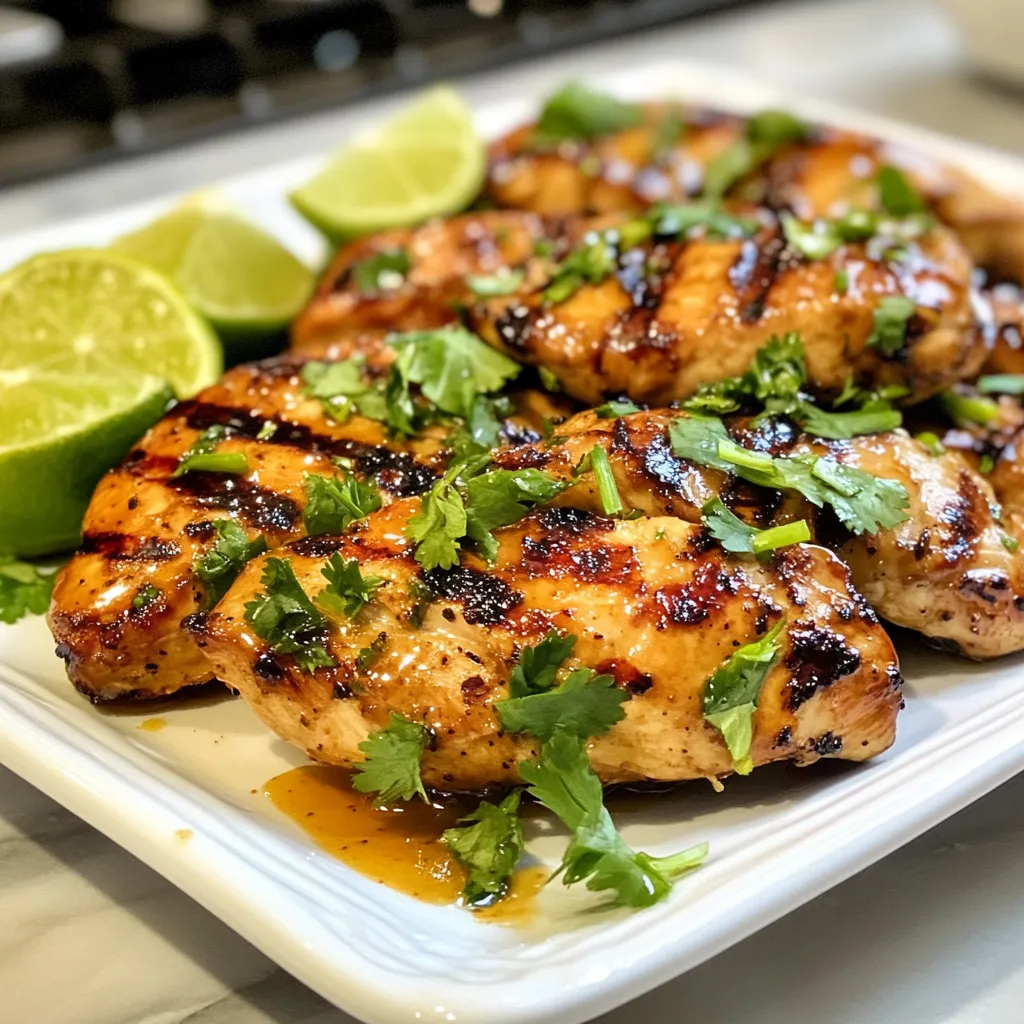
Honey Lime Grilled Chicken Bold and Flavorful Recipe
Ready to elevate your grilling game? This Honey Lime Grilled Chicken recipe packs a punch with bold flavors and simple ingredients. Imagine juicy chicken…
My Latest Desserts
My Latest Recipes

hey,
i’m !
I’m so happy you’re here!
Cooking is my love language, and I’m excited to share my best dishes with you. Hope they become your favorites too! Let’s enjoy every bite of this journey together.
![To make tasty savory breakfast burritos, gather these key items: - 4 large flour tortillas - 6 large eggs - 1 cup bell peppers (red and green), diced - 1 cup cooked breakfast sausage, crumbled (or use veggie sausage for a vegetarian option) - 1 cup shredded cheese (cheddar or pepper jack) - 1 avocado, sliced - ¼ cup fresh cilantro, chopped - 1 tablespoon olive oil - 1 teaspoon garlic powder - 1 teaspoon onion powder - Salt and pepper to taste - Salsa, for serving These ingredients create a flavorful mix that makes each bite delightful. You can enhance your burrito’s flavor with fresh, seasonal items. Consider adding: - Spinach or kale for a green boost - Zucchini or mushrooms for extra texture - Fresh tomatoes for a juicy burst - Chopped green onions for a mild onion flavor Using fresh ingredients not only tastes great, but it also adds nutrition to your meal. You can easily adapt this recipe to meet different dietary needs: - For a vegetarian option, swap sausage for black beans or lentils. - Use gluten-free tortillas if you need to avoid gluten. - For a lower-fat option, replace regular cheese with a lighter cheese or omit it entirely. - If you prefer a dairy-free burrito, use plant-based cheese or skip it altogether. These substitutions allow everyone to enjoy a delicious breakfast burrito. Want the full recipe? Check out the [Full Recipe]. Start by heating the olive oil in a skillet over medium heat. Add the diced bell peppers and cook them for 3-4 minutes. You want them soft, not mushy. While they cook, grab a bowl. Whisk together the eggs, garlic powder, onion powder, salt, and pepper. Mix until everything is well combined. Pour this mixture into the skillet with the peppers. Add the crumbled sausage now. Stir gently until the eggs are set. This usually takes about 5 minutes. Remove the skillet from heat. Your filling is ready! Lay a tortilla flat on a clean surface. Sprinkle a good layer of cheese in the center. Next, spoon some of that tasty egg and sausage mixture on top. Add a few slices of avocado and some fresh cilantro for extra flavor. Now, fold the sides of the tortilla inwards. Start rolling the tortilla from the bottom. Keep it tight but not too tight. Repeat this step for the other tortillas. You've just made your burritos! For an extra crispy burrito, return the assembled burritos to the skillet. Toast them for 2-3 minutes on each side. Keep an eye on them; you want them golden brown, not burnt. This will give you that perfect crunch. Once done, serve your burritos right away. Enjoy them with some salsa on the side for dipping! For the full recipe, check the details above. To get creamy scrambled eggs, start with fresh eggs. Crack them into a bowl and whisk well. I suggest adding a splash of milk or cream for extra creaminess. This also helps the eggs cook evenly. Heat your skillet on medium-low. Low heat cooks the eggs gently. Stir them slowly and keep the eggs moving. Remove them from heat just before they are fully set. The residual heat will finish cooking them. To make your burrito pop with flavor, use fresh herbs and spices. Fresh cilantro and a dash of lime juice add brightness. Garlic and onion powders give depth. You can also season your eggs with salt and pepper. For a kick, consider adding hot sauce or diced jalapeños. Mixing flavors like smoked paprika or cumin can create a unique twist. Don’t be afraid to experiment with your favorite ingredients. If you have leftover burritos, store them in an airtight container. Place parchment paper between each burrito to keep them from sticking. They can last in the fridge for up to three days. To reheat, wrap the burrito in a damp paper towel and microwave for one to two minutes. For a crispier texture, use a skillet. Heat each side for about three minutes until warm and crispy. {{image_2}} You can easily make breakfast burritos without meat. Use scrambled tofu instead of eggs. It’s a great alternative and packed with protein. Add spices like turmeric and nutritional yeast for flavor. You can also use black beans or lentils for a hearty filling. These options are not only tasty but also healthy. Feel free to get creative with your fillings. Swap out bell peppers for spinach or kale. You can add mushrooms for an earthy taste. Try different cheeses like feta or mozzarella for a unique twist. If you want a fresh flavor, add tomatoes or corn. The key is to mix and match your favorite ingredients. If you love heat, add jalapeños or hot sauce to your burritos. Pickled jalapeños can give a nice tang. You can also sprinkle in some cayenne pepper or chili flakes when cooking the eggs. For a smoky flavor, try adding chipotle peppers in adobo sauce. These spicy options will surely wake up your taste buds! For a full recipe to get started, check out the Savory Breakfast Burritos section above. To keep your savory breakfast burritos fresh, store them in the fridge. Wrap each burrito in plastic wrap or foil. Place them in an airtight container. They last for about 3 to 4 days this way. Always let them cool before wrapping to avoid sogginess. Keeping them sealed helps maintain their flavors. You can freeze your burritos for longer storage. After wrapping them tightly in plastic wrap, place them in a freezer-safe bag. Make sure to remove as much air as possible. They can last up to 3 months in the freezer. When ready to eat, thaw them in the fridge overnight before reheating. Reheating is crucial for the best taste. You can use a few methods here. The microwave is quick but may make the burrito a bit soggy. For a crispy texture, use a skillet. Heat on medium heat for 3-4 minutes per side. You can also use an oven, preheated to 350°F (175°C). Wrap the burrito in foil and heat for about 15-20 minutes. Choose the method that fits your time and texture needs! You can change your breakfast burrito in many ways. Start with the base ingredients. You can swap flour tortillas for corn ones if you want a gluten-free option. Next, change the filling. Try black beans, spinach, or mushrooms for variety. For meat lovers, you can use bacon or chorizo. If you prefer a vegetarian option, add extra veggies or tofu. You can also mix in different cheeses, like feta or mozzarella. Finally, don’t forget the toppings! Salsa, sour cream, or hot sauce can add a burst of flavor. Experiment until you find your perfect combination. Yes, you can make savory breakfast burritos ahead of time! Prepare the filling the night before. Store it in the fridge in an airtight container. This makes your morning easier. When you are ready to eat, warm the filling in a skillet or microwave. Then, assemble your burritos using fresh tortillas. If you want, you can freeze the assembled burritos. Just wrap them tightly in foil or plastic wrap. When you want to eat them, heat them in the oven or microwave. Breakfast burritos pair well with many side dishes. Here are some tasty options: - Fresh fruit salad - Hash browns or home fries - Yogurt with honey and granola - A simple green salad - Sliced tomatoes or cucumbers These sides add balance to your meal. They also provide extra flavor and texture. You can mix and match based on your mood and the season. Explore and enjoy your savory breakfast burrito experience! Savory breakfast burritos are easy to make and fun to customize. We explored essential ingredients, fresh options, and substitutions for your diet. I shared step-by-step instructions, tips for perfect eggs, and ways to keep leftovers tasty. You can try different flavors, including vegetarian and spicy options. Don’t forget about storing them right for later. Enjoy creating your own burrito masterpiece!](https://recipespursuit.com/wp-content/uploads/2025/05/cdbc7eaa-f287-40e5-8bbd-af5146fffb60-300x300.webp)


Easy Chickpea Avocado Toast Simple and Tasty Meal
If you’re looking for a quick and satisfying meal, Easy Chickpea Avocado Toast is for you. This tasty dish combines creamy avocado and protein-packed…
![To make this tasty meal, you need simple ingredients that pack a punch. Here’s what you will need: - 1 ripe avocado - 1 cup canned chickpeas, rinsed and drained - 1 tablespoon lemon juice - 1 clove garlic, minced - ¼ teaspoon cumin powder - ½ teaspoon salt - ¼ teaspoon black pepper - 2 slices whole-grain bread These ingredients come together to create a creamy and flavorful spread. The avocado adds healthy fats, while chickpeas give you protein and fiber. To take your toast to the next level, consider these fun garnishes: - 1 tablespoon cherry tomatoes, halved - Fresh cilantro or parsley leaves - Red pepper flakes (optional for spice) These add color and extra flavor. Cherry tomatoes offer a fresh burst, while herbs bring a nice touch. This easy chickpea avocado toast is not only delicious but also healthy. Here’s a quick look at its nutritional benefits: - Calories: Approximately 300 per serving - Protein: 10 grams from chickpeas - Fiber: 8 grams, aiding digestion - Healthy Fats: From the avocado Enjoy this meal as a snack or light lunch. It fuels your body while tasting great. For the full recipe, check the [Full Recipe]. Start by gathering your ingredients. You need: - 1 ripe avocado - 1 cup canned chickpeas, rinsed and drained - 1 tablespoon lemon juice - 1 clove garlic, minced - ¼ teaspoon cumin powder - ½ teaspoon salt - ¼ teaspoon black pepper - 2 slices whole-grain bread - 1 tablespoon cherry tomatoes, halved (for garnish) - Fresh cilantro or parsley leaves (for garnish) - Red pepper flakes (optional, for spice) First, take the avocado and cut it in half. Remove the pit and scoop the green flesh into a bowl. Next, rinse the chickpeas under cold water in a strainer. Let them drain well. This step helps remove extra sodium from canned chickpeas. Now, let's toast the bread. You can use a toaster or a pan. If using a pan, heat it over medium heat. Place the bread slices in the pan. Toast them until they turn golden brown on both sides. This takes about 2-3 minutes per side. Watch closely to avoid burning. Crispy toast will hold the toppings better. With the avocado in the bowl, mash it slightly with a fork. You want it creamy but still a bit chunky. Next, add the chickpeas. Use the fork to mash them together with the avocado. Mix until they are combined but not fully smooth. Now, stir in the lemon juice, minced garlic, cumin powder, salt, and black pepper. Ensure everything is mixed well. This blend gives your toast a fresh and zesty flavor. Finally, it's time to assemble your toast. Spread a generous amount of the chickpea and avocado mix on each slice of toast. Top with halved cherry tomatoes and garnish with fresh herbs. If you like some heat, sprinkle red pepper flakes on top. Enjoy your creation! For the complete recipe, refer to the [Full Recipe]. When picking avocados, look for ripe ones. They should feel slightly soft when pressed. If they are hard, they need more time to ripen. You can place them in a bag with bananas to speed this up. Avoid any avocados with dark spots or bruises. These may taste bad or be overripe. For the best texture, use canned chickpeas. Rinse and drain them well before using. Lightly mash them with the avocado. This keeps some whole for a nice bite. If you mash them too much, it may turn mushy. Aim for a chunky mix to keep it interesting. To keep your toast fresh, store the chickpea and avocado mix in an airtight container. This helps it stay green longer. If you make extra, eat it within a day to enjoy the best flavor. Toast your bread fresh for each meal to keep it crispy. If you have leftover toast, store it in a bag, but it may get soft. {{image_2}} To boost the protein in your chickpea avocado toast, consider adding some extras. You can mix in cooked quinoa or lentils for an extra punch. Another option is to add some hemp seeds for crunch and nutrition. If you eat eggs, a poached or fried egg on top adds creaminess and protein. You can also sprinkle some feta cheese for a salty flavor. Spices and herbs can transform your toast. Try adding smoked paprika or cayenne for a smoky kick. Fresh herbs like basil or chives can brighten the dish. You might also enjoy a dash of garlic powder for extra flavor. Don’t forget about lemon zest to add a fresh zing. Experiment with your favorite spices to find your perfect mix. This recipe is already vegan and can easily be gluten-free. Use gluten-free bread for toasting instead of whole-grain. You can also swap chickpeas for white beans if you want a different taste. Just mash them like chickpeas and follow the same steps. This makes it a great option for anyone with dietary needs. For a nutty flavor, try adding tahini to the mash. For the full recipe, check out the Smashed Chickpea & Avocado Toast 🥑 section. If you have leftover chickpea and avocado mix, store it in an airtight container. Make sure to press plastic wrap directly onto the mix to limit air exposure. This helps keep it fresh and prevents browning. Store it in the fridge for up to 2 days. To reheat your toast, place it in a toaster or toaster oven. This will help regain its crispness. Avoid using a microwave, as it can make the toast soggy. Reheat for about 2-3 minutes until warm and crispy again. The chickpeas can last in the can for 2-3 years if unopened. After opening, store them in the fridge for up to a week. Avocados should be used within 1-2 days after cutting. Whole-grain bread can stay fresh in the pantry for about a week, or longer if frozen. For the full recipe, check out the details above. You can prepare the chickpea and avocado mix ahead of time. Simply mash the avocado and chickpeas as the recipe shows. Store it in an airtight container. Add some lemon juice to keep it fresh. You can prep this mixture a day before. Just toast the bread when you are ready to eat. This way, you save time and enjoy your meal quickly. You can add various healthy toppings to boost flavor and nutrition. Here are some ideas: - Sliced radishes for crunch - Cucumber slices for freshness - Feta cheese for creaminess - Arugula for a peppery kick - Sliced avocado for extra creaminess - Pumpkin seeds for a nutty flavor These toppings not only taste great but also add color to your dish. Yes, you can use dried chickpeas instead of canned ones. However, dried chickpeas need more time. Start by soaking them overnight in water. After soaking, cook them until soft. This usually takes about one to two hours. Make sure to drain and rinse them well before mashing. Using dried chickpeas can enhance the flavor of your toast and is a great way to control the texture. This article covered easy chickpea avocado toast, from essential ingredients to tasty variations. You learned how to prepare and store this dish, ensuring freshness and flavor. The right avocados and chickpeas make a big difference. Don’t forget the optional garnishes and spices to elevate your toast. Experiment with toppings and enjoy this healthy meal any time. Simple, nutritious, and delicious, this toast makes cooking fun and easy. Start creating your own twist today for a tasty treat!](https://recipespursuit.com/wp-content/uploads/2025/07/ffa4b120-b113-4855-9bad-2d81131a7bcd.webp)
