

Latest & Greatest

Spring Hash Brown Crust Quiche Fresh and Flavorful Recipe
Spring is here, and it’s the perfect time for a fresh and flavorful dish! Today, I’ll share my Spring Hash
Read more…browse recipes


![- 1 cup sushi rice - 1 can (5 oz) tuna in water, drained - 1 tablespoon mayonnaise - 1 teaspoon sriracha - 1 tablespoon rice vinegar - 1 teaspoon sugar - 1/2 teaspoon salt - 1 small avocado, sliced - 1/2 cucumber, thinly sliced - 1/4 cup shredded carrots - 2 green onions, chopped - Sesame seeds, for garnish When I make Easy Spicy Tuna Sushi Bowls, I love how simple the ingredients are. You start with sushi rice, which gives the bowls their classic base. Canned tuna is a great choice for this dish. It’s easy to find and quick to use. I often choose a brand packed in water for a lighter taste. Mixing in mayonnaise and sriracha gives the tuna a creamy, spicy kick. The seasoning is just as important. Rice vinegar adds a nice tang. Sugar helps balance the flavors, while salt enhances everything. When you fold this mixture into the rice, it makes the dish come alive. For toppings, I always include sliced avocado. It adds creaminess and a fresh taste. Thinly sliced cucumber gives a nice crunch. Shredded carrots add color and sweetness. Chopped green onions bring a fresh bite, while sesame seeds finish everything off perfectly. Want to explore the full recipe? Check out the Full Recipe for all the details. 1. Start by rinsing the sushi rice. Place it in a bowl and cover it with cold water. Swirl the rice gently, then drain the water. Repeat this step until the water runs clear. This helps remove excess starch. 2. Next, cook the rice. In a medium saucepan, combine the rinsed rice and 1 1/4 cups of water. Bring it to a boil over medium heat. Once boiling, reduce the heat to low. Cover the pot and let it simmer for 18 minutes. The water should be absorbed by then. 3. After cooking, remove the pot from heat and let it sit, covered, for 10 minutes. This helps the rice finish cooking and become fluffy. 4. Now, season the rice. In a small bowl, mix 1 tablespoon of rice vinegar, 1 teaspoon of sugar, and 1/2 teaspoon of salt until dissolved. Gently fold this mixture into the warm rice. Let it cool to room temperature. 1. In another bowl, combine 1 can of drained tuna, 1 tablespoon of mayonnaise, and 1 teaspoon of sriracha. Mix well until the tuna is fully coated. 2. If you love heat, add more sriracha to taste. Adjust the spice to suit your preference. 1. To put it all together, divide the cooled sushi rice into serving bowls. 2. Top each bowl with the spicy tuna mixture. Then, add your favorite toppings: sliced avocado, cucumber, shredded carrots, and chopped green onions. 3. Finish with a sprinkle of sesame seeds for extra crunch. Serve with soy sauce on the side for drizzling or dipping. For the complete recipe, check out the Full Recipe. Enjoy your delicious bowls! To make great sushi rice, you need the right texture. First, rinse the rice well. Rinsing removes excess starch. This helps the rice become sticky. Use cold water and rinse until the water runs clear. After rinsing, cook the rice in the right amount of water. Use 1 cup of sushi rice to 1 and 1/4 cups of water. Boil it, then simmer on low for 18 minutes. Let it rest for 10 minutes after cooking. This step makes the rice fluffy and soft. You can add many flavors to your spicy tuna. Try using sesame oil for a nutty flavor. You can also add chopped scallions or fresh cilantro for brightness. If you want it spicier, add more sriracha. Taste as you mix to find your perfect heat level. Everyone has different spice preferences, so make it yours! Presentation can elevate your dish. Serve the sushi bowls in colorful bowls or plates. Place the rice in the center, then arrange the toppings around it. You can create a rainbow effect with the veggies. Drizzle some soy sauce on top for a nice touch. Pair your bowls with a side of seaweed salad or miso soup for a complete meal. This makes the meal more exciting and visually appealing! {{image_2}} You can switch up the protein in your spicy tuna sushi bowls. If you prefer something different, try using cooked shrimp or salmon. Both options taste great and add a nice twist. For those who like plant-based meals, tofu or chickpeas make excellent choices. Tofu absorbs flavors well and gives a nice texture. Chickpeas add protein and a bit of crunch. Sauces can really change the game in your bowls. You can explore different spicy mayo recipes to find your perfect flavor. Mix mayo with sriracha or go bold with wasabi for a kick. You can also try alternative sauces like ponzu or sesame oil, which add depth and richness. Experimenting with sauces helps you find your favorite taste. If you want to make your meal gluten-free or low-carb, there are easy swaps. Use cauliflower rice instead of sushi rice for a light option. You can also adjust the veggies based on what you have at home. If you’re out of cucumber, try bell peppers or radishes. This flexibility makes it easy to enjoy tasty bowls anytime. For the full recipe, check out the [Full Recipe]. To keep your Easy Spicy Tuna Sushi Bowls fresh, store leftovers properly. First, let the sushi rice cool to room temperature. Place the rice in an airtight container. For the spicy tuna, do the same. Use another airtight container. This keeps both items fresh and safe. Make sure to seal the containers tightly. Leftovers can last for up to three days in the fridge. After that, the rice and tuna may spoil. Watch for signs of spoilage. If you see any off smells or discoloration, throw it away. It’s better to be safe than sorry. Reheat sushi rice gently. The best method is to steam it. Add a splash of water and cover it. This keeps the rice moist. You can also microwave it. Heat in short bursts and stir often. If you have leftover spicy tuna, you can use it in other meals. Mix it into a salad or spread it on toast. You can even use it in a wrap. This way, you transform leftovers into something new and tasty. For the full recipe, refer back to the recipe section. It takes about 15 minutes to prep and 30 minutes to cook. The total time is around 45 minutes. You can enjoy this tasty meal in no time! Yes, you can make sushi rice ahead of time. Just cool it, then store it in an airtight container. Keep it in the fridge for up to three days. When ready, just let it come to room temperature before using it in your bowls. Sriracha adds heat and flavor, but it’s not a must. You can skip it or use less. If you want a milder taste, try mixing in some mayo with a bit of lemon juice instead. For more heat, add more sriracha or use a different hot sauce. Yes, canned tuna works well in sushi recipes. It’s easy and saves time. Just make sure to drain the tuna before mixing it. This way, your bowls won’t get soggy. If you don’t have sushi rice, you can use jasmine or basmati rice. Quinoa is another great option for a healthy twist. Just make sure to adjust cooking times for different grains. This blog post outlined how to make easy and tasty spicy tuna sushi bowls. We covered ingredients, step-by-step instructions, and tips for perfect sushi rice. I also shared how to customize your bowls with different proteins and sauces. Remember, sushi bowls are fun to make and enjoy. Experiment with flavors and toppings to find your favorites. Don't fear leftovers—they store well and can be creatively repurposed. Enjoy your sushi-making journey!](https://recipespursuit.com/wp-content/uploads/2025/06/ed03a85a-9d6f-45c9-96a6-d4624cf6828e.webp)
Easy Spicy Tuna Sushi Bowls Delightful and Quick Meal
Craving a delicious, quick meal? Look no further! My Easy Spicy Tuna Sushi Bowls are perfect for you. In just a few simple steps,…
My Latest Desserts
My Latest Recipes

hey,
i’m !
I’m so happy you’re here!
Cooking is my love language, and I’m excited to share my best dishes with you. Hope they become your favorites too! Let’s enjoy every bite of this journey together.

![- 1 lb boneless, skinless chicken breast, cut into 1-inch cubes - 1 cup fresh pineapple, cut into 1-inch cubes - 1 red bell pepper, cut into 1-inch pieces - 1 green bell pepper, cut into 1-inch pieces - 1 small red onion, cut into wedges For this dish, I choose chicken breast for its mild taste and tender texture. Fresh pineapple adds a sweet and tangy flavor. The bell peppers bring color and crunch, making every bite exciting. - 2 tablespoons olive oil - 3 tablespoons soy sauce (or tamari for gluten-free) - 2 tablespoons honey The marinade makes the chicken juicy. Olive oil gives richness, while soy sauce adds depth. Honey balances the saltiness with a touch of sweetness. - 1 teaspoon garlic powder - 1 teaspoon ground ginger - Salt and pepper to taste Garlic powder and ground ginger enhance the flavor of the chicken. Salt and pepper are key to making every ingredient shine. This recipe is simple yet full of flavor. You can check the [Full Recipe] for all the steps to create this dish. Enjoy the vibrant tastes of grilled pineapple chicken skewers! To start, we need to mix the marinade. In a bowl, whisk together: - 2 tablespoons olive oil - 3 tablespoons soy sauce - 2 tablespoons honey - 1 teaspoon garlic powder - 1 teaspoon ground ginger - Salt and pepper to taste This mix brings a sweet and savory flavor to the chicken. Next, add 1 pound of cubed chicken breast to the bowl. Make sure each piece is coated well with the marinade. Cover the bowl and place it in the fridge for at least 30 minutes. For deeper flavor, let it marinate for up to 2 hours. While the chicken marinates, soak your wooden skewers in water for about 30 minutes. This step helps prevent burning on the grill. After soaking, it's time to assemble the skewers. Thread the marinated chicken cubes onto the soaked skewers. Alternate with 1 cup of fresh pineapple cubes, 1 red bell pepper, 1 green bell pepper, and 1 small red onion. You can mix the order and colors to make it pretty! Now, let’s get grilling! Preheat your grill to medium-high heat. This step is important for getting nice grill marks. Once the grill is ready, place the skewers on it. Cook for about 10 to 12 minutes, turning them occasionally. This ensures even cooking. The chicken should be cooked through and have lovely grill marks. When done, remove the skewers from the grill. Let them rest for a few minutes before serving. Enjoy your grilled pineapple chicken skewers! For the full recipe, see the instructions above. Marinating chicken is key for great flavor. I recommend a minimum of 30 minutes. For the best taste, aim for 2 hours. This lets the chicken soak up all the tasty marinade. Use a tight lid or plastic wrap to cover the bowl. Refrigerate it while you wait. The longer you marinate, the more flavor you get. To check your grill heat, hold your hand above the grill grates. If you can keep it there for 2 seconds, it's high heat. For medium-high, you should hold it for 4 seconds. This is perfect for cooking your skewers. Preheat your grill for about 10 minutes. This helps create nice grill marks and keeps the chicken juicy. When serving your skewers, think about color and freshness. Lay them on a bright plate. Add fresh cilantro on top for a pop of green. You can also serve them with lime wedges for a zesty kick. If you want, add a side of rice or a fresh salad. This makes a complete meal that looks and tastes great. For the full recipe, check out the details above. {{image_2}} When you want to mix things up, try different ingredients in your grilled pineapple chicken skewers. You can use shrimp instead of chicken. Shrimp cooks fast and adds a nice twist. Tofu is another great choice for a meatless option. It soaks up flavors well and is perfect for grilling. For veggies, think about using seasonal produce. Zucchini, mushrooms, or cherry tomatoes all work well. These options not only add color but also vary the taste. Changing up your marinade can make a big difference. If you like heat, add red pepper flakes or a dash of hot sauce. This can give your skewers a spicy kick that is very tasty. If you want more sweetness, try adding more honey or even some brown sugar. This balances the savory flavors nicely. Adjusting the marinade can make your skewers feel fresh and new every time. For the full recipe, check out the complete instructions for making these delicious skewers! To store leftover grilled pineapple chicken skewers, let them cool first. Place them in an airtight container. This keeps them fresh and safe. You can keep them in the fridge for up to three days. Make sure they are well sealed to avoid drying out. Reheating skewers can be tricky. You want to keep them juicy. The best way is to use a skillet. Heat a little oil in the pan over medium heat. Add the skewers and cover them. This traps the steam and helps heat them evenly. Cook for about 3-5 minutes on each side. You can also reheat them in the oven at 350°F for 10-15 minutes. If you want to save skewers for later, freezing is a great option. First, let the skewers cool completely. Then, wrap each skewer in plastic wrap. After that, place them in a freezer bag. This keeps air out and prevents freezer burn. You can freeze them for up to two months. To thaw, move them to the fridge a day before you plan to eat them. You should cook chicken on skewers for about 10-12 minutes. This timing works well on medium-high heat. Make sure to turn the skewers often. This helps prevent burning and ensures even cooking. The chicken should reach an internal temperature of 165°F. Use a meat thermometer for accuracy. Yes, you can use many fruits with chicken skewers! Here are some great options: - Mango: Adds sweetness. - Peaches: Offers a juicy burst. - Zucchini: Adds a fresh crunch. - Cherry tomatoes: Bright and tangy. Feel free to mix and match for fun flavors! Grilled chicken skewers pair well with many side dishes. Here are some tasty choices: - Rice: A simple, filling option. - Salad: A light, crisp complement. - Grilled veggies: Enhance the smoky flavor. - Corn on the cob: Sweet and fun to eat. Try these sides to make your meal complete! For the full recipe, check out the main article. Grilled pineapple chicken skewers are easy and fun to make. You learned about essential ingredients like chicken, pineapple, and bell peppers. We walked through mixing marinades and creating the perfect skewers. Tips on grilling and serving add extra flavor and style. Remember, you can mix up ingredients for more fun. Try different proteins or spices! Enjoy these tasty skewers anytime, and don’t forget to share with friends. Happy grilling!](https://recipespursuit.com/wp-content/uploads/2025/07/622611d3-9b02-470d-aac5-5ab019c13e17-300x300.webp)


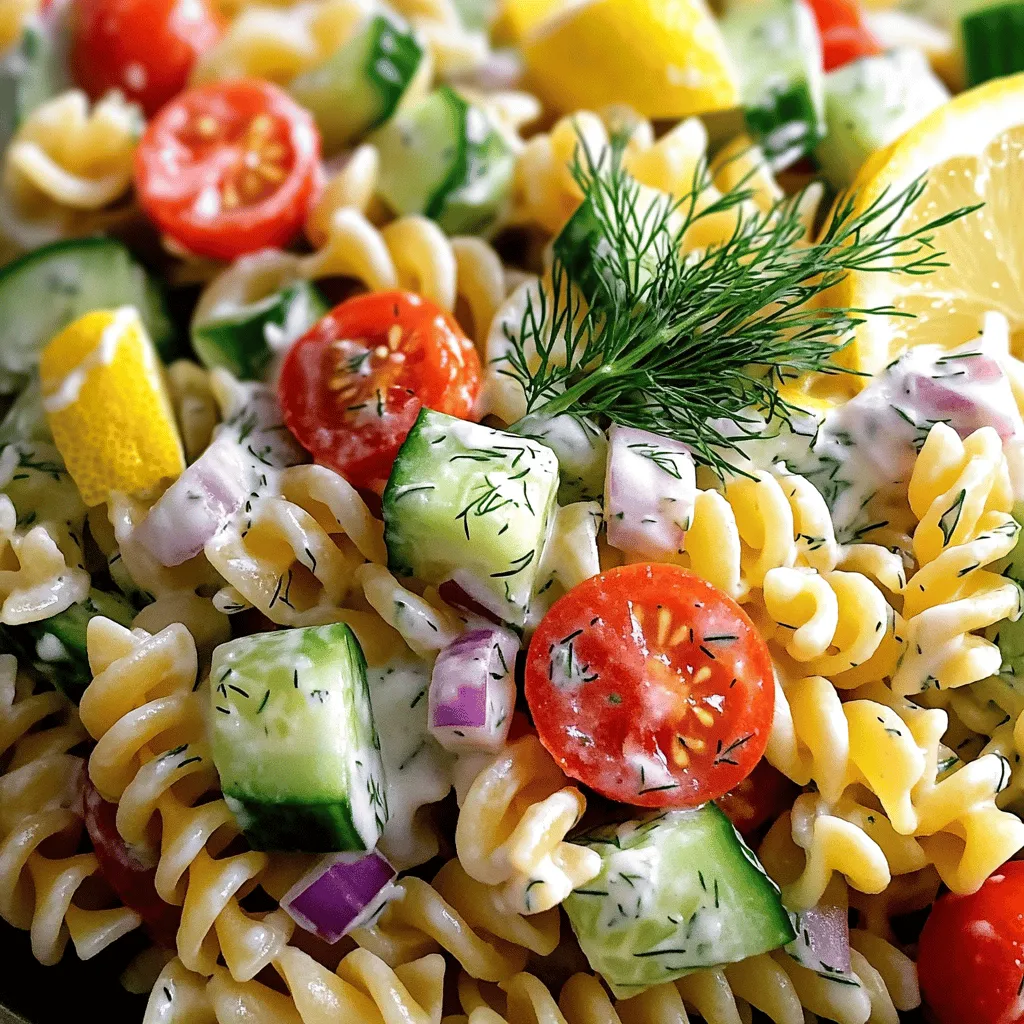
Lemon Dill Tuna Pasta Salad 15-Minute Easy Dish
Looking for a quick, refreshing meal? Try my Lemon Dill Tuna Pasta Salad! In just 15 minutes, you can whip up a delicious dish…