Are you ready to impress your friends and family with a delicious dessert? This No-Bake Tiramisu Delight in Simple Layers is easy to make and full of flavor. With rich layers of cream and coffee-soaked ladyfingers, it’s a crowd-pleaser. Whether you’re a beginner or a pro, my step-by-step guide will show you how to create this treat. Let’s dive into the ingredients and get started on this delightful dessert!
Ingredients
List of Ingredients
– Strong brewed coffee
– Unsweetened cocoa powder
– Cream cheese
– Mascarpone cheese
– Powdered sugar
– Vanilla extract
– Heavy whipping cream
– Ladyfinger cookies
– Chocolate shavings or grated chocolate
Substitute Options
– If you need an alternative for cream cheese, use Greek yogurt. It gives a nice tang.
– For a vegan option, try cashew cream as a mascarpone substitute. Blend soaked cashews with a bit of lemon juice.
– If you want gluten-free ladyfingers, use gluten-free sponge cake or make homemade ones with gluten-free flour.
These options can help you enjoy this delightful dessert, no matter your needs.
Step-by-Step Instructions
Preparation Steps
Preparing the coffee and cocoa mixture
Start by brewing a strong cup of coffee. Let it cool down. In a shallow bowl, mix the cooled coffee with two tablespoons of cocoa powder. This mix will add a rich flavor to your Tiramisu. Set it aside for later use.
Creating the cheese filling
In a large bowl, add softened cream cheese, mascarpone cheese, powdered sugar, and vanilla extract. Use a hand mixer to beat these ingredients together. Mix until the mixture is smooth and creamy, which should take about three to five minutes. This step is key to getting a delicious filling.
Whipping heavy cream
Take another bowl and pour in one cup of heavy whipping cream. Whip it until stiff peaks form. This step takes about three to four minutes. Then, gently fold the whipped cream into the cheese mixture with a spatula. Be careful not to deflate the whipped cream; this keeps your filling light and airy.
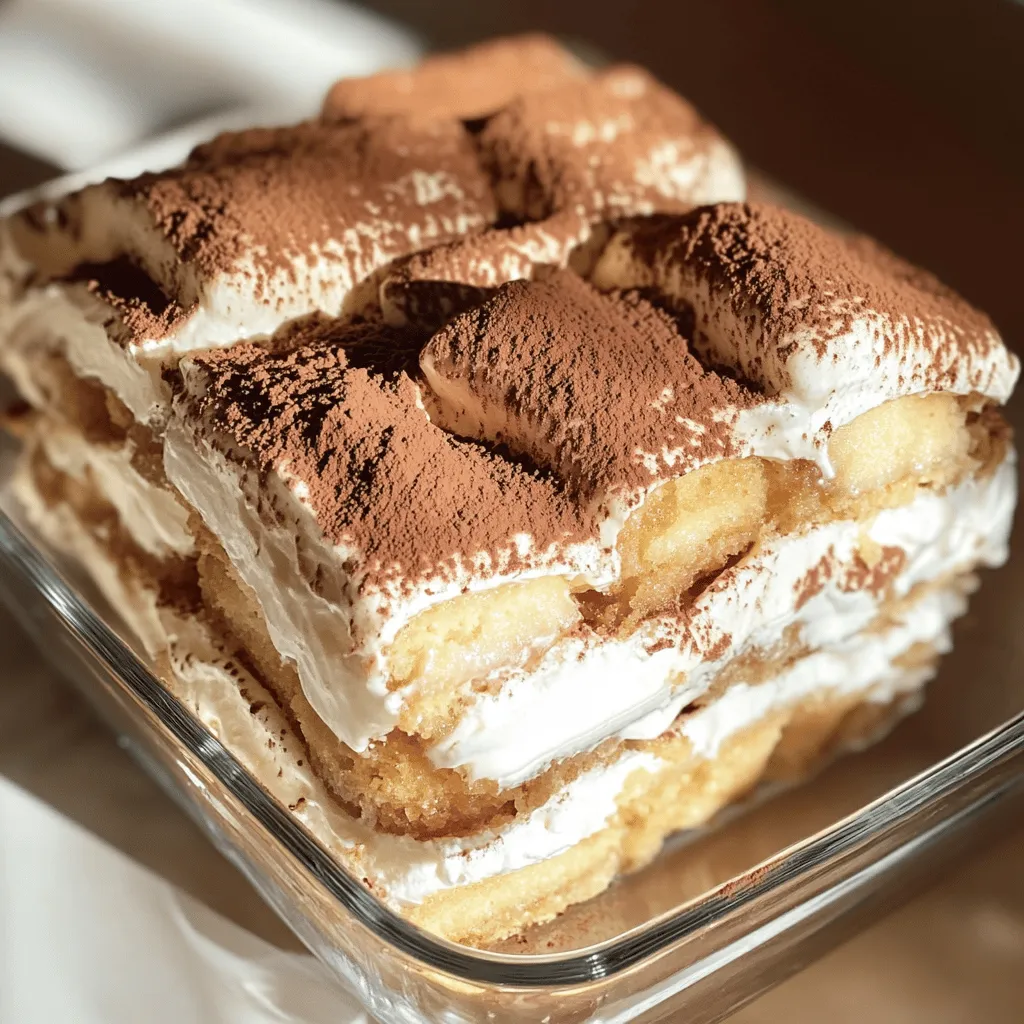
Layering the Tiramisu
Dipping ladyfingers in coffee
Next, grab your ladyfinger cookies. Dip each one into the coffee mixture for one to two seconds. Make sure they soak up the coffee but do not get soggy. This soaking adds flavor and keeps the texture just right.
First layer assembly
In a glass or a dish, layer the soaked ladyfingers at the bottom. Spread half of the cheese mixture on top of the ladyfingers evenly. This creates the first layer of your Tiramisu.
Adding the second layer
Repeat the process with another layer of dipped ladyfingers. Add the remaining cheese mixture on top. Smooth out the top with a spatula for an even finish.
Refrigeration
Importance of chilling time
Cover the dish with plastic wrap and place it in the fridge. Chill it for at least four hours, but overnight is best. The chilling time lets the flavors meld together, making each bite taste better.
Tips for overnight refrigeration
If you can, let it sit overnight. This extra time enhances the flavor and texture. Check that it is well covered to keep it fresh.
Tips & Tricks
Ensuring Perfect Texture
To make sure your ladyfingers stay firm, dip them quickly in the coffee mixture. Soak them for just 1-2 seconds. If you soak them too long, they get soggy. You want them moist but not falling apart. This keeps the layers nice and tidy.
When whipping the cream, use a chilled bowl and beaters. Whip until you see stiff peaks form. It should look fluffy and hold its shape. This lightness adds a lovely texture to the cheese mix.
Flavor Enhancements
For a deeper taste, think about adding coffee liqueur. This gives your tiramisu a rich, adult flavor. Just a tablespoon or two works well. It enhances the coffee taste without overpowering it.
You can also infuse chocolate flavors into your dessert. Add some cocoa powder to the cheese mix. Or, stir in melted chocolate. Both options bring a chocolatey twist to the classic recipe.
Presentation Ideas
When serving, get creative with your dishes. Use clear glasses to show off the layers. You can also make individual servings for a fun touch. This adds charm and makes it easy to share.
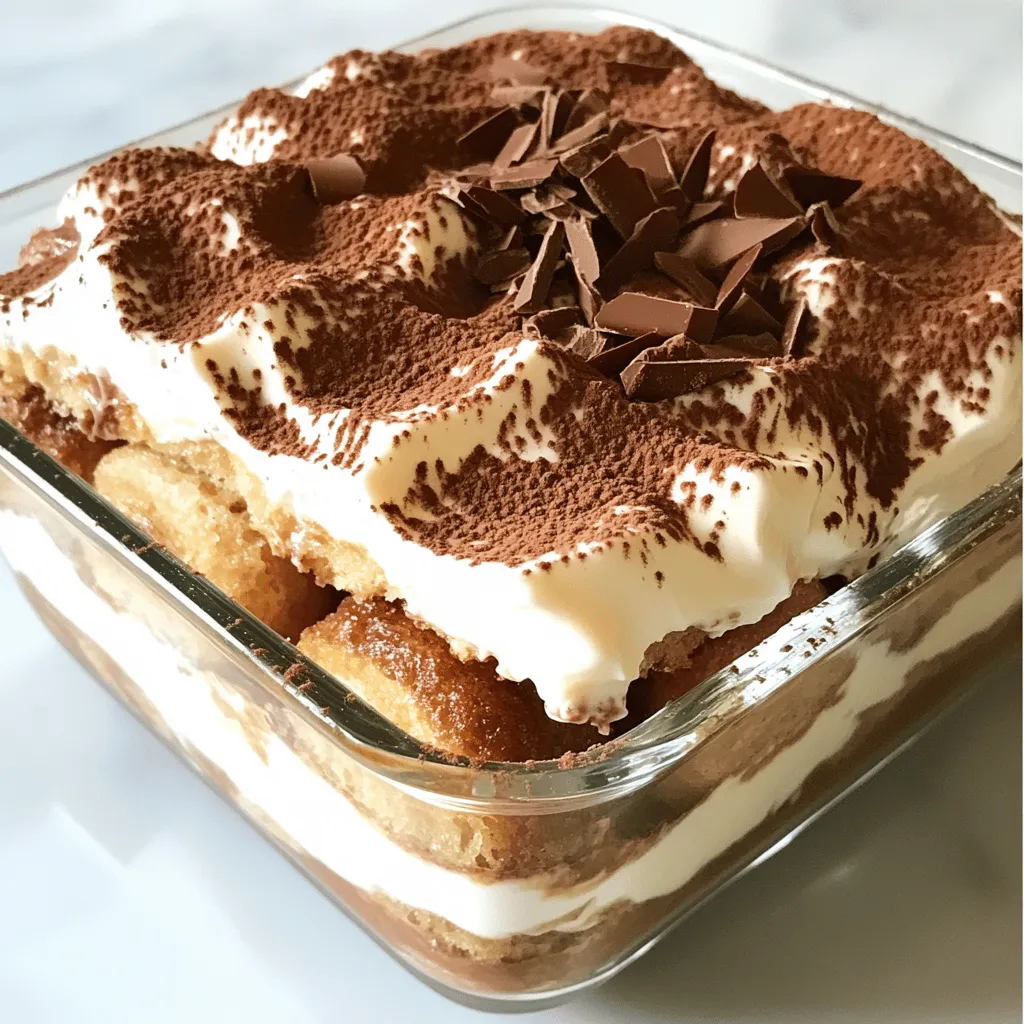
For garnishing, dust the top with cocoa powder. You can also sprinkle chocolate shavings or grated chocolate on top. These small details make your dessert look fancy and inviting.
Variations
Flavor Variations
You can make your Tiramisu even more fun by adding fruit. Layering berries or bananas adds a lovely twist. The fruit brings freshness and color to the dish. Also, consider adding spices like cinnamon or nutmeg. These spices can enhance the flavor, making it warm and cozy. A sprinkle of cinnamon on top adds a special touch too.
Dietary Variations
If you want a healthier option, try a low-sugar version. You can use a sugar substitute in the cheese filling. This keeps the dessert sweet without too much sugar. For those who need dairy-free options, use vegan cream cheese and a dairy-free whipped cream. This way, everyone can enjoy Tiramisu without worry.
Themed Tiramisu
You can easily adapt Tiramisu for holidays or special occasions. For example, adding pumpkin puree for fall gives it a festive feel. During winter, peppermint extract can make it taste like the holidays. You can even decorate it with themed toppings to match. Each season brings new flavors, making Tiramisu a versatile treat.
Storage Info
Best Practices for Storage
To keep your No-Bake Tiramisu fresh, store it in the fridge. Place it in an airtight container or cover it tightly with plastic wrap. This helps keep moisture in and odors out. Make sure the surface is smooth before you cover it.
Freezing Tiramisu
Can you freeze Tiramisu?
Yes, you can freeze No-Bake Tiramisu! However, it may change texture slightly after freezing.
How to properly thaw after freezing
To thaw, move the Tiramisu from the freezer to the fridge. Let it sit for several hours, or overnight. Avoid thawing at room temperature to keep it safe.
Shelf Life
How long does No-Bake Tiramisu last?
When stored properly in the fridge, No-Bake Tiramisu lasts about 3-4 days.
Signs of spoilage
Look for changes in smell or texture. If it smells off or feels watery, it’s best to throw it away.
FAQs
Common Questions
What makes this Tiramisu recipe no-bake?
This Tiramisu is no-bake because it does not use any oven. Instead, you layer soaked ladyfingers with a creamy mixture. This makes it quick and easy to prepare.
Can I use decaf coffee?
Yes, you can use decaf coffee. It will still give the Tiramisu its classic flavor without the caffeine kick. This option is great for anyone avoiding caffeine.
How do I make Tiramisu egg-free?
To make Tiramisu egg-free, simply skip any eggs in the recipe. Use cream cheese and mascarpone for the creamy texture. This way, you can still enjoy a tasty Tiramisu without eggs.
Serving Suggestions
Best pairings with Tiramisu
Tiramisu pairs well with strong coffee or espresso. You can also serve it with a scoop of vanilla ice cream. Fresh berries add a nice touch too.
Do you serve it warm or cold?
Tiramisu should be served cold. Chilling it enhances the flavors and keeps it firm. Serve it straight from the fridge for the best taste.
Ingredient Queries
Where to find ladyfinger cookies?
You can find ladyfinger cookies in most grocery stores. Look in the baking aisle or near the desserts. They are often in boxes labeled as “savoiardi.”
Can I substitute mascarpone with cream cheese?
Yes, you can use cream cheese instead of mascarpone. The flavor will change a bit, but it will still be creamy. Just make sure to blend it until smooth for the best result.
This no-bake Tiramisu recipe uses simple ingredients and easy steps. You learned how to prepare rich flavors while ensuring a perfect texture. I shared tips for presentation and variations to make it your own. Remember, whether you choose gluten-free options or add fruit, creativity matters. Store leftovers properly to enjoy later. With this guide, I hope you feel confident making this delicious dessert. Enjoy every bite and impress friends and family!