No-Bake Salted Caramel Bars Delightful and Easy Treat

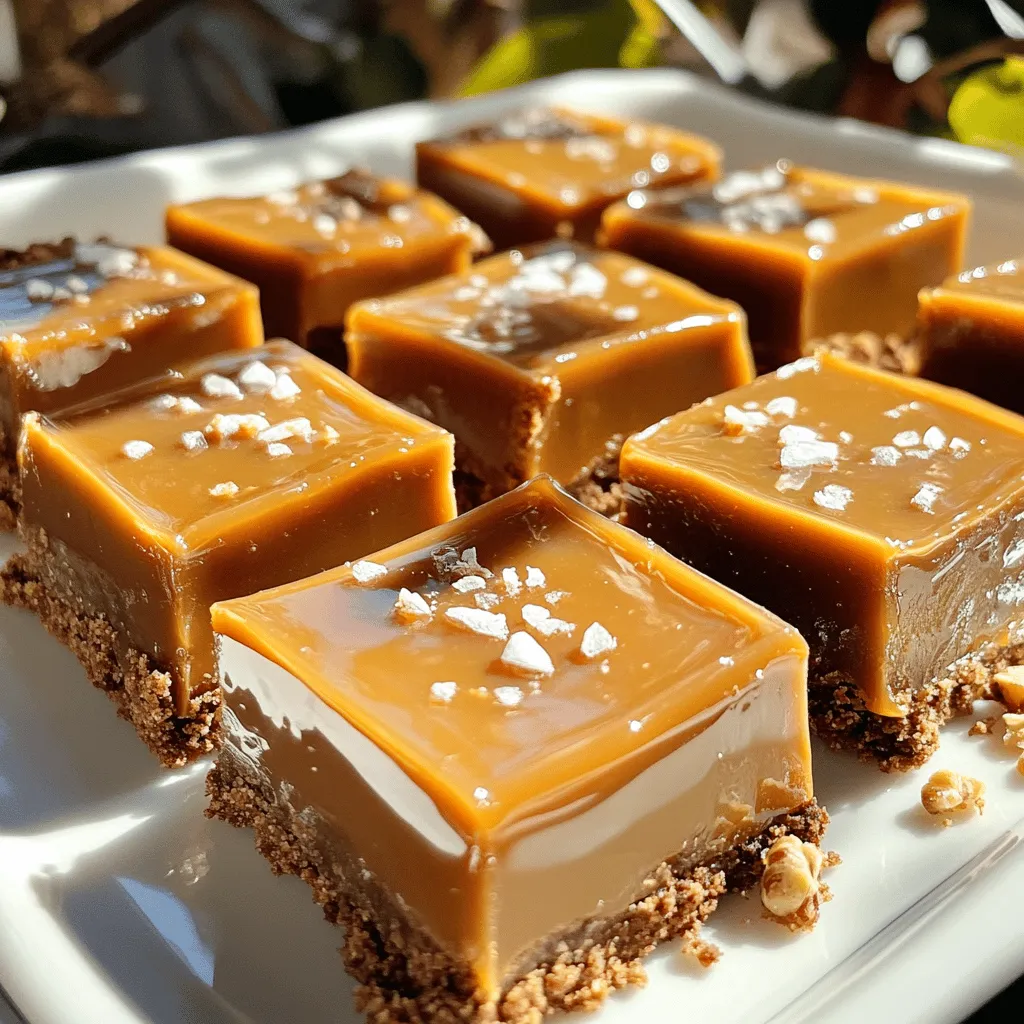
Are you ready for a sweet adventure? These No-Bake Salted Caramel Bars are a real treat that requires no oven time. With just a handful of simple ingredients, you can create a dessert that everyone will love. I’ll guide you step-by-step to make it easy and fun. So grab your apron, and let’s dive into the world of tasty, gooey goodness!

Ingredients

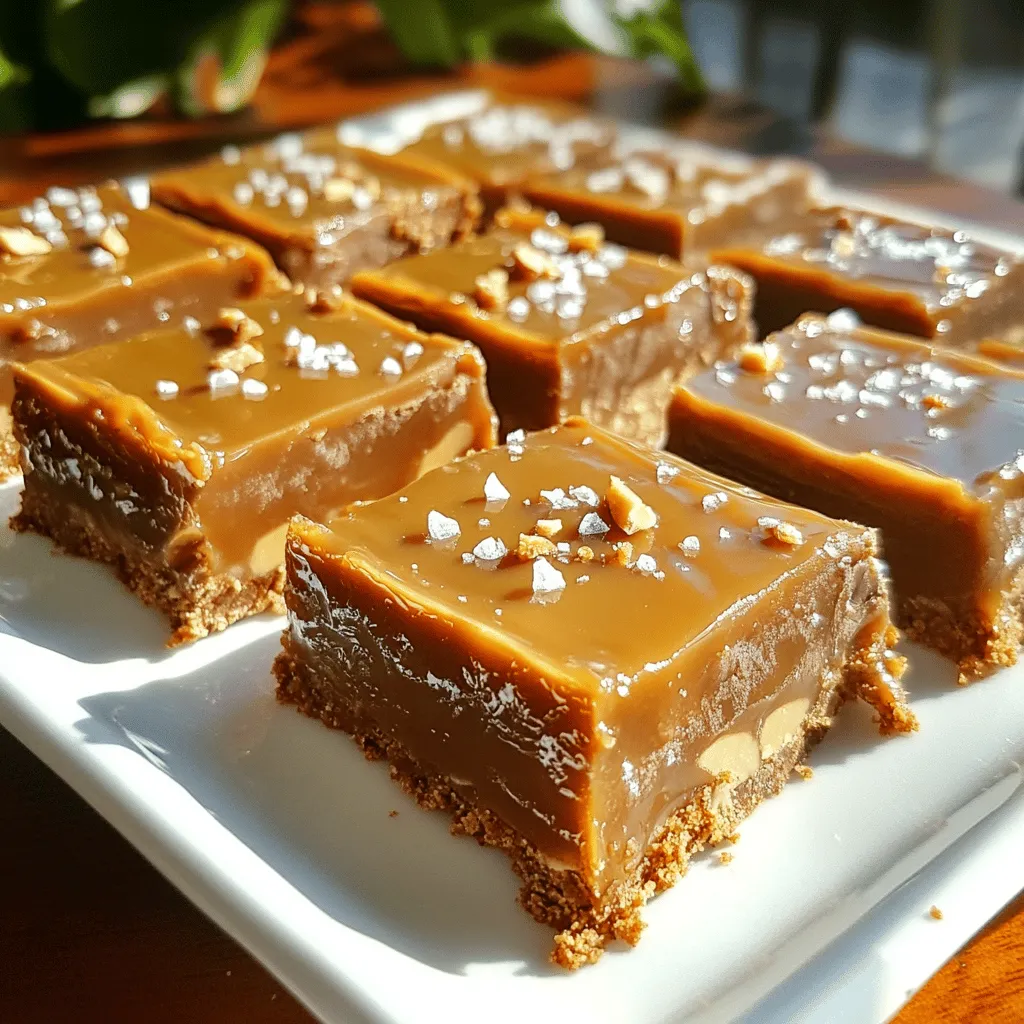
Essential Ingredients for No-Bake Salted Caramel Bars

To make these no-bake salted caramel bars, you need a few key ingredients. Each one works together to create a rich, sweet treat. Here is what you’ll need:

– 1 cup graham cracker crumbs

– 1/2 cup unsweetened cocoa powder

– 1/2 cup melted coconut oil

– 1/4 cup maple syrup

– 1 cup dates, pitted and packed

– 1 cup creamy almond butter

– 1/2 cup almond milk

– 1 teaspoon vanilla extract

– 1/2 teaspoon sea salt (plus more for topping)

Overview of Measurements

Each measurement plays a big role in the final taste. For example, the graham cracker crumbs give a crunchy base. The cocoa powder adds a deep chocolate flavor. Coconut oil helps bind the ingredients while keeping them rich. Maple syrup adds sweetness that balances well with the salt.

Ingredient Substitutions

You can easily swap some ingredients if needed. For a gluten-free option, use gluten-free graham crackers instead. If you want to avoid almond butter, try peanut butter or sunflower seed butter. You can also use honey in place of maple syrup. Just note that it may change the taste slightly.

Step-by-Step Instructions

Preparation Overview

Making No-Bake Salted Caramel Bars is simple. You need just a few easy steps. Gather your ingredients first. Prep takes only 15 minutes. The bars need to chill for at least 2 hours.

Detailed Instructions for Each Step

1. Mix the Base: In a large bowl, blend graham cracker crumbs and cocoa powder. Add melted coconut oil and maple syrup. Stir until all is well mixed.

2. Form the Crust: Press this mixture into a lined 9×9 inch baking dish. Use the back of a measuring cup to make it even. Compact it tightly to form a good base.

3. Make the Caramel Layer: In a food processor, blend pitted dates, almond butter, almond milk, vanilla extract, and sea salt. Blend until smooth. Stop to scrape down the sides as needed.

4. Pour and Spread: Pour this creamy date mixture over the crust. Spread it evenly across the top.

5. Add Sea Salt: Sprinkle a pinch of sea salt on top. This gives a nice sweet and salty contrast.

6. Chill: Place the dish in the fridge for at least 2 hours. This helps the bars set well.

7. Cut and Serve: After chilling, lift the bars out using the parchment paper. Cut into squares or bars based on your preference.

Tips for Monitoring Consistency

– Check the date mixture while blending. It should be smooth and creamy, not chunky. If it’s too thick, add a bit more almond milk.

– When spreading the caramel layer, ensure it covers the crust completely. This helps each bite have the right flavor.

– If the bars feel too soft after chilling, let them chill longer. They should be firm enough to hold their shape.

For the full recipe, don’t forget to refer back to the details provided.

Tips & Tricks

Achieving the Perfect Texture

For great texture, make sure to pack the graham cracker base tightly. This helps it hold together. When blending dates, ensure they turn smooth. If the mix feels too thick, add a splash more almond milk. After chilling, the bars should be firm yet creamy. Don’t rush the chill time; it’s key for the right texture.

Preventing Common Mistakes

One common mistake is not measuring ingredients correctly. Always use dry measuring cups for dry items. If you skip the parchment paper, it can be tough to lift the bars out. Another issue is not blending the date mixture enough. You want it smooth, not lumpy. If it looks gritty, blend more.

Enhancing Flavor with Additional Ingredients

You can boost flavor by adding a pinch of cinnamon or a splash of almond extract. For a nutty crunch, sprinkle chopped nuts on top before chilling. A drizzle of melted dark chocolate can make it even more special. Try adding a layer of fruit, like sliced bananas, for a fresh twist.

Variations

Flavor Variations to Try

You can play with flavors in these no-bake salted caramel bars. Try adding a pinch of cinnamon for warmth. You can also mix in some crushed nuts for crunch. Want a fruity twist? Add dried fruit like cranberries or cherries. For a chocolate lover’s dream, sprinkle mini chocolate chips into the caramel layer. Each variation keeps the base recipe but adds fun new tastes.

Dietary Adjustments (Vegan, Gluten-Free)

Making these bars vegan is easy. Use maple syrup, almond butter, and coconut oil as your base. They are already vegan-friendly. For gluten-free options, be sure to use gluten-free graham cracker crumbs. Most dark chocolate is gluten-free too, so you can still enjoy added chocolate goodness without worry.

Substituting Ingredients for Different Textures

If you want a chewier bar, use more dates in the mix. This gives the bars a more caramel-like feel. For a firmer texture, add a bit more almond butter or cocoa powder. Adjust the almond milk for creaminess. Too much milk makes bars too soft, while too little makes them dry. You can find your perfect balance with these simple swaps.

Storage Info

Best Ways to Store No-Bake Salted Caramel Bars

To keep your no-bake salted caramel bars fresh, store them in an airtight container. Place parchment paper between layers to prevent sticking. This method helps maintain their texture and taste.

Shelf Life and Freezing Tips

These bars last about five days in the fridge. For longer storage, freeze them. Wrap each bar in plastic wrap. Then, place them in a freezer-safe bag. They can stay good for up to three months in the freezer.

How to Rejuvenate Leftovers

If your bars feel a bit dry after freezing, try this simple trick. Let them thaw in the fridge. Then, drizzle a little almond milk over the top. This adds moisture and brings back some of their creaminess. Enjoy your delicious treat again! For the full recipe, check out the earlier section.

FAQs

Can I use different nut butters?

Yes, you can use any nut butter you like. Almond butter gives a nice flavor, but peanut butter works too. If you want a nut-free option, try sunflower seed butter. Each choice adds its own taste, so feel free to experiment!

How do I make these bars less sweet?

To cut down the sweetness, use less maple syrup. You can also add more cocoa powder for a richer flavor without extra sugar. Another option is to use unsweetened nut butter. Adjusting these ingredients helps balance the sweetness to your liking.

What if I can’t find graham cracker crumbs?

No worries! You can crush any cookies you have at home. Digestive biscuits work well too. If you want a gluten-free option, use gluten-free cookies or oats. Just make sure to grind them to a fine crumb for the base.

How long do these bars take to set?

These bars need at least 2 hours in the fridge to set firmly. If you want them to be extra firm, let them chill for longer. The longer they sit, the easier they are to slice. Just check before serving!

Can I add chocolate to the recipe?

Absolutely! You can mix in some melted dark chocolate for extra flavor. Just pour it over the caramel layer before chilling. You can also sprinkle chocolate chips on top for a fun twist. It will make your bars even more delicious!

For the full recipe, check out the No-Bake Salted Caramel Bars.

In this post, we explored the key ingredients for no-bake salted caramel bars and detailed step-by-step instructions. We shared tips for perfecting texture, avoiding mistakes, and enhancing flavors. You also learned about variations, dietary adjustments, and smart storage methods.

These bars are simple to make, and they taste great. Try mixing in different flavors or textures. Enjoy your baking journey, and remember to have fun while experimenting!

To make these no-bake salted caramel bars, you need a few key ingredients. Each one works together to create a rich, sweet treat. Here is what you'll need: - 1 cup graham cracker crumbs - 1/2 cup unsweetened cocoa powder - 1/2 cup melted coconut oil - 1/4 cup maple syrup - 1 cup dates, pitted and packed - 1 cup creamy almond butter - 1/2 cup almond milk - 1 teaspoon vanilla extract - 1/2 teaspoon sea salt (plus more for topping) Each measurement plays a big role in the final taste. For example, the graham cracker crumbs give a crunchy base. The cocoa powder adds a deep chocolate flavor. Coconut oil helps bind the ingredients while keeping them rich. Maple syrup adds sweetness that balances well with the salt. You can easily swap some ingredients if needed. For a gluten-free option, use gluten-free graham crackers instead. If you want to avoid almond butter, try peanut butter or sunflower seed butter. You can also use honey in place of maple syrup. Just note that it may change the taste slightly. Making No-Bake Salted Caramel Bars is simple. You need just a few easy steps. Gather your ingredients first. Prep takes only 15 minutes. The bars need to chill for at least 2 hours. 1. Mix the Base: In a large bowl, blend graham cracker crumbs and cocoa powder. Add melted coconut oil and maple syrup. Stir until all is well mixed. 2. Form the Crust: Press this mixture into a lined 9x9 inch baking dish. Use the back of a measuring cup to make it even. Compact it tightly to form a good base. 3. Make the Caramel Layer: In a food processor, blend pitted dates, almond butter, almond milk, vanilla extract, and sea salt. Blend until smooth. Stop to scrape down the sides as needed. 4. Pour and Spread: Pour this creamy date mixture over the crust. Spread it evenly across the top. 5. Add Sea Salt: Sprinkle a pinch of sea salt on top. This gives a nice sweet and salty contrast. 6. Chill: Place the dish in the fridge for at least 2 hours. This helps the bars set well. 7. Cut and Serve: After chilling, lift the bars out using the parchment paper. Cut into squares or bars based on your preference. - Check the date mixture while blending. It should be smooth and creamy, not chunky. If it’s too thick, add a bit more almond milk. - When spreading the caramel layer, ensure it covers the crust completely. This helps each bite have the right flavor. - If the bars feel too soft after chilling, let them chill longer. They should be firm enough to hold their shape. For the full recipe, don't forget to refer back to the details provided. For great texture, make sure to pack the graham cracker base tightly. This helps it hold together. When blending dates, ensure they turn smooth. If the mix feels too thick, add a splash more almond milk. After chilling, the bars should be firm yet creamy. Don't rush the chill time; it’s key for the right texture. One common mistake is not measuring ingredients correctly. Always use dry measuring cups for dry items. If you skip the parchment paper, it can be tough to lift the bars out. Another issue is not blending the date mixture enough. You want it smooth, not lumpy. If it looks gritty, blend more. You can boost flavor by adding a pinch of cinnamon or a splash of almond extract. For a nutty crunch, sprinkle chopped nuts on top before chilling. A drizzle of melted dark chocolate can make it even more special. Try adding a layer of fruit, like sliced bananas, for a fresh twist. {{image_2}} You can play with flavors in these no-bake salted caramel bars. Try adding a pinch of cinnamon for warmth. You can also mix in some crushed nuts for crunch. Want a fruity twist? Add dried fruit like cranberries or cherries. For a chocolate lover's dream, sprinkle mini chocolate chips into the caramel layer. Each variation keeps the base recipe but adds fun new tastes. Making these bars vegan is easy. Use maple syrup, almond butter, and coconut oil as your base. They are already vegan-friendly. For gluten-free options, be sure to use gluten-free graham cracker crumbs. Most dark chocolate is gluten-free too, so you can still enjoy added chocolate goodness without worry. If you want a chewier bar, use more dates in the mix. This gives the bars a more caramel-like feel. For a firmer texture, add a bit more almond butter or cocoa powder. Adjust the almond milk for creaminess. Too much milk makes bars too soft, while too little makes them dry. You can find your perfect balance with these simple swaps. To keep your no-bake salted caramel bars fresh, store them in an airtight container. Place parchment paper between layers to prevent sticking. This method helps maintain their texture and taste. These bars last about five days in the fridge. For longer storage, freeze them. Wrap each bar in plastic wrap. Then, place them in a freezer-safe bag. They can stay good for up to three months in the freezer. If your bars feel a bit dry after freezing, try this simple trick. Let them thaw in the fridge. Then, drizzle a little almond milk over the top. This adds moisture and brings back some of their creaminess. Enjoy your delicious treat again! For the full recipe, check out the earlier section. Yes, you can use any nut butter you like. Almond butter gives a nice flavor, but peanut butter works too. If you want a nut-free option, try sunflower seed butter. Each choice adds its own taste, so feel free to experiment! To cut down the sweetness, use less maple syrup. You can also add more cocoa powder for a richer flavor without extra sugar. Another option is to use unsweetened nut butter. Adjusting these ingredients helps balance the sweetness to your liking. No worries! You can crush any cookies you have at home. Digestive biscuits work well too. If you want a gluten-free option, use gluten-free cookies or oats. Just make sure to grind them to a fine crumb for the base. These bars need at least 2 hours in the fridge to set firmly. If you want them to be extra firm, let them chill for longer. The longer they sit, the easier they are to slice. Just check before serving! Absolutely! You can mix in some melted dark chocolate for extra flavor. Just pour it over the caramel layer before chilling. You can also sprinkle chocolate chips on top for a fun twist. It will make your bars even more delicious! For the full recipe, check out the No-Bake Salted Caramel Bars. In this post, we explored the key ingredients for no-bake salted caramel bars and detailed step-by-step instructions. We shared tips for perfecting texture, avoiding mistakes, and enhancing flavors. You also learned about variations, dietary adjustments, and smart storage methods. These bars are simple to make, and they taste great. Try mixing in different flavors or textures. Enjoy your baking journey, and remember to have fun while experimenting!

No-Bake Salted Caramel Bars

Indulge in these irresistible No-Bake Salted Caramel Bars that are easy to whip up and perfect for satisfying your sweet tooth! With a rich base of graham crackers and cocoa powder, and a creamy date filling, these bars are a delicious blend of sweet and salty. Discover how to make this delightful treat in just 15 minutes. Click through to explore the recipe and treat yourself to these heavenly bars today!

Ingredients
  

1 cup graham cracker crumbs

1/2 cup unsweetened cocoa powder

1/2 cup melted coconut oil

1/4 cup maple syrup

1 cup dates, pitted and packed

1 cup creamy almond butter

1/2 cup almond milk

1 teaspoon vanilla extract

1/2 teaspoon sea salt (plus more for topping)

Instructions
 

In a large mixing bowl, combine the graham cracker crumbs and cocoa powder. Stir in the melted coconut oil and maple syrup until well combined.

    Press the mixture into the bottom of a parchment-lined 9x9 inch baking dish, creating an even layer. Use the back of a measuring cup to compact it tightly.

      In a food processor, combine the pitted dates, almond butter, almond milk, vanilla extract, and sea salt. Blend until smooth and creamy, stopping to scrape down the sides as needed.

        Pour the date mixture over the crust layer in the baking dish, spreading it evenly.

          Sprinkle a pinch of sea salt on top of the caramel layer for that sweet and salty contrast.

            Place the dish in the refrigerator for at least 2 hours to set properly.

              Once set, remove the bars from the dish using the parchment paper for easy lifting. Cut into squares or bars as desired.

                Prep Time: 15 min | Total Time: 2 hrs 15 min | Servings: 16 bars

                  - Presentation Tips: Arrange the bars on a beautiful platter and drizzle with a little extra almond butter for an eye-catching touch. You can also sprinkle some crushed nuts on top for added texture!

                    Leave a Comment

                    Recipe Rating