No-Bake Chocolate Cheesecake Jars Easy and Delicious

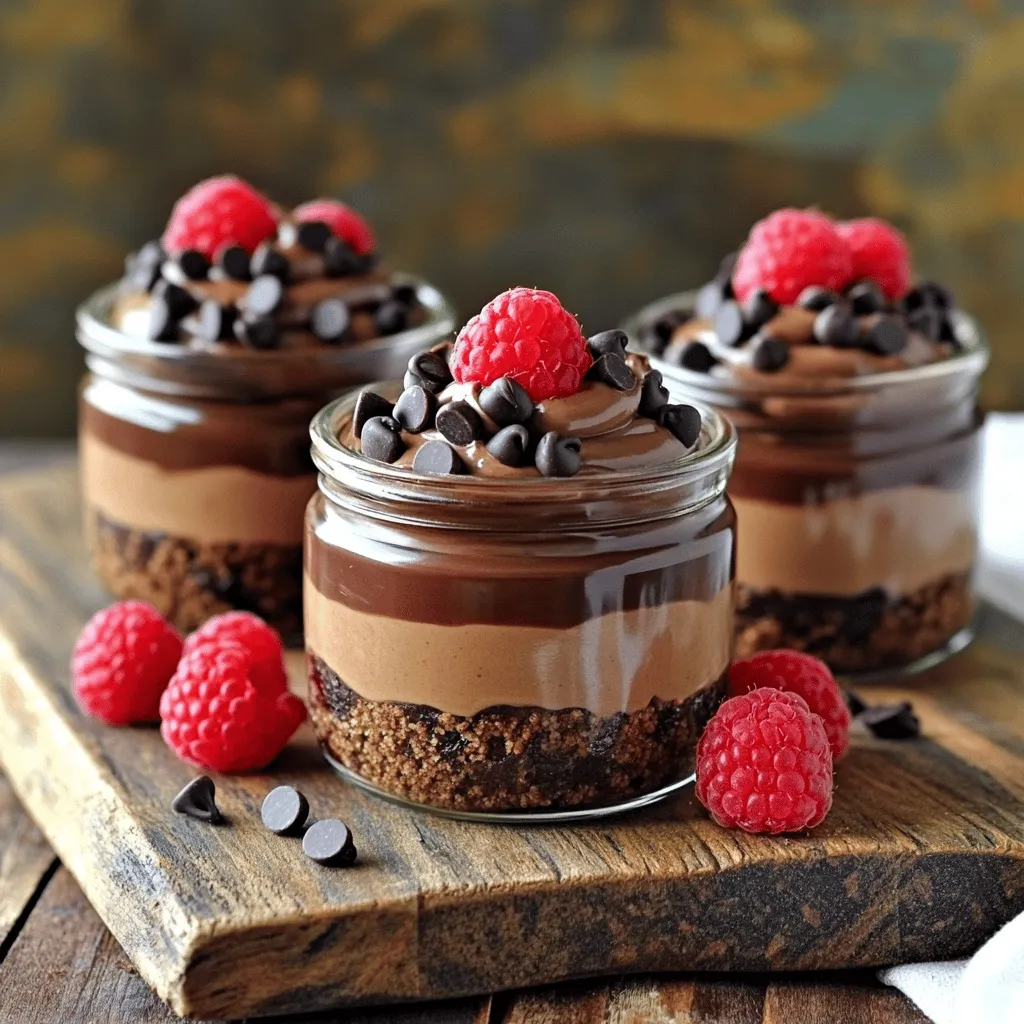
Craving a rich and creamy dessert without the hassle of baking? Look no further! No-Bake Chocolate Cheesecake Jars are your answer to an easy and delicious treat. Whether you’re hosting a gathering or just want a sweet bite, these jars offer layers of chocolate bliss. In this guide, I’ll share simple ingredients, easy steps, and clever tips to create your perfect dessert. Let’s dive in and uncover how to impress your taste buds!

Ingredients

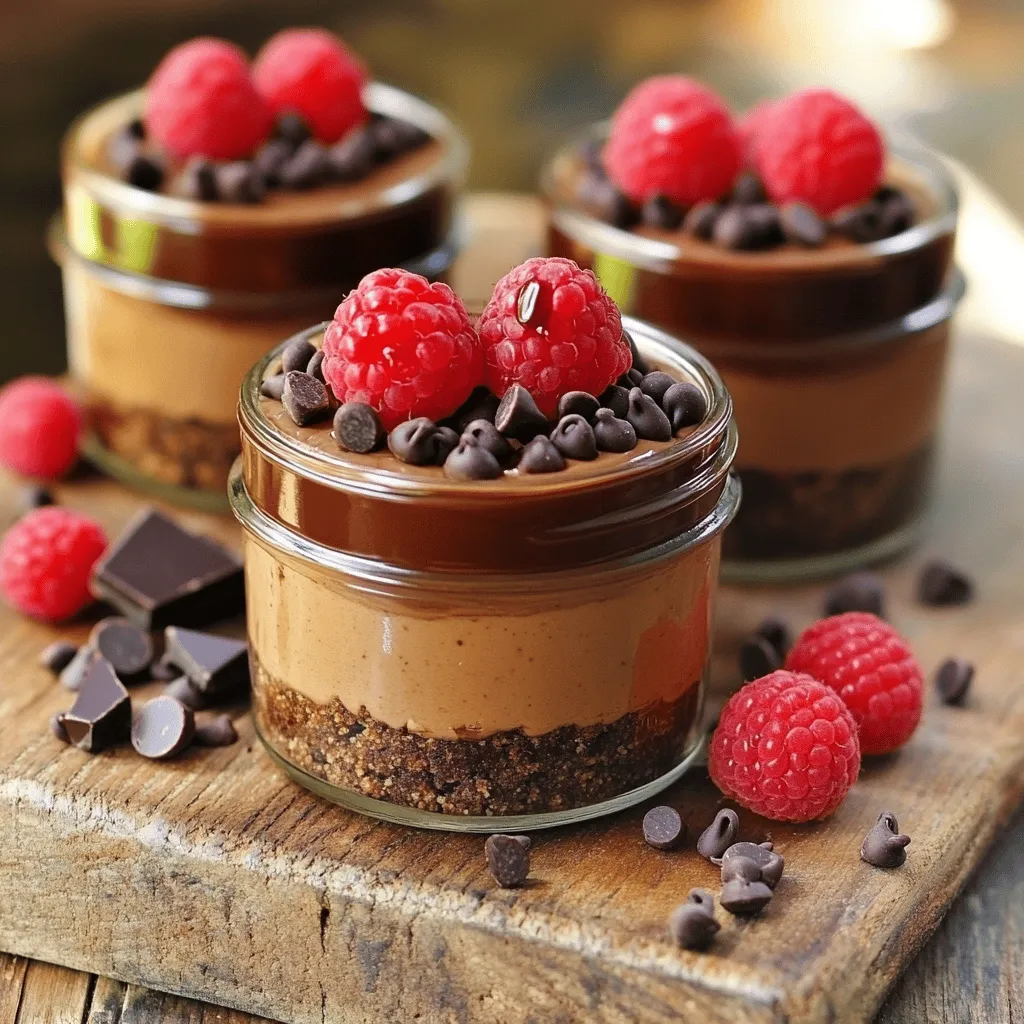
Essential Ingredients for No-Bake Chocolate Cheesecake Jars

To make these jars, you need some key items. Here’s what you will need:

– 8 oz cream cheese, softened

– 1 cup powdered sugar

– 1 cup whipped cream (store-bought or homemade)

– 1/2 cup unsweetened cocoa powder

– 1 teaspoon vanilla extract

– 1 cup chocolate cookie crumbs (like Oreos or chocolate graham crackers)

– 4 tablespoons unsalted butter, melted

– 1/4 cup chocolate chips for garnish

– Fresh raspberries or strawberries for garnish

These ingredients create a rich and creamy dessert that is sure to please.

Recommended Tools and Equipment

You will need a few tools for this recipe. Here’s a list to help you:

– Mixing bowls

– Electric mixer

– Spatula

– Measuring cups and spoons

– Jars or cups for serving

These tools will make the process smooth and fun.

Substitutions and Allergens

If you need alternatives or have allergies, there are options. You can use:

– Low-fat cream cheese for a lighter option.

– Coconut cream instead of whipped cream for a dairy-free choice.

– Gluten-free cookie crumbs for a gluten-free version.

Check for allergens in your ingredients to keep everyone safe. If you want the full recipe, it’s available for those who love to dive deeper into the details.

Step-by-Step Instructions

Detailed Instructions for Each Layer

To start, you need to prepare each layer of the cheesecake jars. First, make the chocolate cookie crust. Mix 1 cup of chocolate cookie crumbs with 4 tablespoons of melted butter in a bowl. Stir until the crumbs are fully coated. This will give your jars a tasty base.

Next, prepare the cheesecake filling. In a mixing bowl, beat 8 oz of softened cream cheese until it gets smooth. Slowly add 1 cup of powdered sugar while mixing. Then, add 1/2 cup of unsweetened cocoa powder and 1 teaspoon of vanilla extract. Mix well until it’s silky smooth. This filling is rich and chocolatey.

Mixing the Cheesecake Filling

When mixing the cheesecake filling, be gentle when adding the whipped cream. You’ll need 1 cup of whipped cream for this. Fold it into your chocolate mixture using a spatula. Do this carefully to keep it light and airy. This step is key to a good texture. You want it to be fluffy and rich.

Layering Techniques for Perfect Presentation

Now, it’s time to layer your jars. Start with 2 tablespoons of the chocolate cookie crust at the bottom. Press it down lightly. Then, add 3 tablespoons of the cheesecake filling over the crust. Repeat these layers until the jars are full. Aim for at least two layers of each. Finish with a layer of cheesecake on top.

For a nice touch, sprinkle chocolate chips on the top before serving. You can also add fresh raspberries or strawberries for color. Remember to chill your jars for at least 2 hours. This helps everything set up nicely. Enjoy your beautiful and delicious no-bake chocolate cheesecake jars! For the complete recipe, check the [Full Recipe].

Tips & Tricks

Tips for Perfecting the Cheesecake Texture

To get the best texture, start with room-temperature cream cheese. This helps it mix easily. Use an electric mixer to beat it until smooth. Avoid lumps for a creamy filling. When adding whipped cream, fold it in gently. This keeps the mixture light and fluffy. Also, use unsweetened cocoa powder for a rich taste. Always make sure your ingredients are fresh for the best flavor.

Common Mistakes to Avoid

One common mistake is not chilling the jars long enough. Letting them chill for at least two hours is key. If you skip this step, the cheesecake may not set properly. Another mistake is over-mixing the whipped cream. This can make the filling dense instead of airy. Lastly, don’t skip the chocolate cookie crumbs layer. This adds a crunchy texture that balances the creamy cheesecake.

Ensuring an Easy Assembly Process

To make assembly simple, gather all your tools and ingredients first. Use a clear jar to show off the layers. Start with the cookie mixture at the bottom. A spoon or small scoop makes layering easy. Alternate layers of cookie and cheesecake until the jar is full. Finish with cheesecake on top for a nice look. This helps create a balanced bite every time. For the final touch, use chocolate chips and berries as a garnish. These add color and extra flavor.

For a complete guide to making these delicious jars, check out the Full Recipe.

Variations

Alternative Flavor Combinations (like Mint or Raspberry)

You can easily switch up the flavor of your no-bake chocolate cheesecake jars. For a fresh twist, add mint extract. Use one teaspoon for a nice minty taste. You can also mix in crushed mint candies for extra crunch. If you prefer fruity notes, try raspberry or strawberry. Swirl in a fruit puree before layering. This adds bright flavor and color.

Different Topping Ideas (like Nuts or Caramel)

Toppings can change the whole look and taste of your dessert. I love using chopped nuts for some extra crunch. Walnuts or pecans work well. You can also drizzle caramel sauce over the top for a sweet treat. For a fun twist, add crushed candy bars or even sprinkles. Choose your favorite toppings to make it your own.

Healthy Substitutes for a Lighter Dessert

Want a lighter version of this dessert? You can swap regular cream cheese for low-fat cream cheese. You can also use Greek yogurt instead of whipped cream. This adds protein and cuts some fat. Consider using honey or maple syrup instead of powdered sugar for sweetness. These small changes keep the flavor while making it healthier.

For more tips on making these delicious jars, check the Full Recipe.

Storage Info

How to Store No-Bake Chocolate Cheesecake Jars

You can store your No-Bake Chocolate Cheesecake Jars in the fridge. Keep them in an airtight container. They will stay fresh for about 3 to 5 days. If you want to keep them longer, freezing is a great option.

Freezing Tips for Extended Shelf Life

To freeze the jars, cover them tightly with plastic wrap or foil. Place them in a freezer-safe container. They can last up to 2 months in the freezer. When you’re ready to enjoy, move them to the fridge overnight to thaw. Do not refreeze after thawing.

Reheating or Refreshing the Dessert

No need to reheat No-Bake Chocolate Cheesecake Jars. They are best served cold. If they seem a little soft after thawing, you can gently mix them to restore texture. Add a few fresh toppings, like berries or chocolate chips, for a fresh look and taste before serving.

FAQs

How long do No-Bake Chocolate Cheesecake Jars last?

No-Bake Chocolate Cheesecake Jars last for about 3 to 5 days in the fridge. Make sure to cover them tightly. This keeps them fresh and tasty. If you want them to last longer, you can freeze them. However, the texture may change after thawing.

Can I use low-fat cream cheese in this recipe?

Yes, you can use low-fat cream cheese! It will still taste great. However, the texture might be a bit different. Low-fat cream cheese can make your cheesecake less rich. If you want a lighter option, this is a good choice.

What can I substitute for whipped cream?

If you need a substitute for whipped cream, try using cool whip or whipped topping. You can also whip coconut cream for a dairy-free option. Another choice is to use Greek yogurt. It adds creaminess and a bit of tang. Just remember, it will change the flavor slightly. For the full recipe, check out the instructions above!

This article walked you through making no-bake chocolate cheesecake jars. You learned about key ingredients, tools, and substitutions. I detailed steps for mixing and layering, plus tips for the best texture. You discovered flavor variations and topping ideas, along with how to store and freeze these desserts.

In conclusion, making these cheesecake jars is fun and easy. Customize them to fit your taste and enjoy delightful treats anytime.

To make these jars, you need some key items. Here’s what you will need: - 8 oz cream cheese, softened - 1 cup powdered sugar - 1 cup whipped cream (store-bought or homemade) - 1/2 cup unsweetened cocoa powder - 1 teaspoon vanilla extract - 1 cup chocolate cookie crumbs (like Oreos or chocolate graham crackers) - 4 tablespoons unsalted butter, melted - 1/4 cup chocolate chips for garnish - Fresh raspberries or strawberries for garnish These ingredients create a rich and creamy dessert that is sure to please. You will need a few tools for this recipe. Here’s a list to help you: - Mixing bowls - Electric mixer - Spatula - Measuring cups and spoons - Jars or cups for serving These tools will make the process smooth and fun. If you need alternatives or have allergies, there are options. You can use: - Low-fat cream cheese for a lighter option. - Coconut cream instead of whipped cream for a dairy-free choice. - Gluten-free cookie crumbs for a gluten-free version. Check for allergens in your ingredients to keep everyone safe. If you want the full recipe, it's available for those who love to dive deeper into the details. To start, you need to prepare each layer of the cheesecake jars. First, make the chocolate cookie crust. Mix 1 cup of chocolate cookie crumbs with 4 tablespoons of melted butter in a bowl. Stir until the crumbs are fully coated. This will give your jars a tasty base. Next, prepare the cheesecake filling. In a mixing bowl, beat 8 oz of softened cream cheese until it gets smooth. Slowly add 1 cup of powdered sugar while mixing. Then, add 1/2 cup of unsweetened cocoa powder and 1 teaspoon of vanilla extract. Mix well until it’s silky smooth. This filling is rich and chocolatey. When mixing the cheesecake filling, be gentle when adding the whipped cream. You’ll need 1 cup of whipped cream for this. Fold it into your chocolate mixture using a spatula. Do this carefully to keep it light and airy. This step is key to a good texture. You want it to be fluffy and rich. Now, it’s time to layer your jars. Start with 2 tablespoons of the chocolate cookie crust at the bottom. Press it down lightly. Then, add 3 tablespoons of the cheesecake filling over the crust. Repeat these layers until the jars are full. Aim for at least two layers of each. Finish with a layer of cheesecake on top. For a nice touch, sprinkle chocolate chips on the top before serving. You can also add fresh raspberries or strawberries for color. Remember to chill your jars for at least 2 hours. This helps everything set up nicely. Enjoy your beautiful and delicious no-bake chocolate cheesecake jars! For the complete recipe, check the [Full Recipe]. To get the best texture, start with room-temperature cream cheese. This helps it mix easily. Use an electric mixer to beat it until smooth. Avoid lumps for a creamy filling. When adding whipped cream, fold it in gently. This keeps the mixture light and fluffy. Also, use unsweetened cocoa powder for a rich taste. Always make sure your ingredients are fresh for the best flavor. One common mistake is not chilling the jars long enough. Letting them chill for at least two hours is key. If you skip this step, the cheesecake may not set properly. Another mistake is over-mixing the whipped cream. This can make the filling dense instead of airy. Lastly, don’t skip the chocolate cookie crumbs layer. This adds a crunchy texture that balances the creamy cheesecake. To make assembly simple, gather all your tools and ingredients first. Use a clear jar to show off the layers. Start with the cookie mixture at the bottom. A spoon or small scoop makes layering easy. Alternate layers of cookie and cheesecake until the jar is full. Finish with cheesecake on top for a nice look. This helps create a balanced bite every time. For the final touch, use chocolate chips and berries as a garnish. These add color and extra flavor. For a complete guide to making these delicious jars, check out the Full Recipe. {{image_2}} You can easily switch up the flavor of your no-bake chocolate cheesecake jars. For a fresh twist, add mint extract. Use one teaspoon for a nice minty taste. You can also mix in crushed mint candies for extra crunch. If you prefer fruity notes, try raspberry or strawberry. Swirl in a fruit puree before layering. This adds bright flavor and color. Toppings can change the whole look and taste of your dessert. I love using chopped nuts for some extra crunch. Walnuts or pecans work well. You can also drizzle caramel sauce over the top for a sweet treat. For a fun twist, add crushed candy bars or even sprinkles. Choose your favorite toppings to make it your own. Want a lighter version of this dessert? You can swap regular cream cheese for low-fat cream cheese. You can also use Greek yogurt instead of whipped cream. This adds protein and cuts some fat. Consider using honey or maple syrup instead of powdered sugar for sweetness. These small changes keep the flavor while making it healthier. For more tips on making these delicious jars, check the Full Recipe. You can store your No-Bake Chocolate Cheesecake Jars in the fridge. Keep them in an airtight container. They will stay fresh for about 3 to 5 days. If you want to keep them longer, freezing is a great option. To freeze the jars, cover them tightly with plastic wrap or foil. Place them in a freezer-safe container. They can last up to 2 months in the freezer. When you’re ready to enjoy, move them to the fridge overnight to thaw. Do not refreeze after thawing. No need to reheat No-Bake Chocolate Cheesecake Jars. They are best served cold. If they seem a little soft after thawing, you can gently mix them to restore texture. Add a few fresh toppings, like berries or chocolate chips, for a fresh look and taste before serving. No-Bake Chocolate Cheesecake Jars last for about 3 to 5 days in the fridge. Make sure to cover them tightly. This keeps them fresh and tasty. If you want them to last longer, you can freeze them. However, the texture may change after thawing. Yes, you can use low-fat cream cheese! It will still taste great. However, the texture might be a bit different. Low-fat cream cheese can make your cheesecake less rich. If you want a lighter option, this is a good choice. If you need a substitute for whipped cream, try using cool whip or whipped topping. You can also whip coconut cream for a dairy-free option. Another choice is to use Greek yogurt. It adds creaminess and a bit of tang. Just remember, it will change the flavor slightly. For the full recipe, check out the instructions above! This article walked you through making no-bake chocolate cheesecake jars. You learned about key ingredients, tools, and substitutions. I detailed steps for mixing and layering, plus tips for the best texture. You discovered flavor variations and topping ideas, along with how to store and freeze these desserts. In conclusion, making these cheesecake jars is fun and easy. Customize them to fit your taste and enjoy delightful treats anytime.

No-Bake Chocolate Cheesecake Jars

Indulge in the rich flavors of No-Bake Chocolate Cheesecake Jars that are perfect for any occasion! This easy recipe combines creamy chocolate cheesecake with crunchy cookie layers, garnished with fresh berries and chocolate chips. In just 20 minutes of prep, you can create these delightful desserts that will impress your guests. Click through to discover the full recipe and treat yourself to this deliciously easy treat!

Ingredients
  

8 oz cream cheese, softened

1 cup powdered sugar

1 cup whipped cream (store-bought or homemade)

1/2 cup unsweetened cocoa powder

1 teaspoon vanilla extract

1 cup chocolate cookie crumbs (like Oreos or chocolate graham crackers)

4 tablespoons unsalted butter, melted

1/4 cup chocolate chips for garnish

Fresh raspberries or strawberries for garnish

Instructions
 

In a mixing bowl, beat the softened cream cheese with an electric mixer until smooth and creamy.

    Gradually add the powdered sugar and continue beating until well combined.

      Add in the unsweetened cocoa powder and vanilla extract; mix until fully combined and the mixture is silky smooth.

        Gently fold in the whipped cream using a spatula until there are no streaks left, ensuring the mixture remains light and airy.

          In a separate bowl, mix the chocolate cookie crumbs with the melted butter until evenly coated.

            Start layering the jars: begin with a layer of the chocolate cookie mixture (about 2 tablespoons).

              Follow this with a layer of the chocolate cheesecake mixture (about 3 tablespoons). Repeat these layers until the jars are filled, finishing with the cheesecake layer on top.

                Chill the jars in the refrigerator for at least 2 hours or until set.

                  Before serving, sprinkle the tops with chocolate chips and add a few fresh berries for an extra touch of flavor and color.

                    Prep Time: 20 minutes | Total Time: 2 hours 20 minutes | Servings: 4-6

                      - Presentation Tips: Serve the jars on a wooden board or decorative tray, and for an extra touch, drizzle some chocolate sauce over the top before serving.

                        Leave a Comment

                        Recipe Rating