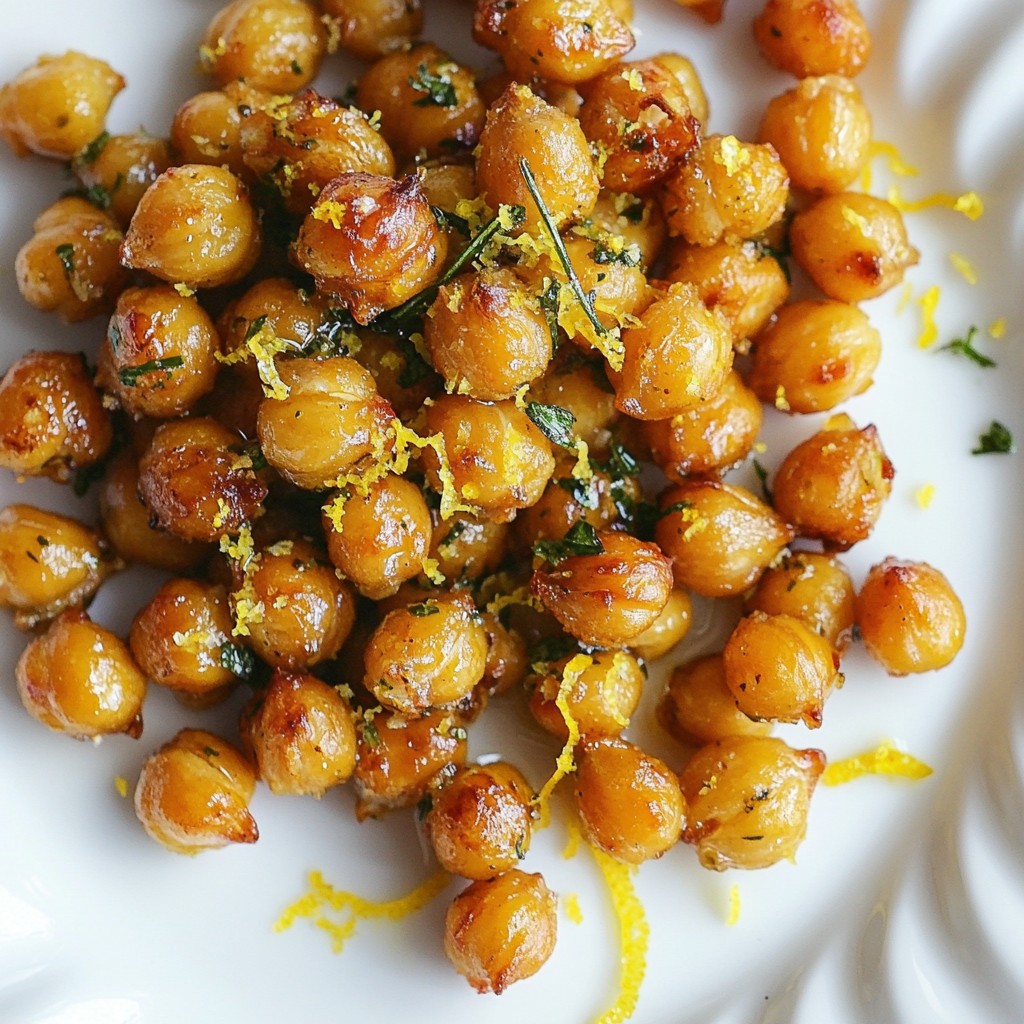
Looking for a tasty snack that packs a crunch? I have just the recipe for you! These Lemon Herb Roasted Chickpeas are easy to make and full of flavor. They’re perfect for munching at home or on-the-go. In this guide, you’ll learn how to choose fresh chickpeas, coat them with delicious herbs, and roast them to crispy perfection. Let’s dive into the details and make this healthy treat together!
Why I Love This Recipe
- Quick and Easy: This recipe takes just 10 minutes to prep, making it a perfect snack option for busy days.
- Flavorful Crunch: With a blend of spices and fresh lemon, these chickpeas are packed with flavor and provide a satisfying crunch.
- Versatile Snack: Enjoy them on their own or use them as a topping for salads and grain bowls for added texture and nutrition.
- Healthy Alternative: These roasted chickpeas are a nutritious snack option that is high in protein and fiber, perfect for guilt-free munching!
Ingredients
Complete List of Ingredients
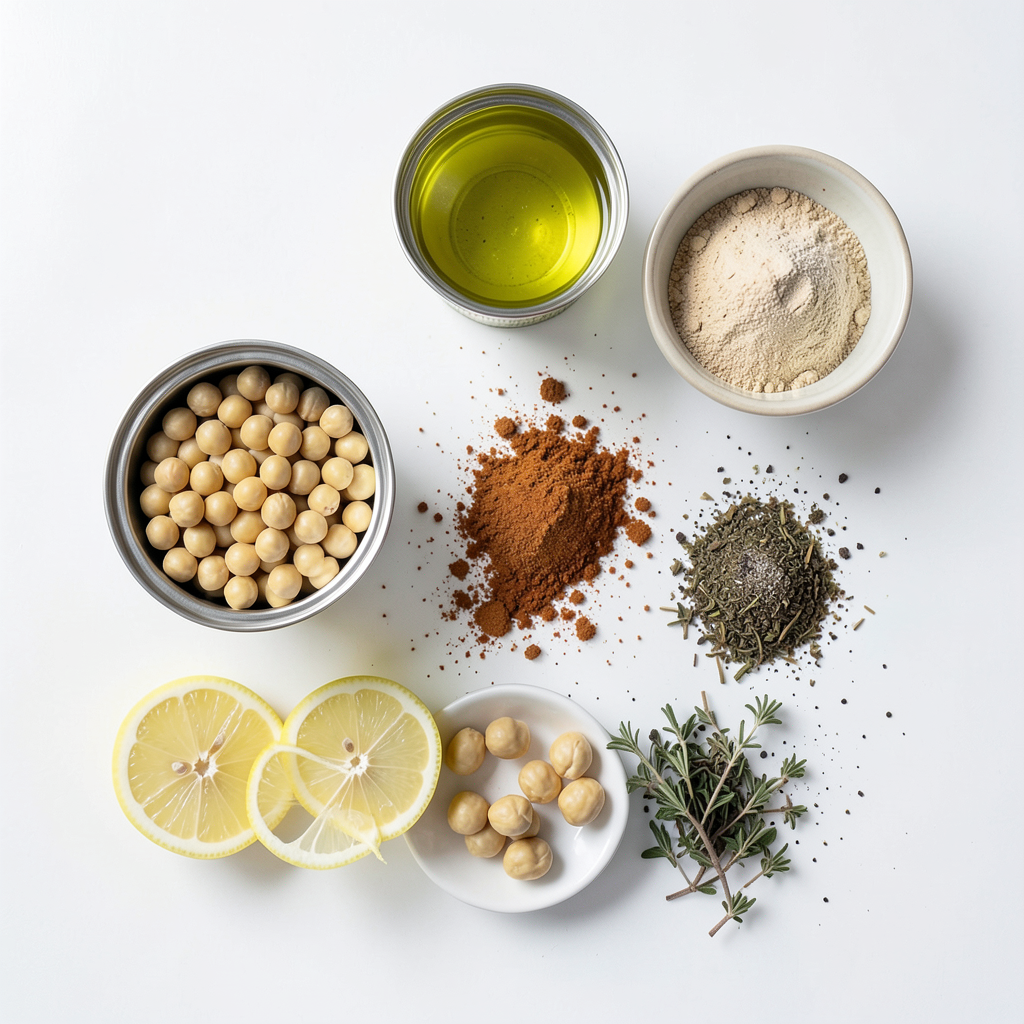
To make Lemon Herb Roasted Chickpeas, you will need:
- 1 can (15 oz) chickpeas, rinsed and drained
- 2 tablespoons olive oil
- 1 teaspoon garlic powder
- 1 teaspoon onion powder
- 1 teaspoon smoked paprika
- Zest of 1 lemon
- 2 tablespoons fresh lemon juice
- 1 teaspoon dried oregano
- 1 teaspoon dried thyme
- Salt and pepper to taste
Helpful Tips for Choosing Fresh Chickpeas
When picking chickpeas, choose the right type. Canned chickpeas are easy and quick. Look for cans without dents or rust. Check the expiration date to ensure freshness. If you want a healthier option, dried chickpeas work too. Just soak them overnight and cook until tender.
Recommended Substitutions for Allergies
If you have allergies, there are good swaps. For olive oil, use avocado oil or coconut oil. Instead of chickpeas, try white beans or lentils. If garlic or onion is a problem, skip them or use garlic-infused oil. Always check labels to avoid allergens.
Step-by-Step Instructions
Prepping Your Oven and Baking Sheet
First, turn on your oven to 400°F (200°C). This heat will help make your chickpeas crispy. Next, grab a baking sheet and line it with parchment paper. This will keep the chickpeas from sticking and help with clean-up later.
Preparing the Chickpeas for Roasting
Open a can of chickpeas and pour them into a strainer. Rinse them well under cold water. Then, let them drain for a bit. It’s key to dry them with a paper towel. This step removes extra moisture. Dry chickpeas roast better and get crunchier.
Coating Chickpeas with Seasonings
In a big bowl, add the dried chickpeas. Pour in olive oil, then add garlic powder, onion powder, smoked paprika, lemon zest, and lemon juice. Next, sprinkle in oregano and thyme. Mix everything well. Use a spoon or your hands to make sure every chickpea gets coated. This is where the flavor comes from.
Roasting Process and Key Indicators for Doneness
Spread the chickpeas on the baking sheet in a single layer. Make sure they don’t touch each other. This helps them roast evenly. Place the sheet in the oven and set a timer for 25-30 minutes. Halfway through, stir the chickpeas to ensure all sides get crispy. You’ll know they are done when they turn golden brown and feel crunchy. Once ready, take them out and sprinkle with salt and pepper. Let them cool for a few minutes. Enjoy them as a snack or on a salad!
Tips & Tricks
How to Achieve Extra Crispy Chickpeas
To make your chickpeas extra crispy, start by drying them well. After rinsing, use a paper towel to pat them dry. This step removes moisture that makes them soggy. Next, spread them out on the baking sheet in a single layer. This helps them roast evenly. Stirring them halfway through cooking also helps. It ensures they cook on all sides.
Best Practices for Flavor Enhancement
Use fresh ingredients for the best taste. Fresh lemon juice and zest add a bright flavor. Garlic powder and onion powder give depth to the dish. Smoked paprika adds a nice, smoky note. Feel free to adjust the spices to your liking. If you want more zing, add a pinch of cayenne pepper. This small change can create a new flavor profile.
Common Mistakes to Avoid When Roasting
One common mistake is not drying the chickpeas enough. If they are wet, they won’t become crispy. Another mistake is overcrowding the baking sheet. If the chickpeas are too close, they will steam instead of roast. Make sure to check on them as they cook. If you notice uneven browning, give them a stir. This will help you achieve that perfect crunch.
Pro Tips
- Dry Chickpeas Thoroughly: Make sure to pat the chickpeas completely dry before seasoning. This step is crucial for achieving maximum crispiness when roasted.
- Experiment with Spices: Feel free to customize the seasoning mix. Try adding cayenne pepper for heat, or nutritional yeast for a cheesy flavor.
- Check for Doneness: Keep an eye on the chickpeas towards the end of roasting. Oven temperatures can vary, so check for a golden brown color to ensure they are perfectly crispy.
- Store Properly: To maintain their crunch, store leftover chickpeas in an airtight container at room temperature. Avoid refrigerating, as this can make them soggy.
Variations
Spicy Lemon Herb Roasted Chickpeas
You can kick up the heat with spicy lemon herb roasted chickpeas. Start with the base recipe, and add 1 teaspoon of cayenne pepper or red pepper flakes. Mix them in with the other spices. This adds a nice zing. Enjoy them as a snack or with your favorite dip.
Mediterranean Twist: Adding Feta and Olives
For a Mediterranean twist, add feta and olives. After roasting the chickpeas, crumble some feta cheese on top. Toss in some chopped olives too. This gives a creamy and salty balance. It’s perfect for salads or as a tasty side.
Sweet and Savory Options: Adding Honey or Maple Syrup
You can also try a sweet and savory version. Drizzle honey or maple syrup over the chickpeas before roasting. Use about 1-2 tablespoons for added sweetness. This makes a unique treat. The blend of flavors is sure to impress.
Storage Info
How to Store Leftover Roasted Chickpeas
To store leftover roasted chickpeas, let them cool completely. This step prevents steam from creating moisture, which makes them soggy. Place them in an airtight container. Make sure to seal it tightly to keep out air. Store the container in your pantry or a cool, dry place. If you want to keep them longer, you can also put the container in the fridge.
Best Containers for Freshness
I recommend using glass or BPA-free plastic containers. These materials help keep the chickpeas fresh. You can also try resealable bags. Just make sure to press out as much air as possible. If you use bags, lay them flat in the fridge or pantry for easy stacking. This method saves space and keeps them crisp.
Reheating Instructions for Optimal Crispiness
To reheat your roasted chickpeas, preheat your oven to 350°F (175°C). Spread the chickpeas on a baking sheet in a single layer. Bake for about 10 minutes or until they are warm and crispy again. You can also use an air fryer. Set it to 350°F (175°C) and cook for about 5-7 minutes. This method works great for keeping the crunch. Avoid using a microwave, as it makes them soft. Enjoy your delicious snack!
FAQs
Can I use dried chickpeas instead of canned?
Yes, you can use dried chickpeas instead of canned. However, you must soak and cook them first. Start by soaking dried chickpeas overnight in water. This helps rehydrate them and make them tender. After soaking, drain and rinse the chickpeas. Then, cook them in boiling water for about an hour until they are soft. Once cooked, you can follow the same steps as with canned chickpeas. This option gives you more control over texture.
How do I know when the chickpeas are done roasting?
You will know the chickpeas are done roasting when they turn golden brown and feel crispy. After about 25-30 minutes in the oven, check them. Stir the chickpeas halfway through cooking to ensure even roasting. Keep an eye on them near the end. If they look dry and crunchy, they are ready. Let them cool slightly before eating. They will crisp up even more as they cool.
Are Lemon Herb Roasted Chickpeas healthy?
Yes, Lemon Herb Roasted Chickpeas are quite healthy. Chickpeas are high in protein and fiber, which helps you feel full. They also have vitamins and minerals like iron and magnesium. Using olive oil adds healthy fats, which are good for your heart. The herbs and lemon juice add flavor without extra calories. Overall, this dish makes a nutritious snack or meal topping that you can enjoy guilt-free.
Roasting chickpeas brings tasty, crunchy snacks to your kitchen. You learned about fresh ingredients and how to pick them. You also found smart ways to coat and roast chickpeas for the perfect crunch. I shared easy recipe twists to keep flavors exciting. Finally, I covered storage tips to keep your snack fresh. With this guide, you can confidently roast chickpeas for you and your family. Enjoy exploring new flavors and making healthy snacks at home.