Are you craving a rich and creamy dessert without the dairy? Look no further! This Dairy-Free Chocolate Mousse is smooth, satisfying, and easy to make. With just a few simple ingredients like silken tofu and dairy-free chocolate chips, you’ll impress yourself and your friends. I’m here to guide you through each step, making sure it’s fun and delicious. Let’s dive into this delightful treat together!
Ingredients
Main Ingredients for Dairy-Free Chocolate Mousse
– 1 cup silken tofu, drained
– 1 cup dairy-free dark chocolate chips
– 1/4 cup maple syrup
– 1 teaspoon vanilla extract
– A pinch of sea salt
To make a rich and creamy mousse, you need some key ingredients that blend beautifully. Start with silken tofu. This ingredient acts as the base. It gives the mousse a smooth texture without any dairy. Next, grab dairy-free dark chocolate chips. They add that rich chocolate flavor we all love. Use maple syrup for sweetness. It gives a nice touch and balances the flavors. Vanilla extract adds depth. Just a little enhances the overall taste. Finally, a pinch of sea salt brings out the chocolate notes.
Optional Ingredients
– Fresh berries (for garnish)
– Coconut whipped cream (for topping)
For an extra touch, consider adding fresh berries. They not only look great but add freshness. You can also top the mousse with coconut whipped cream. This adds a light and fluffy element. It makes your dessert feel even more indulgent. These optional ingredients help elevate your mousse, making it a hit for any occasion.
This recipe is simple yet delicious and can impress anyone.
Step-by-Step Instructions
Melting the Chocolate
To start, we need to melt the dairy-free dark chocolate chips. You can use a double boiler or a microwave. If you choose the microwave:
– Heat the chocolate in 30-second bursts.
– Stir well after each round until it becomes smooth.
For a double boiler, place a heat-safe bowl over simmering water. Stir constantly until the chocolate melts.
Tip: Avoid overheating the chocolate. It should be glossy and smooth, with no lumps.
Blending the Mousse
Next, we blend the mousse ingredients. In a blender or food processor, add:
– 1 cup of drained silken tofu
– The melted chocolate
– 1/4 cup of maple syrup
– 1 teaspoon of vanilla extract
– A pinch of sea salt
Blend until smooth and creamy. Stop to scrape down the sides if needed. This helps mix everything well.
Texture Tip: The mousse should be airy and light. If it feels too thick, add a splash of water or more maple syrup for sweetness.
Setting the Mousse
Now, pour the blended mousse into serving dishes. You can use cups or bowls.
Once filled, place them in the fridge. Let them chill for at least two hours. This helps the mousse set and become fluffy.
Refrigeration Tip: Keep the mousse covered if you plan to store it for longer. This keeps it fresh and tasty.
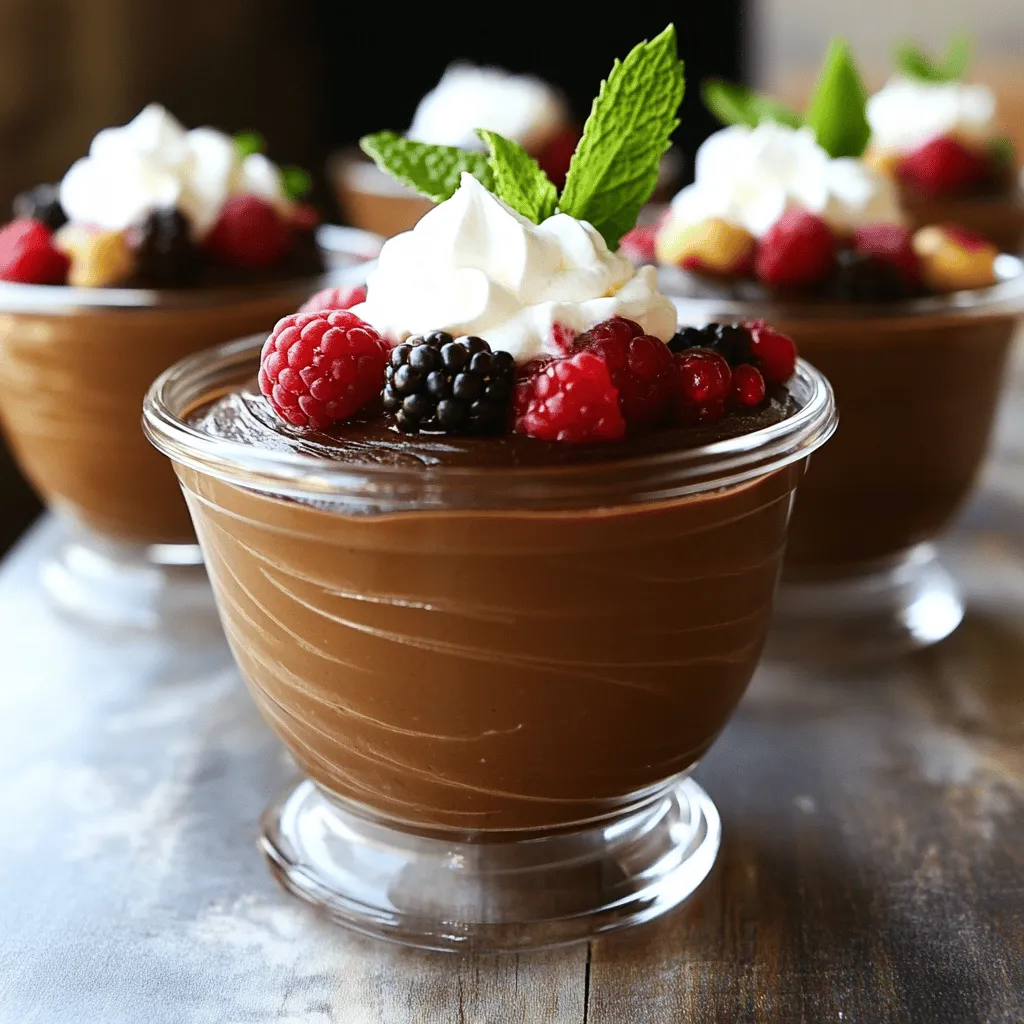
For a perfect finish, top the mousse with coconut whipped cream and fresh berries right before serving. Enjoy this rich and creamy delight!
Tips & Tricks
Perfecting Your Mousse
To make your mousse just right, start with sweetness. Maple syrup is the best choice. It adds a rich flavor and works well with chocolate. Taste as you mix. If you want it sweeter, add more syrup a little at a time.
Using quality chocolate is key too. Look for dairy-free dark chocolate chips that have rich cocoa flavor. Good chocolate makes a huge difference in taste. It gives your mousse that deep, luscious flavor we all love.
Presentation Suggestions
Presentation can elevate your mousse. Use decorative cups for serving. Clear cups show off the creamy layers. You can also use wine glasses for a fancy look.
Garnishing adds visual appeal. Try fresh berries on top for color. A mint leaf can add a nice touch too. Drizzle melted chocolate over the mousse for an extra treat.
Common Mistakes to Avoid
Watch out for common mistakes. Overheating chocolate is a big one. If you heat it too much, it can burn. Use a double boiler or microwave in short bursts to keep it smooth.
Another mistake is not blending enough. You want a silky texture. Blend until smooth and creamy. Scrape down the sides of your blender or processor to mix it all well. This ensures every bite is perfect.
Variations
Flavor Alternatives
You can easily change the taste of your mousse. Adding espresso gives a nice mocha flavor. Just mix in about one tablespoon of espresso powder with the melted chocolate. For a fresh twist, try adding a few drops of orange or peppermint extracts. Both flavors pair well with chocolate and make your mousse even more special.
Texture Modifications
Want a creamier mousse? Mixing in avocado can help. Use one ripe avocado and blend it with the other ingredients. This adds healthy fats and smoothness without changing the flavor much. For some crunch, layer your mousse with crushed cookies. It adds a fun texture and makes each bite exciting.
Dietary Considerations
This recipe is great for vegans, but you can also make it nut-free. Use a nut-free chocolate option to keep it safe for those with allergies. Opt for a seed-based milk, like oat or rice milk, if you want to change the base. This way, everyone can enjoy your rich and creamy delight.
Storage Info
How to Store Leftovers
To keep your mousse fresh, use an airtight container. This prevents air from getting in. Store the mousse in the fridge for up to three days. Be sure to cover the mousse to keep it from drying out. The texture remains creamy if you follow this step.
Freezing Mousse
You can freeze the mousse for longer storage. Pour it into a freezer-safe container. Leave some space at the top for expansion. Cover it with plastic wrap before sealing the lid. This helps to prevent freezer burn. To enjoy your mousse, thaw it in the fridge overnight. This keeps the taste and texture just right.
FAQs
Can I use other types of chocolate?
Yes, you can! Dairy-free milk chocolate works well in this mousse. It adds a sweet and creamy touch. Look for brands that are labeled dairy-free. You can also try dark chocolate with different cocoa percentages. Higher cocoa gives a richer flavor, while lower cocoa yields a milder taste. Experiment to find your favorite!
How long does the mousse last in the fridge?
The mousse can last about three to five days in the fridge. Store it in an airtight container to keep it fresh. If you notice any change in texture or smell, it’s best to toss it. Always check before serving. Enjoy it chilled for the best experience!
Is it possible to make this recipe nut-free?
Absolutely! To make this mousse nut-free, choose dairy-free chocolate that does not contain nuts. You can also use sunflower seed butter instead of nut-based options. This keeps the creamy texture while staying safe for nut allergies. Always read labels to ensure safety. Enjoy your delicious mousse!
This blog post covered how to make a simple, dairy-free chocolate mousse. You learned about the main and optional ingredients, like silken tofu and dairy-free chocolate chips. I shared step-by-step instructions for melting, blending, and setting the mousse. You also got tips to perfect your dish and variations to try.
In closing, making this mousse is fun and easy. With a little practice, you’ll create a dessert that impresses everyone. Enjoy experimenting and making this recipe your own!