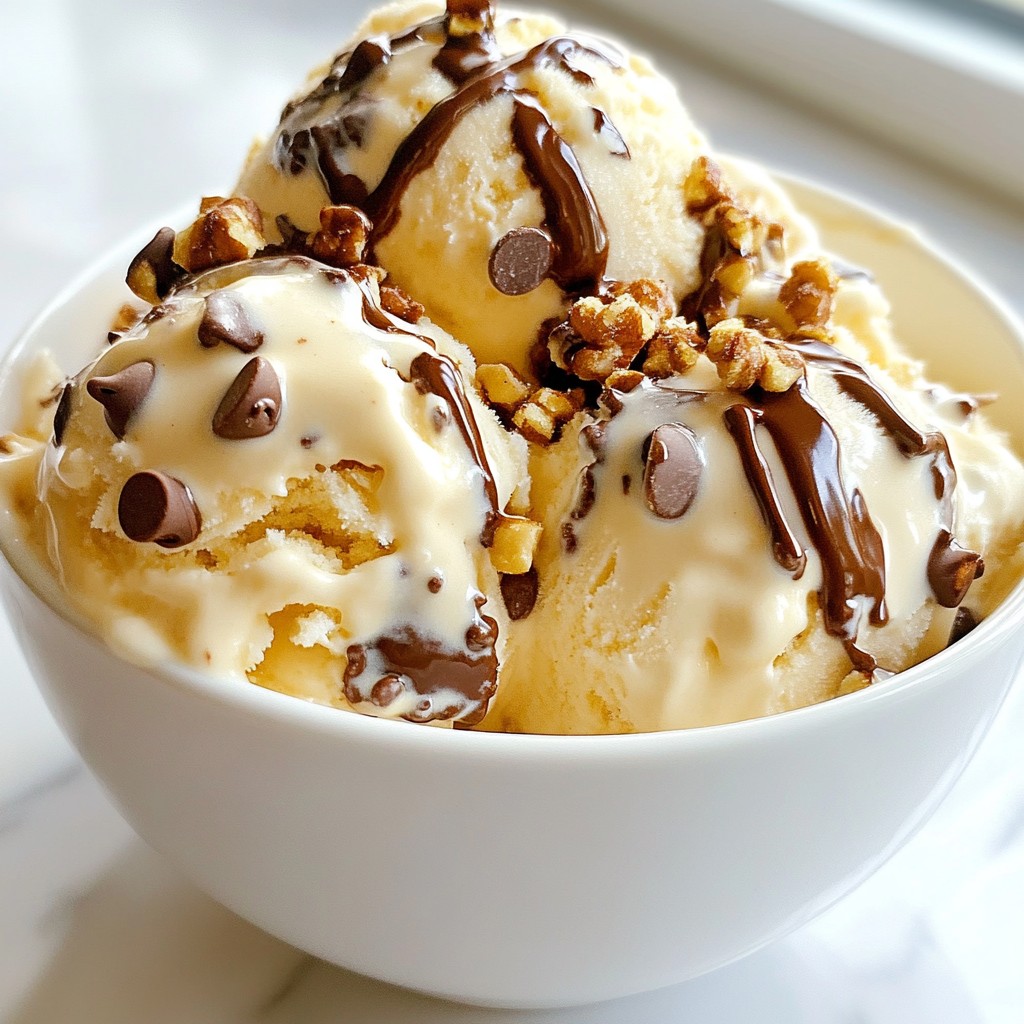
If you love coffee and ice cream, you're in for a treat! Today, I'm sharing my Coffee Crumble Ice Cream Delight with unique mix-ins that will elevate your dessert game. Using just a few simple ingredients and easy steps, you can whip up a creamy, rich treat at home. Whether you want crunchy add-ins or rich flavors, I've got tips and tricks to make your creation stand out. Let's dive in!
Why I Love This Recipe
- Delicious Coffee Flavor: This ice cream captures the rich and robust flavor of coffee, making it a perfect treat for coffee enthusiasts.
- Crunchy Texture: The addition of crushed chocolate cookies and nuts provides a delightful crunch that complements the creamy ice cream.
- Easy to Make: With just a few simple ingredients and steps, this recipe is accessible for anyone to whip up at home.
- Perfect for Any Occasion: This indulgent dessert is great for summer gatherings, special celebrations, or a cozy night in.
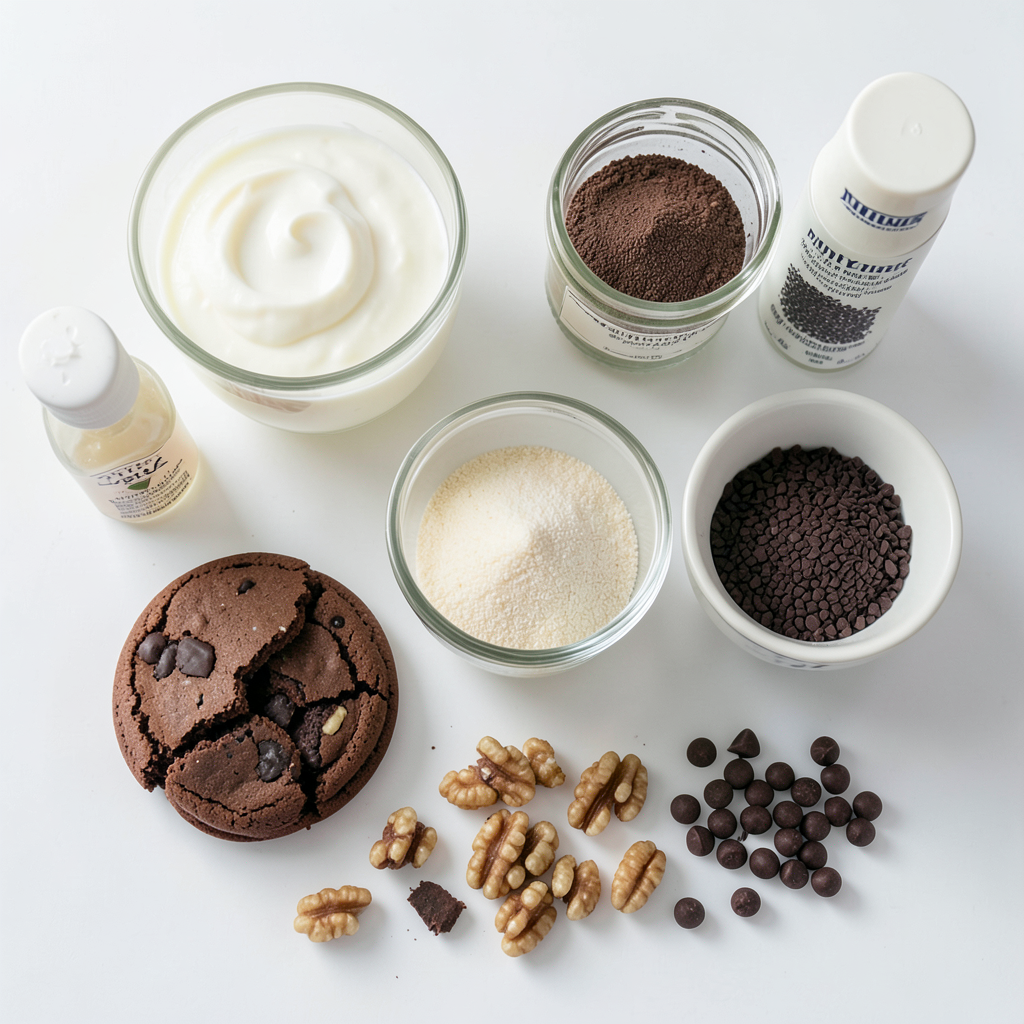
Ingredients
Essential Ingredients
- 2 cups heavy cream
- 1 cup whole milk
- 3/4 cup granulated sugar
To start, heavy cream gives the ice cream a rich and smooth texture. Whole milk adds creaminess and balances the flavor. Granulated sugar sweetens the mix, making every bite delightful.
Flavor Enhancers
- 1 tablespoon instant coffee granules
- 1 teaspoon vanilla extract
Instant coffee granules bring that bold coffee flavor. Vanilla extract adds a warm, sweet note that makes the ice cream taste even better.
Mix-Ins
- 1/2 cup crushed chocolate cookies (like Oreos or chocolate wafer cookies)
- 1/4 cup chopped nuts (walnuts or almonds)
- 1/4 cup chocolate chips
Crushed chocolate cookies add a crunchy texture and rich flavor. Chopped nuts give a nice bite and some healthy fats. Chocolate chips bring extra sweetness and chocolatey goodness.
With these ingredients, you can create a Coffee Crumble Ice Cream that is full of flavor and fun textures. Each bite offers something new, making it a treat you will love to share!
Step-by-Step Instructions
Preparing the Base
To start, get a medium bowl. Add 2 cups of heavy cream, 1 cup of whole milk, and 3/4 cup of granulated sugar. Use a whisk to mix them well. Keep whisking until the sugar dissolves fully. This step is key for a smooth base. Next, add 1 tablespoon of instant coffee granules and 1 teaspoon of vanilla extract. Whisk again until everything blends perfectly. The coffee gives a great flavor, while the vanilla adds richness.
Churning Process
Now it’s time to churn! Pour the coffee mixture into your ice cream maker. Follow the maker's instructions. Churn until it reaches a soft-serve consistency. This usually takes about 20 to 30 minutes. You want it creamy and thick, but not fully frozen yet.
Adding Mix-Ins
Once you have that perfect texture, it’s mix-in time! Use a spatula to fold in 1/2 cup of crushed chocolate cookies, 1/4 cup of chopped nuts, and 1/4 cup of chocolate chips. Gently mix everything until evenly distributed. This step adds fun crunch and flavor to your ice cream. After mixing, transfer the ice cream to a lidded container. Freeze it for at least 4 hours or until firm. Enjoy the thrill of waiting for the delicious treat you’ve just made!
Tips & Tricks
Ensuring Perfect Texture
To get a smooth texture, churn your ice cream well. Most machines need about 20 to 30 minutes. This makes the ice cream light and creamy. If you want to avoid ice crystals, chill your base before churning. A cold mix helps the ice cream freeze faster.
Flavor Boosting Techniques
You can adjust the coffee taste to suit your likes. If you want a stronger flavor, add one more tablespoon of instant coffee. This will give you that rich coffee hit. When it comes to mix-ins, homemade options are often better. They taste fresh and let you control the quality. Store-bought options can save time but may lack flavor.
Presentation Tips
When serving, use vintage ice cream bowls for charm. For a special touch, add more crushed cookies on top. A drizzle of chocolate sauce can make it look fancy. You can also add a few nuts for crunch. These small details make your ice cream stand out and delightful.
Pro Tips
- Use Fresh Coffee: For the best flavor, use fresh instant coffee granules. The quality of the coffee will directly affect the taste of your ice cream.
- Chill Your Base: Before churning, chill the ice cream mixture in the refrigerator for at least an hour. This helps it churn more effectively and achieve a smoother texture.
- Customize Your Mix-Ins: Feel free to experiment with different mix-ins like caramel swirls, crushed toffee, or even flavored chocolate chips to create your unique version of this recipe.
- Storage Tips: Store your ice cream in an airtight container to prevent ice crystals from forming. Placing a piece of parchment paper on the surface before sealing can also help maintain its texture.
Variations
Flavor Alternatives
You can change the taste of your Coffee Crumble Ice Cream by adding different coffee flavors. Try using espresso powder for a stronger taste. You can also use flavored coffee, like hazelnut or mocha. For cream bases, you might want to try coconut cream or almond milk. These options give a unique twist and can make the ice cream lighter.
Dietary Adjustments
If you follow a vegan diet, you can make this ice cream using coconut cream and non-dairy milk. Instead of sugar, use maple syrup or agave nectar. For a sugar-free version, use a sugar substitute like stevia. These changes make the dessert fit many diets while still tasting great.
Unique Mix-Ins
Mix-ins can take your ice cream to the next level. You can use different cookies like vanilla wafers or graham crackers. Try different nuts, such as pecans or macadamia nuts, for extra crunch. Chocolate lovers can swap in dark chocolate or white chocolate chips. These unique mix-ins enhance the flavor and texture, making each scoop exciting.
Storage Info
Freezing Guidelines
To keep your Coffee Crumble Ice Cream fresh, use the right container. A lidded plastic or glass container works best. These containers help keep air out and prevent ice crystals. Make sure the container is airtight. This helps maintain the flavor and texture.
When you freeze the ice cream, place it in the coldest part of the freezer. Avoid the door, where the temperature changes often. You want to freeze it quickly for a smooth texture.
Shelf Life
Homemade ice cream lasts about two weeks in the freezer. After that, it may lose flavor and become icy. Look for signs of spoilage. If you see ice crystals or a change in color, it's time to toss it.
You can also tell it’s bad if it smells off or has a strange texture. Always check before serving to ensure it’s still good.
Re-softening Tips
When you're ready to serve, you may need to soften the ice cream. Take it out of the freezer and let it sit for about 5-10 minutes. This helps it become scoopable.
To keep the texture nice, avoid letting it sit out too long. When you put it back in the freezer, cover it tightly again. This helps it stay creamy and delicious for your next bowl!
FAQs
Can I make this without an ice cream maker?
Yes, you can make this ice cream without an ice cream maker. Here are some tips:
- Mix all ingredients in a bowl.
- Pour the mixture into a shallow dish.
- Place it in the freezer for 30 minutes.
- Stir it every 30 minutes for about 3 hours.
This helps break up ice crystals and gives you a creamy texture.
How long does it take to freeze the ice cream?
The total time to freeze this ice cream is about 4 hours and 15 minutes.
- You need 15 minutes for prep.
- Churning in the machine takes about 20 to 30 minutes.
- After churning, it must freeze for at least 4 hours.
Make sure to check it after 4 hours. It should be firm and ready to scoop.
What can I use instead of heavy cream?
If you want to skip heavy cream, you have options.
- You can use coconut cream for a dairy-free choice.
- Whole milk can work, but it may not be as creamy.
- Greek yogurt is another option, adding a tangy flavor.
Each substitute changes the taste and texture, so choose what you like best.
This blog post covered how to make delicious homemade ice cream. We explored essential ingredients like cream, milk, and sugar. Flavor enhancers, mix-ins, and preparation steps make your ice cream stand out.
Perfect texture and storage tips ensure your ice cream lasts longer. Feel free to experiment with variations and dietary adjustments. Now, you have everything you need to create your own tasty treats. Enjoy making your ice cream to delight friends and family!