Get ready to treat yourself with the ultimate Chocolate Peanut Butter Rice Krispie Treats! These sweet, crunchy delights blend rich chocolate and creamy peanut butter for an irresistible snack. I’ll take you through each step, from melting butter to getting that perfect texture. Whether you’re hosting a party or just craving something sweet, these treats are sure to wow everyone. Let’s dive in and whip up some deliciousness!
Ingredients
To make Chocolate Peanut Butter Rice Krispie Treats, gather these simple ingredients:
– 4 cups Rice Krispies cereal
– 1 cup creamy peanut butter
– 1 cup semi-sweet chocolate chips
– 1 cup mini marshmallows
– ½ cup unsalted butter
– 1 teaspoon vanilla extract
– A pinch of salt
These ingredients come together to create a delightful treat. I love how the crispy texture of the Rice Krispies pairs with the creamy peanut butter. The semi-sweet chocolate chips add a rich layer of flavor, while the mini marshmallows give a fun, chewy bite.
When you mix these ingredients, each one plays a role. The butter helps everything melt together smoothly. The vanilla extract adds a hint of warmth, while the salt balances the sweetness. This recipe is all about harmony in flavors and textures.
Don’t worry if you aren’t a pro in the kitchen. This recipe is easy to follow.Enjoy the process and have fun making these treats!
Step-by-Step Instructions
Preparing the Baking Pan
Start by greasing a 9×13 inch baking pan. You can use cooking spray or butter. This step keeps the treats from sticking. Make sure to cover all the corners. A well-greased pan makes cutting easier later.
Melting Butter and Adding Ingredients
In a large saucepan, melt the unsalted butter over low heat. Stir it gently to prevent burning. Once it’s melted, add the creamy peanut butter and mini marshmallows. Keep stirring until everything is smooth. The marshmallows should fully melt into the mix. After that, remove the saucepan from the heat. Stir in the vanilla extract and a pinch of salt. This adds flavor and richness to the treats.
Mixing and Transferring to the Pan
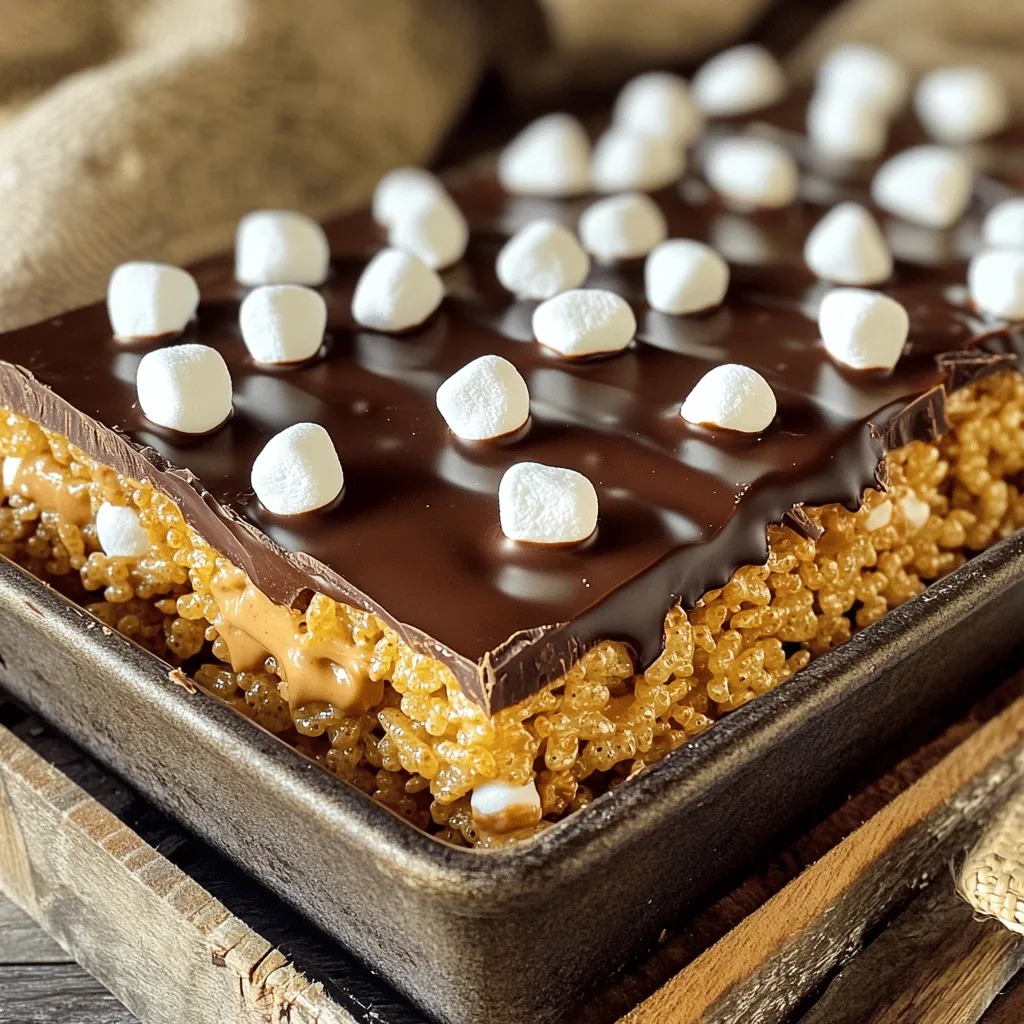
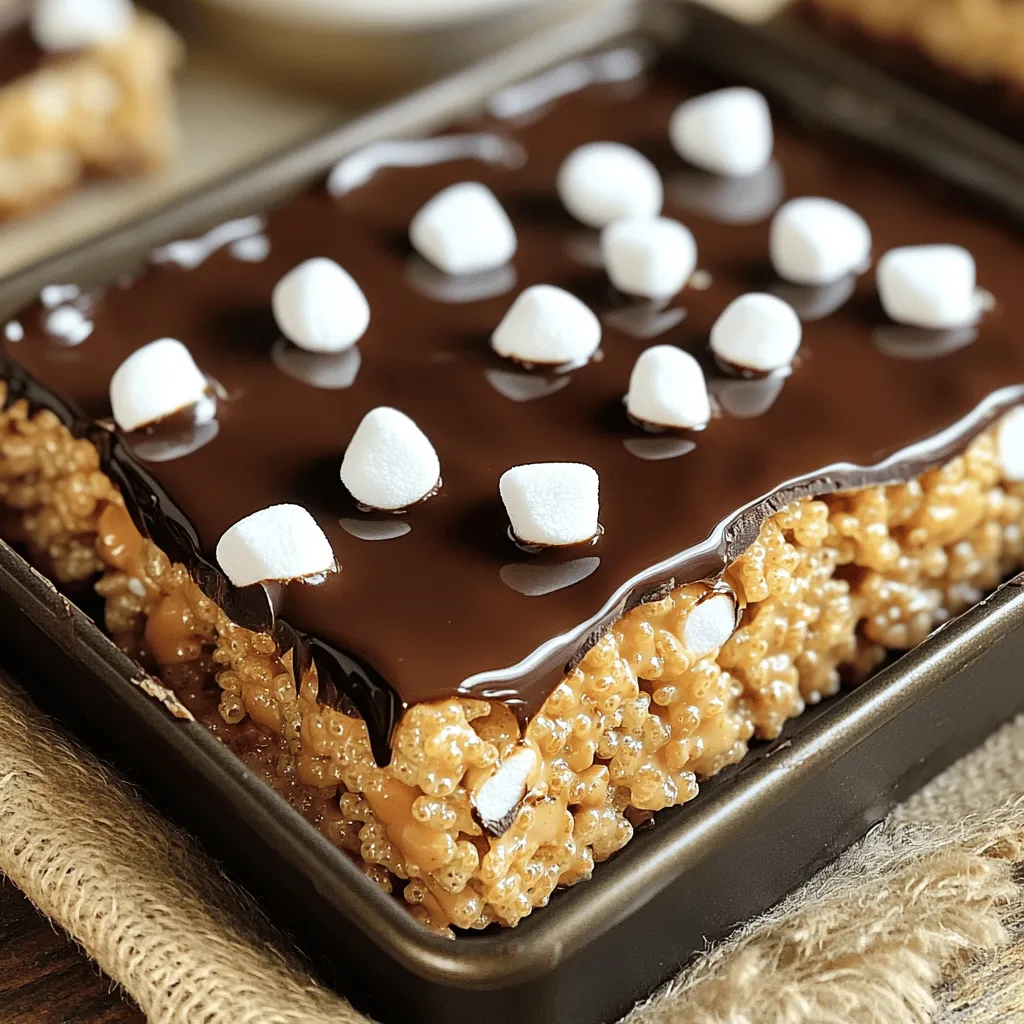
Next, fold in the Rice Krispies cereal. Mix until every piece is coated in that yummy peanut butter mix. Then, gently add half of the chocolate chips. This gives your treats some chocolate goodness inside. Now, pour the mixture into the greased pan. Press it down evenly with a spatula or your hands.
For the topping, melt the remaining chocolate chips in the microwave. Do this in 30-second intervals, stirring each time. Once smooth, spread the melted chocolate over the pressed mixture. Allow the treats to cool completely. You can let them sit at room temperature or refrigerate them for 30 minutes. Once they are set, cut them into squares and serve. Enjoy your Chocolate Peanut Butter Rice Krispie Treats!
Tips & Tricks
Achieving the Perfect Texture
To make your treats chewy and crisp, follow these steps closely. First, use fresh Rice Krispies cereal. Stale cereal can make your treats soggy. When you melt the butter, keep the heat low. This helps the peanut butter and marshmallows blend smoothly. Stir constantly until the mixture is creamy. Once you add the Rice Krispies, mix gently. This keeps them from breaking apart and ensures a nice texture.
Substitute Options for Ingredients
You can easily swap some ingredients. If you want a nut-free version, use sun butter instead of peanut butter. For a dairy-free option, try coconut oil in place of butter. You can also use dairy-free chocolate chips. If you don’t have mini marshmallows, regular marshmallows work too. Just chop them into smaller pieces before adding. Each swap can create a new twist on this classic recipe.
Storage and Freshness Tips
Store your treats in an airtight container. This keeps them soft and fresh for days. If you stack them, place parchment paper between layers. This prevents sticking. For longer storage, you can freeze them. Wrap each square tightly in plastic wrap, then place them in a freezer bag. They can stay fresh for up to three months. When you’re ready to eat, just thaw them at room temperature. Enjoy the taste of your Chocolate Peanut Butter Rice Krispie Treats delight!
Variations
Adding Nuts or Other Mix-Ins
You can make your Chocolate Peanut Butter Rice Krispie Treats even better by adding nuts. Walnuts, pecans, or almonds work well. Just chop them into small pieces and mix them in with the Rice Krispies. This adds a nice crunch and flavor. You can also add dried fruit or seeds for variety. Try mini chocolate candies for a fun twist!
Flavor Variations with Different Chocolate Types
Using different types of chocolate can change the taste. Instead of semi-sweet chocolate chips, you can use dark chocolate for a richer flavor. Milk chocolate will make the treats sweeter. White chocolate offers a creamy taste. You can even swirl in nut butter chips or caramel for unique flavors. Combining chocolates can create a fun layered look and taste!
Healthier Alternatives for a Modified Recipe
If you want a healthier option, you can make a few changes. Use natural peanut butter with no added sugar. Replace the Rice Krispies with whole grain cereal or puffed brown rice for more fiber. You can also use honey or maple syrup instead of some butter. This will still give you a tasty treat but with less sugar and fat.
Serving Suggestions
Best Occasions for Serving
Chocolate Peanut Butter Rice Krispie Treats are perfect for many events. You can serve them at kids’ birthday parties. They also make a great snack for family movie nights. For school events, these treats are a hit. You can even bring them to potlucks. Everyone loves a sweet treat that is easy to grab.
Pairings that Complement the Treats
Pair these treats with cold milk for a classic combo. You can also serve them with hot chocolate for a cozy feel. For a fun twist, try them with a scoop of vanilla ice cream. The creaminess of the ice cream balances the crunch of the treats. If you want a fruity touch, serve them with fresh strawberries or bananas.
Presentation Tips for Parties
To impress your guests, cut the treats into fun shapes. You can use cookie cutters for stars or hearts. Arrange them on a colorful platter for a festive look. Drizzle some extra melted chocolate on top for flair. Adding sprinkles or crushed nuts can make them pop even more. Don’t forget to label them if you have other treats. Everyone will know exactly what they are!
FAQs
How can I prevent my treats from sticking?
To keep your treats from sticking, grease your pan well. I use cooking spray or butter. After you mix the Rice Krispies with the peanut butter, press it evenly into the pan. Use a spatula or your hands, but grease them lightly. This helps prevent sticking.
Can I use gluten-free Rice Krispies?
Yes, you can use gluten-free Rice Krispies. Many brands offer gluten-free options. Just check the label to make sure. This makes the treat suitable for those with gluten sensitivities.
How long do these treats last?
These treats last about a week when stored properly. Keep them in an airtight container. If you want them to last longer, store them in the fridge. Just note that they may become a bit firmer when chilled. Enjoy them fresh for the best taste!
In this blog post, I shared the simple ingredients needed for delicious Rice Krispies treats. I walked you through each step, from melting the butter to mixing the ingredients well. I also offered helpful tips to get the best texture and variations to make your treats unique. Consider the serving suggestions for the best occasions and pairings.
Remember, these treats are fun to make and share. Enjoy experimenting with flavors and textures to fit your taste!