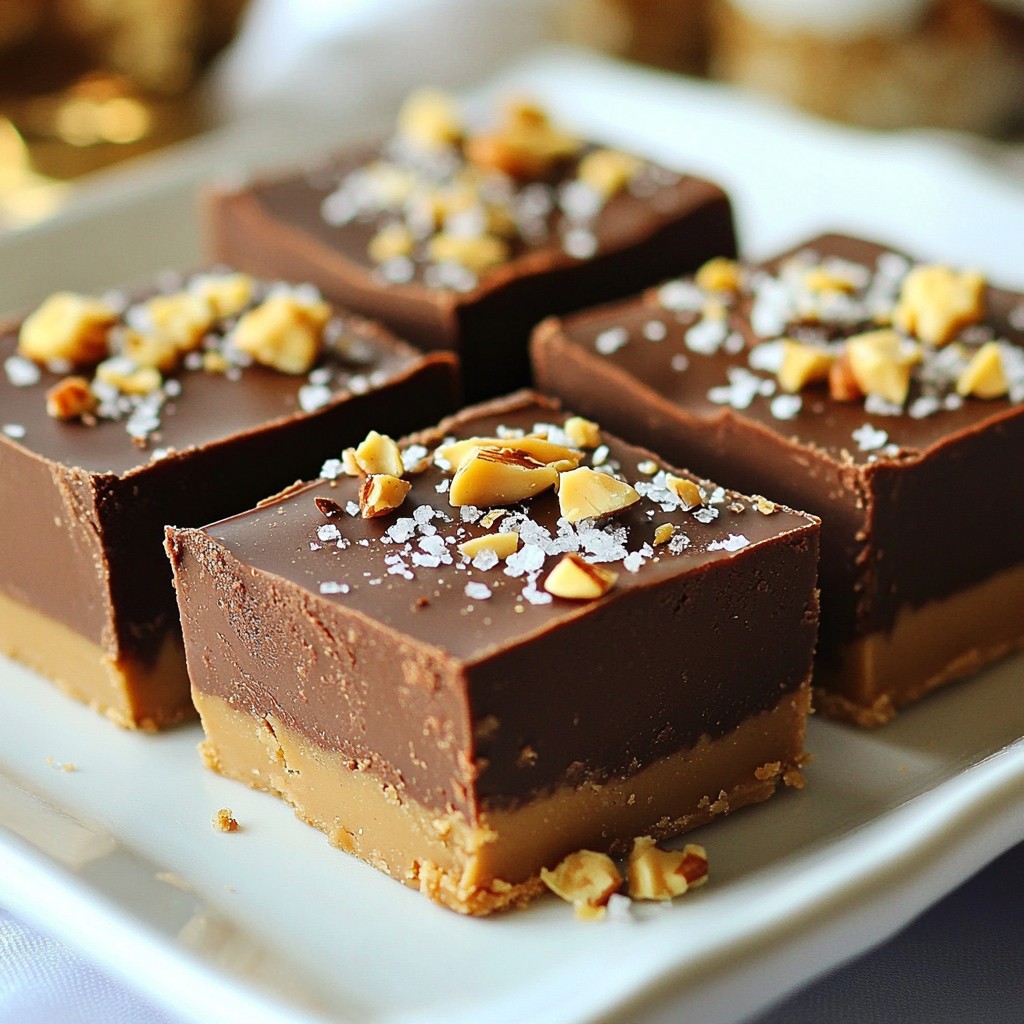
Craving a sweet treat that combines rich chocolate and creamy peanut butter? Look no further! This Chocolate Peanut Butter Fudge is the answer to your dessert dreams. With just a few simple ingredients, you can whip up a batch that’s perfect for any occasion. Whether you're treating yourself or sharing with friends, this fudge is sure to satisfy your sweet tooth. Let’s dive into this delicious recipe!
Error: Connection error.
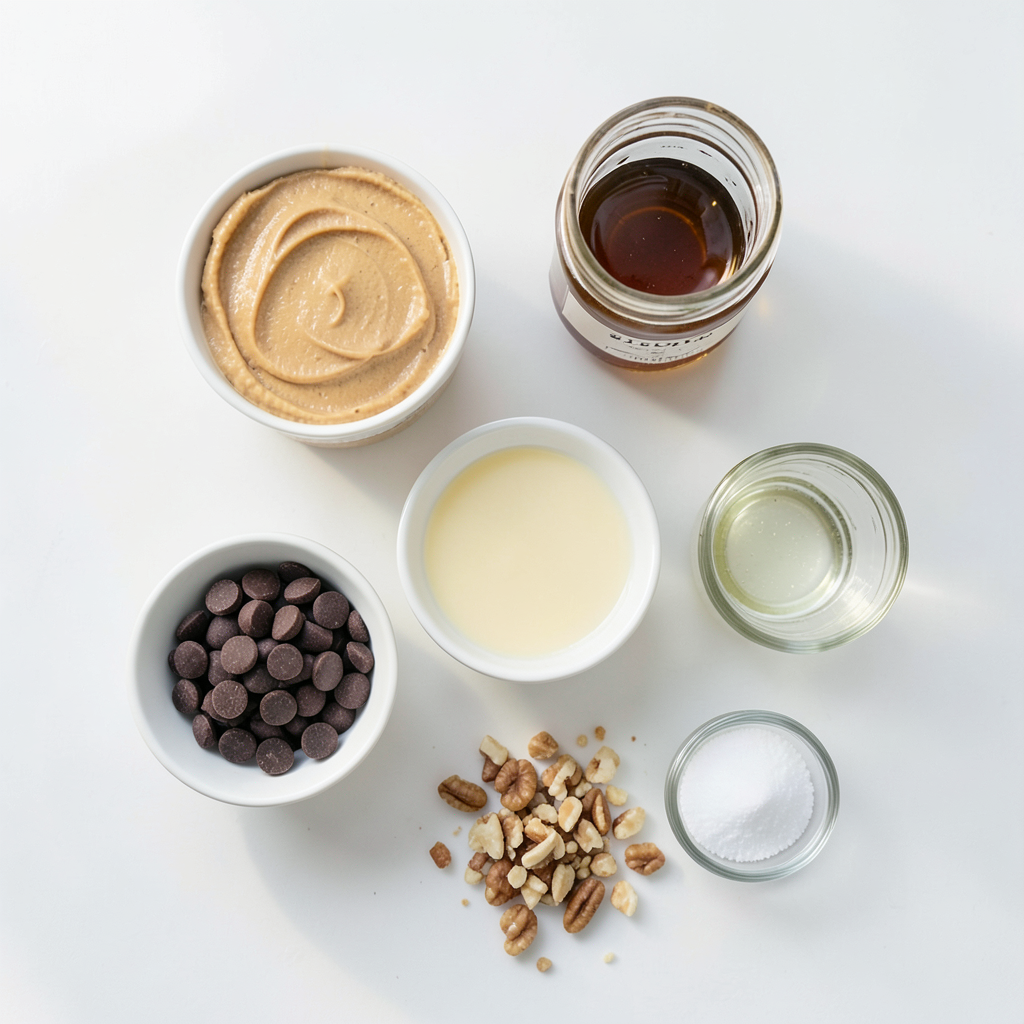
Ingredients
List of Ingredients
- 1 cup creamy peanut butter
- 1 cup dark chocolate chips
- 1 cup sweetened condensed milk
- 1 teaspoon vanilla extract
- 1/4 teaspoon salt
- Optional toppings: Chopped nuts or sea salt
To make chocolate peanut butter fudge, start with the right ingredients. Each one plays a key role in the taste and texture. Creamy peanut butter gives a rich, nutty flavor. Dark chocolate chips add deep sweetness and a slightly bitter note. Sweetened condensed milk binds it all together, creating that perfect fudge consistency.
Vanilla extract enhances the flavor. Just a teaspoon makes a big difference. The salt balances the sweetness, making each bite even better.
If you want to add a little crunch, chopped nuts work great. Sea salt sprinkled on top gives a nice finish. This fudge is easy to make and even more fun to share.
Step-by-Step Instructions
Preparing the Fudge Mixture
- In a medium saucepan, combine 1 cup of creamy peanut butter, 1 cup of dark chocolate chips, and 1 cup of sweetened condensed milk.
- Heat the mixture over medium heat. Stir continuously until it becomes smooth. This step is key. You want no lumps.
Adding Flavor Elements
- Once your mixture is smooth, remove the saucepan from the heat.
- Stir in 1 teaspoon of vanilla extract and 1/4 teaspoon of salt. This adds depth to the fudge's flavor and balances the sweetness.
Setting the Fudge
- Pour the fudge mixture into a lined 8x8 inch square baking dish.
- Spread it evenly with a spatula. If you like, sprinkle some chopped nuts or a pinch of sea salt on top.
- Refrigerate the fudge for at least 2 hours. This helps it set and become firm.
- When it's ready, lift the fudge from the dish by the parchment paper. Cut it into small squares. Enjoy your sweet treat!
Tips & Tricks
Cooking Tips for Perfect Fudge
- Use medium heat and stir consistently to avoid burning.
- Ensure all ingredients are well combined for a smooth texture.
When making fudge, heat is key. If you use high heat, your fudge can burn. Stirring keeps it from sticking to the pan. Mixing well helps to create a creamy texture. You want no lumps in your fudge!
Presentation Tips
- Serve on a decorative plate with chocolate drizzle.
- Experiment with toppings for visual appeal.
Presentation matters! For a nice touch, use a decorative plate. A chocolate drizzle makes it look fancy. You can also try toppings like chopped nuts or sea salt. These add color and texture, making your fudge even more tempting.
Common Mistakes to Avoid
- Overheating the mixture.
- Skipping refrigeration time.
Watch the heat! Overheating can ruin your fudge. It’s also important to refrigerate for the right time. If you skip this step, your fudge won’t set properly. Wait until it’s firm before cutting into squares. That’s when the magic happens!
Error: Connection error.
Variations
Alternative Nut Butters
You can switch peanut butter with almond or cashew butter. This changes the taste and texture. Almond butter gives a nutty flavor, while cashew butter offers creaminess. Both are tasty options. Try them if you want to mix things up!
Flavor Enhancements
Want to make your fudge special? Add a pinch of cinnamon or instant coffee. Cinnamon adds warmth, and coffee gives a rich taste. Just a little can change your fudge from good to great. Experiment and find what you like best!
Healthy Swaps
For a healthier treat, use dark chocolate chips with higher cocoa content. You can also choose sugar-free options. These swaps lower sugar while keeping the taste rich. Your fudge can be both delicious and a bit better for you!
Storage Info
How to Store Leftover Fudge
To keep your fudge fresh, place it in an airtight container. This helps to lock in moisture. Store it in the refrigerator. The cool air will keep it firm and tasty. Avoid leaving it out at room temperature. It can become too soft and lose its texture.
Freezing Options
If you want to save fudge for later, freezing works great! First, cut the fudge into small squares. Wrap each piece tightly in plastic wrap. Then, place the wrapped pieces in a freezer-safe bag. Make sure to remove as much air as possible. You can freeze the fudge for up to three months. When you’re ready to enjoy it, thaw it in the fridge overnight.
Shelf Life
For the best taste and quality, eat the fudge within two weeks. It will be fresh and delicious during this time. After two weeks, the fudge may still be safe to eat, but its texture and flavor may change. Always check for signs of spoilage before enjoying. If it looks or smells off, it’s best to toss it.
FAQs
Can I use milk chocolate instead of dark chocolate?
Yes, you can use milk chocolate. It creates a sweeter taste. Dark chocolate has a rich flavor. Milk chocolate may melt differently. It can be creamier but less intense. Choose based on your taste.
How long does it take for the fudge to set?
The fudge needs at least 2 hours in the fridge. This gives it time to firm up. You can leave it longer if you want. Just make sure it is cool before cutting.
Is this fudge gluten-free?
Yes, this fudge is gluten-free. All ingredients do not contain gluten. Check labels if you use other brands. It’s safe for those with gluten allergies. Enjoy without worry!
This fudge recipe is simple and fun. You learned how to combine peanut butter and chocolate. You also saw tips for making it look great. Different nut butters can change the taste too. Notes on storage and shelf life help keep your fudge fresh.
Enjoy your creamy fudge, and get creative with flavors and toppings. Now, you can impress family and friends with your skills!